Some of you might remember my love for Linux ASCII art stuff and fact that I'm daily forced to work on many consoles, which makes life a bit boring at point and you want to have some diversity as this black and white or black and green screen becomes quite of annoyance at times, hence adding some ASCII art kindness really makes sense. In that relation some time ago I've have written the howto add colorful random ASCII art picture and a bible verse on each SSH server login, joyout sysadmins life with cowsay, fortune, caca-utils and others.
Just recently a colleague of mine Georgi Stoyanov to whom I've shown cowsay, while playing around with cowsay, researching on related cool ASCII art entertainment one could add to his boring daily sysadm life stumbled on another nice piece of 1337 h4x0r software called boxes, that is nowadays available amongs most mainstream RPM and Debian distributions out of the box in default package repositories (it is installable on Ubuntu / Debian / CentOS with apt or yum).
root@pcfreak:~# apt-cache show boxes|grep -i desc -A 5 -B5
Version: 1.3-1
Installed-Size: 253
Maintainer: Salvatore Bonaccorso <carnil@debian.org>
Architecture: amd64
Depends: libc6 (>= 2.14)
Description-en: textmode box- and comment drawing filter
Boxes is extremely configurable filter for adding and removing ASCII art
(comments, for example) around chunks of text. Most modern text editors
support filtering text through external filters. Boxes is such a filter.
Description-md5: 71d39f5c7193aab87deb83d15f0b2e82
Homepage: https://boxes.thomasjensen.com/
Tag: implemented-in::c++, interface::commandline, role::program,
scope::utility, works-with::mail
Section: text
Priority: optional
To start using the preset of nice boxes and shapes depending on the distro type:
On Deb based Linuz OS
debian:~# apt install –yes boxes
…
On RPM based Linuxes:
[root@centos ~ ]# yum install -y boxes
…
Once installed to give it a try, do list all the available basic boxen ASCII Art ( template ) shapes beauties – the art pictures is quite high, below is a short 50 line raw example cut:
root@pcfreak:~# boxes -l |tail -n 50
unicornthink
unknown artist, coded by Mike Meyer <boxes@meyer.fm>:_________________________________
/ \
| E L E C T R O L Y T E S |
\______________________________ '\
() \\
O \\ .
o |\\/|
/ " '\
. . .
/ ) |
' _.' |
'-'/ \
vim-cmt
Bram Moolenaar, coded by Thomas Jensen <boxes(at)thomasjensen(dot)com>:"
" comments used in the vim editor's config file (.vimrc)
"
whirly
unknown artist, coded by Thomas Jensen <boxes(at)thomasjensen(dot)com>:.+"+.+"+.+"+.+"+.+"+.+"+.+"+.+"+.+"+.+"+.+"+.+"+.+"+.+"+.+"+.
( )
) (
( )
"+.+"+.+"+.+"+.+"+.+"+.+"+.+"+.+"+.+"+.+"+.+"+.+"+.+"+.+"+.+"
xes
Joan G. Stark <spunk1111@juno.com>, coded by Thomas Jensen <boxes(at)thomasjensen(dot)com>:<\/><\/><\/>
<\/></\></\></\><\/>
</\> </\>
<\/> <\/>
</\> </\>
<\/> <\/>
</\> </\>
<\/> <\/>
</\> </\>
<\/> <\/>
</\><\/><\/><\/></\>
jgs </\></\></\>
If you want to check out the full list of ascii art templates provided by boxes check out a complete dump out of boxes -l shapes here.
Next lets play a bit to give you an idea on some use of boxes you can add to your login /etc/profile or ~/bashrc or even randomize it with some little bash script to print out some cool stuff on each and every Linux SSH or tty physical console login to prit login date your user name, logged in users or whatever you would like shaped in ascii art picture. For example you can great yourself on system login with whoami command printed in one of the offered boxes ASCII art picture templates, etc.
Below is few sample ideas for use:
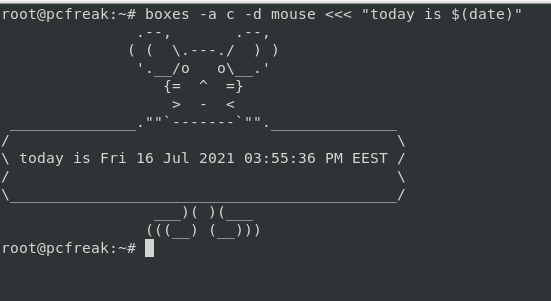
# boxes -a c -d mouse <<< "today is $(date)"
# boxes -a c -d mouse <<< "Hello $USER,today is $(date)"
# boxes -a c -d mouse <<< "Hello $(whoami),today is $(date)"
# boxes -a c -d mouse <<< "Hello $(whoami),today is $(date)" | lolcat
# boxes -a c -d unicornthink <<< "Hello $(whoami),today is $(date)" | lolcat

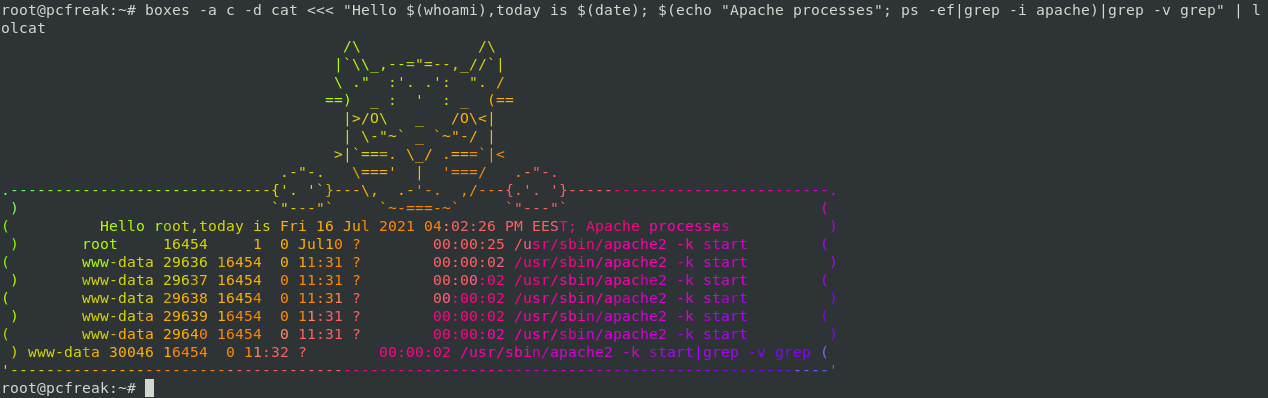
# boxes -a c -d cat <<< "Hello $(whoami),today is $(date); $(echo "Apache processes"; ps -ef|grep -i apache)|grep -v grep" | lolcat
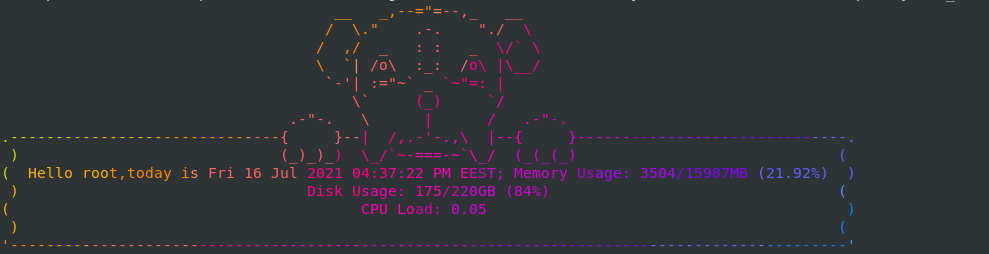
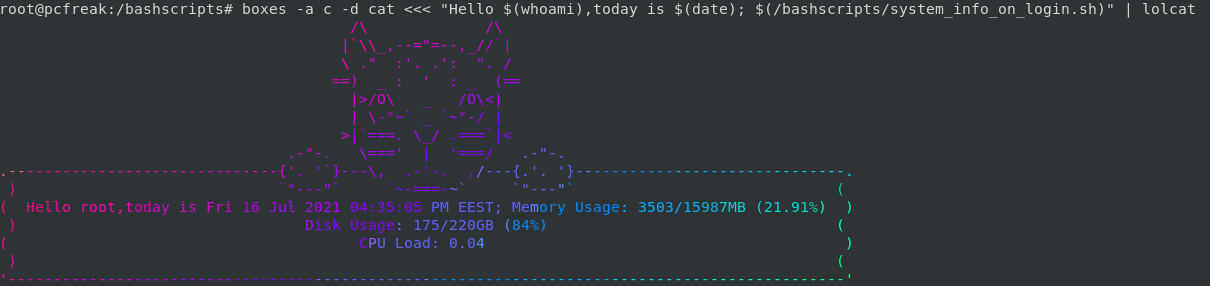
If you have a multiple systems to monitor, it is useful to quickly have an overview of each system and add some artistic qualities for example use some tiny shell script like system_info_on_login.sh and make it look aritistic:
# cat /bashscripts/system_info_on_login.sh
free -m | awk 'NR==2{printf "Memory Usage: %s/%sMB (%.2f%%)\n", $3,$2,$3*100/$2 }'
df -h | awk '$NF=="/"{printf "Disk Usage: %d/%dGB (%s)\n", $3,$2,$5}'
top -bn1 | grep load | awk '{printf "CPU Load: %.2f\n", $(NF-2)}'
Funny cool stuff ain't it is up to your imagination to add whatever beauty you like. If you want to make a little prank you can misteriously place boxes to auto launch on some of the DMZ secured servers and print any strange form to a colleague next time he logs in by adding boxes to launch in his ~/.bashrc with some weird message such as "your account has been pwn3d by a 1337 h4x0r" and watch for his reaction 🙂
Enjoy !