Internet Security Research Group (ISRG). ISRG group gave initiative with the goal to "encrypt the internet", i.e. offer free alternative to the overpriced domani registrer sold certificates with the goal to make more people offer SSL / TSL Free secured connection line on their websites.
ISRG group supported Letsencrypt non-profit certificate authority actrively by Internet industry standard giants such as Mozilla, Cisco, EFF (Electronic Frontier Foundation), Facebook, Google Chrome, Amazon AWS, OVH Cloud, Redhat, VMWare, Github and many many of the leading companies in IT.
Letsencrpyt is aimed at automating the process designed to overcome manual creation, validation, signing, installation, and renewal of certificates for secure websites. I.e. you don't have to manually write on console complicated openssl command lines with passing on Certificate CSR / KEY / PEM files etc and generate Self-Signed Untrusted Authority Certificates (noted in my previous article How to generate Self-Signed SSL Certificates with openssl or use similar process to pay money generate secret key and submit the key to third party authority through a their website webadmin interface in order to Generate SSL brought by Godaddy or Other Certificate Authority.
But of course as you can guess there are downsides as you submit your private key automatically via letsencrypt set of SSL certificate automation domain scripts to a third party Certificate Authority which is at Letsencrypt.org. A security intrusion in their private key store servers might mean a catastrophy for your data as malicious stealer might be able to decrypt your data with some additional effort and see in plain text what is talking to your Apache / Nginx or Mail Server nevertheless the cert. Hence for a high standards such as PCI environments Letsencrypt as well as for the paranoid security freak admins, who don't trust the mainstream letsencrypt is definitely not a choice. Anyways for most small and midsized businesses who doesn't hold too much of a top secret data and want a moderate level of security Letsencrypt is a great opportunity to try. But enough talk, lets get down to business.
How to install and use certbot on Debian GNU / Linux 10 Buster?
Certbot is not available from the Debian software repositories by default, but it’s possible to configure the buster-backports repository in your /etc/apt/sources.list file to allow you to install a backport of the Certbot software with APT tool.
1. Install certbot on Debian / Ubuntu Linux
root@webserver:/etc/apt# tail -n 1 /etc/apt/sources.list
deb http://ftp.debian.org/debian buster-backports main
If not there append the repositories to file:
- Install certbot-nginx certbot-apache deb packages
root@webserver:/ # echo 'deb http://ftp.debian.org/debian buster-backports main' >> /etc/apt/sources.list
- Install certbot-nginx certbot-apache deb packages
root@webserver:/ # apt update
root@webserver:/ # apt install certbot python-certbot-nginx python3-certbot-apache python-certbot-nginx-doc
This will install the /usr/bin/certbot python executable script which is used to register / renew / revoke / delete your domains certificates.
2. Install letsencrypt certbot client on CentOS / RHEL / Fedora and other Linux Distributions
For RPM based distributions and other Linux distributions you will have to install snap package (if not already installed) and use snap command :
[root@centos ~ :] # yum install snapd
systemctl enable –now snapd.socket
To enable classic snap support, enter the following to create a symbolic link between
[root@centos ~ :] # ln -s /var/lib/snapd/snap /snap
snap command lets you install, configure, refresh and remove snaps. Snaps are packages that work across many different Linux distributions, enabling secure delivery and operation of the latest apps and utilities.
[root@centos ~ :] # snap install core; sudo snap refresh core
Logout from console or Xsession to make the snap update its $PATH definitions.
Then use snap universal distro certbot classic package
[root@centos ~ :] # snap install –classic certbot
[root@centos ~ :] # ln -s /snap/bin/certbot /usr/bin/certbot
If you're having an XOrg server access on the RHEL / CentOS via Xming or other type of Xemulator you might check out also the snap-store as it contains a multitude of packages installable which are not usually available in RPM distros.
[root@centos ~ :] # snap install snap-store
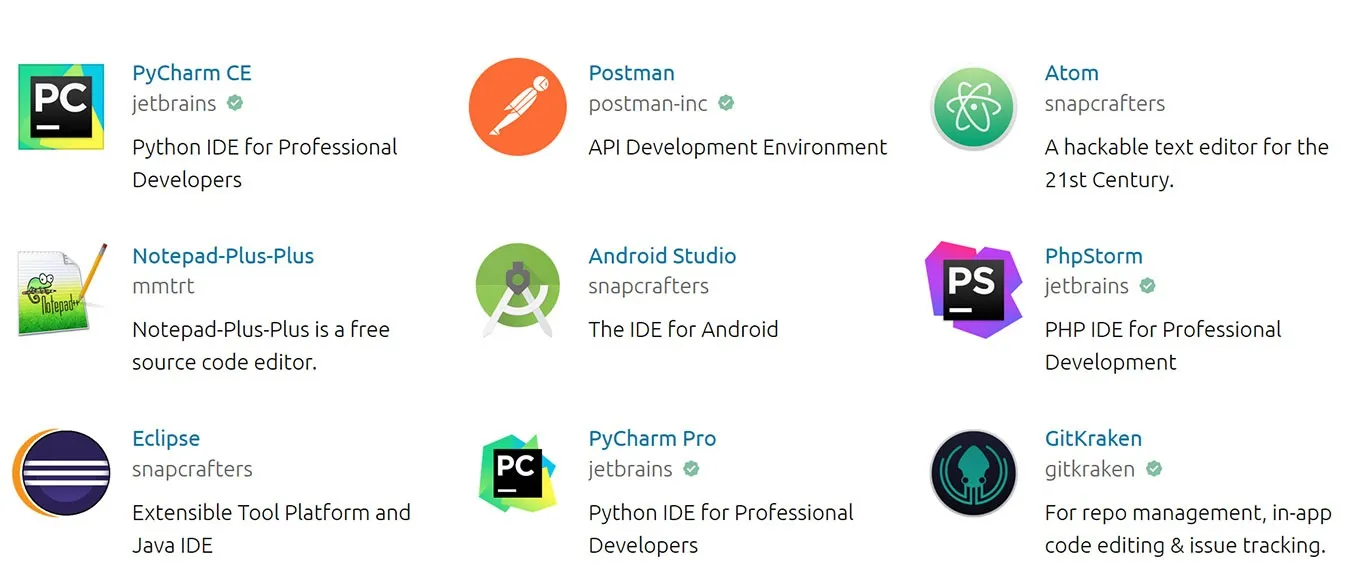
snap-store is a powerful and via it you can install many non easily installable stuff on Linux such as eclipse famous development IDE, notepad++ , Discord, the so favourite for the Quality Assurance guy Protocol tester Postman etc.
- Installing certbot to any distribution via acme.sh script
Another often preferred solution to Universally deploy and upgrade an existing LetsEncrypt program to any Linux distribution (e.g. RHEL / CentOS / Fedora etc.) is the acme.sh script. To install acme you have to clone the repository and run the script with –install
P.S. If you don't have git installed yet do
root@webserver:/ # apt-get install –yes git
…
and then the usual git clone to fetch it at your side
# cd /root
# git clone https://github.com/acmesh-official/acme.sh
Cloning into 'acme.sh'…
remote: Enumerating objects: 71, done.
remote: Counting objects: 100% (71/71), done.
remote: Compressing objects: 100% (53/53), done.
remote: Total 12475 (delta 39), reused 38 (delta 18), pack-reused 12404
Receiving objects: 100% (12475/12475), 4.79 MiB | 6.66 MiB/s, done.
Resolving deltas: 100% (7444/7444), done.
# sh acme.sh –install
To later upgrade acme.sh to latest you can do
# sh acme.sh –upgrade
In order to renew a concrete existing letsencrypt certificiate
# sh acme.sh –renew domainname.com
To renew all certificates using acme.sh script
# ./acme.sh –renew-all
3. Generate Apache or NGINX Free SSL / TLS Certificate with certbot tool
Now lets generate a certificate for a domain running on Apache Webserver with a Website WebRoot directory /home/phpdev/public/www
root@webserver:/ # certbot –apache –webroot -w /home/phpdev/public/www/ -d your-domain-name.com -d your-domain-name.com
root@webserver:/ # certbot certonly –webroot -w /home/phpdev/public/www/ -d your-domain-name.com -d other-domain-name.com
As you see all the domains for which you will need to generate are passed on with -d option.
Once certificates are properly generated you can test it in a browser and once you're sure they work as expected usually you can sleep safe for the next 3 months ( 90 days) which is the default for TSL / SSL Letsencrypt certificates the reason behind of course is security.
4. Enable freshly generated letsencrypt SSL certificate in Nginx VirtualHost config
Go to your nginx VirtualHost configuration (i.e. /etc/nginx/sites-enabled/phpmyadmin.adzone.pro ) and inside chunk of config add after location { … } – 443 TCP Port SSL listener (as in shown in bolded configuration)
server {
…
….
location ~ \.php$ {
include /etc/nginx/fastcgi_params;
## fastcgi_pass 127.0.0.1:9000;
fastcgi_pass unix:/run/php/php7.3-fpm.sock;
fastcgi_index index.php;
fastcgi_param SCRIPT_FILENAME /usr/share/phpmyadmin$fastcgi_script_name;
}
listen 443 ssl; # managed by Certbot
ssl_certificate /etc/letsencrypt/live/phpmyadmin.adzone.pro/fullchain.pem; # managed by Certbot
ssl_certificate_key /etc/letsencrypt/live/phpmyadmin.adzone.pro/privkey.pem; # managed by Certbot
include /etc/letsencrypt/options-ssl-nginx.conf; # managed by Certbot
ssl_dhparam /etc/letsencrypt/ssl-dhparams.pem; # managed by Certbot
5. Enable new generated letsencrypt SSL certificate in Apache VirtualHost
In /etc/apache2/{sites-available,sites-enabled}/your-domain.com-ssl.conf you should have as a minimum a configuration setup like below:
NameVirtualHost *:443 <VirtualHost 123.123.123.12:443>
ServerAdmin hipo@domain.com
ServerName www.pc-freak.net
ServerAlias www.your-domain.com wwww.your-domain.com your-domain.com
HostnameLookups off
DocumentRoot /var/www
DirectoryIndex index.html index.htm index.php index.html.var
CheckSpelling on
SSLEngine on
<Directory />
Options FollowSymLinks
AllowOverride All
##Order allow,deny
##allow from all
Require all granted
</Directory>
<Directory /var/www>
Options Indexes FollowSymLinks MultiViews
AllowOverride All
## Order allow,deny
## allow from all
Require all granted
</Directory>
Include /etc/letsencrypt/options-ssl-apache.conf
SSLCertificateFile /etc/letsencrypt/live/your-domain.com/fullchain.pem
SSLCertificateKeyFile /etc/letsencrypt/live/your-domain.com/privkey.pem
</VirtualHost>
6. Simulate a certificate regenerate with –dry-run
Soon before the 90 days period expiry approaches, it is a good idea to test how all installed Nginx webserver certficiates will be renewed and whether any issues are expected this can be done with the –dry-run option.
root@webserver:/ # certbot renew –dry-run
…
– – – – – – – – – – – – – – – – – – – – – – – – – – – – – – – – – – – – – – – –
** DRY RUN: simulating 'certbot renew' close to cert expiry
** (The test certificates below have not been saved.)
Congratulations, all renewals succeeded. The following certs have been renewed:
/etc/letsencrypt/live/adzone.pro/fullchain.pem (success)
/etc/letsencrypt/live/cdn.natsr.pro/fullchain.pem (success)
/etc/letsencrypt/live/mail.adzone.pro/fullchain.pem (success)
/etc/letsencrypt/live/natsr.pro-0001/fullchain.pem (success)
/etc/letsencrypt/live/natsr.pro/fullchain.pem (success)
/etc/letsencrypt/live/phpmyadmin.adzone.pro/fullchain.pem (success)
/etc/letsencrypt/live/www.adzone.pro/fullchain.pem (success)
/etc/letsencrypt/live/www.natsr.pro/fullchain.pem (success)
** DRY RUN: simulating 'certbot renew' close to cert expiry
** (The test certificates above have not been saved.)
– – – – – – – – – – – – – – – – – – – – – – – – – – – – – – – – – – – – – – – –
…
7. Renew a certificate from a multiple installed certificate list
In some time when you need to renew letsencrypt domain certificates you can list them and choose manually which one you want to renew.
root@webserver:/ # certbot –force-renewal
Saving debug log to /var/log/letsencrypt/letsencrypt.log
How would you like to authenticate and install certificates?
– – – – – – – – – – – – – – – – – – – – – – – – – – – – – – – – – – – – – – – –
1: Apache Web Server plugin (apache)
2: Nginx Web Server plugin (nginx)
– – – – – – – – – – – – – – – – – – – – – – – – – – – – – – – – – – – – – – – –
Select the appropriate number [1-2] then [enter] (press 'c' to cancel): 2
Plugins selected: Authenticator nginx, Installer nginx
Which names would you like to activate HTTPS for?
– – – – – – – – – – – – – – – – – – – – – – – – – – – – – – – – – – – – – – – –
1: adzone.pro
2: mail.adzone.pro
3: phpmyadmin.adzone.pro
4: www.adzone.pro
5: natsr.pro
6: cdn.natsr.pro
7: www.natsr.pro
– – – – – – – – – – – – – – – – – – – – – – – – – – – – – – – – – – – – – – – –
Select the appropriate numbers separated by commas and/or spaces, or leave input
blank to select all options shown (Enter 'c' to cancel): 3
Renewing an existing certificate
Deploying Certificate to VirtualHost /etc/nginx/sites-enabled/phpmyadmin.adzone.pro
Please choose whether or not to redirect HTTP traffic to HTTPS, removing HTTP access.
– – – – – – – – – – – – – – – – – – – – – – – – – – – – – – – – – – – – – – – –
1: No redirect – Make no further changes to the webserver configuration.
2: Redirect – Make all requests redirect to secure HTTPS access. Choose this for
new sites, or if you're confident your site works on HTTPS. You can undo this
change by editing your web server's configuration.
– – – – – – – – – – – – – – – – – – – – – – – – – – – – – – – – – – – – – – – –
Select the appropriate number [1-2] then [enter] (press 'c' to cancel): 2
Redirecting all traffic on port 80 to ssl in /etc/nginx/sites-enabled/phpmyadmin.adzone.pro
– – – – – – – – – – – – – – – – – – – – – – – – – – – – – – – – – – – – – – – –
Your existing certificate has been successfully renewed, and the new certificate
has been installed.
The new certificate covers the following domains: https://phpmyadmin.adzone.pro
You should test your configuration at:
https://www.ssllabs.com/ssltest/analyze.html?d=phpmyadmin.adzone.pro
– – – – – – – – – – – – – – – – – – – – – – – – – – – – – – – – – – – – – – – –
IMPORTANT NOTES:
– Congratulations! Your certificate and chain have been saved at:
/etc/letsencrypt/live/phpmyadmin.adzone.pro/fullchain.pem
Your key file has been saved at:
/etc/letsencrypt/live/phpmyadmin.adzone.pro/privkey.pem
Your cert will expire on 2021-03-21. To obtain a new or tweaked
version of this certificate in the future, simply run certbot again
with the "certonly" option. To non-interactively renew *all* of
your certificates, run "certbot renew"
– If you like Certbot, please consider supporting our work by:
Donating to ISRG / Let's Encrypt: https://letsencrypt.org/donate
Donating to EFF: https://eff.org/donate-le
8. Renew all present SSL certificates
root@webserver:/ # certbot renew
…
Processing /etc/letsencrypt/renewal/www.natsr.pro.conf
– – – – – – – – – – – – – – – – – – – – – – – – – – – – – – – – – – – – – – – –
Cert not yet due for renewal
– – – – – – – – – – – – – – – – – – – – – – – – – – – – – – – – – – – – – – – –
The following certs are not due for renewal yet:
/etc/letsencrypt/live/adzone.pro/fullchain.pem expires on 2021-03-01 (skipped)
/etc/letsencrypt/live/cdn.natsr.pro/fullchain.pem expires on 2021-02-28 (skipped)
/etc/letsencrypt/live/mail.adzone.pro/fullchain.pem expires on 2021-02-28 (skipped)
/etc/letsencrypt/live/natsr.pro-0001/fullchain.pem expires on 2021-03-01 (skipped)
/etc/letsencrypt/live/natsr.pro/fullchain.pem expires on 2021-02-25 (skipped)
/etc/letsencrypt/live/phpmyadmin.adzone.pro/fullchain.pem expires on 2021-03-21 (skipped)
/etc/letsencrypt/live/www.adzone.pro/fullchain.pem expires on 2021-02-28 (skipped)
/etc/letsencrypt/live/www.natsr.pro/fullchain.pem expires on 2021-03-01 (skipped)
No renewals were attempted.
– – – – – – – – – – – – – – – – – – – – – – – – – – – – – – – – – – – – – – – –
9. Renew all existing server certificates from a cron job
The certbot package will install a script under /etc/cron.d/certbot to be run that will attempt every 12 hours however from my experience
often this script is not going to work, the script looks similar to below:
# Upgrade all existing SSL certbot machine certificates
0 */12 * * * root test -x /usr/bin/certbot -a \! -d /run/systemd/system && perl -e 'sleep int(rand(43200))' && certbot -q renew
Another approach to renew all installed certificates if you want to have a specific options and keep log of what happened is using a tiny shell script like this:
10. Auto renew installed SSL / TSL Certbot certificates with a bash loop over all present certificates
#!/bin/sh
# update SSL certificates
# prints from 1 to 104 (according to each certbot generated certificate and triggers rewew and logs what happened to log file
# an ugly hack for certbot certificate renew
for i in $(seq 1 104); do echo "Updating $i SSL Cert" | tee -a /root/certificate-update.log; yes "$i" | certbot –force-renewal | tee -a /root/certificate-update.log 2>&1; sleep 5; done
Note: The seq 1 104 is the range depends on the count of installed SSL certificates you have installed on the machine, that can be seen and set the proper value according to your case when you run one time certbot –force-renewal.