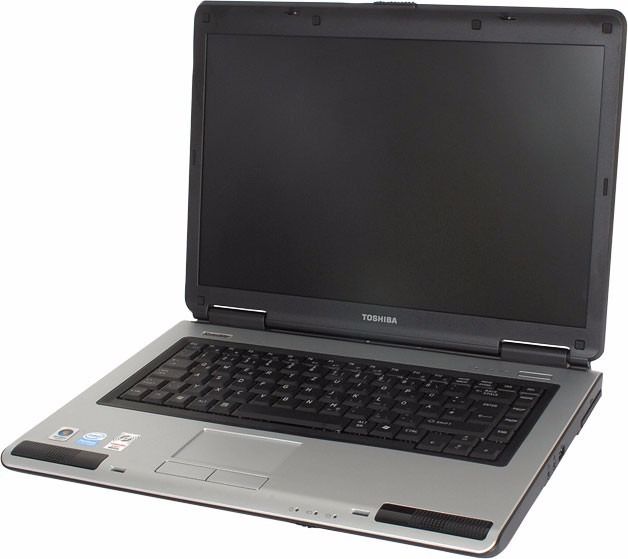
Posts Tagged ‘Linux’

Virtual Keyboard for Linux and other Freedom respecting operating Systems

Monday, July 30th, 2018

How to install and Use Linux Virtual Keyboard and other freedom respecting Operating Systems

  •  Looking for a quick way to use VIRTUAL KEYBOARD ON LINUX COMPUTER OPERATING SYSTEM, you can do it just this 1 task in 3 simple steps  ???
    – Logical question emerges, WHY ??? would you need a virtual keyboard on Free Software OS such as Linux?
    Well, just because sometimes it is much more secure to use a Virtual Keyboard, especially if you have doubt that your keyboard has been tapped or a Key Logger (Sniffer), intercepting the Keyboard IN / OUT jacks, is installed on the computer or you might have sit on a computer of ,a friend running Linux, and you want to make sure he did not install sniffer to intercept your ,SSH login passwords and ,later hack into your Servers, after stealing, the password


  • Assuming you're on : – Debian / Ubuntu Linux, or other of the numerous IT systems such as ,FreeBSD / OpeBSD etc. out there, you can run simply this commands:


  •  apt-get install –yes florence
    * A. To make it, easily invokable for laters, create a small bash, shell script in directory; – location /usr/bin/virtual-keyboard like, the one below:

    vim /usr/bin/virtual-keyboard

    * B.. INside the file Place following 1 liner code
     

    #!/bin/sh
    /usr/bin/florence


    * C… To later invoke it any time:
    Press ALT + F2 (or use Run Command Dialog in GNOME / KDE / Windomaker / IceWM whatever or any other crazy graphic environment of your choice and run:

    /usr/bin/virtual-keyboard


* How to stop unattended upgrades on Debian / Ubuntu and other deb based Linux

Saturday, July 21st, 2018

If you wondered how to stop the annoying automatic upgrades that push unknown software in background loading the computer while you browse or work and Why here is how:

* 1. Stop Annoying Unattended Upgrades on Debian and Ubuntu Linux

As root you have to execute following command
linux:~# apt-get remove –yes unattended-upgrades

And TA DA DAAA DAA DAaM !!!
 

* From now if you like to upgrade to latest in order to upgrade you can do it manually with these 3 commands:

linux:~# apt-get update && apt-get upgrade && apt-get dist-upgrade dist-upgrade

Your thanks to me are very welcome

How to configure Joystick ( Gamepad ) on Debian, Ubuntu, Mint GNU / Linux easily

Thursday, November 2nd, 2017

linux-joystick-howto-configure-easily-joypad-joystick-genius-maxfire

"All work and no fun makes Jack a dull boy …."

If you own a PC joystick and you're a gamer who just migrated to GNU / Linux and you enter the wonderful world of Linux gaming (haha what wonderful world its nightmare :), perhaps you will want an easy way to make your Joystick work on GNU / Linux.

In this article I'll try my best to explain how you can relavitely easy make your Linux joystick (joy stick 🙂 ), bring you the happiness of playing old arcades in an old school joystick way.
 

1. Install necessery packages for joystick under Linux
 

gamelinux:~# apt-get install –yes joystick jstest-gtk joy2key gjoypad xserver-xorg-input-joystick \
xserver-xorg-input-joystick-dev kodi-peripherals


2. Test wherher joystick is properly detected by kernel


gamelinux:~# cat /dev/input/js0


test-whether-joystick-works-on-linux-screenshot-cat-command


If above cat command returns a bunch of weird signs in your terminal, that means the joystick was successfully detected and should be working.
 

3. Load Joystick necessery Linux modules if your Gamepad is not properly detected


Note that I assume you're super user most of below commands are preferrably to be run as root:

If you're Gamepad is not detected, you'll have to manually create /dev/input/js0

gamelinux:~# cd /dev/input
gamelinux;~# MAKEDEV js0


Further on you'll need to perhaps load at least the following 3 modules which gives support for a number of JoySticks / Gamepad devices

gamelinux:~# modprobe joydev
gamelinux:~# modprobe ns558
gamelinux:~# modprobe sidewinder
gamelinux:~# modprobe gameport

Just in case if you're planning to play old Arcade games I recommend you load also following bunch of modules:

gamelinux:~# modprobe snd-seq
gamelinux:~# modprobe 3c59x
gamelinux:~# modprobe snd-emu10k1
gamelinux:~# modprobe snd-pcm-oss
gamelinux:~# modprobe snd-mixer-oss
gamelinux:~# modprobe snd-seq-oss

If you get an error message and don't suceed to calibrate your gamepad, you need to look under to know the modules that fit your Joystick model.


For a MS Sidewinder gamepad

gamelinux:~# modprobe joydev
gamelinux:~# modprobe ns558
gamelinux:~# modprobe sidewinder
gamelinux:~# modprobe analog
## This one work only for analog pad, like joysticks


For a Logitech WingMan digital gamepad
 

gamelinux:~# modprobe joydev
gamelinux:~# modprobe ns558
gamelinux:~# modprobe adi
## Specific driver for Logitech gamepads

For a Logitech WingMan gamepad (analog)

gamelinux:~# modprobe joydev
gamelinux:~# modprobe ns558
gamelinux:~# modprobe analog
## Module for analog gamepads
gamelinux:~# modprobe pcigame
## Module for PCI card (??)
gamelinux:~# modprobe adi
## Module for Logitech pads


For a MS SideWinder ForceFeedBack Pro
 

gamelinux:~# modprobe joydev
gamelinux:~# modprobe ns558
gamelinux:~# modprobe analog
gamelinux:~# modprobe sidewinder
gamelinux:~# modprobe iforce
## Force Feedback driver
gamelinux:~# modprobe evdev


For a Guillemot dual analog gamepad (gameport, non-USB)

gamelinux:~# modprobe joydev
gamelinux:~# modprobe ns558
gamelinux:~# modprobe guillemot
gamelinux:~# modprobe analog
## to check
gamelinux:~# modprobe iforce
## to check


If auto-detect of joystick doesn't work (hopefully not your case)


gamelinux:~# modprobe usbhid
gamelinux:~# modprobe joydev


– Enable Joystick for KDE Users
 

Luckily though historically the kcontrol package was required but nowadays, KDE users could usually calibrate joystick via KDE K Control Centrer


To make joystick configuration permanent on Linux you need to add the modules that worked with your Joystick device to /etc/modules,

for eample I own

JOYSTICK GENIUS MAXFIRE G-08XU

And my

/etc/modules file

looks like so:


gamelinux:~# cat /etc/modules

# /etc/modules: kernel modules to load at boot time.
#
# This file contains the names of kernel modules that should be loaded
# at boot time, one per line. Lines beginning with "#" are ignored.
snd-seq
3c59x
snd-emu10k1
snd-pcm-oss
snd-mixer-oss
snd-seq-oss
joydev


In case of some problems with SoundCard conflicting joystick or the other way around you might also want to add into /etc/modprobe.d/options something similar to


gamelinux:~# vim /etc/modprobe.d/options

gamelinux:~# options snd_ens1371 joystick_port=1


4. Calibrate your joystick either using jstest / jscal commands or GNOME's jstest-gtk
 

To calibrate joystick in text mode use below commands


jscal /dev/input/js0
jstest /dev/input/js0


For the lazy ones you can calibrate your joystick via GNOME's graphical tool jstest-gtk
 

jstest-gtk

jstest-gtk-linux-screenshot-how-to-configure-joystick-linux

This article is just a basic explanation on how to make your joystick work, for thoroughful advanced explanation on JoySticks and Gamepads I recommend ArchLinux Wiki explanation on how to configure Gamepads
 

5. Create missing Symlinks from /dev/input/js0 to /dev/js0
 

I've personally experienced a problem with Xmame / Xmess (Multimedia Arcade Emulator) and other old arcade Virtual Machine Emulators that are supposed to recognize the joystick, but because it is common that the joystick is trying to be invoked via /dev/js0 /dev/js1 (depending on its model), but somehow this links are missing, thus I had to manually create the links with ln command, like so:

– For /dev/input/js0 to link /dev/js0


cd /dev; ln -sf /dev/input/js0;


– For /dev/input/js1 to link /dev/js1


cd /dev; ln -sf /dev/input/js1;


Install TeamViewer on latest Debian, Ubuntu, Fedora, CentOS Linux quick how to

Tuesday, October 31st, 2017

teamviewer-howto-install-on-gnu-linux-teamviewer-and-tux-penguin-logo

If you're a sysadmin who uses GNU / Linux as a Desktop as me you will certainly need to have TeamViewer installed and ready for use on your Linux desktop.

Even though TeamViewer is a proprietary application and I prefer not to use it I'm forced to have it installed because of every now and then a friend or customer would require you to login remotely to his Windows server and clean up the system either from spyware or viruses or just deploy some new software.

Nowdays most of people are running 64 bit ( amd64 ) built operating system and the problem with TeamViewer on Linux 64bit is that it doesn't have an actual full featured 64 port of the application but only have a 32 bits install, besides that big part of components of TeamViewer are running using wine windows emulation and hencing making it work on Linux is sometimes not so trivial as we might have desired.

Because TeamViewer is a 32 bit application, it has a number of dependency libraries that are 32 bit in Linux that's the so called (i386) built libraries (packages).

Hence to make TeamViewer work on modern GNU / Linux operating systems such as Debian / Ubuntu / Mint Linux / Fedora / CentOS etc. it is necessery to have some i386 libraries and other 32 bit things pre-installed and only then you can have a working copy of teamviewer on your Linux.

1. Installing i386 applications required for TeamViewer operation

– On Debian / Ubuntu / Kubuntu / Xubuntu Linux run below commands:

First we need to add the i386 architecture to be supported by Linux


dpkg –add-architecture i386
apt update


Then on Debian and other deb based Linux we need to install following libraries
 

# apt install libjpeg62-turbo:i386 wget gdebi-core


2. Download latest teamviewer version from TeamViewer website

– On Debian, Ubuntu and other deb based Linux distros.

Download latest teamviewer version and install it:


# wget https://download.teamviewer.com/download/teamviewer_i386.deb


On CentOS, Fedora, OpenSuSE other RPM based distros:

Download the Teamviewer package and package signature using wget


# wget https://download.teamviewer.com/download/linux/signature/TeamViewer2017.asc
# wget https://download.teamviewer.com/download/teamviewer.i686.rpm


3. Insteall teamviewer with gdebi (Simple Tool to install deb files)


# gdebi teamviewer_i386.deb


Remote control and meeting solution.
 TeamViewer provides easy, fast and secure remote access and meeting solutions
 to Linux, Windows PCs, Apple PCs and various other platforms,
 including Android and iPhone.
 .
 TeamViewer is free for personal use.
 You can use TeamViewer completely free of charge to access your private
 computers or to help your friends with their computer problems.
 .
 To buy a license for commercial use, please visit http://www.teamviewer.com
 .
 This package contains Free Software components.
 For details, see /opt/teamviewer/doc/license_foss.txt
Do you want to install the software package? [y/N]:y


On Fedora, CentOS, SuSE RPM based ones:


# rpm –import TeamViewer_Linux_PubKey.asc


# rpm -i teamviewer_12.0.xxxxx.i686.rpm


or if you face some failed dependencies you better use zypper that will download any missing teamviewer dependencies.


# zypper install teamviewer_12.0.xxxxx.i686.rpm


4. Start Teamviewer


teamviewer-running-on-linux-screenshot


linux:~$ teamviewer
Init…
CheckCPU: SSE2 support: yes
XRandRWait: No value set. Using default.
XRandRWait: Started by user.
Checking setup…
wine: configuration in '/home/hipo/.local/share/teamviewer12' has been updated.
Launching TeamViewer …
Launching TeamViewer GUI …


How to check Linux OS install date / How long ago was Linux installed

Sunday, October 22nd, 2017

If you're sysadmin who inherited a few hundreds of Linux machines from a previous admin and you're in process of investigating how things were configured by the previous administrator one of the crucial things to find out might be

How Long ago was Linux installed?

Here is how to check the Linux OS install date.

The universal way nomatter the Linux distribution is to use fullowing command:


root@pcfreak:~# tune2fs -l /dev/sda1 | grep 'Filesystem created:'
Filesystem created:       Thu Sep  6 21:44:22 2012


Above command assumes the Linux's root partition / is installed on /dev/sda1 however if your case is different, e.g. the primary root partition is installed on /dev/sda2 or /dev/sdb1 / dev/sdb2 etc. just place the right first partition into the command.

If primary install root partition is /dev/sdb1 for example:
 

root@pcfreak:~# tune2fs -l /dev/sdb1 | grep 'Filesystem created:'


To find out what is the root partition of the Linux server installed use fdisk command:


root@pcfreak:~# fdisk -l


Disk /dev/sda: 465,8 GiB, 500107862016 bytes, 976773168 sectors
Units: sectors of 1 * 512 = 512 bytes
Sector size (logical/physical): 512 bytes / 512 bytes
I/O size (minimum/optimal): 512 bytes / 512 bytes
Disklabel type: dos
Disk identifier: 0x00051eda

Device     Boot     Start       End   Sectors   Size Id Type
/dev/sda1  *         2048 965193727 965191680 460,2G 83 Linux
/dev/sda2       965195774 976771071  11575298   5,5G  5 Extended
/dev/sda5       965195776 976771071  11575296   5,5G 82 Linux swap / Solaris

Disk /dev/sdb: 111,8 GiB, 120034123776 bytes, 234441648 sectors
Units: sectors of 1 * 512 = 512 bytes
Sector size (logical/physical): 512 bytes / 512 bytes
I/O size (minimum/optimal): 512 bytes / 512 bytes
Disklabel type: dos
Disk identifier: 0x00000000


Other ways to check the Linux OS install date on Debian / Ubuntu / Mint etc. deb. based GNU / Linux


Deban based Linux distributions do create an initial /var/log/installer directory containing various install information such as hardware-summary, partition, initial installed deb packages, exact version of Linux distribution, and the way it was installed either it was installed from an ISO image, or it was network install etc.


root@pcfreak:~# ls -al /var/log/installer/
total 1228
drwxr-xr-x  3 root root   4096 sep  6  2012 ./
drwxr-xr-x 72 root root  12288 окт 22 06:26 ../
drwxr-xr-x  2 root root   4096 sep  6  2012 cdebconf/
-rw-r–r–  1 root root  17691 sep  6  2012 hardware-summary
-rw-r–r–  1 root root    163 sep  6  2012 lsb-release
-rw——-  1 root root 779983 sep  6  2012 partman
-rw-r–r–  1 root root  51640 sep  6  2012 status
-rw——-  1 root root 363674 sep  6  2012 syslog


If those directory is missing was wiped out by the previous administrator, to clear up traces of his previous work before he left job another possible way to find out exact install date is to check timestamp of /lost+found directory;
 

root@pcfreak:~# ls -ld /lost+found/
drwx—— 2 root root 16384 sep  6  2012 /lost+found//


Check OS Linux install date on (Fedora, CentOS, Scientific Linux, Oracle and other Redhat RPM based Distros)


[root@centos: ~]# rpm -qi basesystem
Name        : basesystem
Version     : 10.0
Release     : 7.el7
Architecture: noarch
Install Date: Mon 02 May 2016 19:20:58 BST
Group       : System Environment/Base
Size        : 0
License     : Public Domain
Signature   : RSA/SHA256, Tue 01 Apr 2014 14:23:16 BST, Key ID     199e2f91fd431d51
Source RPM  : basesystem-10.0-7.el7.src.rpm
Build Date  : Fri 27 Dec 2013 17:22:15 GMT
Build Host  : ppc-015.build.eng.bos.redhat.com
Relocations : (not relocatable)
Packager    : Red Hat, Inc. <http://bugzilla.redhat.com/bugzilla>
Vendor      : Red Hat, Inc.
Summary     : The skeleton package which defines a simple Red Hat Enterprise Linux system
Description :
Basesystem defines the components of a basic Red Hat Enterprise Linux
system (for example, the package installation order to use during
bootstrapping). Basesystem should be in every installation of a system,
and it should never be removed.


Check TOP Memory and CPU use with ps command on Linux

Sunday, October 22nd, 2017

linux-command-toolbox-how-to-check-maximum-cpu-load-and-max-memory-usage-with-ps-on-linux

There are plenty of software to check the GNU / Linux Server Load bottlenecks such as top / tload / slabtop / htop but for shell scripting purposes or perl  / python / ruby automation Dev Ops scripts and various Web and Middleware Tasks it is always better to know how to print list the TOP Memory and CPU consumption processes on Linux.

Below are two easy commands you can use to check out, which process is the most memory hungry and which running daemon (MySQL / PostgreSQL / Apache whatever) is the overloading your *nix server CPU.

TOP Memory use sorted by process memory max consumption


ps aux  | awk '{print $6/1024 " MBtt" $11}'  | sort -n


TOP CPU use sorted y running daemon
 

ps -eo pcpu,pid,user,args | sort -k 1 -r | head -10


Enjoy 🙂

How to turn keyboard backlight on GNU / Linux, keyboard no backlight solution

Friday, October 20th, 2017

how-to-make-CM_Storm_Devastator-keyboard_backlight-work-on-linux-enabled-disable-keyboard-glowing-gnu-linux

If you're a GNU / Linux user and you happen to buy a backlighted keyboard, some nice new laptop whose keyboard supports the more and more modern keyboard growing or if you happen to install a GNU / Linux for a Gamer friend no matter the Linux distribution, you might encounter sometimes  problem even in major Linux distributions Debian / Ubuntu / Mint / Fedora with keyboard backlight not working.

Lets say you buy a Devastator II backlighted keyboard or any other modern keyboard you plug it into the Linux machine and there is no nice blinking light coming out of the keyboard, all the joy is gone yes I know. The free software coolness would have been even more grandiose if your keyboard was shiny and glowing in color / colors 🙂

But wait, there is hope for your joy to be made complete.

To make the keyboard backlight switch on Just issue commands:


xmodmap -e 'add mod3 = Screen_Lock'


# Turn on the keyboard bright lamps
xset led on

# Turns off the keyboard bright lamps
xset led off


If you want to make the keyboard backlight be enabled permanent the easiest solution is to

– add the 3 command lines to /etc/rc.local

E.g. to do so open /etc/rc.local and before exit 0 command just add the lines:


vim /etc/rc.local


xmodmap -e 'add mod3 = Screen_Lock'

# Turn on the keyboard bright lamps
xset led on

# Turns off the keyboard bright lamps
xset led off


If you prefer to have the keyboard colorful backlight enable and disabled from X environment on lets say GNOME , here is how to make yourself an icon that enabled and disables the colors.

That's handy because at day time it is a kind of meaningless for the keyboard to glow.

Here is the shell script:

#!/bin/bash
sleep 1
xset led 3
xmodmap -e 'add mod3 = Scroll_Lock'


I saved it as /home/hipo/scripts/backlight.sh

(don't forget to make it executable!, to do so run):


chmod +x /home/hipo/scripts/backlight.sh


Then create  the .desktop file at /etc/xdg/autostart/backlight.desktop so that it runs the new shell script, like so:

[Desktop Entry]
Type=Application
Name=Devastator Backlight
Exec=/home/hipo/scripts/backlight.sh
Icon=system-run
X-GNOME-Autostart-enabled=true

Play Midis on Linux / Make Linux MIDI Ready for the Future – Enable embedded MIDI music to play in a Browser, Play MIDIs with VLC and howto enjoy Midis in Text Console

Wednesday, October 4th, 2017

how-to-play-midi-on-gnu-linux-in-graphic-environment-console-and-browser-midi-synthesizer-and-linux-tux-together


Play Midis on Linux or Make Linux MIDI Ready for the Future – Enable embedded MIDI music to play in a Browser, Play MIDIs with VLC and howto enjoy Midis in Text Console HOWTO


Playing MIDI has been quite a lot of fun historically,

if you grow up in the days when personal computers were still young and the Sound Blaster was a luxury, before the raise of Mp3 music format, you have certainly enjoyed the beeping of PC Speaker and later on during 386 and 486 / 586 computers the enjoyment of playing tracked music such as S3M and MOD,

in that good days playing MIDI music was the only alternative for PC maniacs who doesn't own a CD Drive (which itself) was another luxury and even thouse who had a CD ROM device, were mainly playing music in CD audio format (.CDA).
Anyhow MIDI was a cheap and a CPU unintensive way to listen to equivalent of favourite popular Audio Songs and for those who still remember many of the songs were recreated in MIDI format, just with a number of synthesized instruments without any voice (as MIDI is usually).

The same was true also for the good old days of raise of Mobile Phones, when polyphonic was a standard as CPU power was low MIDI was a perfect substitute for the CPU heavy Encoded MP3s / OGG and other formats that required a modern for that time Intel CPU running in 50+ Mhz usually 100 / 166Mhz was perfect for the days to play Mp3 but still even on that PCs we listened to Midi songs.

Therefore if you're one of those people like me who still enjoy to play some Midi Music in the year 2017 and feel a bit like Back into the Future movie and a Free Software fan and user, especially if you're a novice GNU  / Linux Free Software user, you will be unpleasently surprised that most today's default Linux distributions doesn't have an easy way to play Midi music format out of the box right after install.

Hence below article aims to give you an understanding on

How you can play Midi Music on GNU / Linux Operating System

First, lets Prepare to load necessery Linux kernel modules to make sure MIDI can be played by soundcard:

In /etc/modules make sure you have the following list of modules loaded:
 

linux-desktop:~# cat /etc/modules
3c59x
snd-emu10k1
snd-pcm-oss
snd-mixer-oss
snd-seq-oss

!Note the modules are working as of time of writting and in time can change to some other modules, depending on how the development of ALSA (Advanced Linux Sound Architecture) goes, and if the developers decide to rename the upmentioned modules

If you just have added the modules to /etc/modules with vim / nano to reload modules into the Linux kernel run:


linux-desktop:~# modprobe -a


Secondly, Installing a whole bunch of MIDI music related program tools can be achieved in Debian by installing the multimedia-midi package, e.g.:


linux-desktop:~# apt-get install –yes multimedia-midi


1. Playing Midi in Graphical environment with a double click using VLC


How to make MIDI easy listanable in Linux graphical environment like GNOME / KDE / XFCE desktop ?


If you want to make Midi music execution sa easy as  just clicking on the .MIDI file format on Linux you can do that with a midi extension available for VLC (Video Lan Client) Universal Multi Platform Media Player player

To install it on Debian Ubuntu GNU / Linux
 

# apt-get install –yes vlc-plugin-fluidsynth


Необходимо е да се изтеглят 6754 B архиви.
След тази операция ще бъде използвано 35,8 kB допълнително дисково пространство.
Изт:1 http://deb.debian.org/debian stretch/main amd64 vlc-plugin-fluidsynth amd64 2.2.6-1~deb9u1 [6754 B]
Изтеглени 6754 B за 0с (33,6 kB/сек)           
Selecting previously unselected package vlc-plugin-fluidsynth:amd64.
(Reading database … 382976 files and directories currently installed.)
Preparing to unpack …/vlc-plugin-fluidsynth_2.2.6-1~deb9u1_amd64.deb …
Unpacking vlc-plugin-fluidsynth:amd64 (2.2.6-1~deb9u1) …
Setting up vlc-plugin-fluidsynth:amd64 (2.2.6-1~deb9u1) …
Processing triggers for libvlc-bin:amd64 (2.2.6-1~deb9u1) …


Besides making your MIDI play on the GUI environment easy as a a point and click VLC will also be able to play MIDIs on GNU / Linux from your favourite browser (nomatter Firefox / Chrome or Opera), even though the player would play in a new PopUP Window it is easy to select once MIDI file from a random website for example – here is a directory listing of Webserver with Doom II Soundtrack in MIDI format , click over any file from list and Choose option for VLC to always remember that MIDI files has to be opened with VLC player.


2. Enable Firefox / IceWeasel browser to Support Website embedded MIDI files


So VLC could make you listen the downloadable MIDIs from Web pages but,
 

What if you have stumbled on an old website which was configured with very OLD HTML Code to play some nice music (or even different MIDI songs) for each part of the website (for each webpage) and you want to have the Websites created with embedded MIDIs to automatically play on Linux oncce you visit the site?


Sadly default support in Browser for MIDI across all GNU / Linux, I've used so far never worked out of the box, not that still anyone is developing modern websites with MIDIs, but still for the sake of backward compitability and for sake of interactivity it is worthy to enable embedded MIDI support in Linux

But with a couple of tunings as usual GNU / Linux can do almost everything, so here is how to enable embedded browser support for Midi on Linux (That should work with minor modifications not only on Debian / Ubuntu / ArchLinux but also on Fedoras, CentOS etc.
If you try it on any of this distributions, please drop a short comment and tell me in few lines how you made embedded midi worked on that distros.


apt-get install –yes timidity mozplugger

Next do restart firefox

Sometimes in order to work you might need to delete /home/[YOUR_USERNAME]/.mozilla/pluginreg.dat and restart firefox again, e.g. make a backup and give it a try:


cp -rpf /home/hipo/.mozilla/pluginreg.dat /home/hipo/.mozilla/pluginreg.dat.bak
rm -f /home/hipo/.mozilla/pluginreg.dat


Another good tip as talking for embedding MIDI support is to embed XPDF to render PDF pages inside the Browser, by default this is done by GNOME's Evince PDF reader but as it is sometimes buggy and might crash it is generally a good idea to switch to xpdf instead, if for some reason PDF is not directly displaying in browser or suddenly stopped working after some distro uipgrade, you might want to do below as well:
 

apt-get install xpdf

vim /etc/mozpluggerrc

Fin d and Comment out the line starting with:

It should look like this afterwards:

 Repeat Swallow ….
 

text/x-pdf: pdf: PDF file
#      repeat swallow(documentShell) fill: acroread -geometry +9000+9000 +useFrontEndProgram "$file"
        repeat noisy swallow(Xpdf) fill: xpdf -g +9000+9000 "$file"
        repeat noisy swallow(gv) fill: gv –safer –quiet –antialias -geometry +9000+9000 "$file"


3. Play Midi music in Linux text console / terminal


There is a console tool that historically has been like the Linux standard for playing midis over the years as I remember, its called timidity


To install timidity on .Deb based Linux:
 

linux-desktop:~$ su root
Password:
linux-desktop:~# apt-get install –yes timidity

Необходимо е да се изтеглят 0 B/580 kB архиви.
След тази операция ще бъде използвано 0 B допълнително дисково пространство.
(Reading database … 382981 files and directories currently installed.)
Preparing to unpack …/timidity_2.13.2-40.5_amd64.deb …
Unpacking timidity (2.13.2-40.5) over (2.13.2-40.5) …
Processing triggers for menu (2.1.47+b1) …
Processing triggers for man-db (2.7.6.1-2) …
Setting up timidity (2.13.2-40.5) …
Processing triggers for menu (2.1.47+b1) …


To test your new MIDI Synthesizer tool and make the enjoyment full you can download Doom 2 extracted MIDI Soundtrack from here
 

Once you have downloaded above Metal MIDI DOOM old school arcade soundtrack and untarred it into your home directory be it ~/doom-midis

A remark to make here is timidity is quite CPU intensive, but on modern Dual and Quad-Core PC Notebooks, the CPU load is not of a big concern.

To test and play with timidity:
 

linux-desktop~$ timidity ~/mp3/midis/*


timidity-playing-doom-midi-bunny-song-on-debian-stretch-gnome-terminal-screenshot
 

hipo@jericho:~/mp3/midis$ aplaymidi -l
 Port    Client name                      Port name
 14:0    Midi Through                     Midi Through Port-0
128:0    TiMidity                         TiMidity port 0
128:1    TiMidity                         TiMidity port 1
128:2    TiMidity                         TiMidity port 2
128:3    TiMidity                         TiMidity port 3


We have also the playmidi  (simple midi text console terminal player), which historically was working quite decent and I use it to in the past on my RedHat 6.0 and RedHat 7.0 to listen to my .MID format files but unfortunately as of time of writting something is wrong with it, so when I try to play MIDIs with it instead of timidity I get this erro:


$ playmidi *.mid
Playmidi 2.4 Copyright (C) 1994-1997 Nathan I. Laredo, AWE32 by Takashi Iwai
This is free software with ABSOLUTELY NO WARRANTY.
For details please see the file COPYING.
open /dev/sequencer: No such file or directory

Even though I tried hard to resolve that error by loading various midi related MIDI modules and following a lot of the suggestions online on how to  make /dev/sequencer work again it was all no luck.
 

Some people back in the distant year 2005, reported the problem was solved by simply loading snd-seq

But as of time of writting:


# modprobe snd-seq


Some people said in archlinux's Forum

/dev/sequencer sequencer: No such file or directory


is solved by loading snd-seq-oss kernel module, but on my Debian Linux 9.1 Stretch, this ain't work as well :


root@jericho:/home/hipo/mp3/midis# modprobe snd-seq-oss
modprobe: FATAL: Module snd-seq-oss not found in directory /lib/modules/4.9.0-3-amd64
root@jericho:/home/hipo/mp3/midis# uname -a;
Linux jericho 4.9.0-3-amd64 #1 SMP Debian 4.9.30-2+deb9u5 (2017-09-19) x86_64 GNU/Linux


Another invention of mine was to try to also link /dev/snd/seq to /dev/sequencer but this produced no positive result either:


# ln -sf /dev/snd/seq /dev/sequencer
# ls -al /dev/sequencer
lrwxrwxrwx 1 root root 12 окт  4 16:48 /dev/sequencer -> /dev/snd/seq


Note that after lining in that way I got following error with my attempt to play MIDIs with playmidi

# playmidi *.mid
Playmidi 2.4 Copyright (C) 1994-1997 Nathan I. Laredo, AWE32 by Takashi Iwai
This is free software with ABSOLUTELY NO WARRANTY.
For details please see the file COPYING.
there is no soundcard


Anyhow on some other Linux distributions (especially with Older Kernel versions), some of the above 3 suggested Fix might work perfectly fine so if you have some time give it a try please and drop me  a comment on how it went, you will help the GNU / Linux community out there that way.

Well never mind the bollocks, so

Now back to where I started timidity even though it will play fine it will not give any indication on the lenght of the midi song (precious information such as how much time is left until the end is over).

Hence if you prefer a player that gives you an indicator on how much is left towards the end length of each of the played MIDI file you can give a try to wildmidi:


linux-desktop:~$ apt-cache show wildmidi|grep -i description -A 2

Description-en: software MIDI player
 Minimal MIDI player implementation based on the wildmidi library that
 can either dump to WAV or playback over ALSA. It is intended to

Description-md5: b4b34070ae88e73e3289b751230cfc89
Homepage: http://www.mindwerks.net/projects/wildmidi/
Tag: implemented-in::c, role::program, sound::midi, sound::player,

Description: software MIDI player
Description-md5: 4673a7051f104675c73eb344bb045607
Homepage: http://wildmidi.sourceforge.net/
Bugs: https://bugs.launchpad.net/ubuntu/+filebug


If yet not installed install it after becoming admin user:


linux-desktop:~$ su root
Password:

linux-desktop:~# apt-get install –yes wildmidi


wildmidi is much less CPU intensive (it uses gstreamer to play (Gstreamer – open source multimedia framework)

And next give it a try by running:


linux-desktop:~$ wildmidi ~/mp3/midis/*


wildmidi-midi-lenght-status-text-console-player-for-linux-ubuntu-debian-fedora-suse


4. Editting MIDI files with Free Software and Proprietary MIDI Editor Programs


If you want a professional software that can play Midi in a fuzzy interactive GUI way and have some extra possibilities to edit MIDIs and other format give a try to Muse Sequencer:


linux-desktop:~$ sudo apt-get install –yes muse

The following NEW packages will be installed:
  muse
0 upgraded, 1 newly installed, 0 to remove and 38 not upgraded.
Need to get 5814 kB of archives.
After this operation, 21.0 MB of additional disk space will be used.
Get:1 http://deb.debian.org/debian stretch/main amd64 muse amd64 2.1.2-3+b1 [5814 kB]
Fetched 5814 kB in 2s (2205 kB/s)                             
    are supported and installed on your system.
Preconfiguring packages …
Selecting previously unselected package muse.
(Reading database … 382981 files and directories currently installed.)
Preparing to unpack …/muse_2.1.2-3+b1_amd64.deb …
Unpacking muse (2.1.2-3+b1) …
Processing triggers for mime-support (3.60) …
Processing triggers for desktop-file-utils (0.23-1) …
Processing triggers for doc-base (0.10.7) …
Processing 1 added doc-base file…
Registering documents with scrollkeeper…
Processing triggers for man-db (2.7.6.1-2) …
Processing triggers for shared-mime-info (1.8-1) …
Unknown media type in type 'all/all'
Unknown media type in type 'all/allfiles'
Processing triggers for gnome-menus (3.13.3-9) …
Setting up muse (2.1.2-3+b1) …
Processing triggers for hicolor-icon-theme (0.15-1) …


Below is short description what Muse can do for you:


MusE is a MIDI/audio sequencer with recording and editing capabilities.
 Some Highlights:
 

  * Standard midifile (smf) import-/export.
  * Organizes songs in tracks and parts which you can arrange with
    the part editor.
  * MIDI editors: pianoroll, drum, list, controller.
  * Score editor with high quality postscript printer output.
  * Realtime: editing while playing.
  * Unlimited number of open editors.
  * Unlimited undo/redo.
  * Realtime and step-recording.
  * Multiple MIDI devices.
  * Unlimited number of tracks.
  * Sync to external devices: MTC/MMC, Midi Clock, Master/Slave.
  * Audio tracks, LADSPA host for master effects.
  * Multithreaded.
  * Uses raw MIDI devices.
  * XML project file.
  * Project file contains complete app state (session data).
  * Application spanning Cut/Paste Drag/Drop.


linux-desktop~:$ muse

muse-advanced-midi-editor-free-software-for-linux


Below is another non-free program that you might, try if MusE doesn't fit your needs (is not rich enough for editting capabilities is bitwig (though I don't recommend since it is not free software)

bitwig – Bitwig Studio is a multi-platform music-creation system for production, performance and DJing, with a focus on flexible editing tools and a super-fast workflow.


bitwig-midi-and-audio-non-free-software-advanced-useful-sound-editor-for-linx


5. Some examples for Text editing and MIDI Conversion to CSV and ABC file formats There is pretty much more

For the MIDI Extremists who or people that create MIDIs and want to learn how a MIDI is made (the content of it etc.), I suggest you take a look at these 3 command line MIDI editing / conversion tools
 

  • midi2abc – A little tool to create MIDI formats to ABC format
  • midi2csv – Conver tour Favourite MIDI files to CSV for educational purposes so see what Channels, Tracks and Time Intervals is a MIDI song mad
  • midicopy – Copy selected, track, channel, time interval of MIDI file to another MIDI file3


Well, that's all folks now enjoy your MIDIs and don't forget to donate, as I'm jobless at the moment and the only profit I make is just a few bucks out of advertisement on this blog.
 

Graphic tool to get Hardware Information on Linux / How to view Hardware Information easy in Linux

Tuesday, October 3rd, 2017


howto-get-graphically-system-hardware-info-linux-gui-program-for-hardware-recognition-linu


IS THERE A GRAPHIC ( GUI ) TOOL TO VIEW HARDWARE INFORMATION ON LINUX?


If you are a console maniac like myself, perhaps you never think that you might need anything graphical besides to view hardware information on Linux, but as we're growing older sometimes it becomes much less easier to just use a graphical tool that can show us all the information we need regarding a Notebook / Desktop PC with Linux or even Server machine with enabled Graphical Environment with a brand new installed GNU / Linux whatever version (I hope you don't own server with running Xorg / Gnome / Mate / Xfce etc. as that's pretty much a waste of hardware resource and opens a dozen of other security risks for the server running services ).


 There are at least 2 ways to quickly check hardware on both PC WorkStation or Server, the easiest and quickest for PC / Notebook Linux users if you have installed GTK libraries or Gnome Desktop Environment is with;
 

LSHW-GTK


LSHW-GTK is simply a GTK frontend over the command line tool for hardware information gathering LSHW
 

HardiInfo


HardInfo – is a small application that displays information about your hardware and operating system. Currently it knows about PCI, ISA PnP, USB, IDE, SCSI, Serial and parallel port devices.


1. Howto Install LSHW-GTK / HardInfo on Debian / Ubuntu / Mint GNU / Linux to easy view hardware information


To install both of them on Debian / Ubuntu GNU / Linux, run:
 

apt-get install –yes lshw lshw-gtk hardinfo


2. Howto install LSHW-GTK on Fedora, CentOS and OpenSuSE Linux to view easy hardware information

On RedHat RPM based Linux distributions, the package to install is called lshw-gui

Install with yum RPM package manager:
 

yum install –yes lshw lshw-gui  hardinfo


3. Run lshw-gtk / hardinfo

Again, find them and run from GUI environment menus or run manually like in below example:

$ lshw-gtk


graphic-program-to-view-computer-hardware-on-linux-lshw-gtk-on-debian-linux-screenshot-view-hardware-easy-linux1


$ hardinfo


hardinfo-a-gui-program-to-view-computer-hardware-info-on-linux-and-freebsd

As you see hardinfo is really interactive and it gives you pretty much all the information, you might need, the only information that was missing at my case and I guess, that would happen to others is information about the SSD Hard Disk, which   180GB

HardInfo is really amazing program as it even includes various common Benchmark Tests and comparison with other Computers:

hardinfo-get-hardware-information-easily-on-linux-and-freebsd-benchmark-info-screenshot-debian-stretch

True that the tests, are pretty simple but still could be useful.

Now run it either from GNOME / Cinnamon (The default graphical environment of Debian Linux) or PLASMA (The new name for the second most popular Linux Graphical Environment – KDE desktop environment)


$ lshw


Here is few more screenshots from hardware info reported from my ThinkPad T410 Laptop Running Debian 9 Stretch at the moment.


MotherBoard -> BIOS Information

(thatnks God this old but gold Thinkpad T420 business notebook does not run UEFI substitute for BIOS 🙂

graphic-program-to-view-computer-hardware-on-linux-lshw-gtk-on-debian-linux-screenshot-view-hardware-easy-linux2

CPU Information (with all the supported CPU capabilities (extensions)

graphic-program-to-view-computer-hardware-on-linux-lshw-gtk-on-debian-linux-screenshot-view-hardware-easy-linux3

Host Bridge Info

graphic-program-to-view-computer-hardware-on-linux-lshw-gtk-on-debian-linux-screenshot-view-hardware-easy-linux4

Thinkpad BATTERY (45N1005) Info

graphic-program-to-view-computer-hardware-on-linux-lshw-gtk-on-debian-linux-screenshot-view-hardware-easy-linux5

By the way another Way to GUI View your Computer is to just generate HTML from lshw command line tool (as it supports export to HTML), here is how:


$ lshw -html > ~/hardware-specs.html


Then just open it with Browser, for example I like GNOME Epiphany browser, so I'll read HTML with it:


$ epiphany ~/hardware-specs.html


graphical-software-to-view-hardware-on-linux-lshw-command-to-generate-html-and-view-it-graphically-in-browser-on-home-pc-or-server


The great thing about generating HTML report for hardware is that on Staging / Production / Development servers which you inherited from some other administrator who for some reason (laziness 🙂 ) didn't left necessery documentation, you can easily map the machine hardware and even if it is a group of machines, you can automate report generation for all of them write a short script that parses the data on each of the HTML reports and finally creates a merged document with main important information about hardware of a cluster of computers etc.

If you still want to stick to console run the console version of lshw or use dmidecode or lshw:


$ lshw

hipo@jericho:~$ lshw
WARNING: you should run this program as super-user.
jericho                     
    description: Computer
    width: 64 bits
    capabilities: smp vsyscall32
  *-core
       description: Motherboard
       physical id: 0
     *-memory
          description: System memory
          physical id: 0
          size: 7870MiB
     *-cpu
          product: Intel(R) Core(TM) i7-2640M CPU @ 2.80GHz
          vendor: Intel Corp.
          physical id: 1
          bus info: cpu@0
          size: 891MHz
          capacity: 3500MHz
          width: 64 bits
          capabilities: fpu fpu_exception wp vme de pse tsc msr pae mce cx8 apic sep mtrr pge mca cmov pat pse36 clflush dts acpi mmx fxsr sse sse2 ss ht tm pbe syscall nx rdtscp x86-64 constant_tsc arch_perfmon pebs bts nopl xtopology nonstop_tsc aperfmperf eagerfpu pni pclmulqdq dtes64 monitor ds_cpl vmx smx est tm2 ssse3 cx16 xtpr pdcm pcid sse4_1 sse4_2 x2apic popcnt tsc_deadline_timer aes xsave avx lahf_lm epb tpr_shadow vnmi flexpriority ept vpid xsaveopt dtherm ida arat pln pts cpufreq
     *-pci
          description: Host bridge
          product: 2nd Generation Core Processor Family DRAM Controller
          vendor: Intel Corporation
          physical id: 100
          bus info: pci@0000:00:00.0
          version: 09
          width: 32 bits
          clock: 33MHz
        *-pci:0
             description: PCI bridge
             product: Xeon E3-1200/2nd Generation Core Processor Family PCI Express Root Port
             vendor: Intel Corporation
             physical id: 1
             bus info: pci@0000:00:01.0
             version: 09
             width: 32 bits
             clock: 33MHz
             capabilities: pci normal_decode bus_master cap_list
             configuration: driver=pcieport
             resources: irq:24 ioport:5000(size=4096) memory:f0000000-f10fffff ioport:c0000000(size=301989888)
           *-generic UNCLAIMED
                description: Unassigned class
                product: Illegal Vendor ID
                vendor: Illegal Vendor ID
                physical id: 0
                bus info: pci@0000:01:00.0
                version: ff
                width: 32 bits
                clock: 66MHz
                capabilities: bus_master vga_palette cap_list
                configuration: latency=255 maxlatency=255 mingnt=255
                resources: memory:f0000000-f0ffffff memory:c0000000-cfffffff memory:d0000000-d1ffffff ioport:5000(size=128) memory:f1000000-f107ffff
        *-display
             description: VGA compatible controller
             product: 2nd Generation Core Processor Family Integrated Graphics Controller
             vendor: Intel Corporation
             physical id: 2
             bus info: pci@0000:00:02.0
             version: 09
             width: 64 bits
             clock: 33MHz
             capabilities: vga_controller bus_master cap_list rom
             configuration: driver=i915 latency=0
             resources: irq:30 memory:f1400000-f17fffff memory:e0000000-efffffff ioport:6000(size=64) memory:c0000-dffff
        *-communication:0
             description: Communication controller
             product: 6 Series/C200 Series Chipset Family MEI Controller #1
             vendor: Intel Corporation
             physical id: 16
             bus info: pci@0000:00:16.0
             version: 04
             width: 64 bits
             clock: 33MHz
             capabilities: bus_master cap_list
             configuration: driver=mei_me latency=0
             resources: irq:27 memory:f3925000-f392500f
        *-communication:1
             description: Serial controller
             product: 6 Series/C200 Series Chipset Family KT Controller
             vendor: Intel Corporation
             physical id: 16.3
             bus info: pci@0000:00:16.3
             version: 04
             width: 32 bits
             clock: 66MHz
             capabilities: 16550 bus_master cap_list
             configuration: driver=serial latency=0
             resources: irq:19 ioport:60b0(size=8) memory:f392c000-f392cfff
        *-network
             description: Ethernet interface
             product: 82579LM Gigabit Network Connection
             vendor: Intel Corporation
             physical id: 19
             bus info: pci@0000:00:19.0
             logical name: enp0s25
             version: 04
             serial: 00:21:cc:cc:b2:27
             capacity: 1Gbit/s
             width: 32 bits
             clock: 33MHz
             capabilities: bus_master cap_list ethernet physical tp 10bt 10bt-fd 100bt 100bt-fd 1000bt-fd autonegotiation
             configuration: autonegotiation=on broadcast=yes driver=e1000e driverversion=3.2.6-k firmware=0.13-3 latency=0 link=no multicast=yes port=twisted pair
             resources: irq:25 memory:f3900000-f391ffff memory:f392b000-f392bfff ioport:6080(size=32)
        *-usb:0
             description: USB controller
             product: 6 Series/C200 Series Chipset Family USB Enhanced Host Controller #2
             vendor: Intel Corporation
             physical id: 1a
             bus info: pci@0000:00:1a.0
             version: 04
             width: 32 bits
             clock: 33MHz
             capabilities: ehci bus_master cap_list
             configuration: driver=ehci-pci latency=0
             resources: irq:16 memory:f392a000-f392a3ff
        *-multimedia
             description: Audio device
             product: 6 Series/C200 Series Chipset Family High Definition Audio Controller
             vendor: Intel Corporation
             physical id: 1b
             bus info: pci@0000:00:1b.0
             version: 04
             width: 64 bits
             clock: 33MHz
             capabilities: bus_master cap_list
             configuration: driver=snd_hda_intel latency=0
             resources: irq:29 memory:f3920000-f3923fff
        *-pci:1
             description: PCI bridge
             product: 6 Series/C200 Series Chipset Family PCI Express Root Port 1
             vendor: Intel Corporation
             physical id: 1c
             bus info: pci@0000:00:1c.0
             version: b4
             width: 32 bits
             clock: 33MHz
             capabilities: pci normal_decode cap_list
             configuration: driver=pcieport
             resources: irq:16
        *-pci:2
             description: PCI bridge
             product: 6 Series/C200 Series Chipset Family PCI Express Root Port 2
             vendor: Intel Corporation
             physical id: 1c.1
             bus info: pci@0000:00:1c.1
             version: b4
             width: 32 bits
             clock: 33MHz
             capabilities: pci normal_decode bus_master cap_list
             configuration: driver=pcieport
             resources: irq:17 memory:f3800000-f38fffff
           *-network
                description: Wireless interface
                product: Centrino Advanced-N 6205 [Taylor Peak]
                vendor: Intel Corporation
                physical id: 0
                bus info: pci@0000:03:00.0
                logical name: wlp3s0
                version: 34
                serial: 26:ad:26:50:f1:db
                width: 64 bits
                clock: 33MHz
                capabilities: bus_master cap_list ethernet physical wireless
                configuration: broadcast=yes driver=iwlwifi driverversion=4.9.0-3-amd64 firmware=18.168.6.1 ip=192.168.0.102 latency=0 link=yes multicast=yes wireless=IEEE 802.11
                resources: irq:28 memory:f3800000-f3801fff
        *-pci:3
             description: PCI bridge
             product: 6 Series/C200 Series Chipset Family PCI Express Root Port 4
             vendor: Intel Corporation
             physical id: 1c.3
             bus info: pci@0000:00:1c.3
             version: b4
             width: 32 bits
             clock: 33MHz
             capabilities: pci normal_decode bus_master cap_list
             configuration: driver=pcieport
             resources: irq:19 ioport:4000(size=4096) memory:f3000000-f37fffff ioport:f1800000(size=8388608)
        *-pci:4
             description: PCI bridge
             product: 6 Series/C200 Series Chipset Family PCI Express Root Port 5
             vendor: Intel Corporation
             physical id: 1c.4
             bus info: pci@0000:00:1c.4
             version: b4
             width: 32 bits
             clock: 33MHz
             capabilities: pci normal_decode bus_master cap_list
             configuration: driver=pcieport
             resources: irq:16 ioport:3000(size=4096) memory:f2800000-f2ffffff ioport:f2000000(size=8388608)
           *-generic
                description: System peripheral
                product: MMC/SD Host Controller
                vendor: Ricoh Co Ltd
                physical id: 0
                bus info: pci@0000:0d:00.0
                version: 08
                width: 32 bits
                clock: 33MHz
                capabilities: bus_master cap_list
                configuration: driver=sdhci-pci latency=0
                resources: irq:16 memory:f2800000-f28000ff
        *-usb:1
             description: USB controller
             product: 6 Series/C200 Series Chipset Family USB Enhanced Host Controller #1
             vendor: Intel Corporation
             physical id: 1d
             bus info: pci@0000:00:1d.0
             version: 04
             width: 32 bits
             clock: 33MHz
             capabilities: ehci bus_master cap_list
             configuration: driver=ehci-pci latency=0
             resources: irq:23 memory:f3929000-f39293ff
        *-isa
             description: ISA bridge
             product: QM67 Express Chipset Family LPC Controller
             vendor: Intel Corporation
             physical id: 1f
             bus info: pci@0000:00:1f.0
             version: 04
             width: 32 bits
             clock: 33MHz
             capabilities: isa bus_master cap_list
             configuration: driver=lpc_ich latency=0
             resources: irq:0
        *-storage
             description: SATA controller
             product: 6 Series/C200 Series Chipset Family 6 port SATA AHCI Controller
             vendor: Intel Corporation
             physical id: 1f.2
             bus info: pci@0000:00:1f.2
             version: 04
             width: 32 bits
             clock: 66MHz
             capabilities: storage ahci_1.0 bus_master cap_list
             configuration: driver=ahci latency=0
             resources: irq:26 ioport:60a8(size=8) ioport:60bc(size=4) ioport:60a0(size=8) ioport:60b8(size=4) ioport:6060(size=32) memory:f3928000-f39287ff
        *-serial
             description: SMBus
             product: 6 Series/C200 Series Chipset Family SMBus Controller
             vendor: Intel Corporation
             physical id: 1f.3
             bus info: pci@0000:00:1f.3
             version: 04
             width: 64 bits
             clock: 33MHz
             configuration: driver=i801_smbus latency=0
             resources: irq:18 memory:f3924000-f39240ff ioport:efa0(size=32)
     *-scsi
          physical id: 2
          logical name: scsi1
          capabilities: emulated
        *-cdrom
             description: DVD-RAM writer
             product: DVDRAM GT50N
             vendor: HL-DT-ST
             physical id: 0.0.0
             bus info: scsi@1:0.0.0
             logical name: /dev/cdrom
             logical name: /dev/cdrw
             logical name: /dev/dvd
             logical name: /dev/dvdrw
             logical name: /dev/sr0
             version: LT20
             capabilities: removable audio cd-r cd-rw dvd dvd-r dvd-ram
             configuration: ansiversion=5 status=nodisc
WARNING: output may be incomplete or inaccurate, you should run this program as super-user.


Enjoy Life ! 🙂

Linux: /var/log/wtmp – No such file or directory quick fix and why it might be missing on a server

Thursday, May 4th, 2017

fix-var-log-wtmp-btmp-no-such-file-or-directory-linux_last_command-howto-quick-fix

If you have to occasionally log  into some client old inherited (not installed by you) Linux servers on and just out of curiosity and for security sake dediced do a quick security (last user login) evaluation, e.g. issued the
last command just to find out you get the error:

last: /var/log/wtmp: No such file or directory

Perhaps this file was removed by the operator to prevent logging last info.

Then this might be a sure indicator that some malicious script kiddie (hax0r) activity has been run over the server or the ex-system administrator if fired recently decided to wipe out all his login tracks among with installing some other nasty rootkit or backdoor.

Under some circumstances the error might be caused also by badly written end user rotate script bugs (like shell or perl script) bugs or by a buggy deployment of Linux OS virtual machine.
The last: /var/log/wtmp: No such file or directory error is likely to happen on Ubuntu / Debian / Redhat / CentOS Linux distributions running on a Cloud PaaS service such as Amazon EC2, some of the Cloud services vendors do choose to explicitly remove /var/log/wtmp for the reason that many of end customers are using their Linux VM servers (Xen Virtualization / OpenVZ / LXC – Linux Containers) etc. irresponsibly and hence become a victim of script kiddie attacks and the failed logins attempts logged in /var/log/wtmp grow to many gigabytes.

Even some Linux distributions or system administrators of Linux server login hosts that has to keep tens of thousands of  login records monthly or are concentrating on simplicity and on an attempt to reduce size has purposefully deleted the last login entry file /var/log/wtmp file to save space.

But anyways if you happen to be missing this file always bear in mind that you might have been a victim of intrusion and you better run chkrootkit and rkhunter

Run below commands to fix the missing /var/log/wtmp

touch /var/log/wtmp
chmod 0664 /var/log/wtmp
chown root:utmp /var/log/wtmp

On some Linux distributions such as Ubuntu and Fedora you might also want to create /var/log/btmp (which is used to log failed login attempts to server)

touch /var/log/btmp
chmod 0664 /var/log/btmp
chown root:utmp /var/log/btmp

Once the files are created the last command will start logging server in logins and logouts as it is supposed to be again, e.g.:
 

linux:~# last -15
root pts/0 192.168.0.15 Fri May 5 16:41 still logged in


This article was inspired by a prior article found on root.bg the site is in Bulgarian so unfortunately you might not be able to read it, but as a content and concept it is pretty similar to www.pc-freak.net, actually the site author Nikolay Nikolov (known in Internet Relay Chat IRC under the pseudonym Joni-B, happened to be an old friend from youth geek IT years 🙂

Enjoy