In this article you will learn how to install and configure LDAP on CentOS 7.9 Linux with standard packages and later on create a sample user to be read from LDAP as well as how to configure SSH login to not only query local stored users under /etc/passwd and /etc/shadow but how to store user credentials and passwords inside LDAP.
The usage and storage of users inside LDAP usually when you have a great number of UNIX user accounts already created on the system or you want to be able to authenticate a single set of SSH UNIX / Samba / Kerberos / Email / Windows / Courier / NIS users with the same account credentials across mutliple servers. Having an LDAP database is longly used in corporate world to store accounts and various sensitive data, information, phonebooks, personal user data and login credentials for various Web systems used to administer or use Local Company infrastructure. The other added value of storing user base in LDAP is the Account and Infrastructure centralization which becomes so vital with the time as a company grows. By having LDAP the administrator a single person could easily, create new Users for employees across company infrastructure without bothering to login physically on each and every host on lets say the existing 3000+ servers.
There is much to be said about LDAP but the main thing to know is LDAP is simply a tree Database where you can store various Objects and assign them values. On a first glimse nothing complex, but if you dig into its administration suddenly you start becoming lost in a true ocean of complex.
Lets proceed and setupall necessery components.
Preparing the Freshly installed Server OS hostname to become host of LDAP
First, include hostname of LDAP Server and Client to /etc/hosts
Supposingly you have already configured a special Physical or Virtual Machine with CentOS 7 Linux with some fqdn
lets say ldapserver next you will have to have a proper objects inside /etc/hosts so the ldap server OS could see the
host: ldapserver with a local LAN domain .local onwards in this article. If you're about to use a Public IP on the internet just put your fully qualified domain name correctly with the respective IPs in /etc/hosts
My Linux server has configured IP and OS Host.
IP: 192.168.1.50
Host: ldapserver
If for some reason you have some other Machine hostname set on install time, change it to the desired one:
[root@ldapserver:~]# hostnamectl set-hostname ldap.mydomain.local
[root@ldapserver:~]# hostnamectl
Static hostname: ldapserver
Icon name: computer-vm
Chassis: vm
Machine ID: 20edc97971064b70a488a3222ab3cdd4
Boot ID: e327dea155844bcd9fe8d68b759ff1c7
Virtualization: xen
Operating System: CentOS Linux 7 (Core)
CPE OS Name: cpe:/o:centos:centos:7
Kernel: Linux 3.10.0-1160.59.1.el7.x86_64
Architecture: x86-64
[root@ldapserver:~]# grep -i ldapserver /etc/hosts
192.168.1.50 ldapserver.local server
192.168.1.60 client.ldapserver.local client
[root@ldapserver:~]# ifconfig eth0
eth0: flags=4163<UP,BROADCAST,RUNNING,MULTICAST> mtu 1500
inet 192.168.1.50 netmask 255.255.255.0 broadcast 192.168.1.255
inet6 fe80::216:3eff:fe53:5d12 prefixlen 64 scopeid 0x20<link>
ether 00:16:3e:54:5d:12 txqueuelen 1000 (Ethernet)
RX packets 22958463 bytes 12911026009 (12.0 GiB)
RX errors 0 dropped 3 overruns 0 frame 0
TX packets 319557 bytes 24259117 (23.1 MiB)
TX errors 0 dropped 0 overruns 0 carrier 0 collisions 0
Disable firewall on LDAP
Before we start, make sure both LDAP server and LDAP clients are visible (e.g. no network firewall preventing the the Machines on the network see each other on TCP / UDP port 389 or whatever port you will be using.
# firewall-cmd –permanent –add-service=ldap
# firewall-cmd –reload
1. Install required LDAP server RPMs
# yum -y install openldap compat-openldap openldap-clients openldap-servers openldap-servers-sql openldap-devel
…
1.1 Start & Enable ldap service
The openldap server is run by running the slapd systemd service
# systemctl start slapd
To make the service automatically load on every server boot
# systemctl enable slapd
# slaptest -u
config file testing succeeded
1.2 Verify ldap port listener exists
# netstat -antup | grep -i 389
tcp 0 0 0.0.0.0:389 0.0.0.0:* LISTEN 1520/slapd
tcp6 0 0 :::389 :::* LISTEN 1520/slapd
1.3 Generate LDAP Admin Password
# slappasswd -h {SSHA} -s your_secret_password_here
It will generate encrypted hash string
Output will be something like:
{SSHA}d/thexcQUuSfe3rx3gPaEhHpNJ52N8D3
2. Configuring LDAP Server admin and basic structure
2.1. Create LDAP Admin user / password pair
Using the SSHA generated encrypted password string copy paste it to the right location in db.ldif
# cd /etc/openldap/slapd.d/
# vi db.ldif
dn: olcDatabase={2}hdb,cn=config
changetype: modify
replace: olcSuffix
olcSuffix: dc=ldapserver,dc=local
dn: olcDatabase={2}hdb,cn=config
changetype: modify
replace: olcRootDN
olcRootDN: cn=ldapadm,dc=ldapserver,dc=local
dn: olcDatabase={2}hdb,cn=config
changetype: modify
replace: olcRootPW
olcRootPW: {SSHA}d/thexcQUuSfe3rx3gPaEhHpNJ52N8D3
If you want to have another admin user besides ldapadm, substitute the string to the user you like.
Replace the encrypted password ({SSHA}d/thexcQUuSfe3rx3gPaEhHpNJ52N8D3) with the password you generated in the previous step.
Caution !!! Be careful when copy paste, the blank lines have to be exactly as shown here !!! This applies for all the .ldif files !
Above LDIF will modify the current objects (records) existing already in LDAP.
2.2 Send the configuration to the LDAP Server listener
# ldapmodify -Y EXTERNAL -H ldapi:/// -f db.ldif
Make a changes to /etc/openldap/slapd.d/cn=config/olcDatabase={1}monitor.ldif (Do not edit manually) file to restrict the monitor access only to ldap root (ldapadm) user not to others.
# vi monitor.ldif
dn: olcDatabase={1}monitor,cn=config
changetype: modify
replace: olcAccess
olcAccess: {0}to * by dn.base="gidNumber=0+uidNumber=0,cn=peercred,cn=external, cn=auth" read by dn.base="cn=ldapadm,dc=ldapserver,dc=local" read by * none
Load the configuration in LDAP memory
# ldapmodify -Y EXTERNAL -H ldapi:/// -f monitor.ldif
3. Setup LDAP Database and schemas
3.1 Copy the DB_CONFIG initial ldap database config from default example template
Set the ldap:ldap permissionsto prevent other users except ldap to read your LDAP database files .dbd / .mdb etc. files
# cp /usr/share/openldap-servers/DB_CONFIG.example /var/lib/ldap/DB_CONFIG
# chown ldap:ldap /var/lib/ldap/*
From their on the basic binary database of LDAP is under /var/lib/ldap , therein you will find a dbd and mdb files where the actual database tree structure is stored.
# ldapadd -Y EXTERNAL -H ldapi:/// -f /etc/openldap/schema/cosine.ldif
# ldapadd -Y EXTERNAL -H ldapi:/// -f /etc/openldap/schema/nis.ldif
# ldapadd -Y EXTERNAL -H ldapi:/// -f /etc/openldap/schema/inetorgperson.ldif
Including, below schemas are optional but recommended to include if you want to have extended support for things in LDAP Server:
# ldapadd -Y EXTERNAL -H ldapi:/// -f /etc/openldap/schema/core.ldif
# ldapadd -Y EXTERNAL -H ldapi:/// -f /etc/openldap/schema/openldap.ldif
# ldapadd -Y EXTERNAL -H ldapi:/// -f /etc/openldap/schema/collective.ldif
# ldapadd -Y EXTERNAL -H ldapi:/// -f /etc/openldap/schema/corba.ldif
# ldapadd -Y EXTERNAL -H ldapi:/// -f /etc/openldap/schema/duaconf.ldif
# ldapadd -Y EXTERNAL -H ldapi:/// -f /etc/openldap/schema/java.ldif
# ldapadd -Y EXTERNAL -H ldapi:/// -f /etc/openldap/schema/pmi.ldif
# ldapadd -Y EXTERNAL -H ldapi:/// -f /etc/openldap/schema/ppolicy.ldif
# ldapadd -Y EXTERNAL -H ldapi:/// -f /etc/openldap/schema/dyngroup.ldif
3.2 Create base.ldif configuration and Apply it
# vi base.ldif
dn: dc=ldapserver,dc=local
dc: ldapserver
objectClass: top
objectClass: domain
dn: cn=ldapadm ,dc=ldapserver,dc=local
objectClass: organizationalRole
cn: ldapadm
description: LDAP Manager
dn: ou=People,dc=ldapserver,dc=local
objectClass: organizationalUnit
ou: People
dn: ou=Group,dc=ldapserver,dc=local
objectClass: organizationalUnit
ou: Group
3.3 Build the configuration (you will be required for your ldapadm earlier set password
# ldapadd -x -W -D "cn=ldapadm,dc=ldapserver,dc=local" -f base.ldif
Output:
Enter LDAP Password:
adding new entry "dc=ldapserver,dc=local"
adding new entry "cn=ldapadm ,dc=ldapserver,dc=local"
adding new entry "ou=People,dc=ldapserver,dc=local"
adding new entry "ou=Group,dc=ldapserver,dc=local"
4. Creating LDAP Users stored on server
4.1 Create .ldif for UNIX users
Create the username.ldif / username1.ldif / username3.ldif files as many as you need for the initial users to be imported under /etc/openldap/slap.d
# cd /etc/openldap/slapd.d/
# vi username.ldif
dn: uid=username,ou=People,dc=ldapserver,dc=local
objectClass: top
objectClass: account
objectClass: posixAccount
objectClass: shadowAccount
cn: dihr
uid: dihr
uidNumber: 9999
gidNumber: 500
homeDirectory: /home/username
loginShell: /bin/bash
gecos: dihr [ Admin (at) PcFreak ]
userPassword: {crypt}x
shadowLastChange: 17058
shadowMin: 0
shadowMax: 99999
shadowWarning: 7
The userPassword: {crypt}x is there as the password will be in encrypted form stored in ldap.
As LDIF files are quite messy and from copy pasting from the web your copy paste could end up with some garbled symbol that could break up your LDAP initial configuration, a copy archive containing the above .LDIF files used to apply is here ldif-configs.tar.gz
4.2 Check the group admins with Group ID (GID) 500 exists and if not create one
# grep -i 500 /etc/group
admins:x:500:
!!! You have to create admin group 500 in order the user to be able to become root. !!!
# groupadd -g 500 admins
4.3 Prepare sudoers configuration for users belonging to LDAP group to be able to become super users
To make the LDAP users to be able to become super users you need to add also following configuration to /etc/sudoers
# vim /etc/sudoers
## Sudoers allows particular users to run various commands as
## the root user, without needing the root password.
##
## Examples are provided at the bottom of the file for collections
## of related commands, which can then be delegated out to particular
## users or groups.
##
## This file must be edited with the 'visudo' command.
## Host Aliases
## Groups of machines. You may prefer to use hostnames (perhaps using
## wildcards for entire domains) or IP addresses instead.
# Host_Alias FILESERVERS = fs1, fs2
# Host_Alias MAILSERVERS = smtp, smtp2
## User Aliases
## These aren't often necessary, as you can use regular groups
## (ie, from files, LDAP, NIS, etc) in this file – just use %groupname
## rather than USERALIAS
# User_Alias ADMINS = jsmith, mikem
## Command Aliases
## These are groups of related commands…
## Networking
# Cmnd_Alias NETWORKING = /sbin/route, /sbin/ifconfig, /bin/ping, /sbin/dhclient, /usr/bin/net, /sbin/iptables, /usr/bin/rfcomm, /usr/bin/wvdial, /sbin/iwconfig, /sbin/mii-tool
## Installation and management of software
# Cmnd_Alias SOFTWARE = /bin/rpm, /usr/bin/up2date, /usr/bin/yum
## Services
# Cmnd_Alias SERVICES = /sbin/service, /sbin/chkconfig, /usr/bin/systemctl start, /usr/bin/systemctl stop, /usr/bin/systemctl reload, /usr/bin/systemctl restart, /usr/bin/systemctl status, /usr/bin/systemctl enable, /usr/bin/systemctl disable
## Updating the locate database
# Cmnd_Alias LOCATE = /usr/bin/updatedb
## Storage
# Cmnd_Alias STORAGE = /sbin/fdisk, /sbin/sfdisk, /sbin/parted, /sbin/partprobe, /bin/mount, /bin/umount
## Delegating permissions
# Cmnd_Alias DELEGATING = /usr/sbin/visudo, /bin/chown, /bin/chmod, /bin/chgrp
## Processes
# Cmnd_Alias PROCESSES = /bin/nice, /bin/kill, /usr/bin/kill, /usr/bin/killall
## Drivers
# Cmnd_Alias DRIVERS = /sbin/modprobe
# Defaults specification
#
# Refuse to run if unable to disable echo on the tty.
#
Defaults !visiblepw
#
# Preserving HOME has security implications since many programs
# use it when searching for configuration files. Note that HOME
# is already set when the the env_reset option is enabled, so
# this option is only effective for configurations where either
# env_reset is disabled or HOME is present in the env_keep list.
#
Defaults always_set_home
Defaults match_group_by_gid
# Prior to version 1.8.15, groups listed in sudoers that were not
# found in the system group database were passed to the group
# plugin, if any. Starting with 1.8.15, only groups of the form
# %:group are resolved via the group plugin by default.
# We enable always_query_group_plugin to restore old behavior.
# Disable this option for new behavior.
Defaults always_query_group_plugin
Defaults env_reset
Defaults env_keep = "COLORS DISPLAY HOSTNAME HISTSIZE KDEDIR LS_COLORS"
Defaults env_keep += "MAIL PS1 PS2 QTDIR USERNAME LANG LC_ADDRESS LC_CTYPE"
Defaults env_keep += "LC_COLLATE LC_IDENTIFICATION LC_MEASUREMENT LC_MESSAGES"
Defaults env_keep += "LC_MONETARY LC_NAME LC_NUMERIC LC_PAPER LC_TELEPHONE"
Defaults env_keep += "LC_TIME LC_ALL LANGUAGE LINGUAS _XKB_CHARSET XAUTHORITY"
#
# Adding HOME to env_keep may enable a user to run unrestricted
# commands via sudo.
#
# Defaults env_keep += "HOME"
Defaults secure_path = /sbin:/bin:/usr/sbin:/usr/bin
## Next comes the main part: which users can run what software on
## which machines (the sudoers file can be shared between multiple
## systems).
## Syntax:
##
## user MACHINE=COMMANDS
##
## The COMMANDS section may have other options added to it.
##
## Allow root to run any commands anywhere
root ALL=(ALL) ALL
## Allows members of the 'sys' group to run networking, software,
## service management apps and more.
# %sys ALL = NETWORKING, SOFTWARE, SERVICES, STORAGE, DELEGATING, PROCESSES, LOCATE, DRIVERS
## Allows people in group wheel to run all commands
%wheel ALL=(ALL) ALL
## Same thing without a password
# %wheel ALL=(ALL) NOPASSWD: ALL
## Allows members of the users group to mount and unmount the
## cdrom as root
# %users ALL=/sbin/mount /mnt/cdrom, /sbin/umount /mnt/cdrom
## Allows members of the users group to shutdown this system
# %users localhost=/sbin/shutdown -h now
## Read drop-in files from /etc/sudoers.d (the # here does not mean a comment)
#includedir /etc/sudoers.d
Cmnd_Alias PASSWD = /usr/bin/passwd [a-zA-Z][a-zA-Z0-9_-]*, \
!/usr/bin/passwd root
Cmnd_Alias SU_ROOT = /bin/su root, \
/bin/su – root, \
/bin/su -l root, \
/bin/su -p root
%admins ALL = SU_ROOT, NOPASSWD: PASSWD
You can also download a copy of above /etc/sudoers prepared for the admin group to be able to elevate to superuser here.
4.4 Process and Include the username to the LDAP server
Send the command to the ldap server:
# ldapadd -x -W -D "cn=ldapadm,dc=ldapserver,dc=local" -f username.ldif
Output:
Enter LDAP Password:
adding new entry "uid=username,ou=People,dc=ldapserver,dc=local"
Change (Create) new password for the user:
# ldappasswd -s newpassw321 -W -D "cn=ldapadm,dc=ldapserver,dc=local" -x "uid=username,ou=People,dc=ldapserver,dc=local"
4.5 Verify the user is properly created and querable from LDAP server db
# ldapsearch -x cn=username -b dc=ldapserver,dc=local
If you want to delete a user, it is up to authentication to the ldap server with -D and your admin user,and LDAP base and wiping out the LDAP objects (change in below username with your actual username:
# ldapdelete -W -D "cn=ldapadm,dc=ldapserver,dc=local" "uid=username,ou=People,dc=ldapserver,dc=local"
4.6. Create LDAP User Password change policy
In order users to be able to change their own passwords create .ldif file
# vi passchange.ldif
dn: olcDatabase={2}hdb,cn=config
changetype: modify
add: olcAccess
olcAccess: to attrs=userPassword by self write by dn.base="cn=ldapadm,dc=ldapserver,dc=local" write by anonymous auth by * none
olcAccess: {1}to * by dn.base="cn=ldapadm,dc=ldapserver,dc=local" write by self write by * read
Run:
# ldapmodify -Y EXTERNAL -H ldapi:/// -f passchange.ldif
Check
# cd /etc/openldap/slapd.d/cn=config
# cat olcDatabase\=\{2\}hdb.ldif
You have to see the lines that we have added with the previous command
olcAccess: {0}to * by dn.base="cn=ldapadm,dc=ldapserver,dc=local" write by s
elf write by * read
olcAccess: {1}to attrs=userPassword by self write by dn.base="cn=ldapadm,ldapserver,dc=local" write by anonymous auth by * none
4.7 Change user password for newly created user "username"
# ldappasswd -H ldap://192.168.1.50 -x -D "cn=ldapadm,dc=ldapserver,dc=local" -W -S "uid=username,ou=People,dc=ldapserver,dc=local"
After that enter new user password and confirmed it for username.
Enter admin ldap password when asked
5. Install LDAP users client configuration to be served by local services
5.1. Install required RPMs
To be able to use the LDAP just imported user directly via ssh logins e.g. have a user be red from ldap daemon without having a record inside /etc/{passwd,shadow,group}
Yuu have to install openldap client and nssp-pam-ldapd (required for PAM authentication to work properly):
# yum install openldap-clients nss-pam-ldapd
5.2 Authenticate LDAP server
Execute the following command, replace the IP or the domain name of the ldap machine
# authconfig –enableldap –enableldapauth –ldapserver=192.168.1.50 –ldapbasedn="dc=ldapserver,dc=local" –enablemkhomedir –update
5.3 Check LDAP server present LDIF definitions
Once all the .ldif files and schemes are applied to the LDAP you can check what was configured and known by the LDAP with slapcat cmd
# slapcat
624c2093 The first database does not allow slapcat; using the first available one (2)
dn: dc=ldapserver,dc=local
dc: ldapserver
objectClass: top
objectClass: domain
structuralObjectClass: domain
entryUUID: ea740fce-1a7c-103b-92a5-f1649bb38b90
creatorsName: cn=ldapadm,dc=ldapserver,dc=local
createTimestamp: 20210316082531Z
entryCSN: 20210316082531.267019Z#000000#000#000000
modifiersName: cn=ldapadm,dc=ldapserver,dc=local
modifyTimestamp: 20210316082531Z
dn: cn=ldapadm,dc=ldapserver,dc=local
objectClass: organizationalRole
cn: ldapadm
description: LDAP Manager
structuralObjectClass: organizationalRole
entryUUID: ea7674e4-1a7c-103b-92a6-f1649bb38b90
creatorsName: cn=ldapadm,dc=ldapserver,dc=local
createTimestamp: 20210316082531Z
entryCSN: 20210316082531.282715Z#000000#000#000000
modifiersName: cn=ldapadm,dc=ldapserver,dc=local
modifyTimestamp: 20210316082531Z
dn: ou=People,dc=ldapserver,dc=local
objectClass: organizationalUnit
ou: People
structuralObjectClass: organizationalUnit
entryUUID: ea785f66-1a7c-103b-92a7-f1649bb38b90
creatorsName: cn=ldapadm,dc=ldapserver,dc=local
createTimestamp: 20210316082531Z
entryCSN: 20210316082531.295274Z#000000#000#000000
modifiersName: cn=ldapadm,dc=ldapserver,dc=local
modifyTimestamp: 20210316082531Z
dn: ou=Group,dc=ldapserver,dc=local
objectClass: organizationalUnit
ou: Group
structuralObjectClass: organizationalUnit
entryUUID: ea7a94ca-1a7c-103b-92a8-f1649bb38b90
creatorsName: cn=ldapadm,dc=ldapserver,dc=local
createTimestamp: 20210316082531Z
entryCSN: 20210316082531.309750Z#000000#000#000000
modifiersName: cn=ldapadm,dc=ldapserver,dc=local
modifyTimestamp: 20210316082531Z
dn: uid=hipo,ou=People,dc=ldapserver,dc=local
objectClass: top
objectClass: account
objectClass: posixAccount
objectClass: shadowAccount
cn: hipo
uid: hipo
uidNumber: 9999
gidNumber: 500
homeDirectory: /home/hipo
loginShell: /bin/bash
gecos: hipo [Admin (at) PCFreak]
shadowMin: 0
shadowMax: 99999
shadowWarning: 7
structuralObjectClass: account
entryUUID: 0b93de5a-1a7d-103b-92a9-f1649bb38b90
creatorsName: cn=ldapadm,dc=ldapserver,dc=local
createTimestamp: 20210316082626Z
userPassword:: e1NTSEF9K2dreklhN1l6YVZtcldhazFrZ2FOT0plcGdvN1FjKzU=
shadowLastChange: 18704
entryCSN: 20210317110729.482931Z#000000#000#000000
modifiersName: uid=hipo,ou=People,dc=ldapserver,dc=local
modifyTimestamp: 20210317110729Z
…
As minimum at least you should see a correct FQDN LDAP domain server and the configured LDAP administrator ldapadm listed among the multiple objects.
5.4 Enable LDAP User Caching Daemon and Check slapd config
# systemctl enable nslcd
# systemctl restart nslcd
Verify LDAP stored username is visible:
# getent passwd -s files username
# getent passwd -s ldap username
username:x:9999:500:dihr [Admin (at) PcFreak]:/home/username:/bin/bash
As you can see the query to the files e.g. to local /etc/passwd, /etc/shadow records for user returns empty as the user is in LDAP.
If the user returns empty also when you're asking the LDAP server for the user existence, it could be that getent is not configured to
check on the right place check /etc/nsswitch.conf if you see records like default query service records like
passwd: files
shadow: files
group: files
automount: files
To:
passwd: files sss ldap
shadow: files sss ldap
group: files sss ldap
automount: files sss ldap
6. Enable LDAP logging via rsyslog
To enable ldap logging via rsyslog create a new local4 logging interface via which logging will occur to rsyslogd.
If you have never used local{1-6} logging interfaces I recommend you check out my previous article how to configure haproxy logging to separate log files on Redhat
# vi /etc/rsyslog.conf
local4.* /var/log/ldap.log
# chown root:root /var/log/ldap.log
# ls -al /var/log/ldap.log
-rw——- 1 root root 23293740 Apr 5 13:35 /var/log/ldap.log
# systemctl restart rsyslog
If you have never used local{1-6} logging interfaces I recommend you check out my previous article how to configure haproxy logging to separate log files on Redhat
Check slapd is producing logs inside ldap.log
# tail -n 50 /var/log/ldap.log
Apr 4 15:40:39 ldapserver slapd[7888]: slapd shutdown: waiting for 0 operations/tasks to finish
Apr 4 15:40:39 ldapserver slapd[7888]: slapd stopped.
Apr 4 15:40:56 ldapserver slapd[8234]: @(#) $OpenLDAP: slapd 2.4.44 (Feb 23 2022 17:11:27) $#012#011mockbuild@x86-01.bsys.centos.org:/builddir/build/BUILD/openldap-2.4.44/openldap-2.4.44/servers/slapd
Apr 4 15:40:56 ldapserver slapd[8236]: slapd starting
7. Setting LDAP server host and Troubleshooting LDAP connectivity issues
Check /etc/openldap/ldap.conf content as a minum you had to have configured URI ldap and BASE vars
TLS_CACERTDIR /etc/openldap/cacerts#
TLS_REQCERT allow
# Turning this off breaks GSSAPI used with krb5 when rdns = false
SASL_NOCANON on
URI ldap://192.168.1.50/
BASE dc=ldapserver,dc=local
Sometimes you might have issues withslapd.conf suffic usually configuring the suffix is done via LDAB DB, however for legacy purposes the old /etc/openldap/slapd.conf can also be created to work around.
# vi /etc/openldap/slapd.conf
suffix "dc=ldapserver,dc=local"
Make sure the nslcd – local LDAP name service daemon is up and running properly
# ps -ef|grep -i nslcd
nslcd 22016 1 0 15:34 ? 00:00:00 /usr/sbin/nslcd
# systemctl status nslcd
● nslcd.service – Naming services LDAP client daemon.
Loaded: loaded (/usr/lib/systemd/system/nslcd.service; enabled; vendor preset: disabled)
Active: active (running) since Fri 2022-04-01 15:34:37 CEST; 2min 47s ago
Docs: man:nslcd(8)
man:nslcd.conf(5)
Main PID: 22016 (nslcd)
CGroup: /system.slice/nslcd.service
└─22016 /usr/sbin/nslcd
Apr 05 13:30:38 ldapserver systemd[1]: Stopped Naming services LDAP client daemon..
Apr 05 13:30:38 ldapserver systemd[1]: Starting Naming services LDAP client daemon….
Apr 05 13:30:38 ldapserver nslcd[23882]: version 0.8.13 starting
Apr 05 13:30:38 ldapserver systemd[1]: Started Naming services LDAP client daemon..
Check configuration in /etc/nslcd.conf is correct. As minimum the URI address to ldap server should be correct. Sometimes if there is no record configured and LDAP server does not respond on 127.0.0.1 that might cause you issues.
Minimum values that should be filled are:
uid nslcd
gid ldap
uri ldap://192.168.1.50/
base dc=ldapserver,dc=local
NB: nslcd system admon is provided by nss-pam-ldapd package containing NSS and PAM libraries for name lookups and authentication using LDAP and is required
for LDAP users to be seen by system services.
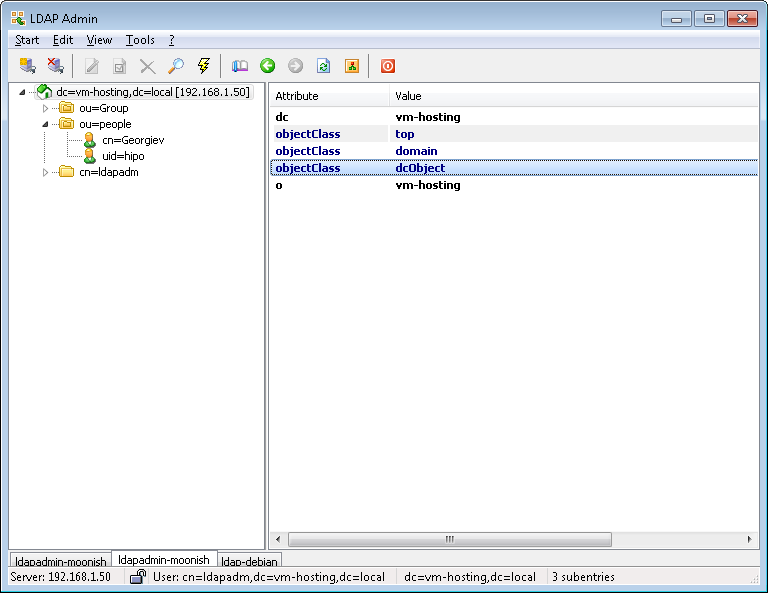
7.1 .Connect to LDAP with LDAPAdmin from Windows host
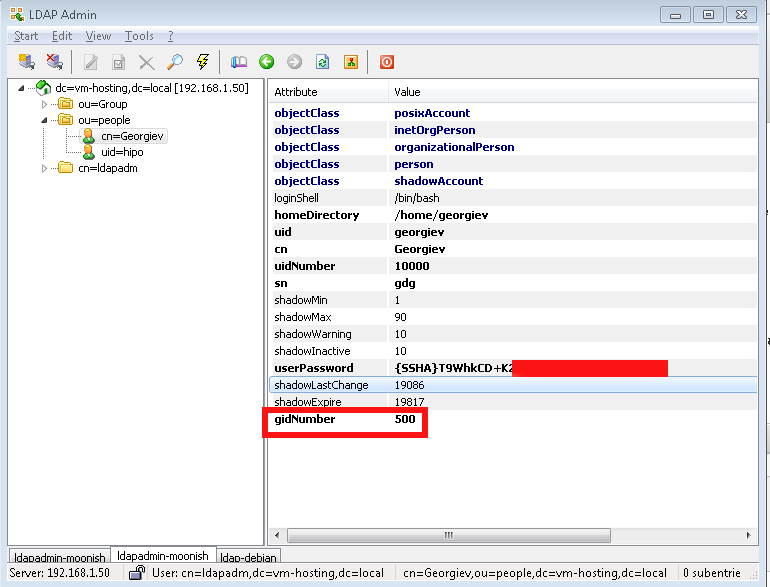
Test whether you can view the Tree structure of the LDAP server with a look like LDAPAdmin. It is really easy to install and Use if you have a Windows machine and even have a portable version if you don't' want to install it.
- !!! Make Selected LDAP User a SuperUser !!!
If you want the earlier added LDAP UNIX user to be able to become root using above /etc/sudoers configuration you will have the to modify the UserAccount with LDAPAdmin and change the selected user to be UID 500 (that is the previously added admins group).
7.2 Install phpldapadmin LDAP Web management interface
[root@ldapserver config]# yum install epel-release
[root@ldapserver config]# yum -y install phpldapadmin httpd php php-fpm php-mysqlnd httpd-tools php-opcache php-gd php-xml php-mbstring php-json php-gmp php-zip php-ldap
[root@ldapserver config]# systemctl enable httpd && systemctl start httpd
Modify the preinstalled phpldapadmin.conf to look as follows (notice the commented Deny rules, you have to comment them to allow access to ldapadmin from anywhere, or
keep them on and only Allow a single IPs from where you plan to access the phpldapadmin)
[root@ldapserver config]# cat /etc/httpd/conf.d/phpldapadmin.conf
#
# Web-based tool for managing LDAP servers
#
Alias /phpldapadmin /usr/share/phpLDAPadmin/htdocs
Alias /ldapadmin /usr/share/phpLDAPadmin/htdocs
<Directory /usr/share/phpLDAPadmin/htdocs>
<IfModule mod_authz_core.c>
# Apache 2.4
Require all granted
</IfModule>
## <IfModule !mod_authz_core.c>
# Apache 2.2
## Order Deny,Allow
## Deny from all
## Allow from 127.0.0.1
## Allow from ::1
## </IfModule>
</Directory>
I've been having issues with the default provided phpldapadmin version to properly run with php74 – getting various errors, after managed to succesfully login, tried to modify multiple files
as prescribed by people online but once I could solve some strange error due to deprecated functions in PHP a new one poped up.
To resolve it I've tried to downgrade to php72* packages but this did not completely solved the errors eithe resolve it. As this did not work removed the installed php72
and installed back php74 and the surrounding required packs xml* etc.
Have to mention, the problem of phpldapadmin's with PHP stems that this project seems to be abandoned since 6+ years.
Luckily there was a workoround to make it work – (clone) the latest version of phpLDAPadmin from github repository and copy it to /usr/share
# yum install git
# cd /usr/local/src/
# git clone https://github.com/leenooks/phpLDAPadmin
# cp -rpf /usr/local/src/phpLDAPadmin /usr/share/phpLDAPadmin/
Next step is to set proper configuration with the DC (Domain Control) and CN (Common Name) Admin use, which in my case is ldapadm
[root@ldapserver config]# vi /usr/share/phpldapadmin/config/config.php
Add following lines before the php file end-tag i.e. ?>
This will overwrite the previously configured phpldapadmin default settings
$servers->newServer('ldap_pla');
$servers->setValue('server','name','ldapserver.ldapserver');
$servers->setValue('server','host','127.0.0.1');
$servers->setValue('server','port',389);
$servers->setValue('server','base',array('dc=ldapserver,dc=local'));
$servers->setValue('login','auth_type','cookie');
$servers->setValue('login','bind_id','cn=ldapadm,dc=ldapserver,dc=local');
$servers->setValue('login','bind_pass','secretpass123');
$servers->setValue('server','tls',false);
To test configuration
Open URL http://fqdn-server.com/phpldapadmin
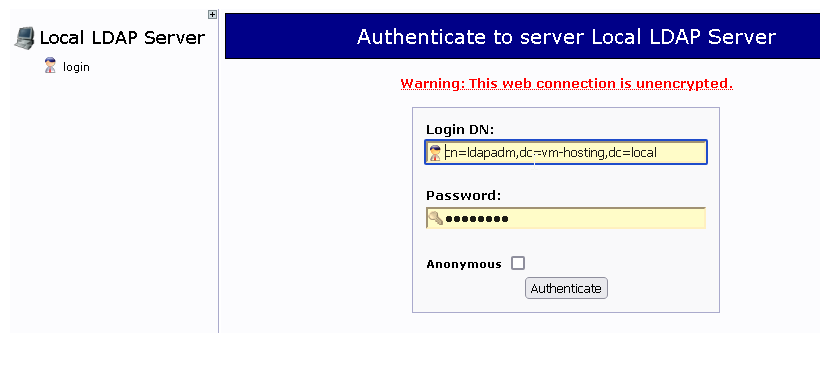
and try to login with cn=ldapadm,ldapserver as username and the LDAP admin password, hopefully it will work
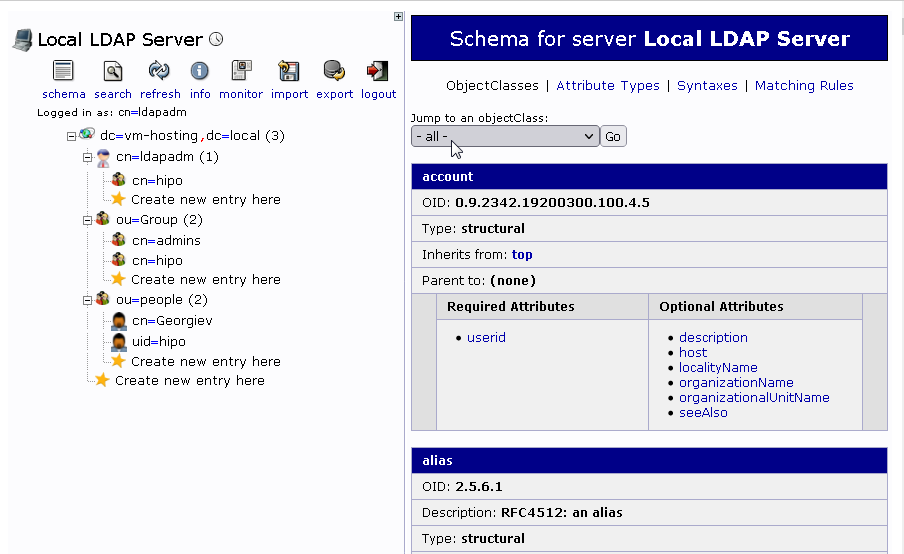
you should no longer get PHP errors while expanding the LDAP Tree structure
8. Troubleshooting / Testing the new LDAP Test User created works logging in locally and remote via SSH
8.1. Try user locally
root@ldap:~# su – username
$ id
uid=10000(georgiev) gid=500(admins) groups=500(admins)
georgiev@ldap:~$
Either remotely connect or if already on the machine do to 127.0.0.1:
# ssh username@localhost -vv
8.2. Test sudo superuser credentials works
If you can login normally, you should be able to become root via sudo as well
username@ldap:~$ sudo su -l
[sudo] password for georgiev:
username@ldap:~$ sudo -l
Matching Defaults entries for georgiev on ldapserver:
!visiblepw, always_set_home, match_group_by_gid, env_reset,
env_keep="COLORS DISPLAY HOSTNAME HISTSIZE KDEDIR LS_COLORS",
env_keep+="MAIL PS1 PS2 QTDIR USERNAME LANG LC_ADDRESS LC_CTYPE",
env_keep+="LC_COLLATE LC_IDENTIFICATION LC_MEASUREMENT LC_MESSAGES",
env_keep+="LC_MONETARY LC_NAME LC_NUMERIC LC_PAPER LC_TELEPHONE",
env_keep+="LC_TIME LC_ALL LANGUAGE LINGUAS _XKB_CHARSET XAUTHORITY",
secure_path=/sbin\:/bin\:/usr/sbin\:/usr/bin
User georgiev may run the following commands on ldapserver:
(root) /bin/su root, /bin/su – root, /bin/su -l root, /bin/su -p root,
NOPASSWD: /usr/bin/passwd [a-zA-Z][a-zA-Z0-9_-]*, !/usr/bin/passwd root
8.3. Check secure / ldap.log / messages log files for more insight
If for some strange reason you cannot login you should further debug what is going via error and success login messages produced in /var/log/secure , /var/log/ldap.log and /var/log/messages.
8.4. Connect via local console and run sshd in debug mode
For Physical servers or VM Machines hosted on Hypervisors where you have direct access via console, a good test is to.
Login via VM console (on xen HV xl console VM-name or if on KVM Hypervisor or if on KVM via
virsh console VM_ID
shut off sshd completely and run it in debug mode
# systemctl stop sshd
# /usr/sbin/sshd -ddd -p 22
debug1: rexec_argv[0]='/usr/sbin/sshd'
debug1: rexec_argv[1]='-ddd'
debug1: rexec_argv[2]='-p'
debug1: rexec_argv[3]='22'
debug3: oom_adjust_setup
debug1: Set /proc/self/oom_score_adj from 0 to -1000
debug2: fd 3 setting O_NONBLOCK
debug1: Bind to port 2208 on 0.0.0.0.
Server listening on 0.0.0.0 port 2208.
Then open again ssh new session and check what is the output error msgs in the sshd debug session, i.e.:
# ssh username@localhost -v
The new debug sshd instance will terminate when the client closes the connection, or the connection can be manually terminated using Crtl-C.
Note: You might want to run the sshd -ddd multiple times as it will be closed on every erroneous login attempt.
8.5. Check PAM login is enabled in /etc/ssh/sshd_config
Open /etc/ssh/sshd_config and make sure you have configured
UsePAM yes
If UsePAM no switch it on and restart sshd service.
8.6. Check ldap configuration in /etc/pam.d/* files is correct
You should have a configuration as follows already existing across /etc/pam.d/* files
# cd /etc/pam.d/
# grep -ri ldap *
/etc/openldap/check_password.conf:# OpenLDAP pwdChecker library configuration
/etc/pam.d/fingerprint-auth-ac:account [default=bad success=ok user_unknown=ignore] pam_ldap.so
/etc/pam.d/fingerprint-auth-ac:session optional pam_ldap.so
/etc/pam.d/smartcard-auth-ac:account [default=bad success=ok user_unknown=ignore] pam_ldap.so
/etc/pam.d/smartcard-auth-ac:session optional pam_ldap.so
/etc/pam.d/password-auth-ac:auth sufficient pam_ldap.so use_first_pass
/etc/pam.d/password-auth-ac:account [default=bad success=ok user_unknown=ignore] pam_ldap.so
/etc/pam.d/password-auth-ac:password sufficient pam_ldap.so use_authtok
/etc/pam.d/password-auth-ac:session optional pam_ldap.so
/etc/pam.d/system-auth-ac:auth sufficient pam_ldap.so use_first_pass
/etc/pam.d/system-auth-ac:account [default=bad success=ok user_unknown=ignore] pam_ldap.so
/etc/pam.d/system-auth-ac:password sufficient pam_ldap.so use_authtok
/etc/pam.d/system-auth-ac:session optional pam_ldap.so
The full set of configured PAM rules that should be in /etc/pam.d files as prescribed by nss-pam-ldapd documentation are:
auth sufficient pam_unix.so
auth sufficient pam_ldap.so use_first_pass
auth required pam_deny.so
account required pam_unix.so
account sufficient pam_ldap.so
account required pam_permit.so
session required pam_unix.so
session optional pam_ldap.so
password sufficient pam_unix.so nullok md5 shadow use_authtok
password sufficient pam_ldap.so try_first_pass
password required pam_deny.so
Usually you should not worry about these records as they should be already added by the package post-install conmfiguration definitions of the previously installed
nss-pam-ldapd, I mention them so you're aware that they're already in.
8.7 Debug what nslcd is doing?
As the user login authentication to LDAP is handled via nslcd (LDAPlocal caching daemon), you can stop the service and run it in debug mode and try to relogin with the user and see the whether the debug messages can give you some hint on what is going wrong, to do so:
# systemctl stop nslcd
# nslcd -d
nslcd: DEBUG: add_uri(ldap://127.0.0.1/)
nslcd: version 0.8.13 starting
nslcd: DEBUG: unlink() of /var/run/nslcd/socket failed (ignored): No such file or directory
nslcd: DEBUG: initgroups("nslcd",55) done
nslcd: DEBUG: setgid(55) done
nslcd: DEBUG: setuid(65) done
nslcd: accepting connections
nslcd: DEBUG: accept() failed (ignored): Resource temporarily unavailable
Try to open in another console ssh session
# ssh georgiev@localhost
nslcd: [8b4567] DEBUG: connection from pid=21954 uid=28 gid=28
nslcd: [8b4567] <passwd="georgiev"> DEBUG: myldap_search(base="dc=ldapserver,dc=local", filter="(&(objectClass=posixAccount)(uid=georgiev))")
nslcd: [8b4567] <passwd="georgiev"> DEBUG: ldap_initialize(ldap://127.0.0.1/)
nslcd: [8b4567] <passwd="georgiev"> DEBUG: ldap_set_rebind_proc()
nslcd: [8b4567] <passwd="georgiev"> DEBUG: ldap_set_option(LDAP_OPT_PROTOCOL_VERSION,3)
nslcd: [8b4567] <passwd="georgiev"> DEBUG: ldap_set_option(LDAP_OPT_DEREF,0)
nslcd: [8b4567] <passwd="georgiev"> DEBUG: ldap_set_option(LDAP_OPT_TIMELIMIT,0)
nslcd: [8b4567] <passwd="georgiev"> DEBUG: ldap_set_option(LDAP_OPT_TIMEOUT,0)
nslcd: [8b4567] <passwd="georgiev"> DEBUG: ldap_set_option(LDAP_OPT_NETWORK_TIMEOUT,0)
nslcd: [8b4567] <passwd="georgiev"> DEBUG: ldap_set_option(LDAP_OPT_REFERRALS,LDAP_OPT_ON)
nslcd: [8b4567] <passwd="georgiev"> DEBUG: ldap_set_option(LDAP_OPT_RESTART,LDAP_OPT_ON)
nslcd: [8b4567] <passwd="georgiev"> DEBUG: ldap_simple_bind_s(NULL,NULL) (uri="ldap://127.0.0.1/")
nslcd: [8b4567] <passwd="georgiev"> ldap_result() failed: No such object
In the debug nslcd debug session you will immediately should get error messages like:
nslcd: [8b4567] DEBUG: connection from pid=21954 uid=28 gid=28
nslcd: [8b4567] <passwd="georgiev"> DEBUG: myldap_search(base="dc=ldapserver,dc=local", filter="(&(objectClass=posixAccount)(uid=georgiev))")
nslcd: [8b4567] <passwd="georgiev"> DEBUG: ldap_initialize(ldap://127.0.0.1/)
nslcd: [8b4567] <passwd="georgiev"> DEBUG: ldap_set_rebind_proc()
nslcd: [8b4567] <passwd="georgiev"> DEBUG: ldap_set_option(LDAP_OPT_PROTOCOL_VERSION,3)
nslcd: [8b4567] <passwd="georgiev"> DEBUG: ldap_set_option(LDAP_OPT_DEREF,0)
nslcd: [8b4567] <passwd="georgiev"> DEBUG: ldap_set_option(LDAP_OPT_TIMELIMIT,0)
nslcd: [8b4567] <passwd="georgiev"> DEBUG: ldap_set_option(LDAP_OPT_TIMEOUT,0)
nslcd: [8b4567] <passwd="georgiev"> DEBUG: ldap_set_option(LDAP_OPT_NETWORK_TIMEOUT,0)
nslcd: [8b4567] <passwd="georgiev"> DEBUG: ldap_set_option(LDAP_OPT_REFERRALS,LDAP_OPT_ON)
nslcd: [8b4567] <passwd="georgiev"> DEBUG: ldap_set_option(LDAP_OPT_RESTART,LDAP_OPT_ON)
nslcd: [8b4567] <passwd="georgiev"> DEBUG: ldap_simple_bind_s(NULL,NULL) (uri="ldap://127.0.0.1/")
nslcd: [8b4567] <passwd="georgiev"> ldap_result() failed: No such object
9. Setting up ldap authentication from LDAP server from other Linux servers
If you want to have other machines than the default machine where you run the server to be authenticating using the user / password credentials stored in the LDAP server on each host
you will have to login as root and have installed packages nss-pam-ldapd and openldap-clients.
# yum install -y nss-pam-ldapd openldap-clients
…
Enable LDAP authentication to remote host and set each never logged in user to automatically create home directory on first loginwith authconfig cmd.
# authconfig –enableldap –enableldapauth –ldapserver=192.168.1.50 –ldapbasedn="dc=ldapserver,dc=local" –enablemkhomedir –update
10. Installing LAM (LDAP Account Manager) Web based Account Management Graphical Interface
LDAP and its surrounding .LDIF files is a true nightmare as even a small mistype in character from the file imported could seriously break things and
make your LDAP server partially or completely unusable. Therefore there is almost noone who does anything serious with LDAP via the command line but a GUI
has to be set in. The most simple one phpldapadmin does resemble more or less the phpmyadmin interface and gives you basic ways to manage LDAP database. However for more advanced use you will have to install and use LDAP Account Manager.
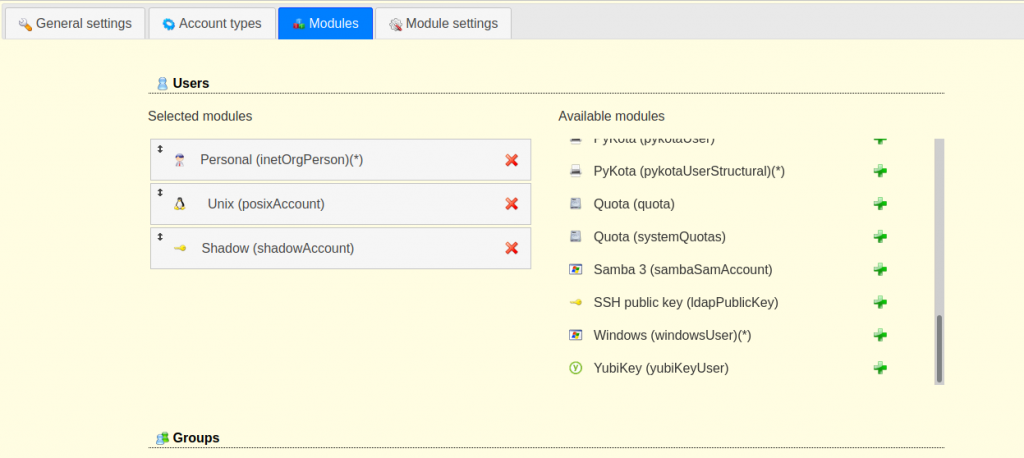
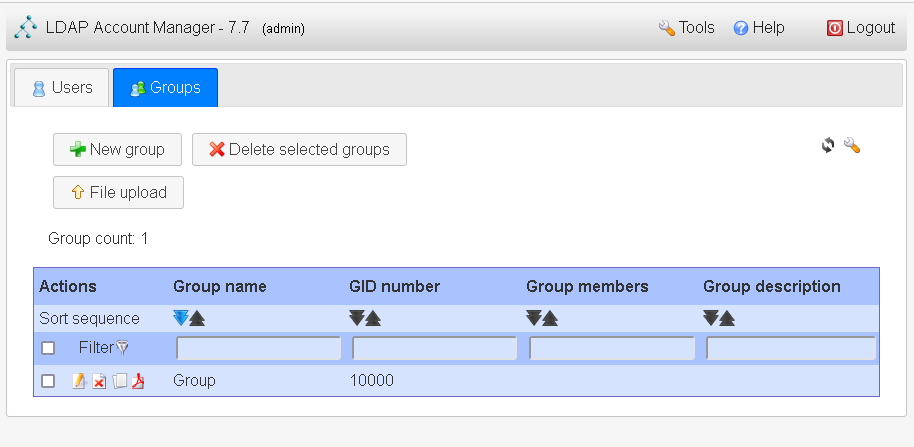
(LAM) is a web frontend for managing entries (e.g. users, groups, DHCP settings) stored in an LDAP directory. The LDAP Account Manager tool was designed to make LDAP management as easy as possible for the user.
LDAP Account Manager Supported Features
- Manage Unix, Samba 3/4, Kolab 3, Kopano, DHCP, SSH keys, a group of names and much more
- Has support for 2-factor authentication
- Support for account creation profiles
- CSV file upload
- Automatic creation/deletion of home directories
- setting file system quotas
- PDF output for all accounts
- Schema and LDAP browser
- Manages multiple servers with different configurations
Unfortunately LAM Is a freeware and if you want the full set of features it supports, you will need to buy the LDAP Account Manager pro edition. But for a starter it makes a great difference to use it instead of doing everything manually.
10.1 Installing LAM Admin GUI
Assuming that you already followed up steps and you have a functioning LDAP server at hand on your machine, you will
further have to install Apache Webserver + PHP
yum install -y httpd httpd-tools php php-fpm php-mysqlnd php-opcache php-gd php-xml php-mbstring php-json php-gmp php-zip php-ldap
Enable HTTPD / PHP services
# systemctl enable –now php-fpm
# systemctl enable –now httpd
Check the status of just run services is fine
# systemctl status php-fpm
# systemctl status httpd
If you happen to have a selinux enabled (hopefully not) also you will have to enable PHP-FPM to serve files through PHP
# setsebool -P httpd_execmem 1
# systemctl restart httpd
If you have firewall on the machine enable httpd to be publicly visible via local LAN or the Internet
# firewall-cmd –permanent –zone=public –add-service=http
# firewall-cmd –reload
Download the latest version of LDAP Account Manager from sourceforge
# wget http://prdownloads.sourceforge.net/lam/ldap-account-manager-7.7-0.fedora.1.noarch.rpm
Install the RPM
# yum localinstall ldap-account-manager-*.rpm
10.2 Configure LDAP Account Manager
Assuming that your Webserver is reachable via an IP address or already configured hostname access in browser
http://(server IP or hostname)/lam
The best practice is to setup a separate subdomain for your mail domain as it is easier to remember, i.e.,
http://ldapserver.fully-qualified-domain-name.com/lam
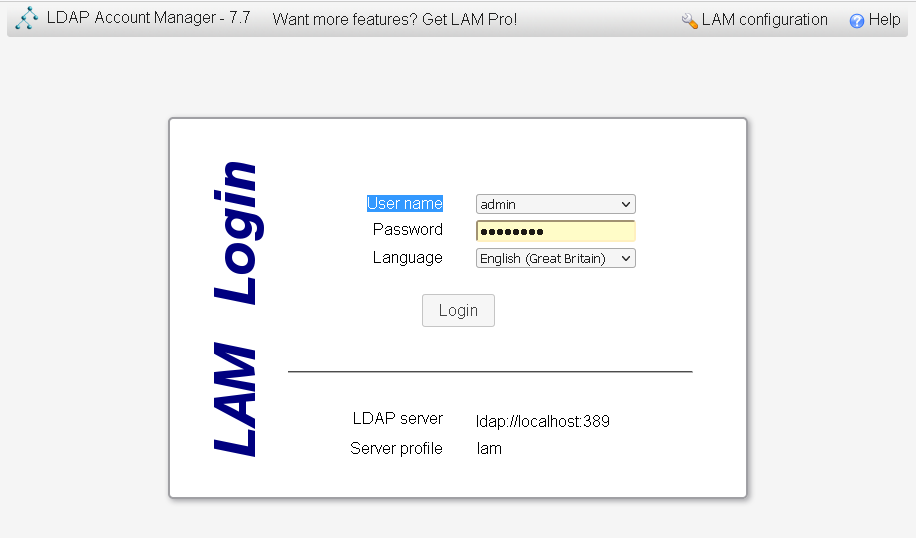
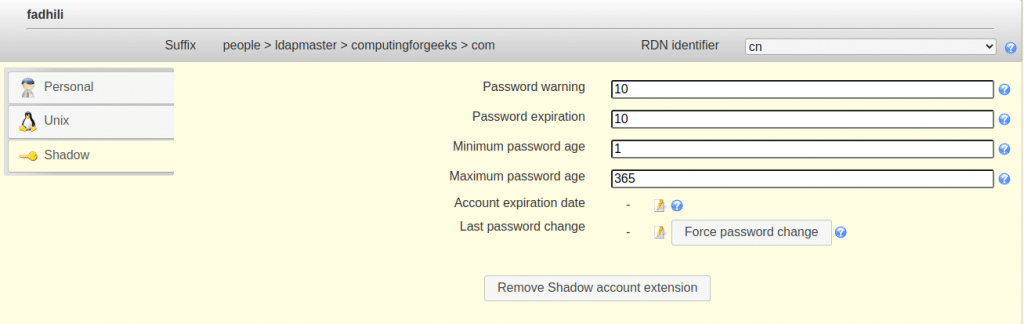
Click on LAM configuration option on the upper right corner to configure your LDAP manager instance.
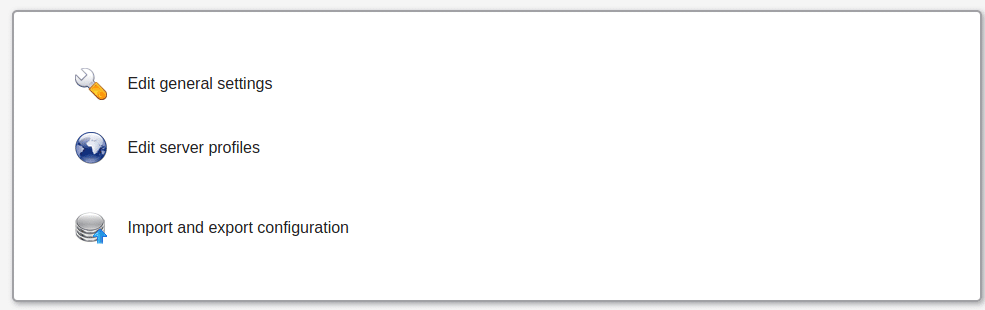
On the page that appears, click on “Edit Server Profiles”.
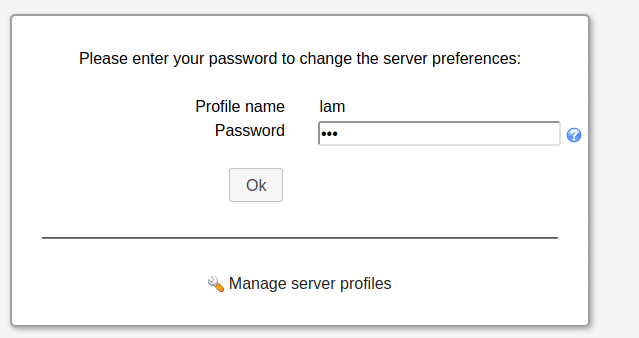
This will ask for profile name password and password.
The default password is same as the username:
lam
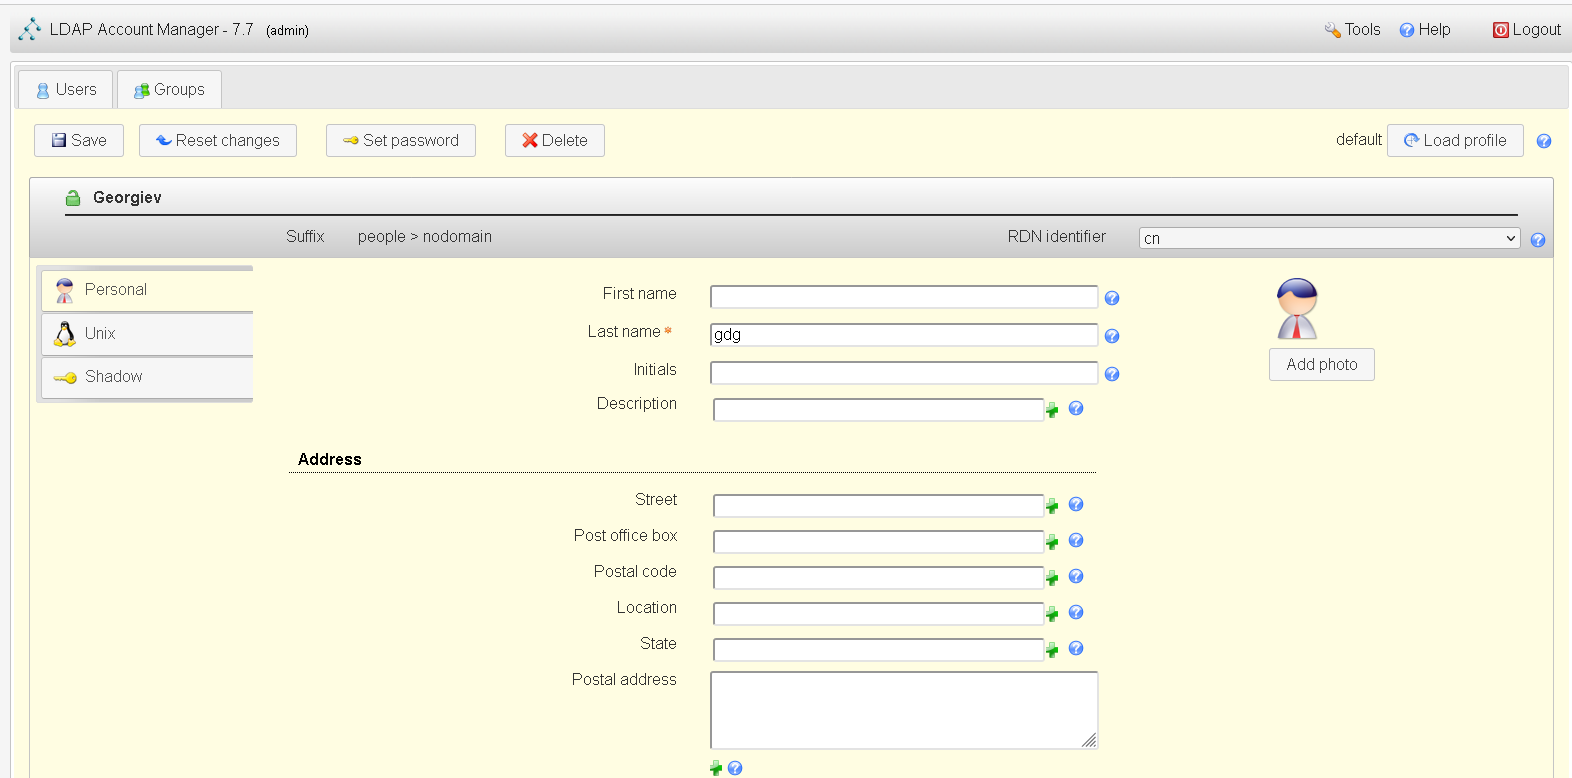
Walk around through the menus and
11. Backing up and Restoring LDAP database
OpenLDAP database can be backed up by simply exporting the directory to an LDIF file, which can then be imported later to restore the database.
slapcat exports the LDAP database's contents to LDIF-formatted output. The content is sent to STDOUT by default, so you should either capture it using the shell's redirect operators.
To back up an LDAP directory, export the directory using the slapcat utility:
# slapcat -b "dc=ldap,dc=example,dc=com" -l backup.ldif
To rebuild the directory from an export, follow these steps:
11.1 Stop the LDAP server
# service stop slapd.service
11.2 Import the file using slapadd
# slapadd -f backup.ldif
Ensure the data files are owned by the ldap user:
# chown -R ldap.ldap /var/lib/ldap/*
11.3 Restart the LDAP server
# service restart slapd.service
Sum it up
In this article it was shown how to install simple LDAP server and configure it to store User / Password / Groups credentials authenticatation with PAM through nss-pam-ldapd helper using the nscld (Local LDAP name service daemon) service.
We have further shown how to setup the initial LDAP Administartor (Super-User) and configure the basic required LDAP base and Db together with the schemes to extend capabilities of openldap such as to have basic support for UNIX User, Password and Groups creation etc.
Further on a sample UNIX user was created in LDAP Tree via username.ldif and admins groups. The UID 500 admins was added to /etc/groups as well as included a standard configuration to /etc/sudoers in order to allow LDAP adde UNIX users to execute predefined commands via sudo such as sudo su – root.
To enable login of the LDAP user required openldap-clients were installed and authconfig used to authorize user queries to LDAP to authenticate.
LDAP Logging was configured via rsyslog local4 interface. Onwards it was shown how to test and troubleshoot possible issues after the installation is complete.
Next it was shown you can configure other Linux servers to remotely query the configured LDAP server as a mean of user authentication and only grant access if the user and its encrypted password is found in the LDAP Database on ldapserver. It was further explained how to test the LDAP is connectable with LDAPAdmin and how to manage the database by installing and managing it through phpLDAPAdmin.
Finally you've seen how to install and configure LAM (LDAP Account Manager) Web GUI that will make the hell of Administrating your LDAP database much more pleasurable.
If you have luck (or better say) Pray fervantly to the Good God, all described in the article steps will work together and you will have a working LDAP User authentication.
However I have to say my experience with OpenLDAP the free software version of the (Lightweight
Directory Access Protocol) is a true nightmare.
This piece of software was created IMHO overly complex and truely chaotic by its creators.
The documentation of openldap is also not the best one I've seen but if you have a tons of free time and a desire, after few days you might start understanding something.
Don't expect it that you have the clear picture, as I believe even the creators of OpenLDAP was not sure what they've created 🙂
Hopefully once you set it up you will have a little joy after the innumerable hours of hectic try outs to make it work. Having all setup to assure yourself, implement a script or a cron job
to dump its database with slapcat regularly to make sure you don't loose youruser data.
I''ve spend quite a lot of hours writting this piece of article reading tons of other articles on the topic, tried many of which and most of them worked partially or something was broken. Therefore I hope this article will not be the next OpenLDAP article but will truly work. If it works for you please drop me a comment and give me a feedback, telling it worked. If you get any errors with the article also let me know and I will fix it ASAP. The goal is to make this Guide a good working guide so the FSF community can benefit.
Also seeing openldap's complete it makes one too much scared to try to upgrade it 🙂
That's all folks Cheers !