Archive for the ‘Joomla’ Category

Change website .JS .PHP Python Perl CSS etc. file permissions recursively for Better Tightened Security on Linux Webhosting Servers

Friday, October 30th, 2015

change-permissions-recursively-on-linux-to-protect-website-against-security-breaches-hacks

It is a common security (breach) mistake that developers or a web design studio make with dedicated or shared hosted websites do to forget to set a nice restrictive file permissions.

This is so because most people (and especially nowdays) developers are not a security freaks and the important think for a programmer is to make the result running in shortest time without much caring on how secure that is.
Permissions issues are common among sites written in PHP / Perl / Python with some CSS and Javascript, but my observations are that JavaScript websites especially that are using some frameworks such as Zend / Smarty etc. and are using JQuery are the most susceptible to suffer from permission security holes such as the classic 777 file permissions, because of developers who’re overworking and pushed up for a deadlines to include new functionality on websites and thus often publish their experimental code on a Production systems without a serious testing by directly uploading the experimental code via FTP / WinSCP on Production system.

Such scenarios are very common for small and middle sized companies websites as well as many of the hobbyist developers websites running on ready CMS system platforms such as Joomla and WordPress.
I know pretty well from experience this is so. Often a lot of the servers where websites are hosted are just share-servers without a dedicated sysadmin and thus there are no routine security audits made on the server and the security permissions issue might lead to a serious website compromise by a cracker and make your website quickly be banned from Google / Yahoo / Ask Jeeves / Yandex and virtually most of Search Engines because of being marked as a spammer or hacked webiste inside some of the multiple website blacklists available nowdays.

Thus it is always a good idea to keep your server files (especially if you’re sysadmin) with restrictive permissions by making the files be owned by superuser (root) in order to prevent some XSS or vulnerable PHP / Python / Perl script to allow you to easily (inject) and overwrite code on your website.

1. Checking whether you have a all users read, write, executable permissions with find command

The first thing to do on your server to assure you don’t have a low security permissioend files is:

find /home/user/website -type f -perm 777 -print

You will get some file as an output like:

./www/tpl/images/js/ajax-dynamic-list/js/ajax-dynamic-list.js
./www/tpl/images/js/ajax-dynamic-list/js/ajax_admin.js
./www/tpl/images/js/ajax-dynamic-list/js/ajax_teams.js
./www/tpl/images/js/ajax-dynamic-list/js/ajax.js
./www/tpl/images/js/ajax-dynamic-list/js/ajax-dynamic-list_admin.js
./www/tpl/images/js/ajax-dynamic-list/lgpl.txt

2. Change permissions recursively to read, write and exec for root and read for everybody and set all files to be owned by (root) superuser

Then to fix the messy permissions files a common recommended permissions is 744 (e.g. Read / Write and Execute permissions for everyone and only read permissions for All Users and All groups).
Lets say you want to make files permissions to 744 just for all JavaScript (JQuery) files for a website, here is how:

find . -iname ‘*.js’ -type f -print -exec chown root:root ‘{}’ \;
find . -iname ‘*.js’ -type f -print -exec chmod 744 ‘{}’ \;

First find makes all Javascript files be owned by root user / group and second one sets all files permissions to 744.

To make 744 all files on server (including JPEG / PNG Pictures) etc.:

find . -iname /home/users/website -type f -print -exec chown root:root ‘{}’ \;
find . -iname /home/users/website -type f -print -exec chmod 744 ‘{}’ \;

Joomla 1.5 fix news css problem partial text (article text not completely showing in Joomla – Category Blog Layout problem)

Monday, October 20th, 2014

joomla-fix-weird-news-blog-article-text-incompletely-shown-category-blog-website-layout-problem

I’m still administrating some old archaic Joomla website built on top of Joomla 1.5. Recently there were some security issues with the website so I first tried using jupgrade (Upgrade Joomla 1.5 to Joomla 2.5) plugin to try to resolve the issues. As there were issues with the upgrade, because of used template was not available for Joomla 2.5, I decided to continue using Joomla 1.5 and applied the Joomla 1.5 Security Patch. I also had to disable a couple of unused joomla components and the contact form in order to prevent spammers of randomly spamming through the joomla … the Joomla Security Scanner was mostly useful in order to fix the Joomla security holes ..

So far so good this Joomla solved security but just recently I was asked to add a new article the Joomla News section – (the news section is configure to serve as a mini site blog as there are only few articles added every few months). For my surprise all of a sudden the new joomla article text started displaying text and pictures partially. The weirdly looking newly added news looked very much like some kind of template or css problem. I tried debugging the html code but unfortunately my knowledge in CSS is not so much, so as a next step I tried to temper some settings from Joomla Administrator in hope that this would resolve the text which was appearing from article used to be cut even though the text I’ve placed in artcle seemed correctly formatted. I finally pissed off trying to solve the news section layout problem so looked online too see if anyone else didn’t stick out to same error and I stumbled on Joomla’s forum explaining the Category Blog Layout Problem

The solution to the Joomla incomplete text showing in article is – To go to Joomla administrator menus:

1. Menus -> Main Menu -> (Click on Menu Item(s) – Edit Menu Item(s)) button
2. Click on News (section)
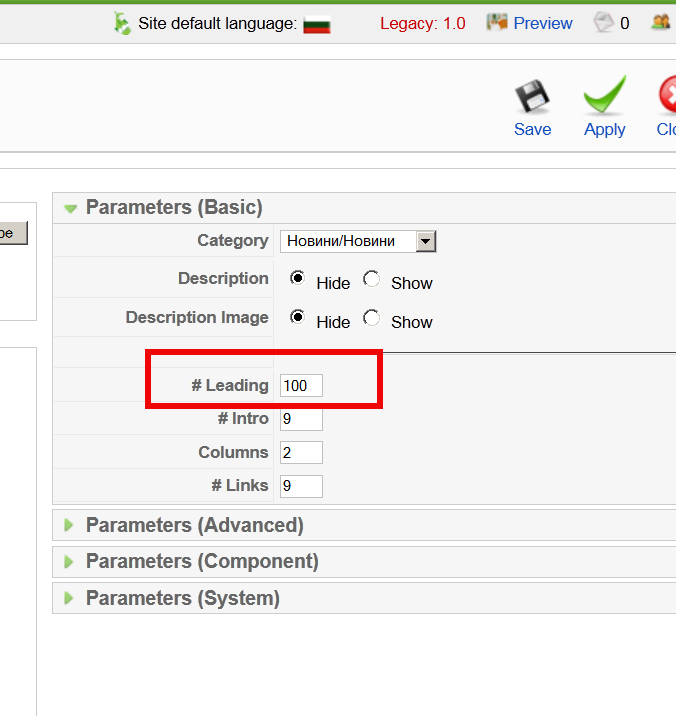
In Parameters section (on the botton right) of screen you will see #Leading set to some low number for example it will be something like 8 or 9. The whole issue in my case was that I was trying to add more than 8 articles and I had a Leading set to 8 and in order to add more articles and keep proper leading I had to raise it to more. To prevent recent leading errors, I’ve raised the Leading to 100 like shown in below screenshot
joomla-blog-layout-basic-parameters-screenshot-fix-joomla-news-cut-text-problem-screenshot

After raising to some high number click Apply and you’re done your problem is solved 🙂
For those curious what the above settings from screenshot mean:

# Leading Articles -> This refers to the number of articles that are to be shown to the full width
# Intro Articles -> This refers to the number of articles that are not to be shown to full width
# Columns -> This refers to the number of columns in which the articles will be shown that are identified as #Intro. If #Intro is zero this setting has no effect
# Links -> Number of articles that are to be shown as links. The number of articles should exceed #leading + #Intro

N.B. Solving this issue took me quite a long time and it caused me a lot of attempts to resolve it. I tried creating the article from scratch, making copy from an old article etc. I even messed few of the news articles one time so badly that I had to recreate them from scratch, before doing any changes to obsolete joomlas always make database and file content backup otherwise you will end up like me in situation loosing 10 hours of your time ..

The bitter experiences once again with Joomla convinced me when I have time I have to migrate this Joomla CMS to WordPress. My so far experience with Joomla prooved to me just for one time the time and nerves spend to learn joomla and built a multi-lingual website with it as well as to administer it with joomla obscure and hard to cryptic interfaces and multiple security issues., makes this CMS completely unworthy to study or use, its hardness to upgrade from release to release, besides its much slow and its less plugins if compared to WordPress makes wordpress much better (and easier to build use platform than Joomla).
So if you happen to be in doubt where to use Joomla or a WordPress to build a new company / community website or a blog my humbe advise is – choose WordPress!

Check your Joomla Security with OWASP Joomla Vulnerability Scanner

Wednesday, June 25th, 2014

check-joomla-security-owasp-vulnerability-scanner-tool

If you working in field of Computer Security you should have definitely heard of OWASP (Open Web Application Security Project).
OWASP is very much like MetaSploit – Penetration Testing Framework except it is focusing mostly on web security.
As of time of wrtitting this post OWASP Project is probably the largest contributor in Web Security tools. If you're somehow in the field of Web and Middleware (Security team) or writting Web Application software (with security in mind) OWASP is definitely a project you should study well and the provided tools can help you develop your web services server infrastructure or application design with top security in mind.

One of the famous OWASP tools is Joomla Security Scanner – a toll that can scan and find all potential and present vulnerability in a Joomla (Pure Joomla or Joomla Based  website). OWASP Joomla Security Scanner script is written in Perl, making it possible to run on any OS Platform that can run Perl and CPAN modules. Thus Joomla Security Scanner is running on Windows, Linux and Mac OS X.

  • To use OWASP Joomla Security scanner on Linux (depending on Linux distribution install perl via deb or rpm package manager – most Linux distributions have it already pre-installed).
     
  • For Joomla Security scanner on Windows you will have to install one of Perl Windows ports either Active Perl or Strawberry Perl.

Once perl interpreter is up installed, e.g. test it with:
 

# perl --version

This is perl, v5.10.1 (*) built for x86_64-linux-gnu-thread-multi
(with 61 registered patches, see perl -V for more detail)

Copyright 1987-2009, Larry Wall

Perl may be copied only under the terms of either the Artistic License or the
GNU General Public License, which may be found in the Perl 5 source kit.

Complete documentation for Perl, including FAQ lists, should be found on
this system using "man perl" or "perldoc perl".  If you have access to the
Internet, point your browser at http://www.perl.org/, the Perl Home Page.


C:Usersggeorgi>perl --version

This is perl 5, version 16, subversion 3 (v5.16.3) built for MSWin32-x64-multi-t
hread
(with 1 registered patch, see perl -V for more detail)

Copyright 1987-2012, Larry Wall

Binary build 1604 [298023] provided by ActiveState http://www.ActiveState.com
Built Apr 14 2014 15:29:45

Perl may be copied only under the terms of either the Artistic License or the
GNU General Public License, which may be found in the Perl 5 source kit.

Complete documentation for Perl, including FAQ lists, should be found on
this system using "man perl" or "perldoc perl".  If you have access to the
Internet, point your browser at http://www.perl.org/, the Perl Home Page.


Download Latest Joolma Vulnerability Scanner (here), in case if tool disappears in future a mirrored version for download of Joomla Vulnerability Scanner is (here)
UnZIP the scanner in new created directory start it run Windows command line (I use ConEmu) – Press Windows button + R (and type ConEmu) – or if you don't have conemu cmd.exe, go to whenever the archive was dearchived:

cd UsersgeorgiDownloadsJoomla-scanner

Install all required CPAN perl modules for Joomla Scanner

cpan

This will launch perl cpan installation console, you will see a prompt:

cpan>

The console is a front end which uses Perl's Cpan modules site to download libraries, CPAN is doing quite a good job as it also downloads dependencies if installed perl module has such.

Inside CPAN console type:

install local::lib

Answer any further prompts by simply pressing Enter a lot of times.
Next install App::cpanminus:

install App::cpanminus

Then Exit CPAN, type:

exit

This should have installed cpanminus to test it run in Linux shell / win command prompt:

cpanm


Usage: cpanm [options] Module [...]
Try `cpanm --help` or `man cpanm` for more options.


As a last step install Switch from cpanminus:

cpanm -f install Switch


Run Joomla Scanner

/images/joomla-vulnerability-scanner-scanning-host-in-action-check-for-joomla-vulnerabilities-tool1
 

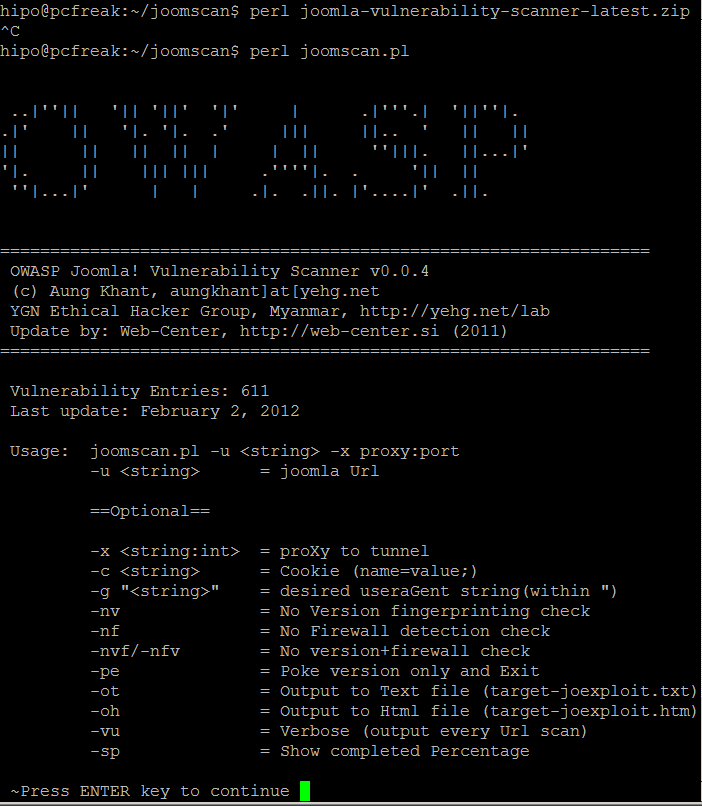
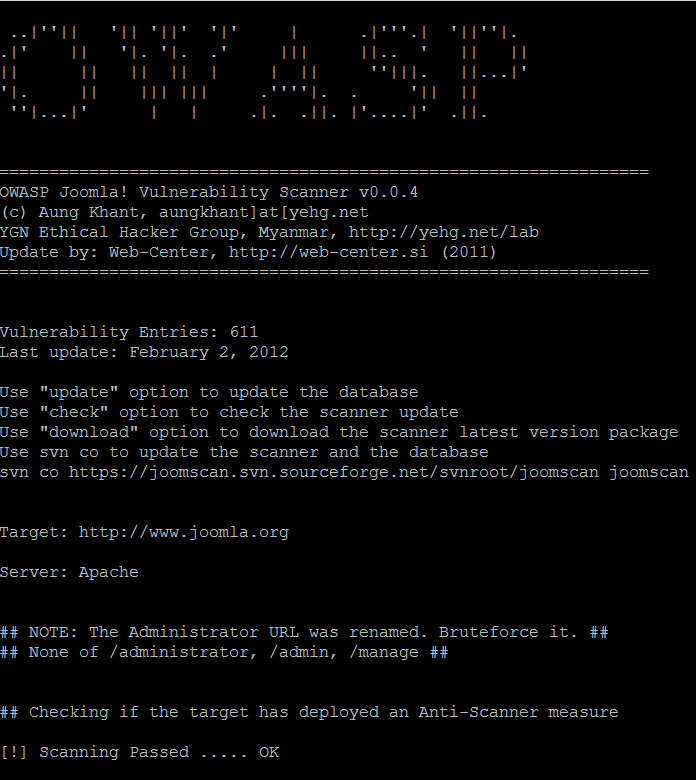
perl joomscan.pl

/images/joomla-vulnerability-scanner-scanning-host-in-action-check-for-joomla-vulnerabilities-tool1


How to Reset Joomla admin Password from MySQL command line

Wednesday, June 19th, 2013

joomla logo how to reset admin password

It is very common thing for clients having Joomla based websites to forget their password. It is possible to reset password from jos_users table using PhpMyadmin. But it is much

# mysql -u root -p
Enter password:

Welcome to the MySQL monitor.  Commands end with ; or \g.
Your MySQL connection id is 975975
Server version: 5.1.66-0+squeeze1 (Debian)

Copyright (c) 2000, 2012, Oracle and/or its affiliates. All rights reserved.

Oracle is a registered trademark of Oracle Corporation and/or its
affiliates. Other names may be trademarks of their respective
owners.

Type 'help;' or '\h' for help. Type '\c' to clear the current input statement.

mysql> USE joomla_site;
Reading table information for completion of table and column names
You can turn off this feature to get a quicker startup with -A

Database changed

mysql> UPDATE `jos_users` SET `password` = MD5( ‘new_password’ ) WHERE `jos_users`.`username` = “administrator” ;

Replace "new password", string with whatever new password is necessary
Change “administrator” or admin with joomla's admin username.

There you, go Joomla admin password is changed 🙂

Installing Usual PHP Apache needed modules for new Debian GNU / Linux servers

Tuesday, September 18th, 2012

Almost evertime whether install a new Debian Linux server to host some websites, use the popular small and mid-sized hosting solution combination:
 

  • Apache webserver
  • PHP module to interpret the PHP programming code
  • MySQL to store the DB Backend

Installing the basis for on Debian is easy:


# apt-get install --yes apache2 apache2-mpm-prefork libapache2-mod-php \
mysql-server php5 php5-mysql mysql-client mysql-common phpmyadmin
....

This of course is in case, if necessery to run websites which are written to usephp code which is not thread safety (Use Apache child prefork technology to manage processes); For websites writen to be thread safety (not use some forking php functions like: php – exec(); fork(); etc. – I install apache2-mpm-prefork for better Webserver performance and speed.

This minimum collection of packages is good only for basic, websites and most Joomla, WordPress, Drupal or whatever custom PHP websites has to be hosted usually require much more PHP functions which are not part of this basic bundle. Hence as I said prior on almost all new Linux debian / ubuntu deb package based servers need to install following list of extra PHP deb packages:


# apt-get install --yes php-apc php-auth-ssl php-mail \
php-http php-net-smtp php-net-socket php-pear php5-cli php5-curl \
php5-gd php5-imagick php5-mapscript php5-mcrypt php5-odbc php5-sybase \
php5-xsl
...,

After installing this standard bundle of modules PHP is extended to support somenice functionalities like Image editting / convertion / resizing … various graphic editting functions as supported by infamous ImageMagick and GDlib, PEAR support (PHP Extension and Application Repository) bundle providing number of useful PHP classes.
php5-xInstalling Usual PHP Apache needed modules for new Debian GNU / Linux serverssl is usually necessery for websites which pass data in XSL format (a specific formatted XML data). php5-xsl is usually necessery for websites containing flash animationsPresentation, videos, games etc.

That is mostly it, hope this helps some sys admin like me who need configure new Debian based hosting server 🙂

Script to Automatically change current MySQL server in wp-config.php to another MySQL host to minimize WordPress and Joomla downtimes

Friday, July 20th, 2012

I'm running a two servers for a couple of home hosted websites. One of the servers is serving as Apache host1 and has configured MySQL running on it and the second is used just for database host2 – (has another MySQL configured on it).
The MySQL servers are not configured to run as a MySQL MASTER and MySQL SLAVE (no mysql replication), however periodically (daily), I have a tiny shell script that is actualizing the data from the active SQL host2 server to host1.

Sometimes due to electricity problems or CPU overheats the active MySQL host at host2 gets stoned and stops working causing the 2 WordPress based websites and One joomla site inaccessible.
Until I manually get to the machine and restart host2 the 3 sites are down from the net and as you can imagine this has a very negative impact on the existing website indexing (PageRank) in Google.

When I'm at home, this is not a problem as I have physical access to the servers and if somethings gets messy I fix it quickly. The problem comes, whether I'm travelling or in another city far from home and there is no-one at home to give the hanged host hard reboot ….

Lately the problems with hang-ups of host2 happaned 3 times or so for 2 weeks, as a result the websites were inaccessible for hours and since there is nobody to reboot the server for hours; the websites keep hanging until the DB host is restarted ;;;;

To work-around this I came with the idea to write a tiny shell script to check if host2 is ping-able in order to assure the Database host is not down and then if script determines host2 (mysql) host is down it changes wp-config.php (set to use host2) to a wp-config.php (which I have beforehand configured to use) host1.

Using the script is a temporary solution, since I have to actually find the real hang-up causing troubles, but at least it saves me long downtimes. Here is a download link to the script I called change_blog_db.sh .
I've configured the script to be run on the Apache node (host1) via a crontab calling the script every 10 minutes, here is the crontab:
 

*/10 * * * * /usr/sbin/change_blog_db.sh > /dev/null 2>&1

The script is written in a way so if it determins host2 is reachable a copy of wp-config.php and Joomla's configuration.php tuned to use host2 is copied over the file config originals. In order to use the script one has to configured the head variables script section, e.g.:

host_to_ping='192.168.0.2';
blog_dir='/var/www/blog';
blog_dir2='/var/www/blog1';blog_dir3='/var/www/joomla';
notify_mail='hipo@www.pc-freak.net';
wp_config_orig='wp-config.php';
wp_config_localhost='wp-config-localhost.php';
wp_config_other_host='wp-config-192.168.0.2.php';
joomla_config_orig='configuration.php';
joomla_config_other_host='configuration-192.168.0.2.php';

You will have to manually prepare;;;

wp-config-localhost.php, wp-config-192.168.0.2.php ,configuration-192.168.0.2.php, wp-config-localhost.php to be existing files configured to with proper host1 and host2 IP addresses.
Hope the script will be useful to others, experiencing database downtimes with WordPress or Joomla installs.
 

How to fix php “Fatal error: Class ‘SimpleXMLElement’ not found” and “Fatal error: Class ‘JLoader’ not found” on FreeBSD

Tuesday, June 21st, 2011

One of the contact forms running on a FreeBSD server configured to work on top of Apache+MySQL suddenly stopped working.

The errors that appeared on the webpage during a page request to the form url was:

Fatal error: Class 'SimpleXMLElement' not found in /var/www/joomla/plugins/system/plugin_googlemap2_helper.php on line 2176 Fatal error: Class 'JLoader' not found in /var/www/joomla/plugins/libraries/loader.php on line 161

As you see in the output the website which was causing the issues was running a Joomla version 1.5.23 Stable configured with RSForm!ver 1.5.x (as a contact form solution) and Google Maps version 2.13b plugins.

The Google Map from Google Maps plugin and the RSform were configured to appear on one physical configured article in Joomla and seemed to work just until now. However yesterday suddenly the error messages:
Fatal error: Class ‘SimpleXMLElement’ not found
Fatal error: Class ‘JLoader’ not found

came out of nothing, it’s really strange as I don’t remember doing any changes to either Joomla or the PHP installation on this server.
There is one more guy who has access to the Joomla installation which I suspect might have changed something in the Joomla, but this scenario is not very likely.

Anyways as the problem was there I had to fix it up. Obviously as the error message Fatal error: Class ‘SimpleXMLElement’ not found reported the server php simplexml was missing!

Just to assure myself the php simplexml extension is not present on the server I used the classical method of setting up a php file with phpinfo(); in it to check all the installed php extensions on the server.

Finally to solve the issue I had to install the module from ports php5-simplexml , e.g.:

freebsd# cd /usr/ports/textproc/php5-simplexml
freebsd# make install clean

Afterwards to make the new settings take place I did restart of my Apache server:

freebsd# /usr/local/etc/rc.d/apache2 restart
Syntax OK
Stopping apache2.
Waiting for PIDS: 63883.
Performing sanity check on apache2 configuration:
Syntax OK
Starting apache2.

Now my Joomla contact form is back to normal 😉

If someone has any idea why this error occured without any php or server modifications, and how comes that all worked fine beforehand even though I did not have the simplexml module instlaled on the server o_O, I would be enormously greatful.

12 must have Joomla extension plugins / Essential modules for new Joomla CMS install

Thursday, June 16th, 2011

Joomla bundle of must have extensions picture

These days very often I have to install, plain new Joomla based websites. I’ve realized that since there is no structured guide to follow describing the most essential plugins that every new fresh new joomla installation is required to have.
Thus I took the time and wrote this post, as it will be useful to myself in my future new joomla based websites establishment, I also believe these guide will be useful to other Joomla enthusiasts or administrators in their daily work.

Below I will describe in short the installation, configuration and oddities I’ve faced during installment of the above described bundle of plugins on a plan Joomla 1.5 install.These article will walk through 12 joomla essential plugins that I believe every fresh Joomla installation should be equipped with.
Hope this guide will be helpful to you. Now let’s start it up:

1. JoomlaXplorer – A sophisticated web file explorer for Joomla

One of the basic modules, beneficial with a new joomla CMS install is Joomla Xptplorer . This module enables the joomla admin to browse files in a web file explorer, on the server where the joomla CMS is installed. Below you see how handy the joomla web explorer provided by the plugin is:
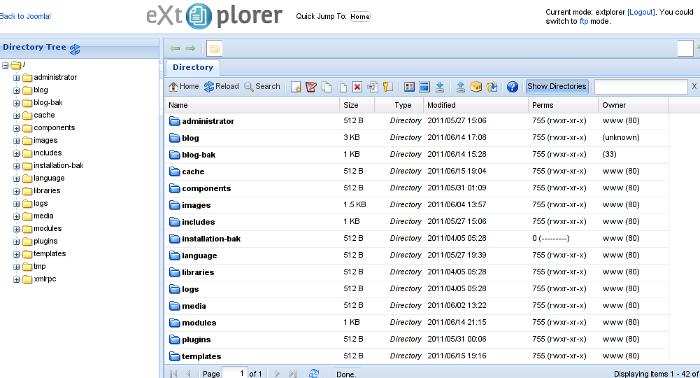
Joomla file explorer extplorer module

Installing and using the plugin is a piece of cake. To install the plugin:

a. download Joomla file Xplorer from here or from the official plugin website.

b. Install the plugin through the admin joomla menu:

Extensions -> Install/Uninstall

c. Start using the newly installed plugin by following to menus:

Components -> eXtplorer

2. JCrawler Generate easily sitemap.xml to aim the overall Joomla website SEO optimization

JCrawler logo plugin joomla

I have previously written a very through tutorial on how to install configure and generate website sitemap with Jcrawler module, You can read my article titled: How to build website sitemap.xml in Joomla here

3. sh404SEF – Make your Joomla links and content more user friendly

sh404sef Joomla Search Engine Optimization plugin

sh404SEF is a great Joomla plugin, which will seriously improve SEO and could contribute well for a website to be better indexed with major search engines.

I have previously written an article describing thoroughfully the install and use procedures for the module.
You can read the article Making your Joomla URLS Google friendly with sh404sef plugin / Simple Joomla link SEO here

4. Akeeba Backup Joomla solution

Akeeba backup Joomla Module

Installing a joomla backup solution is very essential if you does take care about your data, it often happens that server hard disk got crashes or a RAID massives got corrupted or some kind of other unexpected disaster hits the server. In these terrible times, having a website backup will save you nerves and data recovery funds, not to mention that in many cases data recovery is impossible.

Joomla has a very easy to use software for creating full website backup called Akeeba Backup

To start using the software one must:

a. Download Akeeba Backup and install it via:

Extensions -> Install/Uninstall

After the Akeeba Backup installation is over, to create your first backup, one needs to navigate to:

Components -> Akeeba Backup -> Backup Now

Each Akeeba backup (a version of the website’s files data and sql info) will be created in an archive file with the extension .jpa
The backup files are created under joomla’s website (main) root directory in directory location administrator/components/com_akeeba/backup

The Akeeba plugin also has capabilities to recover a (.jpa) backup restore point easily.
To recover a backup with the Akeeba plugin one needs to do it once again, via the plugin joomla web interface.
5. Google Analytics (place easy tracking code) in Joomla

Google Analytics Tracking Module for Joomla

a. Download the Google Analytics Tracking Module
The module is available from Joomla Extensions on joomla.org

At the current time of writting you need to download the analytics_tracking15,zip file

b. Install the Google Analytics Tracking Module;
Login as joomla admin and navigate to;

Extensions -> Install

Place the analytics_tracking15.zip url to the Install URL: field.
Again as of time of writting you need to place https://www.pc-freak.net/files/analytics_tracking15.zip;

c. Open the Module Manager

Extensions -> Module Manager

d. Click over Google Analytics Tracking Module
On the right pane you will notice in the Module Parameters the Analytics_uacct_code field. In the uacct_code field you need to paste your UA obtained from your created google-analytics account.
This code is usually something like UA-2101595-10
Now place your code their and press the save green button located near the right top of the screen. You should see the text in blue Item Saved which would indicate your UA code is stored already in the Google Analytics Tracking Module, now press the Cancel button located again on the right top.
As a last step before the Google analytics is set-up on the Joomla you need to enable the plugin to do you need to press over the tick left sided from the text reading Google Analytics Tracking Module in the Module Manager
e. Click over the Enabled button in Module Manager;
Google Analytics Tracking Module -> Enabled

6. Itprism (Facebook, Twitter etc.) Social Network share buttons Joomla plugin

ITPShare Large Social Buttons Joomla

a. to add the itpsocialbuttons to joomla Download the Itpsocialbuttons latest module files from http://itprism.com/free-joomla-extensions/social-buttons-plugin or use my mirrored module files below:

Download mod_itpsocialbuttons .zip file
Download plg_itpsocialbuttons .zip

After having the two files necessery to be installed to make the ITPSocialButtons appear on website, installation is done like with any other installation:

Extensions -> Install/Uninstall -> Upload Package File (Choose File)

Next its necessery to configure the plugin to do so, follow to menus:

Extensions -> Module Manager -> Share

You will notice the Share dialog in the list of Module Name column in Module Manager

Here is a screenshot on how the settings options for ITpsocialbuttons will look like:
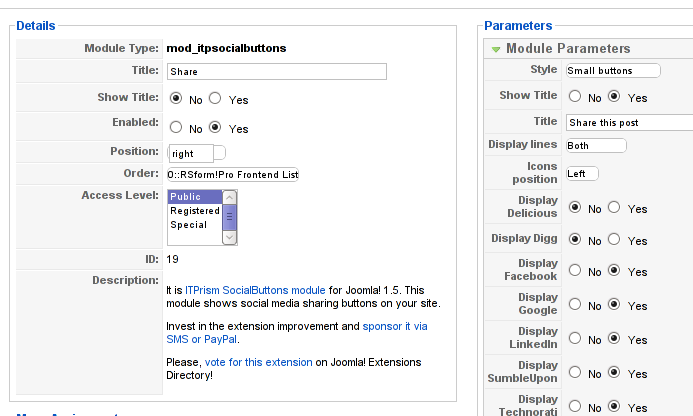
Mod ITpSocialButtons settings screen

The options which I personally changed was:

Show Title – I set this one to No as I wanted to omit the plugin title text to appear on my website.
Further on I’ve set the Enabled option to Yes to enable the plugin and choose the buttons Style option to be of a Small buttons type.
I’ve also found that the most suitable position for the Social Share buttons were to be of a right – Position .

Here is how the social network itprism share buttons looks like:
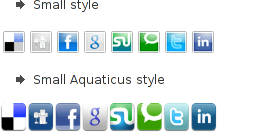
ITprism Joomla Social Share Plugin various button types

The plugin supports sharing of joomla pages to the following list of social networks:
 

  • Delicios.com
  • Digg.com
  • Facebook
  • Google Bookmarks
  • StumbleUpon
  • Technorati
  • Twitter
  • LinkedIn

The module configuration, also allows the user to configure the type of social network buttons, one wants to display on the website.

7. Joomla JCE Content Editor

This content editor is really awesome compared to the default editor TinyMCE. If you want to have an options rich content editor for Joomla, then this is the one for you 🙂
download JCE Content Editor here

After installing the JCE Joomla content editor in order to enable it as a default editor you need to go to the following location:

Site -> Global Configuration -> Default WYSIWYG Editor

There place on Editor TinyMCE and change it with Editor – JCE

Now go to edit some article, and you will see the difference in the editor 🙂

8. Add gallery Joomla capabilities with sigplus (Image Gallery Plus) and Very Simple Image Gallery

Image Gallery Plus sigplus Joomla Screenshot

Image Gallery Plus plugin (sigplus) gallery review screenshot

sigplus Image Gallery Plus is a straightforward way to add image or photo galleries to a Joomla article with a simple syntax. It takes a matter of minutes to set up a gallery but those who are looking for a powerful gallery solution will not be disappointed either: sigplus is suitable for both beginner and advanced users.

Download Sigplus Joomla Image Gallery plugin here
Using sigllus is quite easy all one has to do is use Joomla Media Manager from links:

Site -> Media Manager

Create new folder in the stories folder, let’s say New Pictures and further on use Media Manager to upload all desired pictures to be later displayed.

Being done with uploading the images you want to display, go to Article Manager :

Content -> Article Manager

From there choose your article where new uploaded pictures you want to display and type in the article:

{gallery}New Pictures{/gallery}.

Note that New Pictures is the directory just recently created as stated below, it’s important that there is no spacing between {gallery}and New Pictures, if one tries {gallery} New Pictures {/gallery} instead of {gallery}New Pictures{/gallery} an error will occur instead of the pictures being displayed in a scrolled gallery.

Sigplus Image Gallery has also a number of configuration options, which might make it look a bit more decent.
I have to say in my view the default way sigplus displays pictures is awful!

Another alternative if you don’t like Sigplus ‘s way of creating new galleries is to use Very Simple Image Gallery
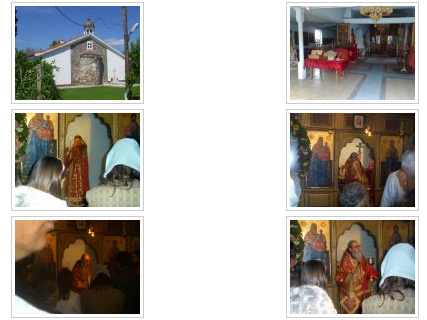
Very Simple Image Gallery joomla screenshot

Here is a screenshot on a sample gallery created with Very Simple Image Gallery Joomla Plugin

You can download Very simple image gallery here

After installing the plugin. It’s use is analogous to the Sigplus . To use it likewise sigplus create new directory through Media Manager and in stories and upload your files in let’s say New Pictures1 . Later on in your article place, the code

{vsig}New Pictures1{/vsig}

Gallery will be generated automatically by the plugin. I think Simple Image Gallery is a bit more advanced and gives a better outlook to Galleries, though it’s configuration settings are much less than with SigPlus image gallery.

To add pictures comments e.g. img link alt=” and title=” tib you need to place a code within the Article manager similar to:

{vsig_c}0|Picture_1.JPG|Some sample text|Some other text{/vsig_c}
{vsig_c}0|Picture_2.JPG|Some example text|Some text{/vsig_c}
etc. ..

Note that the 0 in above example specifies the gallery number if you for instance are using a couple of galleries with Simple Image Gallery , the first one you used would be call 0 . The text specified as comments to the picture will also appear after you preview the gallery right below the picture when clicked on as a picture description in a really nice way.
9. Install Google maps plugin for Joomla
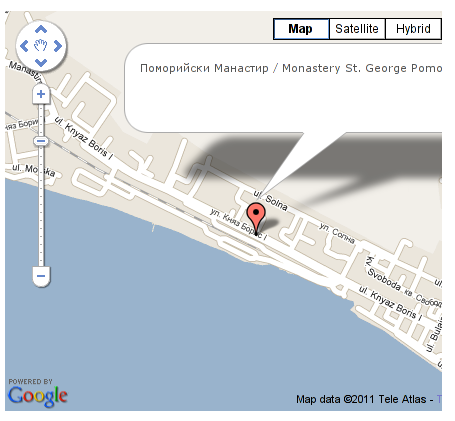
Google Maps plugin for Joomla screenshot

It’s a wise idea that every website has a location map on it’s website, for that reason Google maps is just great.
To install Google maps capability to joomla one can use a plugin called Google Maps .

You can straighly download Joomla’s Googlemap plugin from here

Afterwards use Extension Manager to install the plugin e.g. follow:

Extensions -&gr; Install/Uninstall (Choose File)

and click on Upload File & Install button.

To further enable and configure the Joomla Googlemap plugin you will have to go to the location:

Extensions -> Plugin Manager

Therein you will have to find and enable the Google Maps plugin which is to be found in the column named Plugin Manager
On my Joomla installation the plugin was located in the second page with modules, so if you don’t find the module on the listing with modules on the first page, make sure you scroll to the bottom of the page and click on Next button.

Therein in the list you will most likely notice Google Maps use the Enable button to enable it.

Next step is to configure the plugin, to do so press on the plugin name Google Maps
All configuration necessery here is to place Googlemaps API Key in the respective field (you will see it among config options).

Issuing a new Google Maps api key takes just few seconds, if you already have a gmail account just go to http://code.google.com/apis/maps/signup.html and take few seconds to issue the key.

You will get the key right on your gmail account after being issued (to repeat myself issuing takes few seconds so no worrier here).

One moreOnce having the key place it in the Googlemaps API Key field and configuring Address (which is one of the list of many options the plugin provides) you will be done with configuration.

To display a google map the location you just configured go to the Article Manager , select the article where you want the google maps location picture of your address to appear and type in the Article:

{mosmap|text='Exact street address location'|zoom='15'|zoomType='Large'|zoomNew='0'}

After you save the article a very nice Google map showing you the location’s streets will appear.
You can further conifgure a number of things related to the google map to appear, one thing you might want to play with is the zoom option which as you see in below’s code is equal to 15, e.g. zoom=’15’
Set it to another one if you want to regulate your googlemaps zoom level. For more thoroughful options take a look at the extensive plugin documentation.

10. Joomla Xmap (generating static HTML sitemap) Download Xmap from here , install it the usual plugin way.

Right after installation on the plugin succesful install screen you will notice the link component menu .
Clicking on the component menu you will be leaded to a page showing you few links Sitemap’s URL :
 

  • XML Sitemap:
  • HTML Sitemap:
  • News Sitemap:
  • Images Sitemap:

11. Add Joomla donate Paypal capabilities with Joomla PAYPAL DONATION MODULE

Paypal Donation Module Joomla Screenshot

Just recently I’ve written a a post on how to add a paypal donation capabilities to joomla, you can read my previous post here

12. Install Joomla RSForms Module (Advanced Joomla Forms Support)
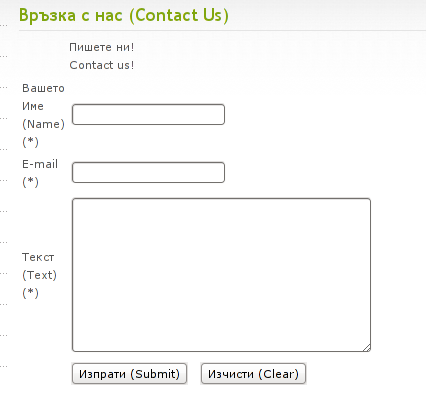
Simple Joomla RsForm contact form

If you’re planning to add a complicated form support for Joomla, there are plenty of plugins, however one that was suggested by a friend of mine which is deep in Joomla world and moreover works good on my joomla installations is RSForms

Joomla – RSForms! is free to download and has great and easy interface to create new joomla forms.

At the time of writting I use these three RSForms components on new Joomla installations:

RSform Pro 1.1.0 com
Mod RsForm for Joomla 1.5
Mod Rsform list for Joomla

For latest release of RSForms! use the link http://www.rsjoomla.com/joomla-components/rsform.html

Installation is like any other module and is done through Extensions -> Install/Uninstall menu.

After installation, setting up a new form is available from the Joomla Menus:

Components -> RSform!Pro -> Manage Forms

I would not enter in details on how to edit the default RSForms or create a new RSForm. Just take some time and learn it by trying 😉

After the rsform is ready, to enable the new form, navigate to Joomla menus:

Menus -> Main Menu

Press the New button located in the buttons bar nearby the page header in the list of options in Select Menu item Type you will notice the RSForm!Pro as an option, press on it to establish the new form in the menus.

A follow up window will appear where one can set a Title: and Alias: for the new form as well as few other options.
After finalizing the settings press on Apply button to save the settings and the new form should appear in Joomla.

Probably there are many more handy plugins, which I’m missing here thus I’ll be glad if readers suggest some more helpful essential (must have plugins) for Joomla.
Feedback on this tutorial is very welcome!
Looking forward to hear for your opinions if my article was helpful to you 😉

How to easy add Joomla 1.5 donate Paypal capabilities with Joomla PAYPAL DONATION MODULE

Wednesday, June 15th, 2011

PayPal donation Module Joomla Screenshot

Many joomla CMS installations are for Non-profit organizations or Non Government organizations. These are organizations which are not officially making profit and therefore this instituations are interested into donations to support their activities.

In this occasions adding Joomla paypal capabilities is very essential. There are plenty of modules which enables Joomla to support paypal monetary payments, however many of them are either paid or requires registration and thus it’s quite time consuming to set up a decent PayPal supporting module for Joomla.
After a bit of investigation thanks God, I’ve come across a module that is free of charge, easily downloadable (wihtout registration) and is also relatively easy to configure, these module is called PAYPAL DONATION MODULE
I’ve mirored the module to my server, just in case if the module disappears in the future.

Here are a very brief explanation on how the module can be downloaded installed and configured:

First Download (mod_ojdonation_pp) Paypal Donation Module here

Install it as joomla module via:

Extensions -> Install/Uninstall
menu

Afterwards, go to:

Extensions -> Module Manager

In the list of modules you will notice the Donate module which will be disabled. Use the Enable button to enable it.

Next by clicking on the Donate Module Name, one can configure the module, where the most essential configuration values that needs to be filled in are:

1. Title: – The title of the donation form:
2. Donation Title: – Title of donation picture to show in the webpage
3. Donation Amount: – Default donation amount user will donate with paypal by clicking on Donate button
4. Currency – Default currency the donators will use to donate to configured paypal account
5. Paypal ID: – The email address of paypal account your donators will donate to (This was a bit hard to understand since Paypal ID is not a number ID but the email address configured as an username in PayPal).
6. Donation Description: – Description text to appear before the Donate button
7. Donation Footer: – Text to appear after the Donate button

There are two ways one could add the donation module to show the donation form, on the joomla website:
a. One is to enable the donation button on every joomla webpage (I don’t like this kind of behaviour).

To use this kind of donate button display approach, you will have to select from the Donation module, conf options:
– Show on FrontPage: and Show Title:

Also make sure the Enabled: option is set to Yes

b. Second approach is to set the PayPal Donation form only to appear on a single menu, to do so:

While in Paypal Donation Module configuration in Menu Assignment section, select:

Select Menu Item(s) from the List
instead of the default All value set for Menus.

The last setting to be choosen is the paypal donation form page location (where exactly on the selected pages the form will appear).

The form location is set from the Position: dropdown menu, the option which I found to be the best one for me was the bottom option. However just play with the Position setting and choose the one that will be best for you.

Then scroll on in the Menu Selection: and choose only the menus where you want a paypal donation form to appear.

Finally to save all the recent made settings, click on Apply and refreshing in a new page should show you paypal’s money donation form in joomla

If all is configured fine with Joomla’s – Paypal Donation Module you should get on your webpage:

PayPal donation Module in Joomla Screenshot
 

How to add multi-lingual (multi language) support in Joomla 1.5

Friday, June 3rd, 2011

Joomfish MultiLanguage Support enable plugin

If you are facing the task to build a multi-language enabled Joomla website like me then I think my experience on building a multi-language website with Joomla CMS might be beneficial to you.

In order to build a multi-language website in Joomla you will have to use Joom!Fish multilanguage Joomla support plugin.

The plugin is a bit buggy, but in overall it will allow you to build a multi language website and consequently add the page different languate translations.

To install the plugin on your 1.5 Joomla based install;

1. Download the JoomFish plugin

Install it the usual joomla way joomla plugins are installed, via;

Extensions -> Install/Uninstall

2. Enable the Joom!Fish plugin

To do so navigate to;

Extensions -> Module Manager

Enable the module by ticking under the Enabled column on the line where you read Language Selection

3. Install Language packs for all languages which should be supported by JoomFish

Now as the JoomFish Language selection module is enabled, one needs to install the necessery Joomla Language Packs for all the languages which the Joomla based website is planned to support.

In my case I neede a three lingual website, which will support only the Languages:
 

  • Bulgarian
  • Russian
  • and

  • English

Thus I went on Joomla! Extensions Directory – extensions.joomla.org and downloaded the the three language packs I needed (English, Russian and Bulgarian).

Again the Installation of the language packs is trivial and is done through the Joomla’s:

Extensions -> Install/Uninstall

After installation to find out all the languages your Joomla installation will support you can navigate inside Joomla admin to:

Extensions -> Install/Uninstall -> Languages

Screenshot of my installed list of Joomla Language packs Screenshot of my installed list of Joomla Language Packs (Multi-Language setup)

Another way to check the list of enabled installed languages supported in your Joomla is via the menu:

Site -> Control Panel -> Language Manager

Something important here is to a default language is set in the Language Manager

4. Create translations from default installed language to the rest of the installed ones

Go to the JoomFish component through the menus:

Components -> Joom!Fish -> Control Panel

If all your language packs are correctly installed and enabled so far you should notice them listed while clicking on Content Languages

If all the Joomla Languages which your website is supposed to support are not there, this means something is generally wrong with installed lanaguage packs and you need to go back few steps and check what might be wrong, hopefully that’s not the case 😉

To immediately start translating your Joomla website to another from one language to another one, use the control menus:

Components -> Joom!Fish -> Translation

Here is screenshot on how this menu would look like:

Joomla JoomFish Plugin Translate Menu Screenshot

Notice in the above screenshot the Languages: and Content Elements dropdown menus, this ones are actually the two menus used for all language translations.

One needs to select under Languages: menu the Language to which will be translated to, while in Content Elements: has to be choseen the exact site elements which are about to be translated.

The Content Elements: necessery to be translated in most of the cases would be just Menus and Contents

Translating that will have your website user frontend be completely translated info the foreign language choosen in the Languages: dialog.

After finalizing the translations of all Articles available in Menus and Contents make sure the translation is Published, by selecting the Published tick, below I show you an example language translation edit of an article, on the left side you see the Published tick which need to be enabled, for translation to appear officially in Joomla.

Joomla Joomfish published tick enabled screenshot

After completing all the translations of elements offered by the translation window, save the translation by pressing the Apply buttonFurther on you can check the website in a new tab, if everything is okay with translations, on the down left corner of the website footer you should notice the flags of enabled languages to appear.
Clicking on each of the languages should show you the website in the language choosen (if you have previously done the translation to the respective menus).

5. Solving a minor bug in JoomlaFish which prevents translated language text to display on webpages

During translation of my website from Bulgarian to English, I have noticed a bug of JoomFish, even though I did the translation of all my Menus and website Content elements and saved the translations, refreshing the website in a new tab and choosing the desired translation was constantly displaying the error message:

“There are no translations available”

I was not able to find a good explanation on the Internet on why exactly and how this bug occurs, but by some experiments I come up with a workaround.

If you get the “There are no translations available” after properly configuring Joom!Fish Multilang support, in order to solve the error you will have to select temporary a different default website language from the one currently specified by your website.

(E.g.) go to jooma admin panel location:

Site -> Control Panel -> Language Manager

and trigger the default language configured to some of the other available ones. After reverting back in a couple of seconds this setting to your desired default language the annoying: “There are no translations available” message will disappear and your translated content will appear on the website.

6. Changing the location of language flags (language links) in Joomla’s JoomFish

I have seen plenty of people online looking for a solution on how they can change the default image flags location, which by default is placed a place which is not that intuitive and visible by the user.

Maybe I did not searched enough but from my quick research it appears there is no information available on how the placement of language flags switching menu can be changed.

Even though I couldn’t find a solution to change the langage flags in JoomFish , after a bunch of experiments I find a way to do it! 🙂

The placement of Language selector buttons can be easily adjusted through following the Joomla Admin menu:

Extensions -> Module Mamager -> Language Selection

After opening the Language Selection , you will notice the Position: dropdown menu setting. The setting has a bunch of optionsand allows you to choose the best preferred placement of the language selector flag buttons, just take few minutes to experiment which settingfits you best and choose the one most suitable to you and you’re done! 😉

Honestly I never imagined that building a multi-lingual website with Joomla will be such a piece of cake.

The only drawback with JoomFish, is the way language translation is implemented as it is not enough user friendly, anyways having the option to build multi language website for free using open source CMS solution is great. Ain’t it? 🙂