Posts Tagged ‘freebsd’

Howto import a UTF8 textbook (book) in MySQL table / A simple step by step guide through on howto import books in MySQL

Tuesday, March 23rd, 2010

I was looking forward to import a textbook I own to MySQL in order to be able later to easily manipulate the text with MySQL queries. After some time spend on trying hard. Here is the steps I took to import the textbook:

1. First we create necessery database and set default charset to UTF8:

freebsd$ mysql -u root -p
# create database textbook in mysql and change it to your likings
mysql$ CREATE database "textbook";
mysql$ use textbook;
mysql$ SET NAMES UTF8;

2. Then we CREATE Necessery database that will use further as a table to import the textbook into:
Below we create the table “textbook” with one column “sentence”

mysql$ CREATE table textbook (sentence varchar(5000);

3. Now we import the book:

mysql$ LOAD DATA INFILE '/path/to/file/textbook.txt' INTO TABLE textbook;

4. Last it might be a good idea to add some extra numbered column to be able to track the lines of the textbook as below:

mysql$ ALTER table textbook ADD COLUMN ID INT NOT NULL auto_increment FIRST, ADD PRIMARY KEY(ID);

In my case the book was in cyrillic and after I’ve taken the above steps I didn’t have any problems with cyrillic letters in the table.
Of course the above method is a bit dump since it’s not flexible enough and doesn’t track the textbook parts or titles, however it’s still a good way to store example on how to store text data in mysql table and could help somebody further in his journey in learning MySQL and next to that serving some simple daily SQL taks.

Fixing Apache error – client denied by server configuration on FreeBSD

Thursday, January 17th, 2013

If you have just installed a FreeBSD host with Apache and configured a Vhost document root to interpret  PHP or Perl scripts and you end up with error in browser like:


HTTP 403 / client denied by server configuration error

or

Forbidden
You don't have permission to access /index.html on this server.

It is most likely due to improperly configured Apache directory or directories permissions. In Apache error log /var/log/httpd-error.log, there are plenty of error messages logged like:

[Tue Jan 15 13:09:39 2013] [error] [client 92.96.95.177] client denied by server configuration: /usr/home/hipo/public_html/management
[Tue Jan 15 13:09:41 2013] [error] [client 92.96.95.177] client denied by server configuration: /usr/home/hipo/public_html/management
[Tue Jan 15 13:09:41 2013] [error] [client 92.96.95.177] client denied by server configuration: /usr/home/hipo/public_html
[Tue Jan 15 13:09:41 2013] [error] [client 92.96.95.177] client denied by server configuration: /usr/home/hipo/public_html
[Tue Jan 15 13:09:41 2013] [error] [client 92.96.95.177] client denied by server configuration: /usr/home/hipo/public_html
[Tue Jan 15 13:09:41 2013] [error] [client 92.96.95.177] client denied by server configuration: /usr/home/hipo/public_html

The issue is caused by Apache <Directory> configuration which is restrictive and set to first deny and then apply allow rule, i.e.:


<Directory /usr/home/hipo/public_html>
  Options ExecCGI -Indexes FollowSymLinks
   Allowoverride All
    Order Deny,allow
    Deny from all
    Allow from localhost
    Allow from 123.123.123.123
</Directory>

To solve the problem change default Deny set policy (Deny from all) and first policy to be applied which is Deny to allow;

 <Directory "/usr/home/hipo/public_html">
        Options ExecCGI -Indexes FollowSymLinks
        Allowoverride All
        Order Allow,deny
        Allow from all
        #DirectoryIndex index.cgi
  </Directory>

It is possible to not specify any Order Allow,deny (if there is no previous Apache <Directory> directive to override, so in many  cases you can use;

 <Directory "/usr/home/hipo/public_html">
        Options ExecCGI -Indexes FollowSymLinks
        Allowoverride All
        Allow from all
        #DirectoryIndex index.cgi
  </Directory>

Finally restart Apache and all should be good;

freebsd# /usr/local/etc/rc.d/apache22 restart
....

FreeBSD Desktop: Allow All system users to mount CDROM, DVD, USB Devices and other external devices

Friday, November 16th, 2012

freebsd allow all system users to mount CD DVD USB in GNOME and KDE desktop - freebsd power to serve logo

Users who use FreeBSD for multiple logins Desktop host or in universities multiple login Desktop  shared user PCs will have problems with mounting CD and DVD Roms, Usbs and other external devices. To mount any of those a root or toor superuser  will be required and this makes a really bad impression to the novice users, making them think FreeBSD is user unfriendly, where in reality it was just build to behave so with higher security in mind.
This ruins a whole user GNOME experience and disappoints the end user, especially if the user is just a person who needs to do some browsing and copy few files from and to the host.
This prevents udevd and auto mount in GNOME and  KDE GUI environments to be unable to automatically mount and unmount CD / DVDs and USBS where plugged or unplugged but instead just poping up permission errors whether CD or USB is attached.
Thanksfully, you can change this behavior to make FreeBSD a bit more user friendly and of course 'less secure' by few simple commands 🙂

Here is how:

freebsd# sysctl -w vfs.usermount=1

vfs.usermount: 0 -> 1

echo 'vfs.usermount=1' >> /etc/sysctl.conf

What is required next is to add all devices which will be mountable by all users in /dev/devfs.conf.

To get a list of devices do:
freebsd# camcontrol devlist

at scbus0 target 0 lun 0 (pass0,da0) at scbus1 target 3 lun 0 (pass1,sa0) at scbus1 target 6 lun 0 (pass2,cd0) #

Most USB devices are recognized and assigned as /dev/da0, and almost all CD and DVD Rom devices will be initialized by kernel as /dev/cd0, however if you get something different just set the appropriate vals.

a) Add permission records for CD / DVD ROM in /etc/devfs.conf
freebsd# echo 'own /dev/da0 root:operator' >> /etc/devfs.conf
freebsd# echo 'perm /dev/da00 0666' >> /etc/devfs.conf

b) Add permission records for USBs in /dev/devfs.conf

freebsd# echo '## allow member of operator to mount cdrom' >> /etc/devfs.conf
freebsd# echo 'own /dev/cd0 root:operator' >> /etc/devfs.conf
freebsd# echo 'perm /dev/cd0 0660' >> /etc/devfs.conf

To allow, all present system users to have access to mount USB, CD / DVD roms, it is necessery to add all users to the operator, group. This is a security bad practice as this will make allow all users to have extra permissions to binaries on the system owned or allowed to be accessed by operator group. However for home computers, where you, your sister and a bunch of good friends have accounts, security shouldn't be of a great concern.

If you know well all your users and you have disabled SSH on the system and security is not of top priority run:

freebsd# /usr/local/bin/bash
root@freebsd~# for i in /home/*; do user=$(echo $i|sed -e 's#/home/##g'); do \
pw groupmod operator -m $user; \
done

Onwards, you can check few users to see to see if they are added to operator group

freebsd$ id
uid=1001(hipo) gid=1001(hipo) groups=1001(hipo),0(wheel),5(operator)

Well that's all now your GNOME hal process – (Hardware Abstraction Layer) will be able to manage CD / DVDs and USBs with no more weird errors.

This article was inspired by cybercity's Allow normal users to mount CDROMs DVDs and USB devices. So thanks 'em for being a source of inspiration.

Enjoy 🙂

Convert PDF .pdf to Plain Text .txt files on GNU / Linux and FreeBSD / pdftotext

Friday, November 16th, 2012

Convert PDF .pdf to .txt Plain Text on GNU / Linux Redhat, Debian, CentOS, Fedora and FreeBSD with pdftotext poppler-utils

If you need to convert Adobe PDF to Plain Text on Linux or FreeBSD, you will have to take a look at a poppler-utils – (PDF Utilities).

For those who wonder why you need at all a .PDF in .TXT, I can think of at least 4 good reasons. 
 

PDF to text convertion on Linux and other UNIX-es is possible through a set of tools called poppler-utils

poppler-utils is installable on most Linux distributions on Debian Ubuntu based Linux-es it is installable with the usual:

noah:~# apt-get install --yes poppler-utils
....

On Fedora it is available and installable from default repositories with yum

[root@fedora~]# yum -y install poppler-utils 

On Mandriva Linux:
[root@mandriva~] # urpmi poppler
....

On FreeBSD (and possibly other BSDs) you can install via ports or install it from binary with:

freebsd# pkg_add -vr poppler-utils
....

Here is a list of poppler-utils contents from the .deb Debian package, on other distros and BSD the /bin content tools are same.
noah:~ # dpkg -L poppler-utils|grep -i /usr/bin/
/usr/bin/pdftohtml
/usr/bin/pdfinfo
/usr/bin/pdfimages
/usr/bin/pdftops
/usr/bin/pdftoabw
/usr/bin/pdftoppm
/usr/bin/pdffonts
/usr/bin/pdftotext

1. Converting  .pdf to .txt 

Converting whole PDF document to TXT is done with:

$ pdftotext PeopleWare-Productive_Projects.pdf PeopleWare-Productive_Projects.txt
 
2. Extracting from PDF to Text file only selected pages

 Dumping to .TXT only specific pages from a PDF file: is done through -f and -l arguments (First and Last) pages number.

$ pdftotext -f 3 -l 10 PeopleWare-Productive_Projects.pdf PeopleWare-Productive_Projects.txt

3. Converting PDF to TXT  protected with password

  $ pdftotext -opw 'Password' Password-protected-file.pdf Unprotected-file-dump.txt

the -opw arguments stand for 'Owner Password'. As suggested by man page -opw will bypass all PDF security restrictions. In PDFs there are file permission password protection as well as user password. 

To remove permissions password protection of file

$ pdftotext -upw 'Password' Password-protected-file.pdf Unprotected-file-dump.txt

 
4. Converting .pdf to .txt and setting type of end of file

Depending on the type of Operating System the TEXT file will be red further, you can set the type of end of lines (for those who don't know it here is the 3 major OSes UNIX, Windows, and MAC end of line codes:

DOS & Windows: \r\n 0D0A (hex), 13,10 (decimal)
Unix & Mac OS X: \n, 0A, 10
Macintosh (OS 9): \r, 0D, 13

$ pdftotext -eol unix PeopleWare-Productive_Projects.pdf
PeopleWare-Productive_Projects.txt

The -eol accepts (mac, unix or dos) as options

A bit off topic but very useful thing is to then listen to converted .txt files using festival.

5. Reading .PDF in Linux Text Console and Terminals

$ pdftotext PDF_file_to_Read.pdf -

Btw it is interesting to mention Midnight Commander ( mcview ), component which supports opening .pdf files in console uses pdftotext for extracting PDFs and visualizing in plain text in exactly same way

Well that's it happy convertion.

tmux – FreeBSD, BSD* and Linux alterinative to GNU screen terminal emulator

Thursday, November 1st, 2012

tmux gnu screen (newer) alternative terminal emulator for Linux, FreeBSD, OpenBSD
After my yesterday blog post explaining basis GNU screen use, I've decided to blog a bit more on the topic as I find terminal emulation to be quite interesting 🙂

Just like on on GNU / Linux, GNU Screen is available and installable via FreeBSD port – /usr/ports/sysutils/screen. Though screen is compatible with FreeBSD, it is not from scratch written to run on BSD architecture, but rather ported. Besides, that within the fild of terminal emulation, there are plenty of recent developments and feature richer programs available from install already. One of those I reference is tmux..  tmux's is superior to screen in that it is a re-writen terminal (from scratch) terminal emulator – multiplexer (as referenced in man tmux).

Another fundamental difference is it comes licensed under "less restrictive" BSD license (interesting fact is BSD has only 3 clauses), whether to GNU Screen applies GPLv 2 / 3 (4 freedoms clauses).
Tmux is presently existing for multiple architectures besides BSD including Linux and even as I check in its documentation has support for HP-HX and IRIX.

To install / use tmux on FreeBSD / NetBSD install port /usr/ports/sysutils/tmux with

: freebsd# cd /usr/ports/sysutils/tmux
freebsd# make install clean
....

Installing mux on Debian GNU Linux is available straight from default package repositories, i.e. :

debian:~# apt-get install --yes mux
....

It is inteersting fact to mention, since OpenBSD 4.6 – Mr. Theo De Raddt and friends decided tmux to part of the base system! This means a lot since OpenBSD has always existed with the main ideology to be the most secure UNIX / BSD based OS around. This fact probably means from purely secure stand point tmux might be better choice than gnu screen

Another reason why tmux might be better alternative to Screen for BSD users besides security, is its configuration is much more simplistic whilst compared with Screen. If you have used screen, already you should surely know how complicated things are when it comes to configuration and screen (set) variables.

tmux's pre-defined command bindings are similar to SCREEN's, the difference is instead of Screen's:

CTRL + a + (letter)

key bindings are invoked with:

CTRL + b + (kbd letter)
 

People who already are acustomed to screen (like myself 🙂 )  would not be easy to re-learn use CTRL + b, thus it is helpful to revert default tmux CTRL + b  to screen's CTRL + a.


http://niallohiggins.com/2009/06/04/tmux-a-bsd-alternative-to-gnu-screen/

$ echo 'set -g prefix C-a' >> ~/.tmux.conf
$ echo 'bind-key C-a last-window' >> ~/.tmux.conf

Moving over virtual windows in tmux just like in screen can be done using:

CTRL + a + 1 … 9

One has to be careful, as pressing CTRL + a should be done with a llittle delay before pressing the next letter, otherwise the command does not take affect.
 

Detaching emulated session, in tmux is done like in screen with pressing:

CTRL + a + (d [half a sec delay before pressing])

Attaching to latest detached tmux session is done with:

tmux attach


There are plenty of other stuff and applications but here I will not get in detail as it is all  in man page.


tmux
is great for BSD users,
but for Linux users  byobu is  more interactive and user friendly (out of the box – with no need for extra configs)

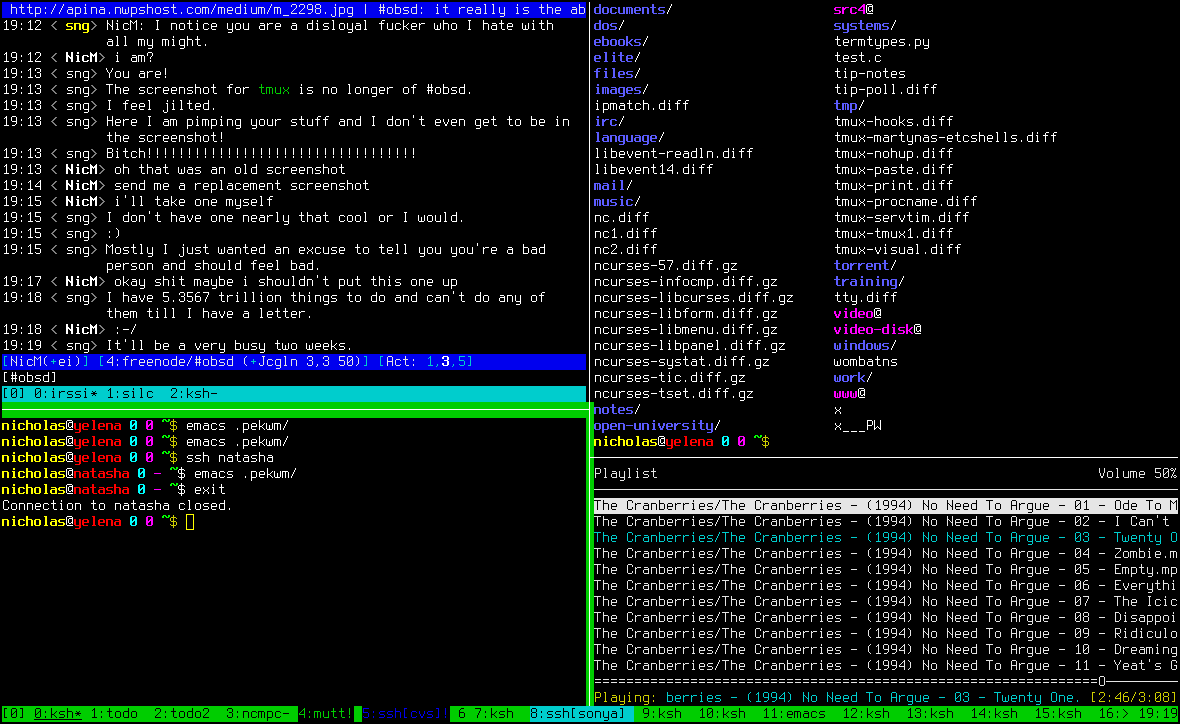
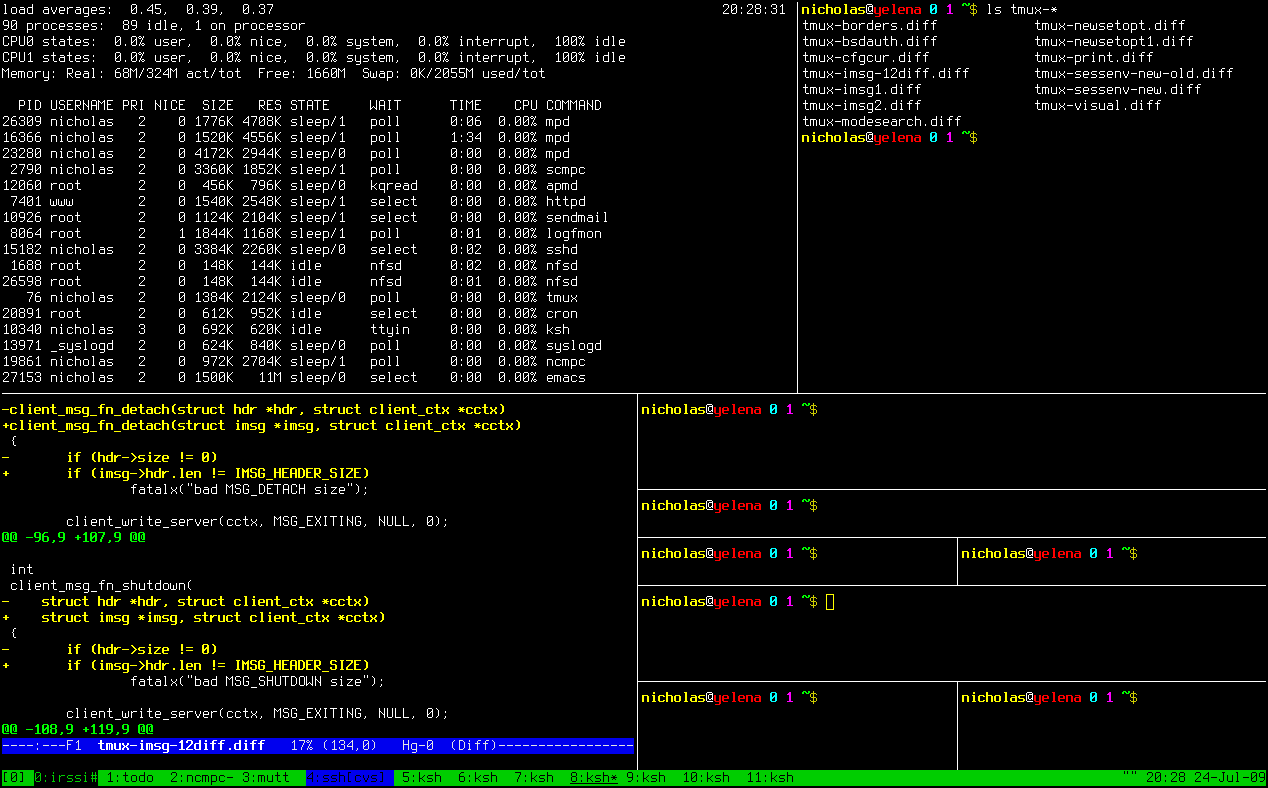
Here are 2 screenshots from tmux website:
advanced tmux use 4 squares split virtual terminals / tmux use screenshot

tmux screenshot with shared multiple wins

How to do (all) install packages binary upgrade FreeBSD 7.2 to FreeBSD 9.0 RELEASE

Wednesday, October 3rd, 2012

FreeBSD binary upgrade portupgrade pkgng pkg_add 7.2 to FreeBSD 9.0 RELEASE how to
In last article I’ve writen how FreeBSD version to version upgrade can be done using, as it is (mostly) mandatory to complete a packages binary upgrade right after the kernel and world update, in this article I will explain how to do BSD binary package upgrade.

Once the BSD boots with a new after succesful:


# freebsd-update upgrade -r 9.0-RELEASE && freebsd-update install

1. Upgrade FreeBSD port tree structure (skele) with latest BSD available,br />
It is necessery either to rebuild all installed packages on System or do a binary upgrade, this is because some of the installed packages might already be linked to older versions of FreeBSD 7.2 [in my case] – (or whatever older version) world you have.

1. Update BSD port tree skele to the latest published on FreeBSD download servers

It is generally wise idea to upgrade your BSD port structure immediately after BSD world and kernel upgrade.
For convenience you can use following ports-supfile (configured to fetch latest FreeBSD) ports directory structure:

Download it in /etc and run csup:


freebsd# cd /etc/
freebsd# wget -q https://www.pc-freak.net/files/ports-supfile
freebsd# csup -g -L 2 /etc/ports-supfile
Parsing supfile "/etc/ports-supfile"
Connecting to cvsup4.de.freebsd.org
Connected to 212.12.50.227
Server software version: SNAP_16_1h
MD5 authentication started
MD5 authentication successful
Negotiating file attribute support
Exchanging collection information
Establishing multiplexed-mode data connection
Running
Updating collection ports-all/cvs
Edit ports/UPDATING
....
....

The port structure upgrade takes me on my Pentium 1.8 Ghz with 1GB ramwith a 20 Mbit connectivity to the internet about 15 minutes; It could vary depending on PC hardware and Internet connectivity as well as to when for a last time the port tree was upgraded (how much new data csup has to fetch to hdd).

2. Re-build ports Index file /usr/ports/INDEX*

Onwards the ports index file needs to be rebuild;


freebsd# make index
Generating INDEX-9 - please wait..
....

Here my make index failed with an error:


*** Error code 1
1 error
********************************************************************
Before reporting this error, verify that you are running a supported
version of FreeBSD (see http://www.FreeBSD.org/ports/) and that you
have a complete and up-to-date ports collection. (INDEX builds are
not supported with partial or out-of-date ports collections -- in
particular, if you are using cvsup, you must cvsup the "ports-all"
collection, and have no "refuse" files.) If that is the case, then
report the failure to ports@FreeBSD.org together with relevant
details of your ports configuration (including FreeBSD version,
your architecture, your environment, and your /etc/make.conf
settings, especially compiler flags and WITH/WITHOUT settings).
Note: the latest pre-generated version of INDEX may be fetched
automatically with "make fetchindex".
********************************************************************
*** Error code 1

Cause this error, I had to update the index with portsnap (get already pre-generated one by another person).

portsnap has other advantages too – it doesn’t take so long time as well as load CPU less than manually building it; even better it takes shorter time to complete. This is why for (ports index updates) on productive servers it might be (probably) better to use portsnap:


freebsd# make fetchindex
/usr/ports/INDEX-9.bz2 100% of 1622 kB 203 kBps
freebsd# ls -al INDEX-*
-rw-r--r-- 1 root wheel 24216397 Mar 14 2011 INDEX-7
-rw-r--r-- 1 root wheel 36006912 Feb 8 2010 INDEX-7.db
-rw-r--r-- 1 root wheel 26526196 Oct 2 14:45 INDEX-9
freebsd# rm -f INDEX-7 INDEX-7.db

3. Do a binary package upgrade of every packages present on previous FreeBSD 7.2 install with portupgrade

It is generally also a good idea to create a dump of all system installed packages with pkg_info, before doing anything else:


freebsd# pkg_info -qoa | sort > /root/packagelist

Since my system is quite, slow I cannot afford to recompile all from BSD ports, thus I used the “old fashioned” portupgrade to complete the binary upgrade:

For “conservative” BSD users it might be better to use portupgrade, to do upgrade all installed packages with it run:


freebsd# rm /var/db/pkg/pkgdb.db && pkgdb -Ffuv && portupgrade -afpRr -m BATCH=yes
....

I got during above portupgrade errors like:


Stale dependency: brasero-2.26.0_1 --> hal-0.5.11_23 -- manually run 'pkgdb -F' to fix, or specify -O to force.

In order to solve this errors, I had to exec:


freebsd# pkgdb -Fa

Then after each time fixing the pkgdb database run:


freebsd# pkgdb -Ffuv && portupgrade -afpRr -m BATCH=yes

Besides portupgrade, the upgrade can be done using other metdhology;

a) Using a few lines shell of bash scripting loop and pkg_info and pkg_add

b) Using pkgng

4. Binary all package upgrade using pkg_info, pkg_delete, pkg_add with a while shell loop

An alternative FreeBSD installed packages upgrade to latest is with standard BSD tools combined with few lines of shell of bash while loop.

This whole update approach is thoroughfully explained in this BSD forum thread .

The update method pointed by the forum can be done by issuing (preferrably in bash shell root console):


root # pkg_info -qoa > /root/packagelist
root # pkg_delete -a -f
root # rm -r -f /boot/modules /usr/local /var/db/pkg
root # while read PKG; do pkg_add -r $( basename ${PKG} ); done < /root/packagelist

The problem with this update approach is if some packages names are changed, some packages might not be able to be found by and (respectively) will fail to fetch and install with pkg_add -r. Thus I personally don’t recommend using this .update method as it is unsafe.

5. Completing packages BSD binary upgrade with pkgng (PKG Next Generation) tool

Install pkgng from respective port, e.g.:


freebsd# cd cd /usr/ports/ports-mgmt/pkg
....
....
/usr/local/man/man8/pkg-remove.8.gz -> /usr/local/man/man8/pkg-delete.8.gz
/usr/local/man/man8/pkg-static.8.gz -> /usr/local/man/man8/pkg.8.gz
===> pkg-static (install)
install -o root -g wheel -m 555 pkg-static /usr/local/sbin
If you are upgrading from the old package format, first run:
# pkg2ng
===> Running ldconfig
/sbin/ldconfig -m /usr/local/lib
===> Registering installation for pkg-1.0.1
===> Cleaning for pkg-1.0.1
freebsd# make install clean
....

Right after installing you can use it and upgrade packs:


freebsd# cp -rpf /usr/local/etc/pkg.conf.sample /usr/local/etc/pkg.conf
freebsd# pkg update
Updating repository catalogue
repo.txz 100% 13MB 771.3KB/s 1.3MB/s 00:17
freebsd# pkg upgrade -fy
...
freebsd# pkg-static update
....
freebsd# pkg-static upgrade -fy

,,,
,,,,

P.S. I tried the pkgng for my first time, for some weird reason I was unable to upgrade my packages with it on 1 host, though literally followed update instructions on Full binary upgrade with pkgng 1.0-beta7 – Bapt tutorial . If someone knows of a better tutorial how update can be done using pkgng drop me a comment or point me to a tutorial.
The overall all packages update experience for me wasn’t so nice as it took me too much of time to upgrade. I like BSD stability but when it comes to updates its a time eater …

How to do world and kernel binary upgrade of FreeBSD 7.2 RELEASE to FreeBSD 9.0

Tuesday, October 2nd, 2012

FreeBSD 7.2 to FreeBSD 9.0 kernel world and kernel binary upgrade fbsd logo

1. Use FreeBSD upgrade with 9.0-RELEASE as an argument


freebsd# freebsd-update upgrade -r 9.0-RELEASE
....

Note that you will get on screen an error message like so:

The update metadata is correctly signed, but failed an integrity check.
Cowardly refusing to proceed any further.

You can safely ignore the message but anyways it is good to do following substitution in freebsd-update sript:

2. Patch freebsd-update script with sed


freebsd# sed -i '' -e 's/=_/=%@_/' /usr/sbin/freebsd-update
....

After that, run freebsd-update, one more time:


freebsd# freebsd-update upgrade -r 9.0-RELEASE
....

3. Confirm merges and changes from 7.2 to 9.0

Here during the upgrade you will be prompted for about 20-30 questions, which in most cases will be okay if you answer with yes. Most questions, are just notifications that in FreeBSD 9.0, some extra users were added some version release numbers are changed and the old files need to get merged with the new ones. It is good idea to read all the prompts and be sure to know what you’re doing before answering. Anyhow in my case I was quite in hurry so I simply did yes and q (to quit each of the diff notification screens pop-ping up after each yes answer.

4. Install all the freebsd-update upgrade fetched binaries

Once this process is completed you can safely install FBSD 9.0 kernel and world binaries:


freebsd# freebsd-update install
....

5. Restart the system to test if FreeBSD 9.0 RELEASE just installed new kernel boots

To test if all is okay with the update restart system:


# shutdown -r now
....

After system boots, do uname and uptime to assure system boots with 9.0 kernel:


freebsd# uptime
7:37PM up 2 days, 22:37, 1 user, load averages: 1.05, 1.02, 1.00
freebsd# uname -a;
FreeBSD freebsd 9.0-RELEASE-p3 FreeBSD 9.0-RELEASE-p3 #0: Tue Jun 12 01:47:53 UTC 2012 root@i386-builder.daemonology.net:/usr/obj/usr/src/sys/GENERIC i386
freebsd#

5. Finalize binary and world upgrade

Then to finalize the binary BSD world and kernel update once again issue:


freebsd# freebsd-update install
...
Please rebuild all installed 3rd party software (e.g., programs
installed from the ports tree) and then run
"/usr/sbin/freebsd-update install" again to
finish installing updates.


freebsd# freebsd-update install
....

That’s all FreeBSD 7.2 -> 9.0 (kernel and world) upgrade is succesful. After the upgrade some packages might not be working and you will have to check and manually update ports which are not working (due to linked to old FreeBSD 7.2 world libraries and so on). It is also good to upgrade all installed ports. I will explain how I did ports upgrade a separate article. Cheers 😉

How to configure Tor Public server on Debian Linux and FreeBSD

Monday, October 1st, 2012

Tor onion running public server on FreeBSD and Debian Ubuntu Gnu / Linux

I like configuring publicly accessible tor on hosts which I own, the reason is because I like very much and want to support the good initiative of Tor Onion Project.

Anonymity on the Internet is becoming harder day after day thus I believe any freedom respecting person should do his best to support any project that aims to help us be anonymous on the net.

Installing even one Tor server at home makes difference and makes Tor Network better. So if you have a spare internet connection somewhere, I kindly ask you start a tor server! Help Tor Project grow – Help protect our anonimity 🙂

After the loud “speech”, here is in short how easy it is to configure Tor Server on Linux and BSD.
Keep in mind installing it as pointed below makes Tor server automatically becomes part of Tor Nodes Network; next time you use tor it is likely you use tor via your own node 🙂

1. Install tor debian package


apt-get --yes install tor

2. Set proper torrc configuration in /etc/tor/torrc

Edit /etc/tor/torrc and place something like:


SocksPort 0 # what port to open for local application connections
SocksListenAddress 127.0.0.1 # accept connections only from localhost
## Required: A unique handle for this server
Nickname pcfreak
ORPort 9001
ExitPolicy reject *:6660-6667,reject *:*
ExitPolicy reject *:* # middle node only -- no exits allowed
# See http://wiki.noreply.org/noreply/TheOnionRouter/TorFAQ#Hibernation
# We have 400GB of traffic per month
# We want that to be about 150GB per week
BandwidthRate 50 KB
BandwidthBurst 1MB
AccountingStart week 1 00:00
AccountingMax 150 GB
DataDirectory /var/lib/tor
RunAsDaemon 1
ContactInfo hip0

3. Allow port in iptables firewall 9001


/sbin/iptables -A INPUT -p tcp -m tcp --dport 9001 -j ACCEPT
/sbin/iptables -A INPUT -p udp -m udp --dport 9001 -j ACCEPT

You might want to permanetly store new iptables settings i.e.:


# iptables-save > /root/iptables.tor.save

4. Restart tor server


# /etc/init.d/tor restart

Run telnet or / nmap to test if your host is reachable via port 9001.


# telnet www.pc-freak.net 9001
Trying 83.228.93.76...
Connected to www.pc-freak.net.
Escape character is '^]'.
Connection closed by foreign host.

Installing Tor Public server on FreeBSD.
Installing tor onion server on FreeBSD is equivalent:


freebsd# cd /usr/ports/security/tor
freebsd# make install && make install clean

Then use you can use exactly same torrc config like in above example it works identically on Linux and BSD.
Here you get same working torrc

On FreeBSD tor is stopped started via /usr/local/etc/rc.d/tor start/stop init script:

Restart it and you’re done on BSD too:


freebsd# /usr/local/etc/rc.d/tor restart
...

Another thing is to allow port 9001, config with packet filter (pf) /etc/pf.conf should be something like:


EXT_IP="192.168.0.2"
EXT_NIC="em0"
pass out log quick on $EXT_NIC proto TCP from any to $EXT_IP port 9001 flags $SYN_ONLY keep state

Once pf options are in restart pf.conf;


freebsd# pfctl -d
No ALTQ support in kernel
ALTQ related functions disabled
freebsd# pfctl -e -f /etc/pf.conf
No ALTQ support in kernel
ALTQ related functions disabled

Enjoy sharing your internet bandwidth with rest of Tor Project network 🙂

How to install binary packages on older FreeBSD releases / Install binary packages on FreeBSD 7.2

Saturday, September 29th, 2012

If you’re in a situation like, me where you run some old verison of FreeBSD and you need to install a bunch of packages let’s say GNOME Desktop environment on a host which before was used as a network router / mail server and general firewall. You will probably be surprised the usual way to install a pre-compiled BSD binaries with pkg_add -vr packagename will no longer work, i.e.:


freebsd# pkg_add -vr gnome2
Error: FTP Unable to get ftp://ftp.freebsd.org/pub/FreeBSD/ports/i386/packages-7.2-release/Latest/gnome2.tbz: File unavailable (e.g., file not found, no access)
pkg_add: unable to fetch 'ftp://ftp.freebsd.org/pub/FreeBSD/ports/i386/packages-7.2-release/Latest/gnome2.tbz' by URL
pkg_add: 1 package addition(s) failed

The reason why binary package fetch and install no longer work is obvious the repository link ftp://ftp.freebsd.org/pub/FreeBSD/ports/i386/packages-7.2-release/Latest/ which was previously working no longer works.

So to install be able to install this already obsolete compiled packages what is neccessery is to explicitly change the FTP location, where the packages will be looked for with a location to a working link corresponding to your FreeBSD version. To make sure the link is working in accordance with your FreeBSD release do a search in Google and get the proper FTP link. My BSD version is RELEASE 7_2, hence after a quick look in Google, I found a binary repository containing packages for my FreeBSd under link:


ftp://ftp-archive.freebsd.org/pub/FreeBSD-Archive/ports/i386/packages-7.2-release/Latest

To change the default set binary .tgz packages repository to the newer correct one for the currently logged in user via tty or over ssh use the csh / bash PACKAGESITE variable.
Whether in csh type:


freebsd# setenv PACKAGESITE ftp://ftp-archive.freebsd.org/pub/FreeBSD-Archive/ports/i386/packages-7.2-release/Latest/

Either if you use Bourne Again (bash) shell type;


[root@freebsd ~]# export PACKAGESITE="ftp://ftp-archive.freebsd.org/pub/FreeBSD-Archive/ports/i386/packages-7.2-release/Latest/"
[root@freebsd ~]#

Just as a matter of fact it is useful to say pkg_add command uses FreeBSD (Linux wget like) fetch to download the pre-compiled binaries. In other words the PACKAGESITE var is understood by fetch command, whether it is looking for some shell exported vars 🙂
To make the new PACKAGESITE setting permanent in csh include it in /root/.cshrc:


echo 'setenv PACKAGESITE ftp://ftp-archive.freebsd.org/pub/FreeBSD-Archive/ports/i386/packages-7.2-release/Latest/' >> /root/.cshrc

If your root user is set to use bash add it to /root/.bashrc


echo 'export PACKAGESITE="ftp://ftp-archive.freebsd.org/pub/FreeBSD-Archive/ports/i386/packages-7.2-release/Latest/"' >> /root/.bashrc

That’s all now you will now be able to install pre-compiled packages via pkg_add 🙂 Enjoy!

Make your Debian Linux and FreeBSD terminal / console display daily verse from KJV Bible

Saturday, September 26th, 2009

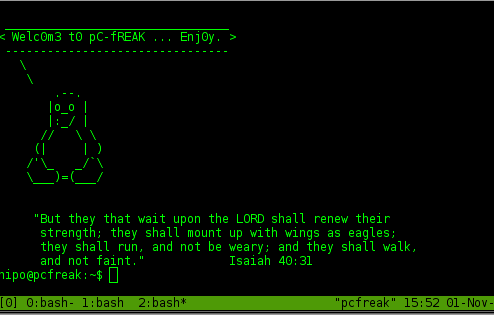
Since I am a Christian and I want to daily be in touch with the Holy Scriptures and I am most of the time spending on my Linux system. I have came to the conclusion that it’s beneficial to
have a daily bible displaying everytime after login in console or terminal in X.

Therefore I thought it might be helpful to somebody out there who would wish to have short sentece of bible on each Linux / FreeBSD machine login.

Here is how to set bible quote to appear everytime after login in Debian Linux:
First install the verse program through:


# apt-get install verse

Next if you want to make the verse display global for the system put :


if [ -f /usr/bin/verse ]; thenecho/usr/bin/verse fi

in /etc/bash.bashrc
On the other hand if you’d like to make it local for your account or a setnumber of accounts on your system append


if [ -f /usr/bin/verse ]; thenecho/usr/bin/verse fi

to your user ~/.bashrc as well as to the home directories of the users you’d like to display a bible verse (if for several users).

If you decide to do that be aware that your login via sftp won’t work anymore – forget about sftp transfers ….

Every time you attempt to login you’ll experience the error message:

“Received message too long”. However that ain’t a real problem for me since I use my system as a desktop and don’t sftp or ssh remotely to my desktop.
In order to prevent this issue where sftp interactivity gets broken it is better to add verse app to execute via /etc/profile i. e. in /etc/profile on top of file add:


if [ -f /usr/bin/verse ]; then echo /usr/bin/verse fi

On FreeBSD the same is achieved a bit differently. Here is how to install it in FreeBSD:

First install fortune program and then install the fortune bible module; In FreeBSD bible quotes are only available via the good old fortune program:

cd /usr/ports/misc/fortune-mod-bible;
make install clean

Next open:the /etc/profile file and insert in the end of it:

echo /usr/games/fortune /usr/local/share/games/fortune/bible

On your next login your FreeBSD should be showing a bible
sentence (quotation) after each and every login.
What is different with Debian’s verse program is that verse keeps displaying one exact quote of the bible during every login for the whole day,
where in FreeBSD the fortune-mod-bible does show a different (random) bible sentence on each and every user login.