Archive for June, 2016

Install and Run Multiple Tomcat and JAVA server instances on single Windows server Howto

Friday, June 17th, 2016

tomcat-windows-install-multiple-tomcats-on-one-single-windows-logo
I've had a task at my work place to install Multiple Tomcat servers on Windows 2012 Server R2 the task seems trivial however I've faced few minor issues and the few searches in Google returned very few articles discussing the topic and this give me the idea that it might be helpful to others to come up with my own article as this might save time for those Linux guys who need to install Multiple Tomcat instances on the same Windows server without spending too much time to dig into the arcane winblows.

I stumbled on some issues during installation  thus took the time to systemize below shortly how I managed to run 2 Tomcat servers on One Windows 2012 R2 machine.
 

First thing to do is to obtain latest compiled Tomcat server archive from Tomcat's official download page here.

Latest Tomcat stable release as of time of writting this article is 7.0.69, so I've downloaded 64 Bit archive (as the server is running X64 Operating system) and unarchived it twice on the Install server under 2 separate directory locations under:


D:\Tomcat\Tomcat_Instance-1


and


D:\Tomcat\Tomcat_Instance-2


Copy of the 7.0.69 X86 tomcat zip archive is here and X64 bit tomcat 7.0.69 is here

Once the files are properly untarred I also needed to download also Java as the WAR application supposed to run on the Windows machine had as requirement Java JDK 8.

Downloading Java is a trivial task, however in my case the server used to be in DMZ (Demiliterized Zone) / Firewalled network and hence instead of using the default Java installer provided from Oracle website which is trying to download from Internet, I had instead to download and use the Offline current JAVA 8u91 version.
Just for sake of some convenience I've made a mirrored version of X86 JAVA 8 (8u91) is here and JAVA 8u91 X64 version here
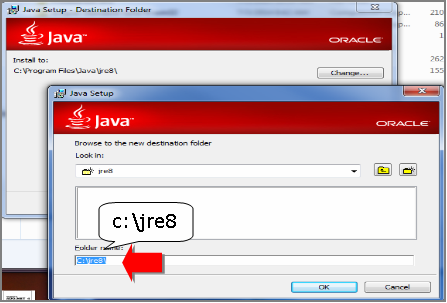
 

install-Java-JDK-and-JRE-8-on-Microsoft-Windows-howto

JAVA JDK install is a trivial task just run the isntaller set the proper locations initially for JDK base folder in my case this was:


D:\Java\jdk


and later throughout during install, I was asked also to fill in full path location for JRE, in my case this was


D:\Java\jre


It was a little bit surprising for me that JRE install path had to be entered and because I was not careful enough I had twice entered the same path for both JRE and JDK, i.e. entered on both prompts:


D:\Java


This caused issues and a messed Java install but I realized that after the 3rd re-install of Java when I decided to also read instead of by habit click Next / Next and Complete the install as used to be in the good old days of Windows XP and Windows 98 🙂

Once Java set up correctly I've tested it with:


C:\Users\georgi> java -version
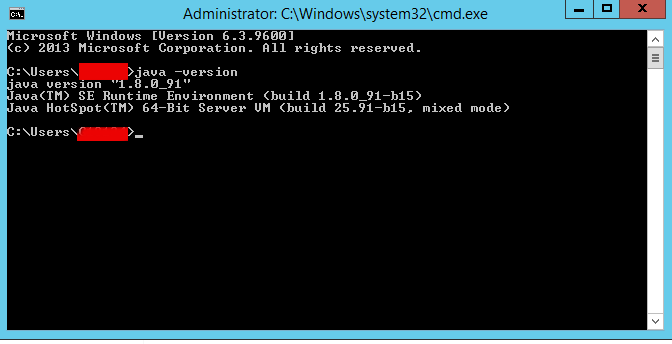


test-java-version-on-microsoft-windows-command-howto-screenshot


It is also necessery to set properly following 2 JAVA command line environment variables:
 

JAVA_HOME
JRE_HOME


On the logged in user Environment Variables with which Tomcat will be running on how to do that check my previous article how to add Environment Variables on Windows


Make sure you have the following 2 environment variables set upped:


JAVA_HOME=D:\Java\jdk


JRE_HOME=D:\Java\jre


For one time set (assuming Java is installed) under D:Javajre and D:Javajdk, you will need to type in command prompt:

set JAVA_HOME=D:\Java\jdk

set JRE_HOME=D:\Java\jre

Once assured Java is running fine I proceeded to run the Tomcat serevrs, in order to make them working it was necessery to change all coinciding Port names under:


conf/server.xml


because if there are coinciding ports (assuming that like me you're trying to run both Tomcat under the same IP address), the servers will fail to run because they're trying to bind under the same Port TCP addresses.

Assuming that the tomcat archive files are copied from .zip into D:TomcatTomcat_Instance-1 and D:TomcatTomcat_Instance-2 folders and you have in each of the 2 the following directory structure:


    /bin : This directory contains the startup and shutdown scripts for both Windows and Linux.
    /conf : This directory contains the main configuration files for Tomcat. The two most important are the server.xml and the global web.xml .
    /server : This directory contains the Tomcat Java Archive files.
    /lib : This directory contains Java Archive files that Tomcat is dependent upon.
    /logs : This directory contains Tomcat’s log files.
    /src : This directory contains the source code used by the Tomcat server. Once Tomcat is released, it will probably contain interfaces and abstract classes only.
    /webapps : All web applications are deployed in this directory; it contains the WAR file.
    /work : This is the directory in which Tomcat will place all servlets that are generated from JSPs. If you want to see exactly how a particular JSP is interpreted, look in this directory.


You will need to edit server.xml in both of the Tomcats and make sure the configuration for ports is not coinciding, i.e., I've changed the following configurations for Tomcat_Instance-2 installation:


    Connector Port : This is the port where Apache Tomcat listen for the HTTP requests. Default port is 8080, I've changed this to 8089 for second Tomcat server
    Shutdown Port : This port is used when we try to shutdown the Apache Tomcat Server. Default port is 8005 so changed that to 8006 in Tomcat_Instance-2
    AJP (Apache JServ Protocol) Connector Port : The Apache JServ Protocol (AJP) is a binary protocol that can conduct inbound requests from a web server through to an application server that sits behind the web server.
I've commented out the configuration for AJP completely and used for my custom needs the following server.xml configuration:

<Connector port="11111" address="10.251.27.24" protocol="AJP/1.3" enableLookups="false"/>

    Redirect Port : Any redirection happening inside Apache Tomcat will happen through this port. In Apache TOMCAT there are two instance where redirect Port is mentioned. First one is for the Apache TOMCAT server and other one is for the AJP port. Default here is port 8443 so changed that one to to listen to 8444 instead.


Another thing necessery to do is to create setenv.bat file under both D:\TomcatTomcat_Instance-1\bin and D:\Tomcat\Tomcat_Instance-2\bin with following content:
 

set JRE_HOME=D:\java\jre
set JAVA_HOME=d:\java\jdk
exit /b 0


The quickest way to do it without bothering with Notepad text editor is by issuing:


cd tomcat\Tomcat_Instance1\bin
echo set JRE_HOME=D:\java\jre > setenv.bat
echo set JAVA_HOME=D:javajdk >> setenv.bat


cd tomcat\Tomcat_Instance2\bin
echo set JRE_HOME=D:\java\jre > setenv.bat
echo set JAVA_HOME=D:\java\jdk >> setenv.bat


The setenv.sh is a standard variables file read by Tomcat on Instance start up time
 

Next part of Tomcat installation is to install each of the 2 instances after defining CATALINA_BASE to point to first and second Tomcat instance directories, e.g open a Command Prompt (cmd.exe) and run there:


set CATALINA_BASE=D:\Tomcat\Tomcat_Instance-1

C:|> d:

D:|> cd Tomcat\Tomcat_Instance-1\bin


D:Tomcat\Tomcat_Instance-1\bin> service install Tomcat_Instance-1


You will get output like:


Using CATALINA_BASE:   " D:\Tomcat\Tomcat_Instance-1"
Using CATALINA_HOME:   " D:\Tomcat\Tomcat_Instance-1"
Using CATALINA_TMPDIR: " D:\TomcatTomcat_Instance-1\temp"
Using JRE_HOME:        "D:\java\jre"
Using CLASSPATH:       "D:\Tomcat\Tomcat_Instance-1\bin\bootstrap.jar; D:\Tomcat\Tomcat_Instance-1\bin\tomcat-juli.jar"


Then for the second Tomcat server instance run in command prompt:


set CATALINA_BASE=D:\Tomcat\Tomcat_Instance-2

d:

cd Tomcat\Tomcat_Instance-2\bin
service install Tomcat_Instance-2

Using CATALINA_BASE:   " D:\Tomcat\Tomcat_Instance-2"
Using CATALINA_HOME:   " D:\Tomcat\Tomcat_Instance-2"
Using CATALINA_TMPDIR: " D:\Tomcat\Tomcat_Instance-2\temp"
Using JRE_HOME:        "D:\java\jre"
Using CLASSPATH:       "D:\Tomcat\Tomcat_Instance-1\bin\bootstrap.jar; D:\TomcatTomcat_Instance-2\bin\tomcat-juli.jar"
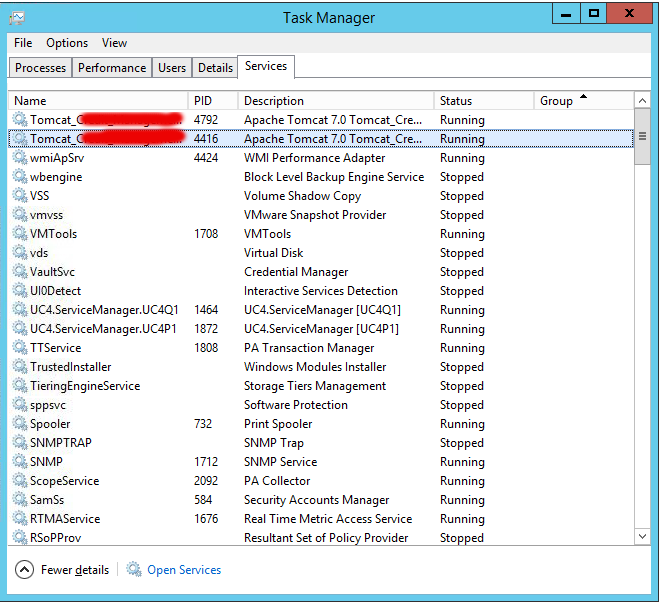
windows-running-two-tomcat-instances-on-the-same-single-server-screenshot


Here is all the service.bat batch file parameters:


D:\Tomcat\Tomcat_Instance-11\bin>service.bat /
?
Unknown parameter "/?"


Usage: service.bat install/remove [service_name] [/user username]


To test both Tomcat servers where they run simultaneously without issues, I run in 2 separate command prompts – opened (cmd.exe) two times and run in each of them:

What this little command does is uses Tomcat7.exe command to Add / Remove / Modify the Tomcat instance into Windows Services, the same can be happily done also with the good old
sc (service configure) windows command.


D:

cd Tomcat\Tomcat_Instance-1\bin\startup.bat

D:

cd Tomcat\Tomcat_Instance-2\bin\startup.bat
 

Both executed without errors in command line and to stop them I've pressed the usual CTRL+C.
To make sure once again both server instances ran wihtout errors, I've checked in D:TomcatTomcat_Instance-{1,2}logs/catalina*.log and in both of them all looked fine.
Another good check if you want to be 10000% sure Tomcat is running is to look up for Tomcat listening on above configured ports, for example run below in cmd:


D:Tomcat> netstat -a|findstr "8080"


I've also used the 2 following command to set up proper Services description for both of services:


D:\Tomcat\Tomcat_Instance-1\tomcat7 //US//Tomcat_Instance1 –Description="Apache Tomcat Server – Tomcat-Instance1.my-site.com"

D:\Tomcat\Instance_Instance-2\tomcat7 //US//Tomcat_Instance2 –Description="Apache Tomcat Server – Tomcat-Instance2.my-site.com "


A very helpful resource during the Apache (Windows Service) instance install / setup /modification that helped me is on Tomcat's official site here
 

N! B! Very important note to make here for anyone experiencing strange issues when trying to add multiple issues is below:

I've experienced some issues while trying to add the 2 Tomcat servers into Windows services initially with tomcat7.exe command like so:

Trying installing Tomcat71 service with cmd:
 

 tomcat7 //IS//Tomcat71 –DisplayName="Apache Tomcat 7" ^
     –Install="D:\Tomcat\Tomcat_Instance-1\bin\tomcat7.exe" –Jvm=auto ^
     –StartMode=jvm –StopMode=jvm ^
     –StartClass=org.apache.catalina.startup.Bootstrap –StartParams=start ^
     –StopClass=org.apache.catalina.startup.Bootstrap –StopParams=stop


And Tomcat72 instance with cmd:
 

 tomcat7 //IS//Tomcat71 –DisplayName="Apache Tomcat 7" ^
     –Install="D:\Tomcat\Tomcat_Instance-2\bin\tomcat7.exe" –Jvm=auto ^
     –StartMode=jvm –StopMode=jvm ^
     –StartClass=org.apache.catalina.startup.Bootstrap –StartParams=start ^
     –StopClass=org.apache.catalina.startup.Bootstrap –StopParams=stop


I've tried multiplet imes to Add and remove the Tomcat71 and Tomcat72 Windows service names (with) Tomcat DS (Delete Service)
 

tomcat7 //DS/Tomcat71
tomcat7 //DS/Tomcat72


And strangely the two instances were continuously crashing when I tried to start them (with Properties button and Start instruction) from Windows Task Manager (taskmgr.exe) -> Services

Finally I realized the issue is caused by some problems that somehow occured with Windows Service Names Tomcat71 and Tomcat72 by simply readding the two instances under another name the instances stopped crashing and all worked thanks to help of colleague Anatoliy who pointed me tot he problem by trying to install his own instances under a different service name).

Thanks God finally the 2 instances run fine !


Install and make Apache + PHP to work with PosgreSQL database server on Debian Linux and set up server Web Posgre interface Pgpadmin howto

Wednesday, June 15th, 2016

make-apache-php-work-with-postgresql-pgsql-and-install-postgresql-db-web-admin-interface

In previous article I've wrote on how to install postgresql on Debian Linux using the deb repository this was necessery to import some PostGres DBs, however this was not enough to run the posgresql php based website aimed as connection from Apache / PHP module to PostGre was failing after a bit of investigation and a check in phpinfo(); I've realized the module PHP module for postgres pgsql.so was missing, here is what I did in order to install it:
 

debian:~# apt-get install php5-pgsql phppgadmin libapache2-mod-auth-pgsql 

PHP sessions enable configuration

As it is common a common problem with PHP applications written to use PostGres is to loose sessions and by default PHP does not have configured sessions.save_path it is a very good practice to directly enable it in /etc/php5/apache2/php.ini open the file in text editor:
 

debian:~# vim /etc/php5/apache2/php.ini


Find the commented directive line:
 

;session.save_path = “/tmp”


and uncomment it, i.e.:
 

session.save_path = “/tmp”


Quit saving vim with the usual :wq!

The 3 modules provides pgsql.so for PHP and mod_auth_pgsql.so for Apache2, the 3rd packae phpgadmin provides a Web administration interface for installed PostgreSQL servers Databases, for those experienced with MySQL Database its the same as PHPMyAdmin.


 Here is quick configuration for use of PostgreAdmin interface:

By default PHPPGADMIN installation process configure the Apache2 server' /etc/phppgadmin/apache.conf  to use  /etc/apache2/conf.d/phppgadmin


Here is the default my server package instaleld  file content:


Alias /phppgadmin /usr/share/phppgadmin

<Directory /usr/share/phppgadmin>

DirectoryIndex index.php
AllowOverride None

order deny,allow
deny from all
allow from 127.0.0.0/255.0.0.0 ::1/128
# allow from all

<IfModule mod_php5.c>
  php_flag magic_quotes_gpc Off
  php_flag track_vars On
  #php_value include_path .
</IfModule>
<IfModule !mod_php5.c>
  <IfModule mod_actions.c>
    <IfModule mod_cgi.c>
      AddType application/x-httpd-php .php
      Action application/x-httpd-php /cgi-bin/php
    </IfModule>
    <IfModule mod_cgid.c>
      AddType application/x-httpd-php .php
      Action application/x-httpd-php /cgi-bin/php
    </IfModule>
  </IfModule>
</IfModule>

</Directory>

It is generally a good practice to change the default Alias location of phppgadmin, so edit the file and change it to something like:
 

Alias /phppostgresgadmin /usr/share/phppgadmin


  • Then phpPgAdmin is available at http://servername.com/phppostgresadmin (only from localhost, however in my case I wanted to be able to access it also from other hosts so allowed PostgresGadmin from every hosts, to do so, I've commented in above config


# allow from 127.0.0.0/255.0.0.0 ::1/128


and uncommented #allow from all line, e.g.:
 

allow from all


Also another thing here is in your VirtualHost whenever you plan to access the PHPPGADMIN is to include in config ( in my case this is the file /etc/apache2/sites-enabled/000-default before (</VirtualHost> end line) following Alias:
 

Alias /phpposgreadmin /usr/share/phppgadmin


Then to access PostGreSQL PHP Admin interface in Firefox / Chrome open URL:


http://your-default-domain.com/phpposgreadmin

phpPgAdmin-postgresql-php-web-interface-debian-linux-screenshot


Configure access to a remote PostgreSQL Server

With PhpPgAdmin, you can manage many PostgreSQL servers locally (on the localhost) or on remote hosts.

First, you have to make sure that the distant PostgreSQL server can handle your request, that you can connect to it. You can do this by modifying the /etc/postgresql/9.5/main/filepg_hba.conf and adding a line like:

# PhpPgAdmin server access host all db_admin xx.xx.xx.xx 255.255.255.255 md5

Then, you need to add your distant PostgreSQL server into the config file for PhpPgAdmin. This file is  /etc/phppgadmin/config.inc.php the default postgresql port is 5432, however you might have configured it already to use some different port if you're not sure about the port number the postgresql is listening check it out:


debian:~# grep -i port /etc/postgresql/*/main/postgresql.conf
etc/postgresql/9.5/main/postgresql.conf:port = 5433                # (change requires restart)
/etc/postgresql/9.5/main/postgresql.conf:                    # supported by the operating system:
/etc/postgresql/9.5/main/postgresql.conf:# ERROR REPORTING AND LOGGING


To login to phppgadmin interface there is no root administrator user such as in PHP so you will need to priorly create some user and later use it for connection from Postgres Web interface.

To create from console new user in postgres:
 

debian:~# su – postgres
posgres@debian:~$ psql template1
posgres@debian:~$ psql -d template1 -U postgres


Welcome to psql 9.5, the PostgreSQL interactive terminal. Type: \copyright for distribution terms \h for help with SQL commands \? for help on internal slash commands \g or terminate with semicolon to execute query \q to quit template1=#

template1=# CREATE USER MyNewUser WITH PASSWORD 'myPassword';


To add a new database to postgres from shell:

template1=# CREATE DATABASE NewDatabase;
 

template1=# GRANT ALL PRIVILEGES ON DATABASE NewDatabase to MyNewUser;


template1=# q

Last command instructs it to quit if you want to get more info about possible commands do type instead of q ? for general help or for database / table commands only h
If you need to connect to NewDatabase just to test first it works in console before trying it from postgrepgadmin


posgres@debian:~$ psql -d NewDatabase -U MyNewUser


Install postgresql on Debian Squeeze / How to install PostGreSQL on Obsolete Debian installation

Friday, June 10th, 2016

how-to-install-postgresql-on-obsolete-old-debian-squeeze-tutorial

If you're in position like me to be running an old version of Debian (Squeeze) and you need to install PostgreSQL you will notice that the Debian 6.0 standard repositories are no longer active and apt-get update && apt-get upgrade are returning errors, thus because this Debian release is already too old and even the LTS repositories are inactive it is impossible to install postgresql with the usual.

To get around the situation first thing I did was to try to add followin Debian  repositories. to /etc/apt/sources.list
 

deb http://ftp.debian.net/debian-backports squeeze-backports-sloppy main
deb http://archive.debian.org/debian-archive/debian/ squeeze main contrib non-free
deb http://archive.debian.org/debian-archive/debian/ squeeze-lts main contrib non-free

After adding it I continued getting missing package errors while trying:
 

# apt-get update && apt-get install postgresql postgresql-client
….
…..


E: Some index files failed to download. They have been ignored, or old ones used instead.


Thus I googled a bit and I found the following PostgreSQL instructions working Debian 7.0 Wheeze and decided to try it 1 in 1 just changing the repository package wheezy word with squeeze
in original tutorial postgre's deb repositories are:


deb http://apt.postgresql.org/pub/repos/apt/ wheezy-pgdg main


I've only changed that one with:


deb http://apt.postgresql.org/pub/repos/apt/ squeeze-pgdg main


I guess though this worked for Debian Squeeze installing current versions such as Debian 8.0 Jessis and newer wouldn't be a prolem if you just change the debian version keyword witht he distribution for which you need the postgresql package


Here is all the consequential steps I took to make the PostgreSQL 9.5 running on my old and unsupported Debian 6.0 Squeeze

Create /etc/apt/sources.list.d/pgdg.list. The distributions are called codename-pgdg. In the example, replace wheezy with the actual distribution you are using:

# vim /etc/apt/sources.list.d/pgdg.list


deb http://apt.postgresql.org/pub/repos/apt/ squeeze-pgdg main

debian:~# apt-get –yes install wget ca-certificates debian:~# wget –quiet -O – https://www.postgresql.org/media/keys/ACCC4CF8.asc | sudo apt-key add – debian:~# apt-get update debian:~# apt-get upgrade debian:~# apt-get –yes install postgresql-9.5 pgadmin3

Next step is to connect to PostGreSQL and create database user and a database # su – postgres $ psql

Create a new database user and a database:

postgres=# CREATE USER mypguser WITH PASSWORD 'mypguserpass'; postgres=# CREATE DATABASE mypgdatabase OWNER mypguser;


or

# createuser mypguser #from regular shell # createdb -O mypguser mypgdatabase

Quit from the database

postgres=# q

Connect as user mypguser to new database

# su – mypguser $ psql mypgdatabase

or

# psql -d mypgdatabase -U mypguser

If you get errors like:

psql: FATAL: Ident authentication failed for user "mypguser"

edit pg_hba.conf in /etc/postgresql/9.5.Y/main/pg_hba.conf


local all all trust # replace ident or peer with trust

reload postgresql

/etc/init.d/postgresql reload …


To make sure that PostGreSQL is running on the system check the following processes are present on the server:


root@pcfreak:/var/www/images# ps axu|grep -i post postgres 9893 0.0 0.0 318696 16172 ? S 15:20 0:00 /usr/lib/postgresql/9.5/bin/postgres -D /var/lib/postgresql/9.5/main -c config_file=/etc/postgresql/9.5/main/postgresql.conf postgres 9895 0.0 0.0 318696 1768 ? Ss 15:20 0:00 postgres: checkpointer process postgres 9896 0.0 0.0 318696 2700 ? Ss 15:20 0:00 postgres: writer process postgres 9897 0.0 0.0 318696 1708 ? Ss 15:20 0:00 postgres: wal writer process postgres 9898 0.0 0.0 319132 2564 ? Ss 15:20 0:00 postgres: autovacuum launcher process postgres 9899 0.0 0.0 173680 1652 ? Ss 15:20 0:00 postgres: stats collector process root 14117 0.0 0.0 112404 924 pts/1 S+ 16:09 0:00 grep -i post


Well that's all folks now you will have the postgresql running on its default port 5433:


debian:/etc/postgresql/9.5/main# grep -i port postgresql.conf
port = 5433 # (change requires restart)
# supported by the operating system:
# ERROR REPORTING AND LOGGING # %r = remote host and port


Well that's it folks thanks The Lord Jesus Christ grace by the prayers of John The Baptist and Saint Sergij Radonezhki it works 🙂


Adobe PDF Reader Mac OS X disable (Automatic) Update annoying prompt popping up every now and then

Wednesday, June 8th, 2016

Adobe-Reader-icon

Generally recent'y I've been more and more convinced the less you update the better. I've recently installed Adobe Reader on the Mac Book Air of Svetlana, cause I still have some illusions some PDFs are visible more clearly with Adobe. And soon I was unpleasently suprised that once installed Adobe automatically added auto-update service to the Mac and an auto-update policy that is popping up all the time with offers to update.

This could get crazy every normal person that prefer to not update software so often. There are not much people I know of that like to be puzzled on every next release about the new functionality he don't need anyways but I guess adobe's company aggressiveness escalated nowadays.

Thanksfully as I've googled quickly I found the fix on the common site for Mac problems Mac OS X Daily here

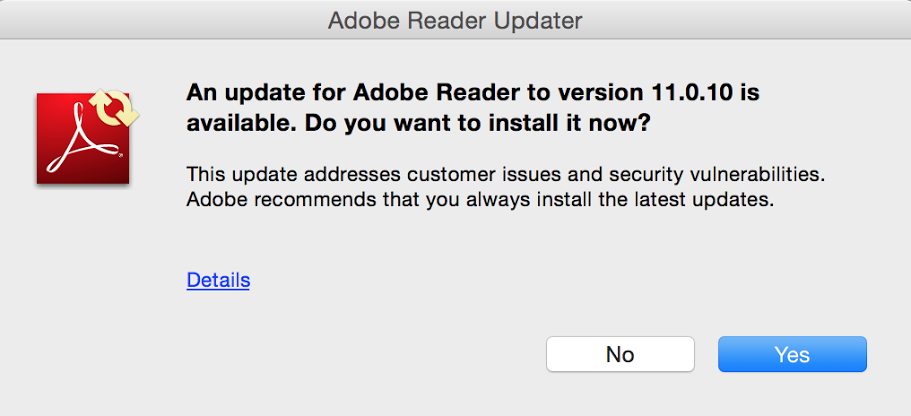
FlashUpdateNotification_annoying-prompt-how-to-disable

To get rid of the m'f'in Automatic Adobe Reader update


 Launch Terminal (located in /Applications/Utilities/)
* At the command prompt, paste this command exactly

defaults write com.adobe.AdobeUpdater.Admin Disable.Update -bool yes

* Hit return to execute the command 

You will get no output but anyways this nice command will have created for you inside your home directory (/Library/Preferences/) the file Preferences/com.adobe.AdobeUpdater.Admin.plist

You check the file's existence with command:


svetlana@localhost:~$ ls -al ~/Library/Preferences/com.adobe.AdobeUpdater.Admin.plist
-rw——-  1 svetlana  staff  62 Jun  6 19:52 /Users/svetlana/Library/Preferences/com.adobe.AdobeUpdater.Admin.plist


The conent of the file is simple it sets a boolean valiable of Disable.Update to True 


cat ~/Library/Preferences/com.adobe.AdobeUpdater.Admin.plist
bplist00?^Disable.Update


This will guarantee you that rebooting your Mac (which I guess was some 6 months ago or just a simple user logging out will not prompt you with the sh*tty annoying Adobe Update Manager