Posts Tagged ‘list’

How to RPM update Hypervisors and Virtual Machines running Haproxy High Availability cluster on KVM, Virtuozzo without a downtime on RHEL / CentOS Linux

Friday, May 20th, 2022

virtuozzo-kvm-virtual-machines-and-hypervisor-update-manual-haproxy-logo


Here is the scenario, lets say you have on your daily task list two Hypervisor (HV) hosts running CentOS or RHEL Linux with KVM or Virutozzo technology and inside the HV hosts you have configured at least 2 pairs of virtual machines one residing on HV Host 1 and one residing on HV Host 2 and you need to constantly keep the hosts to the latest distribution major release security patchset.

The Virtual Machines has been running another set of Redhat Linux or CentOS configured to work in a High Availability Cluster running Haproxy / Apache / Postfix or any other kind of HA solution on top of corosync / keepalived or whatever application cluster scripts Free or Open Source technology that supports a switch between clustered Application nodes.

The logical question comes how to keep up the CentOS / RHEL Machines uptodate without interfering with the operations of the Applications running on the cluster?

Assuming that the 2 or more machines are configured to run in Active / Passive App member mode, e.g. one machine is Active at any time and the other is always Passive, a switch is possible between the Active and Passive node.

HAProxy--Load-Balancer-cluster-2-nodes-your-Servers

In this article I'll give a simple step by step tested example on how you I succeeded to update (for security reasons) up to the latest available Distribution major release patchset on one by one first the Clustered App on Virtual Machines 1 and VM2 on Linux Hypervisor Host 1. Then the App cluster VM 1 / VM 2 on Hypervisor Host 2.
And finally update the Hypervisor1 (after moving the Active resources from it to Hypervisor2) and updating the Hypervisor2 after moving the App running resources back on HV1.
I know the procedure is a bit monotonic but it tries to go through everything step by step to try to mitigate any possible problems. In case of failure of some rpm dependencies during yum / dnf tool updates you can always revert to backups so in anyways don't forget to have a fully functional backup of each of the HV hosts and the VMs somewhere on a separate machine before proceeding further, any possible failures due to following my aritcle literally is your responsibility 🙂


0. Check situation before the update on HVs / get VM IDs etc.

Check the virsion of each of the machines to be updated both Hypervisor and Hosted VMs, on each machine run:
 

# cat /etc/redhat-release
CentOS Linux release 7.9.2009 (Core)


The machine setup I'll be dealing with is as follows:
 

hypervisor-host1 -> hypervisor-host1.fqdn.com 
•    virt-mach-centos1
•    virt-machine-zabbix-proxy-centos (zabbix proxy)

hypervisor-host2 -> hypervisor-host2.fqdn.com
•    virt-mach-centos2
•    virt-machine-zabbix2-proxy-centos (zabbix proxy)

To check what is yours check out with virsh cmd –if on KVM or with prlctl if using Virutozzo, you should get something like:

[root@hypervisor-host2 ~]# virsh list
 Id Name State
—————————————————-
 1 vm-host1 running
 2 virt-mach-centos2 running

 # virsh list –all

[root@hypervisor-host1 ~]# virsh list
 Id Name State
—————————————————-
 1 vm-host2 running
 3 virt-mach-centos1 running

[root@hypervisor-host1 ~]# prlctl list
UUID                                    STATUS       IP_ADDR         T  NAME
{dc37c201-08c9-589d-aa20-9386d63ce3f3}  running      –               VM virt-mach-centos1
{76e8a5f8-caa8-5442-830e-aa4bfe8d42d9}  running      –               VM vm-host2
[root@hypervisor-host1 ~]#

If you have stopped VMs with Virtuozzo to list the stopped ones as well.
 

# prlctl list -a

[root@hypervisor-host2 74a7bbe8-9245-5385-ac0d-d10299100789]# vzlist -a
                                CTID      NPROC STATUS    IP_ADDR         HOSTNAME
[root@hypervisor-host2 74a7bbe8-9245-5385-ac0d-d10299100789]# prlctl list
UUID                                    STATUS       IP_ADDR         T  NAME
{92075803-a4ce-5ec0-a3d8-9ee83d85fc76}  running      –               VM virt-mach-centos2
{74a7bbe8-9245-5385-ac0d-d10299100789}  running      –               VM vm-host1

# prlctl list -a


If due to Virtuozzo version above command does not return you can manually check in the VM located folder, VM ID etc.
 

[root@hypervisor-host2 vmprivate]# ls
74a7bbe8-9245-4385-ac0d-d10299100789  92075803-a4ce-4ec0-a3d8-9ee83d85fc76
[root@hypervisor-host2 vmprivate]# pwd
/vz/vmprivate
[root@hypervisor-host2 vmprivate]#


[root@hypervisor-host1 ~]# ls -al /vz/vmprivate/
total 20
drwxr-x—. 5 root root 4096 Feb 14  2019 .
drwxr-xr-x. 7 root root 4096 Feb 13  2019 ..
drwxr-x–x. 4 root root 4096 Feb 18  2019 1c863dfc-1deb-493c-820f-3005a0457627
drwxr-x–x. 4 root root 4096 Feb 14  2019 76e8a5f8-caa8-4442-830e-aa4bfe8d42d9
drwxr-x–x. 4 root root 4096 Feb 14  2019 dc37c201-08c9-489d-aa20-9386d63ce3f3
[root@hypervisor-host1 ~]#


Before doing anything with the VMs, also don't forget to check the Hypervisor hosts has enough space, otherwise you'll get in big troubles !
 

[root@hypervisor-host2 vmprivate]# df -h
Filesystem                       Size  Used Avail Use% Mounted on
/dev/mapper/centos_hypervisor-host2-root   20G  1.8G   17G  10% /
devtmpfs                          20G     0   20G   0% /dev
tmpfs                             20G     0   20G   0% /dev/shm
tmpfs                             20G  2.0G   18G  11% /run
tmpfs                             20G     0   20G   0% /sys/fs/cgroup
/dev/sda1                        992M  159M  766M  18% /boot
/dev/mapper/centos_hypervisor-host2-home  9.8G   37M  9.2G   1% /home
/dev/mapper/centos_hypervisor-host2-var   9.8G  355M  8.9G   4% /var
/dev/mapper/centos_hypervisor-host2-vz    755G   25G  692G   4% /vz


[root@hypervisor-host1 ~]# df -h
Filesystem               Size  Used Avail Use% Mounted on
/dev/mapper/centos-root   50G  1.8G   45G   4% /
devtmpfs                  20G     0   20G   0% /dev
tmpfs                     20G     0   20G   0% /dev/shm
tmpfs                     20G  2.1G   18G  11% /run
tmpfs                     20G     0   20G   0% /sys/fs/cgroup
/dev/sda2                992M  153M  772M  17% /boot
/dev/mapper/centos-home  9.8G   37M  9.2G   1% /home
/dev/mapper/centos-var   9.8G  406M  8.9G   5% /var
/dev/mapper/centos-vz    689G   12G  643G   2% /vz

Another thing to do before proceeding with update is to check and tune if needed the amount of CentOS repositories used, before doing anything with yum.
 

[root@hypervisor-host2 yum.repos.d]# ls -al
total 68
drwxr-xr-x.   2 root root  4096 Oct  6 13:13 .
drwxr-xr-x. 110 root root 12288 Oct  7 11:13 ..
-rw-r–r–.   1 root root  4382 Mar 14  2019 CentOS7.repo
-rw-r–r–.   1 root root  1664 Sep  5  2019 CentOS-Base.repo
-rw-r–r–.   1 root root  1309 Sep  5  2019 CentOS-CR.repo
-rw-r–r–.   1 root root   649 Sep  5  2019 CentOS-Debuginfo.repo
-rw-r–r–.   1 root root   314 Sep  5  2019 CentOS-fasttrack.repo
-rw-r–r–.   1 root root   630 Sep  5  2019 CentOS-Media.repo
-rw-r–r–.   1 root root  1331 Sep  5  2019 CentOS-Sources.repo
-rw-r–r–.   1 root root  6639 Sep  5  2019 CentOS-Vault.repo
-rw-r–r–.   1 root root  1303 Mar 14  2019 factory.repo
-rw-r–r–.   1 root root   666 Sep  8 10:13 openvz.repo
[root@hypervisor-host2 yum.repos.d]#


[root@hypervisor-host1 yum.repos.d]# ls -al
total 68
drwxr-xr-x.   2 root root  4096 Oct  6 13:13 .
drwxr-xr-x. 112 root root 12288 Oct  7 11:09 ..
-rw-r–r–.   1 root root  1664 Sep  5  2019 CentOS-Base.repo
-rw-r–r–.   1 root root  1309 Sep  5  2019 CentOS-CR.repo
-rw-r–r–.   1 root root   649 Sep  5  2019 CentOS-Debuginfo.repo
-rw-r–r–.   1 root root   314 Sep  5  2019 CentOS-fasttrack.repo
-rw-r–r–.   1 root root   630 Sep  5  2019 CentOS-Media.repo
-rw-r–r–.   1 root root  1331 Sep  5  2019 CentOS-Sources.repo
-rw-r–r–.   1 root root  6639 Sep  5  2019 CentOS-Vault.repo
-rw-r–r–.   1 root root  1303 Mar 14  2019 factory.repo
-rw-r–r–.   1 root root   300 Mar 14  2019 obsoleted_tmpls.repo
-rw-r–r–.   1 root root   666 Sep  8 10:13 openvz.repo


1. Dump VM definition XMs (to have it in case if it gets wiped during update)

There is always a possibility that something will fail during the update and you might be unable to restore back to the old version of the Virtual Machine due to some config misconfigurations or whatever thus a very good idea, before proceeding to modify the working VMs is to use KVM's virsh and dump the exact set of XML configuration that makes the VM roll properly.

To do so:
Check a little bit up in the article how we have listed the IDs that are part of the directory containing the VM.
 

[root@hypervisor-host1 ]# virsh dumpxml (Id of VM virt-mach-centos1 ) > /root/virt-mach-centos1_config_bak.xml
[root@hypervisor-host2 ]# virsh dumpxml (Id of VM virt-mach-centos2) > /root/virt-mach-centos2_config_bak.xml


2. Set on standby virt-mach-centos1 (virt-mach-centos1)

As I'm upgrading two machines that are configured to run an haproxy corosync cluster, before proceeding to update the active host, we have to switch off
the proxied traffic from node1 to node2, – e.g. standby the active node, so the cluster can move up the traffic to other available node.
 

[root@virt-mach-centos1 ~]# pcs cluster standby virt-mach-centos1


3. Stop VM virt-mach-centos1 & backup on Hypervisor host (hypervisor-host1) for VM1

Another prevention step to make sure you don't get into damaged VM or broken haproxy cluster after the upgrade is to of course backup 


[root@hypervisor-host1 ]# prlctl backup virt-mach-centos1

or
 

[root@hypervisor-host1 ]# prlctl stop virt-mach-centos1
[root@hypervisor-host1 ]# cp -rpf /vz/vmprivate/dc37c201-08c9-489d-aa20-9386d63ce3f3 /vz/vmprivate/dc37c201-08c9-489d-aa20-9386d63ce3f3-bak
[root@hypervisor-host1 ]# tar -czvf virt-mach-centos1_vm_virt-mach-centos1.tar.gz /vz/vmprivate/dc37c201-08c9-489d-aa20-9386d63ce3f3

[root@hypervisor-host1 ]# prlctl start virt-mach-centos1


4. Remove package version locks on all hosts

If you're using package locking to prevent some other colleague to not accidently upgrade the machine (if multiple sysadmins are managing the host), you might use the RPM package locking meachanism, if that is used check RPM packs that are locked and release the locking.

+ List actual list of locked packages

[root@hypervisor-host1 ]# yum versionlock list  

…..
0:libtalloc-2.1.16-1.el7.*
0:libedit-3.0-12.20121213cvs.el7.*
0:p11-kit-trust-0.23.5-3.el7.*
1:quota-nls-4.01-19.el7.*
0:perl-Exporter-5.68-3.el7.*
0:sudo-1.8.23-9.el7.*
0:libxslt-1.1.28-5.el7.*
versionlock list done
                          

+ Clear the locking            

# yum versionlock clear                               


+ List actual list / == clear all entries
 

[root@virt-mach-centos2 ]# yum versionlock list; yum versionlock clear
[root@virt-mach-centos1 ]# yum versionlock list; yum versionlock clear
[root@hypervisor-host1 ~]# yum versionlock list; yum versionlock clear
[root@hypervisor-host2 ~]# yum versionlock list; yum versionlock clear


5. Do yum update virt-mach-centos1


For some clarity if something goes wrong, it is really a good idea to make a dump of the basic packages installed before the RPM package update is initiated,
The exact versoin of RHEL or CentOS as well as the list of locked packages, if locking is used.

Enter virt-mach-centos1 (ssh virt-mach-centos1) and run following cmds:
 

# cat /etc/redhat-release  > /root/logs/redhat-release-$(hostname)-$(date '+%Y-%m-%d_%H-%M-%S').out
# cat /etc/grub.d/30_os-prober > /root/logs/grub2-efi-$(hostname)-$(date '+%Y-%m-%d_%H-%M-%S').out


+ Only if needed!!
 

# yum versionlock clear
# yum versionlock list


Clear any previous RPM packages – careful with that as you might want to keep the old RPMs, if unsure comment out below line
 

# yum clean all |tee /root/logs/yumcleanall-$(hostname)-$(date '+%Y-%m-%d_%H-%M-%S').out


Proceed with the update and monitor closely the output of commands and log out everything inside files using a small script that you should place under /root/status the script is given at the end of the aritcle.:
 

yum check-update |tee /root/logs/yumcheckupdate-$(hostname)-$(date '+%Y-%m-%d_%H-%M-%S').out
yum check-update | wc -l
yum update |tee /root/logs/yumupdate-$(hostname)-$(date '+%Y-%m-%d_%H-%M-%S').out
sh /root/status |tee /root/logs/status-before-$(hostname)-$(date '+%Y-%m-%d_%H-%M-%S').out


6. Check if everything is running fine after upgrade

Reboot VM
 

# shutdown -r now


7. Stop VM virt-mach-centos2 & backup  on Hypervisor host (hypervisor-host2)

Same backup step as prior 

# prlctl backup virt-mach-centos2


or
 

# prlctl stop virt-mach-centos2
# cp -rpf /vz/vmprivate/92075803-a4ce-4ec0-a3d8-9ee83d85fc76 /vz/vmprivate/92075803-a4ce-4ec0-a3d8-9ee83d85fc76-bak
## tar -czvf virt-mach-centos2_vm_virt-mach-centos2.tar.gz /vz/vmprivate/92075803-a4ce-4ec0-a3d8-9ee83d85fc76

# prctl start virt-mach-centos2


8. Do yum update on virt-mach-centos2

Log system state, before the update
 

# cat /etc/redhat-release  > /root/logs/redhat-release-vorher-$(hostname)-$(date '+%Y-%m-%d_%H-%M-%S').out
# cat /etc/grub.d/30_os-prober > /root/logs/grub2-efi-vorher-$(hostname)-$(date '+%Y-%m-%d_%H-%M-%S').out
# yum versionlock clear == if needed!!
# yum versionlock list


Clean old install update / packages if required
 

# yum clean all |tee /root/logs/yumcleanall-$(hostname)-$(date '+%Y-%m-%d_%H-%M-%S').out


Initiate the update

# yum check-update |tee /root/logs/yumcheckupdate-$(hostname)-$(date '+%Y-%m-%d_%H-%M-%S').out 2>&1
# yum check-update | wc -l 
# yum update |tee /root/logs/yumupdate-$(hostname)-$(date '+%Y-%m-%d_%H-%M-%S').out 2>&1
# sh /root/status |tee /root/logs/status-before-$(hostname)-$(date '+%Y-%m-%d_%H-%M-%S').out


9. Check if everything is running fine after upgrade
 

Reboot VM
 

# shutdown -r now


10. Stop VM vm-host2 & backup
 

# prlctl backup vm-host2


or

# prlctl stop vm-host2

Or copy the actual directory containig the Virtozzo VM (use the correct ID)
 

# cp -rpf /vz/vmprivate/76e8a5f8-caa8-5442-830e-aa4bfe8d42d9 /vz/vmprivate/76e8a5f8-caa8-5442-830e-aa4bfe8d42d9-bak
## tar -czvf vm-host2.tar.gz /vz/vmprivate/76e8a5f8-caa8-4442-830e-aa5bfe8d42d9

# prctl start vm-host2


11. Do yum update vm-host2
 

# cat /etc/redhat-release  > /root/logs/redhat-release-vorher-$(hostname)-$(date '+%Y-%m-%d_%H-%M-%S').out
# cat /etc/grub.d/30_os-prober > /root/logs/grub2-efi-vorher-$(hostname)-$(date '+%Y-%m-%d_%H-%M-%S').out


Clear only if needed

# yum versionlock clear
# yum versionlock list
# yum clean all |tee /root/logs/yumcleanall-$(hostname)-$(date '+%Y-%m-%d_%H-%M-%S').out


Do the rpm upgrade

# yum check-update |tee /root/logs/yumcheckupdate-$(hostname)-$(date '+%Y-%m-%d_%H-%M-%S').out
# yum check-update | wc -l
# yum update |tee /root/logs/yumupdate-$(hostname)-$(date '+%Y-%m-%d_%H-%M-%S').out
# sh /root/status |tee /root/logs/status-before-$(hostname)-$(date '+%Y-%m-%d_%H-%M-%S').out


12. Check if everything is running fine after upgrade
 

Reboot VM
 

# shutdown -r now


13. Do yum update hypervisor-host2


# cat /etc/redhat-release  > /root/logs/redhat-release-vorher-$(hostname)-$(date '+%Y-%m-%d_%H-%M-%S').out
# cat /etc/grub.d/30_os-prober > /root/logs/grub2-efi-vorher-$(hostname)-$(date '+%Y-%m-%d_%H-%M-%S').out

Clear lock   if needed

# yum versionlock clear
# yum versionlock list
# yum clean all |tee /root/logs/yumcleanall-$(hostname)-$(date '+%Y-%m-%d_%H-%M-%S').out


Update rpms
 

# yum check-update |tee /root/logs/yumcheckupdate-$(hostname)-$(date '+%Y-%m-%d_%H-%M-%S').out 2>&1
# yum check-update | wc -l
# yum update |tee /root/logs/yumupdate-$(hostname)-$(date '+%Y-%m-%d_%H-%M-%S').out 2>&1
# sh /root/status |tee /root/logs/status-before-$(hostname)-$(date '+%Y-%m-%d_%H-%M-%S').out


14. Stop VM vm-host1 & backup


Some as ealier
 

# prlctl backup vm-host1

or
 

# prlctl stop vm-host1

# cp -rpf /vz/vmprivate/74a7bbe8-9245-4385-ac0d-d10299100789 /vz/vmprivate/74a7bbe8-9245-4385-ac0d-d10299100789-bak
# tar -czvf vm-host1.tar.gz /vz/vmprivate/74a7bbe8-9245-4385-ac0d-d10299100789

# prctl start vm-host1


15. Do yum update vm-host2
 

# cat /etc/redhat-release  > /root/logs/redhat-release-vorher-$(hostname)-$(date '+%Y-%m-%d_%H-%M-%S').out
# cat /etc/grub.d/30_os-prober > /root/logs/grub2-efi-vorher-$(hostname)-$(date '+%Y-%m-%d_%H-%M-%S').out
# yum versionlock clear == if needed!!
# yum versionlock list
# yum clean all |tee /root/logs/yumcleanall-$(hostname)-$(date '+%Y-%m-%d_%H-%M-%S').out
# yum check-update |tee /root/logs/yumcheckupdate-$(hostname)-$(date '+%Y-%m-%d_%H-%M-%S').out
# yum check-update | wc -l
# yum update |tee /root/logs/yumupdate-$(hostname)-$(date '+%Y-%m-%d_%H-%M-%S').out
# sh /root/status |tee /root/logs/status-before-$(hostname)-$(date '+%Y-%m-%d_%H-%M-%S').out


16. Check if everything is running fine after upgrade

+ Reboot VM

# shutdown -r now


17. Do yum update hypervisor-host1

Same procedure for HV host 1 

# cat /etc/redhat-release  > /root/logs/redhat-release-vorher-$(hostname)-$(date '+%Y-%m-%d_%H-%M-%S').out
# cat /etc/grub.d/30_os-prober > /root/logs/grub2-efi-vorher-$(hostname)-$(date '+%Y-%m-%d_%H-%M-%S').out

Clear lock
 

# yum versionlock clear
# yum versionlock list
# yum clean all |tee /root/logs/yumcleanall-$(hostname)-$(date '+%Y-%m-%d_%H-%M-%S').out

# yum check-update |tee /root/logs/yumcheckupdate-$(hostname)-$(date '+%Y-%m-%d_%H-%M-%S').out
# yum check-update | wc -l
# yum update |tee /root/logs/yumupdate-$(hostname)-$(date '+%Y-%m-%d_%H-%M-%S').out
# sh /root/status |tee /root/logs/status-before-$(hostname)-$(date '+%Y-%m-%d_%H-%M-%S').out


18. Check if everything is running fine after upgrade

Reboot VM
 

# shutdown -r now


Check hypervisor-host1 all VMs run as expected 


19. Check if everything is running fine after upgrade

Reboot VM
 

# shutdown -r now


Check hypervisor-host2 all VMs run as expected afterwards


20. Check once more VMs and haproxy or any other contained services in VMs run as expected

Login to hosts and check processes and logs for errors etc.
 

21. Haproxy Unstandby virt-mach-centos1

Assuming that the virt-mach-centos1 and virt-mach-centos2 are running a Haproxy / corosync cluster you can try to standby node1 and check the result
hopefully all should be fine and traffic should come to host node2.

[root@virt-mach-centos1 ~]# pcs cluster unstandby virt-mach-centos1


Monitor logs and make sure HAproxy works fine on virt-mach-centos1


22. If necessery to redefine VMs (in case they disappear from virsh) or virtuosso is not working

[root@virt-mach-centos1 ]# virsh define /root/virt-mach-centos1_config_bak.xml
[root@virt-mach-centos1 ]# virsh define /root/virt-mach-centos2_config_bak.xml


23. Set versionlock to RPMs to prevent accident updates and check OS version release

[root@virt-mach-centos2 ]# yum versionlock \*
[root@virt-mach-centos1 ]# yum versionlock \*
[root@hypervisor-host1 ~]# yum versionlock \*
[root@hypervisor-host2 ~]# yum versionlock \*

[root@hypervisor-host2 ~]# cat /etc/redhat-release 
CentOS Linux release 7.8.2003 (Core)

Other useful hints

[root@hypervisor-host1 ~]# virsh console dc37c201-08c9-489d-aa20-9386d63ce3f3
Connected to domain virt-mach-centos1
..

! Compare packages count before the upgrade on each of the supposable identical VMs and HVs – if there is difference in package count review what kind of packages are different and try to make the machines to look as identical as possible  !

Packages to update on hypervisor-host1 Count: XXX
Packages to update on hypervisor-host2 Count: XXX
Packages to update virt-mach-centos1 Count: – 254
Packages to update virt-mach-centos2 Count: – 249

The /root/status script

+++

#!/bin/sh
echo  '=======================================================   '
echo  '= Systemctl list-unit-files –type=service | grep enabled '
echo  '=======================================================   '
systemctl list-unit-files –type=service | grep enabled

echo  '=======================================================   '
echo  '= systemctl | grep ".service" | grep "running"            '
echo  '=======================================================   '
systemctl | grep ".service" | grep "running"

echo  '=======================================================   '
echo  '= chkconfig –list                                        '
echo  '=======================================================   '
chkconfig –list

echo  '=======================================================   '
echo  '= netstat -tulpn                                          '
echo  '=======================================================   '
netstat -tulpn

echo  '=======================================================   '
echo  '= netstat -r                                              '
echo  '=======================================================   '
netstat -r


+++

That's all folks, once going through the article, after some 2 hours of efforts or so you should have an up2date machines.
Any problems faced or feedback is mostly welcome as this might help others who have the same setup.

Thanks for reading me 🙂

List and fix failed systemd failed services after Linux OS upgrade and how to get full info about systemd service from jorunal log

Friday, February 25th, 2022

systemd-logo-unix-linux-list-failed-systemd-services

I have recently upgraded a number of machines from Debian 10 Buster to Debian 11 Bullseye. The update as always has some issues on some machines, such as problem with package dependencies, changing a number of external package repositories etc. to match che Bullseye deb packages. On some machines the update was less painful on others but the overall line was that most of the machines after the update ended up with one or more failed systemd services. It could be that some of the machines has already had this failed services present and I never checked them from the previous time update from Debian 9 -> Debian 10 or just some mess I've left behind in the hurry when doing software installation in the past. This doesn't matter anyways the fact was that I had to deal to a number of systemctl services which I managed to track by the Failed service mesage on system boot on one of the physical machines and on the OpenXen VTY Console the rest of Virtual Machines after update had some Failed messages. Thus I've spend some good amount of time like an overall of a day or two fixing strange failed services. This is how this small article was born in attempt to help sysadmins or any home Linux desktop users, who has updated his Debian Linux / Ubuntu or any other deb based distribution but due to the chaotic nature of Linux has ended with same strange Failed services and look for a way to find the source of the failures and get rid of the problems. 
Systemd is a very complicated system and in my many sysadmin opinion it makes more problems than it solves, but okay for today's people's megalomania mindset it matches well.

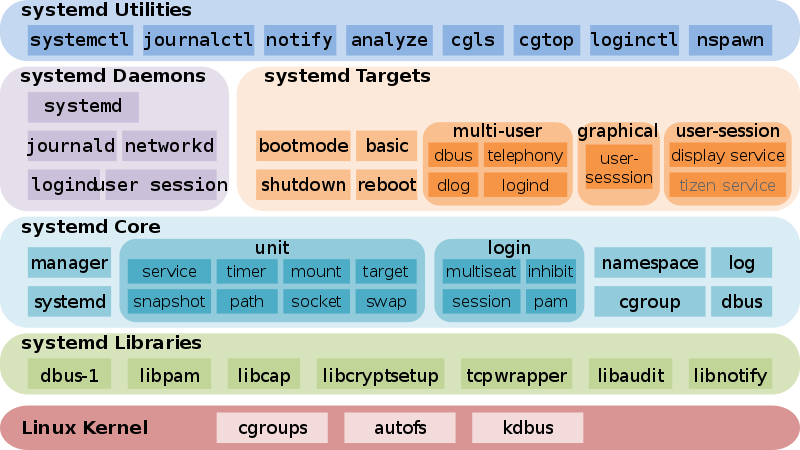
Systemd_components-systemd-journalctl-cgroups-loginctl-nspawn-analyze.svg


1. Check the journal for errors, running service irregularities and so on
 

First thing to do to track for errors, right after the update is to take some minutes and closely check,, the journalctl for any strange errors, even on well maintained Unix machines, this journal log would bring you to a problem that is not fatal but still some process or stuff is malfunctioning in the background that you would like to solve:
 

root@pcfreak:~# journalctl -x
Jan 10 10:10:01 pcfreak CRON[17887]: pam_unix(cron:session): session closed for user root
Jan 10 10:10:01 pcfreak audit[17887]: USER_END pid=17887 uid=0 auid=0 ses=340858 subj==unconfined msg='op=PAM:session_close grantors=pam_loginuid,pam_env,pam_env,pam_permit>
Jan 10 10:10:01 pcfreak audit[17888]: CRED_DISP pid=17888 uid=0 auid=0 ses=340860 subj==unconfined msg='op=PAM:setcred grantors=pam_permit acct="root" exe="/usr/sbin/cron" >
Jan 10 10:10:01 pcfreak CRON[17888]: pam_unix(cron:session): session closed for user root
Jan 10 10:10:01 pcfreak audit[17888]: USER_END pid=17888 uid=0 auid=0 ses=340860 subj==unconfined msg='op=PAM:session_close grantors=pam_loginuid,pam_env,pam_env,pam_permit>
Jan 10 10:10:01 pcfreak audit[17884]: CRED_DISP pid=17884 uid=0 auid=0 ses=340855 subj==unconfined msg='op=PAM:setcred grantors=pam_permit acct="root" exe="/usr/sbin/cron" >
Jan 10 10:10:01 pcfreak CRON[17884]: pam_unix(cron:session): session closed for user root
Jan 10 10:10:01 pcfreak audit[17884]: USER_END pid=17884 uid=0 auid=0 ses=340855 subj==unconfined msg='op=PAM:session_close grantors=pam_loginuid,pam_env,pam_env,pam_permit>
Jan 10 10:10:01 pcfreak audit[17886]: CRED_DISP pid=17886 uid=0 auid=33 ses=340859 subj==unconfined msg='op=PAM:setcred grantors=pam_permit acct="www-data" exe="/usr/sbin/c>
Jan 10 10:10:01 pcfreak CRON[17886]: pam_unix(cron:session): session closed for user www-data
Jan 10 10:10:01 pcfreak audit[17886]: USER_END pid=17886 uid=0 auid=33 ses=340859 subj==unconfined msg='op=PAM:session_close grantors=pam_loginuid,pam_env,pam_env,pam_permi>
Jan 10 10:10:08 pcfreak NetworkManager[696]:  [1641802208.0899] device (eth1): carrier: link connected
Jan 10 10:10:08 pcfreak kernel: r8169 0000:03:00.0 eth1: Link is Up – 100Mbps/Full – flow control rx/tx
Jan 10 10:10:08 pcfreak kernel: r8169 0000:03:00.0 eth1: Link is Down
Jan 10 10:10:19 pcfreak NetworkManager[696]:
 [1641802219.7920] device (eth1): carrier: link connected
Jan 10 10:10:19 pcfreak kernel: r8169 0000:03:00.0 eth1: Link is Up – 100Mbps/Full – flow control rx/tx
Jan 10 10:10:20 pcfreak kernel: r8169 0000:03:00.0 eth1: Link is Down
Jan 10 10:10:22 pcfreak NetworkManager[696]:
 [1641802222.2772] device (eth1): carrier: link connected
Jan 10 10:10:22 pcfreak kernel: r8169 0000:03:00.0 eth1: Link is Up – 100Mbps/Full – flow control rx/tx
Jan 10 10:10:23 pcfreak kernel: r8169 0000:03:00.0 eth1: Link is Down
Jan 10 10:10:33 pcfreak sshd[18142]: Unable to negotiate with 66.212.17.162 port 19255: no matching key exchange method found. Their offer: diffie-hellman-group14-sha1,diff>
Jan 10 10:10:41 pcfreak NetworkManager[696]:
 [1641802241.0186] device (eth1): carrier: link connected
Jan 10 10:10:41 pcfreak kernel: r8169 0000:03:00.0 eth1: Link is Up – 100Mbps/Full – flow control rx/tx

If you want to only check latest journal log messages use the -x -e (pager catalog) opts

root@pcfreak;~# journalctl -xe

Feb 25 13:08:29 pcfreak audit[2284920]: USER_LOGIN pid=2284920 uid=0 auid=4294967295 ses=4294967295 subj==unconfined msg='op=login acct=28696E76616C>
Feb 25 13:08:29 pcfreak sshd[2284920]: Received disconnect from 177.87.57.145 port 40927:11: Bye Bye [preauth]
Feb 25 13:08:29 pcfreak sshd[2284920]: Disconnected from invalid user ubuntuuser 177.87.57.145 port 40927 [preauth]

Next thing to after the update was to get a list of failed service only.


2. List all systemd failed check services which was supposed to be running

root@pcfreak:/root # systemctl list-units | grep -i failed
● certbot.service                                                                                                       loaded failed failed    Certbot
● logrotate.service                                                                                                     loaded failed failed    Rotate log files
● maldet.service                                                                                                        loaded failed failed    LSB: Start/stop maldet in monitor mode
● named.service                                                                                                         loaded failed failed    BIND Domain Name Server


Alternative way is with the –failed option

hipo@jeremiah:~$ systemctl list-units –failed
  UNIT                        LOAD   ACTIVE SUB    DESCRIPTION
● haproxy.service             loaded failed failed HAProxy Load Balancer
● libvirt-guests.service      loaded failed failed Suspend/Resume Running libvirt Guests
● libvirtd.service            loaded failed failed Virtualization daemon
● nvidia-persistenced.service loaded failed failed NVIDIA Persistence Daemon
● sqwebmail.service           masked failed failed sqwebmail.service
● tpm2-abrmd.service          loaded failed failed TPM2 Access Broker and Resource Management Daemon
● wd_keepalive.service        loaded failed failed LSB: Start watchdog keepalive daemon

LOAD   = Reflects whether the unit definition was properly loaded.
ACTIVE = The high-level unit activation state, i.e. generalization of SUB.
SUB    = The low-level unit activation state, values depend on unit type.
7 loaded units listed.


root@jeremiah:/etc/apt/sources.list.d#  systemctl list-units –failed
  UNIT                        LOAD   ACTIVE SUB    DESCRIPTION
● haproxy.service             loaded failed failed HAProxy Load Balancer
● libvirt-guests.service      loaded failed failed Suspend/Resume Running libvirt Guests
● libvirtd.service            loaded failed failed Virtualization daemon
● nvidia-persistenced.service loaded failed failed NVIDIA Persistence Daemon
● sqwebmail.service           masked failed failed sqwebmail.service
● tpm2-abrmd.service          loaded failed failed TPM2 Access Broker and Resource Management Daemon
● wd_keepalive.service        loaded failed failed LSB: Start watchdog keepalive daemon


To get a full list of objects of systemctl you can pass as state:
 

# systemctl –state=help
Full list of possible load states to pass is here
Show service properties


Check whether a service is failed or has other status and check default set systemd variables for it.

root@jeremiah~:# systemctl is-failed vboxweb.service
inactive

# systemctl show haproxy
Type=notify
Restart=always
NotifyAccess=main
RestartUSec=100ms
TimeoutStartUSec=1min 30s
TimeoutStopUSec=1min 30s
TimeoutAbortUSec=1min 30s
TimeoutStartFailureMode=terminate
TimeoutStopFailureMode=terminate
RuntimeMaxUSec=infinity
WatchdogUSec=0
WatchdogTimestampMonotonic=0
RootDirectoryStartOnly=no
RemainAfterExit=no
GuessMainPID=yes
SuccessExitStatus=143
MainPID=304858
ControlPID=0
FileDescriptorStoreMax=0
NFileDescriptorStore=0
StatusErrno=0
Result=success
ReloadResult=success
CleanResult=success

Full output of the above command is dumped in show_systemctl_properties.txt


3. List all running systemd services for a better overview on what's going on on machine
 

To get a list of all properly systemd loaded services you can use –state running.

hipo@jeremiah:~$ systemctl list-units –state running|head -n 10
  UNIT                              LOAD   ACTIVE SUB     DESCRIPTION
  proc-sys-fs-binfmt_misc.automount loaded active running Arbitrary Executable File Formats File System Automount Point
  cups.path                         loaded active running CUPS Scheduler
  init.scope                        loaded active running System and Service Manager
  session-2.scope                   loaded active running Session 2 of user hipo
  accounts-daemon.service           loaded active running Accounts Service
  anydesk.service                   loaded active running AnyDesk
  apache-htcacheclean.service       loaded active running Disk Cache Cleaning Daemon for Apache HTTP Server
  apache2.service                   loaded active running The Apache HTTP Server
  avahi-daemon.service              loaded active running Avahi mDNS/DNS-SD Stack


It is useful thing is to list all unit-files configured in systemd and their state, you can do it with:


root@pcfreak:~# systemctl list-unit-files
UNIT FILE                                                                 STATE           VENDOR PRESET
proc-sys-fs-binfmt_misc.automount                                         static          –            
-.mount                                                                   generated       –            
backups.mount                                                             generated       –            
dev-hugepages.mount                                                       static          –            
dev-mqueue.mount                                                          static          –            
media-cdrom0.mount                                                        generated       –            
mnt-sda1.mount                                                            generated       –            
proc-fs-nfsd.mount                                                        static          –            
proc-sys-fs-binfmt_misc.mount                                             disabled        disabled     
run-rpc_pipefs.mount                                                      static          –            
sys-fs-fuse-connections.mount                                             static          –            
sys-kernel-config.mount                                                   static          –            
sys-kernel-debug.mount                                                    static          –            
sys-kernel-tracing.mount                                                  static          –            
var-www.mount                                                             generated       –            
acpid.path                                                                masked          enabled      
cups.path                                                                 enabled         enabled      


root@pcfreak:~# systemctl list-units –type service –all
  UNIT                                   LOAD      ACTIVE   SUB     DESCRIPTION
  accounts-daemon.service                loaded    inactive dead    Accounts Service
  acct.service                           loaded    active   exited  Kernel process accounting
● alsa-restore.service                   not-found inactive dead    alsa-restore.service
● alsa-state.service                     not-found inactive dead    alsa-state.service
  apache2.service                        loaded    active   running The Apache HTTP Server
● apparmor.service                       not-found inactive dead    apparmor.service
  apt-daily-upgrade.service              loaded    inactive dead    Daily apt upgrade and clean activities
 apt-daily.service                      loaded    inactive dead    Daily apt download activities
  atd.service                            loaded    active   running Deferred execution scheduler
  auditd.service                         loaded    active   running Security Auditing Service
  auth-rpcgss-module.service             loaded    inactive dead    Kernel Module supporting RPCSEC_GSS
  avahi-daemon.service                   loaded    active   running Avahi mDNS/DNS-SD Stack
  certbot.service                        loaded    inactive dead    Certbot
  clamav-daemon.service                  loaded    active   running Clam AntiVirus userspace daemon
  clamav-freshclam.service               loaded    active   running ClamAV virus database updater
..


linux-systemd-components-diagram-linux-kernel-system-targets-systemd-libraries-daemons


4. Finding out more on why a systemd configured service has failed


Usually getting info about failed systemd service is done with systemctl status servicename.service
However, in case of troubles with service unable to start to get more info about why a service has failed with (-l) or (–full) options


root@pcfreak:~# systemctl -l status logrotate.service
● logrotate.service – Rotate log files
     Loaded: loaded (/lib/systemd/system/logrotate.service; static)
     Active: failed (Result: exit-code) since Fri 2022-02-25 00:00:06 EET; 13h ago
TriggeredBy: ● logrotate.timer
       Docs: man:logrotate(8)
             man:logrotate.conf(5)
    Process: 2045320 ExecStart=/usr/sbin/logrotate /etc/logrotate.conf (code=exited, status=1/FAILURE)
   Main PID: 2045320 (code=exited, status=1/FAILURE)
        CPU: 2.479s

Feb 25 00:00:06 pcfreak logrotate[2045577]: 2022/02/25 00:00:06| WARNING: For now we will assume you meant to write /32
Feb 25 00:00:06 pcfreak logrotate[2045577]: 2022/02/25 00:00:06| ERROR: '0.0.0.0/0.0.0.0' needs to be replaced by the term 'all'.
Feb 25 00:00:06 pcfreak logrotate[2045577]: 2022/02/25 00:00:06| SECURITY NOTICE: Overriding config setting. Using 'all' instead.
Feb 25 00:00:06 pcfreak logrotate[2045577]: 2022/02/25 00:00:06| WARNING: (B) '::/0' is a subnetwork of (A) '::/0'
Feb 25 00:00:06 pcfreak logrotate[2045577]: 2022/02/25 00:00:06| WARNING: because of this '::/0' is ignored to keep splay tree searching predictable
Feb 25 00:00:06 pcfreak logrotate[2045577]: 2022/02/25 00:00:06| WARNING: You should probably remove '::/0' from the ACL named 'all'
Feb 25 00:00:06 pcfreak systemd[1]: logrotate.service: Main process exited, code=exited, status=1/FAILURE
Feb 25 00:00:06 pcfreak systemd[1]: logrotate.service: Failed with result 'exit-code'.
Feb 25 00:00:06 pcfreak systemd[1]: Failed to start Rotate log files.
Feb 25 00:00:06 pcfreak systemd[1]: logrotate.service: Consumed 2.479s CPU time.


systemctl -l however is providing only the last log from message a started / stopped or whatever status service has generated. Sometimes systemctl -l servicename.service is showing incomplete the splitted error message as there is a limitation of line numbers on the console, see below


root@pcfreak:~# systemctl status -l certbot.service
● certbot.service – Certbot
     Loaded: loaded (/lib/systemd/system/certbot.service; static)
     Active: failed (Result: exit-code) since Fri 2022-02-25 09:28:33 EET; 4h 0min ago
TriggeredBy: ● certbot.timer
       Docs: file:///usr/share/doc/python-certbot-doc/html/index.html
             https://certbot.eff.org/docs
    Process: 290017 ExecStart=/usr/bin/certbot -q renew (code=exited, status=1/FAILURE)
   Main PID: 290017 (code=exited, status=1/FAILURE)
        CPU: 9.771s

Feb 25 09:28:33 pcfrxen certbot[290017]: The error was: PluginError('An authentication script must be provided with –manual-auth-hook when using th>
Feb 25 09:28:33 pcfrxen certbot[290017]: All renewals failed. The following certificates could not be renewed:
Feb 25 09:28:33 pcfrxen certbot[290017]:   /etc/letsencrypt/live/mail.pcfreak.org-0003/fullchain.pem (failure)
Feb 25 09:28:33 pcfrxen certbot[290017]:   /etc/letsencrypt/live/www.eforia.bg-0005/fullchain.pem (failure)
Feb 25 09:28:33 pcfrxen certbot[290017]:   /etc/letsencrypt/live/zabbix.pc-freak.net/fullchain.pem (failure)
Feb 25 09:28:33 pcfrxen certbot[290017]: 3 renew failure(s), 5 parse failure(s)
Feb 25 09:28:33 pcfrxen systemd[1]: certbot.service: Main process exited, code=exited, status=1/FAILURE
Feb 25 09:28:33 pcfrxen systemd[1]: certbot.service: Failed with result 'exit-code'.
Feb 25 09:28:33 pcfrxen systemd[1]: Failed to start Certbot.
Feb 25 09:28:33 pcfrxen systemd[1]: certbot.service: Consumed 9.771s CPU time.


5. Get a complete log of journal to make sure everything configured on server host runs as it should

Thus to get more complete list of the message and be able to later google and look if has come with a solution on the internet  use:

root@pcfrxen:~#  journalctl –catalog –unit=certbot

— Journal begins at Sat 2022-01-22 21:14:05 EET, ends at Fri 2022-02-25 13:32:01 EET. —
Jan 23 09:58:18 pcfrxen systemd[1]: Starting Certbot…
░░ Subject: A start job for unit certbot.service has begun execution
░░ Defined-By: systemd
░░ Support: https://www.debian.org/support
░░ 
░░ A start job for unit certbot.service has begun execution.
░░ 
░░ The job identifier is 5754.
Jan 23 09:58:20 pcfrxen certbot[124996]: Traceback (most recent call last):
Jan 23 09:58:20 pcfrxen certbot[124996]:   File "/usr/lib/python3/dist-packages/certbot/_internal/renewal.py", line 71, in _reconstitute
Jan 23 09:58:20 pcfrxen certbot[124996]:     renewal_candidate = storage.RenewableCert(full_path, config)
Jan 23 09:58:20 pcfrxen certbot[124996]:   File "/usr/lib/python3/dist-packages/certbot/_internal/storage.py", line 471, in __init__
Jan 23 09:58:20 pcfrxen certbot[124996]:     self._check_symlinks()
Jan 23 09:58:20 pcfrxen certbot[124996]:   File "/usr/lib/python3/dist-packages/certbot/_internal/storage.py", line 537, in _check_symlinks

root@server:~# journalctl –catalog –unit=certbot|grep -i pluginerror|tail -1
Feb 25 09:28:33 pcfrxen certbot[290017]: The error was: PluginError('An authentication script must be provided with –manual-auth-hook when using the manual plugin non-interactively.')


Or if you want to list and read only the last messages in the journal log regarding a service

root@server:~# journalctl –catalog –pager-end –unit=certbot


If you have disabled a failed service because you don't need it to run at all on the machine with:

root@rhel:~# systemctl stop rngd.service
root@rhel:~# systemctl disable rngd.service

And you want to clear up any failed service information that is kept in the systemctl service log you can do it with:
 

root@rhel:~# systemctl reset-failed

Another useful systemctl option is cat, you can use it to easily list a service it is useful to quickly check what is a service, an actual shortcut to save you from giving a full path to the service e.g. cat /lib/systemd/system/certbot.service

root@server:~# systemctl cat certbot
# /lib/systemd/system/certbot.service
[Unit]
Description=Certbot
Documentation=file:///usr/share/doc/python-certbot-doc/html/index.html
Documentation=https://certbot.eff.org/docs
[Service]
Type=oneshot
ExecStart=/usr/bin/certbot -q renew
PrivateTmp=true


After failed SystemD services are fixed, it is best to reboot the machine and check put some more time to inspect rawly the complete journal log to make sure, no error  was left behind.


Closure
 

As you can see updating a machine from a major to a major version even if you follow the official documentation and you have plenty of experience is always more or a less a pain in the ass, which can eat up much of your time banging your head solving problems with failed daemons issues with /etc/rc.local (which I have faced becase of #/bin/sh -e (which would make /etc/rc.local) to immediately quit if any error from command $? returns different from 0 etc.. The  logical questions comes then;
1. Is it really worthy to update at all regularly, especially if you don't know of a famous major Vulnerability 🙂 ?
2. Or is it worthy to update from OS major release to OS major release at all?  
3. Or should you only try to patch the service that is exposed to an external reachable computer network or the internet only and still the the same OS release until End of Life (LTS = Long Term Support) as called in Debian or  End Of Life  (EOL) Cycle as called in RPM based distros the period until the OS major release your software distro has official security patches is reached.

Anyone could take any approach but for my own managed systems small network at home my practice was always to try to keep up2date everything every 3 or 6 months maximum. This has caused me multiple days of irritation and stress and perhaps many white hairs and spend nerves on shit.


4. Based on the company where I'm employed the better strategy is to patch to the EOL is still offered and keep the rule First Things First (FTF), once the EOL is reached, just make a copy of all servers data and configuration to external Data storage, bring up a new Physical or VM and migrate the services.
Test after the migration all works as expected if all is as it should be change the DNS records or Leading Infrastructure Proxies whatever to point to the new service and that's it! Yes it is true that migration based on a full OS reinstall is more time consuming and requires much more planning, but usually the result is much more expected, plus it is much less stressful for the guy doing the job.

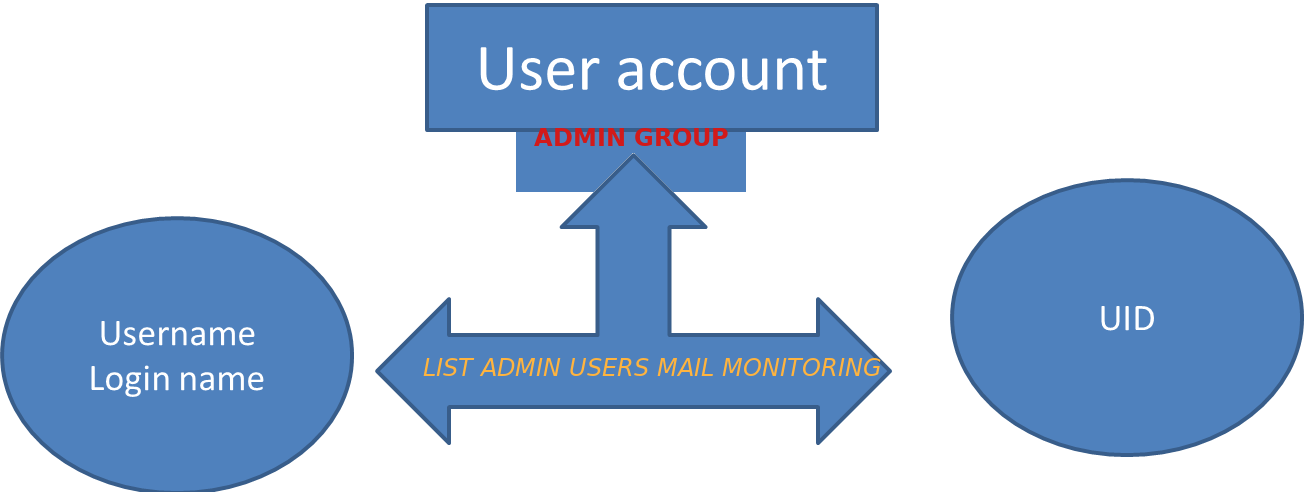
List all existing local admin users belonging to admin group and mail them to monitoring mail box

Monday, February 8th, 2021

local-user-account-creation-deletion-change-monitor-accounts-and-send-them-to-central-monitoring-mail

If you have a bunch of servers that needs to have a tight security with multiple Local users superuser accounts that change over time and you need to frequently keep an have a long over time if some new system UNIX local users in /etc/passwd /etc/group has been added deleted e.g. the /etc/passwd /etc/group then you might have the task to have some primitive monitoring set and the most primitive I can think of is simply routinely log users list for historical purposes to a common mailbox over time (lets say 4 times a month or even more frequently) you might send with a simple cron job a list of all existing admin authorized users to a logging sysadmin mailbox like lets say:
 

Local-unix-users@yourcompanydomain.com


A remark to make here is the common sysadmin practice scenario to have local existing non-ldap admin users group members of whom are authorized to use sudo su – root via /etc/sudoers  is described in my previous article how to add local users to admin group superuser access via sudo I thus have been managing already a number of servers that have user setup using the above explained admin group.

Thus to have the monitoring at place I've developed a tiny shell script that does check all users belonging to the predefined user group dumps it to .csv format that starts with a simple timestamp on when user admin list was made and sends it to a predefined email address as well as logs sent mail content for further reference in a local directory.

The task is a relatively easy but since nowadays the level of competency of system administration across youngsters is declinging -that's of course in my humble opinion (just like it happens in every other profession), below is the developed list-admin-users.sh


#!/bin/bash
# dump all users belonging to a predefined admin user / group in csv format 
# with a day / month year timestamp and mail it to a predefined admin
# monitoring address
TO_ADDRESS="Local-unix-users@yourcompanydomain.com";
HOSTN=$(hostname);
# root@server:/# grep -i 1000 /etc/passwd
# username:x:username:1000:username,,,:/home/username:/bin/bash
# username1:x:username1:1000:username1,,,:/home/username1:/bin/bash
# username5:x:username1:1000:username5,,,:/home/username5:/bin/bash

ADMINS_ID='4355';
#
# root@server # group_id_ID='4355'; grep -i group_id_ID /etc/passwd
# …
# username1:x:1005:4355:username1,,,:/home/username1:/bin/bash
# username5:x:1005:4355,,,:/home/username5:/bin/bash


group_id_ID='215';
group_id='group_id';
FIL="/var/log/userlist-log-dir/userlist_$(date +"%d_%m_%Y_%H_%M").txt";
CUR_D="$HOSTN: Current admin users $(date)"; >> $FIL; echo -e "##### $CUR_D #####" >> $FIL;
for i in $(cat /etc/passwd | grep -i /home|grep /bin/bash|grep -e "$ADMINS_ID" -e "$group_id_ID" | cut -d : -f1); do \
if [[ $(grep $i /etc/group|grep $group_id) ]]; then
f=$(echo $i); echo $i,group_id,$(id -g $i); else  echo $i,admin,$(id -g $i);
fi
done >> $FIL; mail -s "$CUR_D" $TO_ADDRESS < $FIL


list-admin-users.sh is ready for download also here

To make the script report you will have to place it somewhere for example in /usr/local/bin/list-admin-users.sh ,  create its log dir location /var/log/userlist-log-dir/ and set proper executable and user/group script and directory permissions to it to be only readable for root user.

root@server: # mkdir /var/log/userlist-log-dir/
root@server: # chmod +x /usr/local/bin/list-admin-users.sh
root@server: # chmod -R 700 /var/log/userlist-log-dir/


To make the script generate its admin user reports and send it to the central mailbox  a couple of times in the month early in the morning (assuming you have a properly running postfix / qmail / sendmail … smtp), as a last step you need to set a cron job to routinely invoke the script as root user.

root@server: # crontab -u root -e
12 06 5,10,15,20,25,1 /usr/local/bin/list-admin-users.sh


That's all folks now on 5th 10th, 15th, 20th 25th and 1st at 06:12 you'll get the admin user list reports done. Enjoy 🙂

Reinstall all Debian packages with a copy of apt deb package list from another working Debian Linux installation

Wednesday, July 29th, 2020

Reinstall-all-Debian-packages-with-copy-of-apt-packages-list-from-another-working-Debian-Linux-installation

Few days ago, in the hurry in the small hours of the night, I've done something extremely stupid. Wanting to move out a .tar.gz binary copy of qmail installation to /var/lib/qmail with all the dependent qmail items instead of extracting to admin user /root directory (/root), I've extracted it to the main Operating system root / directrory.
Not noticing this, I've quickly executed rm -rf var with the idea to delete all directory tree under /root/var just 3 seconds later, I've realized I'm issuing the rm -rf var with the wrong location WITH a root user !!!! Being scared on what I've done, I've quickly pressed CTRL+C to immedately cancel the deletion operation of my /var.

wrong-system-var-rm-linux-dont-do-that-ever-or-your-system-will-end-up-irreversably-damaged

But as you can guess, since the machine has an Slid State Drive drive and SSD memory drive are much more faster in I/O operations than the classical ATA / SATA disks. I was not quick enough to cancel the operation and I've noticed already some part of my /var have been R.I.P-pped in the heaven of directories.

This was ofcourse upsetting so for a while I rethinked the situation to get some ideas on what I can do to recover my system ASAP!!! and I had the idea of course to try to reinstall All my installed .deb debian packages to restore system closest to the normal, before my stupid mistake.

Guess my unpleasent suprise when I have realized dpkg and respectively apt-get apt and aptitude package management tools cannot anymore handle packages as Debian Linux's package dependency database has been damaged due to missing dpkg directory 


/var/lib/dpkg 


Oh man that was unpleasent, especially since I've installed plenty of stuff that is custom on my Mate based desktop and, generally reinstalling it updating the sytem to the latest Debian security updates etc. will be time consuming and painful process I wanted to omit.

So of course the logical thing to do here was to try to somehow recover somehow a database copy of /var/lib/dpkg  if that was possible, that of course led me to the idea to lookup for a way to recover my /var/lib/dpkg from backup but since I did not maintained any backup copy of my OS anywhere that was not really possible, so anyways I wondered whether dpkg does not keep some kind of database backups somewhere in case if something goes wrong with its database.
This led me to this nice Ubuntu thred which has pointed me to the part of my root rm -rf dpkg db disaster recovery solution.
Luckily .deb package management creators has thought about situation similar to mine and to give the user a restore point for /var/lib/dpkg damaged database

/var/lib/dpkg is periodically backed up in /var/backups

A typical /var/lib/dpkg on Ubuntu and Debian Linux looks like so:
 

hipo@jeremiah:/var/backups$ ls -l /var/lib/dpkg
total 12572
drwxr-xr-x 2 root root    4096 Jul 26 03:22 alternatives
-rw-r–r– 1 root root      11 Oct 14  2017 arch
-rw-r–r– 1 root root 2199402 Jul 25 20:04 available
-rw-r–r– 1 root root 2199402 Oct 19  2017 available-old
-rw-r–r– 1 root root       8 Sep  6  2012 cmethopt
-rw-r–r– 1 root root    1337 Jul 26 01:39 diversions
-rw-r–r– 1 root root    1223 Jul 26 01:39 diversions-old
drwxr-xr-x 2 root root  679936 Jul 28 14:17 info
-rw-r—– 1 root root       0 Jul 28 14:17 lock
-rw-r—– 1 root root       0 Jul 26 03:00 lock-frontend
drwxr-xr-x 2 root root    4096 Sep 17  2012 parts
-rw-r–r– 1 root root    1011 Jul 25 23:59 statoverride
-rw-r–r– 1 root root     965 Jul 25 23:59 statoverride-old
-rw-r–r– 1 root root 3873710 Jul 28 14:17 status
-rw-r–r– 1 root root 3873712 Jul 28 14:17 status-old
drwxr-xr-x 2 root root    4096 Jul 26 03:22 triggers
drwxr-xr-x 2 root root    4096 Jul 28 14:17 updates

Before proceeding with this radical stuff to move out /var/lib/dpkg/info from another machine to /var mistakenyl removed oned. I have tried to recover with the well known:

  • extundelete
  • foremost
  • recover
  • ext4magic
  • ext3grep
  • gddrescue
  • ddrescue
  • myrescue
  • testdisk
  • photorec

Linux file deletion recovery tools from a USB stick loaded with a Number of LiveCD distributions, i.e. tested recovery with:

  • Debian LiveCD
  • Ubuntu LiveCD
  • KNOPPIX
  • SystemRescueCD
  • Trinity Rescue Kit
  • Ultimate Boot CD


but unfortunately none of them couldn't recover the deleted files … 

The reason why the standard file recovery tools could not recover ?

My assumptions is after I've done by rm -rf var; from sysroot,  issued the sync (- if you haven't used it check out man sync) command – that synchronizes cached writes to persistent storage and did a restart from the poweroff PC button, this should have worked, as I've recovered like that in the past) in a normal Sys V System with a normal old fashioned blocks filesystem as EXT2 . or any other of the filesystems without a journal, however as the machine run a EXT4 filesystem with a journald and journald, this did not work perhaps because something was not updated properly in /lib/systemd/systemd-journal, that led to the situation all recently deleted files were totally unrecoverable.

1. First step was to restore the directory skele of /var/lib/dpkg

# mkdir -p /var/lib/dpkg/{alternatives,info,parts,triggers,updates}


2. Recover missing /var/lib/dpkg/status  file

The main file that gives information to dpkg of the existing packages and their statuses on a Debian based systems is /var/lib/dpkg/status

# cp /var/backups/dpkg.status.0 /var/lib/dpkg/status


3. Reinstall dpkg package manager to make package management working again

Say a warm prayer to the Merciful God ! and do:

# apt-get download dpkg
# dpkg -i dpkg*.deb


4. Reinstall base-files .deb package which provides basis of a Debian system

Hopefully everything will be okay and your dpkg / apt pair will be in normal working state, next step is to:

# apt-get download base-files
# dpkg -i base-files*.deb


5. Do a package sanity and consistency check and try to update OS package list

Check whether packages have been installed only partially on your system or that have missing, wrong or obsolete control  data  or  files.  dpkg  should suggest what to do with them to get them fixed.

# dpkg –audit

Then resynchronize (fetch) the package index files from their sources described in /etc/apt/sources.list

# apt-get update


Do apt db constistency check:

#  apt-get check


check is a diagnostic tool; it updates the package cache and checks for broken dependencies.
 

Take a deep breath ! …

Do :

ls -l /var/lib/dpkg
and compare with the above list. If some -old file is not present don't worry it will be there tomorrow.

Next time don't forget to do a regular backup with simple rsync backup script or something like Bacula / Amanda / Time Vault or Clonezilla.
 

6. Copy dpkg database from another Linux system that has a working dpkg / apt Database

Well this was however not the end of the story … There were still many things missing from my /var/ and luckily I had another Debian 10 Buster install on another properly working machine with a similar set of .deb packages installed. Therefore to make most of my programs still working again I have copied over /var from the other similar set of package installed machine to my messed up machine with the missing deleted /var.

To do so …
On Functioning Debian 10 Machine (Working Host in a local network with IP 192.168.0.50), I've archived content of /var:

linux:~# tar -czvf var_backup_debian10.tar.gz /var

Then sftped from Working Host towards the /var deleted broken one in my case this machine's hostname is jericho and luckily still had SSHD and SFTP running processes loaded in memory:

jericho:~# sftp root@192.168.0.50
sftp> get var_backup_debian10.tar.gz

Now Before extracting the archive it is a good idea to make backup of old /var remains somewhere for example somewhere in /root 
just in case if we need to have a copy of the dpkg backup dir /var/backups

jericho:~# cp -rpfv /var /root/var_backup_damaged

 
jericho:~# tar -zxvf /root/var_backup_debian10.tar.gz 
jericho:/# mv /root/var/ /

Then to make my /var/lib/dpkg contain the list of packages from my my broken Linux install I have ovewritten /var/lib/dpkg with the files earlier backupped before  .tar.gz was extracted.

jericho:~# cp -rpfv /var /root/var_backup_damaged/lib/dpkg/ /var/lib/


7. Reinstall All Debian  Packages completely scripts


I then tried to reinstall each and every package first using aptitude with aptitude this is done with

# aptitude reinstall '~i'

However as this failed, tried using a simple shell loop like below:

for i in $(dpkg -l |awk '{ print $2 }'); do echo apt-get install –reinstall –yes $i; done

Alternatively, all .deb package reninstall is also possible with dpkg –get-selections and with awk with below cmds:

dpkg –get-selections | grep -v deinstall | awk '{print $1}' > list.log;
awk '$1=$1' ORS=' ' list.log > newlist.log
;
apt-get install –reinstall $(cat newlist.log)

It can also be run as one liner for simplicity:

dpkg –get-selections | grep -v deinstall | awk '{print $1}' > list.log; awk '$1=$1' ORS=' ' list.log > newlist.log; apt-get install –reinstall $(cat newlist.log)

This produced a lot of warning messages, reporting "package has no files currently installed" (virtually for all installed packages), indicating a severe packages problem below is sample output produced after each and every package reinstall … :

dpkg: warning: files list file for package 'iproute' missing; assuming package has no files currently installed
dpkg: warning: files list file for package 'brscan-skey' missing; assuming package has no files currently installed
dpkg: warning: files list file for package 'libapache2-mod-php7.4' missing; assuming package has no files currently installed
dpkg: warning: files list file for package 'libexpat1:amd64' missing; assuming package has no files currently installed
dpkg: warning: files list file for package 'libexpat1:i386' missing; assuming package has no files currently installed
dpkg: warning: files list file for package 'php5.6-readline' missing; assuming package has no files currently installed
dpkg: warning: files list file for package 'linux-headers-4.19.0-5-amd64' missing; assuming package has no files currently installed
dpkg: warning: files list file for package 'libgraphite2-3:amd64' missing; assuming package has no files currently installed
dpkg: warning: files list file for package 'libgraphite2-3:i386' missing; assuming package has no files currently installed
dpkg: warning: files list file for package 'libbonoboui2-0:amd64' missing; assuming package has no files currently installed
dpkg: warning: files list file for package 'libxcb-dri3-0:amd64' missing; assuming package has no files currently installed
dpkg: warning: files list file for package 'libxcb-dri3-0:i386' missing; assuming package has no files currently installed
dpkg: warning: files list file for package 'liblcms2-2:amd64' missing; assuming package has no files currently installed
dpkg: warning: files list file for package 'liblcms2-2:i386' missing; assuming package has no files currently installed
dpkg: warning: files list file for package 'libpixman-1-0:amd64' missing; assuming package has no files currently installed
dpkg: warning: files list file for package 'libpixman-1-0:i386' missing; assuming package has no files currently installed
dpkg: warning: files list file for package 'gksu' missing; assuming package has no files currently installed
dpkg: warning: files list file for package 'liblogging-stdlog0:amd64' missing; assuming package has no files currently installed
dpkg: warning: files list file for package 'mesa-vdpau-drivers:amd64' missing; assuming package has no files currently installed
dpkg: warning: files list file for package 'mesa-vdpau-drivers:i386' missing; assuming package has no files currently installed
dpkg: warning: files list file for package 'libzvbi0:amd64' missing; assuming package has no files currently installed
dpkg: warning: files list file for package 'libzvbi0:i386' missing; assuming package has no files currently installed
dpkg: warning: files list file for package 'libcdparanoia0:amd64' missing; assuming package has no files currently installed
dpkg: warning: files list file for package 'libcdparanoia0:i386' missing; assuming package has no files currently installed
dpkg: warning: files list file for package 'python-gconf' missing; assuming package has no files currently installed
dpkg: warning: files list file for package 'php5.6-cli' missing; assuming package has no files currently installed
dpkg: warning: files list file for package 'libpaper1:amd64' missing; assuming package has no files currently installed
dpkg: warning: files list file for package 'mixer.app' missing; assuming package has no files currently installed

After some attempts I found a way to be able to work around the warning message, for each package by simply reinstalling the package reporting the issue with

apt –reinstall $package_name


Though reinstallation started well and many packages got reinstalled, unfortunately some packages such as apache2-mod-php5.6 and other php related ones  started failing during reinstall ending up in unfixable states right after installation of binaries from packages was successfully placed in its expected locations on disk. The failures occured during the package setup stage ( dpkg –configure $packagename) …

The logical thing to do is a recovery attempt with something like the usual well known by any Debian admin:

apt-get install –fix-missing

As well as Manual requesting to reconfigure (issue re-setup) of all installed packages also did not produced a positive result

dpkg –configure -a

But many packages were still failing due to dpkg inability to execute some post installation scripts from respective .deb files.
To work around that and continue installing the rest of packages I had to manually delete all files related to the failing package located under directory 

/var/lib/dpkg/info#

For example to omit the post installation failure of libapache2-mod-php5.6 and have a succesful install of the package next time I tried reinstall, I had to delete all /var/lib/dpkg/info/libapache2-mod-php5.6.postrm, /var/lib/dpkg/info/libapache2-mod-php5.6.postinst scripts and even sometimes everything like libapache2-mod-php5.6* that were present in /var/lib/dpkg/info dir.

The problem with this solution, however was the package reporting to install properly, but the post install script hooks were still not in placed and important things as setting permissions of binaries after install or applying some configuration changes right after install was missing leading to programs failing to  fully behave properly or even breaking up even though showing as finely installed …

The final solution to this problem was radical.
I've used /var/lib/dpkg database (directory) from ther other working Linux machine with dpkg DB OK found in var_backup_debian10.tar.gz (linux:~# host with a working dpkg database) and then based on the dpkg package list correct database responding on jericho:~# to reinstall each and every package on the system using Debian System Reinstaller script taken from the internet.
Debian System Reinstaller works but to reinstall many packages, I've been prompted again and again whether to overwrite configuration or keep the present one of packages.
To Omit the annoying [Y / N ] text prompts I had made a slight modification to the script so it finally looked like this:
 

#!/bin/bash
# Debian System Reinstaller
# Copyright (C) 2015 Albert Huang
# Copyright (C) 2018 Andreas Fendt

# This program is free software: you can redistribute it and/or modify
# it under the terms of the GNU General Public License as published by
# the Free Software Foundation, either version 3 of the License, or
# (at your option) any later version.

# This program is distributed in the hope that it will be useful,
# but WITHOUT ANY WARRANTY; without even the implied warranty of
# MERCHANTABILITY or FITNESS FOR A PARTICULAR PURPOSE.  See the
# GNU General Public License for more details.

# You should have received a copy of the GNU General Public License
# along with this program.  If not, see <http://www.gnu.org/licenses/>.

# —
# This script assumes you are using a Debian based system
# (Debian, Mint, Ubuntu, #!), and have sudo installed. If you don't
# have sudo installed, replace "sudo" with "su -c" instead.

pkgs=`dpkg –get-selections | grep -w 'install$' | cut -f 1 |  egrep -v '(dpkg|apt)'`

for pkg in $pkgs; do
    echo -e "\033[1m   * Reinstalling:\033[0m $pkg"    

    apt-get –reinstall -o Dpkg::Options::="–force-confdef" -o Dpkg::Options::="–force-confold" -y install $pkg || {
        echo "ERROR: Reinstallation failed. See reinstall.log for details."
        exit 1
    }
done


 debian-all-packages-reinstall.sh working modified version of Albert Huang and Andreas Fendt script  can be also downloaded here.

Note ! Omitting the text confirmation prompts to install newest config or keep maintainer configuration is handled by the argument:


-o Dpkg::Options::="–force-confold


I however still got few NCurses Console selection prompts during the reinstall of about 3200+ .deb packages, so even with this mod the reinstall was not completely automatic.

Note !  During the reinstall few of the packages from the list failed due to being some old unsupported packages this was ejabberd, ircd-hybrid and a 2 / 3 more.
This failure was easily solved by completely purging those packages with the usual

# dpkg –purge $packagename

and reruninng  debian-all-packages-reinstall.sh on each of the failing packages.

Note ! The failing packages were just old ones left over from Debian 8 and Debian 9 before the apt-get dist-upgrade towards 10 Duster.
Eventually I got a success by God's grance, after few hours of pains and trials, ending up in a working state package database and a complete set of freshly reinstalled packages.

The only thing I had to do finally is 2 hours of tampering why GNOME did not automatically booted after the system reboot due to failing gdm
until I fixed that I've temprary used ligthdm (x-display-manager), to do I've

dpkg –reconfigure gdm3

lightdm-x-display-manager-screenshot-gdm3-reconfige

 to work around this I had to also reinstall few libraries, reinstall the xorg-server, reinstall gdm and reinstall the meta package for GNOME, using below set of commands:
 

apt-get install –reinstall libglw1-mesa libglx-mesa0
apt-get install –reinstall libglu1-mesa-dev
apt install –reinstallgsettings-desktop-schemas
apt-get install –reinstall xserver-xorg-video-intel
apt-get install –reinstall xserver-xorg
apt-get install –reinstall xserver-xorg-core
apt-get install –reinstall task-desktop
apt-get install –reinstall task-gnome-desktop


As some packages did not ended re-instaled on system because on the original host from where /var/lib/dpkg db was copied did not have it I had to eventually manually trigger reinstall for those too:


apt-get install –reinstall –yes vlc
apt-get install –reinstall –yes thunderbird
apt-get install –reinstall –yes audacity
apt-get install –reinstall –yes gajim
apt-get install –reinstall –yes slack remmina
apt-get install –yes k3b
pt-get install –yes gbgoffice
pt-get install –reinstall –yes skypeforlinux
apt-get install –reinstall –yes vlc
apt-get install –reinstall –yes libcurl3-gnutls libcurl3-nss
apt-get install –yes virtualbox-5.2
apt-get install –reinstall –yes vlc
apt-get install –reinstall –yes alsa-tools-gui
apt-get install –reinstall –yes gftp
apt install ./teamviewer_15.3.2682_amd64.deb –yes


Note that some of above packages requires a properly configured third party repositories, other people might have other packages that are missing from the dpkg list and needs to be reinstalled so just decide according to your own case of left aside working system present binaries that doesn't belong to any dpkg installed package.

After a bit of struggle everything is back to normal Thanks God! 🙂 !


Find when cron.daily cron.weekly and cron.monthly run on Redhat / CentOS / Debian Linux and systemd-timers

Wednesday, March 25th, 2020

Find-when-cron.daily-cron.monthly-cron.weekly-run-on-Redhat-CentOS-Debian-SuSE-SLES-Linux-cron-logo


The problem – Apache restart at random times


I've noticed today something that is occuring for quite some time but was out of my scope for quite long as I'm not directly involved in our Alert monitoring at my daily job as sys admin. Interestingly an Apache HTTPD webserver is triggering alarm twice a day for a short downtime that lasts for 9 seconds.

I've decided to investigate what is triggering WebServer restart in such random time and investigated on the system for any background running scripts as well as reviewed the system logs. As I couldn't find nothing there the only logical place to check was cron jobs.
The usual
 

crontab -u root -l


Had no configured cron jobbed scripts so I digged further to check whether there isn't cron jobs records for a script that is triggering the reload of Apache in /etc/crontab /var/spool/cron/root and /var/spool/cron/httpd.
Nothing was found there and hence as there was no anacron service running but /usr/sbin/crond the other expected place to look up for a trigger even was /etc/cron*


1. Configured default cron execution times, every day, every hour every month


# ls -ld /etc/cron.*
drwxr-xr-x 2 root root 4096 feb 27 10:54 /etc/cron.d/
drwxr-xr-x 2 root root 4096 dec 27 10:55 /etc/cron.daily/
drwxr-xr-x 2 root root 4096 dec  7 23:04 /etc/cron.hourly/
drwxr-xr-x 2 root root 4096 dec  7 23:04 /etc/cron.monthly/
drwxr-xr-x 2 root root 4096 dec  7 23:04 /etc/cron.weekly/


After a look up to each of above directories, finally I found the very expected logrorate shell script set to execute from /etc/cron.daily/logrotate and inside it I've found after the log files were set to be gzipped and moved to execute WebServer restart with:

systemctl reload httpd 


My first reaction was to ponder seriously why the script is invoking systemctl reload httpd instead of the good oldschool

apachectl -k graceful


But it seems on Redhat and CentOS since RHEL / CentOS version 6.X onwards systemctl reload httpd is supposed to be identical and a substitute for apachectl -k graceful.
Okay the craziness of innovation continued as obviously the reload was causing a Downtime to be visible in the Zabbix HTTPD port Monitoring graph …
Now as the problem was identified the other logical question poped up how to find out what is the exact timing scheduled to run the script in that unusual random times each time ??
 

2. Find out cron scripts timing Redhat / CentOS / Fedora / SLES


/etc/cron.{daily,monthly,weekly} placed scripts's execution method has changed over the years, causing a chaos just like many Linux standard things we know due to the inclusion of systemd and some other additional weird OS design changes. The result is the result explained above scripts are running at a strange unexpeted times … one thing that was intruduced was anacron – which is also executing commands periodically with a different preset frequency. However it is considered more thrustworhty by crond daemon, because anacron does not assume the machine is continuosly running and if the machine is down due to a shutdown or a failure (if it is a Virtual Machine) or simply a crond dies out, some cronjob necessery for overall set environment or application might not run, what anacron guarantees is even though that and even if crond is in unworking defunct state, the preset scheduled scripts will still be served.
anacron's default file location is in /etc/anacrontab.

A standard /etc/anacrontab looks like so:
 

[root@centos ~]:# cat /etc/anacrontab
# /etc/anacrontab: configuration file for anacron
 
# See anacron(8) and anacrontab(5) for details.
 
SHELL=/bin/sh
PATH=/sbin:/bin:/usr/sbin:/usr/bin
MAILTO=root
# the maximal random delay added to the base delay of the jobs
RANDOM_DELAY=45
# the jobs will be started during the following hours only
START_HOURS_RANGE=3-22
 
#period in days   delay in minutes   job-identifier   command
1    5    cron.daily        nice run-parts /etc/cron.daily
7    25    cron.weekly        nice run-parts /etc/cron.weekly
@monthly 45    cron.monthly        nice run-parts /etc/cron.monthly


START_HOURS_RANGE : The START_HOURS_RANGE variable sets the time frame, when the job could started. 
The jobs will start during the 3-22 (3AM-10PM) hours only.

  • cron.daily will run at 3:05 (After Midnight) A.M. i.e. run once a day at 3:05AM.
  • cron.weekly will run at 3:25 AM i.e. run once a week at 3:25AM.
  • cron.monthly will run at 3:45 AM i.e. run once a month at 3:45AM.

If the RANDOM_DELAY env var. is set, a random value between 0 and RANDOM_DELAY minutes will be added to the start up delay of anacron served jobs. 
For instance RANDOM_DELAY equels 45 would therefore add, randomly, between 0 and 45 minutes to the user defined delay. 

Delay will be 5 minutes + RANDOM_DELAY for cron.daily for above cron.daily, cron.weekly, cron.monthly config records, i.e. 05:01 + 0-45 minutes

A full detailed explanation on automating system tasks on Redhat Enterprise Linux is worthy reading here.

!!! Note !!! that listed jobs will be running in queue. After one finish, then next will start.
 

3. SuSE Enterprise Linux cron jobs not running at desired times why?


in SuSE it is much more complicated to have a right timing for standard default cron jobs that comes preinstalled with a service 

In older SLES release /etc/crontab looked like so:


SHELL=/bin/bash
PATH=/sbin:/bin:/usr/sbin:/usr/bin
MAILTO=root
HOME=/

# run-parts
01 * * * * root run-parts /etc/cron.hourly
02 4 * * * root run-parts /etc/cron.daily
22 4 * * 0 root run-parts /etc/cron.weekly
42 4 1 * * root run-parts /etc/cron.monthly


As time of writting article it looks like:


SHELL=/bin/sh
PATH=/usr/bin:/usr/sbin:/sbin:/bin:/usr/lib/news/bin
MAILTO=root
#
# check scripts in cron.hourly, cron.daily, cron.weekly, and cron.monthly
#
-*/15 * * * *   root  test -x /usr/lib/cron/run-crons && /usr/lib/cron/run-crons >/dev/null 2>&1


This runs any scripts placed in /etc/cron.{hourly, daily, weekly, monthly} but it may not run them when you expect them to run. 
/usr/lib/cron/run-crons compares the current time to the /var/spool/cron/lastrun/cron.{time} file to determine if those jobs need to be run.

For hourly, it checks if the current time is greater than (or exactly) 60 minutes past the timestamp of the /var/spool/cron/lastrun/cron.hourly file.

For weekly, it checks if the current time is greater than (or exactly) 10080 minutes past the timestamp of the /var/spool/cron/lastrun/cron.weekly file.

Monthly uses a caclucation to check the time difference, but is the same type of check to see if it has been one month after the last run.

Daily has a couple variations available – By default it checks if it is more than or exactly 1440 minutes since lastrun.
If DAILY_TIME is set in the /etc/sysconfig/cron file (again a suse specific innovation), then that is the time (within 15minutes) when daily will run.

For systems that are powered off at DAILY_TIME, daily tasks will run at the DAILY_TIME, unless it has been more than x days, if it is, they run at the next running of run-crons. (default 7days, can set shorter time in /etc/sysconfig/cron.)
Because of these changes, the first time you place a job in one of the /etc/cron.{time} directories, it will run the next time run-crons runs, which is at every 15mins (xx:00, xx:15, xx:30, xx:45) and that time will be the lastrun, and become the normal schedule for future runs. Note that there is the potential that your schedules will begin drift by 15minute increments.

As you see this is very complicated stuff and since God is in the simplicity it is much better to just not use /etc/cron.* for whatever scripts and manually schedule each of the system cron jobs and custom scripts with cron at specific times.


4. Debian Linux time start schedule for cron.daily / cron.monthly / cron.weekly timing

As the last many years many of the servers I've managed were running Debian GNU / Linux, my first place to check was /etc/crontab which is the standard cronjobs file that is setting the { daily , monthly , weekly crons } 


 debian:~# ls -ld /etc/cron.*
drwxr-xr-x 2 root root 4096 фев 27 10:54 /etc/cron.d/
drwxr-xr-x 2 root root 4096 фев 27 10:55 /etc/cron.daily/
drwxr-xr-x 2 root root 4096 дек  7 23:04 /etc/cron.hourly/
drwxr-xr-x 2 root root 4096 дек  7 23:04 /etc/cron.monthly/
drwxr-xr-x 2 root root 4096 дек  7 23:04 /etc/cron.weekly/


debian:~# cat /etc/crontab 
# /etc/crontab: system-wide crontab
# Unlike any other crontab you don't have to run the `crontab'
# command to install the new version when you edit this file
# and files in /etc/cron.d. These files also have username fields,
# that none of the other crontabs do.

SHELL=/bin/sh
PATH=/usr/local/sbin:/usr/local/bin:/sbin:/bin:/usr/sbin:/usr/bin# Example of job definition:
# .—————- minute (0 – 59)
# |  .————- hour (0 – 23)
# |  |  .———- day of month (1 – 31)
# |  |  |  .——- month (1 – 12) OR jan,feb,mar,apr …
# |  |  |  |  .—- day of week (0 – 6) (Sunday=0 or 7) OR sun,mon,tue,wed,thu,fri,sat
# |  |  |  |  |
# *  *  *  *  * user-name command to be executed
17 *    * * *    root    cd / && run-parts –report /etc/cron.hourly
25 6    * * *    root    test -x /usr/sbin/anacron || ( cd / && run-parts –report /etc/cron.daily )
47 6    * * 7    root    test -x /usr/sbin/anacron || ( cd / && run-parts –report /etc/cron.weekly )
52 6    1 * *    root    test -x /usr/sbin/anacron || ( cd / && run-parts –report /etc/cron.monthly )

What above does is:

– Run cron.hourly once at every hour at 1:17 am
– Run cron.daily once at every day at 6:25 am.
– Run cron.weekly once at every day at 6:47 am.
– Run cron.monthly once at every day at 6:42 am.

As you can see if anacron is present on the system it is run via it otherwise it is run via run-parts binary command which is reading and executing one by one all scripts insude /etc/cron.hourly, /etc/cron.weekly , /etc/cron.mothly

anacron – few more words

Anacron is the canonical way to run at least the jobs from /etc/cron.{daily,weekly,monthly) after startup, even when their execution was missed because the system was not running at the given time. Anacron does not handle any cron jobs from /etc/cron.d, so any package that wants its /etc/cron.d cronjob being executed by anacron needs to take special measures.

If anacron is installed, regular processing of the /etc/cron.d{daily,weekly,monthly} is omitted by code in /etc/crontab but handled by anacron via /etc/anacrontab. Anacron's execution of these job lists has changed multiple times in the past:

debian:~# cat /etc/anacrontab 
# /etc/anacrontab: configuration file for anacron

# See anacron(8) and anacrontab(5) for details.

SHELL=/bin/sh
PATH=/usr/local/sbin:/usr/local/bin:/sbin:/bin:/usr/sbin:/usr/bin
HOME=/root
LOGNAME=root

# These replace cron's entries
1    5    cron.daily    run-parts –report /etc/cron.daily
7    10    cron.weekly    run-parts –report /etc/cron.weekly
@monthly    15    cron.monthly    run-parts –report /etc/cron.monthly

In wheezy and earlier, anacron is executed via init script on startup and via /etc/cron.d at 07:30. This causes the jobs to be run in order, if scheduled, beginning at 07:35. If the system is rebooted between midnight and 07:35, the jobs run after five minutes of uptime.
In stretch, anacron is executed via a systemd timer every hour, including the night hours. This causes the jobs to be run in order, if scheduled, beween midnight and 01:00, which is a significant change to the previous behavior.
In buster, anacron is executed via a systemd timer every hour with the exception of midnight to 07:00 where anacron is not invoked. This brings back a bit of the old timing, with the jobs to be run in order, if scheduled, beween 07:00 and 08:00. Since anacron is also invoked once at system startup, a reboot between midnight and 08:00 also causes the jobs to be scheduled after five minutes of uptime.
anacron also didn't have an upstream release in nearly two decades and is also currently orphaned in Debian.

As of 2019-07 (right after buster's release) it is planned to have cron and anacron replaced by cronie.

cronie – Cronie was forked by Red Hat from ISC Cron 4.1 in 2007, is the default cron implementation in Fedora and Red Hat Enterprise Linux at least since Version 6. cronie seems to have an acive upstream, but is currently missing some of the things that Debian has added to vixie cron over the years. With the finishing of cron's conversion to quilt (3.0), effort can begin to add the Debian extensions to Vixie cron to cronie.

Because cronie doesn't have all the Debian extensions yet, it is not yet suitable as a cron replacement, so it is not in Debian.
 

5. systemd-timers – The new crazy systemd stuff for script system job scheduling


Timers are systemd unit files with a suffix of .timer. systemd-timers was introduced with systemd so older Linux OS-es does not have it.
 Timers are like other unit configuration files and are loaded from the same paths but include a [Timer] section which defines when and how the timer activates. Timers are defined as one of two types:


  • Realtime timers (a.k.a. wallclock timers) activate on a calendar event, the same way that cronjobs do. The option OnCalendar= is used to define them.
  • Monotonic timers activate after a time span relative to a varying starting point. They stop if the computer is temporarily suspended or shut down. There are number of different monotonic timers but all have the form: OnTypeSec=. Common monotonic timers include OnBootSec and OnActiveSec.


    For each .timer file, a matching .service file exists (e.g. foo.timer and foo.service). The .timer file activates and controls the .service file. The .service does not require an [Install] section as it is the timer units that are enabled. If necessary, it is possible to control a differently-named unit using the Unit= option in the timer’s [Timer] section.

    systemd-timers is a complex stuff and I'll not get into much details but the idea was to give awareness of its existence for more info check its manual man systemd.timer

Its most basic use is to list all configured systemd.timers, below is from my home Debian laptop
 

debian:~# systemctl list-timers –all
NEXT                         LEFT         LAST                         PASSED       UNIT                         ACTIVATES
Tue 2020-03-24 23:33:58 EET  18s left     Tue 2020-03-24 23:31:28 EET  2min 11s ago laptop-mode.timer            lmt-poll.service
Tue 2020-03-24 23:39:00 EET  5min left    Tue 2020-03-24 23:09:01 EET  24min ago    phpsessionclean.timer        phpsessionclean.service
Wed 2020-03-25 00:00:00 EET  26min left   Tue 2020-03-24 00:00:01 EET  23h ago      logrotate.timer              logrotate.service
Wed 2020-03-25 00:00:00 EET  26min left   Tue 2020-03-24 00:00:01 EET  23h ago      man-db.timer                 man-db.service
Wed 2020-03-25 02:38:42 EET  3h 5min left Tue 2020-03-24 13:02:01 EET  10h ago      apt-daily.timer              apt-daily.service
Wed 2020-03-25 06:13:02 EET  6h left      Tue 2020-03-24 08:48:20 EET  14h ago      apt-daily-upgrade.timer      apt-daily-upgrade.service
Wed 2020-03-25 07:31:57 EET  7h left      Tue 2020-03-24 23:30:28 EET  3min 11s ago anacron.timer                anacron.service
Wed 2020-03-25 17:56:01 EET  18h left     Tue 2020-03-24 17:56:01 EET  5h 37min ago systemd-tmpfiles-clean.timer systemd-tmpfiles-clean.service


8 timers listed.


N ! B! If a timer gets out of sync, it may help to delete its stamp-* file in /var/lib/systemd/timers (or ~/.local/share/systemd/ in case of user timers). These are zero length files which mark the last time each timer was run. If deleted, they will be reconstructed on the next start of their timer.

Summary

In this article, I've shortly explain logic behind debugging weird restart events etc. of Linux configured services such as Apache due to configured scripts set to run with a predefined scheduled job timing. I shortly explained on how to figure out why the preset default install configured cron jobs such as logrorate – the service that is doing system logs archiving and nulling run at a certain time. I shortly explained the mechanism behind cron.{daily, monthy, weekly} and its execution via anacron – runner program similar to crond that never misses to run a scheduled job even if a system downtime occurs due to a crashed Docker container etc. run-parts command's use was shortly explained. A short look at systemd.timers was made which is now essential part of almost every new Linux release and often used by system scripts for scheduling time based maintainance tasks.

How to Avoid the 7 Most Frequent Mistakes in Python Programming

Monday, September 9th, 2019

python-programming-language-logo

Python is very appealing for Rapid Application Development for many reasons, including high-level built in data structures, dynamic typing and binding, or to use as glue to connect different components. It’s simple and easy to learn but new Python developers can fall in the trap of missing certain subtleties.

Here are 7 common mistakes that are harder to catch but that even more experienced Python developers have fallen for.


1. The misuse of expressions as function argument defaults

Python allows developers to indicate optional function arguments by giving them default values. In most cases, this is a great feature of Python, but it can create some confusion when the default value is mutable. In fact, the common mistake is thinking that the optional argument is set to whatever default value you’ve set every time the function argument is presented without a value. It can seem a bit complicated, but the answer is that the default value for this function argument is only evaluated at the time you’ve defined the function, one time only.  

how-to-avoid-the-7-most-frequent-mistakes-in-python-programming-3


2. Incorrect use of class variables

Python handles class variables internally as dictionaries and they will follow the Method Resolution Order (MRO). If an attribute is not found in one class it will be looked up in base classes so references to one part of the code are actually references to another part, and that can be quite difficult to handle well in Python. For class attributes, I recommend reading up on this aspect of Python independently to be able to handle them.

how-to-avoid-the-7-most-frequent-mistakes-in-python-programming-2


3. Incorrect specifications of parameters for exception blocks

There is a common problem in Python when except statements are provided but they don’t take a list of the exceptions specified. The syntax except Exception is used to bind these exception blocks to optional parameters so that there can be further inspections. What happens, however, is that certain exceptions are then not being caught by the except statement, but the exception becomes bound to parameters. The way to get block exceptions in one except statement has to be done by specifying the first parameter as a tuple to contain all the exceptions that you want to catch.

how-to-avoid-the-7-most-frequent-mistakes-in-python-programming-1
 

4. Failure to understand the scope rules

The scope resolution on Python is built on the LEGB rule as it’s commonly known, which means Local, Enclosing, Global, Built-in. Although at first glance this seems simple, there are some subtleties about the way it actually works in Python, which creates a more complex Python problem. If you make an assignment to a variable in a scope, Python will assume that variable is local to the scope and will shadow a variable that’s similarly named in other scopes. This is a particular problem especially when using lists.


5. Modifying lists during iterations over it


When a developer deletes an item from a list or array while iterating, they stumble upon a well known Python problem that’s easy to fall into. To address this, Python has incorporated many programming paradigms which can really simplify and streamline code when they’re used properly. Simple code is less likely to fall into the trap of deleting a list item while iterating over it. You can also use list comprehensions to avoid this problem.

how-to-avoid-the-7-most-frequent-mistakes-in-python-programming-8


6. Name clash with Python standard library


Python has so many library modules which is a bonus of the language, but the problem is that you can inadvertently have a name clash between your module and a module in the standard library. The problem here is that you can accidentally import another library which will import the wrong version. To avoid this, it’s important to be aware of the names in the standard library modules and stay away from using them.

how-to-avoid-the-7-most-frequent-mistakes-in-python-programming-5


7. Problems with binding variables in closures


Python has a late binding behavior which looks up the values of variables in closure only when the inner function is called. To address this, you may have to take advantage of default arguments to create anonymous functions that will give you the desired behavior – it’s either elegant or a hack depending on how you look at it, but it’s important to know.


how-to-avoid-the-7-most-frequent-mistakes-in-python-programming-6

Python is very powerful and flexible and it’s a great language for developers, but it’s important to be familiar with the nuances of it to optimize it and avoid these errors.

Ellie Coverdale, a technical writer at Essay roo and UK Writings, is involved in tech research and projects to find new advances and share her insights. She shares what she has learned with her readers on the Boom Essays blog.

Upgrade Debian Linux 9 to 10 Stretch to Buster and Disable graphical service load boot on Debian 10 Linux / Debian Buster is out

Tuesday, July 9th, 2019

howto-upgrade-debian-linux-debian-stretch-to-buster-debian-10-buster

I've just took a time to upgrade my Debian 9 Stretch Linux to Debian Buster on my old school Laptop (that turned 11 years old) Lenovo Thinkpad R61 . The upgrade went more or less without severe issues except few things.

The overall procedure followed is described n a few websites out there already and comes up to;


0. Set the proper repository location in /etc/apt/sources.list


Before update the sources.list used are:
 

deb [arch=amd64,i386] http://ftp.bg.debian.org/debian/ buster main contrib non-free
deb-src [arch=amd64,i386] http://ftp.bg.debian.org/debian/ buster main contrib non-free


deb [arch=amd64,i386] http://security.debian.org/ buster/updates main contrib non-free
deb-src [arch=amd64,i386] http://security.debian.org/ buster/updates main contrib non-free

deb [arch=amd64,i386] http://ftp.bg.debian.org/debian/ buster-updates main contrib non-free
deb-src [arch=amd64,i386] http://ftp.bg.debian.org/debian/ buster-updates main contrib non-free

deb http://ftp.debian.org/debian buster-backports main


For people that had stretch defined in /etc/apt/sources.list you should change them to buster or stable, easiest and quickest way to omit editting with vim / nano etc. is run as root or via sudo:
 

sed -i 's/stretch/buster/g' /etc/apt/sources.list
sed -i 's/stretch/buster/g' /etc/apt/sources.list.d/*.list

The minimum of config in sources.list after the modification should be
 

deb http://deb.debian.org/debian buster main
deb http://deb.debian.org/debian buster-updates main
deb http://security.debian.org/debian-security buster/updates main

Or if you want to always be with latest stable packages (which is my practice for notebooks):

deb http://deb.debian.org/debian stable main
deb http://deb.debian.org/debian stable-updates main
deb http://security.debian.org/debian-security stable/updates main


1. Getting list of hold packages if such exist and unholding them, e.g.


apt-mark showhold


Same could also be done via dpkg

dpkg –get-selections | grep hold


To unhold a package if such is found:

echo "package_name install"|sudo dpkg –set-selections

For those who don't know what hold package is this is usually package you want to keep at certain version all the time even though after running apt-get upgrade to get the latest package versions.
 

2. Use df -h and assure you have at least 5 – 10 GB free space on root directory / before proceed

df -h /

3. Update packages list to set new set repos as default

apt update


4. apt upgrade
 

apt upgrade

Here some 10 – 15 times you have to confirm what you want to do with configuration that has changed if you're unsure about the config (and it is not critical service) you're aware as such as Apache / MySQL / SMTP etc. it is best to install the latest maintainer version.

Hopefully here you will not get fatal errors that will interrupt it.

P.S. It is best to run apt-update either in VTTY (Virtual console session) with screen or tmux or via a physical tty (if this is not a remote server) as during the updates your GUI access to the gnome-terminal or konsole / xterm whatever console used might get cut. Thus it is best to do it with command:
 

screen apt upgrade


5. Run dist-upgrade to finalize the upgrade from Stertch to Buster


Once all is completed of the new installed packages, you will need to finally do, once again it is best to run via screen, if you don't have installed screen install it:


if [ $(which screen) ]; then echo 'Installed'; else apt-get install –yes screen ; fi

screen apt dist-upgrade


Here once again you should set whether old configuration to some e services has to stay or the new Debian maintainer package shipped one will overwrite the old and locally modified (due to some reason), here do wisely whatever you will otherwise some configured services might not boot as expected on next boot.


6. What if you get packages failed on update


If you get a certain package failed to configure after installed due to some reason, if it is a systemd service use:


journalctl -xe |head -n 50


or fully observer output of journalctl -xe and decide on yourself.

In most cases

dpkg-reconfigure failed-package-name


should do the trick or at least give you more hints on how to solve it.


Also if a package seems to be in inconsistent or broken state after upgrade  and simple dpkg-reconfigure doesn't help, a good command
that can help you is


dpkg-reconfigure -f package_name


or you can try to workaround a failed package setup with:
 

dpkg –configure -a

 
If dpkg-reconfigure doesn't help either as I experienced in prior of Debian from Debian 6 -> 7 an Debian 7 ->8 updates on some Computers, then a very useful thing to try is:
 

apt-get update –fix-missing 

apt-get install -f


At certain cases the only work around to be able to complete the package upgrade is to to remove the package with apt remove but due to config errors even that is not possible to work around this as final resort run:
 

dpkg –remove –force-remove-reinstreq


7. Clean up ununeeded packages


Some packages are left over due to package dependencies from Stretch and not needed in buster anymore to remove them.
 

apt autoremove


8. Reboot system once all upgrade is over


/sbin/reboot


9. Verify your just upgraded Debian is in a good state


root@noah:~# uname -a;
Linux noah 4.19.0-5-rt-amd64 #1 SMP PREEMPT RT Debian 4.19.37-5 (2019-06-19) x86_64 GNU/Linux


root@noah:~# cat /etc/issue.net
Debian GNU/Linux 10


root@noah:~# lsb_release -a
No LSB modules are available.
Distributor ID:    Debian
Description:    Debian GNU/Linux 10 (buster)
Release:    10
Codename:    buster


root@noah:~# hostnamectl
   Static hostname: noah
         Icon name: computer-laptop
           Chassis: laptop
        Machine ID: 4759d9c2f20265938692146351a07929
           Boot ID: 256eb64ffa5e413b8f959f7ef43d919f
  Operating System: Debian GNU/Linux 10 (buster)
            Kernel: Linux 4.19.0-5-rt-amd64
      Architecture: x86-64


10. Remove annoying picture short animation with debian logo looping


plymouth-debian-graphical-boot-services

By default Debian 10 boots up with annoying screen hiding all the status of loaded services state .e.g. you cannot see the services that shows in [ FAILED ] state and  which do show as [ OK ] to revert back the old behavior I'm used to for historical reasons and as it shows a lot of good Boot time debugging info, in previous Debian distributions this was possible  by setting the right configuration options in /etc/default/grub

which so far in my config was like so

GRUB_CMDLINE_LINUX_DEFAULT="quiet splash scsi_mod.use_blk_mq=y dm_mod.use_blk_mq=y zswap.enabled=1 text"


Note that zswap.enabled=1 passed option is because my notebook is pretty old machine from 2008 with 4GB of memory and zswap does accelerate performance when working with swap – especially helpful on Older PCs for more you can read more about zswap on ArchLinux wiki
After modifying this configuration to load the new config into grub the cmd is:
 

/usr/sbin/update-grub

 
As this was not working and tried number of reboots finally I found that annoying animated gif like picture shown up is caused by plymouth below is excerpts from Plymouth's manual page:


       "The plymouth sends commands to a running plymouthd. This is used during the boot process to control the display of the graphical boot splash."

Plymouth has a set of themes one can set:


# plymouth-set-default-theme -l
futureprototype
details
futureprototype
joy
lines
moonlight
softwaves
spacefun
text
tribar


I tried to change that theme to make the boot process as text boot as I'm used to historically with cmd:
 

update-alternatives –config text.plymouth

 
As after reboot I hoped the PC will start booting in text but this does not happened so the final fix to turn back to textmode service boot was to completely remove plymouth
 

apt-get remove –yes plymouth

Preparing your Linux to work with the Cloud providers – Installing aws , gcloud, az, oc, cf CLI Cloud access command interfaces

Wednesday, October 10th, 2018

howto Install-Cloud-access-tools-for-google-aws-azure-openshift-cloud-foundryCloud_computing-explained-on-linux.svg

If you're a sysadmin / developer whose boss requires a migration of Stored Data, Database structures or Web Objects to Amazon Web Services / Google Clourd or you happen to be a DevOps Engineer you will certainly need to have installed as a minimumum amazon AWS and Google Clouds clients to do daily routines and script stuff in managing cloud resources without tampering to use the Web GUI interface.

Here is how to install the aws, gcloud, oc, az and cf next to your kubernetes client (kubectl) on your Linux Desktop.
 

1. Install Google Cloud  gcloud (to manage Google Cloud platform resources and developer workflow
 

google-cloud-logo

Here is few cmds to run to install  gcloud, gcloud alpha, gcloud beta, gsutil, and bq commands to manage your Google Cloud from CLI

a.) On Debian / Ubuntu / Mint or any other deb based distro

# Create environment variable for correct distribution
export CLOUD_SDK_REPO="cloud-sdk-$(lsb_release -c -s)"


# Add the Cloud SDK distribution URI as a package source
# echo "deb http://packages.cloud.google.com/apt $CLOUD_SDK_REPO main" | sudo tee -a /etc/apt/sources.list.d/google-cloud-sdk.list


# Import the Google Cloud Platform public key
$ sudo curl https://packages.cloud.google.com/apt/doc/apt-key.gpg | sudo apt-key add –


# Update the package list and install the Cloud SDK
$ sudo apt-get update && sudo apt-get install google-cloud-sdk


b) On CentOS, RHEL, Fedora Linux and other rpm based ones
 

$ sudo tee -a /etc/yum.repos.d/google-cloud-sdk.repo << EOM
[google-cloud-sdk]
name=Google Cloud SDK
baseurl=https://packages.cloud.google.com/yum/repos/cloud-sdk-el7-x86_64
enabled=1
gpgcheck=1
repo_gpgcheck=1
gpgkey=https://packages.cloud.google.com/yum/doc/yum-key.gpg
       https://packages.cloud.google.com/yum/doc/rpm-package-key.gpg
EOM

# yum install google-cloud-sdk


That's all now the text client to talk to Google Cloud's API gcloud is installed under
/usr/bin/gcloud

Latest install instructions of Google Cloud SDK are here.


2. Install AWS Cloud command line interface tool for managing AWS (Amazon Web Services)
 

AmazonWebservices_Logo.svg

AWS client is dependent on Python PIP so before you proceed you will have to install python-pip deb package if on Debian / Ubuntu Linux use apt:


# apt-get install –yes python-pip


It is also possible to install newest version of PIP a tiny shell script provided by Amazon get-pip.py


# curl -O https://bootstrap.pypa.io/get-pip.py
# python get-pip.py –user


# pip install awscli –upgrade –user


3. Install Azure Cloud Console access CLI command interface
 

Microsoft_Azure_Cloud-Logo.svg

On Debian / Ubuntu or any other deb based distro:

# AZ_REPO=$(lsb_release -cs)
# echo "deb [arch=amd64] https://packages.microsoft.com/repos/azure-cli/ $AZ_REPO main" | \
$ sudo tee /etc/apt/sources.list.d/azure-cli.list

# curl -L https://packages.microsoft.com/keys/microsoft.asc | sudo apt-key add –
$ sudo apt-get update
$ sudo apt-get install apt-transport-https azure-cli


Finaly to check that Azure CLI is properly installed run simple login with:


$ az login


$ sudo rpm –import https://packages.microsoft.com/keys/microsoft.asc
$ sudo sh -c 'echo -e "[azure-cli]\nname=Azure CLI\nbaseurl=https://packages.microsoft.com/yumrepos/azure-cli\nenabled=1\ngpgcheck=1\ngpgkey=https://packages.microsoft.com/keys/microsoft.asc" > /etc/yum.repos.d/azure-cli.repo'
$ sudo yum install azure-cli

$ az login


For Latest install instructions check Amazon's documentation here

4. Install OpenShift OC CLI tool to access OpenShift Open Source Cloud


OpenShift-Redhat-cloud-platform

Even thought OpenShift has its original Redhat produced package binaries, if you're not on RPM distro it is probably
best to install using official latest version from openshift github repo.


As of time of writting this article this is done with:


# wget https://github.com/openshift/origin/releases/download/v1.5.1/openshift-origin-client-tools-v1.5.1-7b451fc-linux-64bit.tar.gz
tar –xvf openshift-origin-client-tools-v1.5.1-7b451fc-linux-64bit.tar.gz


# # mv openshift-origin-client-tools-v1.5.1-7b451fc-linux-64bit oc-tool


# cd oc-tool
# echo'export PATH=$HOME/oc-tool:$PATH' >> ~/.bashrc


To test openshift, try to login to OpenShift cloud:


$ oc login
Server [https://localhost:8443]: https://128.XX.XX.XX:8443


Latest install instructions on OC here

5. Install Cloud Foundry cf CLI Cloud access tool

cloud-foundry-cloud-logo

a) On Debian / Ubuntu Linux based distributions, do run:


$ wget -q -O – https://packages.cloudfoundry.org/debian/cli.cloudfoundry.org.key | sudo apt-key add –
$ echo "deb https://packages.cloudfoundry.org/debian stable main" | sudo tee /etc/apt/sources.list.d/cloudfoundry-cli.list
$ sudo apt-get update
$ sudo apt-get install cf-cli


b) On RHEL Enterprise Linux / CentOS and Fedoras


$ sudo wget -O /etc/yum.repos.d/cloudfoundry-cli.repo https://packages.cloudfoundry.org/fedora/cloudfoundry-cli.repo
$ sudo yum install cf-cli


For latest install insructions on cf cli check Cloud Foundry's install site

There plenty of other Cloud providers with the number exponentially growing and most have their own custom cli tools to access but as there use is not so common as the 5 ones mentioned below, I've omited 'em. If you're interested to know the complete list of Cloud Providers providing Cloud Services check here.

6. Install Ruby GEMs RHC tools collection

If you have to work with Redhat Cloud Storage / OpenShift you will perhaps want to install also (RHC) Redhat Collection Tools.

Assuming that the Linux system is running an up2date version of ruby programming language do run:


root@jeremiah:~# gem install rhc
Fetching: net-ssh-5.0.2.gem (100%)
Successfully installed net-ssh-5.0.2
Fetching: net-ssh-gateway-2.0.0.gem (100%)
Successfully installed net-ssh-gateway-2.0.0
Fetching: net-ssh-multi-1.2.1.gem (100%)
Successfully installed net-ssh-multi-1.2.1
Fetching: minitar-0.7.gem (100%)
The `minitar` executable is no longer bundled with `minitar`. If you are
expecting this executable, make sure you also install `minitar-cli`.
Successfully installed minitar-0.7
Fetching: hashie-3.6.0.gem (100%)
Successfully installed hashie-3.6.0
Fetching: powerbar-1.0.18.gem (100%)
Successfully installed powerbar-1.0.18
Fetching: minitar-cli-0.7.gem (100%)
Successfully installed minitar-cli-0.7
Fetching: archive-tar-minitar-0.6.1.gem (100%)
'archive-tar-minitar' has been deprecated; just install 'minitar'.
Successfully installed archive-tar-minitar-0.6.1
Fetching: highline-1.6.21.gem (100%)
Successfully installed highline-1.6.21
Fetching: commander-4.2.1.gem (100%)
Successfully installed commander-4.2.1
Fetching: httpclient-2.6.0.1.gem (100%)
Successfully installed httpclient-2.6.0.1
Fetching: open4-1.3.4.gem (100%)
Successfully installed open4-1.3.4
Fetching: rhc-1.38.7.gem (100%)
===========================================================================


If this is your first time installing the RHC tools, please run 'rhc setup'

===========================================================================
Successfully installed rhc-1.38.7
Parsing documentation for net-ssh-5.0.2
Installing ri documentation for net-ssh-5.0.2
Parsing documentation for net-ssh-gateway-2.0.0
Installing ri documentation for net-ssh-gateway-2.0.0
Parsing documentation for net-ssh-multi-1.2.1
Installing ri documentation for net-ssh-multi-1.2.1
Parsing documentation for minitar-0.7
Installing ri documentation for minitar-0.7
Parsing documentation for hashie-3.6.0
Installing ri documentation for hashie-3.6.0
Parsing documentation for powerbar-1.0.18
Installing ri documentation for powerbar-1.0.18
Parsing documentation for minitar-cli-0.7
Installing ri documentation for minitar-cli-0.7
Parsing documentation for archive-tar-minitar-0.6.1
Installing ri documentation for archive-tar-minitar-0.6.1
Parsing documentation for highline-1.6.21
Installing ri documentation for highline-1.6.21
Parsing documentation for commander-4.2.1
Installing ri documentation for commander-4.2.1
Parsing documentation for httpclient-2.6.0.1
Installing ri documentation for httpclient-2.6.0.1
Parsing documentation for open4-1.3.4
Installing ri documentation for open4-1.3.4
Parsing documentation for rhc-1.38.7
Installing ri documentation for rhc-1.38.7
Done installing documentation for net-ssh, net-ssh-gateway, net-ssh-multi, minitar, hashie, powerbar, minitar-cli, archive-tar-minitar, highline, commander, httpclient, open4, rhc after 10 seconds
13 gems installed
root@jeremiah:~#

To start with rhc next do:
 

rhc setup
rhc app create my-app diy-0.1


and play with it to install software create services on the Redhat cloud.


Closure

This are just of the few of the numerous tools available and I definitely understand there is much more to be said on the topic.
If you can remember other tools tor interesting cloud starting up tips about stuff to do on a fresh installed Linux PC to make life easier with Cloud / PaaS / SaaS / DevOps engineer please drop a comment.

Virtualbox Shared folder set up on Linux between Host and Guest OS – Set up Virtualbox shared folder to Copy files from PC Host to Guest

Wednesday, September 12th, 2018

mount-shares-between-host-OS-and-guest-virtual-machine-howto-virtualbox-vbox-logo

How to set-up Virtualbox shared folder to Copy files from PC Host  and Guest Virtualized OS?

Running VirtualBox Host is an easy thing to set-up across all Operating Systems.  Once you have it sooner or later you will need to copy files from the VM Host OS (that in my case is GNU / Linux) to the virtualized Guest operating system (again in my case that's again another Linux ISO running indide the Virtual Machine).

Below are steps to follow To use Virtualbox Shared Folder functionality to copy files between VBox and your Desktop / server Linux install.

1. Install Virtualbox Guest Additions CD Image ISO

I've explained how to add the Guest Additions CD image thoroughfully in my previous article Howto enable Copy / Paste Virtualbox betwen Linux guest and Host OS
Anyways I'll repeat myself below for sake of clarity:

To do so use Oracle VBox menus (on the booted virtualized OS VBox window):


Devices -> Insert Guest additions CD Image


Mount the ISO inside the Linux Virtual Machine:

root@debian:~# mount /media/cdrom1/
 

If the mount fails and there are no files inside the mount point it might be because the virtualbox-dkms and virtualbox-guest-dkms packages might be missing on the Host OS.

To install them (on Debian GNU / Linux) assuming that you're using virtualbox default distro packages /etc/apt/sources.list :
 

apt-get install –yes -qq virtualbox-dkms virtualbox-guest-dkms


and run:


root@debian:/media/cdrom1# cd /media/cdrom1; sh VBoxLinuxAdditions.run


2. Create directory for Shared Folder that will be used to access Host / OS files from the Guest Virtualized OS
 

root@debian:~# mkdir /mnt/shared_folder


3. Map from VBox program interface Shared folder settings and Mount /mnt/shared_folder location

virtualbox-virtual-machine-devices-shared-folders-shared-folder-settings-linux-screenshot


Devices -> Shared Folder -> Shared Folder settings -> Transient Folders (click blue folder add small button right)


From Transient Folders add whatever directory you want to be shared from your local notebook / PC to the VM.

virtualbox-devices-Shared-Folder-Add-Shared-Folder-add-share-linux-screenshotDepending on whether you would like to mount the shared folder only for reading files (choose Read Only) to make it a permanent shared folder (and not just for the one session of current running Virtual Machine until its killed use Make Permanent) or check Auto-Mount tick if you want the shared_folder mapping to be mounted on every VM boot.

Once the shared_folder directory location is set-up from GUI menu click OK and in order for the settings to take effect, you'll need to restart the VM Guest with Linux (use halt command from terminal) or Power Off the Machine via the VBox menus.

To mount use command like:

mount -t vboxsf name_of_folder_linked_from_vbox  /mnt/name_folder_guest_os/


mount-vboxsf-shared-folder-mnt-shared-linux-guest-screenshot

In my case I wanted to share home folder /home so the command I used is:

root@debian:~# mount -t vboxsf  shared_folder /mnt/shared_folder


If everything is fine your Host OS file content from /home will be visible (for read and write if you Mapped it so) 
under /mnt/shared_folder …

And as Turtles Ninja used to heavily say Cowabunga !!! 🙂
You have it mounted and ready for file share between Desktop -> Virtualized OS.


Bear in mind that above mount command has to run as root (superuser) to succeed.

You now could copy files from your Host OS (running the Virtual Machine) and the Guest OS (Virtualized OS) using /mnt/shared_folder mount point without problems.

The example is if you want to share files between VirtualBox installed Linux and the Guest (Desktop / server) OS, however at many cases mounting your Host OS directory for root users might be not very practical but, instead you might prefer to do the mount for specific non admin user, for example I prefer to do the shared folder mount with my pointed non-root username hipo.

Here is how to do above VM shared_folder mount for non-root user:

First you need to know the exact UID / GID (User ID / Group ID) of user, you can get that with id command:


hipo@linux:~$  id
uid=1000(hipo) gid=1000(hipo) groups=1000(hipo),24(cdrom),25(floppy),29(audio),30(dip),44(video),46(plugdev),108(netdev),114(bluetooth),115(lpadmin),119(scanner)


As you see UID / GID in my case are 1000 / 1000

hipo@linux:~$ sudo mount -t vboxsf -o rw,uid=1000,gid=1000 shared_folder /mnt/shared_folder


mount-virtual-box-shared_folder-with-non-administration-permissions-non-root-permissions-id-and-mount-command-screenshot-linux


4. Mounting configured shared_folder to automatically mount into the Guest OS Linux on every boot

a) Configuring shared_folder auto-mount using /etc/rc.local

If you need the shared_folder to automatically mount next-time you boot the virtual machine quickest way is to add the mount command to /etc/rc.local (on Debian 8 and Debian 9 and newer Ubuntu Linuxes rc.local is missing by default to enable it to work like it worked before read follow my previous article ).

b) Configuring auto-mount for shared_folder through /etc/fstab

The more professional way to auto-mount on emulated OS VM boot time,  you could add the vboxsf mount definitions to /etc/fstab with your favourite text-editor mcedit, nano, joe etc. … (for me that's vim).

Syntax of /etc/fstab is as follows:
 

<Device> <Mount Point> <Type> <Options> <Dump> <Pass>

root@linux:~# vim /etc/fstab


shared_folder /mnt/shared_folder                                vboxsf rw,uid=1000,gid=1000 0 0

Note that you will want to change 1000 / 1000, id / gid with the ones of the non-admin user you would like to add to mount it for.

A quick way to add it to /etc/fstab with a shell one-liner is with command
 

root@linux:~# echo 'shared_folder /mnt/shared_folder                                vboxsf rw,uid=1000,gid=1000 0  0' >> /etc/fstab

An alternative way to add a user to have permissions for vboxsf file system (without specifying the long -o uid=1000,gid=1000 options is to simply add the username in question to group vboxsf like so:

c) Adding non super user username to vboxsf group

root@linux:~# usermod -G vboxsf hipo
root@linux:~# grep -i vboxsf /etc/group
vboxsf:x:999:hipo


hipo@linux:~$ sudo mount -t vboxsf  shared_folder /mnt/shared_folder


without the extra arguments and the options to pass to /etc/fstab (for eventual requirement to auto mount the shared_folder) would be more simple e.g.:


echo 'shared_folder /mnt/shared_folder                                vboxsf ' >> /etc/fstab


One note to make here is if the uesr is added to vboxsf the line for /etc/fstab to auto mount to mount for root user and non-root will be identical.

Then you can get the /etc/fstab auto-mount configured tested by running:

c) Checking auto-mount is working

hipo@linux:~# mount -a
hipo@linux:~# mount |grep -i vboxsf
shared_folder on /mnt/shared_folder type vboxsf (rw,nodev,relatime)


5. What if you end up with mounting failed errors ? – What might be causing the mounting failed Protocol error (a few things to check to solve)


In case of troubles with the mount you might get an error like:

hipo@linux:~# mount -t vboxsf  share_folder /mnt/shared_folder

/sbin/mount.vboxsf: mounting failed with the error: Protocol error


This error might be caused because of Insert Guest Additions CD Image might be not properly enabled and installed using the ISO provided VBoxLinuxAdditions.sh shell script.
Other common reason you might get this error if you have mistyped the Folder name: given in Shared Folders -> Folder Path -> Add Share for example I have given shared_folder as a Map name but as you can see in above mount -t vboxsf, I've mistyped share_folder instead of the correct one shared_folder inserted.
In some VBox releases this error was caused by bugs in the Virtual Machine.
 

virtualbox-virtual-machine-shared-folder-transient-folder-add-folder-linux-VM-guest-linux

One useful tip is to be able to check whether a Virtualbox Virtual Machine has a configured shared_folder (if you're logging to manage the machine on remote server – nomatter whether you have logged in with VNC / Teamviewer / Citrix etc. or via SSH session.

To do so use VBoxControl as of time of writting usually located on most distributions under (/usr/bin/VBoxControl)


hipo@linux:~# VBoxControl sharedfolder list -automount
Oracle VM VirtualBox Guest Additions Command Line Management Interface Version 5.2.18
(C) 2008-2018 Oracle Corporation
All rights reserved.


Auto-mounted Shared Folder mappings (0):

No Shared Folders available.

You can use VBoxControl command to get set and list a number of settings on the VBox VM, here is an useful example with it where you get information about numerous VBox info values:


root@linux:~# VBoxControl guestproperty enumerate
Oracle VM VirtualBox Guest Additions Command Line Management Interface Version 5.2.18
(C) 2008-2018 Oracle Corporation
All rights reserved.


Name: /VirtualBox/GuestInfo/OS/Product, value: Linux, timestamp: 1536681633430852000, flags: <NULL>
Name: /VirtualBox/GuestInfo/Net/0/V4/IP, value: 10.0.2.15, timestamp: 1536681633438717000, flags: <NULL>
Name: /VirtualBox/HostInfo/GUI/LanguageID, value: en_US, timestamp: 1536697521395621000, flags: RDONLYGUEST
Name: /VirtualBox/GuestInfo/Net/0/MAC, value: 08002762FA1C, timestamp: 1536681633442120000, flags: <NULL>
Name: /VirtualBox/GuestInfo/OS/ServicePack, value: <NULL>, timestamp: 1536681633431259000, flags: <NULL>
Name: /VirtualBox/HostInfo/VBoxVerExt, value: 5.2.18, timestamp: 1536681619002646000, flags: TRANSIENT, RDONLYGUEST
Name: /VirtualBox/GuestInfo/Net/0/V4/Netmask, value: 255.255.255.0, timestamp: 1536681633440157000, flags: <NULL>
Name: /VirtualBox/GuestInfo/OS/Version, value: #1 SMP Debian 4.9.110-3+deb9u2 (2018-08-13), timestamp: 1536681633431125000, flags: <NULL>
Name: /VirtualBox/GuestAdd/VersionExt, value: 5.2.18, timestamp: 1536681633431582000, flags: <NULL>
Name: /VirtualBox/GuestAdd/Revision, value: 124319, timestamp: 1536681633432515000, flags: <NULL>
Name: /VirtualBox/HostGuest/SysprepExec, value: <NULL>, timestamp: 1536681619002355000, flags: TRANSIENT, RDONLYGUEST
Name: /VirtualBox/GuestInfo/OS/LoggedInUsers, value: 1, timestamp: 1536681673447293000, flags: TRANSIENT, TRANSRESET
Name: /VirtualBox/GuestInfo/Net/0/Status, value: Up, timestamp: 1536681633443911000, flags: <NULL>
Name: /VirtualBox/GuestInfo/Net/0/Name, value: enp0s3, timestamp: 1536681633445302000, flags: <NULL>
Name: /VirtualBox/HostGuest/SysprepArgs, value: <NULL>, timestamp: 1536681619002387000, flags: TRANSIENT, RDONLYGUEST
Name: /VirtualBox/GuestAdd/Version, value: 5.2.18, timestamp: 1536681633431419000, flags: <NULL>
Name: /VirtualBox/HostInfo/VBoxRev, value: 124319, timestamp: 1536681619002668000, flags: TRANSIENT, RDONLYGUEST
Name: /VirtualBox/GuestInfo/Net/0/V4/Broadcast, value: 10.0.2.255, timestamp: 1536681633439531000, flags: <NULL>
Name: /VirtualBox/HostInfo/VBoxVer, value: 5.2.18, timestamp: 1536681619002613000, flags: TRANSIENT, RDONLYGUEST
Name: /VirtualBox/GuestInfo/OS/LoggedInUsersList, value: hipo, timestamp: 1536681673446498000, flags: TRANSIENT, TRANSRESET
Name: /VirtualBox/GuestInfo/Net/Count, value: 1, timestamp: 1536698949773993000, flags: <NULL>
Name: /VirtualBox/GuestInfo/OS/Release, value: 4.9.0-7-amd64, timestamp: 1536681633431001000, flags: <NULL>
Name: /VirtualBox/GuestInfo/OS/NoLoggedInUsers, value: false, timestamp: 1536681673447965000, flags: TRANSIENT, TRANSRESET
Name: /VirtualBox/GuestAdd/HostVerLastChecked, value: 5.2.18, timestamp: 1536681702832389000, flags: <NULL>

Hope you enjoyed ! Have phun! 🙂

The Best Most Effective Search Engine Optimization SEO tips or how to stay ahead of your competitors

Friday, October 27th, 2017


The 16 most effective search engine optimization tips

I've found an infogram that is showing the best practices of Search Engine Optimization as today SEO has been dependent strongly on this factors I suggest you closely check your site, whether all of the 16 pinpointed tips are already implemented in your site if not you better implement them before the robots (Machine Learning), Cloud Computing and the rest of the modern tech savy mambo jambo stuff modern technology takes over SEO ranking in Google. If you run a start up business like me this tips will definitely help you to keep up in the list of Google, Bing and Yahoo ahead of your competitors.

Enjoy Learning and please share anything you find missing on the diagram which you already do to Boost Up your SEO!