Archive for August, 2010

The Shepheard of Hermas an apocrypha book, used by some early Christian heresies

Tuesday, August 10th, 2010

Shepherd of Hermes, The Good shepherd

Heresis in Christianity, has seen long time ago been sprawling and trying to infect the correct Christian faith we shold have.
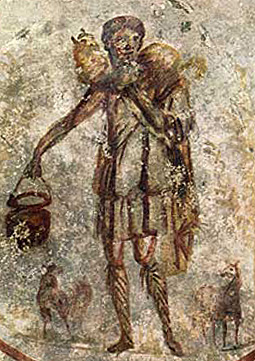
One very famous apocrypha book which was very modern around “alternative” faith seekers is The Shepher of Hermas – The Good Shepherd
The work has been well known in the west and has been widely copied in the middle ages.
The original work dating is probably either to the 2nd cenruty or to the distant 88 – 97 year after Christ.
The work is actually something similar to the Revelation of John, though it’s most probably.
The book consists of five visions granted to Hermas, a former slave. This is followed by twelve mandates or commandments, and ten similitudes, or parables. It commences abruptly in the first person: “He who brought me up sold me to a certain Rhoda, who was at Rome. After many years I met her again, and began to love her as a sister.” As Hermas was on the road to Cumae, he had a vision of Rhoda, who was presumably dead. She told him that she was his accuser in heaven, on account of an unchaste thought the (married) narrator had once had concerning her, though only in passing. He was to pray for forgiveness for himself and all his house. He is consoled by a vision of the Church in the form of an aged woman, weak and helpless from the sins of the faithful, who tells him to do penance and to correct the sins of his children. Subsequently he sees her made younger through penance, yet wrinkled and with white hair; then again, as quite young but still with white hair; and lastly, she shows herself as glorious as a Bride.

This allegorical language continues through the other parts of the work. In the second vision she gives Hermas a book, which she afterwards takes back in order to add to it. The fifth vision, which is represented as taking place twenty days after the fourth, introduces “the Angel of repentance” in the guise of a shepherd, from whom the whole work takes its name. He delivers to Hermas a series of precepts (mandata, entolai), which form an interesting development of early Christian ethics. One point which deserves special mention is the assertion of a husband’s obligation to take back an adulterous wife on her repentance. The eleventh mandate, on humility, is concerned with false prophets who desire to occupy the first seats (that is to say, among the presbyters). Some have seen here a reference to Marcion, who came to Rome c.140 and desired to be admitted among the priests (or possibly even to become bishop of Rome).
After the mandates come ten similitudes (parabolai) in the form of visions, which are explained by the angel. The longest of these (Similitude 9) is an elaboration of the parable of the building of a tower, which had formed the matter of the third vision. The tower is the Church, and the stones of which it is built are the faithful. But in the third vision it looked as though only the holy are a part of the Church; in Similitude 9 it is clearly pointed out that all the baptized are included, though they may be cast out for grave sins, and can be readmitted only after penance.
In spite of the grave subjects, the book is written in a very optimistic and hopeful tone, like most early Christian works.Our Church the estern Orthodox Church identintifies the work nowadays as a heresy, so any man determined ot read it better do it with a blessing of his spiritual father, otherwise man is risking to have a serious harm on his spiritual state.
We should be well aware that since the book is talking against the presbyters in the early Church and does criticize the spiritual authority ok Christ’s early church it has to be considered as a dangerous reading for us the comtemporary Christians.
However I thought mentioning the book here would be interesting, since it’s so ancient and therefore with a high historical value, not to mention it is so similar by some things with its ideas to early Christianity.

Monitoring and restart server services (Apache, Mysql, Bind) with Monit to prevent server downtimes

Monday, August 9th, 2010

Monit Daemon Service Logo

If you’re a system administrator responsible for a server running a heavy loaded high traffic website equipped with Apache, MySQL, Bind, Spamassassin .. you name the service, you have probably already faced the stressful situations whenever unexpected server services crashes occur.

You should already know by experience that whenever an Apache or Database server goes down especially on a well known respected website, then you’re into real shit.

In my prefessional work experience as a system admin some time ago I found a handy small program written especially to save you the many nerves and worries, of unexpected server services failures caused by an unexpected running server software bugs.

The great program able to monitor your specified system services is called Monit

Monit is specially written with the idea in mind to track daemon, processes, files, devices and even a remote systems.

What makes monit a really superb and a desireful piece of software to install on each and every software you take care of is it’s ability to trigger certain activities whenever some critical problems with monitor system files are missing, daemons are not runnign any more, some kind of critical system overload occurs and even almost everything bad you can imagine could happen could be previously foreseen and described from the monit configuration file monitrc

For instance if your MySQL server is crashing every now and then without logging any meaningful to its log file, and yet your site users have to wait before it gets restarted by you, you can easily automate that using monit.

Monit is also built with a small daemon listening on a port that is able to show you the monitored services state, it’s also capable of sending altert emails in case if critical predefined occurances.

Monit is even able to be installed on a number of server nodes and be used directly from a common web interface and therefore a management of all server services from just one interface is possible.
This is especially handy if you’re a system administrator responsible for 10+ servers like I used to be some time ago.

Another handy example of whenever using monit would be of a immesurable extra benefit is for instance if you have a server where you have a dying SSH server every now and then on your dedicated server located some 100 000 km away.

If you have properly installed and configure monit and this kind of emergency situation occurs monit will handle the situation and restart your SSHD daemon ASAP as it realizes the sshd daemon is not properly running on your server.

In this article I’m about to explain how to install and configure monit on a Debian GNU/Linux.
The install and configure procedure should be most likely also compatible with Ubuntu and any other Debian based distribution like Sidux, on Redhat based Linuxes the steps to be followed might be a bit different but yet easily adapted from the one I explain here.

1. Install the monit deb package on your Debian server debian-server:~# apt-get install monit

2. Configure monit to enabled as a daemon and start up on boot

– Edit /etc/default/monit :

By default /etc/default/monit looks like so:

# Defaults for monit initscript
# sourced by /etc/init.d/monit
# installed at /etc/default/monit by maintainer scripts
# Fredrik Steen <stone@debian.org>

# You must set this variable to for monit to start
startup=0

# To change the intervals which monit should run uncomment
# and change this variable.
# CHECK_INTERVALS=180

Change in the above /etc/default/monit configuration:

startup=1

This is necessary otherwise the monit daemon won’t start up.

3. Download my monitrc already configured to track and Restart MySQL, Apache and Bind

Apart from monitoring MySQL, Apache and Bind, with this configuration monit is configured to alert on an emailthat needs to be configured from /etc/monit/monitrc .

It also checks for free disk space availability dangerously decreasing as well as for high load avarage and critical low levels of memory usage.

You will have to modify the monitrc provided and substitute the my default domain www.pc-freak.net with whatever is the name of yours.

Some other minor modifations to the conf file might be necessary so review it before proceeding with running up the monit daemon.

You can either download a working copy of monitrc or directly execute on your server:

debian-server:~# cd/etc/monit
debian-server:/etc/monit # mv monitrc monitrc.orig
debian-server:/etc/monit # wget https://www.pc-freak.net/files/monitrc

After a minor modifications to monitrc you should be ready to start up the monit service and it will monitor and alert whenever it matches any of the configuration prerogative.

4. Test monit configuration

To test if your prepared monitrc has a valid syntax issue:


debian-server:~# monit -t

5. Start up the monit service

debian-debian-server:~# /etc/init.d/monit start

6. Accessing Monit Web interface

Monit Web interface will run on the port number 2812.If you have any firewall preventing acccess to 2812 make sure you allow access to the port in order to be able to access it.

Now point your browser to http://www.yourdomain.com:2812/.
Log in with admin and test, and you should see the monit web interface

Having a monit on your server can assure you a better both server and services uptime as well as inform you of a possible approaching problems, the uses of monit to track and react on certain unexpected common troubles comes up to your imagination and creativity.

Using spriteme can improve your website view performance (Spriteme and sprites a quick look)

Sunday, August 8th, 2010

SpriteMe icon, improve website access times with spriteme

I’ve recently come across around SpriteMe a project which explains an approach in web development towards picture showing speed up with CSS.
The whole idea behind spriteme that it allows you to have a large image with a number of images and you can use some javascript to display the necessary image element part of the complete many elements image.

Using this kind of approach in displaying images in a website can save you the many dubious requests to the webserver and therefore could improve the website general access time.
The whole concept is very intesting so I suggest check it out by yourself.

Starting with sprime is a piece of cake as the guys of sprime.org has prepared a special javascript bookmark button which through which the user is able to prepare some image sprites.

A very good profound article on what is the Sprites and therein implementation called CSS Sprites: What They Are, Why They’re Cool, and How To Use Them can be red here
Another good place to visit if you want to further read about Sprime and Sprites is the Css Sprites website

The whole concept behind sprime is based on an oldschool computer graphics technology called SpriteMe Read further about sprite technology more in wikipedia
The css sprites are also well documented in w3cschools.com website so take a quick look therein as well.

As I’m a into computing for quite some time I even remeber that there was times that this kind of technology was a complete hype, even if I’m my memory is correct the great Heroes of Might and Magic II ‘s game graphic system was based around the sprite technology.

BTW Heroes of Might and Magic II is in the head in my best strategy game list.
Sprites was also heavily used earlier in games industry especially in console games for it’s numerous privileges.
I haven’t yet myself implemented the spritesme CSS technology in my website but I’m considering doing so ASAP I have some few hours time.
Not everything is perfect with spritesme though it can have a major impact on a website performance whenever implemented, there are still many risks as many browsers doesn’t render the CSS in a proper way, not to mention that there are many people who use text mode browsers as lynx/links or some browser extensions that would not play well with CSS.
In the meantime I’ll be glad to get some feedback of users who has experience with spritesme in web dev.

Controlling fan with Thinkfan on Lenovo Thinkpad R61 on Debian GNU/Linux (adjusting proper fan cycling)

Saturday, August 7th, 2010

Some time ago before I have blogged about How to properly control your Lenovo Thinkpad R61 fan rotation cycles on Linux with ThinkFan
In this tiny article I have explained my previous obstacles of making my Notebook CPU cooling fan to properly rotate and cool up my Central Processing Unit.

However just recently I’ve upgraded my Debian Unstable – Squeeze/Sid through the apt-get manager to the newest possible package updates.
The upgraded bundle of packages also updated my sid thinkfan package to:

hipo@noah:~$ dpkg -l |grep -i thinkfan
ii thinkfan 0.7.1-1 simple and lightweight fan control program

I was unpleasently suprised when I tried to restart thinkfan using the thinkfan init.d script I have used until recently /etc/init.d/thinkfan , cause /etc/init.d/thinkfan was no longer be.

Furthermore I give a try to directly launch the thinkfan daemon from the terminal trying to backround the service, like so:

noah:~# thinkfan &
WARNING: Using default temperature inputs in /proc/acpi/ibm/thermal.
WARNING: You have not provided any correction values for any sensor, and your fan will only start at 55 °C. This can be dangerous for your hard drive.

Though this started up the thinkfan daemon as you can see the note in the message below it started up with a consistent cycling cooling to keep the CPU wamrth sticked to 55 ° degrees:
<</p>

Create ln symbolink or hard links with mount –bind for better filesystem read/write performance / Adding mount –bind to /etc/fstab

Friday, August 6th, 2010

If you’re building a website and you need to create a link from a certain destination to another place.
You’ve probably already thought about using the ln command to create a symbolic link to the questionable directory (folder).
Though this is one of the possible approaches to solve the task, it’s far not the best one.
A possible alternative to the good old fashioned ln -s way would be through a bind mountmount –bind
The mount –bind is well documented in mount’s manual so it’s best if you take a look at it.
You might want to check the following ln vs mount bind discussion to know more about why mount –bind is probably a better more efficient solution to link a location to another one in terms of efficiency.
fstab proper record for linking directory to another one using the –bind mount feature :

Bind mount is used to export a certain mounted directory to another one. The end result when using bind –mount it is absolutely.identical to a normal link created with ln .

However using a normal symlink is also less prone to a security leaks like filesystem directory traversal attacks etc.
Wherein ln -s command is used actually a new inode is created pointing to a certain filesystem object (let’s say directory),for comparison mounting it instead of linking the directory won’t have it’s own inode on the filesystem created.
The above inode explanation directly means that in hard links and mount binds creation no special inode is reseverved for either thehard link or the mount –bind thus working with directories created with mount –bind is a bit faster and on a heavy loadedfilesystems will have a positive decrease if used.

To permanently create a mount –bind from the /etc/fstab file in Linux, it would be necessary to place an fstab record like the one shown below:

/home/username/www/random/images /home/username/www/unknown/images/ bind defaults,bind 0 0

To add the mount bind to fstab directly from terminal/console you can use a command like:

debian:~# echo "/home/username/www/random/images /home/username/www/unknown/images/ bind defaults,bind 0 0" >> /etc/fstab

How to install and configure torbutton on Debian / Anonymizing Iceweasel, Firefox on Debian GNU/Linux

Thursday, August 5th, 2010

Tor Onion Logo

There is a quite a buzz online recently about the implications breach of personal privacy by simple browing online.
A week ago I've blogged On How to improve your web browser security for better personal identity
Though there is probably a plenty of more things to be done on guaranteeing your anonymous identity online, the article lacked to mention one very one vital project related with anonymity – the tor Anonymity online project
The project offer the user the right to be anonymous online through a complex constantly expanding network of volunteers which voluntary install and grant access to the installed tor server to be used as a proxy from their computers.
A very thorough explanation on what is tor can be red here
Enabling tor on your personal computer would at least guarantee you that every now and then your traffic browser network traffic (request) would flow through a random tor servers located on a different worldly geographic locations.
Usually the traffic to a destination host would pass through 5 tor network nodes. Where the traffic is unecrypted between last node and the 4th node, while in the other four ones it's completely crypted.
This makes your tracking almost impossible if it's based on technologies like for instance Maxmind's Geoip or Geonames's geographical data base because every now and then you'll appear to be coming to the end point referrar web server originating from a different tor node ip address

The tor server is a free software licensed under the GPL and this is also a good assurance because everybody is able to have a look on the code and this is a further guarantee that the software doesn't include a malicious ways for a middle users to sniff on your traffic.

The tor project has even built a pre-bundled browser ready to be worn by yourself on a usb stick, so you can quickly start using the tor anonymous network on any random computer anywhere.
The tor browser page is available here also Tor Browser Bundle for Windows is available here
Tor server is available for both Windows, Mac OS X, Linux and Linux/BSD Unix
Of course tor is not perfect it opens some other possible doors for attackers which are much less likely to occur if you don't use it, however in general it's better off with tor than without it.

One serious reason for not reason for not using Tor might be that it's usually many times slower than normal browser since, it routes traffic through a different tor network nodes.
So if you decide to go on and use it you better be patient and calm 🙂

Since I'm a Debian user and I really do value my privacy I decided to start using Tor.
In order to start using Tor it's usually necessary to configure your browser to use The TorButoon Firefox browserextension

Nevertheless on Debian GNU/Linux if you try to go the straigh way as explained on Tor's website install the TorButton and configure it to work in cooperation with the polipo caching proxy
You will be not able to browse after enabling straight the tor plugin.
If you try the up-mentioned approach you're probably about to come to errors like:
"the proxy server is refusing connections"
,
Proxy error: 502 Disconnected operation and object not in cache
or
504 Connect to superquizgames.com:80 failed: SOCKS error: host unreachableThe following error occurred while trying to access http://yourwebsite.com/:504 Connect to superquizgames.com:80 failed: SOCKS error: host unreachable

In order to properly install configure and enable the TorButton on my Debian GNU/Linux I had to get through the following steps:

1. Install the polipo caching proxy

debian:~# apt-get install polipo

2. Download and overwrite default polipo configuration with the one from torproject.org

This is necessary to configure in order to have polipo adapted to work with tor, so issue the following commands:

debian:~# cd /etc/polipo
debian:~# wget https://svn.torproject.org/svn/torbrowser/trunk/build-scripts/config/polipo.conf
debian:~# mv config config.bak
debian:~# mv polipo.conf config

3. Restart polipo for the new config settings to take affect

debian:~# /etc/init.d/polipo restart

4. Install the iceweasel-torbutton browser extension

debian:~# apt-get install iceweasel-torbutton

The iceweasel-torbutton will also install you the tor package which is evidently required for the torbutton to operate.
Now you should be ready to go, you can enable the tor use from the tor button which should appear in your browser in the bottom right corner of your browser.
It should look something similar to:

Tor Button screenshot in Iceweasel

Tor Enable/Disable Iceweasel browser Button

To test your Tor Configuration you can use the Test Settings button which is straight available from TorButton's preferences

From here after it might be a good idea to play with the TorButton security settings and configure it according to your liking, bear in mind that you should have a solid knowledge on how browsers work and some basic Internet protocols before you start tampering this options.
If tou don't know what you do you better stop and don't tamper with the torbutton security options.
The only one that you will most probably want to untick is The Disable plugins during Tor usage , stopping this option will allow you to have a flash video streaming display properly, otherwise you won't be able to use , Vbox etc.
Below you see a screenshot of the TorButton Security Settings dialog.

TorButton properties Dialog

To open up this dialog you need to navigate to the TorButto and choose preferences with the right mouse buttons 🙂
Hope this article is informative to somebody out there.
User feedback is mostly welcome! Cheers 🙂

How to configure Debian to create new added users through adduser to be secure by default / Limiting access to other user’s information

Tuesday, August 3rd, 2010

If you’re about to add new users to your Debian GNU/Linux you should have certainly noticed that the defaultusers created in /home directory are created with a 755 chmod permissions .
What makes it even worser is that in Debian by default the root user home directory /root has also a 755 permissons by default, you can see an example of the insecure behaviour below:

hipo@noah:/$ ls -ld root/
drwxr-xr-x 67 root root 4096 Aug 3 12:40 root/

This is quite a big security leak since every user on the system can read and copy all the documents of every other one without any constraint. Users can have read access to the administrator root user !
I have no clear clue why the Debian development team has taken the decision to set such an insecure permissions by default, but anyways it’s probably a good practice if you’re sane person with a security in mind, should certainly realize that this kind of insecure by default permissions has to be changed for a secure one.
This is probably about to save you tons of nerves of possible security info leak among users or even, security leaks coming out of your home root directory.

Changing the default permissions for the new created users on the system using the adduser command is pretty easy and is being controlled by /etc/adduser.conf

the variable responsible for the persmissons of newly created user directories found within the file is: DIR_MODE by default in Debian this variable is set to be equal to DIR_MODE=0755 which as I’ve already said is insecure thus a recommandable change value would be: DIR_MODE=750

So procceed and open the vim /etc/adduser.conf and change the DIR_MODE=755 variable to DIR_MODE=0750 there is plenty of more configuration options that you might want to tamper with one worthy to mention is that through the same conf file you’re able to specify the range values between which a new created user’s ids and gids could borrow.
This can be done via the variables FIRST_SYSTEM_UID LAST_SYSTEM_UID and respectively for GIDS, FIRST_SYSTEM_GID and LAST_SYSTEM_GID

Another thing to do immediately is change your root’s directory default set permissions during after your Debian Linux installation is complete, to do so:

debian:~# chmod 750 /root

If you’re in a position where you have already any number of users existing with alredy created insecure user home directories permissions (755) then a simple (bash shell) one liner to change all the system users permissions to 750 and hence prohibit users to be able to read among each other’s directory would be:

debian:~# for i in /home/*; do chmod 750 $i; done

The default insecure behaviour that Debian Linux possess as well as the issue discussed above is well documentaed in Securing Debian Manual so check it out for a more thorough info on Debian security.

How to improve your web browser security – Better securing your personal identity privacy on the Net

Monday, August 2nd, 2010

improve-browser-security-howto-improve-firefox-chrome-security
Nowadays internet privacy has become a taboo. Many people do understand how vital is it to protect your privacy online.
Unfortunately not much has done much in order to improve their state of security whilst on the net.
In this article you’re about to find out how trusted and secure is the browsing in the Internet and next to it you will find some possibleways and thoughts how you can improve your personal privacy and the amount of information your browser reveals about your (habits, interestest, and, lifestyle) while surfing online.
There are a lot of private information that can leak through a simple web serarch, let’s say you decide to search for some kind of sickness and it’s treatment.. just few minutes later the paid advertisement popping up will be showing up targetting ads related to your previous sickness google search.
This is tiny bit of information your browser reveals, however there is much much more. So let me give you a few more examples:
Let’s say you visit a website with an Adobe Flash browser player enabled. It’s very likely that the website will have flash advertisement this popular this day. If that is the scenario it’s very likely that the flash application is built to use тхе so called flash cookies supported.
You might have never heard about flash cookies but anyways this one of cookies are one of the most malicious cookies ever invented.
One of the main reason they’re so dubious is the fact THEY NEVER EXPIRE!
Though as with normal cookies flash cookies are used for storing user details, let’s say your profile details or settings concerning your youtube video player etc. and this sound nice, market guys use the same features to track what you do online.
Using flash cookies for instance everybody who cratefted a specific adobe flash page is able to list your flash cookies stored browser history!
To partly setup the behaviour of your Flash player and change the defailt flash player settings for good use the flashplayer settings manager

It’s really odd that the only way to configure flash is to configure it via adobe’s webpage this is much sneaky since, God only knows what kind of information as well probably your whole flash browser history and flash cookies is being sent Adobe for later analysis.
Moreover the flash player is a propriatary software and this makes it even more likely to have included some extra spying software and stuff alike ..

To see all the stored information by flash about a websites you have visited check out:

flashplayer settings manager

Honestly I was quite shocked when I saw many websites I have visited for the rest 1.5+ year listed.

From hence since we know how “evil” flash storage manager cookies are, one sure step to increase your browser privacy is to periodically get rid of Flash Storage (Flash Cookies).
To achieve periodical flash cookies wipe out on Linux, below I provide you with a tiny .tcsh script which is tested and is working on Debian and Ubuntu. Get rid of Local Flash Storage shell script for Linux
(Stores data of the websites you have visited using your browser flash player)

To check your general Browser security The Electronic Frontier Foundation has developed a special website to test your browser anonymity visit penoptickclick.eff.org and click the > TEST ME button

In my case all my installed browser plugins were listed as well many information related to what kind of browser I use the version on the architecture I’m running on etc. etc.
Thereafter navigate to about:config and set the variable dom.storage.enabled to false . This will completely disable the DOM cookies which by the way never expire!
DOM cookies aren’t so widely used yet but still it’s possible that some websites online has stareted using them, since they’re completely junky and bad designed for instance DOM a cookie can contant up to (100KB) of information. then it’s best that you disable them completely.
Another recommendable thing to disable on your Iceweasel / Firefox that will tighten up your security is the keyword.enabled variable click twice on it and assure yourself it reads false
Disabling it will prevent the google word suggest to appear each time you type something in Google search box, albeit not every character you type will be sent to Google.

Also a really nice worthy reading is the article explaining dom cookies
Take some time and read it to get a better idea on DOM cookies what they are and why you don’t want them.
Likewise take a look at Flash Cookie Forensics for a bit more insight on the flash cookies

After reading the article about flash cookies, I came to the conclusion that maybe it’s best that they’re completely enabled. Anyways if they’re disabled then many websites won’t work properly which is something we don’t want.
It’s rather strange that the only available way to control your flash and disable the flash cookies is via Flashplayer Web Based Setting Manager
Since it’s “Web Based Manager” and it is hosted on Adobe’s web site this probably means that everything you do through it gets logged by Adobe, not so nice (neither secure) heh ..

It’s recommended also to install and configure the following list of extra Firefox plugins to ensure a bit more Anonimity while surfing on the Internet.

  • Adblock Plus
  • AntiSocial
  • BeeFree
  • Beef Taco
  • BetterPrivacy
  • DownloadHelper
  • Download Statusbar
  • Live HTTP Headers
  • No FB Tracking
  • NoScript
  • RefControl

Now configure AdBlock plus to work with EasyPrivacy+EasyList (by default it works only with EasyList).
To subscribe for ABP EasyPrivacy click here

BeeFree Mozilla Addon .
Is under the GNU GPL license and it helps you defend a bit more your privacy. It’s advantage use is to prevent search engines from knowing which links from their search results is most probably for you to check. Looks like a promising and great stuff
It is said in the add-on website that as a side effect of using the plugin it will probably increase your browser speed.
This post has highly adopted information from the Bulgarian Article by Anton Zinoviev, 2010 About your web browser and the inviolability of your personal life
Big thanks to Anton Zinoviev for the time and effort taken to research on the topic of browser security and write this wonderful thoroughful article.
To configure the BeeFree Firefox security tightening browser addon you will have to type in your browser URL address bar once again
about:config
Now you will have to look up for the following browser config keys:

extensions.beefree.websites.default.header.accept-charset.action
a
Set it’s value to be 2 e.g. extensions.beefree.websites.default.header.accept-charset.action = 2
Now look for the key value extensions.beefree.websites.default.header.accept-charset.value.text and set it’s value to:
*/*
Changing the extensions.beefree.websites.default.header.accept-charset.action = */* will make BeeFree compatible to some securing anti spam programs.
Last thing to do to complete the BeeFree configuration create the key value extensions.beefree.website.generic.header.useragent.action
To create this one press on a random key the last mouse button and select New -> Integer
The value for the newly created extensions.beefree.website.generic.header.useragent.action should be set to 4
Creating this key will instruct beefree to protect your browser from revealing it’s browser version variable.
Interesting to say each restart of the browser will make BeeFree to select a random Firefox Linux or Windows version, dependant of the OS type you use.

The AntiSocial addon will prevent your browser from revealing information to Facebook about your personal interests. It blocks the facebook elements which are being embedded to your browser by some websites.

No FB Tracking stops facebook of keeping an eye on you through the buttons “I like”. Using this buttons facebook can track you even if you’re not logged in or registered in the social network.

Installing all this plugins would take you time but considering the privacy is invaluable time shouldn’t be a concern of you.
Also some of the plugins like NoScript make take some time until you’re used to it but it’s worth to learn using it.
BetterPrivacy is able and will delete all flash cookies when your browser exits, this will prevent that some sites pry on you through the shitty flash cookies technology, this type of cookies NEVER EXPIRE! Hard to swallow but a fact …

In Linux this plugin is reported to work correctly however, in Windows there are dubious reports about it.
This is just a brief overview about how to improve your browsing privacy and therefore general personal data security, there is plenty much already red and said on topic, however I hope this could be some kind of basis for my dear reader for a later research on the topic.

How to dump table from a selected database in MySQL

Sunday, August 1st, 2010

I’ve recently had to dump a few tables from MySQL database to do so I used mysqldump,here is how:

/usr/bin/mysqldump database_name table_name -u root -p > table_name.sql