Posts Tagged ‘hard drive’

Linux extending life time for a damaged hard drive server tricks on a live server. Force fcsk on next reboot.Read-only file system error solutions

Friday, February 17th, 2023

linux-extending-life-time-for-a-damaged-hard-drive-server-tricks-can-not-read-superblock-linux-force-fsck-on-next-reboot

In our daily work as system administrators we have some very old Legacy systems running Clustered High Availability proxies using CRM (Cluster Resource Manager) and some legacy systems still using Heartbeat to manage the cluster instead of the newer and modern Corosync variant.

The HA cluster is only 2 nodes Linux machine and running the obscure already long time unsupported version of Redhat 5.11 (Ootpa) who was officially became stable distant year 1998 (yeath the years were good) and whose EOL (End of Life) has been reached long time ago and the OS is no longer supported, however for about 14 years the machines has been running perfectly fine until one of the Cluster nodes managed by ocf::heartbeat:IPAddr2 , that is  /etc/ha.d/resource.d/IPAddr2 shell script. Yeah for the newbies Heartbeat Application Cluster in Linux does work like that it uses a number of extendable pair of shell scripts written for different kind of Network / Web / Mail / SQL or whatever services HA management.

The first node configured however, started failing due to some errors like:
 

EXT3-fs error (device dm-1): ext3_journal_start_sb: Detected aborted journal
sd 0:2:0:0: rejecting I/O to offline device
Aborting journal on device sda1.
sd 0:2:0:0: rejecting I/O to offline device
printk: 159 messages suppressed.
Buffer I/O error on device sda1, logical block 526
lost page write due to I/O error on sda1
sd 0:2:0:0: rejecting I/O to offline device
ext3_abort called.
EXT3-fs error (device sda1): ext3_journal_start_sb: Detected aborted journal
Remounting filesystem read-only
sd 0:2:0:0: rejecting I/O to offline device
megaraid_sas: FW was restarted successfully, initiating next stage…
megaraid_sas: HBA recovery state machine, state 2 starting…
megasas: Waiting for FW to come to ready state
megasas: FW in FAULT state!!
FW state [-268435456] hasn't changed in 180 secs
megaraid_sas: out: controller is not in ready state
megasas: waiting_for_outstanding: after issue OCR. 
megasas: waiting_for_outstanding: before issue OCR. FW state = f0000000
megaraid_sas: pending commands remain even after reset handling. megasas[0]: Dumping Frame Phys Address of all pending cmds in FW
megasas[0]: Total OS Pending cmds : 0 megasas[0]: 64 bit SGLs were sent to FW
megasas[0]: Pending OS cmds in FW :

The result out of that was a frequently the filesystem of the machine got re-mounted as Read Only and of course that is
quite bad if you have a running processess of haproxy that should be able to be living their and take up some Web traffic
for high availability and you run all the traffic only on the 2nd pair of machine.

This of course was a clear sign for a failing disks or some hit bad blocks regions or as the messages indicates, some
problem with system hardware or Raid SAS Array.

The physical raid on the system, just like rest of the hardware is very old stuff as well.

[root@haproxy_lb_node1 ~]# lspci |grep -i RAI
01:00.0 RAID bus controller: LSI Logic / Symbios Logic MegaRAID SAS 2108 [Liberator] (rev 05)

The produced errors not only made the machine to auto-mount its root / filesystem in Read-Only mode but besides has most
likely made the machine to automatically reboot every few days or few times every day in a raw.

The second Load Balancer node2 did operated perfectly, and we thought that we might just keep the broken machine in that half running
and inconsistent state for few weeks until we have built the new machines with Pre-Installed new haproxy cluster with modern
RedHat Linux 8.6 distribution, but since we have to follow SLAs (Service Line Agreements) with Customers and the end services behind the
High Availability (HA) Haproxy cluster were at danger … 

We as sysadmins had the task to make our best to try to stabilize the unstable node with disk errors for the system to servive
and be able to normally serve traffic (if node2 that is in a separate Data center fails due to a hardware or electricity issues etc.)
.

Here is few steps we took, that has hopefully improved the situation.

1. Make backups of most important files of high importance

Always before doing anything with a broken system, prepare backup of the most important files, if that is a cluster that should be a backup of the cluster configurations (if you don't have already ones) backup of /etc/hosts / backup of any important services configs /etc/haproxy/haproxy.cfg /etc/postfix/postfix.cfg (like it was my case), preferrably backup of whole /etc/  any important files from /root/ or /home/users* directories backup of at leasts latest logs from /var/log etc.
 

2. Clear up all unnecessery services scripts from the server

Any additional Softwares / Services and integrity checking tools (daemons) / scripts and cron jobs, were immediately stopped and wheter unused removed.

E.g. we had moved through /etc/cron* to check what's there,

# ls -ld /etc/cron.*
drwx—— 2 root root 4096 Feb  7 18:13 /etc/cron.d
drwxr-xr-x 2 root root 4096 Feb  7 17:59 /etc/cron.daily
-rw-r–r– 1 root root    0 Jul 20  2010 /etc/cron.deny
drwxr-xr-x 2 root root 4096 Jan  9  2013 /etc/cron.hourly
drwxr-xr-x 2 root root 4096 Jan  9  2013 /etc/cron.monthly
drwxr-xr-x 2 root root 4096 Aug 26  2015 /etc/cron.weekly


And like well professional butchers removed everything unnecessery that could trigger any extra unnecessery disk read / writes to HDD.

E.g. just create

# mkdir -p /root/etc_old/{/etc/cron.d,\
/etc/cron.daily,/etc/cron.hourly,/etc/cron.monthly\
,/etc/cron.weekly}


And moved all unnecessery cron job scripts like:

1. nmon (old school network / memory / hard disk console tool for monitoring and tuning server parameters)
2. clamscan / freshclam crons
3. mlocate (the script that is taking care for periodic run of updatedb command to keep the locate command to easily search
for files inside the DB to put less read operations on disk in case if you need to find file (e.g. prevent yourself to everytime
run cmd like: find / . -iname '*whatever_you_look_for*'
4. cups cron jobs
5. logwatch cron
6. rkhunter stuff
7. logrotate (yes we stopped even logrotation trigger job as we found the server was crashing sometimes at the same time when
the lograte job to rotate logs inside /var/log/* was running perhaps leading to a hit of the I/O read error (bad blocks).


Also inspected the Administrator user root cron job for any unwated scripts and stopped two report bash scripts that were part of the PCI tightened Security procedures.
Therein found script responsible to periodically report the list of installed packages and if they have not changed, as well a script to periodically report via email the list of
/etc/{passwd,/etc/shadow} created users, used to historically keep an eye on the list of users and easily see if someone
has created new users on the machine. Those were enabled via /var/spool/cron/root cron jobs, in other cases, on other machines if it happens for you
it is a good idea to check out all the existing user cron jobs and stop anything that might be putting Read / Write extra heat pressure on machine attached the Hard drives.

# ls -al /var/spool/cron/
total 20
drwx——  2 root root 4096 Nov 13  2015 .
drwxr-xr-x 12 root root 4096 May 11  2011 ..
-rw——-  1 root root  133 Nov 13  2015 root


3. Clear up old log files and any files unnecessery

Under /var/log and /home /var/tmp /var/spool/tmp immediately try to clear up the old log files.
From my past experience this has many times made the FS file inodes that are storing on a unbroken part (good blocks) of the hard drive and
ready to be reused by newly written rsyslog / syslogd services spitted files.

!!! Note that during the removal of some files you might hit a files stored on a bad blocks that might lead to a unexpected system reboot.

But that's okay, don't worry most likely after a hard reset by a technician in the Datacenter the machine will boot again and you can enjoy
removing remaining still files to send them to the heaven for old files.


4. Trigger an automatic system file system check with fsck on next boot

The standard way to force a Linux to aumatically recheck its Root filesystem is to simply create the /forcefsck to root partition or any other secondary disk partition you would like to check.

# touch /forcefsck

# reboot


However at some occasions you might be unable to do it because, the / (root fs) has been remounted in ReadOnly mode, yackes …

Luckily old Linux distibutions like this RHEL 5.1, has a way to force a filesystem check after reboot fsck and identify any
unknown bad-blocks and hopefully succceed in isolating them, so you don't hit into the same auto-reboots if the hard drive or Software / Hardware RAID
is not in terrible state
, you can use an option built in in /sbin/shutdown command the '-F'

   -F     Force fsck on reboot.


Hence to make the machine reboot and trigger immediately fsck:

# shutdown -rF now


Just In case you wonder why to reboot before check the Filesystem. Well simply because you need to have them unmounted before you check.

In that specific case this produced so far a good result and the machine booted just fine and we crossed the fingers and prayed that the machine would work flawlessly in the coming few weeks, before we finalize the configuration of the substitute machines, where this old infrastructure will be migrated to a new built cluster with new Haproxy and Corosync / Pacemaker Cluster on a brand new RHEL.

NB! On newer machines this won't work however as shutdown command has been stripped off this option because no SystemV (SystemInit) or Upstart and not on SystemD newer services architecture.
 

5. Hints on checking the hard drives with fsck

If you happen to be able to have physical access to the remote Hardare machine via a TTY[1-9] Console, that's even better and is the standard way to do it but with this specific case we had no easy way to get access to the Physical server console.

It is even better to go there and via either via connected Monitor (Display) or KVM Switch (Those who hear KVM switch first time this is a great device in server rooms to connect multiple monitors to same Monitor Display), it is better to use a some of the multitude of options to choose from for USB Distro Linux recovery OS versions or a CDROM / DVD on older machines like this with the Redhat's recovery mode rolled on.
After mounting the partition simply check each of the disks
e.g. :

# fsck -y /dev/sdb
# fsck -y /dev/sdc

Or if you want to not waste time and look for each hard drive but directly check all the ones that are attached and known by Linux distro via /etc/fstab definition run:

# fsck -AR

If necessery and you have a mixture of filesystems for example EXT3 , EXT4 , REISERFS you can tell it to omit some filesystem, for example ext3, like that:

# fsck -AR -t noext3 -y


To skip fsck on mounted partitions with fsck:

# fsck -M /dev/sdb


One remark to make here on fsck is usually fsck to complete its job on various filesystem it uses other external component binaries usually stored in /sbin/fsck*

ls -al /sbin/fsck*
-rwxr-xr-x 1 root root  55576 20 яну 2022 /sbin/fsck*
-rwxr-xr-x 1 root root  43272 20 яну 2022 /sbin/fsck.cramfs*
lrwxrwxrwx 1 root root      9  4 юли 2020 /sbin/fsck.exfat -> exfatfsck*
lrwxrwxrwx 1 root root      6  7 юни 2021 /sbin/fsck.ext2 -> e2fsck*
lrwxrwxrwx 1 root root      6  7 юни 2021 /sbin/fsck.ext3 -> e2fsck*
lrwxrwxrwx 1 root root      6  7 юни 2021 /sbin/fsck.ext4 -> e2fsck*
-rwxr-xr-x 1 root root  84208  8 фев 2021 /sbin/fsck.fat*
-rwxr-xr-x 2 root root 393040 30 ное 2009 /sbin/fsck.jfs*
-rwxr-xr-x 1 root root 125184 20 яну 2022 /sbin/fsck.minix*
lrwxrwxrwx 1 root root      8  8 фев 2021 /sbin/fsck.msdos -> fsck.fat*
-rwxr-xr-x 1 root root    333 16 дек 2021 /sbin/fsck.nfs*
lrwxrwxrwx 1 root root      8  8 фев 2021 /sbin/fsck.vfat -> fsck.fat*


6. Using tune2fs to  adjust tunable filesystem parameters on ext2/ext3/ext4 filesystems (few examples)

a) To check whether really the filesystem was checked on boot time or check a random filesystem on the server for its last check up date with fsck:

#  tune2fs -l /dev/sda1 | grep checked
Last checked:             Wed Apr 17 11:04:44 2019

On some distributions like old Debian and Ubuntu, it is even possible to enable fsck to log its operations during check on reboot via changing the verbosity from NO to YES:

# sed -i "s/#VERBOSE=no/VERBOSE=yes/" /etc/default/rcS


If you're having the issues on old Debian Linuxes  and not on RHEL  it is possible to;

b) Enable all fsck repairs automatic on boot

by running via:
 

# sed -i "s/FSCKFIX=no/FSCKFIX=yes/" /etc/default/rcS


c) Forcing fcsk check on for server attached Hard Drive Partitions with tune2fs

# tune2fs -c 1 /dev/sdXY

Note that:
tune2fs can force a fsck on each reboot for EXT4, EXT3 and EXT2 filesystems only.

tune2fs can trigger a forced fsck on every reboot using the -c (max-mount-counts) option.
This option sets the number of mounts after which the filesystem will be checked, so setting it to 1 will run fsck each time the computer boots.
Setting it to -1 or 0 resets this (the number of times the filesystem is mounted will be disregarded by e2fsck and the kernel).


 For example you could:

d) Set fsck to run a filesystem check every 30 boots, by using -c 30 
 

# tune2fs -c 30 /dev/sdXY


e) Checking whether a Hard Drive has been really checked on the boot


#  tune2fs -l /dev/sda1 | grep checked
Last checked:             Wed Apr 17 11:04:44 2019


e) Check when was the last time the file system /dev/sdX was checked:
 

# tune2fs -l /dev/sdX | grep Last\ c
Last checked:             Thu Jan 12 20:28:34 2017


f) Check how many times our /dev/sdX filesystem was mounted

# tune2fs -l /dev/sdX | grep Mount
Mount count:              157

g) Check how many mounts are allowed to pass before filesystem check is forced
 

# tune2fs -l /dev/sdX | grep Max
Maximum mount count:      -1


7. Repairing disk / partitions via GRUB fsck.mode and fsck.repair kernel module options

It is also possible to force a fsck.repair on boot via GRUB, but that usually is not an option someone would like as the machine might fail too boot if it hards to repair hardly, however in difficult situations with failing disks temporary enabling it is good idea.

This can be done by including for grub initial config

GRUB_CMDLINE_LINUX_DEFAULT="quiet splash fsck.mode=force fsck.repair=yes"

fsck.mode=force – will force a fsck each time a system boot and keeping that value enabled for a long time inside GRUB is stupid for servers as

sometimes booting could be severely prolonged because of the checks especially with servers with many or slow old hard drives.

fsck.repair=yes – will make the fsck try to repair if it finds bad blocks when checking (be absolutely sure you know, what you're doing if passing this options)

The options can be also set via editing the GRUB boot screen, if you have physical access to the server and don't want to reload the grub loader and possibly make the machine unbootable on next boot.
 

8. Few more details on how /etc/fstab disk fsck check parameters values for Systemd Linux machines works

The "proper" way on systemd (if we can talk about proper way on Linux) to runs fsck for each filesystem that has a fsck is to pass number greater than 0 set in
/etc/fstab (last column in /etc/fstab), so make sure you edit your /etc/fstab if that's not the case.

The root partition should be set to 1 (first to be checked), while other partitions you want to be checked should be set to 2.

Example /etc/fstab:
 

# /etc/fstab: static file system information.

/dev/sda1  /      ext4  errors=remount-ro  0  1
/dev/sda5  /home  ext4  defaults           0  2

The values you can put here as a second number meaning is as follows:
0 – disabled, that is do not check filesystem
1 – partition with this PASS value has a higher priority and is checked first. This value is usually set to the root / partition
2 – partitions with this PASS value will be checked last

a) Check the produced log out of fsck

Unfortunately on the older versions of Linux distros with SystemV fsck log output might be not generated except on the physical console so if you have a kind of duplicator device physical tty on the display port of the server, you might capture some bad block reports or fixed errors messages, but if you don't you might just cross the fingers and hope that anything found FS irregularities was recovered.

On systemd Linux machines the fsck log should be produced either in /run/initramfs/fsck.log or some other location depending on the Linux distro and you should be able to see something from fsck inside /var/log/* logs:

# grep -rli fsck /var/log/*


Close it up

Having a system with failing disk is a really one of the worst sysadmin nightmares to get. The good news is that most of the cases we're prepared with some working backup or some work around stuff like the few steps explained to mitigate the amount of Read / Writes to hard disks on the failing machine HDDs. If the failing disk is a primary Linux filesystem all becomes even worse as every next reboot, you have no guarantee, whether the kernel / initrd or some of the other system components required to run the Core Linux system won't break up the normal boot. Thus one side changes on the hard drives is a risky business on ther other side, if you're in a situation where you have a mirror system or the failing system is just a Linux server installed without a Cluster pair, then this is not a big deal as you can guarantee at least one of the nodes still up, unning and serving. Still doing too much of operations with HDD is always a danger so the steps described, though in most cases leading to improvement on how the system behaves, the system should be considered totally unreliable and closely monitored not only by some monitoring stuff like Zabbix / Prometheus whatever but regularly check the systems state via normal SSH logins. It is important if you have some important datas or logs on the system that are not synchronized to a system node to copy them before doing any of the described operations. After all minimal is backuped, proceed to clear up everything that might be cleared up and still the machine to continue providing most of its functionalities, trigger fsck automatic HDD check on next reboot, reboot, check what is going on and monitor the machine from there on.

Hopefully the few described steps, has helped some sysadmin. There is plenty of things which I've described that might go wrong, even following the described steps, might not help if the machines Storage Drives / SAS / SSD has too much of a damage. But as said in most cases following this few steps would improve the machine state.

Wish you the best of luck!
 

How to create SD Card DATA dump image to .ISO with dd and mount it with imdisk from command line on Windows CygWin with MobaXterm

Saturday, September 18th, 2021

dd-command-logo
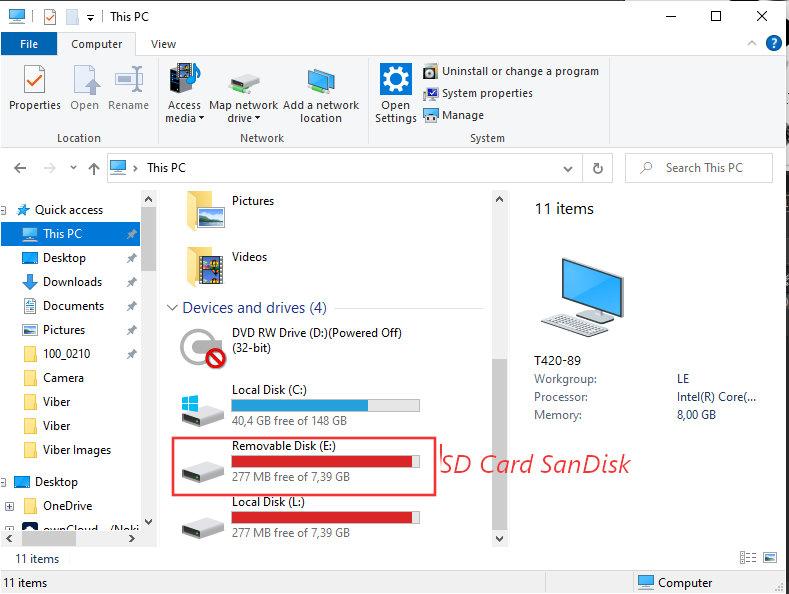
I'm forced to use Windows every now and then and do some ordinary things which I do usually on Linux such as dumping the content of my Android phone SD Card SanDisk, Kingston etc. to .ISO image etc.

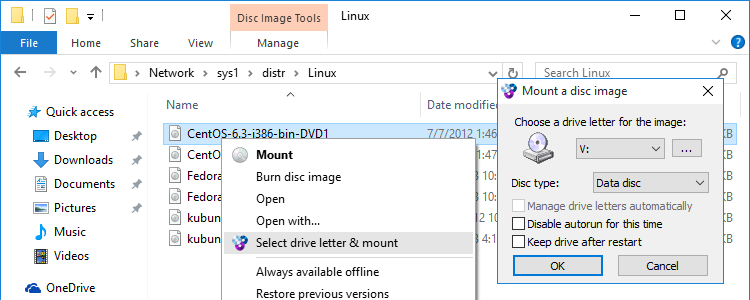
On Linux creating and mounting a data copy of a whole SD Card is a relatively simple thing and there are plenty of ways to do it such as using the dd ( command-line utility for Unix and Unix-like operating systems whose primary purpose is to convert and copy files as said in the command manual .- e.g. ''man dd'. ). On Microsoft Windows environment perhaps one of easiest ways is to use WinCDEmu (which is relatively free under LGPL License).
WinCDEmu is capable of doing plenty of things such as:
 

  • One-click mounting of ISO, CUE, NRG, MDS/MDF, CCD, IMG images.

  • Supports unlimited amount of virtual drives.

  • Runs on 32-bit and 64-bit Windows versions from XP to Windows 10.

  • Allows creating ISO images through a context menu in Explorer.

  • Small installer size – less than 2MB!

  • Have a portable version

WinCDEmu is a nice piece of software that perhaps every Win poweruser can enjoy, plus it has a nice Graphical frontend:

wincdemu-graphical-create-iso-and-mount-so-ms-windows-software

But what if you're a console geek, like me and you end up forced to be using Windows on your Work PC and you still need to create .iso dump of your Mobile SD Card or external attached Hard Drive, without the graphical mambo jumbo in the old fashioned way with dd?

Luckily Windows advanced command lined users could massively benefit from Cygwin + Mobaxterm (if you don't know or used MobaXterm and you still use things like Putty / SuperPutty or SecureCRT – perhaps you can reconsider and make your sysadmin life easier with MobaXerm gnome-terminal like SSH tabbed Windows alternative.

Once having mobaxterm + cygwin you have dd installed on the Windows host as it is part of the busybox minimal environment and you can use it in the same manner as your used in Linux environment.

sdcard-sandisk-drive-my-computer-windows-screenshot
 

1. Using dd to copy files on Linux / UNIX OS with a dialog status bar

To use dd the usual syntax on Linux / BSD / Unix is:
 

dd if=/dev/dev-name_ID of=/path/to/directory/dump/location.iso bs=2048


As 2048 BS (Bytes) per second is quite a low value usually on Modern operating systems, this bytesize is usually increased to some MBs  ( Megabytes).

For example if the reading from carrier  is Solid State Drive Disk (SSD) supporting 100 MBs per second and the output SD Card is a 32 Bit Kingston Plus+ drive with whose write speed is up to 50 ~ 100 MBs, you can use cmd as:

dd if=/dev/dev-name_ID of=/path/to/directory/dump/location.iso bs=100M


If you need to have a progress on the dd copy (in case if you copy some large SD Card 128 GB or 256GB or a full copy of a hard drive partition that is really big lets say 8 Terabytes of data, dialog and pv comes quite handy.

To use them install them first:

# apt-get install –yes pv dialog


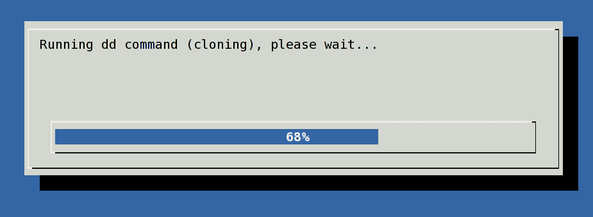
Next to have a beautiful ncurses dialog box with the status (very useful if you're shell scripting), use:
 

(pv -n /dev/sda | dd of=/dev/sdb bs=128M conv=notrunc,noerror) 2>&1 | dialog –gauge "Running dd command (cloning), please wait…" 10 70 0

pv-dialog-dd-command-ncurses-status-screenshot-gnu-linux
 

2. Listing the avaialble copy drives /dev/sda /dev/sdb1 … etc. disk locations on Windows 7 / 10 / 11 OS

[User.T420-89] ➤ for F in /dev/s* ; do echo "$F    $(cygpath -w $F)" ; done

check-drives-loop-on-cygwin-to-be-used-later-with-dd-copy-iso-creating-imageCheck drives device naming on WIndows PC – Screenshot extract from Mobaxterm

As you can see the drive location we've seen in Windows Explorer is located at drive E: above bash for loop reveals us this is located and readable from CygWin / MobaxTerm at /dev/sdb1


3. Create .iso image file on WIndows OS with dd command
 

To create a full data copy dump of to .iso (image file) with dd on Windows , I had to run:

[User.T420-89] ➤ dd if=/dev/sdb1 of=sdcard-blu-r1-hd-sdcard-backup_10092021a.img bs=100M

75+1 records in
75+1 records out
7944011776 bytes (7.4GB) copied, 391.794316 seconds, 19.3MB/s


dd-copy-drive-data-screenshot-100mb-bitesize-windows-mobaxterm


4. Mount the newly create dd Image with imdisk

In order to test the image is properly created, you can attempt to mount it from command line on Linux, mounting it is quite easy and is up to mounting the just created .img file as a loopback (loop) device, like so: 

# mount -o loop file.iso /mnt/dir

Unfortunately cygwin and mobaxterm's embedded mount command on Win OS does not support the loopback device so to have it you have to install and use some additional program  such as the upmentioned WinCDEmu or if you prefer to do it fully from command line and further on automate the process of creating a dump of images of attached drives out of a multiple computers (lets say belonging to a Windows Active Directory domain). You might install and use something like:


imdisk 

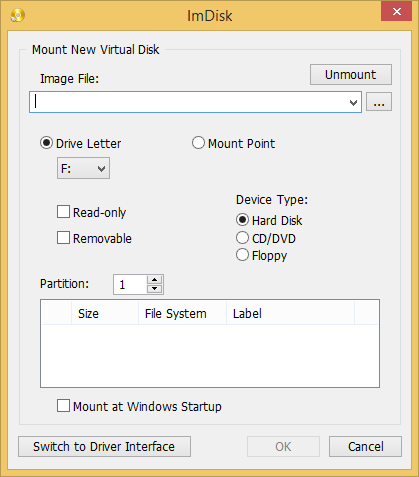
imdisk-gui-interface-ms-windows-screenshot

imdisk handy tool is  created by Olof Lagerkvist. It is free and open-source software, which  will let you mount image files of hard drive, cd-rom or floppy, and create one or several ramdisks with various parameters either from a command line or via its Graphical interface.

To use imdisk download it from its home page on sourceforge extract and install it, pretty much as any other software it has both 32 bit version as a legacy for old computers as well as 64 bit exe installer.
The general command line use of it follows a cmd syntax like:

  • Mounting .iso image files from command line on WIndows host with imdisk


[User.T420-89] ➤ ImDisk.exe -a -f "sdcard-blu-r1-hd-sdcard-backup_10092021.img" -m #:

Where:
 

  • #: – is the actual drive you would like to mount to.
     
  • -a option stands for attach to, it will configure and attach a virtual disk with the parameters specified and attach it to the system.
     
  • -f – is self explanatory, provides the iso image file naming 

If you want to attach the newly created image to lets say  L:\ windows new mapped drive

ImDisk.exe -a -f "sdcard-blu-r1-hd-sdcard-backup_10092021.img" -m l:

  • Unmount mounted .img image with imdisk from cmd line

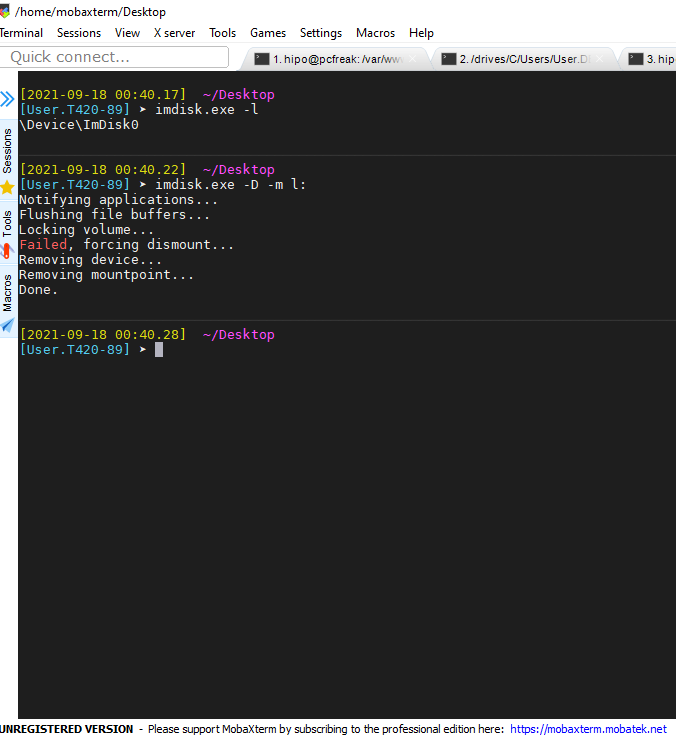
[User.T420-89] ➤ imdisk.exe -l
\Device\ImDisk0
                                                                                                                              ✘

[User.T420-89] ➤ imdisk.exe -D -m l:
Notifying applications…
Flushing file buffers…
Locking volume…
Failed, forcing dismount…
Removing device…
Removing mountpoint…
Done.

imdisk-detach-attached-drive-mobaxterm-windows-screenshot


What we learned ?

What we have learned in this article is how to use Mobaxterm embedded dd Data Convert and Copy command to prepare full image backups of SD card or external drives on Windows OS. Also few alternative ways were entions such as using WinCDEmu free  open source alternative to DaemonTools program to create / mount or convert the image for the GUI lovers. Also for hard core sysadmins as me was shown how to list drives devices attached to the Win PC {/dev/sda,/dev/sdb} etc. and how to copy partition data with dd just like one would do on Linux OS. Finally to test the created image, I've shown you how to use the imdisk free software tool to attach and detach image to a mapped local Windows drive.

Hope this article learned you something new.

Saving multiple passwords in Linux with Revelation and Keepass2 – Keeping track of multiple passwords

Thursday, October 17th, 2013

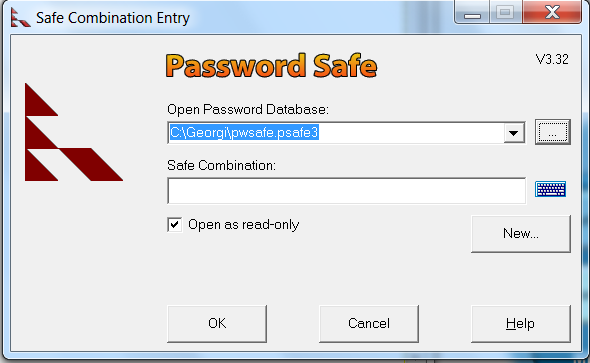
System Administrators who use MS Windows to access multiple hosts in big companies like HP or IBM certainly use some kind of multiple password manager like PasswordSafe.

Keep multiple passwords safe in Microsoft Windows 7 passwordsafe with masterpassword

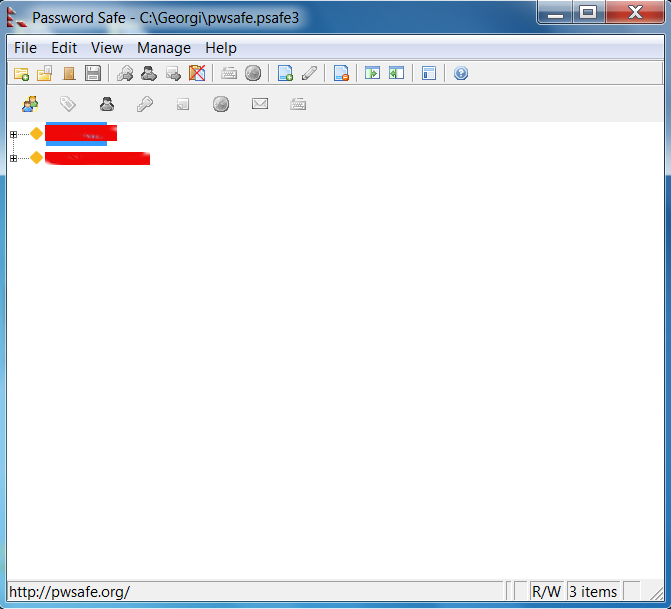
When number of passwords you have to keep in mind grows significantly using something like PasswordSafe becomes mandatory. Same is valid also for valid for system administrators who use GNU / Linux as a Desktop environment to administer thousands or hundreds of servers. I'm one of those admins who for years use Linux and until recently I kept logging all my passwords in separate directory full with text files created with vim (text editor). As the number of passwords and accesses to servers and web interfaces grow up dramatically as well as my requirement for security raised up I wanted to have my passwords secured being kept encrypted on my hard drive. For those who never use PasswordSafe the idea of program is to store all passwords you have in encrypted database which can be only opened through PasswordSafe by providing a master password.

passwordsafe on microsoft windows keep in order multiple passwords manager

Of course having one master password imposes other security risks as someone who knows the MasterPass can easily access all your passwords anyways for now such level of security perfectly fits my needs.

PasswordSafe is since recently Open Source so there is a Linux port, but the port is still in beta and though I tried hard to install it using provided .deb binaries as well as compile from source, I finally give it up. And decided to review what kind of password managers are available in Debian Wheezy's ports.

Here are those I found with;

apt-cache search password|grep -i manager

cpm – Curses based password manager using PGP-encryption
fpm2 – password manager with GTK+ 2.x GUI
gringotts – secure password and data storage manager
kedpm – KED Password Manager
kedpm-gtk – KED Password Manager
keepass2 – Password manager
keepassx – Cross Platform Password Manager
kwalletmanager – secure password wallet manager
password-gorilla – cross-platform password manager
revelation – GNOME2 Password manager

I didn't have the time to test each one of them, so I installed and checked only those which seemed more reliable, i.e.:
keepass2 and revelation

# apt-get install –yes fpm2 keepass2 revelation

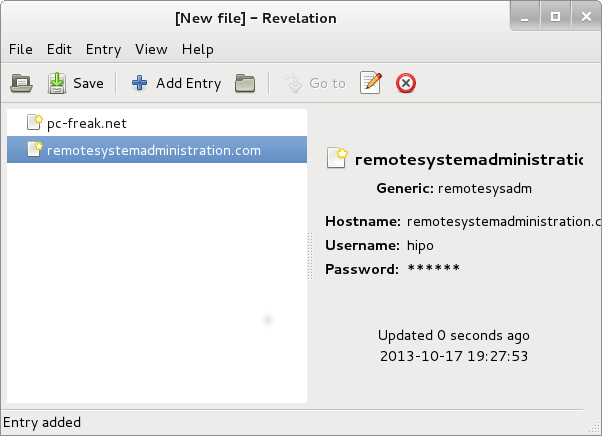
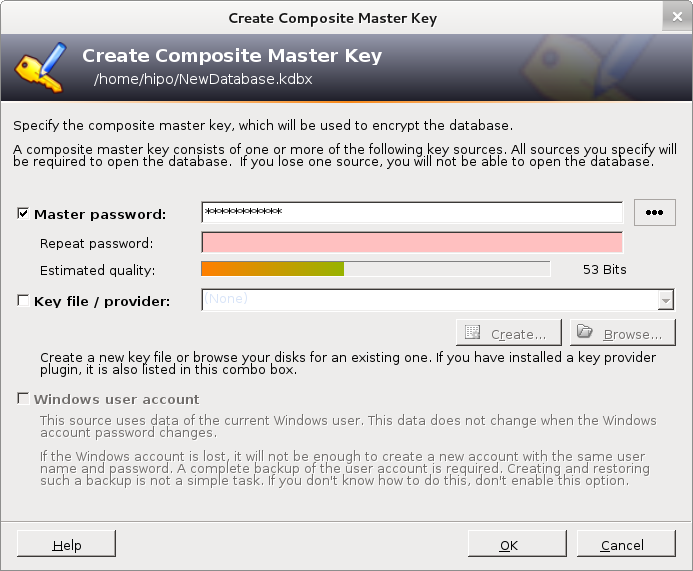
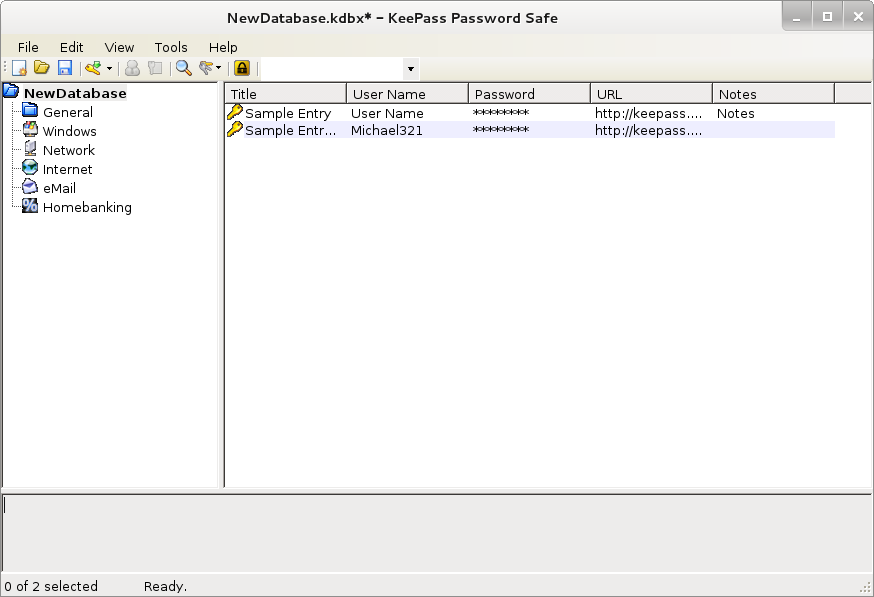
Below is screenshot of each one of managers:

Revelation Linux Gnome graphic password manager program

Revelation – GNOME Password Manager

keepass2 Linux gui password manager screenshot Debian - graphic manager for storing passwords

kde password safe gui program Linux Debian screenshot

KDE QT Interface Linux GUI Password Manager (KeePass2)

With one of this tools admin's life is much easier as you don't have to get crazy and remember thousands of passwords.
Hope this helps some admin out there! Enjoy ! 🙂
 

Ubuntu 9.04 Jaunty on Toshiba L300 PLSBGE Laptop

Sunday, September 20th, 2009

toshiba-l300-plsbge-laptop-ubuntu-9.04-install

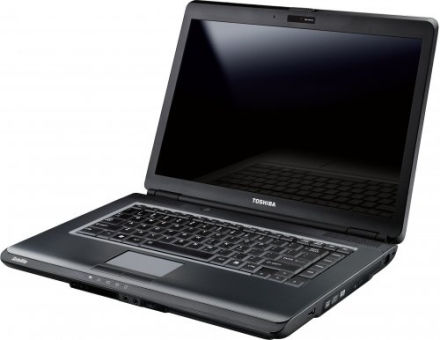
Today I had the task to Install Ubuntu GNU / Linux on Toshiba L300 PLSBGE Laptop.

I had already installed Windows Vista Enterprise on the notebook. Thus I used Acronis Disk Directory Suite to partition the harddrive for Ubuntu even though I could have used the gparted included on Ubuntu’s installation CD. I’ve asked specificly if
I could use the Ubuntu CD to repartition my hard drive in #ubuntu in irc.freenode.net.
The answer was positive it’s absolutely safe to resize an NTFS partition using Ubuntu’s installation LiveCD and gparted.That seems like a good news for all of us the free software users / enthusiasts / hobbyists etc.
I hated the default Ubuntu behaviour it automatically decided to install itself on a automatically created 2.5 GB partition.
I thought it won’t be so dumb to install itself on such a tiny partition. Well guess what I was wrong IT WAS SO DUMB!
Even though I had already 80 GB ext3 partition. Ubuntu’s default behaviour was to install on an automatically created 2.5GB partition.
Right after the installation I was stunned just to realize there was no free space on the drive where the dumbass installed itself.
After that I had some issues deleting the already cretead partitions, which for some reason messed up. Luckily the good old fdisk fixed the situation so I could easily delete all the partitions except the vista and recreate them again using gparted with Ubuntu’s install LiveCD. The install was completely flawless. Everything worked out of the box, no external efforts to fix broken stuff like usually happens in Linux fantastic! The only broken thing was that switching to plain console with ctrl+alt+f1 would visualize a non working display output and I couldn’t see the ttys at all. That wasn’t such a hassle since the system is planned to work only in GUI mode. I guess Ubuntu is going through a real development with a positive end results. Even external USB printer Canon PIXMA IP3300 worked by simply plugging it in. For some weird reason to make the printer work correctly I had to use driver for Canon PIXMA IP3000. Anyways it worked with it and the printer started printing correctly even though officially on some of the linux printers databases it’s reported the printer won’t work correctly never ever.END—–

How to fully recover deleted files on ext3 Debian Linux partition – undelete files from ext3 filesystems with ext3grep

Monday, March 7th, 2011

In order to recover fully data by mistake or on purpose deleted on Debian GNU/Linux there is a tool called ext3grep which is able to completely recover data by innodes.

Recovering the deleted files data is very easy and can be done via some livecd after installing the ext3grep tool.

In my case I used the Back Track Linux distribution to recover my data. Recovery is still in process and it appears all or at least most of my data is about to be recovered.

For the recovery procedure all necessary is an external partition in ext3 or ext3 where the recovered data from the ext3 device can be stored.

My partition was about 20GB and since I had no external hard dive to store the data to I used the sshfs to mount remotely a hard drive via the networking using the sshfs program to make the ssh mount for more see my previous post Howto mount remote server ssh filesystem using sshfs

The Backtrack livecd linux security distribution is missing the ext3grep tool thus I had to first install the tool after booting the livecd on the notebook to succeed in that it was necessary to install the e2fslibs-dev package through the command:

debian:~# apt-get install e2fslibs-dev

Further on I've downloaded the latest version of the ext3grep and untarred the archive and compiled it with the commands:

debian:~# ./configure && make && make install
Then I used the simple commands:

debian:~# cd /mnt/res
debian:~# ext3grep --restore-all /dev/sda8

to launch the recovery.
Where in the above commands /mnt/res is the mountpoint location where I wanted to have all my data recovered and the /dev/sda8 is the device from which I wanted to recover my data.

It takes a bit long until the recovery is completed and with 20 gigabytes of data about 5, 6 hours might be necessary for the data to be recovered but the main point is it recovers.

Checking I/O Hard Disk (Overhead) Read / Write operations on Microsoft Windows 7 – Resource Monitor

Friday, July 26th, 2013

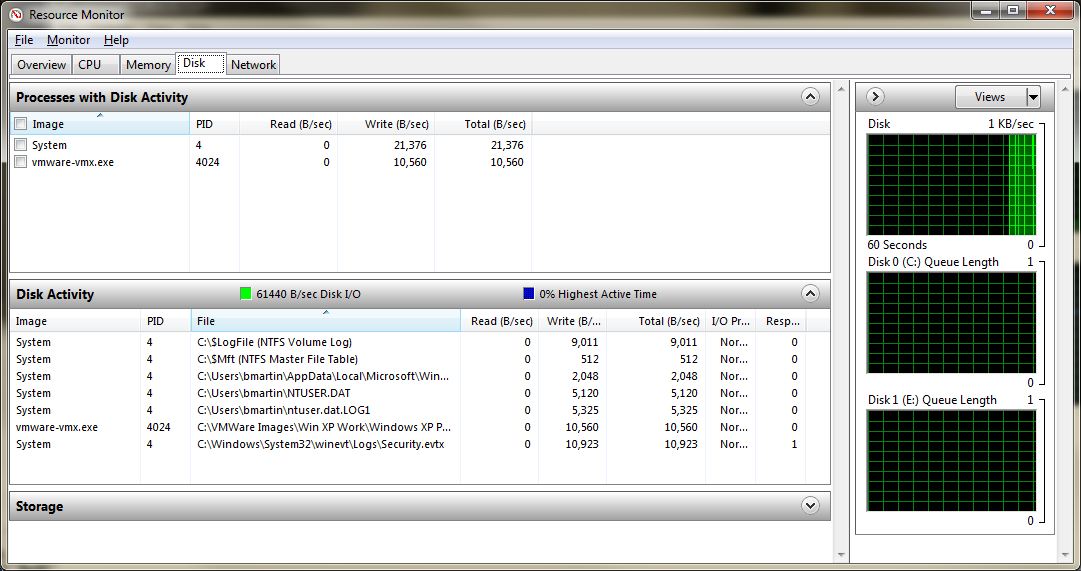
I mainly have to deal with Linux servers. Today however I had to check for problems Microsoft Windows 7 server. The machine looked Okay but was reading from hard drive all the time. Hence I needed to check what is the Hard disk approximate read / write speed per second. I know on lInux tracking i/o hard disk server bottlenecks is done with iostat or dstat.

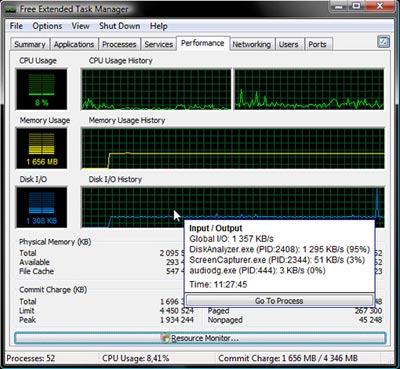
However I never did that on Windows, so I had to learn it by experience. Its actually pretty easy and you don't even need to install external program to see read / write hdd speed operations. Windows 7 is bundled with a Program called Resource Manager. Running Resource Manager's easiest method is from Windows Task Manager, i.e.:

Windows 7 Task Manager processes performance tab - how to check hard drive bottleneck windows server
Press Ctrl + Alt + Del (Choose Start Task Manager) and from Task Manager click on Resource Monitor Button.
Immediately resource Monitor pops up and selecting the Disk tab priovides information on HDD Read / Write speed per sec. Using Resource Monitor, you can quickly also see which process is creating the most HDD overhead for server.

microsoft windows 7 resource monitor screenshot

windows resource monitor disk tab hard disk show read write speed win7

Though I'm not Microsoft fan, I should admit Resource Manager does a great job.


Save data from failing hard disk on Linux – Rescuing data from failing disk with bad blocks

Wednesday, April 16th, 2014

save-data-from-failing-hard-drive-data-recovery-badblocks-linux_1.jpg
Sooner or later your Linux Desktop or Linux server hard drive will start breaking up, whether you have a hardware or software RAID 1, 6 or 10 you can  and good hard disk health monitoring software you can react on time but sometimes as admins we have to take care of old servers which either have RAID 0 or missing RAID configuration and or disk firmware is unable to recognize failing blocks on time and remap them. Thus it is quite useful to have techniques to save data from failing hard disk drives with physical badblocks.

With ddrescue tool there is still hope for your Linux data though disk is full of unrecoverable I/O errors.

apt-cache show ddrescue
 

apt-cache show ddrescue|grep -i description -A 12

Description: copy data from one file or block device to another
 dd_rescue is a tool to help you to save data from crashed
 partition. Like dd, dd_rescue does copy data from one file or
 block device to another. But dd_rescue does not abort on errors
 on the input file (unless you specify a maximum error number).
 It uses two block sizes, a large (soft) block size and a small
 (hard) block size. In case of errors, the size falls back to the
 small one and is promoted again after a while without errors.
 If the copying process is interrupted by the user it is possible
 to continue at any position later. It also does not truncate
 the output file (unless asked to). It allows you to start from
 the end of a file and move backwards as well. dd_rescue does
 not provide character conversions.


To use ddrescue for saving data first thing is to shutdown the Linux host boot the system with a Rescue LiveCD like SystemRescueCD – (Linux system rescue disk), Knoppix (Most famous bootable LiveCD / LiveDVD), Ubuntu Rescue Remix or BackTrack LiveCD – (A security centered "hackers" distro which can be used also for forensics and data recovery), then mount the failing disk (I assume disk is still mountable :). Note that it is very important to mount the disk as read only, because any write operation on hard drive increases chance that it completely becomes unusable before saving your data!

To make backup of your whole hard disk data to secondary mounted disk into /mnt/second_disk

# mkdir /mnt/second_disk/rescue
# mount /dev/sda2 /mnt/second_disk/rescue
# dd_rescue -d -r 10 /dev/sda1 /mnt/second_disk/rescue/backup.img
# mount -o loop /mnt/second_disk/rescue/backup.img

In above example change /dev/sda2 to whatever your hard drive device is named.

Whether you have already an identical secondary drive attached to the Linux host and you would like to copy whole failing Linux partition (/dev/sda) to the identical drive (/dev/sdb) issue:

ddrescue -d -f -r3 /dev/sda /dev/sdb /media/PNY_usb/rescue.logfile

If you got just a few unreadable files and you would like to recover only them then run ddrescue just on the damaged files:

ddrescue -d –R -r 100 /damaged/disk/some_dir/damaged_file /mnt/secondary_disk/some_dir/recoveredfile

-d instructs to use direct I/O
-R retrims the error area on each retry
-r 100 sets the retry limit to 100 (tries to read data 100 times before resign)

Of course this is not always working as on some HDDs recovery is impossible due to hard physical damages, if above command can't recover a file in 10 attempts it is very likely that it never succeeds …

A small note to make here is that there is another tool dd_rescue (make sure you don't confuse them) – which is also for recovery but GNU ddrescue performs better with recovery.
How ddrescue works is it keeps track of the bad sectors, and go back and try to do a slow read of that data in order to read them.
By the way BSD users would happy to know there is ddrescue port already, so data recovery on BSDs *NIX filesystems if you're a Windows user you can use ddrescue to recover data too via Cygwin.
Of course final data recovery is also very much into God's hands so before launching ddrescue, don't forget to say a prayer 🙂

Archive Outlook mail in Outlook 2010 to free space in your mailbox

Thursday, May 15th, 2014

outlook-archive-old-mail-to-prevent-out-of-space-problems-outlook-logo
If you're working in a middle or big sized IT company or corporation like IBM or HP, you're already sucked into the Outlook "mail whirlwind of corporate world" and daily flooded with tons of corporate spam emails with fuzzy business random terms like taken from Corporate Bullshit Generator

Many corporations, because probably of historic reasons still provide employees with small sized mailboxes half a gigabyte, a gigabyte or even in those with bigger user Mailboxes like in Hewlett Packard, this is usually no more than 2 Gigabytes.

This creates a lot of issues in the long term because usually mail communication in Inbox, Sent Items, Drafts Conversation History, Junk Email and Outbox grows up quickly and for a year or a year and a half, available Mail space fills up and you stop receiving email communication from customers. This is usually not too big problem if your Mailbox gets filled when you're in the Office (in office hours). However it is quite unpleasent and makes very bad impression to customers when you're in a few weeks Summar Holiday with no access to your mailbox and your Mailbox free space  depletes, then you don't get any mail from the customer and all the time the customer starts receiving emails disrupting your personal or company image with bouncing messages saying the "INBOX" is full.

To prevent this worst case scenario it is always a good idea to archive old mail communication (Items) to free up space in Outlook 2010 mailbox.
Old Outlook Archived mail is (Saved) exported in .PST outlook data file format. Later exported Mail Content and Contacts could be easily (attached) from those .pst file to Outlook Express, leaving you possibility to still have access to your old archived mail keeping the content on your hard drive instead on the Outlook Exchange Mailserver (freeing up space from your Inbox).

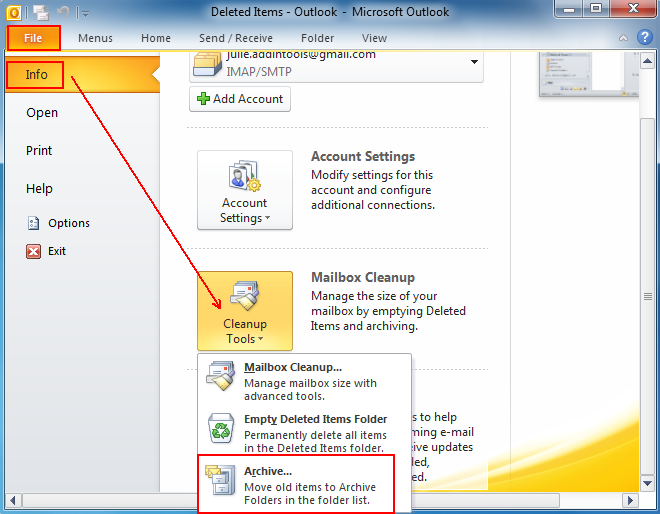
Here is how to archive your Outlook mail Calendar and contacts:

Archive-outlook-mail-in-microsoft-outlook-2010-free-space-in-your-mailbox

1. Click on the "File" tab on the top horizontal bar.Select "Cleanup Tools" from the options.

2. Click "Cleanup Tools" from the options.

3. Click on the "Archive this folder and all subfolders" option.

4. Select what to archive (e.g. Inbox, Drafts, Sent Items, Calendar whatever …)

5. Choose archive items older than (this is quite self-explanatory)

6. Select the location of your archive file (make sure you palce the .PST file into directory you will not forget later)

That's all now you have old mails freed up from Outlook Exchange server. Now make sure you create regular backups ot old-archived-mail.pst file you just created, it is a very good idea to upload this folder to encrypted file system on USB stick or use something like TrueCrypt to encrypt the file and store it to external hard drive, if you already don't have a complete backup corporate solution backuping up all your Laptop content.

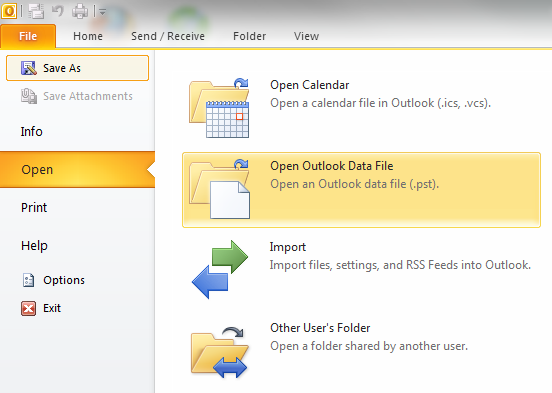
Later Attaching or detaching exported .PST file in Outlook is done from:

File -> Open -> Open Outlook Data File

outlook-open-backupped-pst-datafile-archive-importing-to-outlook-2010


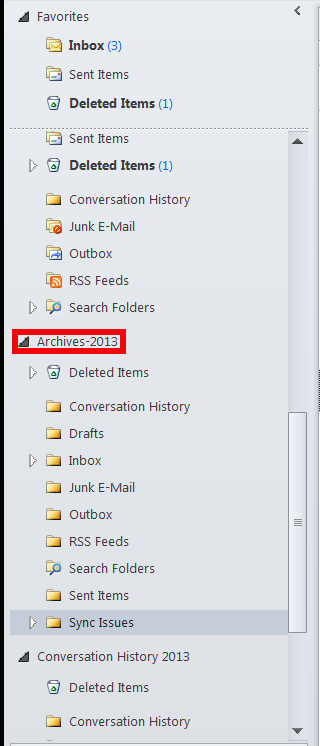
Once .PST file is opened and attached in Left Inbox pane you will have the Archived old mail folder appear.


outlook-archived-mail-pannel-screenshot-windows-7
You can change Archived name (like I did to some meaningful name) like I've change it to Archives-2013 by right clicking on it (Data File properties -> Advanced)

How to disable GNOME popup notification in Debian Wheezy Linux

Friday, August 2nd, 2013

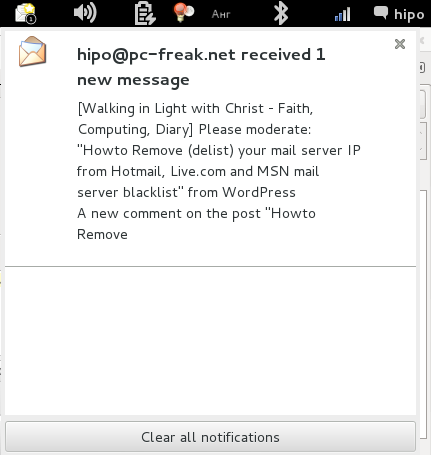
how to disable remove GNOME 2 / 3 popup e mail notification Debian Ubuntu Linux screenshot

I found it very annoying to have a pop-up notification every time I receive a new email it is just pointless there especially, when I already use Thunderbird (IceDove) to fetch my email via pop3. This pop-up notification though planned to be useful messes with my Desktop and breaks the habit on how I'm used to old GNOME interface…. I remember same popup notification was present on older Fedora releases (back in time when I used Fedora Linux for my Desktop).

disable Gnome popup notification new email Debian GNU Linux Wheezy 7 screenshot

My logical guess was in order to disable popup notification in GNOME 3 I had to tamper with gconf-editor. In gconf-editor config database there is:

Apps -> Notification daemon

Problem it is not possible to turn it off. Only available change options are:

default-sound, popup_location, sound_enabled, and theme

After some time of try / fail attempts I found the solution on linuxquestions forum, its quite raw solution but it works, all I had to do is change permissions of /usr/lib/notification-daemon/notification-daemon;

debian:~# chmod 0000 /usr/lib/notification-daemon/notification-daemon

Another thing that is handy to disable is POP UP Window with warning that you have low disk space on Hard Drive.

The warinng for Disk space is very annoying and popups up on every GNOME boot. Actually the hard drive with Low disk space is and old mounted partition in NTFS and I only use it to read data.

Here is how to disable HDD Notification Warnings in GNOME:

debian:~# chmod 0000 /usr/lib/gnome-disk-utility/gdu-notification-daemon

Teracopy faster Windows copy or Save files from Windows PC with dying hard drive

Wednesday, July 3rd, 2013

TeraCopy logo copy files faster and prevent windows hangs up on broken hard disks
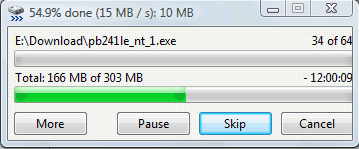
My sysadmin colleague mentioned today about TeraCopy. An application for Microsoft Windows designed to be used to Move or Copy  files. So why would one want to use Teracopy instead of normal Windows Explorer copy integrated soft? Reason is Teracopy is faster than MS Windows Copy / Move and uses dynamically adjusted buffers to reduce seek times. This asynchronous copying speeds up file transfers between physical HDDs.

More precious feature of TeraCopy is whether you have to Save data from hard disks with Bad Sectors, it can skip faulty files (stored on bad sectors) without triggering Windows to hang up or halt with the Blue Screen of Death.TeraCopy even can be setup to replace Windows Explorer (i.e. Shell Integration copy and move functions). Beside that it works well with Unicode encoded file names (Cyrillic, Chineese) etc.

Teracopy copying files on Microsoft windows 7 substitutes default windows copy and move opeartions

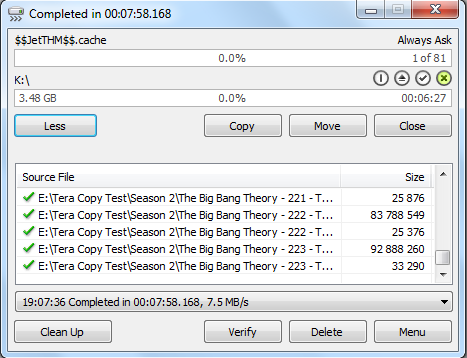
As of time of writting article, TeraCopy has support for all Windows NT (Windows XP / 2000) as well as for Windows 7 and 8. Whether a failure to copy file occurs it tries to recopy file several times in order to achieve copy success. After each file is copied a CRC check up value of file is calculated and matched. It also provides a way more verbose information on copied files than Windows default Copy. It is very useful in copying large files from system to system as file transfers complete time is significantly lower

teracopy with more information on copying files screenshot MS Windows

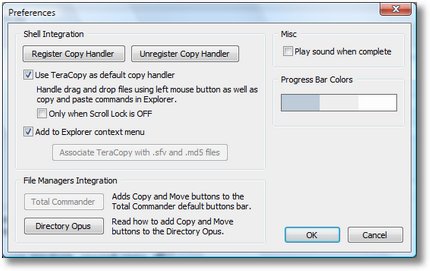
Once TeraCopy is installed it automatically does replace Explorer Copy and Move functions, hence after install every next Move or Copy operation is auto handled by it. In preferences the user could still revert back Copy / Move functions to Explorer original.

TeraCopy copy faster files and save files from broken win hdd preferences screenshot

Unfortunately TeraCopy is not-free software but freeware and can only be used to non-commercial use, for commercial use you have to purchase TeraCopy Pro version.