Archive for January, 2024

Zabbix script to track arp address cache loss (arp incomplete) from Linux server to gateway IP

Tuesday, January 30th, 2024

Zabbix_arp-network-incomplete-check-logo.svg

Some of the Linux servers recently, I'm responsible had a very annoying issue recently. The problem is ARP address to default configured server gateway is being lost, every now and then and it takes up time, fot the remote CISCO router to realize the problem and resolve it. We have debugged with the Network expert colleague, while he was checking the Cisco router and we were checking the arp table on the Linux server with arp command. And we came to conclusion this behavior is due to some network mess because of too many NAT address configurations on the network or due to a Cisco bug. The colleagues asked Cisco but cisco does not have any solution to the issue and the only close work around for the gateway loosing the mac is to set a network rule on the Cisco router to flush its arp record for the server it was loosing the MAC address for.
This does not really solve completely the problem but at least, once we run into the issue, it gets resolved as quick as 5 minutes time. }

As we run a cluster environment it is useful to Monitor and know immediately once we hit into the MAC gateway disappear issue and if the issue persists, exclude the Linux node from the Cluster so we don't loose connection traffic.
For the purpose of Monitoring MAC state from the Linux haproxy machine towards the Network router GW, I have developed a small userparameter script, that is periodically checking the state of the MAC address of the IP address of remote gateway host and log to a external file for any problems with incomplete MAC address of the Remote configured default router.

In case if you happen to need the same MAC address state monitoring for your servers, I though that might be of a help to anyone out there.
To monitor MAC address incomplete state with Zabbix, do the following:
 

1. Create  userparamater_arp_gw_check.conf Zabbix script
 

# cat userparameter_arp_gw_check.conf 
UserParameter=arp.check,/usr/local/bin/check_gw_arp.sh


2. Create the following shell script /usr/local/bin/check_gw_arp.sh


#!/bin/bash
# simple script to run on cron peridically or via zabbix userparameter
# to track arp loss issues to gateway IP
#gw_ip='192.168.0.55';
gw_ip=$(ip route show|grep -i default|awk '{ print $3 }');
log_f='/var/log/arp_incomplete.log';
grep_word='incomplete';
inactive_status=$(arp -n "$gw_ip" |grep -i $grep_word);
# if GW incomplete record empty all is ok
if [[ $inactive_status == ” ]]; then 
echo $gw_ip OK 1; 
else 
# log inactive MAC to gw_ip
echo "$(date '+%Y-%m-%d %H:%M:%S')" "ARP_ERROR $inactive_status 0" | tee -a $log_f 2>&1 >/dev/null;
# printout to zabbix
echo "1 ARP FAILED: $inactive_status"; 
fi

You can download the check_gw_arp.sh here.

The script is supposed to automatically grep for the Default Gateway router IP, however before setting it up. Run it and make sure this corresponds correctly to the default Gateway IP MAC you would like to monitor.
 

3. Create New Zabbix Template for ARP incomplete monitoring
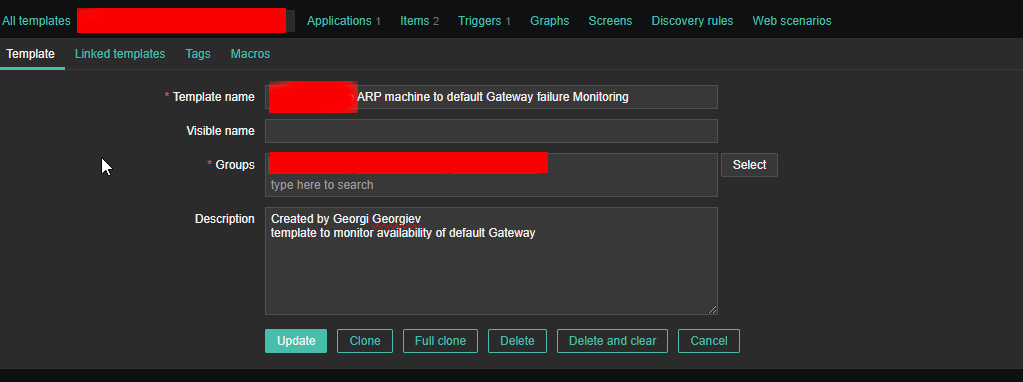
 

arp-machine-to-default-gateway-failure-monitoring-template-screenshot

Create Application 

*Name
Default Gateway ARP state

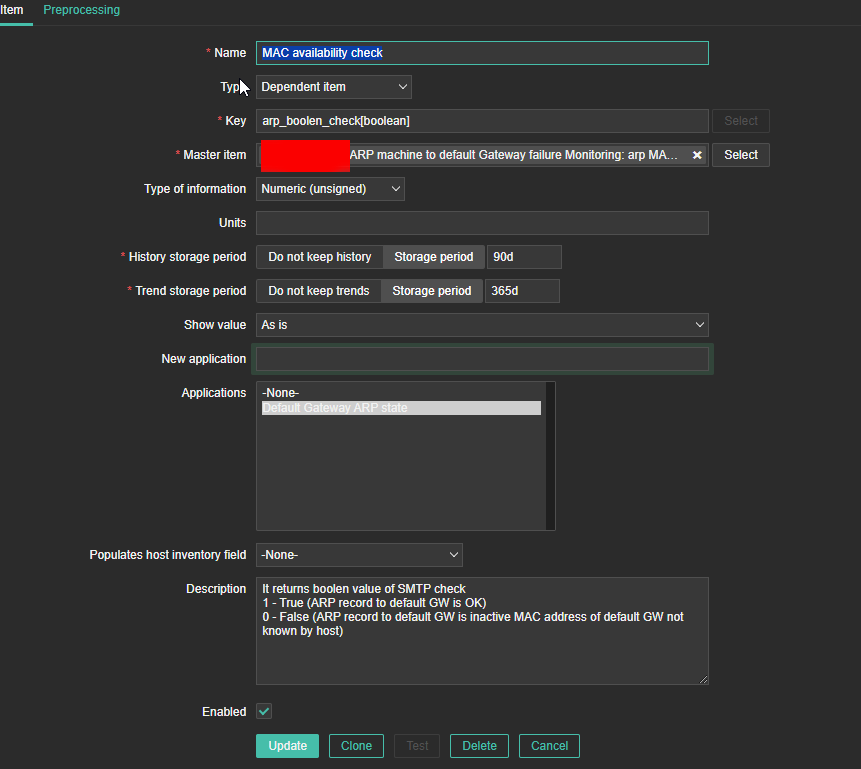
4. Create Item and Dependent Item 
 

Create Zabbix Item and Dependent Item like this

arp-machine-to-default-gateway-failure-monitoring-item-screenshot


arp-machine-to-default-gateway-failure-monitoring-item1-screenshot

arp-machine-to-default-gateway-failure-monitoring-item2-screenshot


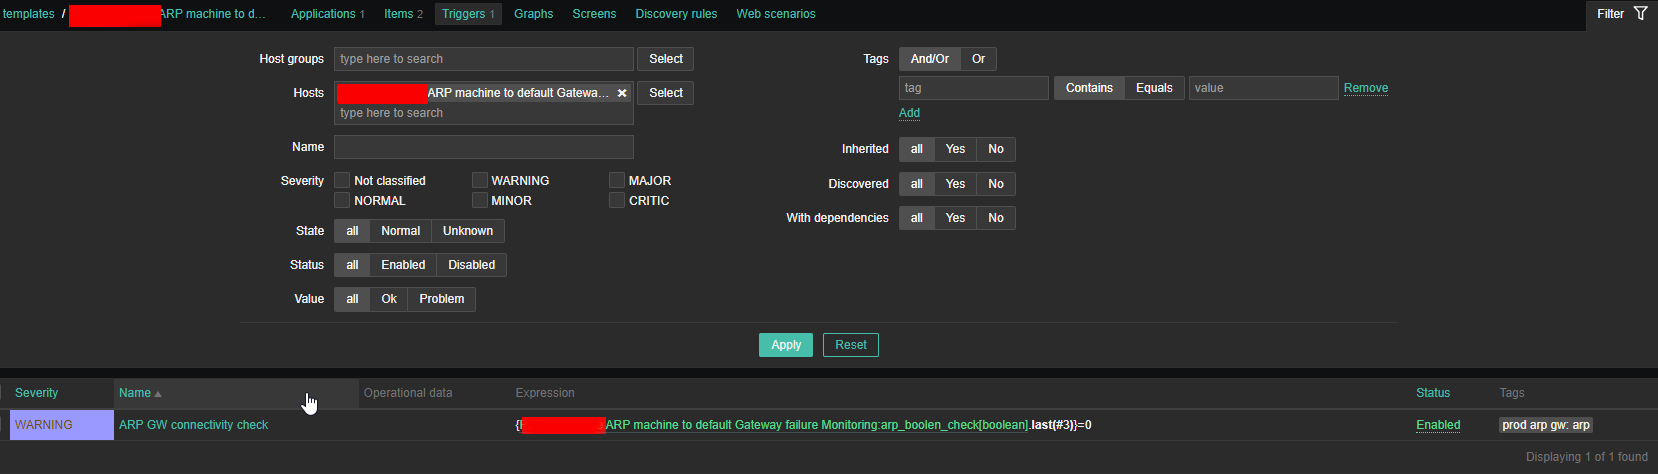
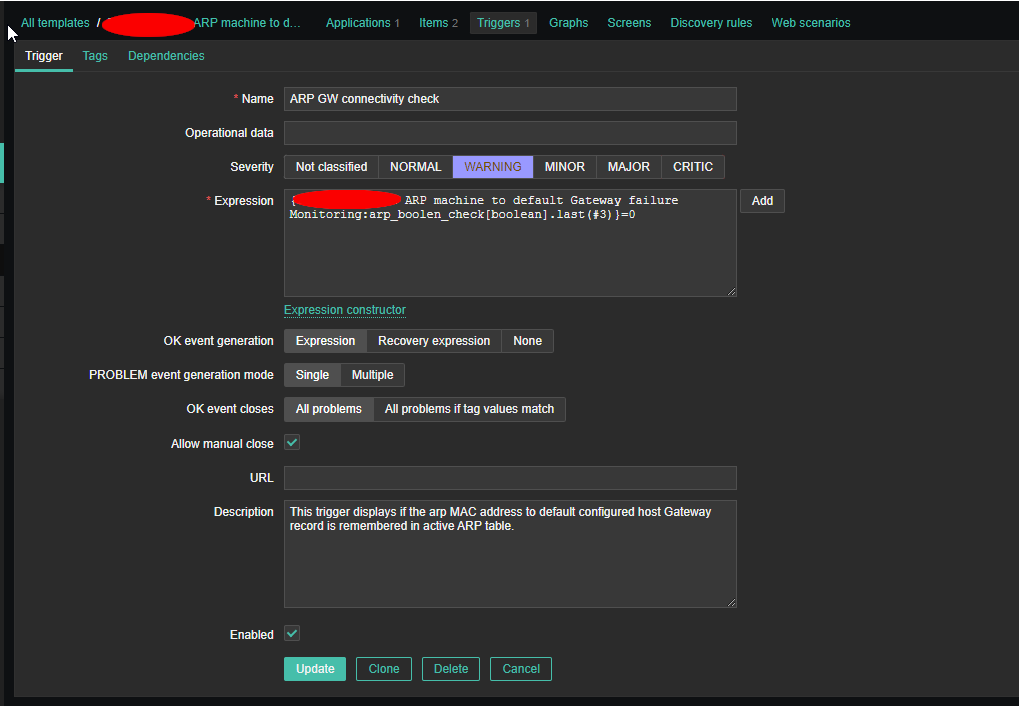
5. Create Trigger to trigger WARNING or whatever you like
 

arp-machine-to-default-gateway-failure-monitoring-trigger-screenshot


arp-machine-to-default-gateway-failure-monitoring-trigger1-screenshot

arp-machine-to-default-gateway-failure-monitoring-trigger2-screenshot


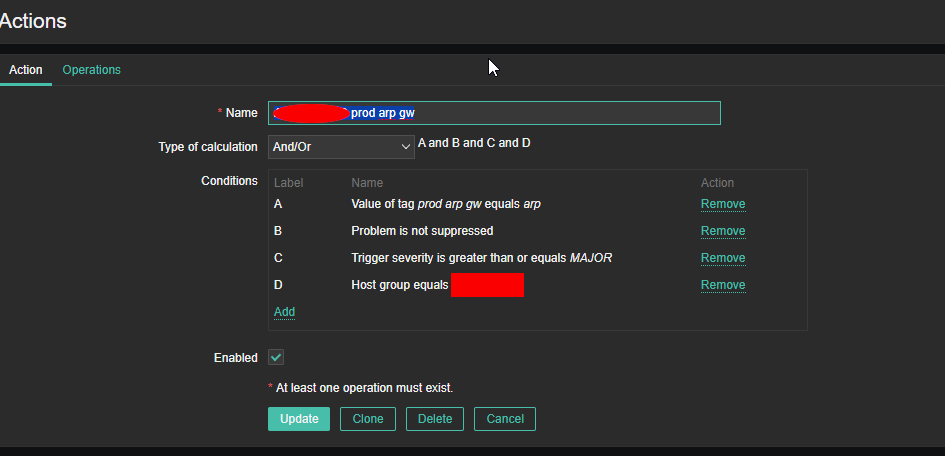
6. Create Zabbix Action to notify via Email etc.
 

arp-machine-to-default-gateway-failure-monitoring-action1-screenshot


arp-machine-to-default-gateway-failure-monitoring-action2-screenshot

That's all. Once you set up this few little things, you can enjoy having monitoring Alerts for your ARP state incomplete on your Linux / Unix servers.
Enjoy !

KVM Creating LIVE and offline VM snapshot backup of Virtual Machines. Restore KVM VM from backup. Delete old KVM backups

Tuesday, January 16th, 2024

kvm-backup-restore-vm-logo

For those who have to manage Kernel-Based Virtual Machines it is a must to create periodic backups of VMs. The backup is usually created as a procedure part of the Update plan (schedule) of the server either after shut down the machine completely or live.

Since KVM is open source the very logical question for starters, whether KVM supports Live backups. The simple answer is Yes it does.

virsh command as most people know is the default command to manage VMs on KVM running Hypervisor servers to manage the guest domains.

KVM is flexible and could restore a VM based on its XML configuration and the VM data (either a static VM single file) or a filesystem laying on LVM filesystem etc.

To create a snapshot out of the KVM HV, list all VMs and create the backup:

# export VM-NAME=fedora;
# export SNAPSHOT-NAME=fedora-backup;
# virsh list –all


It is useful to check out the snapshot-create-as sub arguments


# virsh help snapshot-create-as

 OPTIONS
    [–domain] <string>  domain name, id or uuid
    –name <string>  name of snapshot
    –description <string>  description of snapshot
    –print-xml      print XML document rather than create
    –no-metadata    take snapshot but create no metadata
    –halt           halt domain after snapshot is created
    –disk-only      capture disk state but not vm state
    –reuse-external  reuse any existing external files
    –quiesce        quiesce guest's file systems
    –atomic         require atomic operation
    –live           take a live snapshot
    –memspec <string>  memory attributes: [file=]name[,snapshot=type]
    [–diskspec]  disk attributes: disk[,snapshot=type][,driver=type][,file=name]


# virsh shutdown $VM_NAME
# virsh snapshot-create-as –domain $VM-NAME –name "$SNAPSHOT-NAME"


1. Creating a KVM VM LIVE (running machine) backup
 

# virsh snapshot-create-as –domain debian \
–name "debian-snapshot-2024" \
–description "VM Snapshot before upgrading to latest Debian" \
–live

On successful execution of KVM Virtual Machine live backup, should get something like:

Domain snapshot debian-snapshot-2024 created


2. Listing backed-up snapshot content of KVM machine
 

# virsh snapshot-list –domain debian


a. To get more extended info about a previous snapshot backup

# virsh snapshot-info –domain debian –snapshotname debian-snapshot-2024


b. Listing info for multiple attached storage qcow partition to a VM
 

# virsh domblklist linux-guest-vm1 –details

Sample Output would be like:

 Type   Device   Target   Source
——————————————————————-
 file   disk     vda      /kvm/linux-host/linux-guest-vm1_root.qcow2
 file   disk     vdb      /kvm/linux-host/linux-guest-vm1_attached_storage.qcow2
 file   disk     vdc      /kvm/linux-host/guest01_logging_partition.qcow2
 file   cdrom    sda      –
 file   cdrom    sdb      


3. Backup KVM only Virtual Machine data files (but not VM state) Live


# virsh snapshot-create-as –name "mint-snapshot-2024" \
–description "Mint Linux snapshot" \
–disk-only \
–live
–domain mint-home-desktop


4. KVM restore snapshot (backup)
 

To revert backup VM state to older backup snapshot:
 

# virsh shutdown –domain manjaro
# virsh snapshot-revert –domain manjaro –snapshotname manjaro-linux-back-2024 –running


5. Delete old unnecessery KVM VM backup
 

# virsh snapshot-delete –domain dragonflybsd –snapshotname dragonfly-freebsd