Posts Tagged ‘shell script’

How to automate open xen Hypervisor Virtual Machines backups shell script

Tuesday, June 22nd, 2021

openxen-backup-logo As a sysadmin that have my own Open Xen Debian Hypervisor running on a Lenovo ThinkServer few months ago due to a human error I managed to mess up one of my virtual machines and rebuild the Operating System from scratch and restore files service and MySQl data from backup that really pissed me of and this brought the need for having a decent Virtual Machine OpenXen backup solution I can implement on the Debian ( Buster) 10.10 running the free community Open Xen version 4.11.4+107-gef32c7afa2-1. The Hypervisor is a relative small one holding just 7 VM s:

HypervisorHost:~#  xl list
Name                                        ID   Mem VCPUs      State   Time(s)
Domain-0                                     0 11102    24     r—–  214176.4
pcfrxenweb                                  11 12288     4     -b—-  247425.5
pcfrxen                                     12 16384    10     -b—-  1371621.4
windows7                                    20  4096     2     -b—-   97887.2
haproxy2                                    21  4096     2     -b—-   11806.9
jitsi-meet                                  22  2048     2     -b—-   12843.9
zabbix                                      23  2048     2     -b—-   20275.1
centos7                                     24  2040     2     -b—-   10898.2

HypervisorHost:~# xl list|grep -v 'Name ' |grep  -v 'Domain-0'  |wc -l
7


The backup strategy of the script is very simple to shutdown the running VM machine, make a copy with rsync to a backup location the image of each of the Virtual Machines in a bash shell loop for each virtual machine shown in output of xl command and backup to a preset local directory in my case this is /backups/ the backup of each virtual machine is produced within a separate backup directory with a respective timestamp. Backup VM .img files are produced in my case to mounted 2x external attached hard drives each of which is a 4 Terabyte Seagate Plus Backup (Storage). The original version of the script was made to be a slightly different by Zhiqiang Ma whose script I used for a template to come up with my xen VM backup solution. To prevent the Hypervisor's load the script is made to do it with a nice of (nice -n 10) this might be not required or you might want to modify it to better suit your needs. Below is the script itself you can fetch a copy of it /usr/sbin/xen_vm_backups.sh :

#!/bin/bash

# Author: Zhiqiang Ma (http://www.ericzma.com/)
# Modified to work with xl and OpenXen by Georgi Georgiev – https://pc-freak.net
# Original creation dateDec. 27, 2010
# Script takes all defined vms under xen_name_list and prepares backup of each
# after shutting down the machine prepares archive and copies archive in externally attached mounted /backup/disk1 HDD
# Latest update: 08.06.2021 G. Georgiev – hipo@pc-freak.net

mark_file=/backups/disk1/tmp/xen-bak-marker
log_file=/var/log/xen/backups/bak-$(date +%Y_%m_%d).log
err_log_file=/var/log/xen/backups/bak_err-$(date +%H_%M_%Y_%m_%d).log
xen_dir=/xen/domains
xen_vmconfig_dir=/etc/xen/
local_bak_dir=/backups/disk1/tmp
#bak_dir=xenbak@backup_host1:/lhome/xenbak
bak_dir=/backups/disk1/xen-backups/xen_images/$(date +%Y_%m_%d)/xen/domains
#xen_name_list="haproxy2 pcfrxenweb jitsi-meet zabbix windows7 centos7 pcfrxenweb pcfrxen"
xen_name_list="windows7 haproxy2 jitsi-meet zabbix centos7"

if [ ! -d /var/log/xen/backups ]; then
echo mkdir -p /var/log/xen/backups
 mkdir -p /var/log/xen/backups
fi

if [ ! -d $bak_dir ]; then
echo mkdir -p $bak_dir
 mkdir -p $bak_dir

fi


# check whether bak runned last week
if [ -e $mark_file ] ; then
        echo  rm -f $mark_file
 rm -f $mark_file
else
        echo  touch $mark_file
 touch $mark_file
  # exit 0
fi

# set std and stderr to log file
        echo mv $log_file $log_file.old
       mv $log_file $log_file.old
        echo mv $err_log_file $err_log_file.old
       mv $err_log_file $err_log_file.old
        echo "exec 2> $err_log_file"
       exec 2> $err_log_file
        echo "exec > $log_file"
       exec > $log_file


# check whether the VM is running
# We only backup running VMs

echo "*** Check alive VMs"

xen_name_list_tmp=""

for i in $xen_name_list
do
        echo "/usr/sbin/xl list > /tmp/tmp-xen-list"
        /usr/sbin/xl list > /tmp/tmp-xen-list
  grepinlist=`grep $i" " /tmp/tmp-xen-list`;
  if [[ “$grepinlist” == “” ]]
  then
    echo $i is not alive.
  else
    echo $i is alive.
    xen_name_list_tmp=$xen_name_list_tmp" "$i
  fi
done

xen_name_list=$xen_name_list_tmp

echo "Alive VM list:"

for i in $xen_name_list
do
   echo $i
done

echo "End alive VM list."

###############################
date
echo "*** Backup starts"

###############################
date
echo "*** Copy VMs to local disk"

for i in $xen_name_list
do
  date
  echo "Shutdown $i"
        echo  /usr/sbin/xl shutdown $i
        /usr/sbin/xl shutdown $i
        if [ $? != ‘0’ ]; then
                echo 'Not Xen Disk image destroying …';
                /usr/sbin/xl destroy $i
        fi
  sleep 30

  echo "Copy $i"
  echo "Copy to local_bak_dir: $local_bak_dir"
      echo /usr/bin/rsync -avhW –no-compress –progress $xen_dir/$i/{disk.img,swap.img} $local_bak_dir/$i/
     time /usr/bin/rsync -avhW –no-compress –progress $xen_dir/$i/{disk.img,swap.img} $local_bak_dir/$i/
      echo /usr/bin/rsync -avhW –no-compress –progress $xen_vmconfig_dir/$i.cfg $local_bak_dir/$i.cfg
     time /usr/bin/rsync -avhW –no-compress –progress $xen_vmconfig_dir/$i.cfg $local_bak_dir/$i.cfg
  date
  echo "Create $i"
  # with vmmem=1024"
  # /usr/sbin/xm create $xen_dir/vm.run vmid=$i vmmem=1024
          echo /usr/sbin/xl create $xen_vmconfig_dir/$i.cfg
          /usr/sbin/xl create $xen_vmconfig_dir/$i.cfg
## Uncomment if you need to copy with scp somewhere
###       echo scp $log_file $bak_dir/xen-bak-111.log
###      echo  /usr/bin/rsync -avhW –no-compress –progress $log_file $local_bak_dir/xen-bak-111.log
done

####################
date
echo "*** Compress local bak vmdisks"

for i in $xen_name_list
do
  date
  echo "Compress $i"
      echo tar -z -cfv $bak_dir/$i-$(date +%Y_%m_%d).tar.gz $local_bak_dir/$i-$(date +%Y_%m_%d) $local_bak_dir/$i.cfg
     time nice -n 10 tar -z -cvf $bak_dir/$i-$(date +%Y_%m_%d).tar.gz $local_bak_dir/$i/ $local_bak_dir/$i.cfg
    echo rm -vf $local_bak_dir/$i/ $local_bak_dir/$i.cfg
    rm -vrf $local_bak_dir/$i/{disk.img,swap.img}  $local_bak_dir/$i.cfg
done

####################
date
echo "*** Copy local bak vmdisks to remote machines"

copy_remote () {
for i in $xen_name_list
do
  date
  echo "Copy to remote: vm$i"
        echo  scp $local_bak_dir/vmdisk0-$i.tar.gz $bak_dir/vmdisk0-$i.tar.gz
done

#####################
date
echo "Backup finishes"
        echo scp $log_file $bak_dir/bak-111.log

}

date
echo "Backup finished"


Things to configure before start using using the script to prepare backups for you is the xen_name_list variable

#  directory skele where to store already prepared backups
bak_dir=/backups/disk1/xen-backups/xen_images/$(date +%Y_%m_%d)/xen/domains

# The configurations of the running Xen Virtual Machines
xen_vmconfig_dir=/etc/xen/
# a local directory that will be used for backup creation ( I prefer this directory to be on the backup storage location )
local_bak_dir=/backups/disk1/tmp
#bak_dir=xenbak@backup_host1:/lhome/xenbak
# the structure on the backup location where daily .img backups with be produced with rsync and tar archived with bzip2
bak_dir=/backups/disk1/xen-backups/xen_images/$(date +%Y_%m_%d)/xen/domains

# list here all the Virtual Machines you want the script to create backups of
xen_name_list="windows7 haproxy2 jitsi-meet zabbix centos7"

If you need the script to copy the backup of Virtual Machine images to external Backup server via Local Lan or to a remote Internet located encrypted connection with a passwordless ssh authentication (once you have prepared the Machines to automatically login without pass over ssh with specific user), you can uncomment the script commented section to adapt it to copy to remote host.

Once you have placed at place /usr/sbin/xen_vm_backups.sh use a cronjob to prepare backups on a regular basis, for example I use the following cron to produce a working copy of the Virtual Machine backups everyday.
 

# crontab -u root -l 

# create windows7 haproxy2 jitsi-meet centos7 zabbix VMs backup once a month
00 06 1,2,3,4,5,6,7,8,9,10,11,12 * * /usr/sbin/xen_vm_backups.sh 2>&1 >/dev/null


I do clean up virtual machines Images that are older than 95 days with another cron job

# crontab -u root -l

# Delete xen image files older than 95 days to clear up space from backup HDD
45 06 17 * * find /backups/disk1/xen-backups/xen_images* -type f -mtime +95 -exec rm {} \; 2>&1 >/dev/null

#### Delete xen config backups older than 1 year+3 days (368 days)
45 06 17 * * find /backups/disk1/xen-backups/xen_config* -type f -mtime +368 -exec rm {} \; 2>&1 >/dev/null

How to calculate connections from IP address with shell script and log to Zabbix graphic

Thursday, March 11th, 2021

We had to test the number of connections incoming IP sorted by its TCP / IP connection state.

For example:

TIME_WAIT, ESTABLISHED, LISTEN etc.


The reason behind is sometimes the IP address '192.168.0.1' does create more than 200 connections, a Cisco firewall gets triggered and the connection for that IP is filtered out. To be able to know in advance that this problem is upcoming. a Small userparameter script is set on the Linux servers, that does print out all connections from IP by its STATES sorted out.


The script is calc_total_ip_match_zabbix.sh is below:

#!/bin/bash
#  check ESTIMATED / FIN_WAIT etc. netstat output for IPs and calculate total
# UserParameter=count.connections,(/usr/local/bin/calc_total_ip_match_zabbix.sh)
CHECK_IP='192.168.0.1';
f=0; 


for i in $(netstat -nat | grep "$CHECK_IP" | awk '{print $6}' | sort | uniq -c | sort -n); do

echo -n "$i ";
f=$((f+i));
done;
echo
echo "Total: $f"


root@pcfreak:/bashscripts# ./calc_total_ip_match_zabbix.sh 
1 TIME_WAIT 2 ESTABLISHED 3 LISTEN 

Total: 6


root@pcfreak:/bashscripts# ./calc_total_ip_match_zabbix.sh 
2 ESTABLISHED 3 LISTEN 
Total: 5


images/zabbix-webgui-connection-check1

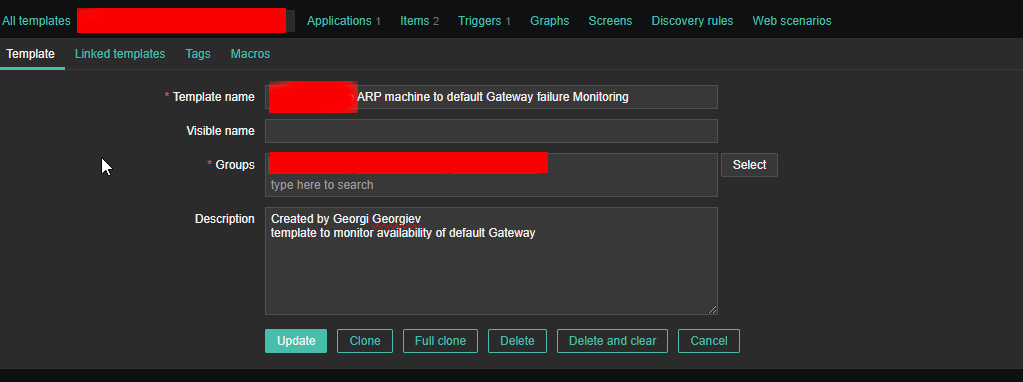
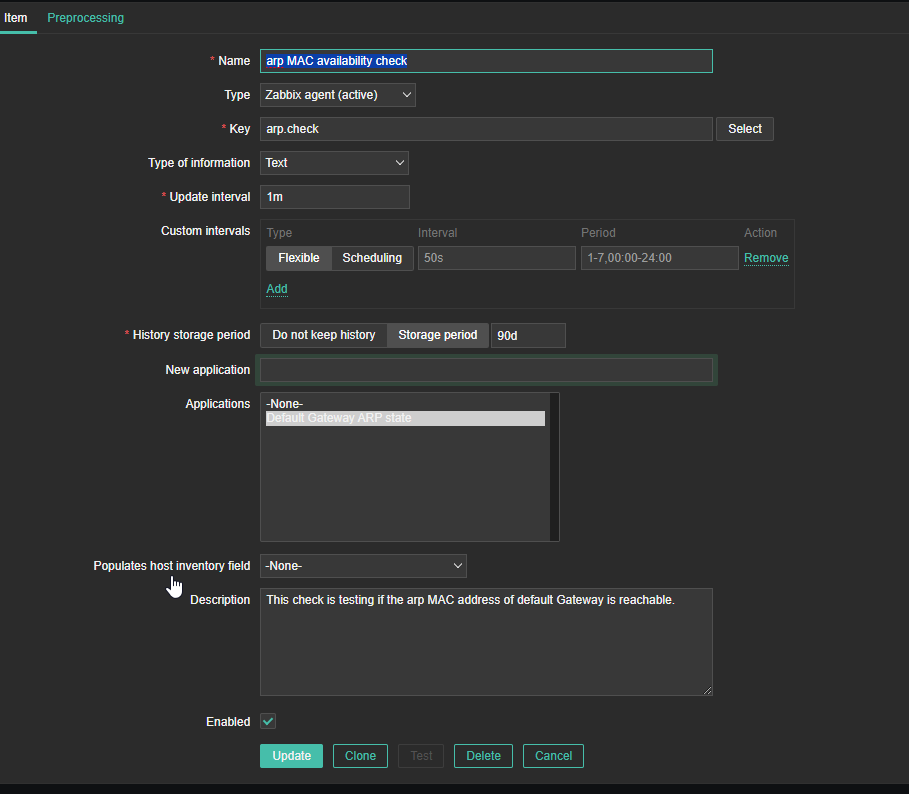
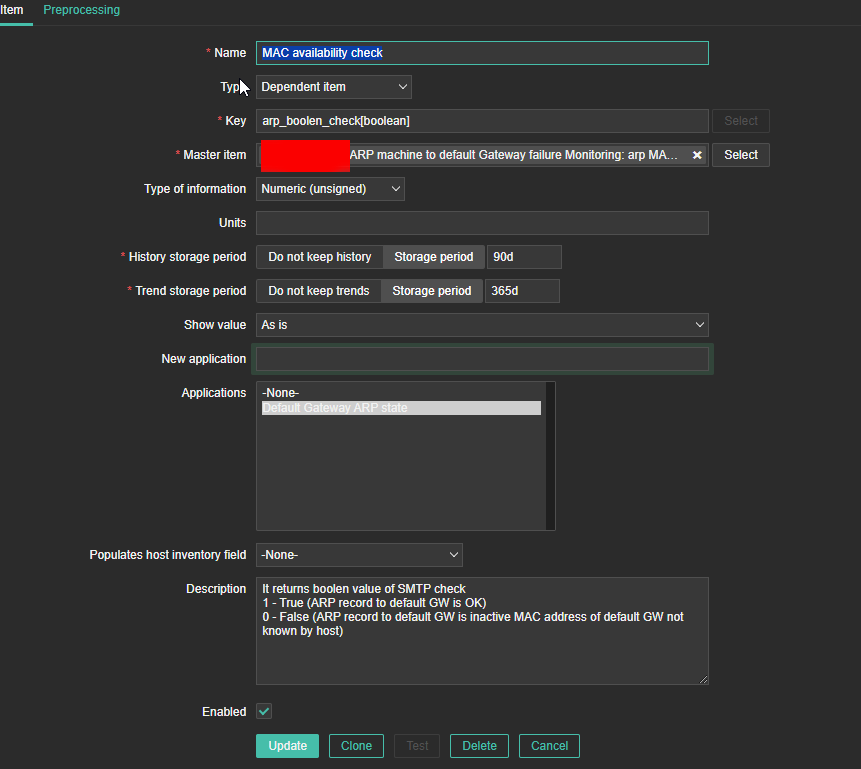
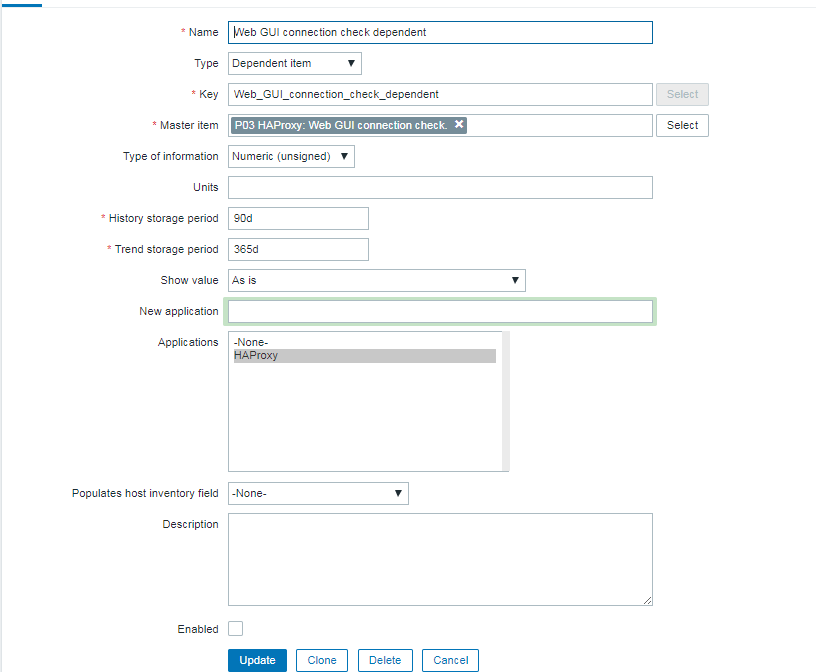
To make process with Zabbix it is necessery to have an Item created and a Depedent Item.


webguiconnection-check1

webguiconnection-check1
 

webgui-connection-check2-item

images/webguiconnection-check1

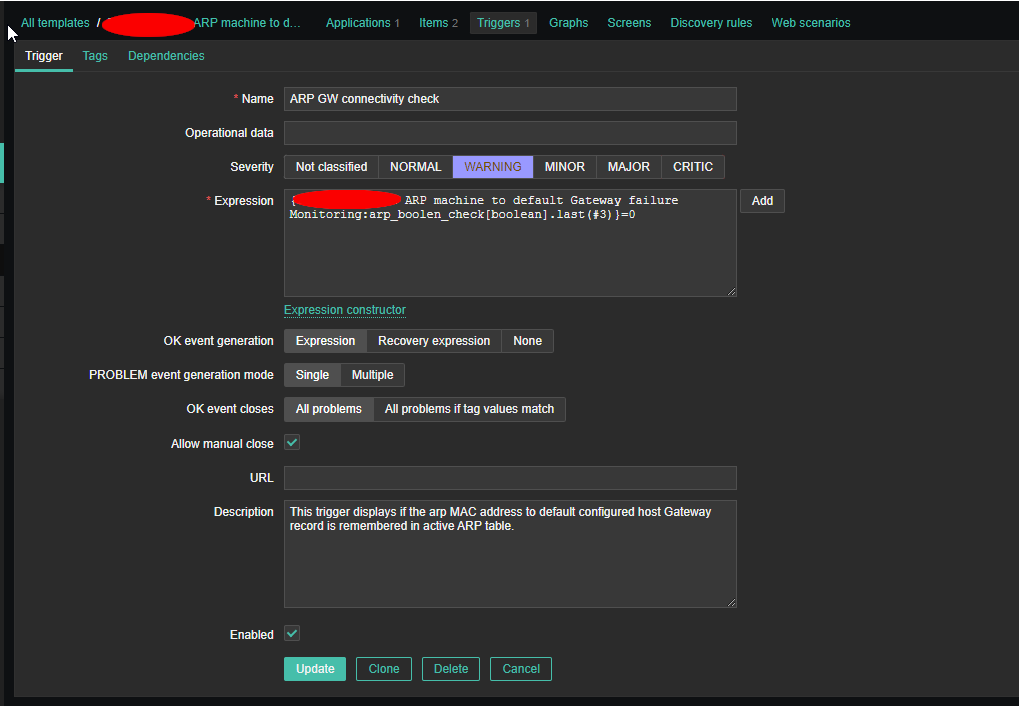
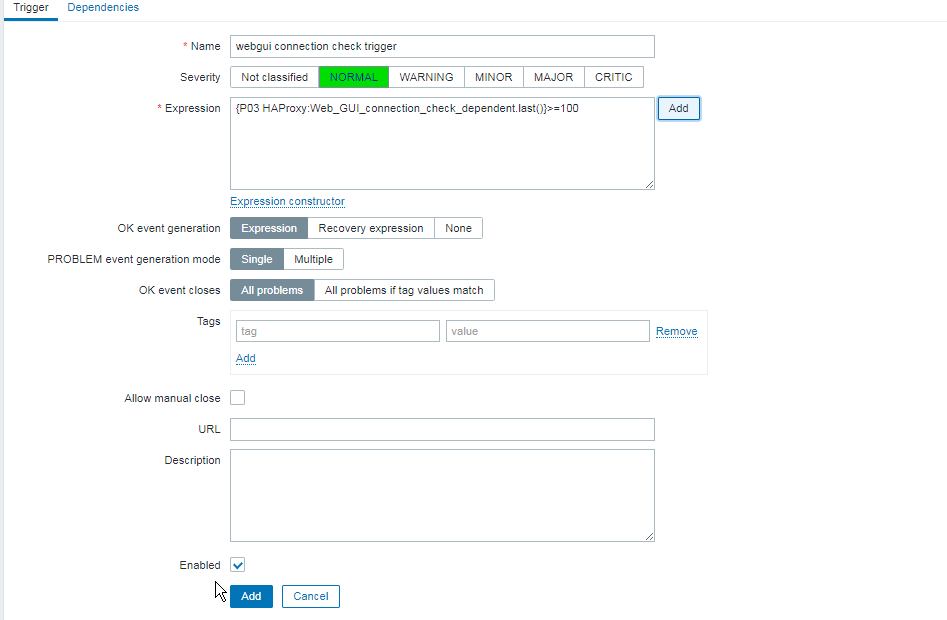
Finally create a trigger to trigger alarm if you have more than or eqaul to 100 Total overall connections.


images/zabbix-webgui-connection-check-trigger

The Zabbix userparameter script should be as this:

[root@host: ~]# cat /etc/zabbix/zabbix_agentd.d/userparameter_webgui_conn.conf
UserParameter=count.connections,(/usr/local/bin/webgui_conn_track.sh)


Some collleagues suggested more efficient shell script solution for suming the overall number of connections, below is less time consuming version of script, that can be used for the calculation.
 

#!/bin/bash -x
# show FIN_WAIT2 / ESTIMATED etc. and calcuate total
count=$(netstat -n | grep "192.168.0.1" | awk ' { print $6 } ' | sort -n | uniq -c | sort -nr)
total=$((${count// /+}))
echo "$count"
echo "Total:" "$total"

      2 ESTABLISHED
      1 TIME_WAIT
Total: 3


Below is the graph built with Zabbix showing all the fluctuations from connections from monitored IP. ebgui-check_ip_graph


Create simple proxy http server with netcat ( nc ) based tiny shell script

Tuesday, January 26th, 2021

use-Netcat_proxy-picture

The need of proxy server is inevitable nowadays especially if you have servers located in a paranoid security environments. Where virtually all is being passed through some kind of a proxy server. In my work we have recently started a  CentOS Linux release 7.9.2009 on HP Proliant DL360e Gen8 (host named rhel-testing).

HP DL360e are quite old nowadays but since we have spare servers and we can refurnish them to use as a local testing internal server Hypervisor it is okay for us. The machine is attached to a Rack that is connected to a Secured Deimilitarized Zone LAN (DMZ Network) which is so much filtered that even simple access to the local company homebrew RPM repository is not accessible from the machine.
Thus to set and remove software from the machine we needed a way to make yum repositories be available, and it seems the only way was to use a proxy server (situated on another accessible server which we use as a jump host to access the testing machine).

Since opening additional firewall request was a time consuming non-sense and the machine is just for testing purposes, we had to come with a solution where we can somehow access a Local repository RPM storage server http://rpm-package-server-repo.com/ for which we have a separate /etc/yum.repos.d/custom-rpms.repo definition file created.

This is why we needed a simplistic way to run a proxy but as we did not have the easy way to install privoxy / squid / haproxy or apache webserver configured as a proxy (to install one of those of relatively giant piece of software need to copy many rpm packages and manually satisfy dependencies), we looked for a simplistic way to run a proxy server on jump-host machine host A.

A note to make here is jump-host that was about to serve as a proxy  had already HTTP access towards the RPM repositories http://rpm-package-server-repo.com and could normally fetch packages with curl or wget via it …

For to create a simple proxy server out of nothing, I've googled a bit thinking that it should be possible either with BASH's TCP/IP capabilities or some other small C written tool compiled as a static binary, just to find out that netcat swiss army knife as a proxy server bash script is capable of doing the trick.

Jump host machine which was about to be used as a proxy server for http traffic did not have enabled access to tcp/port 8888 (port's firewall policies were prohibiting access to it).Since 8888 was the port targetted to run the proxy to allow TCP/IP port 8888 accessibility from the testing RHEL machine towards jump host, we had to issue first on jump host:

[root@jump-host: ~ ]# firewall-cmd –permanent –zone=public –add-port=8888/tcp

To run the script once placed under /root/tcp-proxy.sh on jump-host we had to run a never ending loop in a GNU screen session to make sure it runs forever:

Original tcp-proxy.sh script used taken from above article is:
 

#!/bin/sh -e


if [ $# != 3 ]
then
    echo "usage: $0 <src-port> <dst-host> <dst-port>"
    exit 0
fi

TMP=`mktemp -d`
BACK=$TMP/pipe.back
SENT=$TMP/pipe.sent
RCVD=$TMP/pipe.rcvd
trap 'rm -rf "$TMP"' EXIT
mkfifo -m 0600 "$BACK" "$SENT" "$RCVD"
sed 's/^/ => /' <"$SENT" &
sed 's/^/<=  /' <"$RCVD" &
nc -l -p "$1" <"$BACK" | tee "$SENT" | nc "$2" "$3" | tee "$RCVD" >"$BACK"


Above tcp-proxy.sh script you can download here.

I've tested the script one time and it worked, the script syntax is:

 [root@jump-host: ~ ]#  sh tcp-proxy.sh
usage: tcp-proxy.sh <src-port> <dst-host> <dst-port>


To make it work for one time connection I've run it as so:


 [root@jump-host: ~ ]# sh tcp-proxy.sh 8888 rpm-package-server-repo.com 80


To make the script work all the time I had to use one small one liner infinite bash loop which goes like this:

[root@jump-host: ~ ]#  while [ 1 ]; do sh tcp-proxy.sh 8888 rpm-package-server-repo.com 80; done​

On rhel-testing we had to configure for yum and all applications to use a proxy temporary via
 

[root@rhel-tresting: ~ ]# export http_proxy=jump-host_machine_accessibleIP:8888


And then use the normal yum check-update && yum update to apply to rhel-testing machine latest RPM package security updates.

The nice stuff about the tcp-proxy.sh with netcat in a inifite loop is you will see the binary copy of traffic flowing on the script which will make you feel like in those notorious Hackers movies ! 🙂

The stupid stuff is that sometimes some connections and RPM database updates or RPMs could be cancelled due to some kind of network issues.

To make the connection issues that are occuring to the improvised proxy server go away we finally used a slightly modified version from the original netcat script, which read like this.
 

#!/bin/sh -e


if [ $# != 3 ]
then
    echo "usage: $0 <src-port> <dst-host> <dst-port>"
        exit 0
        fi

        TMP=`mktemp -d`
        BACK=$TMP/pipe.back
        SENT=$TMP/pipe.sent
        RCVD=$TMP/pipe.rcvd
        trap 'rm -rf "$TMP"' EXIT
        mkfifo -m 0600 "$BACK" "$SENT" "$RCVD"
        sed 's/^/ => /' <"$SENT" &
        sed 's/^/<=  /' <"$RCVD" &
        nc –proxy-type http -l -p "$1" <"$BACK" | tee "$SENT" | nc "$2" "$3" | tee "$RCVD" >"$BACK"


Modified version tcp-proxy1.sh with –proxy-type http argument passed to netcat script u can download here.

With –proxy-type http yum check-update works normal just like with any normal fully functional http_proxy configured.

Next step wasto make the configuration permanent you can either add to /root/.bashrc or /etc/bashrc (if you need the setting to be system wide for every user that logged in to Linux system).

[root@rhel-tresting: ~ ]#  echo "http_proxy=http://jump-host_machine_accessibleIP:8888/" > /etc/environment


If you need to set the new built netcat TCP proxy only for yum package update tool include proxy only in /etc/yum.conf:

[root@rhel-tresting: ~ ]# vi /etc/yum.conf
proxy=http_proxy=http://jump-host_machine_accessibleIP:8888/


That's all now you have a proxy out of nothing with just a simple netcat enjoy.

Rsync copy files with root privileges between servers with root superuser account disabled

Tuesday, December 3rd, 2019


rsync-copy-files-between-two-servers-with-root-privileges-with-root-superuser-account-disabled

Sometimes on servers that follow high security standards in companies following PCI Security (Payment Card Data Security) standards it is necessery to have a very weird configurations on servers,to be able to do trivial things such as syncing files between servers with root privileges in a weird manners.This is the case for example if due to security policies you have disabled root user logins via ssh server and you still need to synchronize files in directories such as lets say /etc , /usr/local/etc/ /var/ with root:root user and group belongings.

Disabling root user logins in sshd is controlled by a variable in /etc/ssh/sshd_config that on most default Linux OS
installations is switched on, e.g. 

grep -i permitrootlogin /etc/ssh/sshd_config
PermitRootLogin yes


Many corporations use Vulnerability Scanners such as Qualys are always having in their list of remote server scan for SSH Port 22 to turn have the PermitRootLogin stopped with:


PermitRootLogin no


In this article, I'll explain a scenario where we have synchronization between 2 or more servers Server A / Server B, whatever number of servers that have already turned off this value, but still need to
synchronize traditionally owned and allowed to write directories only by root superuser, here is 4 easy steps to acheive it.


1. Add rsyncuser to Source Server (Server A) and Destination (Server B)


a. Execute on Src Host:


groupadd rsyncuser
useradd -g 1000 -c 'Rsync user to sync files as root src_host' -d /home/rsyncuser -m rsyncuser


b. Execute on Dst Host:


groupadd rsyncuser
useradd -g 1000 -c 'Rsync user to sync files dst_host' -d /home/rsyncuser -m rsyncuser


2. Generate RSA SSH Key pair to be used for passwordless authentication


a. On Src Host
 

su – rsyncuser

ssh-keygen -t rsa -b 4096


b. Check .ssh/ generated key pairs and make sure the directory content look like.


[rsyncuser@src-host .ssh]$ cd ~/.ssh/;  ls -1

id_rsa
id_rsa.pub
known_hosts


3. Copy id_rsa.pub to Destination host server under authorized_keys


scp ~/.ssh/id_rsa.pub  rsyncuser@dst-host:~/.ssh/authorized_keys


Next fix permissions of authorized_keys file for rsyncuser as anyone who have access to that file (that exists as a user account) on the system
could steal the key and use it to run rsync commands and overwrite remotely files, like overwrite /etc/passwd /etc/shadow files with his custom crafted credentials
and hence hack you 🙂
 

Hence, On Destionation Host Server B fix permissions with:
 

su – rsyncuser; chmod 0600 ~/.ssh/authorized_keys
[rsyncuser@dst-host ~]$


An alternative way for the lazy sysadmins is to use the ssh-copy-id command


$ ssh-copy-id rsyncuser@192.168.0.180
/usr/bin/ssh-copy-id: INFO: Source of key(s) to be installed: "/root/.ssh/id_rsa.pub"
/usr/bin/ssh-copy-id: INFO: attempting to log in with the new key(s), to filter out any that are already installed
/usr/bin/ssh-copy-id: INFO: 1 key(s) remain to be installed — if you are prompted now it is to install the new keys
root@192.168.0.180's password: 


For improved security here to restrict rsyncuser to be able to run only specific command such as very specific script instead of being able to run any command it is good to use little known command= option
once creating the authorized_keys


4. Test ssh passwordless authentication works correctly


For that Run as a normal ssh from rsyncuser

On Src Host


[rsyncuser@src-host ~]$ ssh rsyncuser@dst-host


Perhaps here is time that for those who, think enabling a passwordless authentication is not enough secure and prefer to authorize rsyncuser via a password red from a secured file take a look in my prior article how to login to remote server with password provided from command line as a script argument / Running same commands on many servers 

5. Enable rsync in sudoers to be able to execute as root superuser (copy files as root)


For this step you will need to have sudo package installed on the Linux server.

Then, Execute once logged in as root on Destionation Server (Server B)


[root@dst-host ~]# grep 'rsyncuser ALL' /etc/sudoers|wc -l || echo ‘rsyncuser ALL=NOPASSWD:/usr/bin/rsync’ >> /etc/sudoers


Note that using rsync with a ALL=NOPASSWD in /etc/sudoers could pose a high security risk for the system as anyone authorized to run as rsyncuser is able to overwrite and
respectivle nullify important files on Destionation Host Server B and hence easily mess the system, even shell script bugs could produce a mess, thus perhaps a better solution to the problem
to copy files with root privileges with the root account disabled is to rsync as normal user somewhere on Dst_host and use some kind of additional script running on Dst_host via lets say cron job and
will copy gently files on selective basis.

Perhaps, even a better solution would be if instead of granting ALL=NOPASSWD:/usr/bin/rsync in /etc/sudoers is to do ALL=NOPASSWD:/usr/local/bin/some_copy_script.sh
that will get triggered, once the files are copied with a regular rsyncuser acct.


6. Test rsync passwordless authentication copy with superuser works


Do some simple copy, lets say copy files on Encrypted tunnel configurations located under some directory in /etc/stunnel on Server A to /etc/stunnel on Server B

The general command to test is like so:
 

rsync -aPz -e 'ssh' '–rsync-path=sudo rsync' /var/log rsyncuser@$dst_host:/root/tmp/


This will copy /var/log files to /root/tmp, you will get a success messages for the copy and the files will be at destination folder if succesful.


On Src_Host run:


[rsyncuser@src-host ~]$ dst=FQDN-DST-HOST; user=rsyncuser; src_dir=/etc/stunnel; dst_dir=/root/tmp;  rsync -aP -e 'ssh' '–rsync-path=sudo rsync' $src_dir  $rsyncuser@$dst:$dst_dir;


7. Copying files with root credentials via script


The simlest file to use to copy a bunch of predefined files  is best to be handled by some shell script, the most simple version of it, could look something like this.
 

#!/bin/bash
# On server1 use something like this
# On server2 dst server
# add in /etc/sudoers
# rsyncuser ALL=NOPASSWD:/usr/bin/rsync

user='rsyncuser';

dst_dir="/root/tmp";
dst_host='$dst_host';
src[1]="/etc/hosts.deny";
src[2]="/etc/sysctl.conf";
src[3]="/etc/samhainrc";
src[4]="/etc/pki/tls/";
src[5]="/usr/local/bin/";


for i in $(echo ${src[@]}); do
rsync -aPvz –delete –dry-run -e 'ssh' '–rsync-path=sudo rsync' "$i" $rsyncuser@$dst_host:$dst_dir"$i";
done


In above script as you can see, we define a bunch of files that will be copied in bash array and then run a loop to take each of them and copy to testination dir.
A very sample version of the script rsync_with_superuser-while-root_account_prohibited.sh 
 

Conclusion


Lets do short overview on what we have done here. First Created rsyncuser on SRC Server A and DST Server B, set up the key pair on both copied the keys to make passwordless login possible,
set-up rsync to be able to write as root on Dst_Host / testing all the setup and pinpointing a small script that can be used as a backbone to develop something more complex
to sync backups or keep system configurations identicatial – for example if you have doubts that some user might by mistake change a config etc.
In short it was pointed the security downsides of using rsync NOPASSWD via /etc/sudoers and few ideas given that could be used to work on if you target even higher
PCI standards.


Create and Configure SSL bundle file for GoGetSSL issued certificate in Apache Webserver on Linux

Saturday, November 3rd, 2018

gogetssl-install-certificate-on-linux-howto-sslcertificatechainfile-obsolete

I had a small task to configure a new WildCard SSL for domains on a Debian GNU / Linux Jessie running Apache 2.4.25.

The official documentation on how to install the SSL certificate on Linux given by GoGetSSL (which is by COMODO was obsolete as of time of writting this article and suggested as install instructions:
 

SSLEngine on
SSLCertificateKeyFile /etc/ssl/ssl.key/server.key
SSLCertificateFile /etc/ssl/ssl.crt/yourDomainName.crt
SSLCertificateChainFile /etc/ssl/ssl.crt/yourDomainName.ca-bundle


Adding such configuration to domain Vhost and testing with apache2ctl spits an error like:


root@webserver:~# apache2ctl configtest
AH02559: The SSLCertificateChainFile directive (/etc/apache2/sites-enabled/the-domain-name-ssl.conf:17) is deprecated, SSLCertificateFile should be used instead
Syntax OK


To make issued GoGetSSL work with Debian Linux, hence, here is the few things done:

The files issued by Gogetssl.COM were the following:


AddTrust_External_CA_Root.crt
COMODO_RSA_Certification_Authority.crt
the-domain-name.crt


The webserver had already SSL support via mod_ssl Apache module, e.g.:


root@webserver:~# ls -al /etc/apache2/mods-available/*ssl*
-rw-r–r– 1 root root 3112 окт 21  2017 /etc/apache2/mods-available/ssl.conf
-rw-r–r– 1 root root   97 сеп 19  2017 /etc/apache2/mods-available/ssl.load
root@webserver:~# ls -al /etc/apache2/mods-enabled/*ssl*
lrwxrwxrwx 1 root root 26 окт 19  2017 /etc/apache2/mods-enabled/ssl.conf -> ../mods-available/ssl.conf
lrwxrwxrwx 1 root root 26 окт 19  2017 /etc/apache2/mods-enabled/ssl.load -> ../mods-available/ssl.load


For those who doesn't have mod_ssl enabled, to enable it quickly run:


# a2enmod ssl


The VirtualHost used for the domains had Apache config as below:


NameVirtualHost *:443

<VirtualHost *:443>
    ServerAdmin support@the-domain-name.com
    ServerName the-domain-name.com
    ServerAlias *.the-domain-name.com the-domain-name.com

    DocumentRoot /home/the-domain-namecom/www
    SSLEngine On
#    <Directory />
#        Options FollowSymLinks
#        AllowOverride None
#    </Directory>
    <Directory /home/the-domain-namecom/www>
        Options Indexes FollowSymLinks MultiViews
        AllowOverride None
        Include /home/the-domain-namecom/www/htaccess_new.txt
        Order allow,deny
        allow from all
    </Directory>

    ScriptAlias /cgi-bin/ /usr/lib/cgi-bin/
    <Directory "/usr/lib/cgi-bin">
        AllowOverride None
        Options +ExecCGI -MultiViews +SymLinksIfOwnerMatch
        Order allow,deny
        Allow from all
    </Directory>

    ErrorLog ${APACHE_LOG_DIR}/error.log

    # Possible values include: debug, info, notice, warn, error, crit,
    # alert, emerg.
    LogLevel warn

    CustomLog ${APACHE_LOG_DIR}/access.log combined

#    Alias /doc/ "/usr/share/doc/"
#   <Directory "/usr/share/doc/">
#       Options Indexes MultiViews FollowSymLinks
#       AllowOverride None
#       Order deny,allow
#       Deny from all
#       Allow from 127.0.0.0/255.0.0.0 ::1/128
#   </Directory>
SSLCertificateKeyFile /etc/apache2/ssl/the-domain-name.com.key
SSLCertificateFile /etc/apache2/ssl/chain.crt


</VirtualHost>

The config directives enabling and making the SSL actually work are:
 

SSLEngine On
SSLCertificateKeyFile /etc/apache2/ssl/the-domain-name.com.key
SSLCertificateFile /etc/apache2/ssl/chain.crt


The chain.crt file is actually a bundle file containing a bundle of the gogetssl CA_ROOT and RSA_Certification_Authority 3 files, to prepare that file, I've used bundle.sh small script found on serverfault.com here I've made a mirror of bundle.sh on www.pc-freak.net here   the script content is as follows:

To prepare the chain.crt  bundle, I ran:


sh create-ssl-bundle.sh _iq-test_cc.crt chain.crt
sh create-ssl-bundle.sh _iq-test_cc.crt >chain.crt
sh create-ssl-bundle.sh COMODO_RSA_Certification_Authority.crt >> chain.crt
sh create-ssl-bundle.sh bundle.sh AddTrust_External_CA_Root.crt >> chain.crt


Then I copied the file to /etc/apache2/ssl together with the-domain-name.com.key file earlier generated using openssl command earlier explained in my article how to install RapidSSL certificate on Linux

/etc/apache2/ssl was not previously existing (on Debian Linux), so to create it:


root@webserver:~# mkdir /etc/apache2/ssl
root@webserver:~# ls -al /etc/apache2/ssl/chain.crt
-rw-r–r– 1 root root 20641 Nov  2 12:27 /etc/apache2/ssl/chain.crt
root@webserver:~# ls -al /etc/apache2/ssl/the-domain-name.com.key
-rw-r–r– 1 root root 6352 Nov  2 20:35 /etc/apache2/ssl/the-domain-name.com.key


As I needed to add the SSL HTTPS configuration for multiple domains, further on I've wrote and used a tiny shell script add_new_vhost.sh which accepts as argument the domain name I want to add. The script works with a sample Skele (Template) file, which is included in the script itself and can be easily modified for the desired vhost config.
To add my multiple domains, I've used the script as follows:
 

sh add_new_vhost.sh add-new-site-domain.com
sh add_new_vhost.sh add-new-site-domain1.com


etc.

Here is the complete script as well:


#!/bin/sh
# Shell script to add easily new domains for virtual hosting on Debian machines
# arg1 should be a domain name
# This script takes the domain name which you type as arg1 uses it and creates
# Docroot / cgi-bin directory for the domain, create seperate site's apache log directory
# then takes a skele.com file and substitutes a skele.com with your domain name and directories
# This script's aim is to easily enable sysadmin to add new domains in Debian
sites_base_dir=/var/www/jail/home/www-data/sites/;
# the directory where the skele.com file is
skele_dir=/etc/apache2/sites-available;
# base directory where site log dir to be created
cr_sep_log_file_d=/var/log/apache2/sites;
# owner of the directories
username='www-data';
# read arg0 and arg1
arg0=$0;
arg1=$1;
if [[ -z $arg1 ]]; then
echo "Missing domain name";
exit 1;
fi


# skele template
echo "#
#  Example.com (/etc/apache2/sites-available/www.skele.com)
#
<VirtualHost *>
        ServerAdmin admin@design.bg
        ServerName  skele.com
        ServerAlias www.skele.com


        # Indexes + Directory Root.
        DirectoryIndex index.php index.htm index.html index.pl index.cgi index.phtml index.jsp index.py index.asp

        DocumentRoot /var/www/jail/home/www-data/sites/skelecom/www/docs
        ScriptAlias /cgi-bin "/var/www/jail/home/www-data/sites/skelecom/cgi-bin"
        
        # Logfiles
        ErrorLog  /var/log/apache2/sites/skelecom/error.log
        CustomLog /var/log/apache2/sites/skelecom/access.log combined
#       CustomLog /dev/null combined
      <Directory /var/www/jail/home/www-data/sites/skelecom/www/docs/>
                Options FollowSymLinks MultiViews -Includes
                AllowOverride None
                Order allow,deny
                allow from all
                # This directive allows us to have apache2's default start page
                # in /apache2-default/, but still have / go to the right place
#               RedirectMatch ^/$ /apache2-default/
        </Directory>

        <Directory /var/www/jail/home/www-data/sites/skelecom/www/docs/>
                Options FollowSymLinks ExecCGI -Includes
                AllowOverride None
                Order allow,deny
                allow from all
        </Directory>

</VirtualHost>
" > $skele_dir/skele.com;

domain_dir=$(echo $arg1 | sed -e 's/\.//g');
new_site_dir=$sites_base_dir/$domain_dir/www/docs;
echo "Creating $new_site_dir";
mkdir -p $new_site_dir;
mkdir -p $sites_base_dir/cgi-bin;
echo "Creating sites's Docroot and CGI directory";
chown -R $username:$username $new_site_dir;
chown -R $username:$username $sites_base_dir/cgi-bin;
echo "Creating site's Log files Directory";
mkdir -p $cr_sep_log_file_d/$domain_dir;
echo "Creating sites's VirtualHost file and adding it for startup";
sed -e "s#skele.com#$arg1#g" -e "s#skelecom#$domain_dir#g" $skele_dir/skele.com >> $skele_dir/$arg1;
ln -sf $skele_dir/$arg1 /etc/apache2/sites-enabled/;
echo "All Completed please restart apache /etc/init.d/apache restart to Load the new virtual domain";

# Date Fri Jan 11 16:27:38 EET 2008


Using the script saves a lot of time to manually, copy vhost file and then edit it to change ServerName directive, for vhosts whose configuration is identical and only the ServerName listener has to change, it is perfect to create all necessery domains, I've created a simple text file with each of the domains and run it in a loop:
 

while :; do sh add_new_vhost.sh $i; done < domain_list.txt


Virtual Keyboard for Linux and other Freedom respecting operating Systems

Monday, July 30th, 2018

How to install and Use Linux Virtual Keyboard and other freedom respecting Operating Systems

  •  Looking for a quick way to use VIRTUAL KEYBOARD ON LINUX COMPUTER OPERATING SYSTEM, you can do it just this 1 task in 3 simple steps  ???
    – Logical question emerges, WHY ??? would you need a virtual keyboard on Free Software OS such as Linux?
    Well, just because sometimes it is much more secure to use a Virtual Keyboard, especially if you have doubt that your keyboard has been tapped or a Key Logger (Sniffer), intercepting the Keyboard IN / OUT jacks, is installed on the computer or you might have sit on a computer of ,a friend running Linux, and you want to make sure he did not install sniffer to intercept your ,SSH login passwords and ,later hack into your Servers, after stealing, the password


  • Assuming you're on : – Debian / Ubuntu Linux, or other of the numerous IT systems such as ,FreeBSD / OpeBSD etc. out there, you can run simply this commands:


  •  apt-get install –yes florence
    * A. To make it, easily invokable for laters, create a small bash, shell script in directory; – location /usr/bin/virtual-keyboard like, the one below:

    vim /usr/bin/virtual-keyboard

    * B.. INside the file Place following 1 liner code
     

    #!/bin/sh
    /usr/bin/florence


    * C… To later invoke it any time:
    Press ALT + F2 (or use Run Command Dialog in GNOME / KDE / Windomaker / IceWM whatever or any other crazy graphic environment of your choice and run:

    /usr/bin/virtual-keyboard


How to use wget and curl via HTTP Proxy server / How to set a HTTPS proxy server on a bash shell on Linux

Wednesday, January 27th, 2016

linux-ssl-proxy-configuration-from-command-line-with-wget-and-curl-howto

I've been working a bit on a client's automation, the task is to automate process of installations of Apaches / Tomcats / JBoss and Java servers, so me and colleagues don't waste too
much time in trivial things. To complete that I've created a small repository on a Apache with a WebDav server with major versions of each general branch of Application servers and Javas.
In order to access the remote URL where the .tar.gz binaries archives reside, I had to use a proxy serve as the client runs all his network in a DMZ and all Web Port 80 and 443 HTTPS traffic inside the client network
has to pass by the network proxy.

Thus to make the downloads possible via the shell script, writting I needed to set the script to use the HTTPS proxy server. I've been using proxy earlier and I was pretty aware of the http_proxy bash shell
variable thus I tried to use this one for the Secured HTTPS proxy, however the connection was failing and thanks to colleague Anatoliy I realized the whole problem is I'm trying to use http_proxy shell variable
which has to only be used for unencrypted Proxy servers and in this case the proxy server is over SSL encrypted HTTPS protocol so instead the right variable to use is:
 

https_proxy


The https_proxy var syntax, goes like this:

proxy_url='http-proxy-url.net:8080';
export https_proxy="$proxy_url"

how-to-set-https_proxy_url-on-linux-freebsd-openbsd-bsd-and-unix-from-terminal-console

Once the https_proxy variable is set  UNIX's wget non interactive download tool starts using the proxy_url variable set proxy and the downloads in my script works.

Hence to make the different version application archives download work out, I've used wget like so:
 

 wget –no-check-certificate –timeout=5 https://full-path-to-url.net/file.rar


For other BSD / HP-UX / SunOS UNIX Servers where  shells are different from Bourne Again (Bash) Shell, the http_proxy and  https_proxy variable might not be working.
In such cases if you have curl (command line tool) is available instead of wget to script downloads you can use something like:
 

 curl -O -1 -k –proxy http-proxy-url.net:8080 https://full-path-to-url.net/file.rar

The http_proxy and https_proxy variables works perfect also on Mac OS X, default bash shell, so Mac users enjoy.
For some bash users in some kind of firewall hardened environments like in my case, its handy to permanently set a proxy to all shell activities via auto login Linux / *unix scripts .bashrc or .bash_profile that saves the inconvenience to always
set the proxy so lynx and links, elinks text console browsers does work also anytime you login to shell.

Well that's it, my script enjoys proxying traffic 🙂
 

Run 2 and more Skypes simultaneously on Mac OS X – Run multiple Skype acccounts on same Mac

Saturday, June 21st, 2014

run-2-and-more-skypes-simultaneously-on-mac-os-x-multiple-skype-account-login-on-mac
For people running Mac OS X, the question of 
how is it possible to use 2 skype accounts in parallel on Mac probably makes good sense?

I don't own a Mac notebook and thefore I'm a Mac newbie, however, I'm into situation where I and my wife Svetlana went (for 3 days) to my hometown Dobrich and we have with us only her Mac OS X powered Mac Book air.


One user is already logged in Skype, (my wife) is expecting some relatives and friends to contact us and  same time I had to login to check few servers via ssh and discuss some server downtime issues from yesterday in Skype .
Thus we
need 2 skype instances to run separately on her Macbook air powered PC with Mac OS X Leopard
 

Earlier I've blogged how to make 2 and more Skype accounts work simultaneously on one Windows PC because I had to set it up for a company, in this short article I will explain how is possible to run many skype clients on Mac OS X.


1. Open Mac Terminal from Finder

finder-terminal-screenshot-mac-os-x-leopard-run-many-skypes-mac-os

2. In Terminal run the first Skype Instance

Type in Terminal:

open /Applications/Skype.app/Contents/MacOS/Skype

3. Run Second Skype instance

In older Skype Mac OS versions, I read the

/secondary

Skype command option was there and could be used to run a second parallel skype instance on Mac, however in newer releases this option was removed and if you try to invoke it warning window pops up saying an instance is already running.

mac-os-x-you-have-another-copy-of-skype-running-screenshot

To get around the issue and run the second Skype, quickest way is to run another Skype client under privileged user through sudo command (this is unsecure – but anyways as Mac OS is proprietary and we don't have access to code and probably there are tons of spy and report software integrated into the OS, it doesn't really matter.)

mac-os-x-skype-run-screenshot-pic

To get around the issue and run the second Skype, quickest way is to run another Skype client under privileged user through sudo command (this is unsecure – but anyways as Mac OS is proprietary and we don't have access to code and probably there are tons of spy and report software integrated into the OS, it doesn't really matter.)

4. Script it into 2nd_skype.sh for later use

To run and use two parallel skypes regularly it might be useful to make shell script out of it and place it somewhere, 2nd_skype.sh script should be something like:


#!/bin/bash
open /Applications/Skype.app/Contents/MacOS/Skype
sudo /Applications/Skype.app/Contents/MacOS/Skype

Then make the script executable with:

chmod a+x 2nd_skype.sh

5. Run more than 2 Skypes (Run multiple Skypes on same Mac PC hack)

There is another "hack" method with deleting the Skype.pid (Process ID). Skype recognize where it is running by checking its Skype.pid on start up.

Deleting the pid after each next Skype client launch,  allow the user to run as many Skypes as you want on Mac OS X but it is not clear for how long it time it will work.

rm -f ~/Library/Application Support/Skype/Skype.pid

Then launch again Skype in background from Mac Terminal

open -nW '/Application/Skype.app' &

In case if you wonder why the open command is used, since above line could be run also directly and Skype will pop-up, by using open command you instruct the program to detach itself from Terminal from which it run, so later if Terminal is closed Skype app. will not terminate.

Another approach is to create, a many users lets say 5 users and use the Skype sudo run method each client with a separate user.

sudo user1 /Applications/Skype.app/Contents/MacOS/Skype
sudo user2 /Applications/Skype.app/Contents/MacOS/Skype
sudo user3 /Applications/Skype.app/Contents/MacOS/Skype
sudo user4 /Applications/Skype.app/Contents/MacOS/Skype

sudo user5 /Applications/Skype.app/Contents/MacOS/Skype

I enclose the script with the custom icon (Skype) ready to be launched and Voila, on script launch Skype multiple login prompts pops up.

For the lazy ones who don't want to tamper with writting scripts or doing hacks to run Skype multiple times on Mac there is even a Multi Skype Launcher app for Mac.


Linux: How to change recursively directory permissions to executable (+x) flag

Monday, September 2nd, 2013

change recursively permissions of directories and subdirectories Linux and Unix with find command
I had to copy large directory from one Linux server to windows host via SFTP proto (with WinSCP). However some of directories to be copied lacked executable flag, thus WinSCP failed to list and copy them.

Therefore I needed way to set recursively, all sub-directories under directory /mirror (located on Linux server) to +x executable flag.

There are two ways to do that one is directly through find cmd, second by using find with xargs
Here is how to do it with find:

# find /mirror -type d -exec chmod 755 {} + Same done with find + xargs:

# find /path/to/base/dir -type d -print0 | xargs -0 chmod 755
To change permissions only to all files under /mirror server directory with find

# find /path/to/base/dir -type f -exec chmod 644 {} +

Same done with find + xargs:
# find /path/to/base/dir -type f -print0 | xargs -0 chmod 644

Also, tiny shell script that recursively changes directories permissions (autochmod_directories.sh) is here