
As I've started on job position – Linux Architect in last November 2018 in Itelligence AG as a contractor (External Service) – a great German company who hires the best IT specialists out there and offers a flexible time schedules for emploees doing various very cool IT advanced operations and Strategic advancement of SAP's Cloud used Technology and Services improvements for SAP SE – SAP S4HANA and HEC (HANA Enterprise Cloud) and been given for work hardware a shiny Lenovo Thinkpad 500 Laptop with Windows 10 OS (SAP pre-installed), I needed to make some SSH Tunnels to machines to (Hop Station / Jump hosts) for that purpose, after some experimenting with MobaXterm Free (Personal Edition 11.0) and the presumable limitations of tunnels of the free client as well as my laziness to add the multiple ssh tunnels to different ssh / rdp / vnc etc. servers, finally I decided to just copy all the tunnels from a colleague who runs Putty and again use the good old Putty – old school Winblows SSH Terminal Client but just for creating the SSH tunnels and for rest use MobaXterm, just like in old times while still employe in Hewlett Packard. For that reason to copy the Tunnels from my dear German Colleague Henry Beck (A good herated collegue who works in field of Storage dealing with NetApps / filer Clusters QNap etc.).
Till that moment I had no idea how copying a saved SSH Tunnels definition is possible, I did a quick research just to find out this is done not with Putty Interface itself but, insetead through dumping Windows Putty Stored Registry records into a File, then transfer to the PC where Tunnels needs to be imported and then again (either double click the registry file) to load it, into registry or use Windows registry editor command line interface reg, here is how:
1. Export
Run cmd.exe (note below command)
requires elevated Run as Administrator prompt:
Only sessions:
regedit /e "%USERPROFILE%Desktopputty-sessions.reg" HKEY_CURRENT_USERSoftwareSimonTathamPuTTYSessions
All settings:
regedit /e "%USERPROFILE%Desktopputty.reg" HKEY_CURRENT_USERSoftwareSimonTatham
Powershell:
If you have powershell installed on machine, to dump
Only sessions:
reg export HKCUSoftwareSimonTathamPuTTYSessions ([Environment]::GetFolderPath("Desktop") + "putty-sessions.reg")
All settings:
reg export HKCUSoftwareSimonTatham ([Environment]::GetFolderPath("Desktop") + "putty.reg")
2. Import
Double-click on the
*.reg
file and accept the import.
Alternative ways:
cmd.exe
, require elevated command prompt:
regedit /i putty-sessions.reg regedit /i putty.reg
PowerShell:
reg import putty-sessions.reg reg import putty.reg
Below are some things to consider:
Note !: do not replace
SimonTatham
with your username.
Note !: It will create a
reg
file on the Desktop of the current user (for a different location modify path)
Note !: It will not export your related (old system stored) SSH keys.
What to expect next?

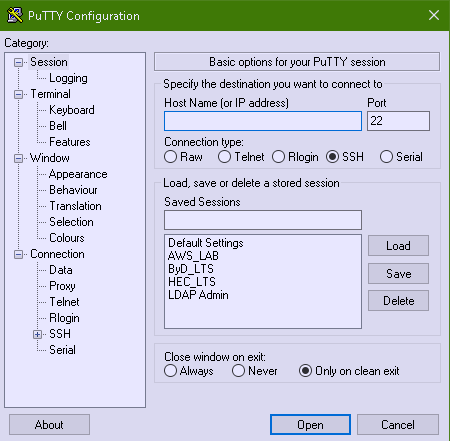
The result is in Putty you will have the Tunnel sessions loadable when you launch (Portable or installed) Putty version.
Press Load button over the required saved Tunnels list and there you go under
Connection SSH -> Tunnels
you will see all the copied tunnels.
Enjoy!
More helpful Articles

Tags: administrator, after, again, ALL, alternative, and, another, are, Below, Button, Click, client, Cloud, clusters, cmd, colleague, collegue, command, command line interface, command prompt


