Posts Tagged ‘sync’

Fix Update KB5060999 Not Installing On Windows 11 Version 23H2/22H2 / Fix windows Update failed

Thursday, July 24th, 2025

fix-Update-KB5060999-Not_Installing_On_Windows_11_Version_23H2_22H2-howto-update-screenshot


Recently I've stumbled across a very annoying issue on my work Laptop. Suddenly windows stopped being upadted it took me really long time of hours of researching to find out how to resolve the error:

Fix Update KB5060999 Not Installing On Windows 11 Version 23H2/22H2 / Fix windows Update failed

After a lot of catch / tries I can manage to Find a fix Thanks God! 

Here are the few steps I took to resolve it, first I've taken all the steps pointed at the Complete Guide Windows Problems it took really long time but even thouigh I did not manage to resolve the issue it give a lot of understanding on different ways of how windows components stick together and how to debug and solve errors if such ones occurs. Thus I warmly recommend it to anyone working as HelpDesk support admin within corporation or if you are a Windows specialist who makes a living from resolving weird unexpected Windows errors for some little money.

Once I went through a lot of underwater stones and nothing word finally  I managed to solve it by following these concrete steps:

1. Check logs and find error message / problems in CBS.log

C:\> notepad c:\windows\Logs\CBS\CBS.log

The root of the issue I found there as a repeating error messages is:

"InternalOpenPackage failed for Package_for_KB3025096~31bf3856ad364e35~amd64~~6.4.1.0 [HRESULT = 0x800f0805 – CBS_E_INVALID_PACKAGE]"


2. Download from Windows catalog the Update


windows11.0-kb5049624-x64-ndp481_6990e824379adc100fd7895adb30e692697381d7.msu to C:\User\myuser\Downloads

3. Use Winrar or 7Zip to extract the msu in local Directory

E.g.open Administrator command line cmd.exe extract  in lets say in \Users\Username\Downloads\
windows11.0-kb5049624-x64-ndp481_6990e824379adc100fd7895adb30e692697381d7

C:\Users/a768839/Downloads/windows11.0-kb5049624-x64-ndp481_6990e824379adc100fd7895adb30e692697381d7 > dir
WSUSSCAN.cab             

4. Remove old package existing on the Windows 11 OS with the same name using DISM tool with /online /remove-package options

C:\Users\myuser\Downloads\windows11.0-kb5049624-x64-ndp481_6990e824379adc100fd7895adb30e692697381d7>DISM /online /remove-package /packagepath:C:\Users\a768839\Downloads\windows11.0-kb5049624-x64-ndp481_6990e824379adc100fd7895adb30e692697381d7\Windows11.0-KB5049624-x64-NDP481.cab                                                                                                                                                                    Deployment Image Servicing and Management tool                                                                                                                                                                                                                                            Version: 10.0.22621.2792                                                                                                                                                                                                                                                                                                                                           Image Version: 10.0.22631.5335                                                                                                                                                                                                                                                                                                                 Processing 1 of 1 – Removing package Package_for_DotNetRollup_481~31bf3856ad364e35~amd64~~10.0.9294.1                                                                                                                                                                                     [==========================100.0%================]                                                                                                                                                                                                                            
 The operation completed successfully.      

                                                                                                                                                                                                                                              5. Use DISM /online /add-package to manually insatall  windows11.0-kb5049624-x64-ndp481_6990e824379adc100fd7895adb30e692697381d7\Windows11.0-KB5049624-x64-NDP481.cab   
                                             

  Assuming you have already downloaded previously and exctracted the .msu file and you have the .cab file at hand run again as cmd.exe Admin                                                                                                                                                                                       

C:\Users\myuser\Downloads\windows11.0-kb5049624-x64-ndp481_6990e824379adc100fd7895adb30e692697381d7>DISM /online /add-package /packagepath:C:\Users\a768839\Downloads\windows11.0-kb5049624-x64-ndp481_6990e824379adc100fd7895adb30e692697381d7\Windows11.0-KB5049624-x64-NDP481.cab                                                                                                                                                                                           Deployment Image Servicing and Management tool                                                                                                                                                                                                                                            Version: 10.0.22621.2792                                                                                                                                                                                                                                                                                                                                                Image Version: 10.0.22631.5335                                                                                                                                                                                                                                                                                                                  Processing 1 of 1 – Adding package Package_for_DotNetRollup_481~31bf3856ad364e35~amd64~~10.0.9294.1                                                                                                                                                                                       [==========================100.0%==========================]                                                                                                                                                                                                                              The operation completed successfully.    


The idea to remove and install the failing package found in the CBS.log was initially found on                                                                   
 http://datadump.ru/windows-update-error-800f0831/
 

6. Force a Windows chkdsk (Check disk on next restart) to make sure no physical hard drive or some other inode Windows Filesystem errors are there

Within same Admin cmd.exe

C:\Users\myuser\> chkdsk /f C:\


Once command executes reboot the PC and wait for the chkdsk scan to complete and PC to Boot as usual

7. Stop / start wuauserv and do sfc /scannow to refresh some Windows update components

Run following set of commands within Admin cmd

C:\> net stop wuauserv
C:\> command prompt in admin mode
C:\>  dism /online /cleanup-image /startcomponentcleanup
C:\>  sfc /scannow
C:\> restart
C:\> sfc /scannow
C:\> net start wuauserv

8. Download Manually failing update from Windows catalog download site:

As of time of writting this article the URL to download is https://catalog.update.microsoft.com/Search.aspx?q=KB5049624%20%20

C:\Users\myuser\Downloads> dir *.msu
windows11.0-kb5060999-x64_99e39c1cf8a8976d9b3313efb38069876c417f70.msu

9. Run Manually again failing Update from command line

Run cmd as Administrator and exec the file:

C:\Users\myuser\Downloads\windows11.0-kb5060999-x64_99e39c1cf8a8976d9b3313efb38069876c417f70.msu

Wait for the install to complete The computer will need to restart

10. Resync the device to the Computer Domain (mandatory step) only if your PC is part of large organizational Domain

Open Microsoft Store / Company Portal and Sync the device (if necessery)

Settings -> Sync

11. Force the PC to sync itself with remote Global Domain policies (mandatory only if PC is part of Domain)

C:\Users\myuser> gpupdate /force
C:\Users\myuser> repadmin /showrepl

Wait for Synchronization and wait for some time for computer compliancy to get back to normal (Computer compliancy might not be an issue if this is a Personal Windows installation) but for computers part of Larger Windows Domains, where a Domain policy requires a compliancy to set of rules)

To come up with this guide and better understand what is going on to resolve it I have to thank my colleague Eduard for assisting me to read the CBS.log and analyze it and also the following forum thread reading explaining what causes the mysterious windows update Update KB5060999 Not Installing On Windows 11 Version 23H2/22H2 to fail.
 

Recover lost / forgotten root password for CentOS 7 Linux / Boot CentOS 6 into Single User mode to reset admin pass

Friday, September 27th, 2024

centos-community-enterprise-operating-system-logo.

If you have some old CentOS 7 Virtual machine hanging for a long time and you don't remember the root password or you don't remember where you have stored it, but you have something important as data left over, you might need to recover root password for your CentOS 7 Virtual Machine.

I recently had to resolve that issue and here is the few easy steps to take to recover the lost root password.

Assuming you have tried to boot the VM and the VM boots fine and your few attempts to input manually some default passwords of yours failed, next 

1. Reboot the Virtual Machine to the GRUB boot menu


grub.png

The GRUB boot screen should appear and be there for few secs

2. Edit the boot loader kernel options ( add add rd.break enforcing=0 )


How to reset root password on CentOS Linux - Clouvider

Press 'e' to Edit the boot loader and modify the boot commands options passed to the linux kernel.

In GRUB edit mode:

add rd.break enforcing=0


to the end of the line starting with linux at the end of passed parameters list as shown in the picture.

When done editing, press Ctrl-x (Control button x key simultaneously) to boot with changed parameters.

ALTERNATIVE WAY TO BOOT THE SYSTEM INTO ROOT WITHOUT PASSWORD PROMPT:

Alternative options to use instead of add rd.break.enforcing=0 are to substitute the rhgb quiet kernel option with init=/bin/bash

Edit CentOS Grub Boot Menu Entries rhgb quiet options shot

Modify kernel parameters pass init=/bin/bash to kernel to boot emergency mode centos linux


As you might wonder for the meaning of the passed 2 parameters:

rd.break breaks the boot process at initramfs while
enforcing=0 disables the SELinux (which often enabled by default on CentOS).

Another way is to 

3. Boot in CentOS emergency mode and Reset the root password
 

When done editing, press Ctrl-x to boot with changed parameters.

As you might wonder for the meaning of the passed parameters:

rd.break breaks the boot process at initramfs while
enforcing=0 disables the SELinux (which often enabled by default on CentOS).

Whence system boots up with the modified kernel options cmd, the switch_root prompt will appear.
As the emerency mode boots the filesystem into read-only mode under /sysroot default directory, in order to be able to
modify the MD5 root password stored hash inside RO mounted /sysroot/etc/shadow you need to remount the Filesystme
in read-write mode.

To Remount the read-only file system /sysroot in write mode:

# mount -o remount,rw /sysroot

As the /sysroot is not the root directory to be able to use a standard passwd command you need to make /sysroot
as the default root folder for the booted linux by chrooting into it.
 

  • Generate MD5 password manually (for Hardcore masochistic admins 🙂 )

If you're a hard core linux sysadmin of course, generate your own new md5 password and directly modify /etc/shadow copy pasting the md5 string.

If you want to manually generate the md5 string, you can do it depending on the required encryption algorithm with:

For (md5, sha256, sha512) encrypted pass

# openssl passwd -6 -salt xyz  yourpass

For   (md5, sha256, sha512) encrypted pwd

# mkpasswd –method=SHA-512 –stdin

For (des, md5, sha256, sha512) encrypted pw

# perl -e 'print crypt("YourPasswd", "salt", "sha512"),"\n"'


Once the string is generated;

# vim  /etc/shadow


and exchange the old with new string for MD5

  • Change password with chroot (the easy common way)

remount read write the filesystem in emergency single user mode CentOS LINUX

# chroot /sysroot

That should drop you into another shell bash-4.x


Reset root user password in CentOS 7

# passwd
Changing password for user root.
New password:
Retype new password:

We need have to sync the entire filesystem we have to use the sync command, for novice sys admins who never heard about this command, below
short description:

The Linux sync command synchronizes cached data to permanent storage.
This data includes modified superblocks, modified inodes, delayed reads and writes, and others. sync uses several system calls:

sync()
syncfs()
fsync()
fdatasync()


For example, the sync command utilizes the sync() system call to write all buffered modifications to file data and metadata to an underlying storage device.

As a Linux systems administrator or developer, understanding the sync command can be crucial for efficient file synchronization. Additionally, sync can be helpful after crashes or when the file system becomes corrupted.

In this tutorial, we’ll explore the various aspects of the sync command. Also, we’ll see how we can use sync in different scenarios.

# sync

# exec /sbin/init

Try out the root password after booting normally into CentOS and the new set administrator pass should work.


Resetting forgotten (lost) root password on CentOS 6

The process is absolutely the same except on the Step 1 (in the modification of GRUB boot menu by pressing e key), add to

rhgb quiet

at the end one 'S'

This S character means 'boot CentOS into Single user mode'

rhgb quiet S


Go to single user mode on CentOS 6 Linux in boot loader S kernel setting

Then, press ENTER key and press b key to boot CentOS 6 into to single user mode.
 

Reboot Safely a frozen (hanged up) Linux Server with Magic SysRQ Key combination

Monday, June 20th, 2011

Linux Magic SysRQ Key picture

Being a remote system administrator for many years from now, I’ve experienced many times sudden Linux crashes, mostly caused by system hardware overloads.

This is a common thing especially on busy Web Servers with (Apache/MySQL). Situations like this are really messy and many times in order to bringt the server back online, one has to either physically go to the Data Center or contact the Technical support to request a server reboot.

In this terrible times, data loss might occur if the Server reset button is used to cold reboot it.

Happily in 99% of the cases the data loss which might occur could be prevented with Linux’s kernel capability to support the Magic SysRQ key !

Having the Magic SysRQ key functionality being supported in Linux in past times wasn’t that common, thanksfully these days this has changed andlmost every Linux distrubution supports this handy feature.

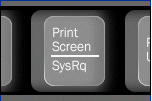
Now you might wonder what is the magic with those Magic SysRQ key ?

Let me explain, Magic SysRQ is a kernel level functionality which supports even completely crashed Linux systems with the horrifying:

Kernel Panic
message to be properly shutdown.

Using Magic SysRQ instead of the mostly used indiced cold reboots is really advantageous, as all the opened files by programs on the crashed server which hanged will be properly saved and closed and thus possible data loss caused by the sudden server crash will be minimized.

One other good thing about the Magic SysRQ Key keyboard combination is that initiating the Magic SysRQ could be made blindly (no need for server monitor or display to present any error messages on the failed server).

Now to check if the magic sysrq is enabled on a server one should issue the command:

Here are some Magic SysRQ keyboard combinations one can use in case of server failure:

ALT+SYSRQ+M to dump memory info;
ALT+SYSRQ+P to dump processes states;
ALT+SYSRQ+S to sync disks;
ALT+SYSRQ+U to unmount all mounted filesystems;
ALT+SYSRQ+E to terminate processes;
ALT+SYSRQ+I to kill all processes
ALT+SYSRQ+U to try to unmount once again;
ALT+SYSRQ+B to reboot.

I would skip to explain what each of the keyboard combinations will do as I believe the above description explains it well.

One classics of combinations one might want to issue on a failed Linux server supporting the Magic SysRQ would be:

ALT+SYSRQ+R
ALT+SYSRQ+E
ALT+SYSRQ+I
ALT+SYSRQ+S
ALT+SYSRQ+U
ALT+SYSRQ+B

The ALT+SYSRQ+REISUB key combination is very popular among system administrators.
Also Magic SysRQ is heavily used by kernel developers as it includes many handy debugging options.

If you try the Magic SysRQ key on older servers and you realize it doesn’t react you will have to recompile the linux kernel and enable the CONFIG_MAGIC_SYSRQ kernel time compilation option.

The Magic SysRQ can also be initiated remotely on a properly running server 😉 by initiating:

server:~# echo b > /proc/sysrq-trigger

This command would be useful if you want to just have fun and test that magic sysrq works on your system for sure 😉

To sum it up using the Magic SysRQ will guarantee your locked up, server a Safe Reboot and will hopefully save you a lot of time for backups recovery.