Posts Tagged ‘feature’

Skype remove word completion / Howto Disable spellcheck autocorrect on Mac OS X, Android Phones Tablets and IPhone iOS

Tuesday, March 14th, 2017

How-to-disable-auto-correct-on-MacOS-X-android-and-iphone

I've recently upgraded my wife's Mac Book Air Mac OS X release from Mountain Lion to latest available OS X release Yosemite and after upgrade the old version of Skype used for about 3 years without any problems (except camera issues due to mac OS X bug the old post is here) stopped working (did crashed) on Skype launch so I took few minutes to upgrade Skype as well from Skype.com Skype for Mac official download page after the quick and unproblematic Skype re-install, Skype client was back to normal with a shiny new outlook and on a first glimpse all worked like a charm but …

On the next day when I took use of temporary the upgraded Mac Book Air with the fresh new OS X Yosemite and Skype's latest app to to do a quick login with my Skype credentials noticed a very annoying autocorrect (auto spelling)  Skype behavior on any new input text message.

I have to admit the idea of autocorrect feature on a system wide scale is great however quick keyboard typers like me who are used to type more than a letter per second use to type so quickly that occasinally you do errors which you're quick to fix but anyhow errors are automatically corrected in a way that you have to retype the whole word quite often which makes your typing a hellish experience. Then the same auto-correct feature becomes a terrible experience and on any device I notice this behavior I tend to remove it immediately.

I remember  the same dictionary auto-spell check / corect behavior was present on my Android run ZTE blade 3 mobile after first Mobile boot and also present on my current iPhone 5 iOS and thus the first thing I did once I start using it is to remove autocorrect (auto spelling) feature and relax the irritation of it.

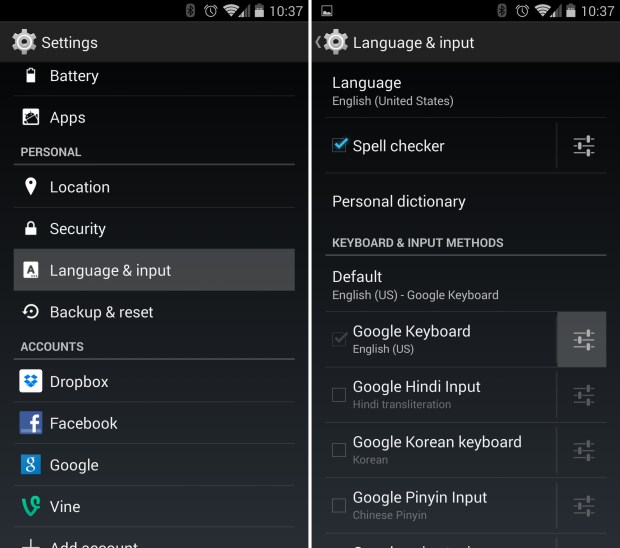
Just in case if you need to disable Spellcheck auto-correct on Android Phone or Tablet do it from

Settings -> Language & input

android-phone-tablet-disable-autocorrect-spell-check

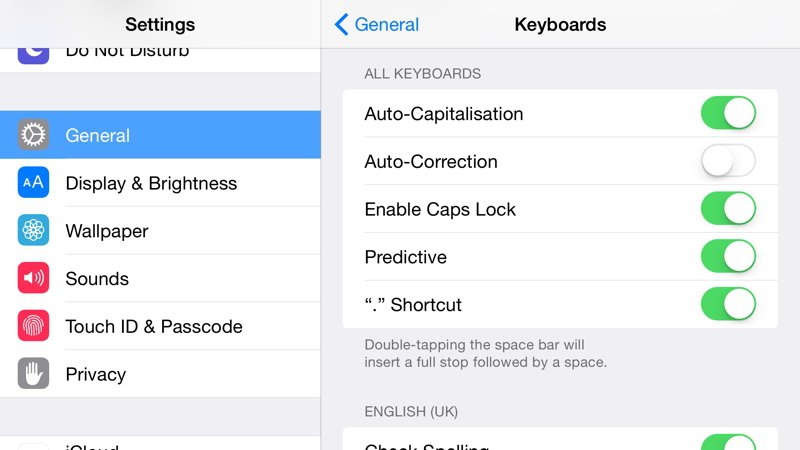
If you happen to be using also IPhone 5 as me or  Iphone 6 / 7 to disable AutoCorrect feature on SMSes / Skype / Viber and other applications do it from Phone's:

Settings -> General

disable_Turn_off_AutoCorrect_in_IPhone_iOS

Shortly I've noticed that the auto-correct feature does not only mess up your typing in Skype but also in Mail and TweetDeck and generally any open application where you can type on Yosemite.


I've took the time to investigate quickly what was causing the new feature that bugged me so much online and came to this nice little article How to turnoff autocorrect on Mac OS X 10.11 El Captain

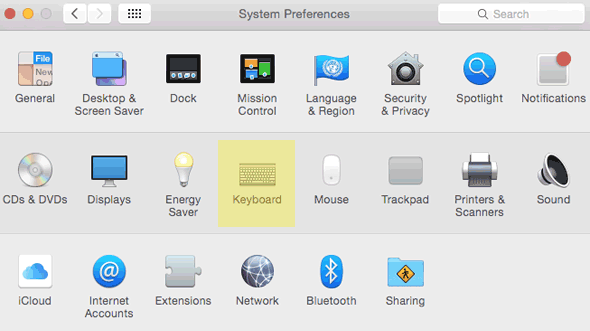
As the article revealed to Turn off the autocorrect Mac OS X feature you I have to go:

Finder -> System Preferences


stop-skype-autocorrect-annoying-macosx-yosemite-system-preferences-menu-screenshot

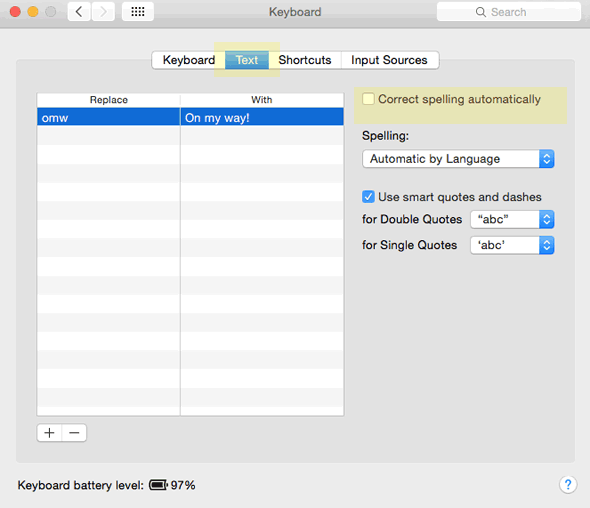
Click on Keyboard -> Text
and turn  Autocorrect off by unchecking Correct spelling automatically

stop-skype-autocorrect-annoying-macosx-yosemite-system-preferences-keyboard-menu-screenshot

By doing this autocorrect spelling is disabled for all applications, however for some people it might be handy to leave the correct feature for Mail app or Microsoft Office (Microsoft Word / Excel) etc. and only turn off (disable) the autorrect feature per application side.

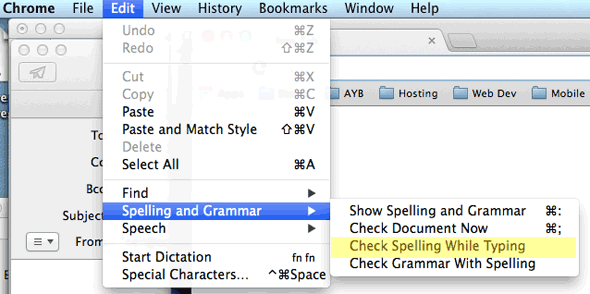
You can  do this in the separate Applications (of choise where you need auto spelling) from  Edit Menu under Spelling and Grammer and enable / disableCheck Spelling While Typing

stop-skype-autocorrect-annoying-macosx-yosemite-spelling-and-grammar-menu-screenshot


Tadam Enjoy ! 🙂


Windows missing volume control on Windows 7, 8 Fix / How to run volume control from command line

Thursday, March 9th, 2017

windows-7-missing-volume-controller-bring-back-volume-control-windows-7-command-to-show-volume-control-on-windows-os


Windows 7/8 Volume Icon disappear from Taskbar?

If you are using  Windows 7 or  Windows 8 Operating System inside a corporate network and your notebook PC is inside domain controller controlled by some crazy administrators who for some reason decided to remove the Taskbar from your Taskbar tray you have come over to exactly same situation like I do here.

Actually some might have experienced an icon "combined" feature which gives the opportunity of some of the standard Tray icons we know since Windows 98 / XP onwards to not show full time in order to save you space. No doubt this feature is great one to use as it is distracting sometimes to have a tons of applications constantly keeping in the Taskbar (right down corner) however if the Active Domain admin did it without any notification and you're a kind of victim you might dislike especially since this behaviour is making you impossible to easily control your phone / headspeakers and mic.


windows-7-8-grouped-taskbar-icons-screenshot-volume-dialog-bar

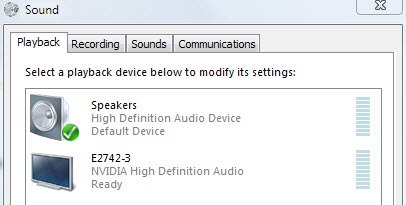
If you check in the Control Panel and click on Sounds  menu in Windows 7/8, you don't see any checkbox for adding the icon back as I have assumed, , but instead all the audio there you can only see the inputs and outputs on your system general settings.

windows-7-8-control-panel-sounds-dialog-box-properties

This behavior was made on purpose and makes sense cauze the taskbar icons since Win XP (if not mistaken) has to be controlled by the taskbar settings pan.

Thus in order to bring back the disappeared icon on  Winblows 7 / Win 8 there is a taskbar properties feature enabling to to hide or view the various taskbar running apps in that number the Volume icon, hence to bring back your Volme Control speaker icon to taskbar you need to customize it.

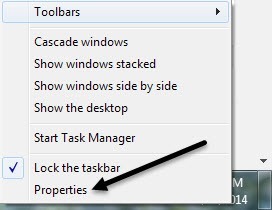
To do so do a mouse Right-click anywhere on the taskbar and choose Properties.

taskbar-properties-windows-7-8-dialog

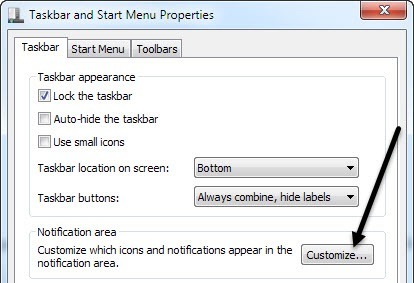
Now, click on the Customize button under Notification area.

taskbar-and-startmenu-menu-properties-customize-taskbar-dialog-bar

In  Notification Area Icons dialog box, there is 2 ticks to check. Assure yourself the volume icon default behavior is set to

Show icon and notifications like in below screenshot

show-icon-notifications-volume-bar-windows-7-8-dialog

To make the new behaviour active click on Turn system icons on or off.

turn-system-icons-on-off-windows-7-8-notification-restore-default-icon-behavior-dialog

One thing to note here is the volume icon shoukld be set to On like in below| shot:


turn-system-icons-on-off-volume-icon-on-windows-7-8
If the reason for the disapperance of the Volume controller in task is not due to Domain Controllear policty it could happen due to late updates pushed by Microsoft if the PC needs a restart or after computer Log off operation.
Another reason for the casual disappearance of sound box could be also a buggy driver, so if the icon keeps disappearing over and over again, you better try to update the driver for your sound card.

However if you end up in a Windows Domain Controller (AD) Policy that is prohibiting the Sound Voulme to appear on your taskbar like in my case all the above won't help you solve it, but luckily there is an easy way to invoke the Volume Control dialog box via


sndvol.exe


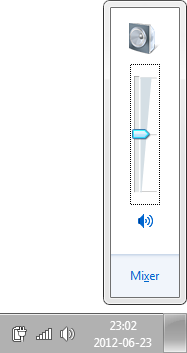
the command will bring up the Volume Control as in upper left corner of screen like in below screenshot:

windows-volume-mixer-taskbar-windows-7-8-shot


If you to show it with a silder use -f flag

sndvol.exe -f

Running just

sndvol.exe


opens the volume mixer, as you noted.


On windows XP the respective command to open a missing Volume Control dialog in taskbar, use instead:

sndvol32

command from Windows Command Prompt:


Start -> Run -> cmd.exe


sndvol32

no params to display master volume window


sndvol32 -x

to display small master volume window

sndvol32 -t

to display volume control only (as per sound icon)

If you have the Volume Controller behavior to be hidden or you need to view any other taskbar hidden application icon  it will be useful for you to use:

AutoHotKey Win+B to focus on the system tray, Left (arrow) to highlight the Volume Control icon icon, and then Enter to bring up the popup.


A good tip you might be interestted to use occasionally is  how to show the current Wireless networks via a command (if that's prohibited otherwise via GUI) so you can easily see the  Connected Networks on Windows using cmd:

rundll32 van.dll,RunVAN

Windows “God Mode” one shortcut to see and configure all setttings in Microsoft Windows 7 / 8 / 10 – Windows Master Control Panel hidden feature

Monday, January 25th, 2016

GodMode-secret-master-control-panel-in-windows-operating-system
One very handy "secret" feature of Windows Operating System which is very useful to people who administrate a dozen of Windows servers daily is called "God Mode".
The idea behind "God Mode" is pretty simple it aims to give you maximum control and viability concentrated in one single Window interface.

God Mode was quite a lot ranted over the past years so it is likely that many of my blog readers are already aware of that Windows secret, but for those who didn't it will be
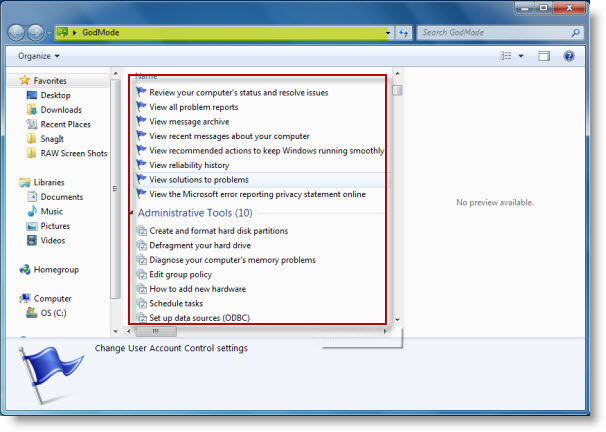
nice to check it out. To see the God Mode Windows functionality just create a New Folder in Windows Desktop or Anywhere on the Windows PC and Rename the New Folder to:
 

GodMode.{ED7BA470-8E54-465E-825C-99712043E01C}

Windows-7-God-mode-screenshot-or-how-to-easily-get-one-point-of-control-in-windows-OS

By creating folder witth his text string you will be able to do almost everything you ever tend to do on Windows from changing the outlook of theme and mouse cursor, changing,
Win explorer's folder's options, modify fonts, change cursor blink rate, get windows performance tools and information, add / remove programs, modify language, modify
firewall settings and in short do everything that is provided by Control Panel + some other goodies like Administrative Tools, Restore Options, Event logs etc. grouped in a fantastic readable manner.
GodMode naming says it all more or less it aims to give you "Godlike" accessibility to the Windows. Of course to be able to properly use the feature you will have to create
the Folder named GodMode.{ED7BA470-8E54-465E-825C-99712043E01C} with Administrator user.
The GodMode is available in Windows OSes since quite a long (2007) and is documented officially by Microsoft

Another alternative shortcut that gives the Godmode Master control panel is:
 

God.{ed7ba470-8e54-465e-825c-99712043e01c}


Enjoy 🙂

BB – A must see ASCII Art Audio / Video portable demo for Linux, FreeBSD, UNIX and DOS

Thursday, May 24th, 2012

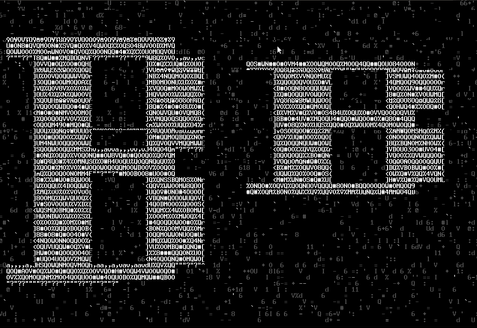
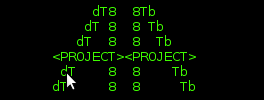
bb Audio Visual ASCII art Linux FreeBSD demonstration old school demo logo

I know and I have enjoyed BB – Portable Demo for already a decade.
I'm sure many newbies to the Free And Open Source (FOSS) realm don't know or heard of bb's existence as nowdays ASCII art is not so well known among youngsters. Hence this short post aims to raise some awareness of the existence of this already OLD but GOLD – awesome! text console / terminal demonstation BB 🙂

bb is pretty much in the spirit of Oldschool Assembly DOS demo scene dominating the geeks dome in the late 80's and yearly 90's.

Historically bb used to be one of the main stunning things one could show to a fellow GNU / Linux new comer.

For the year 2000, seeing all this awesome ASCII video demo running on free Operating System like GNU / Linux was a big think.
The fact that such an advanced ASCII art was distributed freely for an OS which used to exist since only (6 / 7 years) was really outstanding of its time.

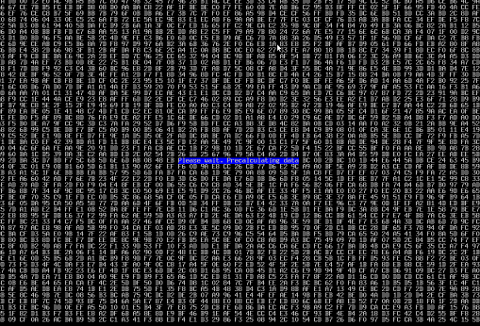
BB text ascii art Linux demo entry screen characters matrix

I still remember how much I was amazed seeing a plain ascii video stream was possible only Linux. Moreover the minimal requirements of bb were quite low for its time – it worked on mostly all PCs one can find at the time.

BB's minimum requirements to work with no chops is just an old 486/66 DX2 CPU Mhz with few megas of memory (32MB of memory was more than enough to run it)

BB text sacii art Linux demo entry screen char matrix

A very unique feature of bb was it was the first Linux demo that succesfully run simultaneously playing on two monitor screens as one can read on the project website.
Unfortunately I didn't owned two monitors back in the day so never ever had the opportunity to see it running on two screens.
Anyhow I've seen it runnign somewhere on some of the Linux install fests visited some years ago…

The demo was developed by 4 man group ppl – the AA group the same digital artists are also the guys behind the AA Project.

AA Lib mascot logo :)

The main aim of AA-lib was to make possible (Doom, Second Reality, X windows) to run rendered in plain ASCII art text.

The project succeeded in a lot of his goals already as there is already existent such an ascii art ports of large games like QUAKE! Be sure to check this awesome project too AAquake ascii quake page is here
, as well as video and pictures could be viewed under a plain console Linux tty or in terminal (via SSH 🙂 )

Thanks to AA-Lib even text mode doom exists.

bb as well as aa-lib has ports for most modern Linux distros in that number one can easily get rpm or deb packages for most of distros.
On Slackware Linux you should compile it from source. Though compilation should be a straightfoward process, not that i tried it myself but I remember a close friend of mine (a great Slackware devotee) who was the one to show me the demo for a first time on his Slackware box.

1. Installing bb on Debian Linux

Debian Linux users like me are privileged as for already many years a Debian package of bb is maintaned thanks to Uwe Herman

Hence for anyone willing to enjoy bb install it by running:

debian:~# apt-get --yes install bb
....
ho@debian:~$ bb

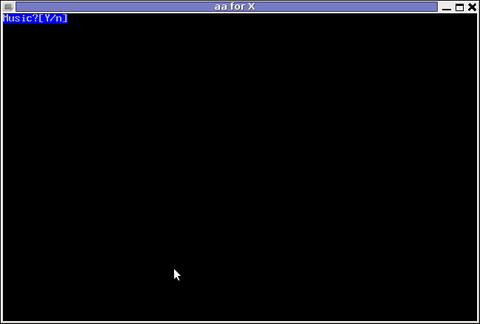
If you're running a X server the aa-lib will immediately run with its X server compiled support:

Running BB Music Screesnhot

2. Installing BB demo on FreeBSD

On FreeBSD, bb demo has a port to install it run:

freebsd# cd /usr/ports/misc/bb freebsd# make install clean ...

Here is good time to say that even though in most of the machines, I've tested the demo I had on some of the hosts problems with sound due to buggy sound drivers.
As of time of writting hopefully on most machines there will be no troubles as most of the Linux sb drivers are better supported by ALSA.

Everyone interested in both Free Software and ASCII art knows well how big in significance is the AA-lib project for the historical development and attraction for new hackers to the Linux dome.
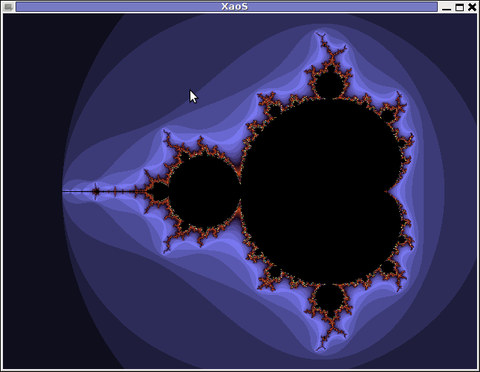
In that sense AAlib head developer Jan HubickaBy the way Jan Hubicka is also the author of another Linux tool called xaos. Xaos is a tool to deal with some kind of advanced higher mathematics stuff called fractals.

XAOS Screenshot Debian Squeeze Linux

Unfortunately I don't know a bit for fractal maths and what the purpose of the tool is but as you can see on the shot it looks nice running 🙂

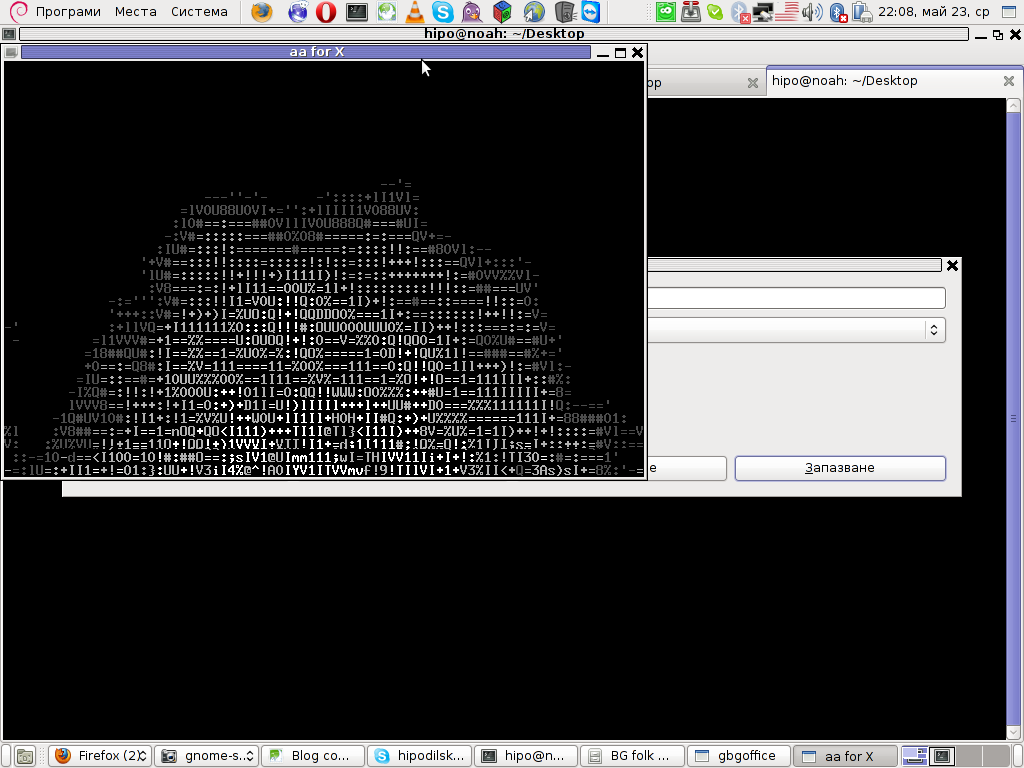
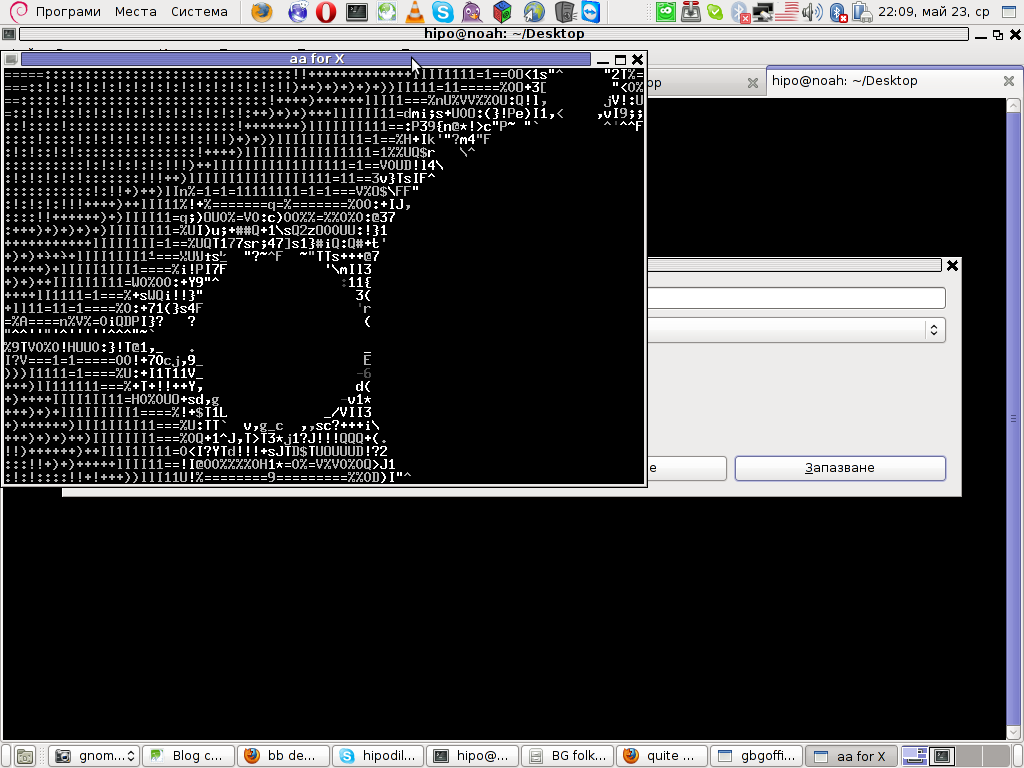
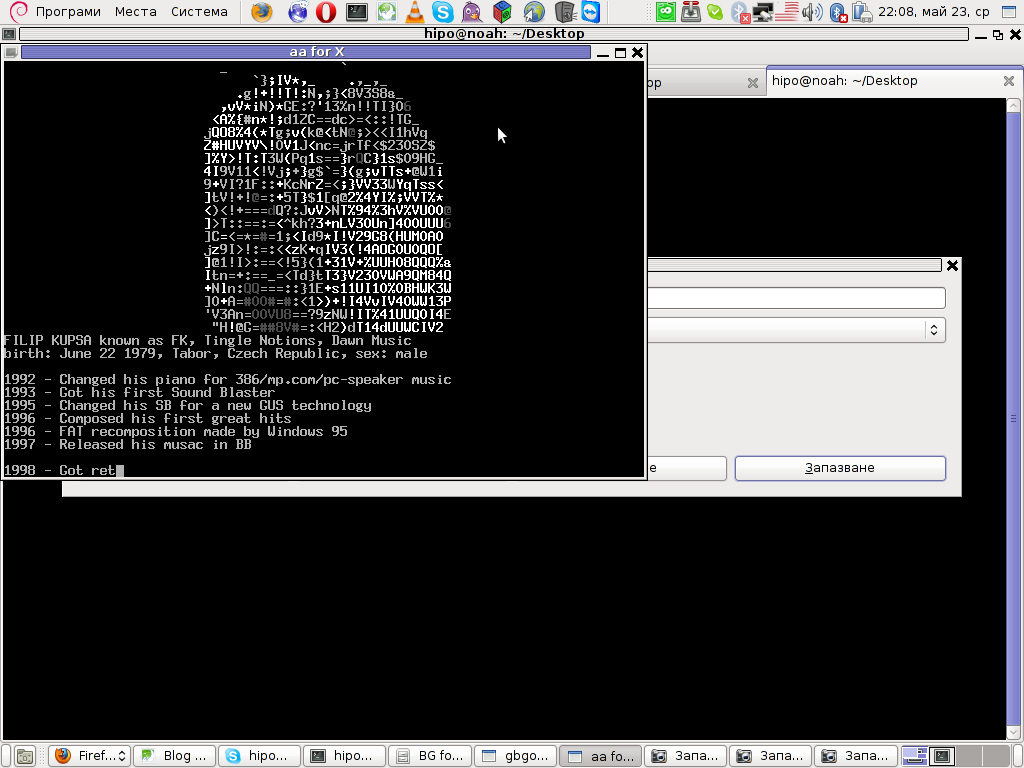
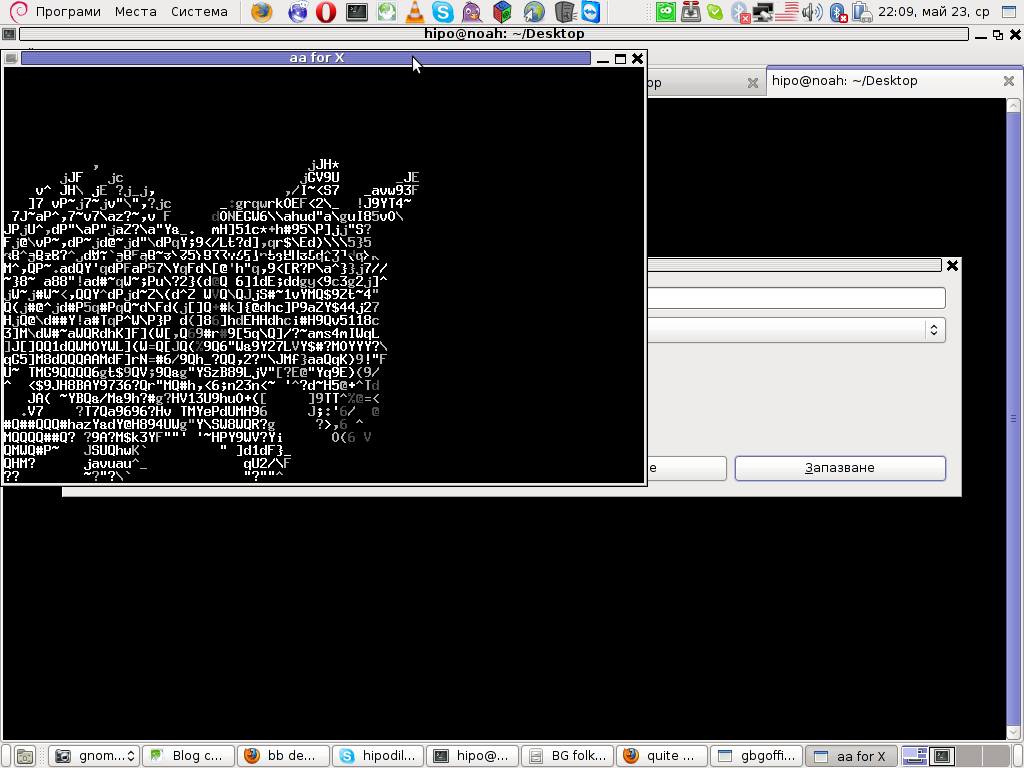
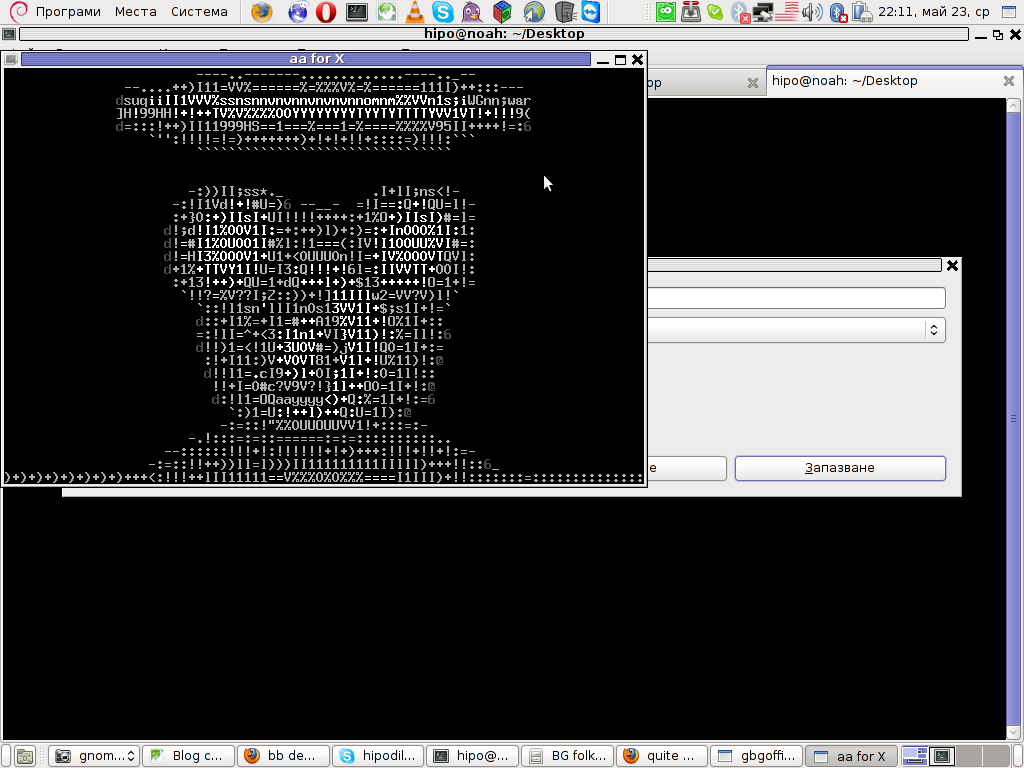
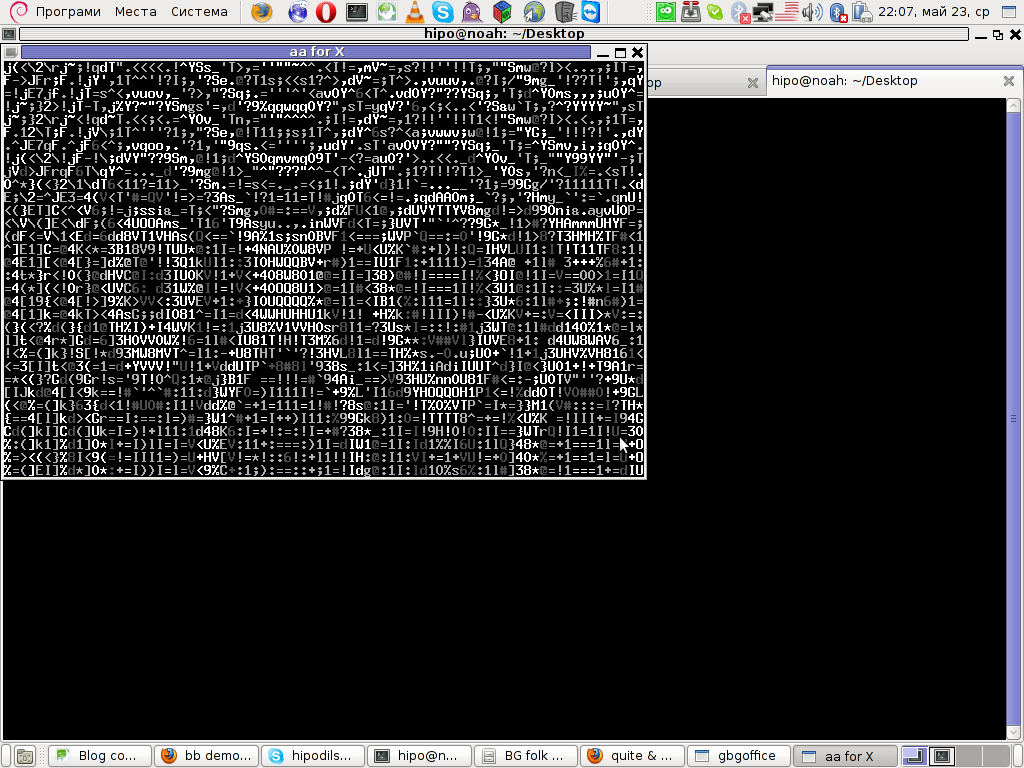
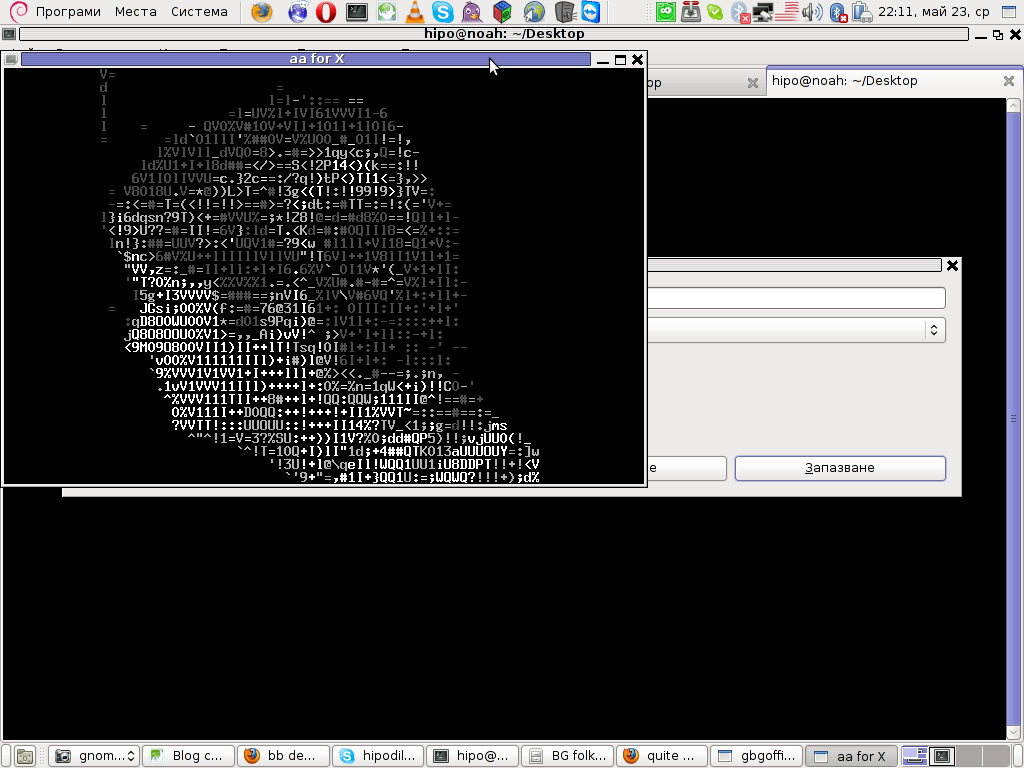
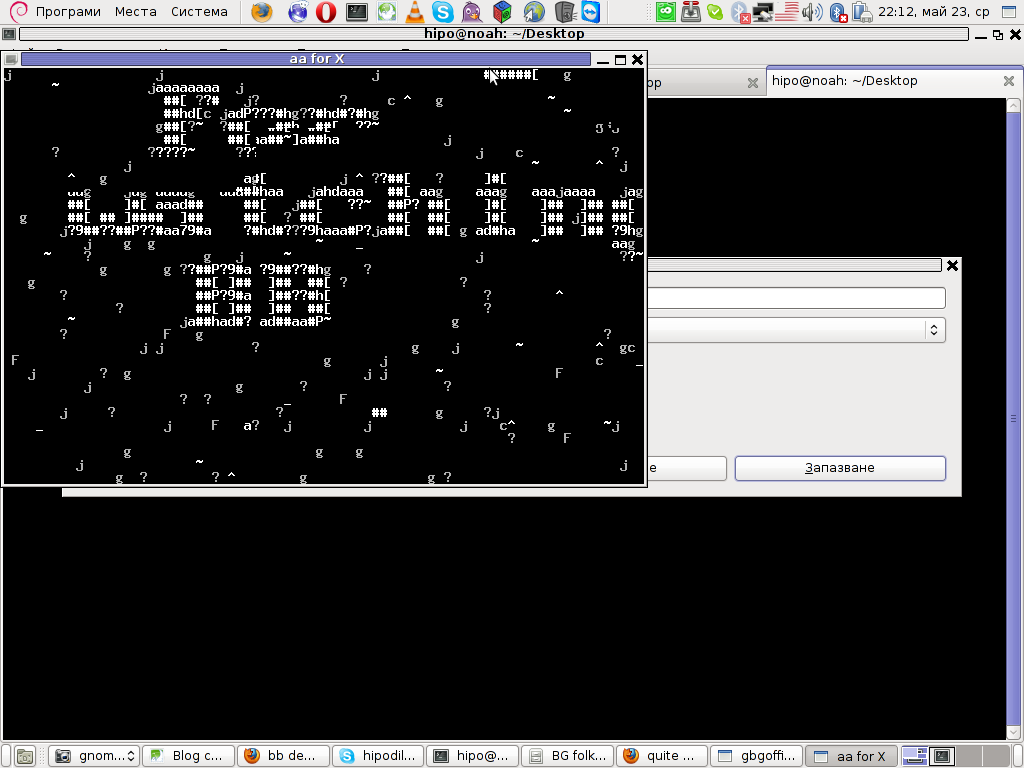
Here are also, lot of the major BB parts in shots:

Running bb music screen screenshot Linux Debian 6 Squeeze

BB AScii fire Linux shot

bb demo ascii art fractals

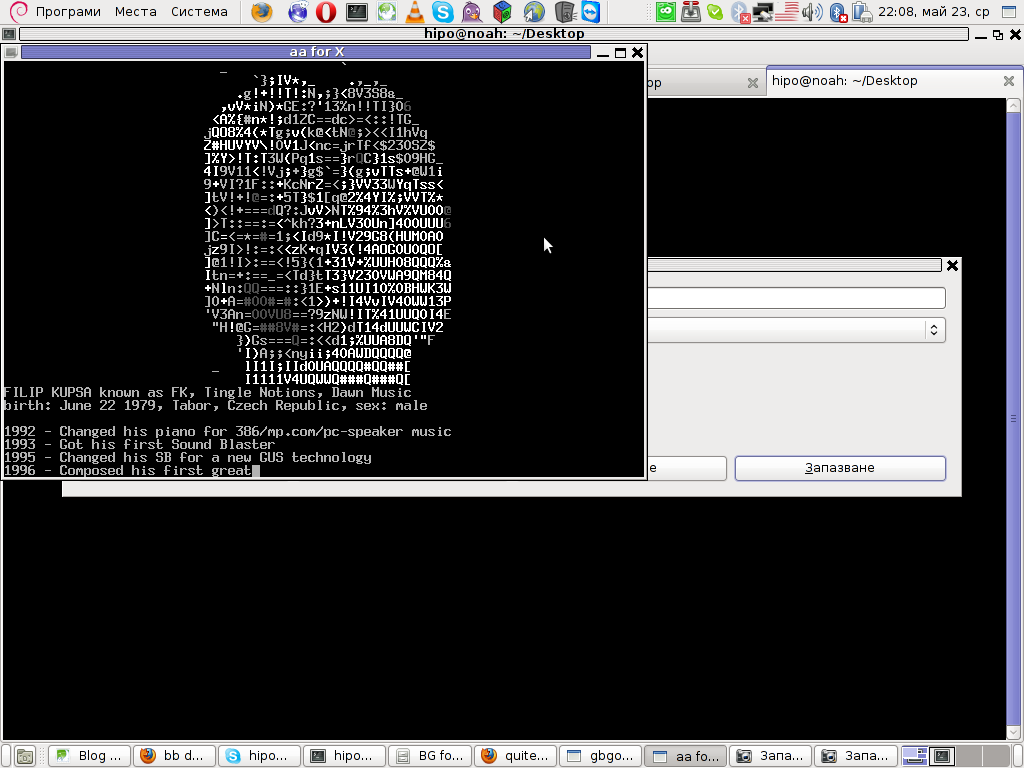
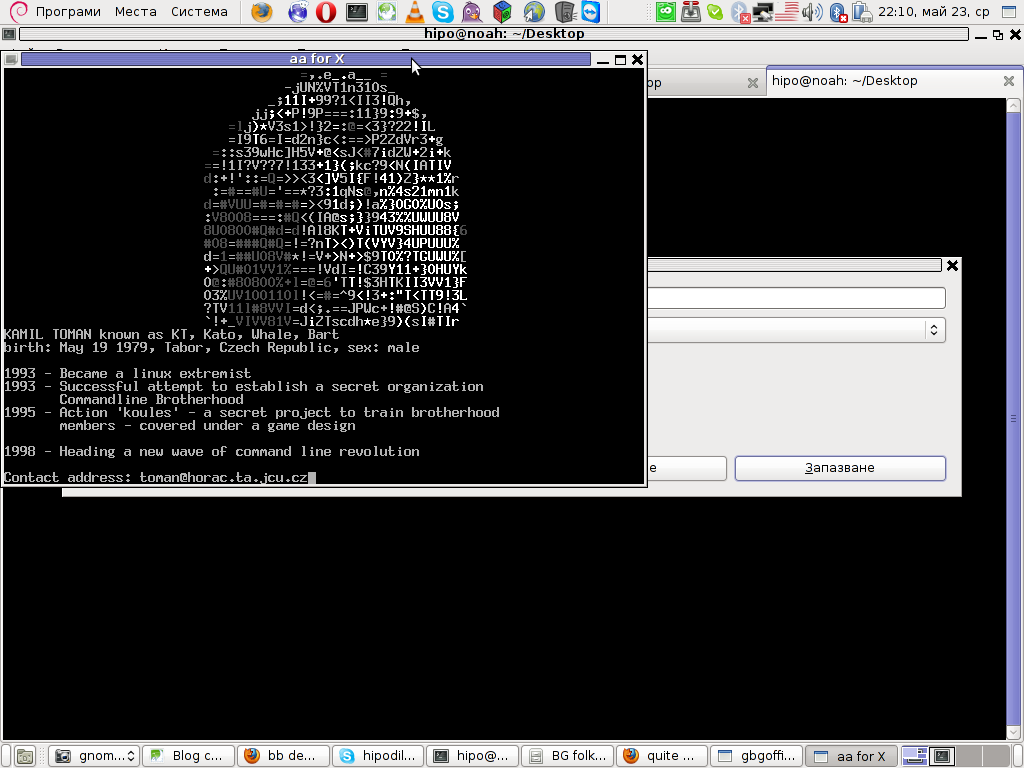
BB demo ascii art back head and description of the dev

bb demo ascii zebra Linux screenshot

bb demo cannon gun shot

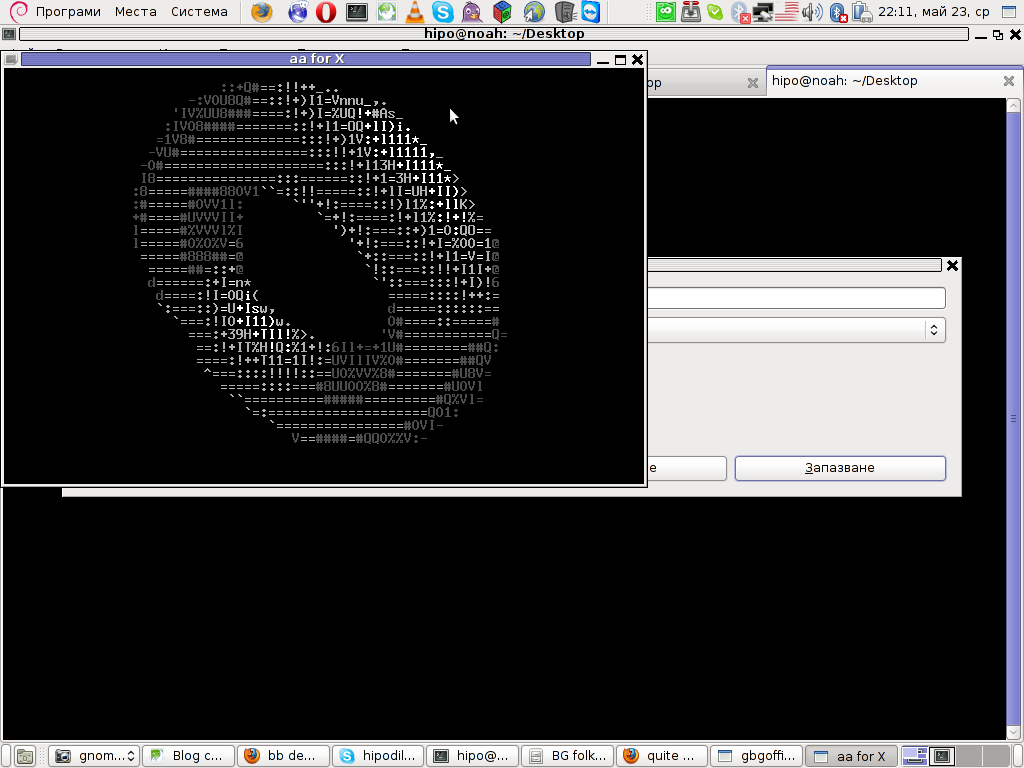
BB demo ring screenshot

BB demo spots Debian shot

BB developer head shot 2

BB developer profile shot

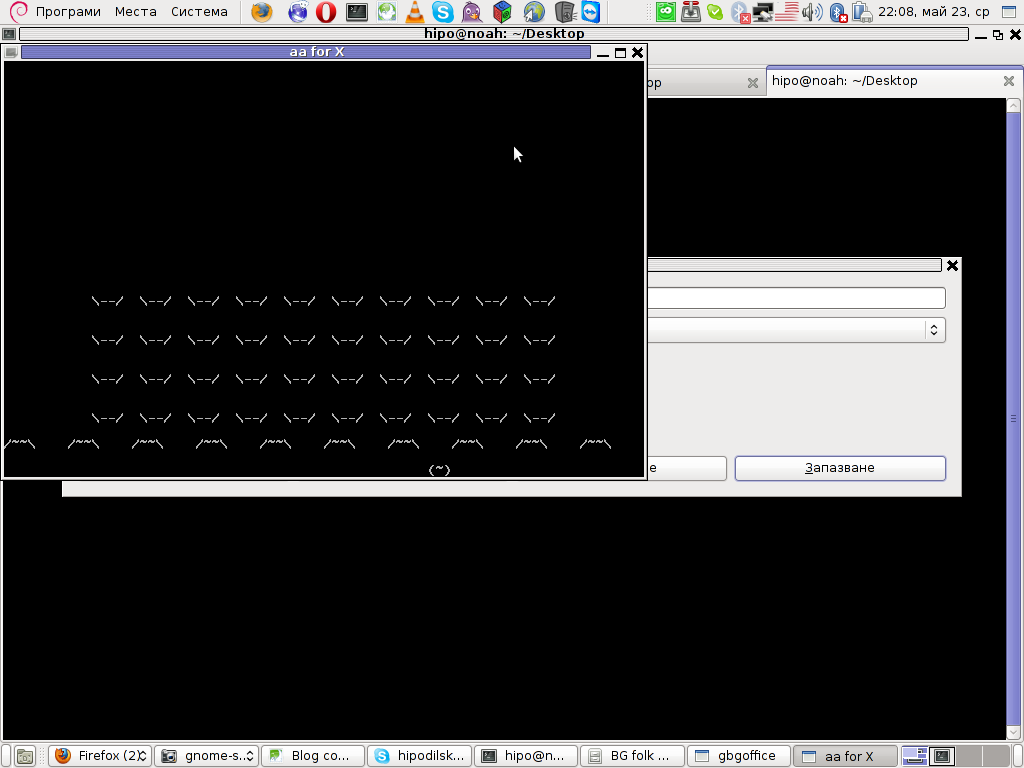
bb game ascii invaders demo

Linux extremist BB demo

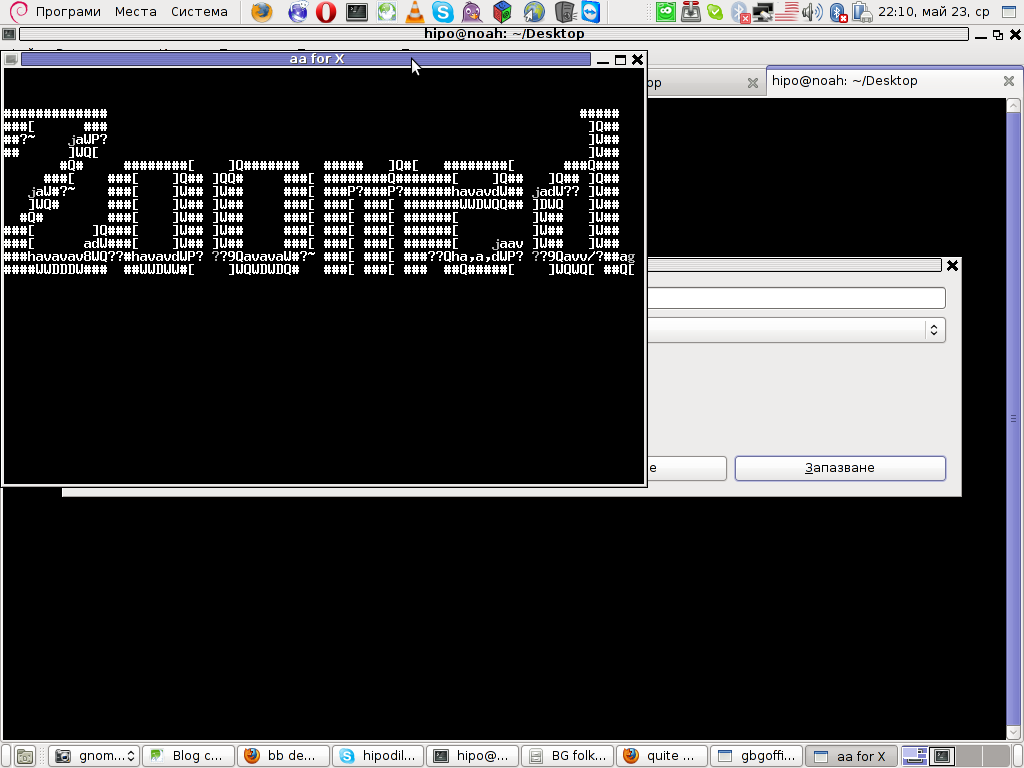
BB demo zoomed text ascii art text

BB Demo thanks for watching screen

For those on MS-Windows OS platform, here is the demo 🙂

BB ASCII Demo standard size running in Linux (With sound)

Enjoy ! 🙂

How to add visitor/visitors counter in Joomla based website using the VINAORA joomla plugin

Wednesday, December 29th, 2010

One of the websites based on Joomla, that I’m managing, had to have the option to show a Visitors Counter on the page bottom.

I did some research online to check for some Joomla plugins that are capable of aiming my Joomla installation with the Visitor Counter feature.

There are a couple of plugins available out there that are able to provide a Joomla installation with a Web Counter, however I’ll just mention the few which I have tested myself.
The ones I’ve tested myself are;

1. VCNT
2. Count your Visitors
3. Cool Hits Counter
and finally the one that I really liked the most:

4. VINAORA

All the prior 3 aforementioned VCNT, Count your Visitors and Cool Hits Counter, are actually working right after installation. I haven’t had the time to test them thoroughfully but from a first look they appear to be counting the visitors.

The Count your visitors – joomla plugin’s download main page was in German with no option to revert to English, so that wasn’t nice.

Though the plugin seems to work fine after just downloaded and installed and configured from

Extensions -> Module Manager

The configuration options for Count your visitors are quite obscure but if you’re a looking for a really simple way to count your Joomla based website visitors it might be a good choice. The plugin is based on the initial Joomla module called Statistics.

By the way I’ve read some reports online that actually Joomla 1.5 also includes some kind of minimal integrated web counter embedded in itself throughout the Joomla Statistics module .
However I personally couldn’t really follow the methods describe to take advantage of the Joomla install integrated Statistics module, however if somebody has already succeeded in using the Statistics default joomla module I’ll be glad, if he shares with me.

I’ve found the VCNT visitor statistics plugin a handy one, but this module had this major problem that the VCNT 1.5 text which was appearing as a heading before the statistics was hard to wipe out of my web page, so eventually I got pissed of and thought and tested the Cool Hits Counter.

The Cool Hits Counter is actually a simplistic module which presents a counter about visitors on the web site in numeric digit numbers.
These module uses the integrated Joomla 1.5 module mod_stats the only difference is the support for numeric digit numbers.

As I’ve said none of the above modules wasn’t flexible enough and therefore wasn’t what I was looking for, thus I decided to use my installed VINAORA Joomla web(users) counter plugin.

The VINAORA is actually quite straight foward to configure, right after installation to start with the configuration I had to navigate to:

Extension -> Module Manager -> Vinaora Visitors Counter -> Module Parameters

Since I wanted just a simple counter without any external statistics I personally prefered using Vinaora’s counter with the optionsDisplay Mode: Simple as well as the Zero-Statistics turned on to (Yes)

Some of the other options I found to be best matching my desires for the Visitors Counter was:

Show Title: No and Position: Left

Now I had this shiny visitors statistics in my Joomla installation but there was the annoying Link in my Visitors Counter appearing on the page, thus in order to remove the default link Visitors Counter which was pointing to the VINAORA’s web page, I had to edit the file:
modules/mod_vvisit_counter/tmpl/default.php located in my Joomla Document Root directory.

First I’ve edited the code on line 21 where I’ve removed out the Vinaora string since I didn’t wanted any reference to Vinaora to occur in my Joomla HTML code.

In line 162 in the code:

$html .= ….

By removing it I’ve completed scraped out the annoying references to VINAORA and their link to http://vinaora.com website and thus made the Visitors counter a look a bit more professional.

Now the counter is working with a graphical numeric digits and everything is just fine with my Web counter Joomla counter thanks to VINAORA 🙂
 

Finally TeamViewer 7 release for GNU / Linux is available

Thursday, March 29th, 2012


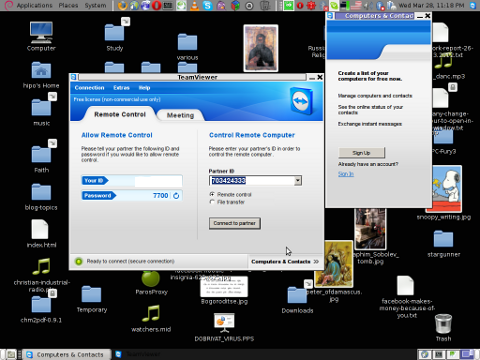
TeamViewer 7 Debian GNU / Linux released, my desktop screenshot

After a long time of inavailability, finally TeamViewer 7 for GNU / Linux is out!

Here is the short TeamViewer 7 Linux release note :

In our TeamViewer download area you will now find TeamViewer 7 for Linux.
The final version includes a selection of new features for Linux, e. g. an integrated screenshot feature and the possibility of saving individual connection settings per computer.
You can now establish cross platform connections with other computers running version 7 and hold online meetings and presentations with up to 25 participants.

We wish you best continued success with TeamViewer!

Well, guys it was about time, even later than that… Until now I've so many times experienced troubles with Windows machines which I had to administrate remotely and they only had a TeamViewer 7 installed (a real, real pain in the ass).

The issue comes cause TeamViewer 6 is incompatible with 7 and just until very recently only TV 6 for Linux was available, so trying to access a 7 install directly from Linux was impossible.
Hence to access TeamViewer 7 Windows install, I had to use either a fresh Windows copy with TeamViewer 7 installed or a Virtual Machine like (Qemu, VirtualBox) with Windows version installed in it.
Often back then, when I had to fix remotely a Windows machine behind a firewall, I had to instruct the machine owners to replace the TeamViewer 7 with TeamViewer 6 in order to be able to easily access the remote host from my Debian Linux.

I still remember, it was quite a stuggle to find a link to a Windows .exe install file for TeamViewer 6.

Now thanksfully, TeamViewer guys are starting to make it easier for the user who would for some reason want to stick to older TV version.
I've noticed on TeamViewer's website there is already a new TeamViewer download page offering for download all the old teamviewer version – 1.x, 2.x, 3.x, 4.x, 5.x, 6.x

One example, where old teamviewer release is useful is if you want to run teamviewer on older hardware or old OS (MS Windows 98 or old Linux distro).

I've made a mirror of teamviewer 6 for Debian / Ubuntu amd 32 and 64 bit versions along with all the OS available TeamViewer version 6 and 7, for the sake of preserving it if one day link to old versions of Teamviewer disappear from their website.

Here are the TeamViewer mirrored files:

Below you see a screenshot of teamviewer 7 running on my Debian Squeeze 🙂

TeamViewer 7 Debian GNU / Linux released, my desktop screenshot

It is great teamviewer produced a Linux working application, however if you run it you realize just like the previous releases TeamViewer is not natively supposed (compiled) to run on GNU / Linux OS but uses wine (windows emulator) to launch through…
Instead of porting the application to be natively for the Linux distros once again with this new release, teamviewer developers just "hacked" it to run on top of windows emulation. Though this is working its performance, is probably a bit degraded and it depends on having install on the Linux host a bunch of useless packages which wine depends on.
Besides that even if it "works" on Linux , TeamViewer has still non-free software essense. I still use it because unfortunately, I don't know of a better remote access program capable to connect to servers behind NAT / machines located behind a tight firewalled routers.
If only (I knew of?) a TeamViewer free software / open source equivalent
I will be glad to hear if someone know a (free software / open source) TeamViewer like program able to access remote hosts with no a real (public inet) IP address?P.S.: By similar TV program I don't mean VNC, UltraVNC and this kind of other VNC derivative programs but mean close TeamViewer alternative.

How to take area screenshots in GNOME – Take quick area selection screenshots in G* / Linux and BSD

Thursday, March 15th, 2012

Quick Area screenshot in GNOME how to make quick area selection screenshots in Linux and FreeBSD gnome-screenshot shot

Often when, you do something on your PC, you need to make a quick screenshot of a screen area.. Yes GNOME's feature to take complete screenshots of Screen with Print Screen SysRQ and consequential picture edit with GIMP is one way, but this is far away from quick. This method to chop out of a complete display screenshot usually takes from 40 secs to 1 minute to properly cut and save a selection of the whole picture.
Another common use, that I love in GNOME is the ALT + Print Screen SysRQ key combination. alt+ print scr sysrq is handy while taking a single window screenshot is desired. Anyways often you only need to make a screenshot of a tiny area of the screen. Many people might think this is not possible currently in GNOME, but they will be wrong as there are no impossible but hard things to achieve on Linux / FreeBSD 😉

There are at least two ways using a predefined command for taking quick area screen snapshot.

1. Taking quick area screenshot by using ImageMagick's import command

To use import you will need to have installed ImageMagickswiss army knife of command line image manipulation 😉
For area screenshot with import, press ALT+F2 and type inside Run Application box:
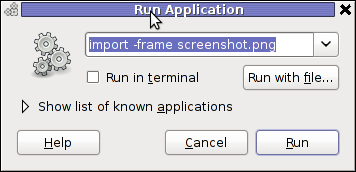
Screenshot GNOME run application GNU / Linux Debian ImageMagick import area screenshot

import -frame screenshot.png

Now make the selection of the exact screen area you would like to screeshot in file screenshot.png
Note that screenshot.png file will be saved by default in your home directory as it is read from $HOME shell variable:

hipo@noah:~$ echo $HOME/home/hipo
hipo@noah:~$ ls -al screenshot.png
-rw-r--r-- 1 hipo hipo 4950 Mar 14 21:11 screenshot.png

You see my $HOME equals /home/hipo, therefore screenshot.png just grabbed is saved in there.

One downside of taking the screenshot with import is that picture snapshot is not further edittable, if it has to be further processed with GIMP or some other graphic editor program.

In the screenshot, below I show you one screen area of my XMMS taken with import -frame screenshot.png cmd:
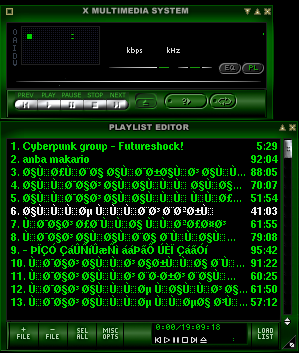
XMMS Screen Area Screenshot import screenshot

Trying to open the screenshot.png, file with GIMP displays the following error in GIMP:
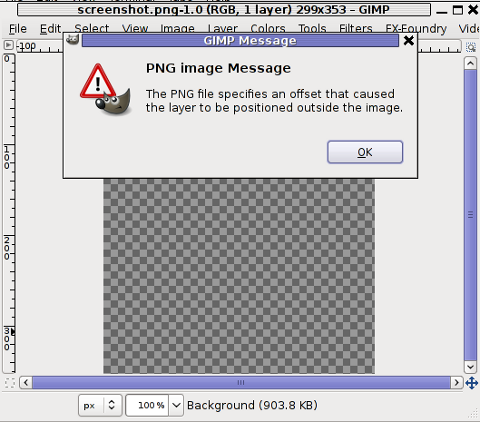
PNG image message PNG the file specifies offset that caused the layer to be positioned outiside image GIMP screenshot

Not all area snapshots taken with import -frame, create this issue sometimes screenshots are opening in GIMP but only area of the screenshot.png is visible in gimp.

Thanksfull, there is work around to this issue by converting the import generated PNG format picture to JPEG with ImageMagick's convert and then edit the .JPEG with GIMP etc.:

hipo@noah:~$ convert screenshot.png screenshot.jpg

Hence to permanently work around it, in case you intend to apply (GIMP modifications), once area snapshot is made instruct import to save its output picture in .jpeg, e.g.:

hipo@noah:~$ import -frame screenshot.jpeg

2. Taking quick area screenshot using gnome-screenshot cmd

Once again invoke the GNOME command Launcher by pressing Alt+F2 (holding alt and pressing F2) and type in the launch box:

gnome-screenshot -a
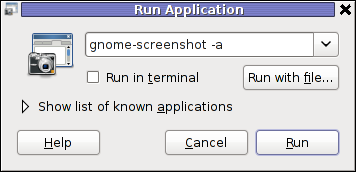
gnome-screenshot Run Application in GNOME 2.30 on Debian GNU / Linux

Below is a small area from my desktop, chopped with gnome-screenshot 🙂

GNOME desktop area chop screenshot with gnome-screenshot on my home Debian Linux

You see on above screenshot a tiny (picture) icon one of the greatest, if not the greatest bulgarian saint – saint John of Rila. St. John's lived as hermit for many years in Rila mountain and by God's grace possessed incorruptable body. His incorruptable body is still kept and can be venerated in Rila Monastery. The monastery is located 160 km from Bulgaria's capital city Sofia

St. Johns first Bulgarian established monastery Rila Monastery is currently the biggest functioing monastery in Bulgaria. The saints monastery is considered one of the most holy places in Bulgaria. If you have a travel or plan a holiday in Bulgaria, I warmly recommend you go there and venerate the saint incorruptable relics.

3. Binding keys to allow quick area screenshot taking with gnome-screenshot in GNOME

This configuration is for GNOME 2.x and is tested to work on my Debian (Squeeze 6.0), GNOME ver. 2.30.2, it should work in earlier Ubuntu versions shipped with GNOME 2.2.xx too. As I've red on the Internet it works well with Ubuntu 10.10Binding a key for screenshot area grab, should be working properly also on any GNOME 2.2.x supporting OS, including the BSD family OSes (FreeBSD, OpenBSD, NetBSD)

a) setting gnome-screenshot key binding for interactive screenshot area grab

Navigate the mouse cursor to GNOME main menus panel in left top, where you see (Applications, Places, System).
Therein use menus:

System -> Preferences -> Keybord Shortcuts -> Add ->

Alternatively if you prefer you can directly invoke the Keyboard Shortcuts configuration with command:

hipo@noah:~$ gnome-keybinding-properties

Further on, assign a shortcut by filling in something like:

name: grab-screen-area
command: gnome-screenshot -i -a
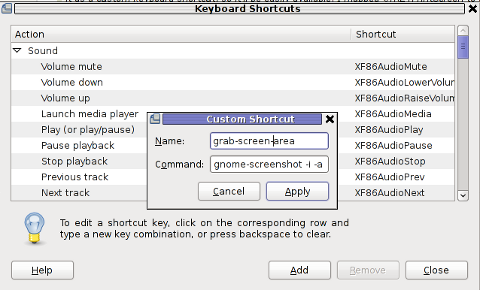
GNOME add keyboard shortcut map key for area interactive screenshot

press Apply and next map a key to the new defined key binding:
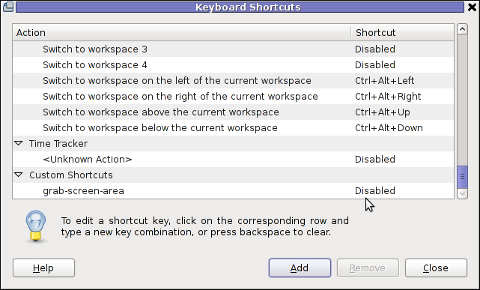
GNOME add keyboard shortcut map key

Under the Shortcut column click on Disabled and assign some key combination to invoke the cmd for example Ctrl+F4

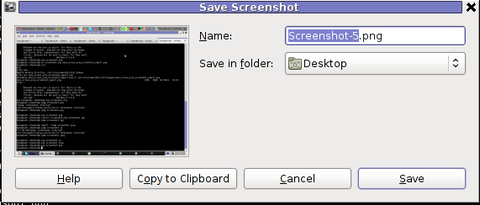
The command gnome-screenshot -i makes gnome-screenshot, show interactive make screenshot dialog like the one in below screenshot.
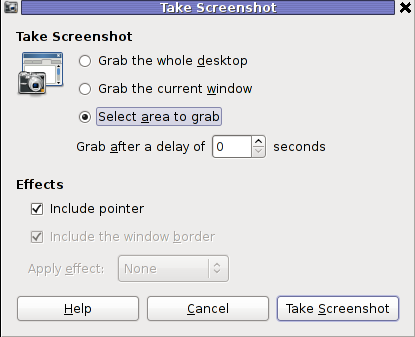
GNOME screenshot interactive screenshot select area grab shot

b) creating gnome-screenshot -a area screenshot key binding for quick area screenshots "on the fly"

The procedure is precisely the same as with adding interactive screenshot; Under Keyboard Shortcuts GNOME config assign new key binding by pressing Add button and adding:

name: grab-screen-area1
command: gnome-screenshot -a

Once again in Shortcut column in line starting with grab-screen-area1 add your desired key switch. I personally like Ctrl+Print Screen SysRQ as it is close to the default GNOME key combination assigned for taking screenshot for a Windows Alt+Print SysRq

It was logical, that this key binding should work and a direct selection mouse cursor to appear once Alt+Print SysRQ is pressed, however for some reason this is not working (hmm, maybe due to bug) ??

Thanksfully it is always possible to substitute the just assigned gnome-screenshot -a key binding with import -frame /home/hipo/Desktop/screenshot.png

If you have followed literally my article so far and you did tried to place a bind for gnome-screenshot -a, modifty grab-screen-area1 to be something like:

name: grab-screen-area1
command: import -frame /home/hipo/Desktop/screenshot.png

Where modify the path /home/hipo/Desktop/screenshot.png, to wherever you prefer the region screep capture to be stored.

c) bind keys for delayed screenshot

This also a handy binding, especially if you every now and then need to make screenshots of screen with a few secs interval.
Add one more keyboard shortcut;

name: grab-screen-area2
command: gnome-screenshot -d 5

Assign a key to make a screenshot of the active display after a delay of 5 seconds. I prefer Ctrl+F5

Onwards every time you would like to make an area screenshot, just use the defined keys:

Ctrl+F4 - will prompt you interactively for the precise type of screenshot you would like to take
Ctrl+Print SysRQ - will prompt you for a direct area to select and once selected will immediately screenshot it
Ctrl+F5 - would do delayed screenshot of entire screen after a delay of 5 seconds

4. Adding border and drop shadow effects with gnome-screenshot Actually, there is plenty of interesting things to do with Screenshots which I never thought were possible.
While reading gnome-screenshot's man page, I've stumbled to an interesting argument:

-e, --effect=EFFECT,
Add an effect to the outside of the screenshot border. EFFECT can be ``shadow'' (adding drop shadow), ``border'' (adding
rectangular space around the screenshot) or ``none'' (no effect). Default is ``none''.

This would have been a nice feature but as of time of writting this article, untofrtunately it is not working in GNOME 2.30.2. I'm not sure if this is a local Debian bug, however I suspect on other Linux distributions with different GNOME build configuration, this features might be working well. My guess here is drop shadow effect and border effect are not working because, gnome-screenshot was compiled without (support for ImageMagick?).
Anyways the way the feature is supposed to be work is by invoking commands:
:

hipo@noah:~$ gnome-screenshot --border-effect=shadow
hipo@noah:~$ nome-screenshot --border-effect=border

The same basic effects, are also available through GIMP's menus:

Image -> Effects

5. Setting default behaviour of gnome-screenshot in gconf-editor GConf (Gnome config registry db)

Experienced, GNOME users should already know about the existence of gconf-editor and the gnome registry database. For those who have don't, coming from MS-Windows background gconf-editor is GNOME (graphical environment) equivalent to Microsoft Windows registry regedit command

gconf-editor can be used to atune the way the screenshots are taken by default. To do so, launch gconf-editor cmd and follow to sub-structure:

/ -> apps -> gnome-screenshot
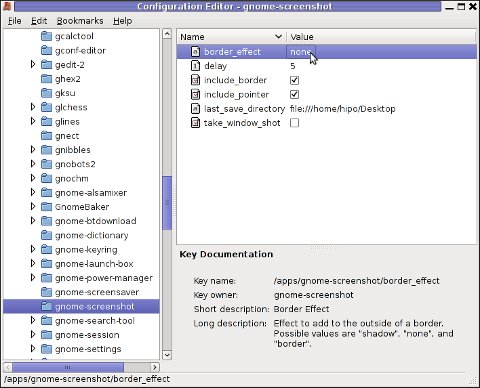
gconf-editor GNOME screenshot border effect none default gnome-screenshot gnome behaviour

The settings in above screenshot are configurations which are used by default by gnome-screenshot, right after install.
You can play with the options to change the default way PrintScreen SysRQ key press will take screenshots.
Here is one example for changing the gnome-screenshot default GNOME behaviour:
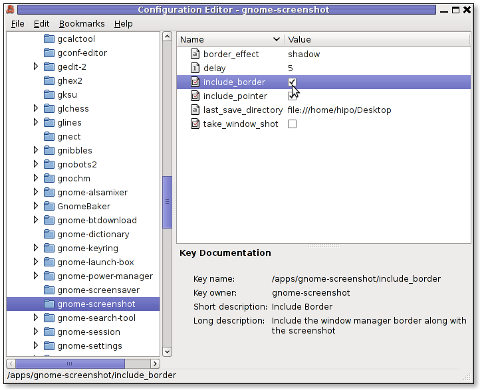
GConf Editor GNOME screenshot, border effect drop shadow and include border option set on Linux Debian

As you can see in above screenshot, I've changed my default gnome-screenshot snap taking to include a drop shadow effect:
Name | Value
border_effect | shadow include_border | (tick on)
last_save_directory | file://home/hipo/Desktop

As you see you can also control, where by default gnome-screenshot will save its screenshots, by default, its saved in $HOME/Desktop
. If you prefer some custom directory to only contain Screenshots taken for instance $HOME/Screenshots, create the directory:
hipo@noah:~$ mkdir ~/Screenshots

and then change the value for last_save_directory gconf var:

last_save_directory | file://home/hipo/Screenshots

Once settings are applied screenshots with Print Screen SysRQ key will be made with Shadow Border effect and saved in /home/hipo/Screenshots

Strangely enough, changing gnome-screenshot default screenshotting values to include screenshot effects like drop shadow or screenshot border effect works just fine.
Even though gnome-screenshot –border-effect=shadow and gnome-screenshot –border-effect=border doesn't directly affect the current screenshot to be made, I've later noticed writting this two commands in the gnome-terminal, does change the border settings for gconf-editor screenshot border.

If you enjoyed, this article and you intend to become "a professional screnshotter" :), you might also enjoy my two other articles:

Happy screenshotting 😉
Poderosa a tabbed Terminal Emulator (PuTTY Windows Alternative)

Tuesday, December 6th, 2011

Even though, I rarely use Windows to connect to remote servers using SSH or Telnet protocols in some cases I’m forced to do that (in cases I’m away from my Linux notebook). I’m doing my best to keep away from logging anywhere via SSH using Windows as when using Windows you never know what kind of spyware, malware or Viruses is already on the system, not to mention Microsoft are sniffing a lot if not everything which is typed on the keyboard… Anyways, usually I use Putty as a quick way to access a remote SSH, however pitily PuTTY lacks an embedded functionality for Tabs and each new connection to a server I had to run a new instance of PuTTY. This is okay if you need to access a single server but in some cases where access to multple servers is necessery lacking the tab functionality and starting 10 times putty is really irritating and one forgets what kind of connection is present on which PuTTY instance.

Earlier on, I’ve blogged about the existence of PuTTY Connection Manager PuTTY add-on program which is a PuTTY wrapper which enables PuTTY to be used with Connection Tabs feature, however installing two programs is quite inconvenient, especially if you have to do this every few days (in case if travelling a lot).

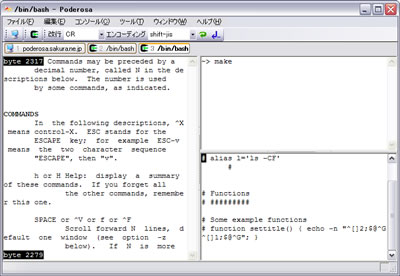
Luckily there is another terminal emulator free program for Windows called PodeRoSA which natively supports a tabbed Secure Shell connections.
If you want to get some experience with it check out Poderosa’s website , here is also a screenshot of the program running few ssh encrypted connections in tabs on a Windows host.

Poderosa Windows ssh / telnet tabs terminal emulator screenshot
Another good reason that one might consider using Poderosa instead of PuTTY is the Apache License under which Poderosa is developed. Currently the Apache License is compatible with GPL free software license which makes the program fully free software. The PuTTY license is under BSD and MIT and some other weird custom license not 100% compatible with GPL and hence PuTTY can be considered less free software in terms of freedom.

How to exclude files on copy (cp) on GNU / Linux / Linux copy and exclude files and directories (cp -r) exclusion

Saturday, March 3rd, 2012

I've recently had to make a copy of one /usr/local/nginx directory under /usr/local/nginx-bak, in order to have a working copy of nginx, just in case if during my nginx update to new version from source mess ups.

I did not check the size of /usr/local/nginx , so just run the usual:

nginx:~# cp -rpf /usr/local/nginx /usr/local/nginx-bak
...

Execution took more than 20 seconds, so I check the size and figured out /usr/local/nginx/logs has grown to 120 gigabytes.

I didn't wanted to extra load the production server with copying thousands of gigabytes so I asked myself if this is possible with normal Linux copy (cp) command?. I checked cp manual e.g. man cp, but there is no argument like –exclude or something.

Even though the cp command exclude feature is not implemented by default there are a couple of ways to copy a directory with exclusion of subdirectories of files on G / Linux.

Here are the 3 major ones:

1. Copy directory recursively and exclude sub-directories or files with GNU tar

Maybe the quickest way to copy and exclude directories is through a littke 'hack' with GNU tar nginx:~# mkdir /usr/local/nginx-new;
nginx:~# cd /usr/local/nginx#
nginx:/usr/local/nginx# tar cvf - \. --exclude=/usr/local/nginx/logs/* \
| (cd /usr/local/nginx-new; tar -xvf - )

Copying that way however is slow, in my case it fits me perfectly but for copying large chunks of data it is better not to use pipe and instead use regular tar operation + mv

# cd /source_directory
# tar cvf test.tar --exclude=dir_to_exclude/*\--exclude=dir_to_exclude1/* . \
# mv test.tar /destination_directory
# cd /destination# tar xvf test.tar

2. Copy folder recursively excluding some directories with rsync

P>eople who has experience with rsync , already know how invaluable this tool is. Rsync can completely be used as for substitute=de.a# rsync -av –exclude='path1/to/exclude' –exclude='path2/to/exclude' source destination

This example, can also be used as a solution to my copy nginx and exclude logs directory casus like so:

nginx:~# rsync -av --exclude='/usr/local/nginx/logs/' /usr/local/nginx/ /usr/local/nginx-new

As you can see for yourself, this is a way more readable for the tar, however it will not work on servers, where rsync is not installed and it is unusable if you have to do operations as a regular users on such for that case surely the GNU tar hack is more 'portable' across systems.
rsync has also Windows version and therefore, the same methodology should be working on MS Windows and good for batch scripting.
I've not tested it myself, yet as I've never used rsync on Windows, if someone has tried and it works pls drop me a short msg in comments.
3. Copy directory and exclude sub directories and files with find

Find in collaboration with cp can also be used to exclude certain directories while copying. Actually this method is better than the GNU tar hack and surely more efficient. For machines, where rsync is not installed it is just a perfect way to copy files from location to location, while excluding some directories, here is an example use of find and cp, for the above nginx case:

nginx:~# cd /usr/local/nginx
nginx:~# mkdir /usr/local/nginx
nginx:/usr/local/nginx# find . -type d \( ! -name logs \) -print -exec cp -rpf '{}' /usr/local/nginx-bak \;

This will find all directories inside /usr/local/nginx with find command print them on the screen, then execute recursive copy over each found directory and copy to /usr/local/nginx-bak

This example will work fine in the nginx case because /usr/local/nginx does not contain any files but only sub-directories. In other occwhere the directory does contain some files besides sub-directories the files had to also be copied e.g.:

# for i in $(ls -l | egrep -v '^d'); do\
cp -rpf $i /destination/directory

This will copy the files from source directory (for instance /usr/local/nginx/my_file.txt, /usr/local/nginx/my_file1.txt etc.), which doesn't belong to a subdirectory.

The cmd expression:

# ls -l | egrep -v '^d'

Lists only the files while excluding all the directories and in a for loop each of the files is copied to /destination/directory

If someone has better ideas, please share with me 🙂

My PHP/ MySQL Restaurant Reservation Form

Tuesday, December 14th, 2010

Two months ago, I’ve developed a contact reservation form in PHP. The form is really easily customizable and is straight forward to integrate.
I’ve developed the form for a small restaurant which was missing the feature on it’s joomla based website in order to be able for restaurant clients to reserve tables.

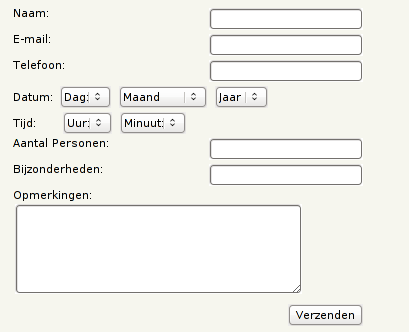
Here is how my restaurant reservation form looks like:

hip0's plain php restaurant reservation form

Later on I found there are plenty of possibilities to easily make a reservation form in Joomla but at that time I had no idea that custom contact forms can be prepared with Joomla, so I developed my own one from scratch in plain PHP and MySQL.

The form’s fields are in Dutch, because the form I’ve developed for a Dutch restaurant.
However changing the form text is really easy,to do so open the php file and modify it, according to your needs.
I decided to share here the reservation form in hope that it might be helpful to somebody out there.
The Reservation form is licensed under GPLv2 so you’re very welcome to distribute and modify it freely.

The form installation is described in the README file you will find bundled with the reservation form archive.

You can d Download my PHP restaurant reservation form here

Feedback on the form is very welcome!