Posts Tagged ‘Debian’

Decrease Debian Linux boot time through decreasing GRUB kernel boot timeout

Friday, October 5th, 2012

Default timeout set for booting GRUB in Debian Linux is 5 seconds. This is really long for (mobile) Desktop Linux users like me who frequently start and stop computer while moving from location to location. Thus I found it useful to decrease the boot timeout set in GRUB in order to decrease my overall boot waiting time.


hipo@noah:~/Desktop$ grep -i timeout /boot/grub/grub.cfg
set timeout=5

To decrease GRUB boot timeout I had to change timeout=5 to timeout=1.
That’s all enjoy 🙂

How to enable cron log separately in cron.log in Debian GNU / Linux

Thursday, October 4th, 2012

Default logging mechanism in and rest of its forks Ubuntu, Xubuntu whatever is done that there is no separate logging for cron daemon (/usr/sbin/cron). Instead all output messages from cron service gets logged in /var/log/auth.log

I don’t like this and since I ever remember using Linux I always liked it whether cron logs its activities in /var/log/cron.log.

Hence on each and every new Desktop or Server install, one of my first things is to set crond log msg separately in /var/log/cron.log.

In older Debians syslog, was used whether in Debian Squeeze, (Wheezy) and onwards releases rsyslog is used.

On hosts depending on syslogd or rsyslogd to manage logs, to enable cron.log just uncomment in either /etc/syslog.conf or /etc/rsyslog.conf:


# cron.* /var/log/cron.log


cron.* /var/log/cron.log

Create cron.log


linux:~# touch /var/log/cron.log

And restart syslogd / rsyslogd and cron


linux:~# /etc/init.d/rsyslogd restart
Stopping enhanced syslogd: rsyslogd.
Starting enhanced syslogd: rsyslogd.
linux:~# /etc/init.d/cron restart
Restarting periodic command scheduler: cron.
....

Check cron.log to see it logs fine:


linux:~# tail -n 5 /var/log/cron.log
Oct 4 16:31:27 pcfreak /usr/sbin/cron[32413]: (CRON) STARTUP (fork ok)
Oct 4 16:31:27 pcfreak /usr/sbin/cron[32413]: (CRON) INFO
(Skipping @reboot jobs -- not system startup)
Oct 4 16:32:35 pcfreak /usr/sbin/cron[32468]: (CRON) INFO
(pidfile fd = 3)
Oct 4 16:32:35 pcfreak /usr/sbin/cron[32469]: (CRON) STARTUP
(fork ok)
Oct 4 16:32:35 pcfreak /usr/sbin/cron[32469]: (CRON) INFO
(Skipping @reboot jobs -- not system startup)

How to configure Tor Public server on Debian Linux and FreeBSD

Monday, October 1st, 2012

Tor onion running public server on FreeBSD and Debian Ubuntu Gnu / Linux

I like configuring publicly accessible tor on hosts which I own, the reason is because I like very much and want to support the good initiative of Tor Onion Project.

Anonymity on the Internet is becoming harder day after day thus I believe any freedom respecting person should do his best to support any project that aims to help us be anonymous on the net.

Installing even one Tor server at home makes difference and makes Tor Network better. So if you have a spare internet connection somewhere, I kindly ask you start a tor server! Help Tor Project grow – Help protect our anonimity 🙂

After the loud “speech”, here is in short how easy it is to configure Tor Server on Linux and BSD.
Keep in mind installing it as pointed below makes Tor server automatically becomes part of Tor Nodes Network; next time you use tor it is likely you use tor via your own node 🙂

1. Install tor debian package


apt-get --yes install tor

2. Set proper torrc configuration in /etc/tor/torrc

Edit /etc/tor/torrc and place something like:


SocksPort 0 # what port to open for local application connections
SocksListenAddress 127.0.0.1 # accept connections only from localhost
## Required: A unique handle for this server
Nickname pcfreak
ORPort 9001
ExitPolicy reject *:6660-6667,reject *:*
ExitPolicy reject *:* # middle node only -- no exits allowed
# See http://wiki.noreply.org/noreply/TheOnionRouter/TorFAQ#Hibernation
# We have 400GB of traffic per month
# We want that to be about 150GB per week
BandwidthRate 50 KB
BandwidthBurst 1MB
AccountingStart week 1 00:00
AccountingMax 150 GB
DataDirectory /var/lib/tor
RunAsDaemon 1
ContactInfo hip0

3. Allow port in iptables firewall 9001


/sbin/iptables -A INPUT -p tcp -m tcp --dport 9001 -j ACCEPT
/sbin/iptables -A INPUT -p udp -m udp --dport 9001 -j ACCEPT

You might want to permanetly store new iptables settings i.e.:


# iptables-save > /root/iptables.tor.save

4. Restart tor server


# /etc/init.d/tor restart

Run telnet or / nmap to test if your host is reachable via port 9001.


# telnet www.pc-freak.net 9001
Trying 83.228.93.76...
Connected to www.pc-freak.net.
Escape character is '^]'.
Connection closed by foreign host.

Installing Tor Public server on FreeBSD.
Installing tor onion server on FreeBSD is equivalent:


freebsd# cd /usr/ports/security/tor
freebsd# make install && make install clean

Then use you can use exactly same torrc config like in above example it works identically on Linux and BSD.
Here you get same working torrc

On FreeBSD tor is stopped started via /usr/local/etc/rc.d/tor start/stop init script:

Restart it and you’re done on BSD too:


freebsd# /usr/local/etc/rc.d/tor restart
...

Another thing is to allow port 9001, config with packet filter (pf) /etc/pf.conf should be something like:


EXT_IP="192.168.0.2"
EXT_NIC="em0"
pass out log quick on $EXT_NIC proto TCP from any to $EXT_IP port 9001 flags $SYN_ONLY keep state

Once pf options are in restart pf.conf;


freebsd# pfctl -d
No ALTQ support in kernel
ALTQ related functions disabled
freebsd# pfctl -e -f /etc/pf.conf
No ALTQ support in kernel
ALTQ related functions disabled

Enjoy sharing your internet bandwidth with rest of Tor Project network 🙂

Disable Apache access.log and error.log logging on Debian Linux and FreeBSD

Tuesday, September 25th, 2012

Disable Apache logging Debian and FreeBSD Linux logo

Many times disabling logging on a busy websites is quite beneficial, especially if more than few Gigabytes are written in Apache visitors log (access.log) every day. Too much visitors to Apache webserver could pose significantly increase disk writes and be negative for overall server performance.

Disabling the log is handy also for websites which already integrate a different type of visitors logging lets say – via MySQL, PostgreSQL (SQL) …

From security perspective disabling logging is a very stupid idea thought, however on systems which are experiencing high load and you need to sacrifice logging to reduce a bit the load (especially if you cannot afford to get a new server hardware), disabling it is an option.

1. Disabling access.log and error on Debian Linux

a) Disabling access.log logging
As most Debian users already know on Debian GNU Linux Apache logs all incoming (port 80) Apache requests to /var/log/apache2/access.log and /var/log/apache2/error.log

Disabling logging is very simple, just comment out line in /etc/apache2/sites-enabled/000-default:


CustomLog ${APACHE_LOG_DIR}/access.log combined

to


#CustomLog ${APACHE_LOG_DIR}/access.log combined

Then restart the webserver to re-read new config value:


# /etc/init.d/apache2 restart
....

Of course this is one of the ways to disable access.log logging. Other ways are to make logging gets logged in good old /dev/null. To use /dev/null forwardingp put Customlog /dev/null in /etc/apache2/sites-enabled/000-default


CustomLog /dev/null

In Debian Lenny and older Debian releases Customlog Apache directive is found in /etc/apache2/apache2.conf.

b) Disabling error.log logging

Same procedure applies for disabling error.log, comment out default ErrorLog directive, restart Apache and you’re done:


ErrorLog ${APACHE_LOG_DIR}/error.log

should become:


ErrorLog /dev/null

Usually just comming ErrorLog ${APACHE_LOG_DIR}/error.log is supposed to work, unfortunately for reason on Debian Squeeze this worked not commenting it and restarting Apache failed to restart apache with error:


# /etc/init.d/apache2 restart
Restarting web server: apache2 ... waiting (2)No such file or directory: apache2: could not open error log file /etc/apache2/logs/error_log.
Unable to open logs
Action 'start' failed.
The Apache error log may have more information.
failed!

Thus to disalbe error.log you need to add ErrorLog /dev/null in /etc/apache2/apache2.conf and once again restart Apache.


ErrorLog /dev/null


# /etc/init.d/apache2 restart

Bear in mind that if you use some custom virtualhosts which has the ErrorLog directive in (let’s say /etc/apache2/sites-enabled/{website-domain.com,website-domain1.com} etc. you need to change there too.
2. Disabling access.log and error.log logging on FreeBSD
On FreeBSD to disable access.log add CustomLog /dev/null to /usr/local/etc/httpd.conf and just like on Linux restart Apache:


freebsd# /usr/local/etc/rc.d/apache2 restart
....

Disaling error.log on BSD is done by changing:


ErrorLog /var/log/httpd-error.log

to


ErrorLog /dev/null

BTW disaling error.log is quite a stupid idea but in some situation, where you don’t update software versions and don’t change often webserver script interpreter and (processed) server side executables / PHP scripts it could be ok.
Still it is much better to change the amount of Apache logged information and keep error.log logging by changing:


LogLevel crit

Using LogLevel crit, will prevent Apache from logging numerous not so useless warnings in error.log, so if you have a very busy server with high loads you better use it.

Don’t expect that disabling logging will drastically improve performance usually even on Apache servers which serve more than 20 000 of requests daily disabling access.log / error.log could would probably reduce load with from 00.1 to maximum 2-3 percentage.

Install ShellInABox (web shell browser AJAX frontend) on Debian GNU / Linux

Sunday, September 23rd, 2012

ShellinAbox web ssh shell browser frontend for Debian, Ubuntu, Arch Linux, Redhat and other GNU / Linux distributions

ShellInABox is a tiny piece of soft which can enable you to access your server or desktop via ssh shell using the web command line shell through AJAX interface. Installing it is not a hard task. To install on any Linux just navigate to shellinabox.com and download compile and install using the source code from tar.gz.
Installing ShellinaBox on Debian or Ubuntu and derivative based Linux it is even easier as on the website there are pre-compiled deb binaries which can be straight installed with dpkg

For 32 bit Debian version, installation is as simple as;

1. Download the i386 deb binary from Shellinabox.com
Just go to the website and look up for correct link and download with links

As of time of writting this post to download with links text browser:


links "http://code.google.com/p/shellinabox/downloads/detail?name=shellinabox_2.9-1_i386.deb&can=2&q="

2. Install deb pack with dpkg


dpkg -i shellinabox_2.9-1_i386.deb

For 64 bit amd64 bit arch Debian, install a Pre-built Debian x86-64 package (requires Ubuntu Karmic). Though the binary is said to be for Ubuntu it also installs and starts the shellinabox service (daemon) without no problem. By default shellinabox is configured to work on port number 4200. Right after install to test it open your favourite browser and do request to localhost port 4200:


http://127.0.0.1:4200/

BTW, I’ve used a couple of others Java based web ssh frontends and I should say, ShellinAbox is much more responsive.
Well that’s all now enjoy connecting to remote system ssh using any AJAX supporting browser 🙂

How to enable UserDir /home/*/public_html on Debian GNU / Linux 6.0.5 (Squeeze)

Saturday, September 22nd, 2012

Enabling mod userdir on Apache server in Debian GNU Linux Squeeze

By default UserDir module is not enabled on Debian. The original documentation related to UserDir is found on Apache’s main website here
On Debain by default the module userdir is installed in directory /usr/lib/apache2/modules/, e.g.:


debian:~# ls -al /usr/lib/apache2/modules/*userdir*
-rw-r--r-- 1 root root 9696 Apr 1 09:40 /usr/lib/apache2/modules/mod_userdir.so

It is installed as external module (not compiled in Apache) – btw something interesting for many might be to see which modules are copmiled as static modules default in Apache by issuing:


debian:~# /usr/sbin/apache2 -l
Compiled in modules:
core.c
mod_log_config.c
mod_logio.c
prefork.c
http_core.c
mod_so.c

In Debian Apache is configured to use Debian’s standard directory locations and use Debian’s config, structure and how to generally manage it, hence in order to add (load) mod_userdir to Apache it is necessery to exec a2enmod perl script:


debian:~# a2enmod userdir
Enabling module userdir.
Run '/etc/init.d/apache2 restart' to activate new configuration!

Another way, which I personally prefer is to create directly symlinks loading the module:


debian:~# ln -sf /etc/apache2/mods-available/userdir.load /etc/apache2/mods-enabled/userdir.load
debian:~# ln -sf /etc/apache2/mods-available/userdir.conf /etc/apache2/mods-enabled/userdir.conf

Next restart Apache server to load the it as suggested by a2enmod:


debian:~# /etc/init.d/apache2 restart
Restarting web server: apache2 ... waiting .

If you want to Allow /home/*users* to be able to use .htaccess, php or simply install CMS systems or alike it is good idea to also change default AllowOverride settings for public_html for that edit /etc/apache2/mods-enabled/userdir.conf and change:


AllowOverride FileInfo AuthConfig Limit Indexes
....

to:


# AllowOverride FileInfo AuthConfig Limit Indexes
AllowOverride all
...

If you do so don’t forget to once again restart apache with /etc/init.d/apache2 restart.

One more thing is to enable PHP for /home/*/public_html, to do so edit /etc/apache2/mods-enabled/php5.conf and comment out:


php_admin_value engine Off


#
#
# php_admin_value engine Off
#

#

#

Thanks to Activating userdir on Debian server blog for pointing out how to enable php for userdirs 🙂

Another alternative way to enable userdirs is to directly create symlinks for each user public_html directory but I guess this is not a best practice, anyways if you prefer to use this instead of using mod_userdir do it with:


ln -sf '/var/www/~username' /home/username/public_html
ln -sf '/var/www/~username1' /home/username1/public_html
...

If you prefer to do symbolic links to public_html for all user homes, you can do it directly in a quick for bash loop by issuing:


for i in /home/*; do
f=$(echo $i | sed -e "s#/home/##g");
ln -sf "/var/www/~$f" /home/"$f"/public_html;
done

How to change order of network cards eth0 and eth0 (swap lan cards) on Debian GNU / Linux

Friday, September 21st, 2012

Swap eth0 and eth1 lan card / how to change network card order on Debian Gnu / linux

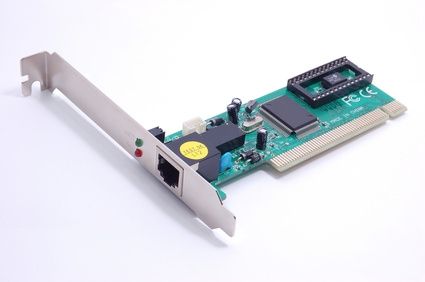
I have a Debian server with 2 network adapter cards – (eth0 and eth1). The first lan card eth0 is Mainboard embedded (integrated) one.

The hardware of the Lenovo ThinkCentre host was purchased with one LAN Card but a second one was added in order to make the machine capable of doing NAT routing with iptables.

The machine is to be configured as a router in 1st lan card eth0, an internet UTP cable should influx and the 2nd lan card is to be connected to a Network Switch and will be used to NAT network traffic from the internal network of number of hosts with assigned local IP addresses like (192.168.0.1 – 255) etc.

Everyone knows that integrated Network cards, are usually inferior to the normal non-integrated ones and besides that if a high voltage (during Weather Storm) enters through UTP cable attached to the integrated LAN Card it is quite likely the whole Mainboard to burn out …

With saying this back to my case I had to make the Internet to connect on eth0 on a Debian Linux host which was supposed to run as a Network router. As eth0 was the one where I had to configure the Internet real IP address to be assigned, I preferred eth0 to be attached to the non-integrated Ethernet Card which was automatically recognized and assigned to be eth1 by kernel.

Therefore I needed to swap interfaces eth0 and eth1, here is how this is done on Debian GNU / Linux Squeeze (6.0.5):

1. Edit /etc/udev/rules.d/70-persistent-net.rules


# vim /etc/udev/rules.d/70-persistent-net.rules

The file content should look something similar to:


# This file was automatically generated by the
/lib/udev/write_net_rules
# program, run by the persistent-net-generator.rules rules file.
#
# You can modify it, as long as you keep each rule on a single
# line, and change only the value of the NAME= key.
# PCI device 0x10ec:0x8168 (r8169)
SUBSYSTEM=="net", ACTION=="add", DRIVERS=="?*",
ATTR{address}=="90:f6:C2:3d:76:f5", ATTR{dev_id}=="0x0",
ATTR{type}=="1", KERNEL=="eth*", NAME="eth0"
# PCI device 0x10ec:0x8168 (r8169)
SUBSYSTEM=="net", ACTION=="add", DRIVERS=="?*",

ATTR{address}=="8d:89:a5:c2:e8:f8", ATTR{dev_id}=="0x0",

ATTR{type}=="1", KERNEL=="eth*", NAME="eth1"

Swap eth0 and eth1 definitions so eth0 becomes eth1 and vice versa, e.g.:


SUBSYSTEM=="net", ACTION=="add", DRIVERS=="?*",

ATTR{address}=="8d:89:a5:c2:e8:f8", ATTR{dev_id}=="0x0",

ATTR{type}=="1", KERNEL=="eth*", NAME="eth0"
SUBSYSTEM=="net", ACTION=="add", DRIVERS=="?*",
ATTR{address}=="90:f6:C2:3d:76:f5", ATTR{dev_id}=="0x0",
ATTR{type}=="1", KERNEL=="eth*", NAME="eth1"

ATTR{type}=="1", KERNEL=="eth*", NAME="eth0"

To make udevd, reassign eth0 / eth1 cards orders restart udev daemon:


# /etc/init.d/udev restart
...

or restart the system, i.e.


# restart

That should swap the Lan card order as recognized by Linux. Cheers 😉

Make your Debian Linux and FreeBSD terminal / console display daily verse from KJV Bible

Saturday, September 26th, 2009

Since I am a Christian and I want to daily be in touch with the Holy Scriptures and I am most of the time spending on my Linux system. I have came to the conclusion that it’s beneficial to
have a daily bible displaying everytime after login in console or terminal in X.

Therefore I thought it might be helpful to somebody out there who would wish to have short sentece of bible on each Linux / FreeBSD machine login.

Here is how to set bible quote to appear everytime after login in Debian Linux:
First install the verse program through:


# apt-get install verse

Next if you want to make the verse display global for the system put :


if [ -f /usr/bin/verse ]; thenecho/usr/bin/verse fi

in /etc/bash.bashrc
On the other hand if you’d like to make it local for your account or a setnumber of accounts on your system append


if [ -f /usr/bin/verse ]; thenecho/usr/bin/verse fi

to your user ~/.bashrc as well as to the home directories of the users you’d like to display a bible verse (if for several users).

If you decide to do that be aware that your login via sftp won’t work anymore – forget about sftp transfers ….

Every time you attempt to login you’ll experience the error message:

“Received message too long”. However that ain’t a real problem for me since I use my system as a desktop and don’t sftp or ssh remotely to my desktop.
In order to prevent this issue where sftp interactivity gets broken it is better to add verse app to execute via /etc/profile i. e. in /etc/profile on top of file add:


if [ -f /usr/bin/verse ]; then echo /usr/bin/verse fi

On FreeBSD the same is achieved a bit differently. Here is how to install it in FreeBSD:

First install fortune program and then install the fortune bible module; In FreeBSD bible quotes are only available via the good old fortune program:

cd /usr/ports/misc/fortune-mod-bible;
make install clean

Next open:the /etc/profile file and insert in the end of it:

echo /usr/games/fortune /usr/local/share/games/fortune/bible

On your next login your FreeBSD should be showing a bible
sentence (quotation) after each and every login.
What is different with Debian’s verse program is that verse keeps displaying one exact quote of the bible during every login for the whole day,
where in FreeBSD the fortune-mod-bible does show a different (random) bible sentence on each and every user login.

Change default new created Debian users insecure (all users read) permissons to secure

Tuesday, September 11th, 2012

In older versions of Debian, the directory permnissions of /home/ directory used to be secure. As of time of writing this post in Debian GNU / Linux Squeeze (6.0.5), default permissions are set to such, that all permissions are set readable for all users. e.g.:

debian:~$ ls -al /home/test
drwxr-xr-x 3 test test 4096 Jul 24 10:51 test

This kind of permissions are probably set like this because of Apache configuration to display every user custom file content in web via /home/[users]/public_html through http://website-url.com/~test … (whatever) ~username.

This is great for machines which are supposed to be used for hosting, but for mail server or SQL Database host such permissions of new created users is quite insecure practice. Also such a /home directory settings are not good even for Webserver hosting servers, which did not display any web content via /home/ users directories.

Therefore on each new configured Debian server it is a wonderful practice to change default new created user to only readable, writable and executable by the user itself ….

To do so;

1. Edit /etc/adduser.conf

Change the variable:

DIR_MODE=755

to

DIR_MODE=700

This will not affect the permissions of current existing directories in /home/, i.e. /home/user1 , /home/user2 etc. but any new created one with adduser or useradd cmd will get permissions of 700

Here are permissions of recent created user syrma:

debian:~# useradd syrma
debian:~# ls -ld /home/syrma
drwxr-xr-x 98 syrma syrma 12288 7 ceâ—ˆ 13,56 hipo/

In /etc/adduserconf, there are plenty of other useful options, you might want to tune (depending on the type of new configured server). Few worthy to change sometimes are:

FIRST_UID=1000, LAST_UID=29999
FIRST_GID=1000, LAST_GID=29999

This two controls how the USER IDSs (UID) and GROUP IDs (GID)s will get assigned. In some cases it might be useful to assign new users from 1000 onwards.

Another helpful variable to tune for creating new users from there is DSHELL, on Linux defaulting to DSHELL=bash shell.

If there is a necessity to set a GLOBAL new created user quota, this is easily done also via adduser.conf. The file allows you to disable certain strings in username from present in new user logins, configure if new users will have their separate directory or belong to a system wide (user group – like in Slackware) and few others. I suggest anyone new to Linux who hears it for a first time check it.

It is maybe worthy to mention in present moment on Ubuntu Linux, by default /etc/adduser.conf, DIR_HOME=700 (is restrictive).
For some new users, who try to configure Apache read /home/[user_dir]/public_html. This could lead to unexplainable errors like:

[Tue Sep 11 10:20:17 2012] [crit] [client 127.0.0.1] (13) Permission denied:/home/syrma/.htaccess pcfg_openfile: unable to check htaccess file, ensure it is readable

This error is due to /home/syrma, improper permissions (Apache) server user (www-data) fails to read /home/syrma directory content and the Apache forked child exits with the respective error.log critical err.

If you get some errors like this, the fix is to just make the directory with readable and executable flag for all users:

# chmod -R 0755 /home/syrma

Why and how to fix when Debian Linux detects and shows only 3GB of memory even though 4 or more are present

Saturday, September 8th, 2012

I was quite shocked to find out free -m was showing 3GB of memory on a brand new purchased Lenovo ThinkCentre Edge71 (according to guarantee paper with 4GB). I got angry seeing this, I paid 350 EUR for a Desktop host and suddenly, there is one giga less …

Since I was not sure if by mistake someome shipped the system with 1 Gigabyte or there is something wrong with Linux unable to detect the whole amount of memory I entered BIOS (on Lenovo ThinkCentre Edge series – to enter BIOS press F1.

Interestingly in BIOS, I can see 4 GigaBytes of memory are present, well this was puzzling … :

Lenovo ThinkCentre Edge71 esktop PC BIOS picture

Still free -m show me 3GB:

# free -m
total used free shared buffers cached
Mem: 2989 186 2803 0 4 76

-/+ buffers/cache: 105 2884
Swap: 5651 0 5651

I checked also in top and htop, hoping maybe there 4 Gigas will show up but nope there also the whole amount of system memory was identified as 2989 MB.

I thought for a while and my first thought was probably, the memory is not detected because there might be integrated Videocard configured to use 1 GB of RAM. So next logical thing to do was check in BIOS, what kind of settings are set for the Video adapter.

possible settings for Video Setup menu are:

IGD,
PEG,
or AUTO

PEG stands for (PCI-e Graphics Device
– IDG is abbreviaton from (Internal Graphics Device)
I give a try to all of them, but I didn’t see any change in amount of detected memory. Debian Squeeze Linux 6.0.5 was always detecting 2989 max memory. I also tried also changing the amount of IGD Pre-allocated Memory Size from 128M to 32MB as well as decreasing the amount of Total Graphics Memory to 128MB. Unfortunately doing all kind of changes didn’t influenced the amount of detected memory by Linux kernel …

To make sure the 3GB detected memory is not because of some Debian Squeeze GNU / Linux bug I tried using a PuppyLinux 4.2.1 LiveCD just to see PuppyLinux was also detecting with 1 GIGA less…

Onwards after a quick research online I red people are experiencing similar problems on Linux, whether a 32 Bit kernel is used on 64 bit machines.
Weirdly it seems 32 Bit Linux kernels (even the new ones) are having troubles detecting more than 3GB of memory, but there is a need for some kind of bigmem supporting kernel .
Here is the exact Linux kernel version making the troubles:

# uname -a;Linux pcfreak 2.6.32-5-686 #1 SMP Sun May 6 04:01:19 UTC 2012 i686 GNU/Linux

Until checking the kernel release, I didn’t realized in the hurry installed a 32 bit version of Debian on the 64 bit machine so to fix up the situation installed 64 bit version kernel;

# apt-get install --yes linux-image-2.6.32-5-amd64

And Hooray! After restarting and booting with the new 64 bit (amd64) kernel, the missing 1 Gigabyte of memory started being detected:

# uname -a;
Linux pcfreak 2.6.32-5-amd64 #1 SMP Sun May 6 05:12:07 UTC 2012 x86_64 GNU/Linux
# free -m
total used free shared buffers cached
Mem: 3913 261 3651 0 4 71
-/+ buffers/cache: 186 3727
Swap: 5651 0 5651

Seeing system boot up fine with the amd64 bit kernel, I removed the old 32 bit kernel, e.g.:

# apt-get --yes remove linux-image-2.6.32-5-686

Well that’s all folks 🙂