Posts Tagged ‘Debian’

Set up Modsecurity on Debian 7 GNU / Linux to mitigate websites virus infections / Cross Site Scripting and SQL Injects

Friday, September 6th, 2013

mod security raise up your Apache webserver security and protect against cross site scripting javascript hacks and viruses

There are plenty of tutorials around on how to install and configure modsecurity  So This tutorial is nothing new, but I decided to write it since, I had to install mod_security on Debian Wheezy to protect a Debian Linux server websites from being periodically infected with Viruses / XSS / Backdoored Javascripts and Trojan horses.

Everyone who used Debian stable distribution knows the packages included in it are usually about 2 years older than latest available. Situation with latest Debian stable Wheezy  is same, but anyways even a bit outdated my experience so far is mod_security does a great job of protecting Apache sites …

1. Install libapache-mod-security and other libraries (not obligitory), but useful on most Apache + PHP servers

  Run below commands to add xml and rest of useful Apache stuff:


apt-get install libxml2 libxml2-dev libxml2-utils
apt-get install libaprutil1 libaprutil1-dev

Above commands will install a bunch of other dependency packages.

Next install mod-security deb. Run below command, to install and activate modsecurity. Note that installing libapache-mod-security will also automatically restart the Apache server.
 

apt-get install libapache-mod-security

Next to enable all functionality of modsecurity headers Apache module is required as well, activate it with:

 
a2enmod headers
service apache2 restart

2. Make sure mod_security Apache config looks like


<IfModule security2_module>
# Default Debian dir for modsecurity's persistent data
SecDataDir /var/cache/modsecurity
# Include all the *.conf files in /etc/modsecurity.
# Keeping your local configuration in that directory
# will allow for an easy upgrade of THIS file and
# make your life easier
Include "/etc/modsecurity/*.conf"
</IfModule>

Important part of conf is  "Include "/etc/modsecurity/*.conf"" line. /etc/modsecurity directory is main place to set up and configure modsecurity. This configuration file, combined with mod-security.load, do everything necessary to load the modsecurity into Apache server.

3.Enable and Load modsecurity default configuration rules:

So far, modsecurity is loaded into the apache server, but isn't stopping any attempts of hack scripts / Viruses / or automated tools to exploit Vulnerabilities in Web Applications. To make modsecurity start filtering requests, should activate  modsecurity specific configuration and load some regular expression rules.
First to do is enable "recommended" modsecurity configuration file:
 

Code:
cd /etc/modsecurity
mv modsecurity.conf-recommended modsecurity.conf

Default configuration from recommended conf enables modsecurity in an "examine only" mode. In order to make full use of the module, we have to make a few changes. With  favorite text editor open modsecurity.conf (mine is vim)and make the following change:

Code:
SecRuleEngine On

This makes modsecurity to block requests based on its (pre-written) developer rules. Other settings in this file that are useful to know about are the debug controls, very useful, whether you have to debug problems with sites not properly opening due to server enabled mod_security.
 

Code:
#SecDebugLog /opt/modsecurity/var/log/debug.log
#SecDebugLogLevel 3

This controls how much information is stored in modsecurity's "audit log as well as keeps track of attacks launched to server. Default debug level of 3 is pretty much and stores "everything". This is dangerous as a huge logs are produces on  busy servers.
 

Code:
SecAuditLogParts ABIJDEFHZ

4. Enable extra modsecurity prevention rules

Modsecurity works by using rules by pre-defined patterns used to recognize when your website/s is being probed or attacked. Once installed modsecurity base package as a dependency modsecurity-crs package is installed. modsecurity-crs contains addition free core rule set. Current Core rule from modsecurity.org are newer than version included with wheezy,  thus rules lack a bit behind but this is only option whether using default debian bundled packge otherwise manual modsecurity recompile is required. We all know how bad it is to custom compile software on production machines, so custom compile experiments are really bad idea.

CRS (Core Rule Set) is installed in /usr/share/modsecurity-crs. This directory contains an "activated_rules" directory present also in /etc/modsecurity

Quickest way to activate rules is by symlinking from the actual config and rule files into the /etc/modsecurity config directory.

We'll be making links from the /usr/share/modsecurity location into /etc/modsecurity to activate some other useful modsec useful rules. First link main crs config file:
 

ln -s /usr/share/modsecurity-crs/modsecurity_crs_10_setup.conf /etc/modsecurity/modsecurity_crs_10_setup.conf

This file provides some basic configuration directives for crs.

Futher on, link each rule file in the base_rules and optional_rules directories using 2 tiny bash loops.


cd /usr/share/modsecurity-crs/base_rules
for f in * ; do sudo ln -s /usr/share/modsecurity-crs/base_rules/$f /etc/modsecurity/$f ; done
cd /usr/share/modsecurity-crs/optional_rules
for f in * ; do sudo ln -s /usr/share/modsecurity-crs/optional_rules/$f /etc/modsecurity/$f ; done

With that done, there's one more edit to check if modsecurity blocking works as expected. Open the /etc/modsecurity/modsecurity.conf file and add the following lines at the end (this is from the free, modsecurity pdf book, link provided below)


SecRule ARGS "MY_UNIQUE_TEST_STRING"\
"phase:1,log,deny,status:503"

Finally after all configuration rules are loaded to modsec, Usual Apache restart is required:

 
/etc/init.d/apache2 restart

Whether no fatal errors pop up and Apache starts normally, now modsecurity should be properly running.

5. Verify if modsecurity is set-up and kicking ass

To verify installation, open a browser and access some of hosted websites  like this:
http://www.your-server-domain.com/?test=MY_UNIQUE_TEST_STRING

A sure sign that modsec works is  503 "Service Temporarily Unavailable" message from Apache. Alternatively  examine server's modsec audit log file (default location in /var/log/apache2/modsec_audit.log) (grep the string MY_UNIQUE_TEST_STRING. You should see full transcript of the communication between your browser and server logged. Depending on amount of site traffic gets make sure to monitor  size of file for some minutes to make sure it doesn't grow too big and it doesn't fill up quickly your HDD.

Well now all fine your Apache server security is better for sure and by God's grace you should not have to deal with hundreds of hours of sites recovery after a bunch of client's websites are hacked.

Feedback and comments are mostly welcome. Enjoy 😉

Install Eaccelerator PHP cacher to decrease server CPU load on Debian Squeeze GNU / Linux

Monday, December 3rd, 2012

eaccelerator a php opcode cache optimizer accelerator

I don't know what is happening with Apache but I'm quite disappointed with the poor performance results  of  Apache2.2.16-6+squeeze8  + PHP 5.3.3-7+squeeze14 – installed from Official Debian Squeeze repositories through debs (apache2-mpm-prefork and libapache2-mod-php5). I should say the Apache is mainly processing PHP part of my wordpress blog which of time of writting contains about 1280 posts, few joomla based sites, another little wordpress and few other very little projects written in PHP The daily unique visitors the host gets are not that high about 8000 UNIQUE IP visitors and besides that the machine is equipped with a good amount of memory running on Lenovo PowerEdge host, here is raw system config where I got issues:

System Memory: 8 GB
Dual Core Intel(R) Pentium(R) CPU G630 @ 2.70GHz (5.40 Ghz), with
CPU  cache size    : 3072 KB.

The machine is not too powerful for a server configuration but for about 8000 Unique visitors mostly fetching WordPress pages many of which are cached with W3 Cache WP Plugin and handled back to the client in plain .html it is unusual such Apache CPU overloads happens. It is true the incoming traffic from crawlers puts a high load on the system as some of the WebCrawlers like 80legs sometimes are fetching pages too agressive and therefore create too high loads from PHP code multiple times interpreted by Apache, it is also a fact that sometimes the machines gets a bunch of increased number of requests from normal User IPs, but still the traffic even in peak hours  should not so high to be causing the weird Apache forked childs CPU overloads.

I've used Eacceleartor in the past and it proofed to significantly reduced the load Apache puts on servers CPU on all servers installed . Thus I thought of experimenting and running Eaccelerator on those particular problematic Debian Squeeze host to see if this will make some difference and fully resolve problems or at least reduce the overloads frequency. Whether this weird Apache overloads happens the system load avarage drops often to 80 or 100! The host is completely lagged then and often inaccessible via ssh. The work around is  either manual Apache restart via Apache init script (/etc/init.d/apache2 restart) or be setting a script to automatically restart Apache whether high load is matched. In some cases, the system gets so loaded that even the automated shell script which does restart Apache on high loads is not working, so only fix is to manually do cold system reset.

Eaccelerator though mostly popular among server administrators and thoughmany of the eaccelerators installs are on Debian  as of time of writting in Debian stable Linux does standard repositories does not include it . In past on Debian Lenny I used to  install Eacceleartor using a 3rd party repository but as I tried following my own tutorial to install it from deb without compiling I've figured out eaccelerator .deb's are no longer available.

Thus I proceeded and install it from source, here is how;

1. First to compile eacceleator from source one needs to have installed few build tools


 apt-get install --yes php5-dev make

2. Second download it from eaccelerator source repo on github, untar, compile, create eaccelerator cache directory, create eaccelerator config and restart Apache to load new settings.

 cd /usr/local/src

 wget -q https://github.com/eaccelerator/eaccelerator/tarball/master
 mv master eacceleartor.tar.gz

 tar -zxvvf eaccelerator.tar.gz
drwxrwxr-x root/root         0 2012-08-16 16:34 eaccelerator-eaccelerator-42067ac/
-rw-rw-r-- root/root       204 2012-08-16 16:34 eaccelerator-eaccelerator-42067ac/.gitignore
-rw-rw-r-- root/root       670 2012-08-16 16:34 eaccelerator-eaccelerator-42067ac/AUTHORS
-rw-rw-r-- root/root     17992 2012-08-16 16:34 eaccelerator-eaccelerator-42067ac/COPYING
-rw-rw-r-- root/root     49163 2012-08-16 16:34 eaccelerator-eaccelerator-42067ac/ChangeLog
-rw-rw-r-- root/root       627 2012-08-16 16:34 eaccelerator-eaccelerator-42067ac/Makefile.frag
-rw-rw-r-- root/root       269 2012-08-16 16:34 eaccelerator-eaccelerator-42067ac/Makefile.in
-rw-rw-r-- root/root      9761 2012-08-16 16:34 eaccelerator-eaccelerator-42067ac/NEWS
-rw-rw-r-- root/root     17053 2012-08-16 16:34 eaccelerator-eaccelerator-42067ac/PHP_Highlight.php
-rw-rw-r-- root/root      7281 2012-08-16 16:34 eaccelerator-eaccelerator-42067ac/README
-rw-rw-r-- root/root      2760 2012-08-16 16:34 eaccelerator-eaccelerator-42067ac/README.win32
-rw-rw-r-- root/root      2634 2012-08-16 16:34 eaccelerator-eaccelerator-42067ac/bugreport.php
-rw-rw-r-- root/root      9235 2012-08-16 16:34 eaccelerator-eaccelerator-42067ac/config.m4

cd $(ls -ld *eaccel*/|awk '{ print $9 }')  phpize
 ./configure
 make
 make install
 mkdir -p /var/cache/eaccelerator
 chmod 0777 /var/cache/eaccelerator
 cd /etc/php5/conf.d/

echo 'extension="eaccelerator.so"' >>  eaccelerator.ini
echo 'eaccelerator.shm_size="16"' >> eaccelearator.ini
echo 'eaccelerator.cache_dir="/var/cache/eaccelerator"' >> eaccelerator.ini
echo 'eaccelerator.enable="1"' >> eaccelerator.ini
echo 'eaccelerator.optimizer="1"' >> eaccelerator.ini
echo 'eaccelerator.check_mtime="1"' >> eaccelerator.ini
echo 'eaccelerator.debug="0"' >> eaccelerator.ini
echo 'eaccelerator.filter=""' >> eaccelerator.ini
echo 'eaccelerator.shm_max="0"' >> eaccelerator.ini
echo 'eaccelerator.shm_ttl="0"' >> eacceleartor.ini
echo 'eaccelerator.shm_prune_period="0"' >> eaccelerator.ini
echo 'eaccelerator.shm_only="0"' >> eaccelerator.ini
echo 'eaccelerator.compress="1"' >> eaccelerator.ini
echo 'eaccelerator.compress_level="9"' >> eaccelerator.ini


/etc/init.d/apache2 restart

For some clarity here is the exact config placed in /etc/php5/conf.d/eaccelerator.ini by above echo commands

extension="eaccelerator.so"
eaccelerator.shm_size="16"
eaccelerator.cache_dir="/var/cache/eaccelerator"
eaccelerator.enable="1"
eaccelerator.optimizer="1"
eaccelerator.check_mtime="1"
eaccelerator.debug="0"
eaccelerator.filter=""
eaccelerator.shm_max="0"
eaccelerator.shm_ttl="0"
eaccelerator.shm_prune_period="0"
eaccelerator.shm_only="0"
eaccelerator.compress="1"
eaccelerator.compress_level="9"

People who are lazy to copy paste from this post and like to have eaccelerator installed updated to a number of hosts (e.g. do some scripting automation) use install_upgrade_eaccelerator_debian.sh tiny shell script.

install_update_eaccelerator_debian.sh script is very useful for people who regularly update Debian to latest security updates.
Due to the fact eaccelerator is compiled from source code, after every update of Apache or PHP packages it is necessery to rebuild also eaccelerator, otherwise after upgrading Apache eaccelerator will stop silenty working, so if you don't explicitly check in phpinfo(); periodically you might even not have noticed that, except if you don't notice a bit of degraded performance after the last Apache / PHP update. Actually the need to re-compile eaccelerator PHP module, after each Apache or PHP update is a bit annoying and is downsize, that package has no native deb. There is one work around to that I can think of – just set install_update_eaccelerator_debian.sh to execute via cron routinely.
 I personally don't do that but people, as I don't like full automation, but people who prefer to install once eaccelerator and further forgot about it should:

a. Copy install_update_eaccelerator_debian.sh script to lets say /usr/local/bin

b. set a cronjob similar to

10 5,10,15,20,25,27 * * * /usr/local/bin/install_update_eaccelerator_debian.sh >/dev/null 2>&1

During execution the cron would put some extra load on the system but at least, you can be sure you will regularly be running with working / updated (re-compiled) version of Eaccelerator.

To test if eaccelerator is loaded on the system check in phpinfo(); function output. Create anywhere in a site DocumentRoot a file like php_info.php with content:

<?
phpinfo();
?>

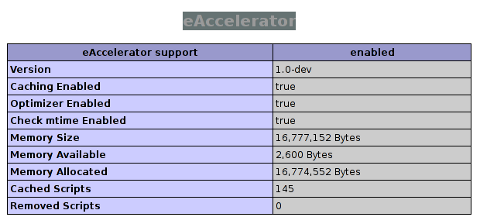
Access the site in browser and look for eaccelerator in it. If eaccelerator is configured to serve well you will see something like on below screenshot:

eaccelerator php cache engine debian squeeze screenshot

Install eacceleartor php load up info debian squeeze linux shot
One note to make here is Eaccelerator might be creating problems due to caching on some hosts using Smarty Framework for a site basis, I assume with some other PHP Frameworks there might be some problems too but in general due to my experience so far I've faced problems with sites due to eaccelerator in very rare occasions in maybe 50 Eaccelerator installs so far, there were issues due to caching only on maybe 2 or 3. However I should share Eaccelerator is not recommended on testing Apace + PHP server for web development, as on those it sometimes might be creating "dev. time lags" in development due to caching – a common example for that is when a developer substitutes a .php with another similar ones whose size is identical to the previous .php script ….

After installing the system load dropped a bit, there is plenty of benchmarking online comparing Eaccelerator with other popular PHP Cachers like XCache, APC, PurePHP etc. – According to benchmarking done between the 3 Eaccelerator is maybe the most fastest PHP Cacher  – the article is a bit outdated but worthy to read.
As a result of putting in use Eaccelerator now the system load is more gracefully distributed in time sar (system activity information) over time does not show moments in which the CPU was "stoned" idling at 0 – as before.

As a result of the resolved downtimes and Apache restarts, I see also in webalizer statistics increase in the amount of traffic (unique visitors). Only time will show for sure if this increased capacity of traffic serving is directly because of Eaccelerator or there were other factors too but as long as I didn't change nothing else on the host I think it is very likely it is thanks to Eaccelerator.
Another note to make here is that on PHP Zend Framework it might be Zend PHP Caching via APC is quicker than Eaccelerator.

P.S. : Sometimes you might need to clean Eacceleartor PHP Cache, as it might be cause for showing old cached pages; even though some PHP were updated – more n that here

I will be glad to hear from people who install Eaccelerator, some feedback, did you got decreased server loads and more stable and quicker served pages?

I would like to also to give thanks to this nice blog article which was along the articles which help me with install guideance and hence was a kind of inspiration of this a bit prolonged but hopefully informative article.

After all, increased "Apache thoroughput" and more served connection without changing (spending on new hardware) is way to increase ur business efficiency and save money 🙂

Njoy 😉

Disable server side includes (SSI) in Apache on Debian GNU / Linux to Improve minor Apache performance

Thursday, November 29th, 2012

Disalable Apache Server-side includes on debian Linux disable SSI for better performance and security
By default Apache deb installable binary on Debian GNU / Linux is shipped with Apache version  (Apache 2.2.16-6+squeeze6) is configured to be able to process Server Side Include (SSIs) scripts.

For those who don't know what is a Server-Side Includes it a way giving  possibility for inclusion through .shtml or even .html files (if configured) to dynamically include and process external scripts. Most admins should have already seen SSI scripts, but it is possible they don't even know it is SSI. An example code from an SSI script looks something like:

<!--#include file="footer.html" -->

<!--#exec cgi="/cgi-bin/foo.cgi" --> <!--#exec cmd="ls -l" -->

As of time of writting (on Debian stable codename Squeeze – and I guess the unstable one too).

In Debian.BG one of my previous employment companies SSI was used on a few website Projects;  However nowadays SSI's are not so popular as they used to be and many websites using mostly PHP for a programming backend don't use / need the Server Side Includes at all. Thus it is recommended on such servers where SSIs aren't used and not planned by company to be used in short future to disable SSI  (.shtml) support completely. As the popular saying says "less is more" – having enabled SSI hanging their is simply a waste of Apache resources and just another hanging unused feature from security stand point is not good.

 SSI .shtml support in Debian is enabled via /etc/apache2/mods-available/mime.conf, not  through apache2.conf because of the modular Apache Debian build structure.

Thus to disable server-side parsing on Debian (and I guess other debian derivatives);

  • Edit /etc/apache2/mods-available/mime.conf

vim /etc/apache2/mods-available/mime.conf

  • Look for file section:

#
# Filters allow you to process content before it is sent to the client.
#
# To parse .shtml files for server-side includes (SSI):
# (You will also need to add "Includes" to the "Options" directive.)
#
AddType text/html .shtml
AddOutputFilter INCLUDES .shtml
 

  • Comment out .shtml mime directives to:

#
# Filters allow you to process content before it is sent to the client.
#
# To parse .shtml files for server-side includes (SSI):
# (You will also need to add "Includes" to the "Options" directive.)
#
##AddType text/html .shtml
##AddOutputFilter INCLUDES .shtml

  •   Apply changes, with the usual apache restart:

debian:~# apache2ctl -k restart

Don't expect that disabling SSI will give a great boost to the webserver but it will definitely, do a minor performance improvement. This should be noticable on  Webserver hosts (using apache2-mpm-prefork) with thousands of Apache forks, on a little home Webserver perf change is unnoticeable.


Disabling sound kernel modules on Debian and Ubuntu GNU / Linux servers

Friday, October 19th, 2012

First step is to list modules related to sound (snd):


root@pcfreak:/var/www# lsmod|grep -i snd
snd_hda_codec_realtek 235234 1
snd_hda_intel 20035 0
snd_hda_codec 53940 2 snd_hda_codec_realtek,snd_hda_intel
snd_hwdep 5220 1 snd_hda_codec
snd_pcm_oss 32415 0
snd_mixer_oss 12478 1 snd_pcm_oss
snd_pcm 60151 3 snd_hda_intel,snd_hda_codec,snd_pcm_oss
snd_seq_midi 4256 0
snd_rawmidi 15323 1 snd_seq_midi
snd_seq_midi_event 4628 1 snd_seq_midi
snd_seq 41281 2 snd_seq_midi,snd_seq_midi_event
snd_timer 15502 2 snd_pcm,snd_seq
snd_seq_device 4493 3 snd_seq_midi,snd_rawmidi,snd_seq
snd 45998 11
snd_hda_codec_realtek,snd_hda_intel,snd_hda_codec,snd_hwdep,snd_pcm_oss,snd_mixer_oss,snd_pcm,snd_rawmidi,snd_seq,snd_timer,snd_seq_device
soundcore 4566 1 snd
snd_page_alloc 6217 2 snd_hda_intel,snd_pcm

Then snd modules could be removed from current live system, for my Intel RealTek SoundBlaster, I had to remove following modules in (remove) order as follows:


root@pcfreak:/var/www# rmmod soundcore
ERROR: Module soundcore is in use by snd
root@pcfreak:/var/www# rmmod snd_hda_codec_realtec
ERROR: Module snd_hda_codec_realtec does not exist in /proc/modules
root@pcfreak:/var/www# rmmod snd_hda_intel
root@pcfreak:/var/www# rmmod snd_hda_codec
ERROR: Module snd_hda_codec is in use by snd_hda_codec_realtek
root@pcfreak:/var/www# rmmod snd_hda_codec_realtek
root@pcfreak:/var/www# rmmod snd_hda_codec
root@pcfreak:/var/www# rmmod snd_pcm_oss
root@pcfreak:/var/www# rmmod snd_seq_midi
root@pcfreak:/var/www# rmmod snd_rawmidi
root@pcfreak:/var/www# rmmod snd_seq_midi_event
root@pcfreak:/var/www# rmmod snd_seq
root@pcfreak:/var/www# rmmod snd_timer
ERROR: Module snd_timer is in use by snd_pcm
root@pcfreak:/var/www# rmmod snd_seq_device
root@pcfreak:/var/www# rmmod snd_pcm
root@pcfreak:/var/www# rmmod snd_seq_device
ERROR: Module snd_seq_device does not exist in /proc/modules
root@pcfreak:/var/www# rmmod snd_hda_intel
ERROR: Module snd_hda_intel does not exist in /proc/modules
rmmod snd_hwdep
root@pcfreak:/var/www# rmmod snd_mixer_oss
root@pcfreak:/var/www# rmmod snd_timer
root@pcfreak:/var/www# rmmod snd
root@pcfreak:/var/www# rmmod soundcore
root@pcfreak:/var/www#

Next step is to permanently disable all (blacklist) on system boot time loaded kernel modules, to do so in file /etc/modprobe.d/snd-bkaclist.conf, put:


blacklist soundcore
blacklist snd
blacklist snd_pcm
blacklist snd_pcsp
blacklist pcspkr

You can do it from shell ‘echo’-ing into file, like so:

# touch /etc/modprobe.d/snd-blacklist.conf
# cd /etc/modprobe.d/
# echo ‘blacklist soundcore’ >> snd-blacklist.conf
# echo ‘blacklist snd’ >> snd-blacklist.conf
# echo ‘blacklist snd_pcm’ >> snd-blacklist.conf
# echo ‘blacklist snd_pcsp’ >> snd-blacklist.conf
# echo ‘blacklist pcspkr’ >> snd-blacklist.conf

Another way is to use a tiny shellscript containing all previously shown rmmod commands and set the script to be executed via /etc/rc.local by adding the rmmod modules script, before exit 0 rc.local line.

Shell script removing my Realtek ICH sound driversis here
If you like to use it download it in /usr/local/bin or somewhere and invoke it via rc.local.
Removing sound blaster kernel support does not impact the overall machine performance, but in terms of security. Having sound driver modules constantly loaded in memory is a point which a possible attacker can use to root the host, so in my view always sound driver support should be removed.
Well that’s it hope this post helps someone 🙂

Fixing strange Debian Linux Squeeze system overloads and Apache Webserver crashes

Friday, October 19th, 2012

For quite some time, my home run server pre-installed with Debian Squeeze Linux has been crashing in a very strange circumstances inside dmesg kernel log and in /var/log/messages on times, when this crashes occur I see errors / warnings spitting not very helpful kernel debug messages like this:


Oct 16 11:32:28 pcfreak kernel: [66657.797930] Pid: 0, comm: swapper Not tainted 2.6.32-5-amd64 #1
Oct 16 11:32:28 pcfreak kernel: [66657.797931] Call Trace:
Oct 16 11:32:28 pcfreak kernel: [66657.797933] [] ? select_nohz_load_balancer+0x94/0x163
Oct 16 11:32:28 pcfreak kernel: [66657.797943] [] ? __report_bad_irq+0x30/0x7d
Oct 16 11:32:28 pcfreak kernel: [66657.797945] [] ? note_interrupt+0x105/0x16e
Oct 16 11:32:28 pcfreak kernel: [66657.797948] [] ? handle_fasteoi_irq+0x93/0xb5
Oct 16 11:32:28 pcfreak kernel: [66657.797952] [] ? handle_irq+0x17/0x1d
Oct 16 11:32:28 pcfreak kernel: [66657.797954] [] ? do_IRQ+0x57/0xb6
Oct 16 11:32:28 pcfreak kernel: [66657.797956] [] ? ret_from_intr+0x0/0x11
Oct 16 11:32:28 pcfreak kernel: [66657.797957] [] ? poll_idle+0x28/0x5b
Oct 16 11:32:28 pcfreak kernel: [66657.797963] [] ? poll_idle+0xa/0x5b
Oct 16 11:32:28 pcfreak kernel: [66657.797965] [] ? cpuidle_idle_call+0x94/0xee
Oct 16 11:32:28 pcfreak kernel: [66657.797968] [] ? cpu_idle+0xa2/0xda
Oct 16 11:32:28 pcfreak kernel: [66657.797971] [] ? early_idt_handler+0x0/0x71
Oct 16 11:32:28 pcfreak kernel: [66657.797974] [] ? start_kernel+0x3dc/0x3e8
Oct 16 11:32:28 pcfreak kernel: [66657.797976] [] ?x86_64_start_kernel+0xf9/0x106

and this:


Oct 16 15:53:14 pcfreak kernel: [82297.972509] apache2 invoked oom-killer: gfp_mask=0x200da, order=0, oom_adj=0
Oct 16 15:53:30 pcfreak kernel: [82297.972513] apache2 cpuset=/ mems_allowed=0
Oct 16 15:53:30 pcfreak kernel: [82297.972515] Pid: 8943, comm: apache2 Not tainted 2.6.32-5-amd64 #1
Oct 16 15:53:30 pcfreak kernel: [82297.972517] Call Trace:
Oct 16 15:53:30 pcfreak kernel: [82297.972523] [] ? oom_kill_process+0x7f/0x23f
Oct 16 15:53:30 pcfreak kernel: [82297.972527] [] ? timekeeping_get_ns+0xe/0x2e
Oct 16 15:53:30 pcfreak kernel: [82297.972529] [] ? __out_of_memory+0x12a/0x141
Oct 16 15:53:30 pcfreak kernel: [82297.972531] [] ? out_of_memory+0x140/0x172
Oct 16 15:53:30 pcfreak kernel: [82297.972534] [] ? __alloc_pages_nodemask+0x4ec/0x5fb
Oct 16 15:53:30 pcfreak kernel: [82297.972538] [] ? do_wp_page+0x386/0x707
Oct 16 15:53:30 pcfreak kernel: [82297.972541] [] ? autoremove_wake_function+0x9/0x2e
Oct 16 15:53:30 pcfreak kernel: [82297.972544] [] ? __wake_up_common+0x44/0x72
Oct 16 15:53:30 pcfreak kernel: [82297.972547] [] ? __wake_up+0x30/0x44
Oct 16 15:53:30 pcfreak kernel: [82297.972549] [] ? handle_mm_fault+0x704/0x80f
Oct 16 15:53:30 pcfreak kernel: [82297.972553] [] ? do_page_fault+0x2e0/0x2fc
Oct 16 15:53:30 pcfreak kernel: [82297.972556] [] ? page_fault+0x25/0x30


Oct 16 18:41:55 pcfreak kernel: [ 6582.554746] Mem-Info:
Oct 16 18:41:55 pcfreak kernel: [ 6582.554747] Node 0 DMA per-cpu:
Oct 16 18:41:55 pcfreak kernel: [ 6582.554751] CPU 0: hi: 0, btch: 1 usd: 0
Oct 16 18:41:55 pcfreak kernel: [ 6582.554753] CPU 1: hi: 0, btch: 1 usd: 0
Oct 16 18:41:55 pcfreak kernel: [ 6582.554755] Node 0 DMA32 per-cpu:
Oct 16 18:41:55 pcfreak kernel: [ 6582.554758] CPU 0: hi: 186, btch: 31 usd: 0
Oct 16 18:41:55 pcfreak kernel: [ 6582.554760] CPU 1: hi: 186, btch: 31 usd: 0
Oct 16 18:41:55 pcfreak kernel: [ 6582.554762] Node 0 Normal per-cpu:
Oct 16 18:41:55 pcfreak kernel: [ 6582.554765] CPU 0: hi: 186, btch: 31 usd: 5
Oct 16 18:41:55 pcfreak kernel: [ 6582.554767] CPU 1: hi: 186, btch: 31 usd: 0
Oct 16 18:41:55 pcfreak kernel: [ 6582.554773] active_anon:1580557 inactive_anon:308231 isolated_anon:9504
Oct 16 18:41:55 pcfreak kernel: [ 6582.554775] active_file:148 inactive_file:220 isolated_file:32
Oct 16 18:41:55 pcfreak kernel: [ 6582.554776] unevictable:0 dirty:5 writeback:494 unstable:0
Oct 16 18:41:55 pcfreak kernel: [ 6582.554777] free:12063 slab_reclaimable:4262 slab_unreclaimable:17553
Oct 16 18:41:55 pcfreak kernel: [ 6582.554778] mapped:148 shmem:43 pagetables:89423 bounce:0
Oct 16 18:41:55 pcfreak kernel: [ 6582.554781] Node 0 DMA free:15880kB min:20kB low:24kB high:28kB active_anon:0kB inactive_anon:0kB active_file:0kB inactive
_file:0kB unevictable:0kB isolated(anon):0kB isolated(file):0kB present:15328kB mlocked:0kB dirty:0kB writeback:0kB mapped:0kB shmem:0kB slab_reclaimable:0kB
slab_unreclaimable:8kB kernel_stack:0kB pagetables:0kB unstable:0kB bounce:0kB writeback_tmp:0kB pages_scanned:0 all_unreclaimable? no
Oct 16 18:41:55 pcfreak kernel: [ 6582.554794] lowmem_reserve[]: 0 2947 7995 7995
Oct 16 18:41:55 pcfreak kernel: [ 6582.554798] Node 0 DMA32 free:24672kB min:4212kB low:5264kB high:6316kB active_anon:2153732kB inactive_anon:538456kB activ
e_file:32kB inactive_file:56kB unevictable:0kB isolated(anon):6912kB isolated(file):0kB present:3017744kB mlocked:0kB dirty:16kB writeback:336kB mapped:184kB
shmem:168kB slab_reclaimable:4400kB slab_unreclaimable:21908kB kernel_stack:1816kB pagetables:131140kB unstable:0kB bounce:0kB writeback_tmp:0kB pages_scann
ed:42 all_unreclaimable? no
Oct 16 18:41:55 pcfreak kernel: [ 6582.554812] lowmem_reserve[]: 0 0 5048 5048
Oct 16 18:41:55 pcfreak kernel: [ 6582.554815] Node 0 Normal free:7700kB min:7216kB low:9020kB high:10824kB active_anon:4168496kB inactive_anon:694468kB acti
ve_file:560kB inactive_file:824kB unevictable:0kB isolated(anon):31104kB isolated(file):128kB present:5169180kB mlocked:0kB dirty:4kB writeback:1640kB mapped
:408kB shmem:4kB slab_reclaimable:12648kB slab_unreclaimable:48296kB kernel_stack:3488kB
pagetables:226552kB unstable:0kB bounce:0kB writeback_tmp:0kB pages_
scanned:224 all_unreclaimable? no
Oct 16 18:41:55 pcfreak kernel: [ 6582.554829] lowmem_reserve[]: 0 0 0 0
Oct 16 18:41:55 pcfreak kernel: [ 6582.554832] Node 0 DMA: 2*4kB 2*8kB 3*16kB 4*32kB 3*64kB 3*128kB 1*256kB 1*512kB 2*1024kB 2*2048kB 2*4096kB = 15880kB
Oct 16 18:41:55 pcfreak kernel: [ 6582.554842] Node 0 DMA32: 114*4kB 73*8kB 273*16kB 256*32kB 85*64kB 10*128kB 1*256kB 0*512kB 0*1024kB 0*2048kB 1*4096kB = 2
4672kB
Oct 16 18:41:55 pcfreak kernel: [ 6582.554852] Node 0 Normal: 867*4kB 103*8kB 7*16kB 13*32kB 7*64kB 1*128kB 1*256kB 0*512kB 0*1024kB 1*2048kB 0*4096kB = 7700
kB
Oct 16 18:41:55 pcfreak kernel: [ 6582.554862] 89702 total pagecache pages
Oct 16 18:41:55 pcfreak kernel: [ 6582.554864] 89257 pages in swap cache
Oct 16 18:41:55 pcfreak kernel: [ 6582.554866] Swap cache stats: add 4155760, delete 4066503, find 618278/801429
Oct 16 18:41:55 pcfreak kernel: [ 6582.554868] Free swap = 0kB
Oct 16 18:41:55 pcfreak kernel: [ 6582.554870] Total swap = 5787636kB
Oct 16 18:41:55 pcfreak kernel: [ 6582.581389] 2096640 pages RAM
Oct 16 18:41:55 pcfreak kernel: [ 6582.581392] 60657 pages reserved
Oct 16 18:41:55 pcfreak kernel: [ 6582.581394] 330845 pages shared
Oct 16 18:41:55 pcfreak kernel: [ 6582.581397] 2012293 pages non-shared

It took, me long time of thinking and pondering what is causing this errors ….
I thought it is due to some failing RAM bank or some kind of conflict URL hardware inconpitability, I had some thoghts that it is possible Hard Disk is failing or have some bad blocks; However as I bought the machine brand new and besides that it is not assembled one PC but brand one Lenovo ThinkEdge, I’ve further thought and investigated if Apache is failing due to some problem with Apache modules. After reviewing all system installed modules, I’ve found php5-suhosin, was installed on the system (probably as a dependency package) to something else I previously installed ??
I don’t have a very positive feedback on some other servers I configured with Apache, whether php5-suhosin was installed so decided to try removing it ….:


# dpkg -r php5-suhosin
.....
# dpkg --purge php5-suhosin

I’ve also lowered down a bit the StartServers and MaxSpareServers (mod_prefork_modules) section in /etc/apache2/apache2.conf:

StartServers there was set to: 700 and MaxSpareServers to 150, I’ve changed the values to read as so:


StartServers 500
MinSpareServers 100
MaxSpareServers 120
MaxClients 1000
MaxRequestsPerChild 10000

Just for info machine is with 8 Gigabytes of Memory and has 1x 2 cores CPU:


# free -m |grep -i 'mem:'
Mem: 7953 7871 81 0 91 753


# cat /proc/cpuinfo |grep -i proces -A 5
processor : 0
vendor_id : GenuineIntel
cpu family : 6
model : 42
model name : Intel(R) Pentium(R) CPU G630 @ 2.70GHz
stepping : 7
--
processor : 1
vendor_id : GenuineIntel
cpu family : 6
model : 42
model name : Intel(R) Pentium(R) CPU G630 @ 2.70GHz
stepping : 7

After that to make module already loaded in system memory by Apache main (parent) process, I restarted Apache as well:


# apache2ctl -k restart

Following that changes – Thanks God! ; I no longer experience the weird errors and Server overloads 😉

Debian Linux how to remove Xorg, Gnome / KDE, GDM and other graphical environment packages from a server

Wednesday, October 17th, 2012

Lets say by mistake you install a package and apt installs as a package dependency a whole bunch of Xorg, GDM GNOME 2 / 3 (desktop environment) along with whole other multitude of meta packages just like, lets say xinit , nautilus, totem, gedit,remmina etc.:
Mistakenly installing a graphical environment happens common (at least in my experience as admin happed many, many times). Often installing GUI by mistake is done on already well configured productive server, serving thousand of HTTP, SQL and Mails daily.
Having a started GDM login on the server takes some from the CPU time and also is extends possibilities for security breach to the server, so as always if something is not used it is better to wipe it off …

Here are some apt-get remove commands which will (COMPLETELY) remove Xserver ( Xorg ), Graphical Login Manager (GDM), GNOME desktop environment and their surrounding stuff:


# apt-get remove xorg
# apt-get remove nautilus-data nautilus-sendto libnautilus-extension1
# apt-get remove desktop-base
# apt-get remove python-gnomedesktop
# apt-get remove gdm3
# apt-get remove totem seahorse remmina gedit-common gconf2 epipha gedit-common gconf-defaults-service xauth
# apt-get remove epiphany-browser-data evolution-webcal gconf2
# apt-get remove nautilus-data nautilus-sendto libnautilus-extension1
# apt-get remove x11-common
# apt-get autoremove --purge gnome*

Here something worthy to mention is in Debian and (its deb based linux erivatives including Ubuntu), there are the so called metapackages. For those who don’t know what a meta-package is?; it is a package linked to a group of packages. Actually the meta package itself is a pre-selected Packages ready to install / remove with apt, aptitude or rest of “intelligent” package management utils available for Debian.
Once a meta-package is installed, all linked package dependencies; be it binaries or libraries as well as the proper configurations are downloaded and installed.

Very useful thing hence is listing all install-able metapackages; to list all available metapackages in Debian Linux use:


# apt-cache search metapackage
....

.....
......

As of time of writing this post there are 276 apt installable metapackages existent on Debian Squeeze 6.0.5 Linux:


# apt-cache search metapackage|wc -l
276

Another more general way to see the basic types of metapackages, installable is via tasksel (tasksel is run and used during initial Debian Installer via install CD);
In tasksel, there are few meta-packages; Actually tasksel is very handy for sysadmins who install new servers :). Here is list of available meta-packs through it:


# tasksel --list-tasks
i web-server Web server
u print-server Print server
i dns-server DNS server
u file-server File server
u mail-server Mail server
u database-server SQL database
i ssh-server SSH server
u laptop Laptop
u manual manual package selection
u desktop Graphical desktop environment
i web-server Web server
u print-server Print server
i dns-server DNS server
u file-server File server
u mail-server Mail server
u database-server SQL database
i ssh-server SSH server
u laptop Laptop
u manual manual package selection

It is possible to also view sub-packages contained within, each of tasksel meta-packs, i.e..:


# tasksel --task-packages desktop
twm
eject
openoffice.org
xserver-xorg-video-all
cups-client
openoffice.org-help-en-us
hp-ppd
avahi-daemon
system-config-printer
openoffice.org-thesaurus-en-us
cpufrequtils
myspell-en-us
xdg-utils
pm-utils
cups
cups-bsd
xorg
iceweasel
xserver-xorg-input-all
hplip
desktop-base
alsa-base
libnss-mdns
browser-plugin-gnash
xterm
anacron
alsa-utils
cups-driver-gutenprint
foo2zjs
hpijs
gimp
menu
kerneloops
openoffice.org-gcj
libgl1-mesa-dri
foomatic-db-engine

Actually using tasksel is much more “intelligent” way to remove GNOME, GDM and Xorg from a server. It will completely wipe out everything previously installed for running Desktop Environment on the host.
To remove desktop environment with tasksel:


# tasksel remove desktop

Ncurses progress bar will appear displaying all removed packages …
In my case, during trying to figure out what packages I need to remove ImageMagick as long as few other packages got removed as dependencies so I had to install them over with:


apt-get install --yes imagemagick libice6 php5-imagick libxvmc1 \
libzbar0 libxt6 libsm6 libxres1 libxtst6 libxvmc1 x-ttcidfont-conf libxxf86dga1

For people who need to remove KDE desktop environment from a host to be used as a server, check out KDE meta-packages:


apt-cache search metapackage|grep -i kde

You can remove all KDE related meta-packs within a bash loop, like so:


for i in $(apt-cache search metapackage|grep -i kde|awk '{ print $1 }'); do \
apt-get remove $i; done

It is also usually good idea, once all packages are removed the RC Remove Candidate deb packagse are removed too – if you don’t know what is RC I suggest you read my previous post here

Removing all rc‘s from system can be done with:


# for i in $(dpkg -l | grep -i '^rc' | awk '{ print $2 }'); do \
dpkg --purge $i; \
done

Though, I tested this if you follow my tutorial be careful, something might break and some essenail package or lib for (your custom) services might be removed. Be careful what is offered to uninstall only approve it if you’re 1000% sure; Please don’t count me responsible if apt- removes something which breaks your productive server 🙂

Debian Linux: dump and migrate identical packages with (dpkg) from server 1 to server 2 /A common sysadmin dpkg package dump mistake

Wednesday, October 17th, 2012

Debian dump and migrate dpkg common mistake, copy migrating deb identical packages between Linux hosts

Over the last years it happened multiple times to me to migrate identical Debian installation (with identical services) hosts, running identical Debian version and identical installed packages and configs in order to move Old (hardware) servers to newer (harware) hosts. I will call for simplicity first system from which migrating “copy from host” and second “copy to host”. Moving exact number of installed packages between “copy host” and “copy to host” systems can probably be done in many ways but I personally prefer using a single method – using dpkg to dump all deb packages list on the system in a file; move this file to “copy to host” and there use a tiny for loop bash (cycle) + dpkg to install all listed packages. Last time I’ve done this is just 2 days ago while I was “Resurrecting” Pc-Freak machine using my l337 h4x0r zk!1lZ and same good old well tested logic 🙂

I used following to dump all packages;


# dpkg -l | awk '{ print $2 }' >> /root/packages_list.txt

This though dumps all deb packages, along with all current installed ones dumps also, package names of debs, which used to some point in time be existent on the system – removed and the belonging package configs were kept on the system (in other words a tiny part of the package left installed on the system, just in case if one needs to install and use package some time in lets say short future).

This keeping of package name configs and skele files in Debian is called in “dpkg language”
(rc – Remove Candidate). While doing operations dpkg package manager marks different packages with different flags, so rc flags are set once the package is apt-get remove-d or dpkg -r packagename is done over a pack.

For unfamiliar with Debian’s dpkg, package system flags, check out man dpkg. Just to give example of rc, here are few packages marked as RC (Remove Candidates):


# dpkg -l |grep -i ^rc|head -n 3
rc acidrip 0.14-0.3 ripping and encoding DVD tool using mplayer and mencoder
rc airsnort 0.2.7e-2 WLAN sniffer
rc airstrike 0.99+1.0pre6a-4 2d dogfight game in the tradition of 'Biplanes' and 'BIP'

The reason, why this package are still “remembered” by dpkg is they were not purged after install- i.e. (dpkg –purge whatever-packagename) was not issued over ’em.

With this said in mind, it is common mistake I make while making a dump of all packages to also dump inside list names of packages mared as RC, e.g.:


# dpkg -l | awk '{ print $2 }' >> /root/packages_list.txt

Later I install often install every packages inside /root/packages_list.txt as for exmp., pointed out in my previous article Debian Linux Squeeze 32 bit i386 to amd64 hell just to later find out I have numerous (daemons), on the old “copy from host” but are installed and ran by dpkg (config scripts) on the 2nd “copy to host ….

Thus to prevent this I recommend people, always think well before doing something (something I often miss).

Thus it is much better to dump only packages obtaining, the ii (dpkg flags).
Here is example of few packages which have ii dpkg package flags:


# dpkg -l | grep -i '^ii' | tail -n 3
ii zip 3.0-3 Archiver for .zip files
ii zlib1g 1:1.2.3.4.dfsg-3 compression library - runtime
ii zlib1g-dev 1:1.2.3.4.dfsg-3 compression library - development

Probably other people just like me, did same mistake as me to dump all ever available package names on the system and later ended up in same situation, where have to remove packages and stop services from running on system boot …

Thus the “correct” way to dump only installed and configured ones debs having the II system flags is by:


# dpkg -l | grep -i '^ii' | awk '{ print $2 }' >> /root/only_installed_deb_packages_list.txt

Then the rest of package copy from “copy from host” machine 1 to “copy to host” 2-nd machine is to be done by uploading /root/only_installed_deb_packages_list.txt to 2nd host with ftp, sftp, scp whatever transfer proto and running on copy to host:


for i in $(cat /root/only_installed_deb_packages_list.txt); do
apt-get install --reinstall $i; done
.

Generally this will make programs on copy host, be on copy to host.
Enjoy 🙂

Pc-Freak 2 days Downtime / Debian Linux Squeeze 32 bit i386 to amd64 hell / Expression of my great Thanks to Alex and my Sister

Tuesday, October 16th, 2012

Debian upgrade Squeeze Linux from 32 to 64 problems, don't try do it except you have physical access !!!

Recently for some UNKNOWN to ME reasons New Pc-Freak computer hardware crashed 2 times over last 2 weeks time, this was completely unexpected especially after the huge hardware upgrade of the system. Currently the system is equipped with 8GB of memory a a nice Dual Core Intel CPU running on CPU speed of 6 GHZ, however for completely unknown to me reasons it continued experience outages and mysteriously hang ups ….

So far I didn’t have the time to put some few documentary pictures of PC hardware on which this blog and the the rest of sites and shell access is running so I will use this post to do this as well:

Below I include a picture for sake of History preservation 🙂 of Old Pc-Freak hardware running on IBM ThinkCentre (1GB Memory, 3Ghz Intel CPU and 80 GB HDD):
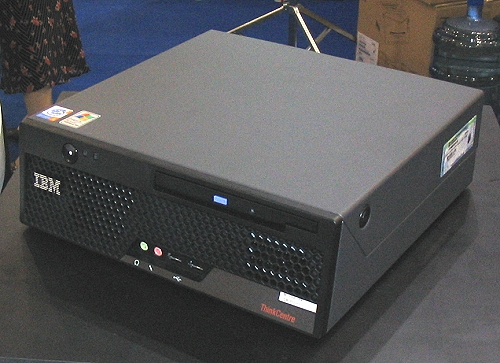
IBM Desktop ThinkCentre old pc-freak hardware server PC

The old FreeBSD powered Pc-Freak IBM ThinkCentre

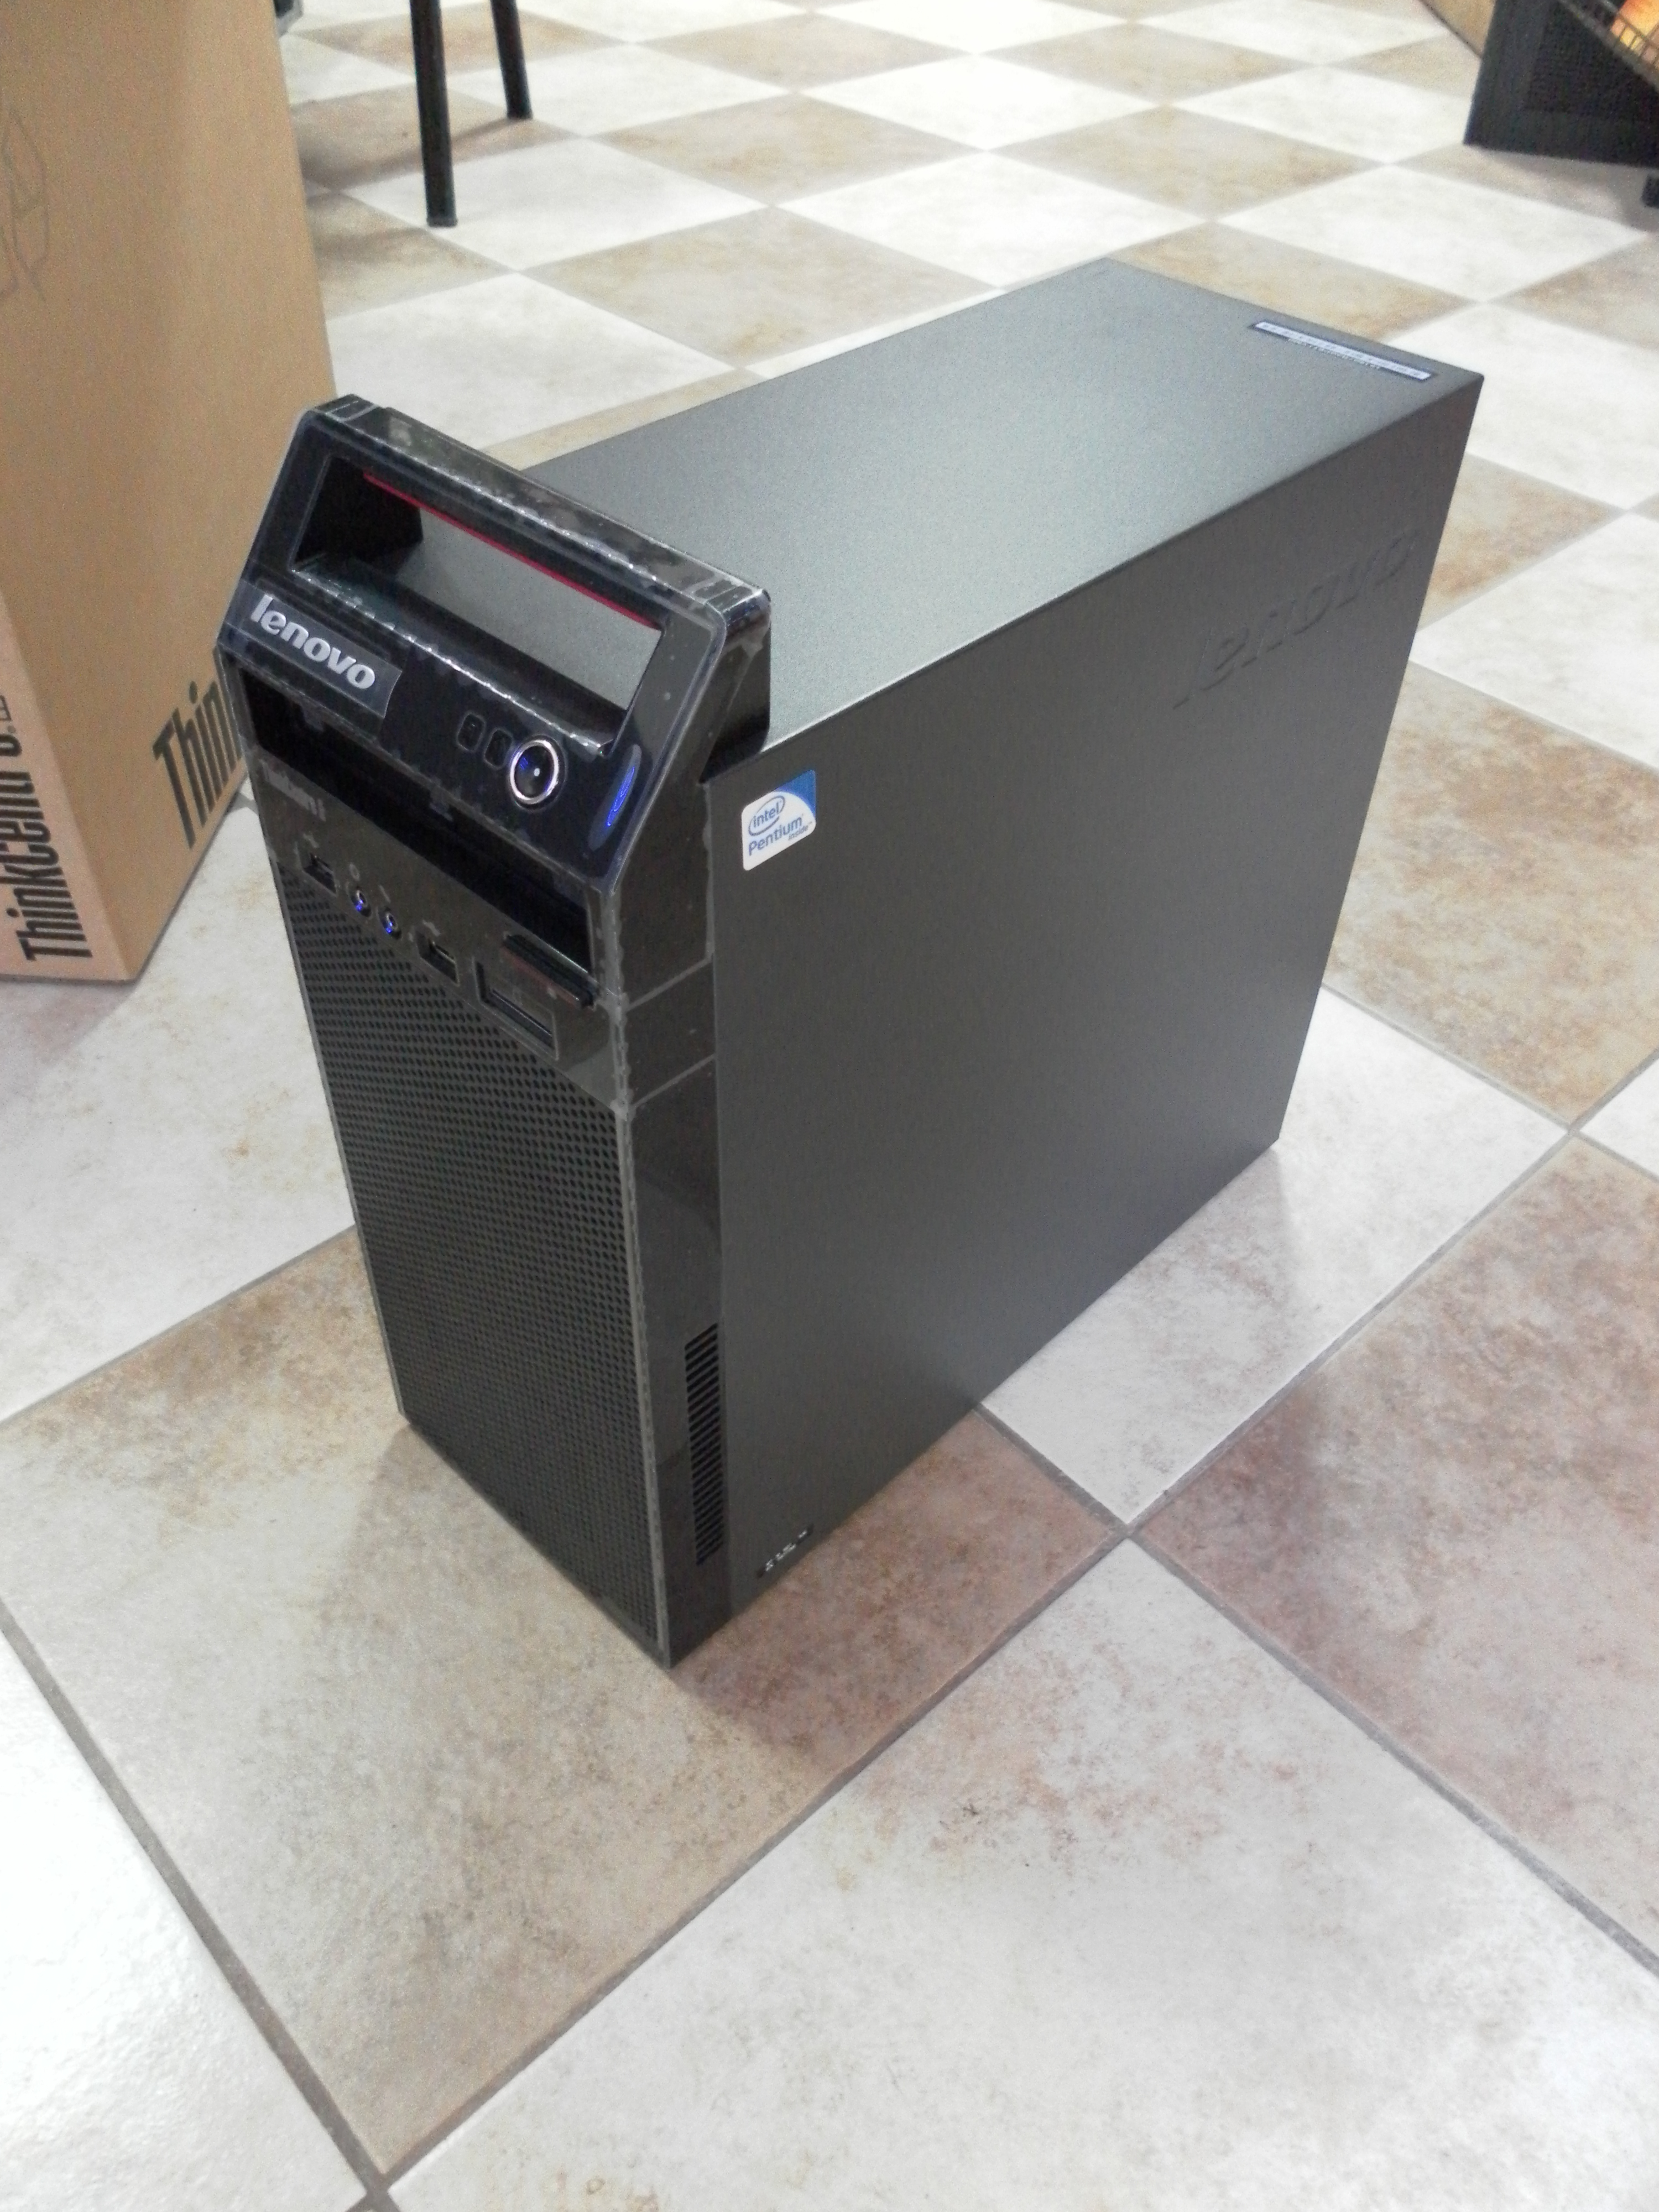
Here are 2 photos of new hardware host running on Lenovo ThinCentre Edge:
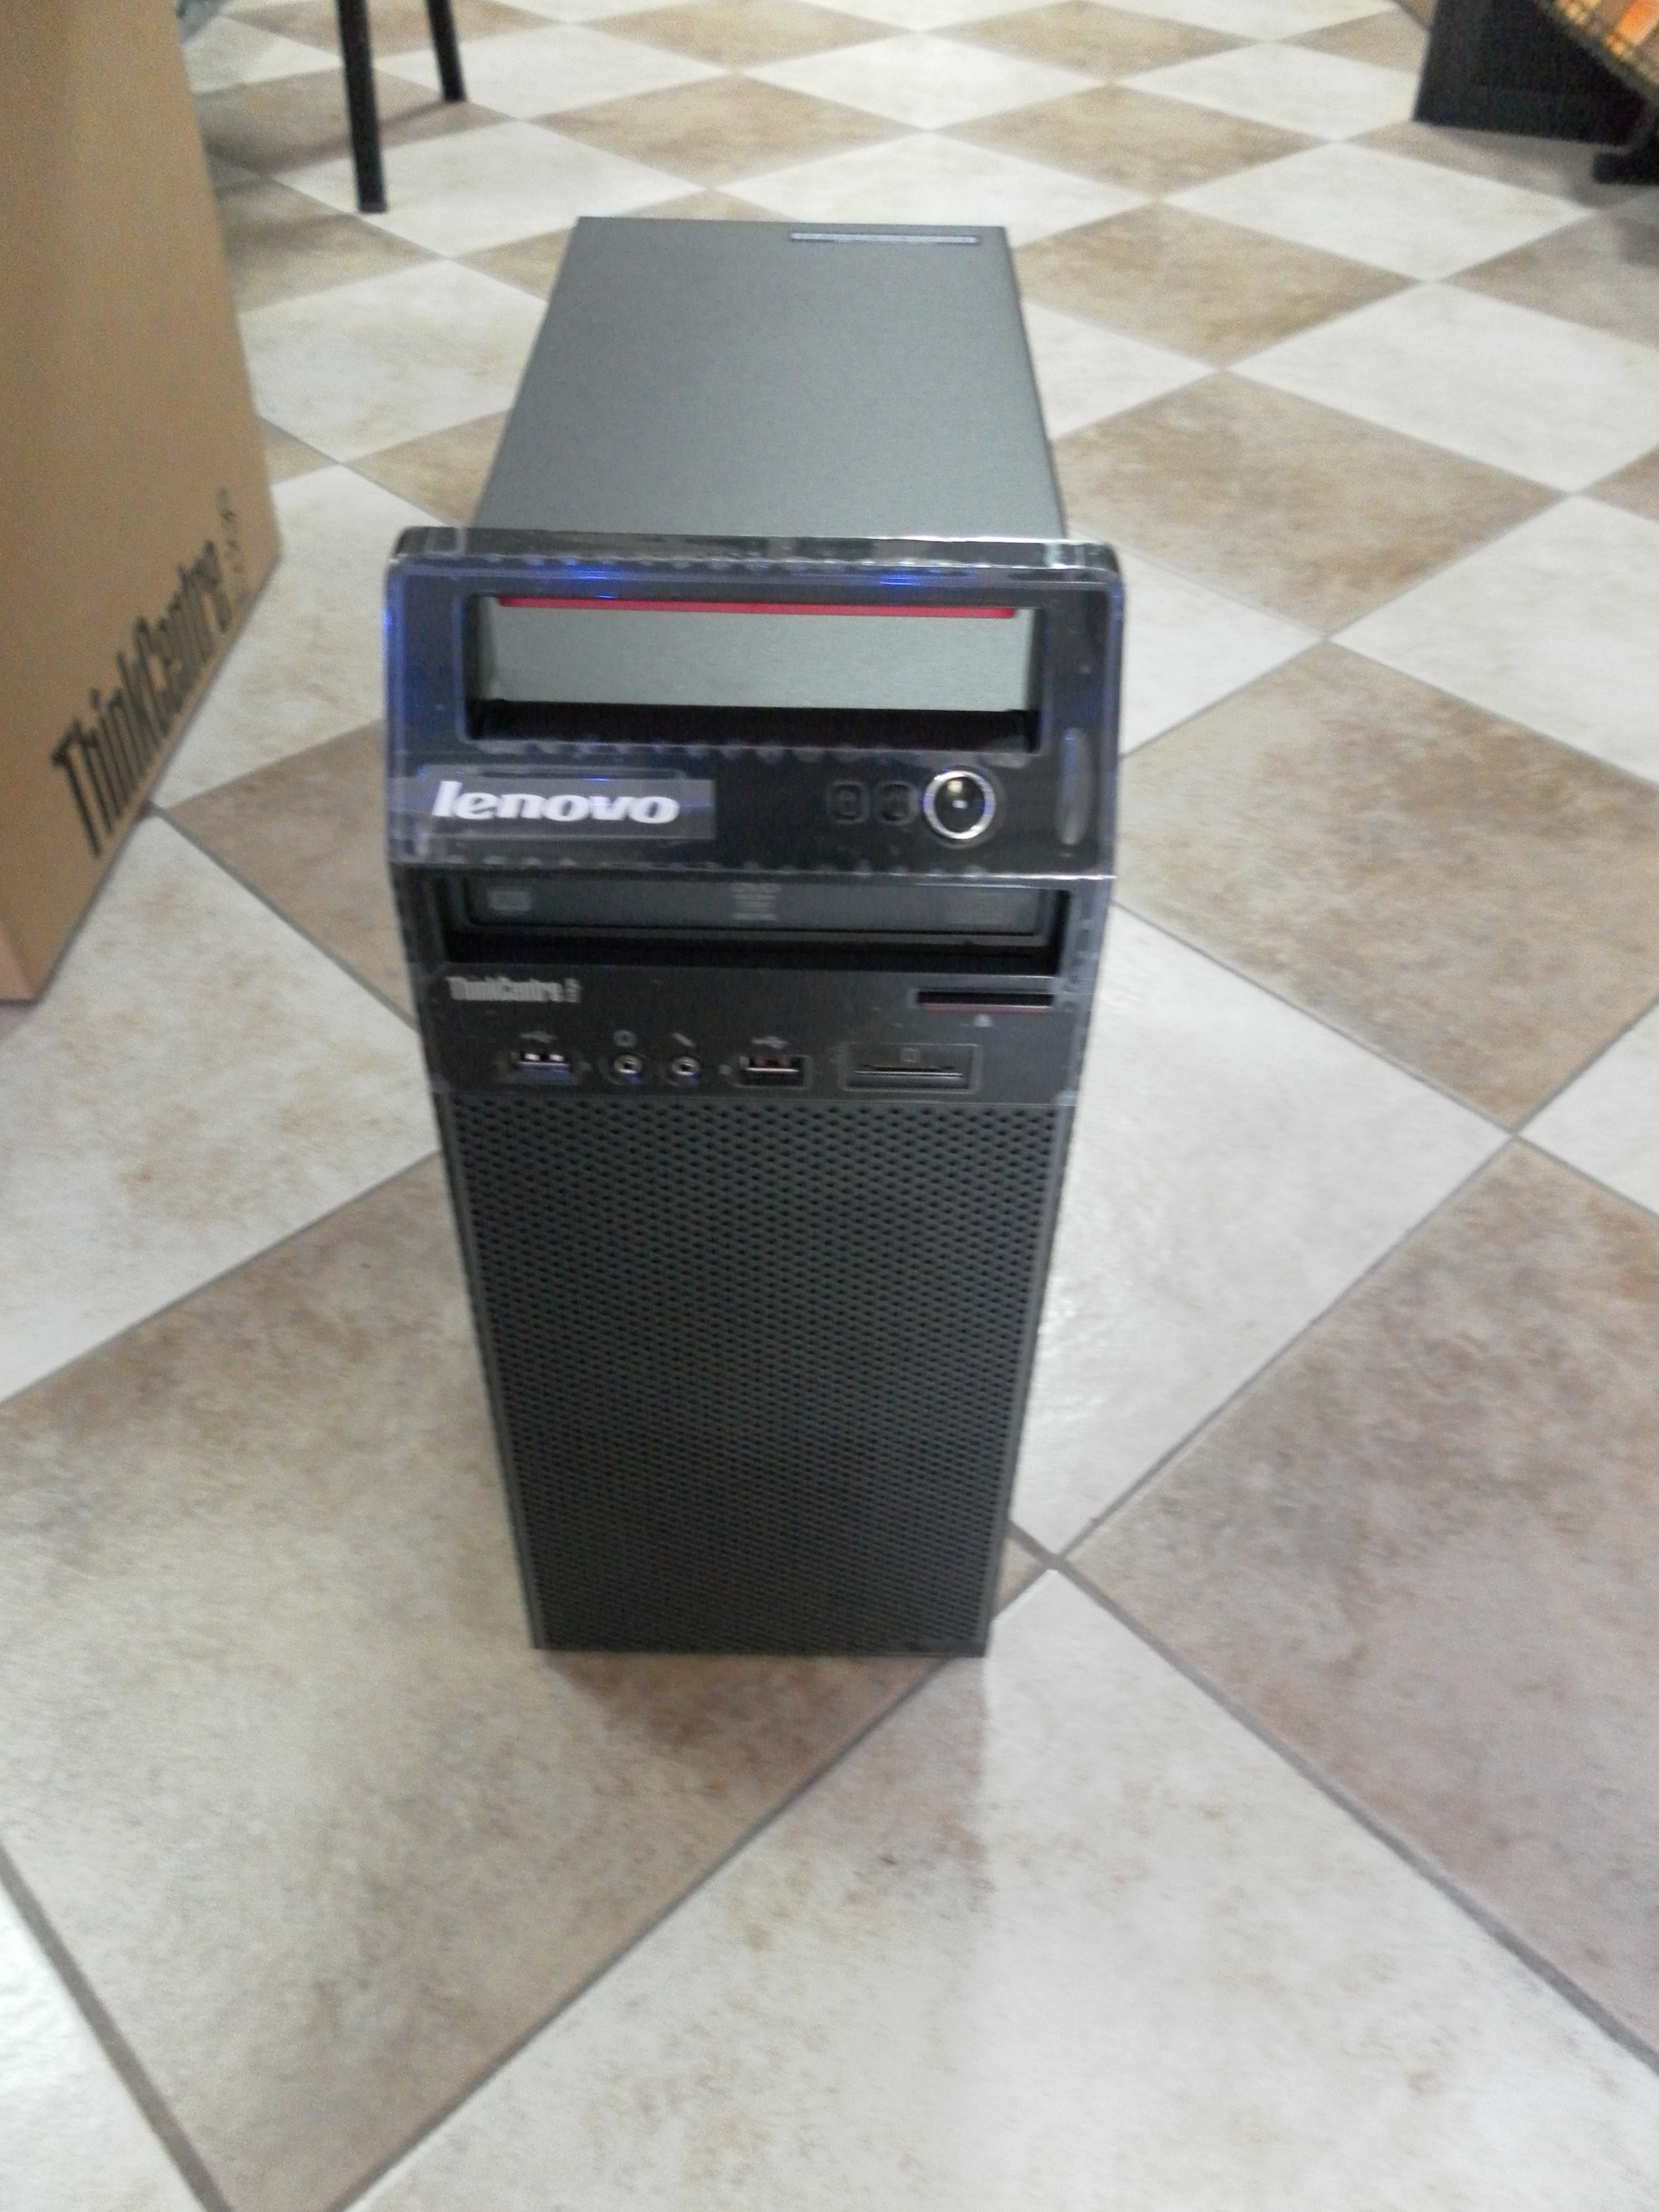
New Pc-Freak host hardware lenovo ThinkEdge Photo
New Pc-Freak host hardware Lenovo ThinkEdge Camera Photo
My guess was those unsual “freezes” were caused due to momentum overloads of WebServer or MySQL db.
Actually the Linux Squeeze installed was “stupidly” installed with a 32 bit Debian Linux (by me). I did that stupidity, just few weeks ago, when I moved every data content (SQL, Apache config, Qmail accounts, Shell accounts etc. etc.) from old Pc-Freak computer to the new purchased one.

After finding out I have improperly installed (being in a hurry) – 32 Bit system, I’ve Upgrade only the system 32 bit kernel hich doesn’t support well more than 4GB to an amd64 one supporting up to 64GB of memory – if interested I’ve prior blogged on this here.
Thanks to my dear friend Alexander (who in this case should have a title similar to Alexander the Great – for he did great and not let me down being there in such a difficult moment for me spending from his personal time helping me bringing up Pc-Freak.Net. To find a bit more about Alex you might check his personal home page hosted on www.pc-freak.net too here 🙂
I don’t exaggerate, really Alex did a lot for me and this is maybe the 10th time I disturb him over the last 2 years, so I owe him a lot ! Alex – I really owe you a lot bro – thanks for your great efforts; thanks for going home 3 times for just to days, thanks for recording Rescue CDs, staying at home until 2 A.M. and really thanks for all!!

Just to mention again, to let me via Secure Shell, Alex burned and booted for me Debian Linux Rescue Live CD downloaded from linke here.

This time I messed my tiny little home hosted server, very very badly!!! Those of you who might read my blog or have SSH accounts on Pc-Freak.NET, already should have figured out Pc-Freak.net was down for about 2 days time (48 HOURS!!!!).

The exact “official” downtime period was:

Saturday OCTOBER 13!!!( from around 16:00 o’clock – I’m not fatalist but this 13th was really a harsh date) until Monday 15-th of Oct (14:00h) ….

I’m completely in charge and responsible for the 2 days down time, and honestly I had one of my worst life days, so far. The whole SHIT story occurred after I attempted to do a 32 bit (i386) to AMD64 (64 bit) system packages deb binary upgrade; host is installed to run Debian Squeeze 6.0.5 ….; Note to make here is Officially according to documentation package binary upgrades from 32 bit to 64 arch Debian Linux are not possible!. Official debian.org documentation recommended for 32 bit to 64 packs update (back up all system existent data) and do a clean CD install / re-install, over the old installed 32 bit version. However ignoring the official documentation, being unwise and stubborn, I decided to try to anyways upgrading using those Dutch person guide … !!!

I’ve literally followed above Dutch guy, steps and instead of succeeding 64 bit update, after few of the steps outlined in his article the node completely (libc – library to which all libraries are linked) broke up. Then trying to fix those amd64 libc, I tried re-installing coreutils package part of base-files – basis libs and bins deb;
I’ve followed few tutorials (found on the next instructing on the 32bit to 64 bit upgrade), combined chunks from them, reloaded libc in a live system !!! (DON’T TRY THAT EVER!); then by mistake during update deleted coreutils package!!!, leaving myself without even essential command tools like /bin/ls , /bin/cp etc. etc. ….. And finally very much (in my fashion) to make the mess complete I decided to restart the system in those state without /bin/ls and all essential /bins ….
Instead of making things better I made the system completely un-bootable 🙁

Well to conclude it, here I am once again I stupid enough not to follow the System Administrator Golden Rule of Thumb:

IF SOMETHING WORKS DON’T TOUCH IT !!!!!!!!! EVER !!!!, cause of my stubbornness I screw it up all so badly.
I should really take some moral from this event, as similar stories has happened to me long time ago on few Fedora Linux hosts on productive Web servers, and I went through all this upgrades nightmare but apparently learned nothing from it. My personal moral out of the story is I NEVER LEARN FROM MY MISTAKES!!! PFFF …

I haven’t had days like this in which I was totally down, for a very long time, really I fell in severe desperation and even depressed, after un-abling to access in any way Pc-Freak.NET, I even thought it will be un-fixable forever and I will loose all data on the host and this deeply saddened me.
Here is good time to Give thanks to Svetlana (Sveta) (A lovely kind, very beautiful Belarusian lady 🙂 who supported me and Sali and his wife Mimi (Meleha) who encouraged and lived up my hardly bearable tempper when angry or/and sad :)). Lastly I have to thank a lot to Happy (Indian Lady whose whose my dear indian brother Jose met me with in Skype earlier. Happy encouraged me in many times of trouble in Skype, giving me wise advices not to take all so serious and be more confied, also most importantly Happy helped me with her prayers …. Probably many others to which I complained about situation helped with their prayers too – Thanks to to God and to all and let God return them blessing according to their good prayers for me !

Some people who know me well might know Pc-Freak.Net Linux host has very sentimental value for me and even though it doesn’t host too much websites (only 38 sites not so important ones ), still it is very bad to know your “work input” which you worked on in your spare time over the last 3 years (including my BLOG – blogging almost every day for last 3 yrs, the public shell SSH access for my Friends, custom Qmail Mail server / POP3 and IMAP services / SQL data etc. might not be lost forever. Or in more positive better scenario could be down for huge period of time like few months until I go home and fix it physically on phys terminal …

All this downtime mess occurred due to my own inability to estimate properly update risks (obviously showing how bad I’m in risk management …). Whole “down time story”” proofed me only, I have a lot to learn in life and worry less about things ….
It also show me how much of an “idol”, one can make some kind of object of daily works as www.pc-freak.net become to me. Good thing is I at least realize my blog has with time, become like an idol to me as I’m mostly busy with it and in a way too much worrying for it makes me fill up in the gap “worshipping an idol” and each Christian knows pretty well, God tells us: “Do not have other Gods besides me”.

I suppose this whole mess was allowed to happen by God’s Great Mercy to show me how weak my faith is, and how often I put my personal interest on top of real important things. Whole situation teached me, once again I easy fall in spirit and despair; hope it is a lesson given to me I will learn from and next time I will be more solid in critical situation …

Here are some of my thoughts on the downtime, as I felt obliged to express them too;

Whole problem severeness (in my mind), would not be so bad if I only had some kind of physical access to System terminal. However as I’m currently in Arnhem Holland 6500 kilometers away from the Server (hosted in Dobrich, Bulgaria), don’t have access to IPKVM or any kind of web management to act on the physical keyboard input, my only option was to ask Alex go home and tell him act as a pro tech support which though I repeat myself I will say again, he did great.
What made this whole downtime mess even worser in my distorted vision on situation is, fact; I don’t know people who are Linux GURUs who can deal with the situation and fix the host without me being physically there, so this even exaggerated me worrying it even more …

I’m relatively poor person and I couldn’t easily afford to buy a flight ticket back to Bulgaria which in best case as I checked today in WizzAir.com’s website would costs me about 90EUR (at best – just one way flight ticket ) to Sofia and then more 17 euro for bus ticket from Sofia to Dobrich; Meaning whole repair costs would be no less than 250 EUR with prince included train ticket expenses to Eindhoven.);

Therefore obviously traveling back to fix it on physical console was not an option.
Some other options I considered (as adviced by Sveta), was hiring some (pro sysadm to fix the host) – here I should say it is almost impossible to find person in Dobrich who has the Linux knowledge to fix the system; moreover Linux system administrators are so expensive these days. Most pro sysadmins will not bother to fix the host if not being paid hour – fee of at least 40 / 50 EUR. Obviously therefore hiring a professional UNIX system adminsitrator to solve my system issues would have cost approximately equal to travel expenses of myself, if going physically to the computer; spend the same 5 hours fixing it and loose at least 2 or 3 more days in traveling back to Holland …..
Also it is good to mention on the system, I’ve done a lot of custom things, which an external hired person will be hardly possible to deal with, without my further interference and even if I had hired someone to fix it I would have spend at least 50 euro on Phone Bills to explain specifics ….

As I was in the shit, I should thanks in this post also (on first place) to MY DEAR SISTER Stanimira !!! My sis was smart enough to call my dear friend Alexander (Alex), who as always didn’t fail me – for a 3rd time BIG THANKS ALEX !, spending time and having desire to help me at this critical times. I instructed him as a first step to try loading on the unbootable linux, the usual boot-able Debian Squeeze Install LiveCD….
So far so good, but unfortunately with this bootable CD, the problem is Debian Setup (Install) CD does not come equipped with SSHD (SSH Server) by default and hence I can’t just get in via Internet;
I’ve searched through the net if there is a way to make the default Debian Install CD1 (.iso) recovery CD to have openssh-server enabled, but couldn’t find anyone explainig how ?? If there is some way and someone reading this post knows it please drop a comment ….

As some might know Debian Setup CD is running as its basis environment busybox; system tools there provided whether choosing boot the Recovery Console are good mostly for installing or re-installing Debian, but doesn’t include any way to allow one to do remote system recovery over SSH connection.

Further on, have instructed Alex, brought up the Network Interfacse on the system with ifconfig using cmds:


# /sbin/ifconfig MY_IP netmask 255.255.255.240
# /sbin/route add default gw MY_GATEWAY_IP;

BTW, I have previously blogged on how to bring network interfaces with ifconfig here
Though the LAN Interfaces were up after that and I could ping ($ ping www.pc-freak.net) this was of not much use, as I couldn’t log in. Neither somehow can access system in a chroot.
I did thoroughfully explained Alex, how to fix the un-chroot-table badly broken (mounted) system. ….
In order to have accessed the system via SSH, after a bit of research I’ve asked Alex to download and boot from the CD Drive Debian Linux based AMD64 Rescue CD available here ….

Using this much better rescue CD than default Debian Install CD1, thanks God, Alex was able to bring up a working sshd server.

To let me access the rescue CD, Alex changed root pass to a trivial one with usual:


# passwd root
....

Then finally I logged in on host via ssh. Since chroot over the mounted /vev/sda1 in /tmp/aaa was impossible due to a missing working /bin/bash – Here just try imagine how messed up this system was!!!, I asked Alex to copy over the basic system files from the Rescue CD with cp copy command within /tmp/aaa/. The commands I asked him to execute to override some of the old messed up Linux files were:


# cp -rpf /lib/* /tmp/aaa/lib
# cp -rpf /usr/lib/* /tmp/aaa/usr/lib
# cp -rpf /lib32/* /tmp/aaa/lib32
# cp -rpf /bin/* /tmp/aaa/bin
# cp -rpf /usr/lib64/* /tmp/aaa/usr/lib64
# cp -rpf /sbin/* /tmp/aaa/sbin
# cp -rpf /usr/sbin/* /tmp/aaa/usr/sbin

After this at least chroot /tmp/aaa worked!! Thanks God!

I also said Alex to try bootstrap to install a base debian system files inside the broken /tmp/aaa, but this didn’t make things better (so I’m not sure if debootstrap helped or made things worse)??. Exact bootstrap command tried on the host was:


# debootstrap --arch amd64 squeeze /tmp/aaa http://ftp.us.debian.org/debian

This command as explained in Debian Wiki Debootstrap section is supposed to download and override basis Linux system with working base bins and libs.

After I logged in over ssh, I’ve entered chroot-ing and following instructions of 2 of my previous articles:

1. How to do proper chroot and recover broken Ubuntu using mount and chrooting

2. How to mount /proc and /dev and in chroot on Linux – for fail system recovery

Next on, after logging in via ssh I chrooted to mounted system;


# mount /dev/sda1 /mnt/aaa
# chroot /mnt/aaa

Inside chrooted environment, I tried running ssh server, listen on separate port 2208 with command:


# /usr/sbin/sshd -p 2208

sshd did not start up but spitted mer error: PRNG is not seeded, after reading a bit online I’ve found others experiencing PRNG is not seeded err in thread here

The PRNG is not seeded error is caused due to a missing /dev/urandom inside the chroot-ed environment:


# ls -al /dev/urandom
ls: cannot access /dev/urandom: No such file or directory

To solve it, one has to create /dev/urandom with mknod command:


# mknod /dev/urandom c 1 9

….

Something else worthy to mention is very helpful post found on noah.org explaining few basic things on apt, aptitude and dpkg which helped me over the whole severe failed dependency apt-get issues experienced inside chroot.

Inside the chroot, I tried using few usual apt-get cmds to solve the multiple appearing broken packages inter-dependency. I tried:


# apt-get update
....
# apt-get --yes upgrade
# apt-get -f install

Even before that apt, package was broken, so I instructed Alex, to download me one from a web link. By mistake I gave him, a Debian Etch apt version instead of Debian Squeze. So using once again dpkg -i apt* after downloading the latest stable apt deb binaries from debian.org, I had to re-install apt-get…

Besides that Alex, had copied a bunch of libraries, straight copied from my notebook running amd64 Debian Squeeze and has to place all this transferred binaries in /mnt/aaa/{lib,usr/lib} in order to solve missing libraries for proper apt-get operation.

As it seemed slightly impossible fix the broken dependencies with apt-get, I first tried fixing failed inter-dependencies using the other automated dependency solver tool (written in perl language) aptitude. I tried with it solving the situation issuing:


# aptitute update
# aptitude safe-upgrade
# aptitude safe-upgrade --full-resolver

No of the above aptitude command options helped anyhow, so
I’ve decided to try the old but gold approach of combining common logic with a bit of shell scripting 🙂
Here is my customly invented approach 🙂 :

1. Inside the chroot, make a dump of all installed deb packages names in a file
2. Outside the chroot straight ssh-ing again to the Rescucd shell, use RescueCD apt-get to only download all amd64 binaries corresponding to dumped packages names
3. Move all downloaded only apt-get binaries from /var/cache/apt/archives to /mnt/aaa/var/cache/apt/archives
4. Inside chroot, run cd to /var/cache/apt/archives/ and use for bash loop to install each package with dpkg -i

Inside Chroot-ed environment chroot /tmp/aaa, dpkg – to dump list of all installed i386 previous packages on broken system:


# dpkg -l|awk '{ print $2 }' >> /mnt/aaa/root/all_deb_packages_list.txt

Thereon, I delete first 5 lines in beginning of file (2 empty lines) and 3 lines with content:


Status=Not/Inst/Conf-files/Unpacked/halF-conf/Half-inst/trig-aWait/Trig-pend
Err?=(none)/Reinst-required
Name

should be deleted.

Onwards outside of chroot-ed env, I downloaded all deb packages corresponding to previous ones in all_deb_packges.txt:


# mkdir /tmp/apt
# cd /tmp/apt
# for i in $(cat /mnt/aaa/root/all_deb_packages.txt; do \
apt-get --download-only install -yy $i \
....
.....
done

In a while after 30 / 40 minutes all amd64 .deb packages were downloaded in rescuecd /var/cache/apt/archives/.
/var/cache/apt/archives/ in LiveCDs is stored in system memory, thanksfully I have 8 Gigabytes of memory on the host so memory was more than enough to store all packs 😉
Once above loop, completed. I copied all debs to /mnt/aaa/var/cache/apt, i.e.:


# cp -vrpf /var/cache/apt/archives/*.deb /mnt/aaa/var/cache/apt/archives/

Then back in the (chroot-ed broken system), in another ssh session chroot /mnt/aaa, I run another shell loop aim-ing to install each copied deb package (below command should run after chroot-ing):


# cd /var/cache/apt/archives
# for i in *.deb; do \
dpkg -i $i
done

I had on the system installed Qmail server which was previously linked against old 32 bit installed libs, so in my case was also necessery rebuild qmail install as well as ucsp-tcp and ucsp-ssl, after rebooting and booting the finally working amd64 libs system (after reboot and proper boot!):

a) to Re-compile qmail base binaries, had to issue:


# qmailctl stop
# cd /usr/src/qmail
# make clean
# make man
# make setup check

b) to re-compile ucspi-tcp and ucspi-ssl:


# rm -rf /packages/ucspi-ssl-0.70.2/
#mkdir /packages
# chmod 1755 /packages
# cd /tmp
# tar -zxvf /downloads/ucspi-ssl-0.70.2.tar.gz
....
# mv /tmp/host/superscript.com/net/ucspi-ssl-0.70.2/ /packages
# cd /packages/ucspi-ssl-0.70.2/
# rm -rf /tmp/host/
# sed -i 's/local\///' src/conf-tcpbin
# sed -i 's/usr\/local/etc/' src/conf-cadir
# sed -i 's/usr\/local\/ssl\/pem/etc\/ssl/' src/conf-dhfile
# openssl dhparam -check -text -5 1024 -out /etc/ssl/dh1024.pem

Then had to stop temporary daemontools service, through commenting line in /etc/inittab:


# SV:123456:respawn:/usr/bin/svscanboot


# init q

After that remove commented line:


SV:123456:respawn:/usr/bin/svscanboot

and consequentually install ucsp-{tcp,ssl}:


# cd /packages/ucspi-ssl-0.70.2/
# package/compile
# package/rts
# package/install

c) Rebuild Courier-Imap and CourierImapSSL

As I have custom compiled Courier-IMAP and Courier-IMAPSSL it was necessery to rebuild Courier-imaps following steps earlier explained in this article

I have on the system running DjbDNS as local caching server so I had to also re-install djbdns, re-compiling it from source

Finally after restart the system booted OKAY!! Thanks God!!!!!! 🙂
Further on to check the boot-ed system runs 64 bit architecture dpkg should be used
To check if the system architecture is 64 now 64 bit, there is a command dpkg-architecture, as I learned from superuser.com forums thread here


root@pcfreak:~# dpkg-architecture -qDEB_HOST_ARCH
amd64

One more thing, which helped me a lot during the whole system recovery was main Debian deb HTTP repositories ftp.us.debian.org/debian/pool/ , I’ve downloaded apt (amd64 Squeeze) version and few other packages from there.
Hope this article helps someone who end up in 32 to 64 bit debian arch upgrade. Enjoy 🙂

How to install Awstats Apache weblog statistics on Debian Squeeze GNU Linux

Monday, October 8th, 2012

I like using Webalizer to keep an eye in web of my access.log, however since the information it shows is a bit chaotic and much less than one in Awstats statistics, I decided to install awstats. I haven’t installed awstats for a long time so I have no exact memory how I previously did it and hence run quick search too see if there is information on specifics concerning Debian Squeeze. I did not find any specific article and therefore decided to write this short one to document how awstats install is done on Debian Squeeze Linux.

1. Installing awstats deb package

There is already a deb package so no need to hunt for specific perl CPAN modules and manually fulfill dependencies.

Installation is as straight as any other deb package:


debian:~# apt-get install --yes awstats
...

2. Change basic awstats.conf configurations to make it properly working

First thing to do immediately after install is to set the primary SiteDomain= for which Awstats will process site statistics.

For that in the beginning (first line) of /etc/awstats/awstats.conf add directive:


SiteDomain="www.your-domain-name.com"

Substitution www.your-domain-name.com with whatever your primary domain will be.

Next in /etc/awstats/awstats.conf change value for DNSLookup. By default DNSLookup is 1, which means each of the IP request in /var/log/apache2/access.log is attempted be resolved via separate DNS request; Most IP Addresses that have quieried Apache webserver however miss proper PTR DNS record and hence attempts to be resolved fail after 10 to 20 seconds.
The overall result of this is processing execution of /var/log/apache2/access.log takes hours in case access.log is >100MB or so. This slow processing slowness is due to failed DNS requests. Besides that it does useless hundreds of queries to DNS servers which take up bandwidth for nothing …

To prevent this I disabled immediately DNSLookup right after install by substituting


DNSLookup=1

with:


DNSLookup=0

Other thing is by default Awstats is set to use LogFormat=4. As you can read in awstats.conf (Comments section) 4 stands for:


# 4 - Apache or Squid native common log format (NCSA common/CLF log format)

However in Debian Linux Apache2 default config is done in a way that Apache keeps logged requests formatted in combined (not in common log

Here is LogFormat directive extracted from /etc/apache2/apache2.conf:


LogFormat "%v:%p %h %l %u %t \"%r\" %>s %O \"%{Referer}i\" \"%{User-Agent}i\"" vhost_combined
LogFormat "%h %l %u %t \"%r\" %>s %O" common
LogFormat "%{Referer}i -> %U" referer
LogFormat "%{User-agent}i" agent

With that said in awstats.conf to match (combined) Apache set logging change LogFormat to 1:


LogFormat=1

3. Generate manual AWStats access.log statistics for first time

You will have to run as superuser following cmd:


debian:~# /usr/lib/cgi-bin/awstats.pl -config=/etc/awstats/awstats.conf
Create/Update database for config "/etc/awstats/awstats.conf" by AWStats version 6.95 (build 1.943)
From data in log file "/var/log/apache2/access.log"...
Phase 1 : First bypass old records, searching new record...
Searching new records from beginning of log file...
Phase 2 : Now process new records (Flush history on disk after 20000 hosts)...
Flush history file on disk (unique url reach flush limit of 5000)
Jumped lines in file: 0
Parsed lines in file: 602983
Found 8 dropped records,
Found 5 corrupted records,
Found 0 old records,
Found 602970 new qualified records.

4. Access awstats statistics in Web Browser

Once the command execution completes, open in Epiphany, Firefox or whatever browser you like URL:


http://www.your-domain-name.com/cgi-bin//awstats.pl?config

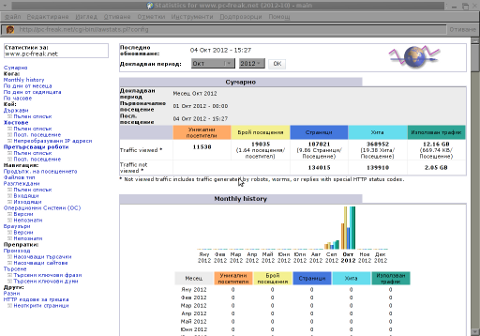
If all is okay you should see some numbers on Unique Visitors like in below browser screenshot:

Screenshot Awstats example Statistics for www.pc-freak.net in Epiphany

5. Set ScriptAlias for easier awstats access path and set directory permissions

In /etc/apache2/apache2.conf or in VirtualHost file, lets say /etc/apache2/sites-enabled/your-domain-name.com, place following configs:


Alias /awstats-icon/ /usr/share/awstats/icon/
ScriptAlias /awstats/ /usr/lib/cgi-bin/

Options None
AllowOverride None
Order allow,deny
Allow from all

For new configs to take effect as usual Apache should be restarted:


debian:~# /etc/init.d/apache2 restart
....

From now on Awstats can be accessed via the much easier to remember access URL:


http://your-domain-name.com/awstats/awstats.pl

6. Protecting Awstats statistics with Apache HTACCESS password

It is a must to protect awstats statistics with password via .htaccess and htpasswd

a.) Use htpasswd to generate user/pass:


linux:~# htpasswd -c /etc/apache2/awstats.passwd admin
New password:
Re-type new password:
Adding password for user admin

b.) Create /usr/lib/cgi-bin/.htaccess with following content:


linux:~# vim /usr/lib/cgi-bin/.htaccess

AuthType Basic
AuthUserFile /etc/apache2/awstats.passwd
AuthGroupFile /dev/null
AuthName "Please Enter Password to access AWstat"
AuthType Basic
Require valid-user

7. Set awstats to generate statistics via daily cron job:

awstats binary deb automatically installs a cron job in /etc/cron.d/awstats:


linux:~# cat /etc/cron.d/awstats
*/10 * * * * www-data [ -x /usr/share/awstats/tools/update.sh ] && /usr/share/awstats/tools/update.sh
# Generate static reports:
10 03 * * * www-data [ -x /usr/share/awstats/tools/buildstatic.sh ] && /usr/share/awstats/tools/buildstatic.sh

I prefer not to use it but use a custom root cron job. To stop /etc/cron.d/awstats from executing I move it to /root:


mv /etc/cron.d/awstats /root

Then I set a new root user cron job to process Apache access.log. The reason I use root user crontab, instead of Apache’s www-data is with www-data user, /var/log/apache2/access.log is unreadable ,…


linux:~# crontab -u root -e
8,18,27,38,48,59 * * * * [ -x /usr/lib/cgi-bin/awstats.pl -a -f /etc/awstats/awstats.conf -a -r /var/log/apache2/access.log ] && /usr/lib/cgi-bin/awstats.pl -config=awstats -update >/dev/null

This cron makes awstats web statistics be refreshed every our in minutes 8,18,27,38,48,59.

That’s it. Enjoy 🙂