Posts Tagged ‘apache’

All Debian Linux package repository apt sources.list file for Debian versions 6, 7, 8, 9, 10, 11 and 12

Friday, May 31st, 2024

debian-package-management-repositories-for-all-distributions

If you have to administrate legacy Debian servers, that keeps hanging either for historical reasons or just because you didn't have time to upgrade it up to latest versions, machines that are hanging in the hangar or a mid office building Old server room, doing nothing but simply NAT (Network Address Translation), Proxying, serving  traffic via Squid / Haproxy / Apache / Varnish or Nginx server but you still want to have the possibility to extend the OS even though it is out of date / End of Life reached and out of support as well as perhaps full of security holes, but due to its unvisibility on the Internet hanging in a Demilitarized network the machine stayed on the Local (DMZ)-ed network and still for example you need to install simple things for administration reasons locally on the machine, for example nmap or netcat or some of the network tools for monitoring such as iftop or iptraf etc. you might find out unfortunately that this is not possible anymore, because the configured /etc/apt/sources.list repository mirror is no longer available at its URL. Thus to restore the functioning of apt and apt-get pkg management tools on Debian you need to correct the broken missing package mirrors due to resructurings on the network with a correct ones, originally provided by Debian or eventually if this doesn't work a possible Debian package archive URL. 

In this article, I'll simply provide such URLs you might use to correct your no longer functioning package manager due to package repositoriy unavailibility, below are the URLs (most of which that should be working as of year 2024). To resolve the issues edit and place the correct Debian version you're using.

1. Check the version of the Debian Linux

# cat /etc/debian_version


or use the universal way to check the linux OS, that should be working on almost all Linux distributions

# cat /etc/issue
Debian GNU/Linux 9 \n \l

2. Modify /etc/apt/sources.list and place URL according to Debian distro version

# vim /etc/apt/sources.list


3. Repositories URL list Original and Archived for .deb packages according to Debian distro release
Debian 6 (Wheezy)

Original repostiroes (Not Available and Not working anymore as of year 2024)


Old Archived .deb repository for 6 Squeeze

deb http://archive.debian.org/debian squeeze main
deb http://archive.debian.org/debian squeeze-lts main


​Debian 7 (Wheezy)

Original repostiroes (Not Available and Not working anymore as of year 2024)

Old Archived .deb repository for Jessie (still working as of 2024) :

deb http://archive.debian.org/debian wheezy main contrib non-free
deb http://archive.debian.org/debian-security wheezy/updates main

( Security updates are not provided anymore.)

NOTE:  If you get an error about keyrings, just install it
 

# apt-get install debian-archive-keyring


Debian 8 (Jessie)
Original .deb package repository with non-free included for Debian 8 "Jessie"

deb http://deb.debian.org/debian/ jessie main contrib non-free
deb http://ftp.debian.org/debian/ jessie-updates main contrib
deb http://security.debian.org/ jessie/updates main contrib non-free

Old Archived .deb repository for 8 Jessie (still working as of 2024):

deb http://archive.debian.org/debian/ jessie main non-free contrib
deb-src http://archive.debian.org/debian/ jessie main non-free contrib
deb http://archive.debian.org/debian-security/ jessie/updates main non-free contrib
deb-src http://archive.debian.org/debian-security/ jessie/updates main non-free contrib


# echo "Acquire::Check-Valid-Until false;" | tee -a /etc/apt/apt.conf.d/10-nocheckvalid

# apt-get update

# apt-get update && apt-get upgrade


 If you need backports, first be warned that these are archived and no longer being updated; they may have security bugs or other major issues. They are not supported in any way.

deb http://archive.debian.org/debian/ jessie-backports main


Debian 9 (Stretch)
Original .deb package repository with non-free included for Debian 9 "Stretch":


deb http://deb.debian.org/debian/ stretch main contrib non-free
deb http://deb.debian.org/debian/ stretch-updates main contrib non-free
deb http://security.debian.org/ stretch/updates main contrib non-free

Archived old repository .deb for Stretch :

deb http://archive.debian.org/debian/ stretch main contrib non-free
deb http://archive.debian.org/debian/ stretch-proposed-updates main contrib non-free
deb http://archive.debian.org/debian-security stretch/updates main contrib non-free


Debian 10 (Buster)
Origian repository URL:

deb http://deb.debian.org/debian/ buster main non-free contrib
deb http://deb.debian.org/debian/ buster-updates main non-free contrib
deb http://security.debian.org/ buster/updates main non-free contrib


Fixing unworking backports for Debian 10 Buster


Change the /etc/apt/sources.list URL with this one

deb http://archive.debian.org/debian buster-backports main contrib non-free


If you want to list packages installed via the backports repository only, that needs to be replaced with newer versions (if such available from the repository)

# apt list –installed | grep backports
# dpkg –list | grep bpo
# dpkg –list | grep -E '^ii.*bpo.*'

ii  libpopt0:amd64                        1.18-2                         amd64        lib for parsing cmdline parameters
ii  libuutil3linux                        2.0.3-9~bpo10+1                amd64        Solaris userland utility library for Linux
ii  libzfs4linux                          2.0.3-9~bpo10+1                amd64        OpenZFS filesystem library for Linux


Debian 11 (Bullseye)
Origianl repository address:

deb http://deb.debian.org/debian bullseye main contrib non-free
deb http://deb.debian.org/debian bullseye-updates main contrib non-free
deb http://security.debian.org/debian-security bullseye-security main contrib non-free

Debian 12 (Bookworm)
Original Repository :


deb http://deb.debian.org/debian bookworm main contrib non-free-firmware non-free
deb http://deb.debian.org/debian bookworm-updates main contrib non-free-firmware non-free
deb http://security.debian.org/debian-security bookworm-security main contrib non-free-firmware non-free

Add Backports to sources.list

deb http://deb.debian.org/debian bookworm-backports main


Thats all, hopefully that would help some sysadmin out there. Enjoy !

Linux: Howto Disable logging for all VirtualHosts on Apache and NGINX Webservers one liner

Wednesday, July 1st, 2020

disable-apache-nginx-logging-for-all-virtualhosts
Did you happen to administer Apache Webservers or NGINX webservers whose logs start to grow so rapidly that are flooding the disk too quickly?
Well this happens sometimes and it also happens that sometimes you just want to stop logging especially, to offload disk writting.

There is an easy way to disable logging for requests and errors (access_log and error_log usually residing under /var/log/httpd or /var/log/nginx ) for  all configured Virtual Domains with a short one liner, here is how.

Before you start  Create backup of /etc/apache2/sites-enabled / or /etc/nginx to be able to revert back to original config.

# cp -rpf /etc/apache2/sites-enabled/ ~/

# cp -rpf /etc/nginx/ ~/


1. Disable Logging for All  Virtual Domains configured for Apache Webserver

First lets print what the command will do to make sure we don't mess something

# find /home/hipo/sites-enabled/* -exec echo sed -i 's/#*[Cc]ustom[Ll]og/#CustomLog/g' {} \;


You will get some output like

find /home/hipo//sites-enabled/* -exec echo sed -i 's/#*[Cc]ustom[Ll]og/#CustomLog/g' {} \;

find /etc/apache2/sites-enabled/* -exec sed -i 's/#*[Cc]ustom[Ll]og/#CustomLog/g' {} \;
find /etc/apache2/sites-enabled/* -exec sed -i 's/#*[Ee]rror[Ll]og/#ErrorLog/g' {} \;

2. Disable Logging for All configured Virtual Domains for NGINX Webserver
 

find /etc/nginx/sites-enabled/* -exec sed -i 's/#*access_log/#access_log/g' {} \;
find /etc/nginx/sites-enabled/* -exec sed -i 's/#*error_log/#error_log/g' {} \;

f course above substituations that will comment out with '#' occurances from file configs of only default set access_log and error_log / access.log, error.log 
for machines where there is no certain convention on file naming and there are multiple domains in custom produced named log files this won't work.

This one liner was inspired from a friend's daily Martin Petrov. Martin blogged initially about this nice tip for those reading Cyrillic check out mpetrov.net, so. Thanks Marto ! 🙂

Where are Apache log files on my server – Apache log file locations on Debian / Ubuntu / CentOS / Fedora and FreeBSD ?

Tuesday, November 7th, 2017

apache-where-are-httpd-access-log-files

Where are Apache log files on my server?

1. Finding Linux / FreeBSD operating system distribtion and version

Before finding location of Apache log files it is useful to check what is the remote / local Linux operating system version, hence

First thing to do when you login to your remote Linux server is to check what kind of GNU / Linux you're dealing with:

cat /etc/issue
cat /etc/issue.net


In most GNU / Linux distributions should give you enough information about the exact Linux distribution and version remote server is running.

You will get outputs like

# cat /etc/issue
SUSE LINUX Enterprise Server 10.2 Kernel \r (\m), \l

or

# cat /etc/issue
Debian GNU/Linux 8 \n \l

If remote Linux is Fedora look for fedora-release file:

cat /etc/fedora-release Fedora release 7 (Moonshine)

The proposed freedesktop.org standard with the introduction of systemd across all Linux distributions is

/etc/os-release


# cat /etc/os-release
PRETTY_NAME="Debian GNU/Linux 8 (jessie)"
NAME="Debian GNU/Linux"
VERSION_ID="8"
VERSION="8 (jessie)"
ID=debian
HOME_URL="http://www.debian.org/"
SUPPORT_URL="http://www.debian.org/support"
BUG_REPORT_URL="https://bugs.debian.org/"


Once we know what kind of Linux distribution we're dealing with, we can proceed with looking up for standard location of Apache config:

2. Apache config file location for Fedora / CentOS / RHEL and other RPM based distributions

RHEL / Red Hat / CentOS / Fedora Linux Apache access file location
 

/var/log/httpd/access_log


3. Apache config file location for Debian / Ubuntu and other deb based Linux distributions

Debian / Ubuntu Linux Apache access log file location

/var/log/apache2/access.log


4. Apache config file location for FreeBSD

FreeBSD Apache access log file location –

/var/log/httpd-access.log


5. Finding custom Apache access log locations
 

If for some reason the system administrator on the remote server changed default path for each of distributions, you can find custom configured log files through:

a) On Debian / Ubuntu / deb distros:

debian:~# grep CustomLog /etc/apache2/apache2.conf


b) On CentOS / RHEL / Fedora Linux RPM based ones:

[root@centos:  ~]# grep CustomLog /etc/httpd/conf/httpd.conf


c) On FreeBSD OS


freebsd# grep CustomLog /etc/httpd/conf/httpd.conf
 # a CustomLog directive (see below).
    #CustomLog "/var/log/httpd-access.log" common
    CustomLog "/var/log/httpd-access.log" combined

Installing the phpbb forum on Debian (Squeeze/Sid) Linux

Saturday, September 11th, 2010

howto-easily-install-phpbb-on-debian-gnu-linux

I've just installed the phpbb forum on a Debian Linux because we needed a goodquick to install communication media in order to improve our internal communication in a student project in Strategic HR we're developing right now in Arnhem Business School.

Here are the exact steps I followed to have a properly it properly instlled:

1. Install the phpbb3 debian package
This was pretty straight forward:

debian:~# apt-get install phpbb3

At this point of installation I've faced a dpkg-reconfigure phpbb deb package configuration issue:
I was prompted to pass in the credentials for my MySQL password right after I've selected the MySQL as my preferred database back engine.
I've feeded my MySQL root password as well as my preferred forum database name, however the database installation failed because, somehow the configuration procedure tried to connect to my MySQL database with the htcheck user.
I guess this has to be a bug in the package itself or something from my previous installation misconfigured the way the debian database backend configuration was operating.
My assumption is that my previously installed htcheck package or something beforehand I've done right after the htcheck and htcheck-php packages installation.

after the package configuration failed still the package had a status of properly installed when I reviewed it with dpkg
I've thought about trying to manually reconfigure it using the dpkg-reconfigure debian command and I gave it a try like that:

debian:~# dpkg-reconfigure phpbb3

This time along with the other fields I've to fill in the ncurses interface I was prompted for a username before the password prompted appeared.
Logically I tried to fill in the root as it's my global privileges MySQL allowed user.
However that didn't helped at all and again the configuration tried to send the credentials with user htcheck to my MySQL database server.
To deal with the situation I had to approach it in the good old manual way.

2. Manually prepare / create the required phpbb forum database

To completet that connected to the MySQL server with the mysql client and created the proper database like so:

debian:~# mysql -u root -p
mysql>
CREATE database phpbb3forum;

3. Use phpmyadmin or the mysql client command line to create a new user for the phpbb forum

Here since adding up the user using the phpmyadmin was a way easier to do I decided to go that route, anyways using the mysql cli is also an option.

From phpmyadmin It's pretty easy to add a new user and grant privileges to a certain database, to do so navigate to the following database:

Privileges -> -> Add a new user ->

Now type your User name: , Host , Password , Re-type password , also for a Host: you have to choose Local from the drop down menu.

Leave the Database for user field empty as we have already previously created our desired database in step 2 of this article

Now press the "Go" button and the user will get created.

Further after choose the Privileges menu right on the bottom of the page once again, select through the checkbox the username you have just created let's say the previously created user is phpbb3

Go to Action (There is a picture with a man and a pencil on the right side of this button

Scroll down to the page part saying Database-specific privileges and in the field Add privileges on the following database: fill in your previosly created database name in our case it's phpbb3forum

and then press the "Go" button once again.
A page will appear where you will have to select the exact privileges you would like to grant on the specific selected database.
For some simplicity just check all the checkbox to grant as many privilegs to your database as you could.
Then again you will have to press the "Go" button and there you go you should have already configured an username and database ready to go with your new phpbb forum.

4. Create a virtualhost if you would like to have the forum as a subdomain or into a separate domain

If you decide to have the forum on a separate sub-domain or domain as I did you will have to add some kind of Virtualhost into either your Apache configuration /etc/apache2/apache2.conf or into where officially the virutualhosts are laid in Debian Linux in /etc/apache2/sites-available
I've personally created a new file like for instance /etc/apache2/sites-available/mysubdomain.mydomain.com

Here is an example content of the new Virtualhost:

<VirtualHost *>
ServerAdmin admin-email@domain.com
ServerName mysubdomain.domain.com

# Indexes + Directory Root.
DirectoryIndex index.php index.php5 index.htm index.html index.pl index.cgi index.phtml index.jsp index.py index.asp

DocumentRoot /usr/share/phpbb3/www/

# Logfiles
ErrorLog /var/log/apache2/yourdomain/error.log
CustomLog /var/log/apache2/yourdomain/access.log combined
# CustomLog /dev/null combined
<Directory /usr/share/phpbb3/www/>
Options FollowSymLinks MultiViews -Includes ExecCGI
AllowOverride All
Order allow,deny
allow from all </Directory>
</VirtualHost>

In above Virtualhost just change the values for ServerAdmin , ServerName , DocumentRoot , ErrorLog , CustomLog and Directory declaration to adjust it to your situation.

5. Restart the Apache webserver for the new Virtualhost to take affect

debian:~# /etc/init.d/apache2 restart

Now accessing your http://mysubdomain.domain.com should display the installed phpbb3 forum
The default username and password for your forum you can use straight are:

username: admin
password: admin

So far so good you by now have the PHPBB3 forum properly installed and running, however if you try to Register a new user in the forum you will notice that it's impossible because of a terrible ugly message reading:

Sorry but this board is currently unavailable.

I've spend few minutes online to scrape through the forums before I can understand what I have to stop that annoying message from appearing and allow new users to register in the phpbb forum

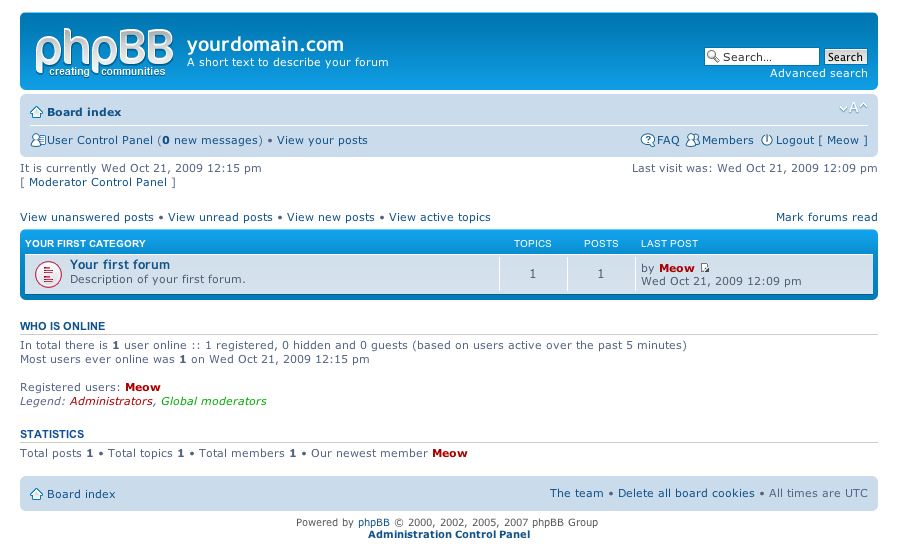
The solution came natural and was a setting that had to be changed with the forum admin account, thus login as admin and look at the bottom of the page, below the text reading Powered by phpBB © 2000, 2002, 2005, 2007 phpBB Group you will notice a link with Administration Control Panel
just press there a whole bunch of menus will appear on the screen allowing you to do numerous things, however what you will have to do is go to
Board Settings -> Disable Board

and change the radio button there to say No

That's all now your forum will be ready to go and your users can freely register and if the server where the forum is installed has an already running mail server, they will receive an emails with a registration data concerning their new registrations in your new phpbb forum.
Cheers and Enjoy your new shiny phpbb Forum 🙂

How to get rid of “PHP Warning: PHP Startup: Unable to load dynamic library ‘/usr/lib/php5/20090626/suhosin.so'” on Debian GNU / Linux

Tuesday, October 25th, 2011

PHP-warning-how-to-fix-warnings-and-errors-php-logo

After a recent new Debian Squeeze Apache+PHP server install and moving a website from another server host running on CentOS 5.7 Linux server, some of the PHP scripts running via crontab started displaying the following annoying PHP Warnings :

debian:~# php /home/website/www/cron/update.php

PHP Warning: PHP Startup: Unable to load dynamic library '/usr/lib/php5/20090626/suhosin.so' – /usr/lib/php5/20090626/suhosin.so: cannot open shared object file: No such file or directory in Unknown on line 0

Obviously the error revealed that PHP cli is not happy that, I've previously removes the suhosin php5-suhosin module from the system.
I wouldn't have removed php5-suhosin if sometimes it doesn't produced some odd experiences with the Apache webserver.
To fix the PHP Warning, I used first grep to see, where exactly the suhosin module gets included in debian's php.ini config files. debian:~# cd /etc/php5
debian:/etc/php5# grep -rli suhosin *
apache2/conf.d/suhosin.ini
cgi/conf.d/suhosin.ini
cli/conf.d/suhosin.ini
conf.d/suhosin.ini

Yeah that's right Debian has three php.ini php config files. One for the php cli/usr/bin/php, another for the Apache webserver loaded php library/usr/lib/apache2/modules/libphp5.so and one for Apache's cgi module/usr/lib/apache2/modules/mod_fcgid.so .

I was too lazy to edit all the above found declarations trying to include the suhosin module in PHP, hence I remembered that probably all this obsolete suhosin module declaration are still present because probably the php5-suhosin package is still not purged from the system.

A quick check with dpkg , further strenthened my assumption as the php5-suhosin module was still hanging around as an (rc – remove candidate);

debian:~# dpkg -l |grep -i suhosin
rc php5-suhosin 0.9.32.1-1 advanced protection module for php5

Hence to remove the obsolete package config and directories completely out of the system and hence solve the PHP Warning I used dpkg –purge, like so:

debian:~# dpkg --purge php5-suhosin
(Reading database ... 76048 files and directories currently installed.)
Removing php5-suhosin ...
Purging configuration files for php5-suhosin ...
Processing triggers for libapache2-mod-php5 ...
Reloading web server config: apache2.

Further on to make sure the PHP Warning is solved I did the cron php script another go and it produced no longer errors:

debian:~# php /home/website/www/cron/update.php
debian:~#

How to disable tidy HTML corrector and validator to output error and warning messages

Sunday, March 18th, 2012

I've noticed in /var/log/apache2/error.log on one of the Debian servers I manage a lot of warnings and errors produced by tidy HTML syntax checker and reformatter program.

There were actually quite plenty frequently appearing messages in the the log like:

...
To learn more about HTML Tidy see http://tidy.sourceforge.net
Please fill bug reports and queries using the "tracker" on the Tidy web site.
Additionally, questions can be sent to html-tidy@w3.org
HTML and CSS specifications are available from http://www.w3.org/
Lobby your company to join W3C, see http://www.w3.org/Consortium
line 1 column 1 - Warning: missing <!DOCTYPE> declaration
line 1 column 1 - Warning: plain text isn't allowed in <head> elements
line 1 column 1 - Info: <head> previously mentioned
line 1 column 1 - Warning: inserting implicit <body>
line 1 column 1 - Warning: inserting missing 'title' element
Info: Document content looks like HTML 3.2
4 warnings, 0 errors were found!
...

I did a quick investigation on where from this messages are logged in error.log, and discovered few .php scripts in one of the websites containing the tidy string.
I used Linux find + grep cmds find in all php files the "tidy "string, like so:

server:~# find . -iname '*.php'-exec grep -rli 'tidy' '{}' ;
find . -iname '*.php' -exec grep -rli 'tidy' '{}' ; ./new_design/modules/index.mod.php
./modules/index.mod.php
./modules/index_1.mod.php
./modules/index1.mod.php

Opening the files, with vim to check about how tidy is invoked, revealed tidy calls like:

exec('/usr/bin/tidy -e -ashtml -utf8 '.$tmp_name,$rett);

As you see the PHP programmers who wrote this website, made a bigtidy mess. Instead of using php5's tidy module, they hard coded tidy external command to be invoked via php's exec(); external tidy command invocation.
This is extremely bad practice, since it spawns the command via a pseudo limited apache shell.
I've notified about the issue, but I don't know when, the external tidy calls will be rewritten.

Until the external tidy invocations are rewritten to use the php tidy module, I decided to at least remove the tidy warnings and errors output.

To remove the warning and error messages I've changed:

exec('/usr/bin/tidy -e -ashtml -utf8 '.$tmp_name,$rett);

exec('/usr/bin/tidy --show-warnings no --show-errors no -q -e -ashtml -utf8 '.$tmp_name,$rett);

The extra switches meaning is like so:

q – instructs tidy to produce quiet output
-e – show only errors and warnings
–show warnings no && –show errors no, completely disable warnings and error output

Onwards tidy no longer logs junk messages in error.log Not logging all this useless warnings and errors has positive effect on overall server performance especially, when the scripts, running /usr/bin/tidy are called as frequently as 1000 times per sec. or more

Apache Benchmarking

Monday, January 14th, 2008

They’re few tools out there which are most common in use to do benchmarking and stess test on webservers. One of them “the most common one”is called “ab” or apache benchmark Check it out here another very common tool is called flood Check it here Flood seems to be the newer and most accurate tool to use for stress testing unfortunately it has one weakness. It only works with configuration file which is in xml format. So every time before you start it you have to generate a new xml file to suite your needs. Also a tool recommended to me in the #apache in the irc.freenode.net network is called “jmeter”, it’s located here . I personally didn’t tested it because it uses Java as a back end. While googling around I also have stucked on this interesting project PHPSPEED although I wasn’t able to test it looks like a promising test suite.END—–

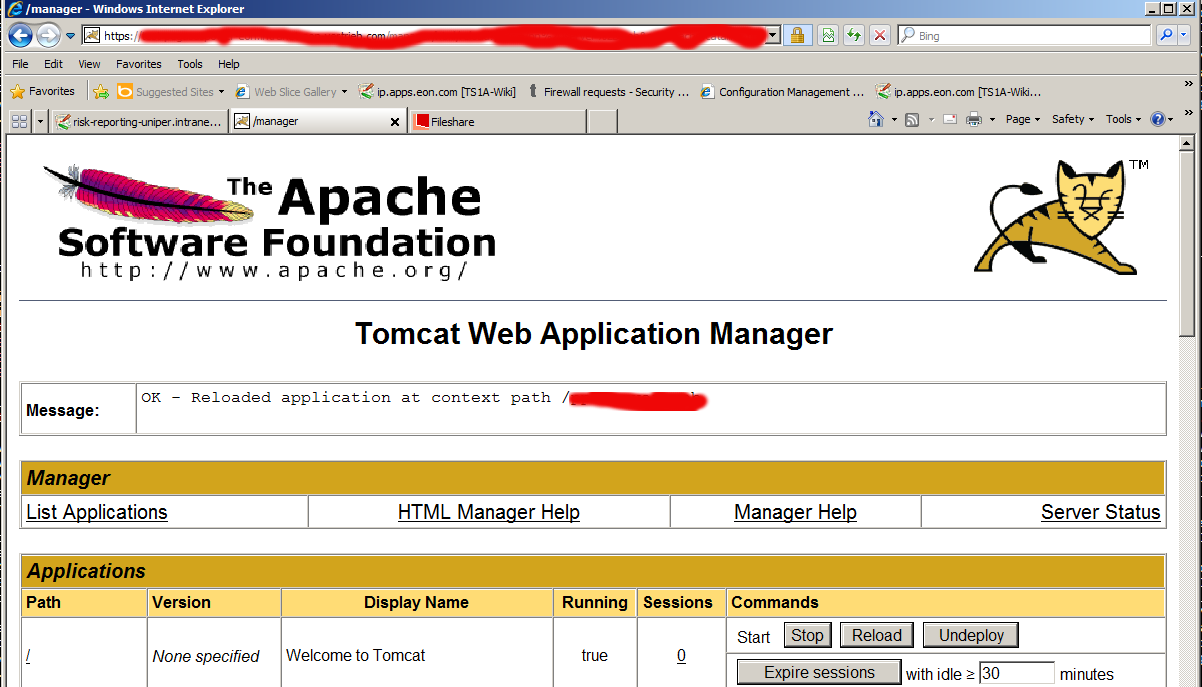
Fix “FAIL – Application at context path /application-name could not be started” deployment error in Tomcat manager

Thursday, October 1st, 2015

tomcat-manager-FAIL-Application-at-context-path-application-name-could-not-be-started-fix-solution-error

While deploying an environment called "Interim" which is pretty much like a testing Java application deployed from a Java EAR (Enterprise Archive) file from within a Tomcat Manager GUI web interface after stopping the application and trying to start it, the developers come across the error:


FAIL – Application at context path /application-name could not be started


The error puzzled me for a while until I checked the catalina.out I've seen a number of thrown Java Eceptions errors like:

Okt 01, 2015 10:48:46 AM org.springframework.web.context.ContextLoader initWebApplicationContext

Schwerwiegend: Context initialization failed

org.springframework.beans.factory.BeanCreationException: Error creating bean with name 'com.sun.xml.ws.transport.http.servlet.SpringBinding#2' defined in ServletContex

t resource [/WEB-INF/pp-server-beans.xml]: Cannot create inner bean ‘(inner bean)’ of type [org.jvnet.jax_ws_commons.spring.SpringService] while setting bean property

'service'; nested exception is org.springframework.beans.factory.BeanCreationException: Error creating bean with name '(inner bean)#33': FactoryBean threw exception on

 object creation; nested exception is java.lang.OutOfMemoryError: PermGen space

I've googled a bit about the error:

"FAIL – Application at context path /application-name could not be started"

and come across this Stackoverflow thread and followed suggested solution to fix web.xml tag closing error but it seems there was no such error in my case, I then also tried solution suggested by this thread (e.g. adding in logging.properties) file:
 

org.apache.catalina.core.ContainerBase.[Catalina].level = INFO
org.apache.catalina.core.ContainerBase.[Catalina].handlers = java.util.logging.ConsoleHandler

unfortunately this helped neither to solve the error when it is tried to be started from tomcat manager.

After asking for help a colleague Kostadin, he pointed me to take a closer look in the error (which is a clear indication) that the reserved space is not enough (see below err):
 

java.lang.OutOfMemoryError: PermGen space

And he pointed me then to Solution (which is to modify the present tomcat setenv.sh) settings which looked like this:

# Heap size settings

export JAVA_OPTS="-Xms2048M -Xmx2048M"


# SSCO test page parameter

export JAVA_OPTS="$JAVA_OPTS -DTS1A_TESTSEITE_CONFIG_PATH=test-myapplication.com"

# Default garbage collector settings

export JAVA_OPTS="$JAVA_OPTS -XX:MaxPermSize=128M"


# Aggressive garbage collector settings.

# Do not use! For testing purposes only!

#export JAVA_OPTS="$JAVA_OPTS -Xss128k -XX:ParallelGCThreads=20 -XX:+UseConcMarkSweepGC -XX:+UseParNewGC -XX:SurvivorRatio=8 -XX:TargetSurvivorRatio=90 -XX:MaxTenuringThreshold=31 -XX:+AggressiveOpts -XX:MaxPermSize=128M"


####### DO NOT CHANGE BELOW HERE #######

# Disable X11 usage

unset DISPLAY

export JAVA_OPTS="$JAVA_OPTS -Djava.awt.headless=true"


# Garbage collection log settings

export JAVA_OPTS="$JAVA_OPTS -verbose:gc -XX:+PrintGCTimeStamps -XX:+PrintGCDetails -Xloggc:/web/tomcat/current/logs/gc.log -XX:-TraceClassUnloading"


# Enable JMX console

export JAVA_OPTS="$JAVA_OPTS -Dcom.sun.management.jmxremote"


The solution is to to add following two options to export JAVA_OPTS (above options):

-XX:PermSize=512m -XX:MaxPermSize=512m


After modifications, my new line within setenv.sh looked like so:


JAVA_OPTS="-Xms2048M -Xmx2048M -XX:PermSize=512m -XX:MaxPermSize=512m"


Finally to make new JAVA_OPTS settings, I've restarted Tomcat with:


cd /web/tomcat/bin/
./shutdown.sh
sleep 5; ./startup.sh


And hooray it works fine thanks God! 🙂