Posts Tagged ‘web content’

Windows 10 install local Proxy server to Save bandwidth on a slow and limited Mobile Phone HotSpot network Shared connections

Wednesday, August 20th, 2025

https://pc-freak.net/images/how-to-use-local-proxy-to-speed-up-internet-speed-connectivity-on-windows-os-with-squid-and-privoxy

If you're running on Internet ISP that is providing via a Internet / Wifi Router device with a 3G / 4G / 5G etc. but your receiving point location is situated somewhere very far in a places like High mountains lets say Rila Mountain or  Alps on a very distant places where Internet coverate of Inetner Service Provider is low or very low but you need still to Work / Play / Entertain on the Net frequently.
Hence you will cenrtainly be looking for a ways to Speed Up / Optimize the Internet connectivity somehow.
You cannot do miracles but certainly the daily operations and a pack up of repeating traffic can be achieved by using installing and using simple local proxy server.

The advantages of using a proxy are even more besides the speed up of Internet connection lines, here is the Pros you get by using the proxy:
 

  • Using Caches frequently accessed content (e.g., images, scripts, web pages).
  • Blocks ads and trackers (reduces bandwidth).
  • Compresses data (if needed)
  • Can serve multiple local devices if needed.
     

To save bandwidth on a slow and limited connectivity Internet router or mobile phone hotspot using Windows 10, you can install a local proxy server that:

Here’s a step-by-step guide to set this up:
 

Install a local caching proxy server on Windows 10 to reduce bandwidth usage over a mobile hotspot.


1. Install Squid (Caching Proxy Server)

Squid is a powerful and widely used open-source caching proxy.

Download Squid for Windows

Download Squid for Windows from:

https://squid.acmeconsulting.it/download (Unofficial, stable build)

or compile it manually (if you're having an own Linux or BSD router that is passing on the traffic)

2. Install Squid Proxy sever on Windows


2.1. Extract or install the downloaded Squid package.


2.2. Install it as a Windows Service

Open Command Prompt (Admin) and run:

C:\\Users\\hipo\\Downloads> squid -i

Initialize cache directories:
 

C:\\Users\\hipo\\Downloads> squid -z


3. Configure Squid Proxy via squid.conf


3.1. Open squid.conf

usually in

C:\\Squid\\etc\\squid\\squid.conf
 

3.2. Edit key lines:  

http_port 3128
cache_dir ufs c:/squid/var/cache 100 16 256
access_log c:/squid/var/logs/access.log
cache_log c:/squid/var/logs/cache.log
maximum_object_size 4096 KB
cache_mem 64 MB


3.3. Allow local access:


acl localnet src 192.168.0.0/16
http_access allow localnet

(Adjust IP ranges according to your network.)


Here's a ready-to-use Squid configuration file optimized for Running on Windows 10:

  • Caching web content to save bandwidth
  • Blocking ads and trackers
  • Allowing local device connections


Location for the squid Config File
 

The Windows squid installer should have setup the Squid proxy by default inside C:\Squid so the full path to squid.conf should be:
Place this as

squid.conf

in:

C:\\Squid\\etc\\squid\\squid.conf


# BASIC CONFIGURATION
http_port 3128
visible_hostname localhost

# CACHE SETTINGS
cache_mem 128 MB
maximum_object_size 4096 KB
maximum_object_size_in_memory 512 KB
cache_dir ufs c:/squid/var/cache 100 16 256
cache_log c:/squid/var/logs/cache.log
access_log c:/squid/var/logs/access.log

# DNS
dns_nameservers 8.8.8.8 1.1.1.1

# ACLs (Access Control Lists)
acl localhost src 127.0.0.1/32
acl localnet src 192.168.0.0/16
acl Safe_ports port 80      # HTTP
acl Safe_ports port 443     # HTTPS
acl Safe_ports port 21      # FTP
acl CONNECT method CONNECT

# BLOCKED DOMAINS (Ad/Tracking)
acl ads dstdomain .doubleclick.net .googlesyndication.com .googleadservices.com
acl ads dstdomain .ads.yahoo.com .adnxs.com .track.adform.net
http_access deny ads

# SECURITY & ACCESS CONTROL
http_access allow localhost
http_access allow localnet
http_access deny !Safe_ports
http_access deny CONNECT !SSL_ports
http_access deny all

# REFRESH PATTERNS (Cache aggressively)
refresh_pattern ^ftp:           1440    20%     10080
refresh_pattern ^gopher:        1440    0%      1440
refresh_pattern -i \.jpg$       10080   90%     43200
refresh_pattern -i \.png$       10080   90%     43200
refresh_pattern -i \.gif$       10080   90%     43200
refresh_pattern -i \.css$       10080   90%     43200
refresh_pattern -i \.js$        10080   90%     43200
refresh_pattern -i \.html$      1440    90%     10080
refresh_pattern .               0       20%     4320

# LOGGING
logfile_rotate 10


4. Start the Squid Win Service from Admin command prompt

C:\Users\hipo> net start squid


5. Test the Proxy


Set the proxy server in your Windows proxy settings:
 

  • Go to Settings > Network & Internet > Proxy
     
  • Enable Manual proxy setup:

Address: 127.0.0.1

Port: 3128

Browse the web — Squid will now cache content locally.

Make sure

C:\Squid\var\cache

and

C:\Squid\var\logs

exist.

You can expand the ad block list by importing public blocklists. Let me know if you want help with that.

To share this proxy with other local devices, ensure they’re on the same network and allowed via ACL.
 

6. Block Ads and Save More Bandwidth with the Proxy

You can modify Squid to:

Block ad domains (using

acl

rules or a blacklist)

Limit download sizes

Restrict background updates or telemetry

Example rule to block a domain:

acl ads dstdomain .doubleclick.net .ads.google.com http_access deny ads


7. Use Aternative lightweight Proxy Privoxy (Lightweight filtering proxy) 

What is Privoxy?

Privoxy is a lightweight, highly customizable proxy server focused on privacy protection, content filtering, and web page optimization.

Unlike caching proxies (like Squid), Privoxy doesn’t store data locally—but it filters and blocks unnecessary traffic before it even reaches your browser.

7.1. Why Use Privoxy to Speed Up Internet?

Here's how Privoxy helps:

Feature Benefit
 Blocks Ads & Banners Reduces page load size and clutter
 Stops Trackers Prevents background data requests
Filters Pop-ups Improves usability and safety
Speeds Up Web Browsing By stripping unwanted content
Low Resource Usage Works on older or low-spec systems


Privoxy is easier to set up than Squid and usually much more simple and fits well if you want something simpler and more light weight and is also great for ad/tracker blocking.
To install and use it it comes to 4 simple steps

  1. Download from: https://www.privoxy.org/

  2. Install and run it.

  3. Configure browser/system to use proxy lets say on:

    127.0.0.1:8118

  4. Customize

    config.txt

    to add block rules.

7.2. Configure Your Web Browser or System Proxy

Set your browser/system to use the local Privoxy proxy:

Proxy address:

127.0.0.1

Port:

8118

On Windows:

Go to Settings > Network & Internet > Proxy

Enable Manual Proxy Setup

Enter:

Address:

127.0.0.1

Port:

8118

Save

7.3: Enable Privoxy Filtering and Blocking Rules

Privoxy comes with built-in rules for:

  • Ad blocking
  • Tracker blocking
  • Cookie management
  • Script filtering

You can customize filters in the configuration files via following configs:

Main config:

C:\\Program Files (x86)\\Privoxy\\config


Action files:

C:\\Program Files (x86)\\Privoxy\\default.action


Filter files:

C:\\Program Files (x86)\\Privoxy\\default.filter


7.4. Example to Block All Ads with Privoxy

Look in

default.action

and ensure these are uncommented:


{ +block }


Or add specific ad server domains:

{ +block{Ad Servers} }
.com.doubleclick.net
.ads.google.com
.adnxs.com


You can further use community-maintained blocklists for stronger Ads filtering.


Privoxy does not compress traffic, so to speed up even further with privoxy you might Compress traffic to do so use ziproxy (the http traffic compressor).

Now all your HTTP traffic is routed through Privoxy and you will notice search engines and repeatingly accessed websites pictures and Internet resources such as css / javscript / htmls etc. will give a boost !

Fiddler – Windows web debugging proxy for any browser – Linux web debugging applications

Thursday, May 29th, 2014

fiddler-web-proxy-debugging-http-https-traffic-in-windows-browser
Earlier I've blogged about helpful web developer or a web hosting system administrator Web Browser plugins . Among the list of useful plugins for debugging sent / received web content on your desktop (HTTPWatchm, HTTPFox, Yslow etc.), I've found another one called Fiddler.

Telerik's Fiddler is a Browser plugin  and a Windows Desktop application to monitor HTTP and HTTPS outbound web traffic and report and provide you with various information useful for:

fiddler-web-debugger-for-browser-and-desktop-for-windows-keep-trac-and-optimize-web-traffic-to-web-servers

  • Performance Testing
  • HTTP / HTTPS
  • Traffic recording
  • Security Testing
  • Web Session Manipulation
  • Encode Decode web traffic
  • Convert strings from / to Base64, Hex, DeflatedSAML etc.
  • Log all URL requests originating from all opened browsers on your Desktop
  • Decrypt / encrypt HTTPS traffic using man in the middle techniques
  • Show tuning details for accessed web pages
     

Fiddler is available to install and use as a desktop application (requires .NET 2) or install as a browser plugin. Perhaps the coolest  Fiddler feature from my perspective is its decrypt / encrypt in Base64 and Hex available from TextWizard menu. The tool is relatively easy to use for those who have experience in web debugging, for novice here is a video explaining tool's basics.

Fiddler doesn't have a Linux build yet but it is possible to run it also on Linux using Mono Framework and a few hacks.

charles-proxy-web-debugging-tool-for-linux-fiddler-alternative
A good native Linux / UNIX alternatives to Fiddler are Nettool, Charles Proxy, Paros Proxy and Web Scarab.

Maldetect – Malware web content file scanner for GNU / Linux – Keep your hosting servers Malware clean

Tuesday, June 4th, 2013

Linux malware detect scan for malware from commandline / Fedora, CentOS, Debian, Ubuntu 

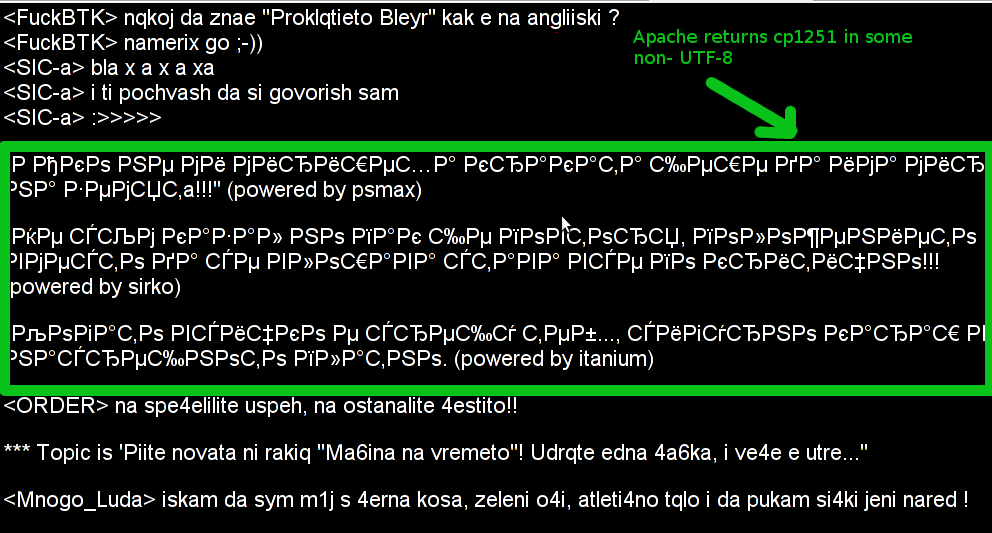
It is so common nowadays that Shared hosting clients upload PHP / Javascript / Ajax scripts carelessly downloaded from somewhere containing malicious features or infected by third party script kiddie tools which replicate themselves after succesfully exploit some common PHP or Perl vulnerability. I'm sure even as time of writing this post probably millions of old un-updated Hosting Linux servers are silent Malware hives.
Therefore For Shared Hosting server servers it is useful to know about the existence of Maldetect – Linux Malware scanner also known under the name LMD.

Linux Maldetect – in what it does is very similar to Windows good Spyware Detect and Clean tool Malware Bytes. LMD uses Spyware definition database collected from network edge Intrusion detection systems who caught Web bugs commonly exploited as well as from custom user submissions of Malicious stuff. Maldetect's database can easily be exported and plays well together with ClamAV antivirus. LMD is very precious and is one of the must have outfits for hosting admins, as its use allows you to determine succesful cracking before system is rootkited and you have to audit for Backdoors or Rookit with rkhunter and chkroot

1. Install Linux MalDetect

LMD is young project so it does not still have a package deb and rpm package builds. Installation is done from source;

debian:~# wget http://www.rfxn.com/downloads/maldetect-current.tar.gz
debian:~# tar -xzf maldetect-current.tar.gz
debian:~# cd maldetect-*
debian:~# ./install.sh

Linux Malware Detect v1.4.1
            (C) 2002-2013, R-fx Networks <proj@r-fx.org>
            (C) 2013, Ryan MacDonald <ryan@r-fx.org>
inotifywait (C) 2007, Rohan McGovern <rohan@mcgovern.id.au>
This program may be freely redistributed under the terms of the GNU GPL

installation completed to /usr/local/maldetect
config file: /usr/local/maldetect/conf.maldet
exec file: /usr/local/maldetect/maldet
exec link: /usr/local/sbin/maldet
exec link: /usr/local/sbin/lmd
cron.daily: /etc/cron.daily/maldet

maldet(3143): {sigup} performing signature update check…
maldet(3143): {sigup} local signature set is version 201205035915
maldet(3143): {sigup} new signature set (2013060217799) available
maldet(3143): {sigup} downloaded http://www.rfxn.com/downloads/md5.dat
maldet(3143): {sigup} downloaded http://www.rfxn.com/downloads/hex.dat
maldet(3143): {sigup} downloaded http://www.rfxn.com/downloads/rfxn.ndb
maldet(3143): {sigup} downloaded http://www.rfxn.com/downloads/rfxn.hdb
maldet(3143): {sigup} downloaded http://www.rfxn.com/downloads/maldet-clean.tgz
maldet(3143): {sigup} signature set update completed
maldet(3143): {sigup} 11509 signatures (9641 MD5 / 1868 HEX)

2. Maldetect configs and binaries

Config is default installed in –  /usr/local/maldetect/conf.maldet
Main executed binary is placed in –  /usr/local/maldetect/maldet
There is a cron skele file placed in /etc/cron.daily/maldet. Its useful to run maldet via cron to check all sites on server and get e-mail reports.

3. Keep maldet up2date

debian:~# maldet --update-ver

Linux Malware Detect v1.4.2
            (C) 2002-2013, R-fx Networks <proj@r-fx.org>
            (C) 2013, Ryan MacDonald <ryan@r-fx.org>
inotifywait (C) 2007, Rohan McGovern <rohan@mcgovern.id.au>
This program may be freely redistributed under the terms of the GNU GPL v2

maldet(3511): {update} checking for available updates...
maldet(3511): {update} hashing install files and checking against server...
maldet(3511): {update} latest version already installed.

4. Update Maldetect definitions manually

Maldetect Malware definitions are designed to auto-update via cron. For people who don't like to waste CPU time and scrape on HDD with cronjob;

debian:~# maldet --update

5. Configure LMD

Tune according to your needs in config (/usr/local/maldetect/conf.maldet)

maxfilesize="768k"
email_alert=1
email_subj="Attention Malware found! Check your server!"
email_addr="hipo@www.pc-freak.net"

6. Scanning for Malware manually

debian:~# maldet -a /home,/var/www/blog,/sbin,/opt
....
Linux Malware Detect v1.4.2
(C) 2002-2013, R-fx Networks <proj@r-fx.org>
(C) 2013, Ryan MacDonald <ryan@r-fx.org>
inotifywait (C) 2007, Rohan McGovern <rohan@mcgovern.id.au>
This program may be freely redistributed under the terms of the GNU GPL v2

maldet(21709): {scan} signatures loaded: 11509 (9641 MD5 / 1868 HEX)
maldet(21709): {scan} building file list for /var/www/blog, this might take awhile...
maldet(21709): {scan} file list completed, found 6814 files...
maldet(21709): {scan} found ClamAV clamscan binary, using as scanner engine...
maldet(21709): {scan} scan of /var/www/blog (6814 files) in progress...

maldet(21709): {scan} scan completed on /var/www/blog: files 6814, malware hits 0, cleaned hits 0
maldet(21709): {scan} scan report saved, to view run: maldet --report 062813-1012.21709
...

As you see from above output  you can view Maldet report by issuing:

debian:~# maldet --report 062813-1012.21709

malware detect scan report for pcfreak:

SCAN ID: 070113-1223.7481

TIME: Jul  1 12:24:20 +0300

PATH: .

TOTAL FILES: 9164

TOTAL HITS: 326

TOTAL CLEANED: 0


NOTE: quarantine is disabled! set quar_hits=1 in conf.maldet or to quarantine results run:

debian:~# maldet -q 070113-1223.7481

FILE HIT LIST:

{CAV}Exploit.SafariCrash-1 : ./osX/dos/1715.html

{CAV}Exploit.PPC : ./osX/local/1973.pl

{CAV}Exploit.Perl.Sadmin : ./solaris/remote/101.pl

{CAV}Exploit.FirefoxCrash : ./multiple/dos/1716.html

{HEX}exp.linux.setuid.13 : ./multiple/local/7129.sh

{CAV}HTML.Shellcode : ./multiple/remote/2082.html


In case some badware is captured by Maldet to quarantine files run suggested command:

debian:~# maldet -q 070113-1223.7481

Linux Malware Detect v1.4.2

            (C) 2002-2013, R-fx Networks <proj@r-fx.org>

            (C) 2013, Ryan MacDonald <ryan@r-fx.org>

inotifywait (C) 2007, Rohan McGovern <rohan@mcgovern.id.au>

This program may be freely redistributed under the terms of the GNU GPL v2


maldet(21341): {quar} malware quarantined from './php/remote/2008.php' to '/usr/local/maldetect/quarantine/2008.php.19608'

maldet(21341): {clean} restoring /usr/local/maldetect/quarantine/2008.php.19608 for cleaning attempt

maldet(21341): {clean} trying to clean ./php/remote/2008.php with base64.inject.unclassed rule

maldet(21341): {clean} rescanning ./php/remote/2008.php for malware hits

maldet(21341): {clean} clean successful on ./php/remote/2008.php


Just for a close up below is a list of common 60 Malwares found on Hosting servers (taken from Maldetect Website);

base64.inject.unclassed     perl.ircbot.xscan
bin.dccserv.irsexxy         perl.mailer.yellsoft
bin.fakeproc.Xnuxer         perl.shell.cbLorD
bin.ircbot.nbot             perl.shell.cgitelnet
bin.ircbot.php3             php.cmdshell.c100
bin.ircbot.unclassed        php.cmdshell.c99
bin.pktflood.ABC123         php.cmdshell.cih
bin.pktflood.osf            php.cmdshell.egyspider
bin.trojan.linuxsmalli      php.cmdshell.fx29
c.ircbot.tsunami            php.cmdshell.ItsmYarD
exp.linux.rstb              php.cmdshell.Ketemu
exp.linux.unclassed         php.cmdshell.N3tshell
exp.setuid0.unclassed       php.cmdshell.r57
gzbase64.inject             php.cmdshell.unclassed
html.phishing.auc61         php.defash.buno
html.phishing.hsbc          php.exe.globals
perl.connback.DataCha0s     php.include.remote
perl.connback.N2            php.ircbot.InsideTeam
perl.cpanel.cpwrap          php.ircbot.lolwut
perl.ircbot.atrixteam       php.ircbot.sniper
perl.ircbot.bRuNo           php.ircbot.vj_denie
perl.ircbot.Clx             php.mailer.10hack
perl.ircbot.devil           php.mailer.bombam
perl.ircbot.fx29            php.mailer.PostMan
perl.ircbot.magnum          php.phishing.AliKay
perl.ircbot.oldwolf         php.phishing.mrbrain
perl.ircbot.putr4XtReme     php.phishing.ReZulT
perl.ircbot.rafflesia       php.pktflood.oey
perl.ircbot.UberCracker     php.shell.rc99
perl.ircbot.xdh             php.shell.shellcomm


How to convert file content encoded in windows-cp1251 charset to UTF-8 (with iconv) to be delivered properly encoded to browsing end clients

Wednesday, May 16th, 2012

windows-cp1251 bulgarian to UTF-8 / Encoding Communication Decoding Communication Funny Picture

I have a bunch of old html files all encoded in the historically obsolete Windows-cp1251. Windows-CP1251 used to be common used 7 years ago and therefore still big portions of the web content in Bulgarian / Russian Cyrillic is still transferred to the end users in this encoding.

This was just before the "UTF-8 revolution", where massively people started using UTF-8,
Well it was clear the specific national country text encoding standards will quickly be moved by to UTF-8 – Universal Encoding format which abbreviation stands for (Unicode Transformation Format).

Though UTF-8 was clear to be "the future", many web developers mostly because of their incompetency or using an old sources of learning how to writen in HTML continued to use windows-cp1251 in HTMLs. I'm even convinced, there are still developers out there who are writting websites for Bulgarian / Russian / Macedonian customers using obsolete encodings …

The smarter developers of those accustomed to windows-cp1251, KOI-8R etc. etc., were using the meta tag to specify the type of charset of the web page content with:

<meta http-equiv="content-type" content="text/html;charset=windows-cp1251">

or

<meta http-equiv="content-type" content="text/html;charset=koi-8r">

Anyhow, still many devs even didn't placed the windows-cp1251 in the head of the HTML …

The result for the system administrator is always a mess – a lot of webpages that are showing like unreadable signs and tons of unhappy customers.
As always the system administrator is considered responsible, for the programmer mistakes :). So instead of programmers fix their bad cooking, the admin has to fix it all!

One quick work around me as admin has applied to failing to display pages in Cyrillic using the Windows-cp1251 character encoding was to force windows-cp1251 as a default encoding for the whole virtualhost or Apache directory with Apache directives like:

<VirtualHost *:80>
ServerAdmin some_user@some_host.com
DocumentRoot /var/www/html
AddDefaultCharset windows-cp1251
ServerName the_host_name.com
ServerAlias www.the_host_name.com
....
....
<Directory>
AddDefaultCharset windows-cp1251
>/Directory>
</VirtualHost>

Though this mostly would, work there are some occasions, where only a particular html files from all the content served by Apache is encoded in windows-cp1251, if most of the content is already written in UTF-8, this could be a big issues as you cannot just change the UTF-8 globally to windows-cp1251, just because few pages are written in archaic encoding….
Since most of the content is displayed to the client by Apache (as prior explained) just fine, only particular htmls lets's ay single.html, single2.html etc. etc. are displayed with some question marks or some non-human readable "hieroglyphs".

Below is a screenshot from two pages returned to my browser in wrongly set htmls charset:

Improper Windows CP1251 encoding with Apache set to serve UTF-8 encoding questiomarks

Improper Windows CP1251 delivered page in UTF-8 browser view

Apache returns cp1251 in some non-UTF8 wrong encoding (webserver improperly served cyrillic encoding)

Improperly served encoding CP1251 delivered by Apache in non-utf-8 encoding

When this kind of issues occur, the only solution is to simply login to the server and use iconv command to convert all files returning unreadable content from whatever the non UTF-8 encoding is lets say in my case Bulgarian typeset of cp1251 to UTF-8

Here is how the iconv command to convert between windows-cp1251 to utf-8 the two sample files named single1.html and single2.html

server:/web# /usr/bin/iconv -f WINDOWS-1251 -t UTF-8 single1.html > single1.html.utf8
server:/web# mv single1.html single1.html.bak;
server:/web# mv single1.html.utf8 single1.html
server:/web# /usr/bin/iconv -f WINDOWS-1251 -t UTF-8 single2.html > single2.html.utf8
server:/web# mv single2.html single2.html.bak;
server:/web# mv single2.html.utf8 single2.html

I always, make copies of the original cp1251 encoded files (as you see mv single1.html single1.html.bak), because if something goes wrong with convertion I can easily revert back.

If there are 10 files with consequential numbers naming they can be converted using a short for loop, like so:

server:/web# for i $(seq 1 10); do
/usr/bin/iconv -f WINDOWS-1251 -t UTF-8 single$i.html > single$i.html.utf8;mv single$i.html single$i.html.bak
mv single$i.html.utf8 single$i.html
done

Just as earlier mentioned if single1.html, single2.html … has in the html <head>:

<meta http-equiv="Content-Type" content="text/html; charset=windows-1251">

You should open, each of the files in question and wipe out the line either by hand or use sed to wipe it in one loop if it has to be done for lets say 10 files named (single{1..10})

server:/web# for i in $(seq 1 10); do
sed '/<meta http-equiv="Content-Type" content="text\/html; charset=windows-1251>/d' single$i.txt > single$i.txt.new;
mv single$i.txt single$i.txt.bak;
mv single$i.txt.new single$i.txt

Well now,

How to find out all programs bandwidth use with (nethogs) top like utility on Linux

Friday, September 30th, 2011

Just run across across a super nice top like, program for system administrators, its called nethogs and is definitely entering my “l337” admin outfit next to tools like iftop, nettop, ettercap, darkstat htop, iotop etc.

nethogs is ultra easy to use, to get immediately in console statistics about running processes UPLOAD and DOWNLOAD bandwidth consumption just run it:

linux:~# nethogs

Nethogs screenshot on Linux Server with Nginx
Nethogs running on Debian GNU/Linux serving static web content with Nginx

If you need to check what program is using what amount of network bandwidth, you will definitely love this tool. Having information of bandwidth consumption is also viewable partially with iftop, however iftop is unable to track the bandwidth consumption to each process using the network thus it seems nethogs is unique at what it does.

Nethogs supports IPv4 and IPv6 as well as supports network traffic over ppp. The tool is available via package repositories for Debian GNU/Lenny 5 and Debian Squeeze 6.

To install Nethogs on CentOS and Fedora distributions, you will have to install it from source. On CentOS 5.7, latest nethogs which as of time of writting this article is 0.8.0 compiles and installs fine with make && make install commands.

In the manner of thoughts of network bandwidth monitoring, another very handy tool to add extra understanding on what kind of traffic is crossing over a Linux server is jnettop
jnettop shows which hosts/ports is taking up the most network traffic.
It is available for install via apt in Debian 5/6).

Here is a screenshot on jnettop in action:

Jnettop check network traffic in console

To install jnettop on latest Fedoras / CentOS / Slackware Linux it has to be download and compiled from source via jnettop’s official wiki page
I’ve tested jnettop install from source on CentOS release 5.7 and it seems to compile just fine using the usual compile commands:

[root@prizebg jnettop-0.13.0]# ./configure
...
[root@prizebg jnettop-0.13.0]# make
...
[root@prizebg jnettop-0.13.0]# make install

If you need to have an idea on the network traffic passing by your Linux server distringuished by tcp/udp/icmp network protocols and services like ssh / ftp / apache, then you will definitely want to take a look at nettop (if of course not familiar with it yet).
Nettop is not provided as a deb package in Debian and Ubuntu, where it is included as rpm for CentOS and presumably Fedora?
Here is a screenshot on nettop network utility in action:

Nettop server traffic division by protocol screenshot
FreeBSD users should be happy to find out that jnettop and nettop are part of the ports tree and the two can be installed straight, however nethogs would not work on FreeBSD, I searched for a utility capable of what Nethogs can, but couldn’t find such.
It seems the only way on FreeBSD to track bandwidth back and from originating process is using a combination of iftop and sockstat utilities. Probably there are other tools which people use to track network traffic to the processes running on a hos and do general network monitoringt, if anyone knows some good tools, please share with me.