Posts Tagged ‘passphrase’

How to connect to WiFi network using console or terminal on GNU / Linux

Wednesday, November 2nd, 2011

iwlist-screenshot-howto-connect-to-wifi-in-text-console-linux-wpasupplicant

Sometimes its useful to connect to Wireless Networks using console . The reasons for that might be many, one possible reason is to be able to debug, Wireless connection failures or simply omit the use of the many available GUI wifi connection programs.

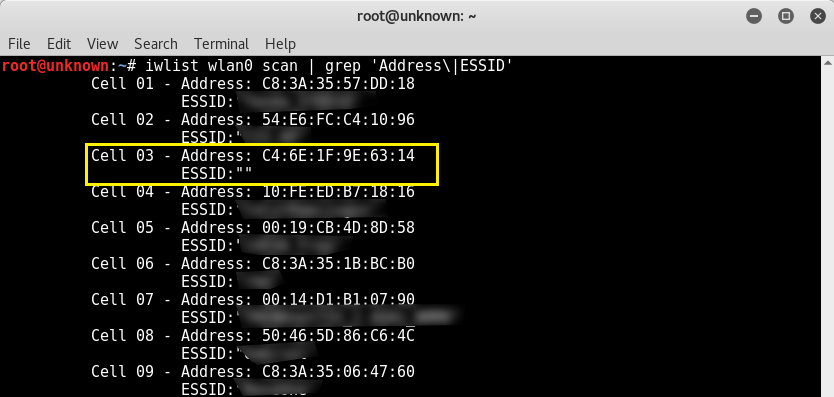
As a first step before connecting in terminal is to look up for the wifi networks available for connection, this is done with cmd:

linux:~# iwlist wlan0 scanning
wlan0 Scan completed :
Cell 01 - Address: 00:24:01:90:8F:38
Channel:7
Frequency:2.442 GHz (Channel 7)
Quality=70/70 Signal level=-39 dBm
Encryption key:on
ESSID:"magdanoz"
Bit Rates:1 Mb/s; 2 Mb/s; 5.5 Mb/s; 11 Mb/s
Bit Rates:6 Mb/s; 9 Mb/s; 12 Mb/s; 48 Mb/s; 18 Mb/s
24 Mb/s; 36 Mb/s; 54 Mb/s
Mode:Master
Extra:tsf=000000034f5c786b
Extra: Last beacon: 68ms ago
IE: Unknown: 00086D616764616E6F7A
IE: Unknown: 010482848B96
IE: Unknown: 030107
IE: Unknown: 32080C1218602430486C
IE: Unknown: CC0700CC020000018A
IE: Unknown: CC0700CC0300000100
IE: WPA Version 1
Group Cipher : TKIP
Pairwise Ciphers (2) : TKIP CCMP
Authentication Suites (1) : PSK
IE: IEEE 802.11i/WPA2 Version 1
Group Cipher : TKIP
Pairwise Ciphers (2) : TKIP CCMP
Authentication Suites (1) : PSK
Cell 02 - Address: 00:1E:2A:60:5E:DC
Channel:1
...

To just list the ESSID s of the wifi networks:

linux:~# iwlist wlan0 scanning|grep -i 'essid'
ESSID:"magdanoz"
ESSID:"default"
ESSID:"todorov"
ESSID:"BTC-ADSL"
ESSID:"Zahari"
ESSID:"Drago"

1. Connecting to Open Wireless Network

Now from the above output it is clear 6 wifi networks are available for connection. The default wifi network from the list is an Open network (e.g. without pass). To connect to it I use cmd:

linux:~# /sbin/iwconfig wlan0 essid 'default'
linux:~# /sbin/iwconfig wlan0 key open

After connected to configure IP, Gateway and DNS from a DHCP server running on the WIFI router, dhclient cmd is used:

linux:~# /sbin/dhclient wlan0

2. Connecting to WEP 64bit / 128bit encrypted network

linux:~# /sbin/iwconfig wlan0 key 1234-5678-9101-1213

3. Connecting to WPA / WPA2 encrypted wifi network

To connect to WPA or WPA2 encrypted network its necessery to have installed wpasupplicant package. The name of the package might vary in different distributions on Debian and Ubuntu, the name of the package is wpasupplicant, on Fedora, CentOS and RHEL the package that has to be in is wpa_supplicant :
After having installed the wpa_supplicant to connect to the network with ESSID name magdanoz , wpa_passphrase is used first:

linux:~# /usr/bin/wpa_passphrase magdanoz Secret_Wifi_Password | tee -a /etc/wpa_supplicant.conf
network={
ssid="magdanoz"
#psk="Secret_Wifi_Password"
psk=6f7590250c4496ff7bf8dd25199ac3bb5a614d4bc069975aa884bcf084da73bc
}

As you see in above command the secret password key is generated printed on the screen and then added to /etc/wpa_supplicant.conf , necessery to establish the wireless connection with wpa_supplicant with cmd:

linux:~# /sbin/wpa_supplicant wpa_supplicant -d wext -i wlan0 -c /etc/wpa_supplicant.conf -B

-d wext instructs wpa_supplicant to use (Linux wireless extension driver).
-B tells wpa_supplicant to background the connection to prevent the wireless connection to drop off, if the console / terminal from which it is launched gets closed.

In case of succesful connection with wpa_supplicant , once again IP, Gateway and DNS is configured fetching the settings from the wifi hotspot dhcp server:

linux:~# /sbin/dhclient wlan0

General information about the wireless network and info related to the established connection can be obtained with /usr/bin/iwconfig :

linux:~# /sbin/iwconfig
lo no wireless extensions.
eth0 no wireless extensions.
wlan0 IEEE 802.11abg ESSID:"magdanoz"
Mode:Managed Frequency:2.442 GHz Access Point: 00:24:00:90:8F:38
Bit Rate=54 Mb/s Tx-Power=15 dBm
Retry long limit:7 RTS thr:off Fragment thr:off
Encryption key:off
Power Management:off
Link Quality=70/70 Signal level=-39 dBm
Rx invalid nwid:0 Rx invalid crypt:0 Rx invalid frag:0
Tx excessive retries:0 Invalid misc:0 Missed beacon:0

To configure the exact channel over which the wireless connection will be established again is done with iwconfig, for instance to configure wlan0 wifi connection established to be on wifi channel 7:

linux:~# /sbin/iwconfig wlan0 channel 11

By default iwconfig is set to automatically set the channel based on connected network ESSID , if the channel is modified to some specific number to revert it back use:

linux:~# /sbin/iwconfig wlan0 channel auto
 

Auto insert password for a Trusted SSL Certificate / Automatically enter password for an SSL Certificate during Apache startup on Debian Lenny

Friday, March 26th, 2010

Protect-Your-Private-SSL_keys-Apache-howto
I've recently installed a Trusted certificate that I've previously protected with a pass-phrase to an Apache server running on top of Debian in order to have a better security.
Now everytime I restart Apache it's pretty annyoing and non-practical at the same time, to enter the Passphrase assigned to the SSL certificate.
It's also dangerous because if Apache crashes and tries to resurrect itself restartig it might not start-up again.
Another unpleasant possible scenario is if for example some of the php code developers tries to change something minor in some Virtualhost and afterwards restarts Apache for the new configurations to take place, again Apache won't bring up and a chaos would emerge.
So I decided to configurate my Apache that it auto fills in the passphrase each time it's being started or restarted.To do that I consulted some online resources and I end up redirected by a blog post to the mod_ssl ssl_reference web page

There is plenty of stuff on that document however in my case all I needed was one directive in /etc/apache2/mods-avalable/mods-available/ssl.conf :

SSLPassPhraseDialog exec:/etc/apache2/mods-available/passphrase

The above code must replace:

SSLPassPhraseDialog builtin

Now last step is to prepare the /etc/apache2/mods-available/passphrase .
Make sure the file has the following content:

#!/bin/sh
echo "yoursecretpassword"

Change above yoursecretpassword with your configured passphrase.
Also please make sure /etc/apache2/mods-availabe/passphrase has proper set permissions. In my case I've set the following permissions for the file:

debian:~# chown www-data:www-data /etc/apache2/mods-available/passphrase
debian:~# chmod 700 /etc/apache2/mods-available/passphrase

That should be it, Restart Apache and make sure Apache is properly loaded without anySSL passphrase prompts.
However you should have in mind that auto enabling passphrase loading on starting in Apache is much more insecure than typing in the password every time you restart Apache. Storing the passphrase in a file is quite insecure compared to if you type it every time Apache starts.
For instance if a hacker breaks into your server he might be able to steal your SSL certificate as well as the passphrase file.
And surely this is something you don't want. Anyways flexibility has a price and if you decide to go the way described, please note the risk first.


If you haven't already added a password to your private key during certficate generation time,

Of course you can add/remove a passphrase at a later time.

    add one (assuming it was an rsa key, else use dsa)

    openssl rsa -des3 -in your.key -out your.encrypted.key
    mv your.encrypted.key your.key

    the -des3 tells openssl to encrypt the key with DES3.

    remove it

    openssl rsa -in your.key -out your.open.key

    you will be asked for your passphrase one last time
    by omitting the -des3 you tell openssl to not encrypt the output.

    mv your.open.key your.key


Howto create a (wildcard / multiple) SSL certificate

Thursday, June 23rd, 2011

Wildcard SSL picture

It’s the first time I’m creating a wildcard ssl certificate. It appeared there is no fundamental difference between generating a normal SSL certificate and generating a wildcard certificate.

The procedure for generating a wildcard SSL certificate is as follows:

1. Generate an SSL key file

server:~# /usr/bin/openssl genrsa -des3 -out domain.com.key 2048
Enter pass phrase for domain.com.key:

Fill in any passphrase you like, the 2048 specifies the encryption level, 2048 is good enough and is the most commonly used as of today.
I’ve saw there is also an option to use 4096 bits encryption but I never tried that myself, I would be glad if somebody can share if he has succesfully established an SSL certificate with 4096 encryption.

2. Generate the certificate request file

server:~# /usr/bin/openssl req -new -key /home/hipo/domain.com.key -out /home/hipo/domain.com.csr

Further on it’s necessery to fill in some info concerning the newly generated webserver SSL, e.g.:

Enter pass phrase for /home/hipo/domain.com.key:
You are about to be asked to enter information that will be incorporated
into your certificate request.
What you are about to enter is what is called a Distinguished Name or a DN.
There are quite a few fields but you can leave some blank
For some fields there will be a default value,
If you enter '.', the field will be left blank.
-----
Country Name (2 letter code) [AU]:
State or Province Name (full name) [Some-State]:
Locality Name (eg, city) []:
Organization Name (eg, company) [Internet Widgits Pty Ltd]:
Organizational Unit Name (eg, section) []:
Common Name (eg, YOUR name) []:
Email Address []:
Please enter the following 'extra' attributes
to be sent with your certificate request
A challenge password []:
An optional company name []:

Fill all the values according to your requirements, the only vital thing here is to fill in a proper Common Name (eg, YOUR name) []:

The Common Name should always be equal to *.domain.com , if something else is typed in the SSL certificate won’t be considered a valid one when placed on the multiple subdomains.

The newly generated domain.com.csr file should be looking something similar to:

server:~# less < domain.com.csr
-----BEGIN CERTIFICATE REQUEST-----
MIIC2jCCAcICAQAwgZQxCzAJBgNVBAYTAkdCMQ8wDQYDVQQIEwZMb25kb24xDzAN
BgNVBAcTBkxvbmRvbjEQMA4GA1UEChMHU2FudHJleDEWMBQGA1UECwwNKi5zYW50
cmV4Lm5ldDEWMBQGA1UEAwwNKi5zYW50cmV4Lm5ldDEhMB8GCSqGSIb3DQEJARYS
bWFzcmF3eXpAeWFob28uY29tMIIBIjANBgkqhkiG9w0BAQEFAAOCAQ8AMIIBCgKC
AQEAlm9NwcQiA+AAVuVIjg8nCCn5nN14C3rSdcRNuE6oFo9E5uhl9yz8YDIg7wNx
FNQsmw0AwMzkao5Qv9yrmHqbht8qqPfG7YpcTiAoAuSaN6Nm25/zYrSu1uRsnc4C
9lINS8Va+n0Jt+CCQmomTKSarJqNfgo3j1ZU/HuOKcCEktIe0eKigMWxFKCM8wLh
CIdj6AwburckW1/ubOGlu2XKdcY5CbFe4cNGyME3rg33ft8b6v/ORWLSBMrt3QGP
bj42uZP6NoLaZCpsquJLeziLkT4rxdArUApdaTaEFrNMnwzGmUK10qmfx8SQodUl
QXmyd+PpQtaglymjIKN0L8Y36QIDAQABoAAwDQYJKoZIhvcNAQEFBQADggEBAIKe
UTXUt7XvaqVOesTmGCuVmv+Lz/GtGOEw+lfCNM4UFB950H975hHKo63YQr9Vqqqn
WlqZ0nXuwbZdfIh3xhTxzUqF/4m00OFQTbM9hwt6dyqLkmcc4J0rnTsvqjPkUsW5
U7iAIB/UIyDYUcAEky3gnokq3MLH42zXBViPM2+g/fkmJA4jaeoHGINbYMuxFh6Z
r2fIgAfGjms+hNaJvINDoBN5y6YUQbeJc+RoXMrG9clrDsUIGfmkTKCkG0BRJ2ki
Sdbm4IZMtQKU/C4a8vxZkFdleGqWeWL1SBtjjAnTtpb0uF+QmOPLcCoKnBwtEUU9
dPJlEzI+TCgAmKhZoXo=
-----END CERTIFICATE REQUEST-----

Next on this BEGIN CERTIFICATE REQUEST will have to be filled in to the certificate issuer website, whether it’s requested, let’s say in GlobeSSL.

Based on the certificate request a valid SSL certificate will be issued by the SSL provider.
Here one important note to make is that if your domain contians some prohibited keywords like, let’s say bank, finance, poker etc., a keywords which might be considered a fraud or forgery then probably the SSL certificate won’t be issued by the SSL issuer and you will have to further contact the SSL cert provider and send them some more information related to the type of business the new website is going to run.
This kind of domain keyword filter, that is implemented by SSL certificate issuer companies is made to protect internet users from possible frauds or scam websites as well as reduce the level of potential dangerous pyramid like businesses that are so modern on the net these days.

Last step before the certificate will be visible in a browser is to set it for a domain name or virtualhost in Apache, lighttpd or whatever webser is used.
As I’m personally using it with Apache webserver, below I’ll describe how to set it in Apache version 2.x.
3. Configure the newly configured SSL certificate to run on Apache virtualhost

Open up the virtualhost file which coresponds to the domain name to be secured with SSL, for example /etc/apache/sites-available/www.domain.com
Within the <Virtualhost> directives place in a code similar to:

SSLEngine on
# domain.com.crt cointains the wildcard SSL certificate generated and obtained by you from RapidSSL
SSLCertificateFile /etc/apache2/ssl/domain.com.pem

Here the file /etc/apache2/ssl/domain.com.pem should contain both the:

—-BEGIN RSA PRIVATE KEY—– issued earlier in step one with openssl command, as well as:

—–BEGIN CERTIFICATE—– which will be issued by the SSL certificate reseller.

Finally it’s necessery that Apache is restarted to load the new configured certificate:

server:~# /etc/init.d/apache2 restart

The above described steps need to be repeated for all the wildcard subdomains which will use the multiple SSL generated certificate and hopefully if all is well tuned, the certificates should start appearing to all the web domain subdomains immediately.