Posts Tagged ‘hipo’

How to turn On or Off Screen Reader ORCA on Linux Desktop enabled by mistype or a kid smash on the keyboard

Wednesday, November 22nd, 2023

orca-screen-reader-communication-services-logo

For those who type quite fast and use Microsoft Windows, its quite common to start the annoying NARRATOR (Windows Speaking Program) by accidently due to mistyping pressing together Windows key + Control + Enter.
This enables Narrator to read stuff on the screen here and there and to turn it off you just have to either Lock the Windows Computer and press again Windows key + Control + Enter to TURN OFF NARRATOR.

Linux does not have a Narrator but have also embedded Eye impairment Assistive Technology called ORCA.

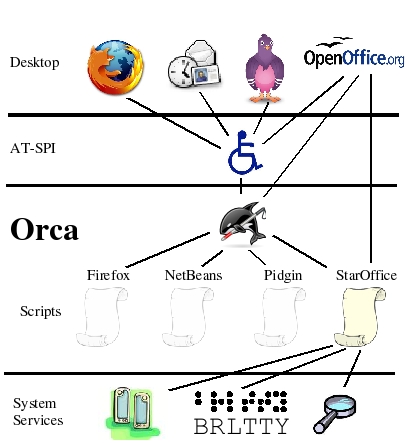
Orca works with applications and toolkits that support the Assistive Technology Service Provider Interface (AT-SPI), which is the primary assistive technology infrastructure for Linux and Solaris. Applications and toolkits supporting the AT-SPI include the GNOME Gtk+ toolkit, the Java platform's Swing toolkit, LibreOffice, Gecko, and WebKitGtk. AT-SPI support for the KDE Qt toolkit is being pursued.

ORCA is nowadays installed and integrated into many if not most Linux distributions out there. Enabling ORCA is not such a common thing on Linux,so today I got quite puzzled once I came back to the computer, leaving the 3.7 months kid near the Keyboard and finding out that I've enabled aloud screen reader that is reading what is every Window / Menu / Program or object I select with the mouse on my Linux MATE Desktop home GUI environment running on top of Debian Linux.

After a quick look up in Google on what exactly is the Linux program that is reading my screen I came across ORCA, which seem to be visible also as running in my process list:

hipo@jeremiah:~/Downloads$ ps -ef|grep -i orca
hipo     1068376    7960 17 18:48 tty2     00:00:01 orca

After a quick check online I found out that,

To start (Turn On ) Orca Screen Reader using the keyboard:

Windows logo button (Super Key) key + Alt + S 

Of course, it is possible to shut off the annoying reader by simply killing it with:

kill -9 orca


Ubuntu users, could start Orca using a mouse and keyboard:

Open the Activities overview and start typing Accessibility.

Click Accessibility to open the panel.

Select thez to open it.

Switch the Screen Reader switch to on.

Problem solved now Screen Reader on Linux is disabled, maybe it is time to disable Orca key press ability to prevent the kid from enabling it again since I don't need it actively thanksfully. with

xmodmap -e 'keycode <value>='

or simply removing the orca package with apt:

# apt remove orca

Analyze disk space usage in Linux / BSD with du / find and filelight /qdirstat / baobab GUI disk usage analyzers to check what takes up your disk space on Unix like OSes

Friday, April 21st, 2023

linux-how-to-find-out-what-files-and-directories-has-occupied-all-your-disk-space-partition-from-console-and-GUI_du-find-filelight-baobab-qdirstat-duff-linux-450x450

If you're a Desktop Linux or BSD UNIX user and your hard disk / external SSD / flash drive etc. space starts to be misteriously disapper due to whatever reaseon such as a crashing applications producing rapidly log error / warning messages leading quickly to filling up the disk or out of a sudden you have some Disk space lost without knowing what kind of data filled up the disk or you're downloading some big sized bittorrent files forgotten in your bittorrent client or complete mirroring a large website and you suddenly get the result of root directory ( / ) getting fully or nearly filled up, then you definitely would want to check out what has disk activity has eaten up your disk space and leaing to OS and Aplication slow responsiveness.

For the Linux regular *nix user finding out what is filling the disk is a trivial task with with find / du -hsc * but as people have different habits to use find and du I'll show you the most common ways I use this two command line tools to identify disk space low issues for the sake of comparison.
Others who have better easier ways to do it are very welcome to share it with me in the comments.
 

1. Finding large files on hard disk with find Linux command tool
 

host:~# find /home -type f -printf "%s\t%p\n" | sort -n | tail -10
2100000000    /home/hipo/Downloads/MameUIfx incl. ROMs/MameUIfx incl. ROMs-6.bin
2100000000    /home/hipo/Downloads/MameUIfx incl. ROMs/MameUIfx incl. ROMs-7.bin
2100000000    /home/hipo/Downloads/MameUIfx incl. ROMs/MameUIfx incl. ROMs-8.bin
2100000000    /home/hipo/Downloads/MameUIfx incl. ROMs/MameUIfx incl. ROMs-9.bin
2815424080    /home/hipo/.thunderbird/h3dasfii.default\
/ImapMail/imap.gmail.com/INBOX
2925584895    /home/hipo/Documents/.git/\
objects/pack/pack-8590b069cad26ac0af7560fb42b51fa9bfe41050.pack
4336918067    /home/hipo/Games/Mames_4GB-compilation-best-arcade-games-of-your-14_04_2021.tar.gz
6109003776    /home/hipo/VirtualBox VMs/CentOS/CentOS.vdi
23599251456    /home/hipo/VirtualBox VMs/Windows 7/Windows 7.vdi
33913044992    /home/hipo/VirtualBox VMs/Windows 10/Windows 10.vdi

I use less rarely find on Desktops and more when I have to do some kind of data usage analysis on servers, of course for my Linux home computer and any other Linux desktop machines, or just a small incomprehensive analysis du cmd is much more appropriate to use.


2. Finding large files Megabyte occupying space files sorted in Megabytes and Gigas with du
 

  • Check main 10 files sorted in megabytes that are hanging in a directory

pcfkreak:~# du -hsc /home/hipo/*|grep 'M\s'|sort -rn|head -n 10
956M    /home/hipo/last_dump1.sql
711M    /home/hipo/hipod
571M    /home/hipo/from-thinkpad_r61
453M    /home/hipo/ultimate-edition-themes
432M    /home/hipo/metasploit-framework
355M    /home/hipo/output-upgrade.txt
333M    /home/hipo/Плот
209M    /home/hipo/Work-New.tar.gz
98M    /home/hipo/DOOM64
90M    /home/hipo/mp3

  • Get 10 top larges files in Gigabytes that are space hungry and eating up your space

pcfkreak:~# du -hsc /home/hipo/*|grep 'G\s'|sort -rn|head -n 10
156G    total
60G    /home/hipo/VirtualBox VMs
37G    /home/hipo/Downloads
18G    /home/hipo/Desktop
11G    /home/hipo/Games
7.4G    /home/hipo/ownCloud
7.1G    /home/hipo/Документи
4.6G    /home/hipo/music
2.9G    /home/hipo/root
2.8G    /home/hipo/Documents


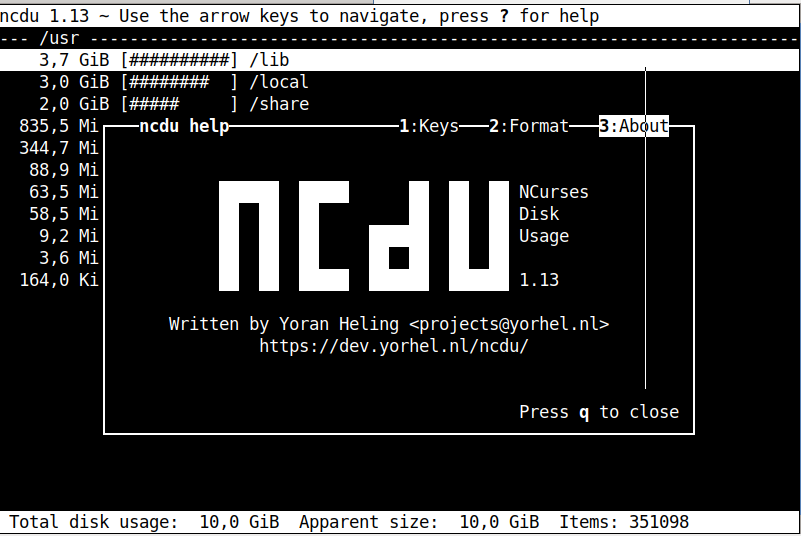
If you want to still work on the console terminal but you don't want to type too much you can use ncdu (ncurses) text tool, install it with

# apt install –yes ncdu


https://www.pc-freak.net/images/ncdu-gnu-linux-debian-screenshot.png

 For the most lazy ones or complete Linux newbies that doesn't want to spend time typing / learing or using text commands or softwares you can also check what has eaten up your full disk space with GUI tools as well.

There are at least 3 tools to use to check in Graphical Interface what has occupied your disk space on Linux / BSD, I'm aware of:

3. Filelight GUI disk usage analysis Linux tool

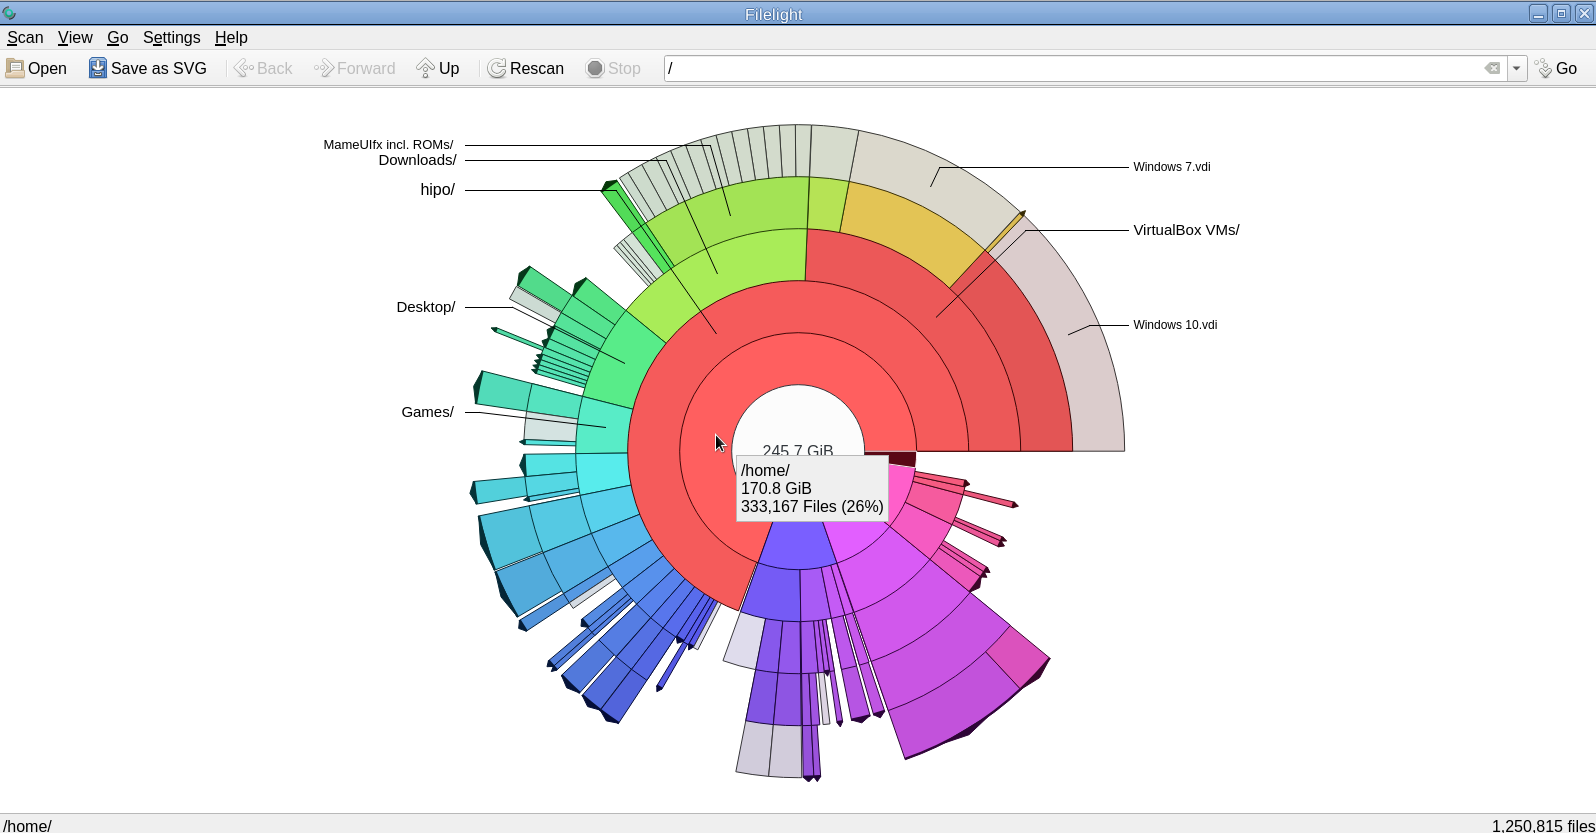
For those using KDE or preferring a shiny GUI interface that will capture the eye, perhaps filelight would be the option of choice tool to get analysis sum of your directory sturctures and file use on the laptop or desktop *unix OS.

unix-desktop:~# apt-cache show filelight|grep -i description-en -A 7
Description-en: show where your diskspace is being used
 Filelight allows you to understand your disk usage by graphically
 representing your filesystem as a set of concentric, segmented rings.
 .
 It is like a pie-chart, but the segments nest, allowing you to see both
 which directories take up all your space, and which directories
 and files inside those directories are the real culprits.
Description-md5: 397ff9a469e07a772f22460c66b66875


To use it simply go ahead and install it with apt or yum / dnf or whatever Linux package manager your distro uses:

unix-desktop:~# apt-get install –yes filelight

filelight-show-where-disk-space-is-being-used-graphically-tool-linux

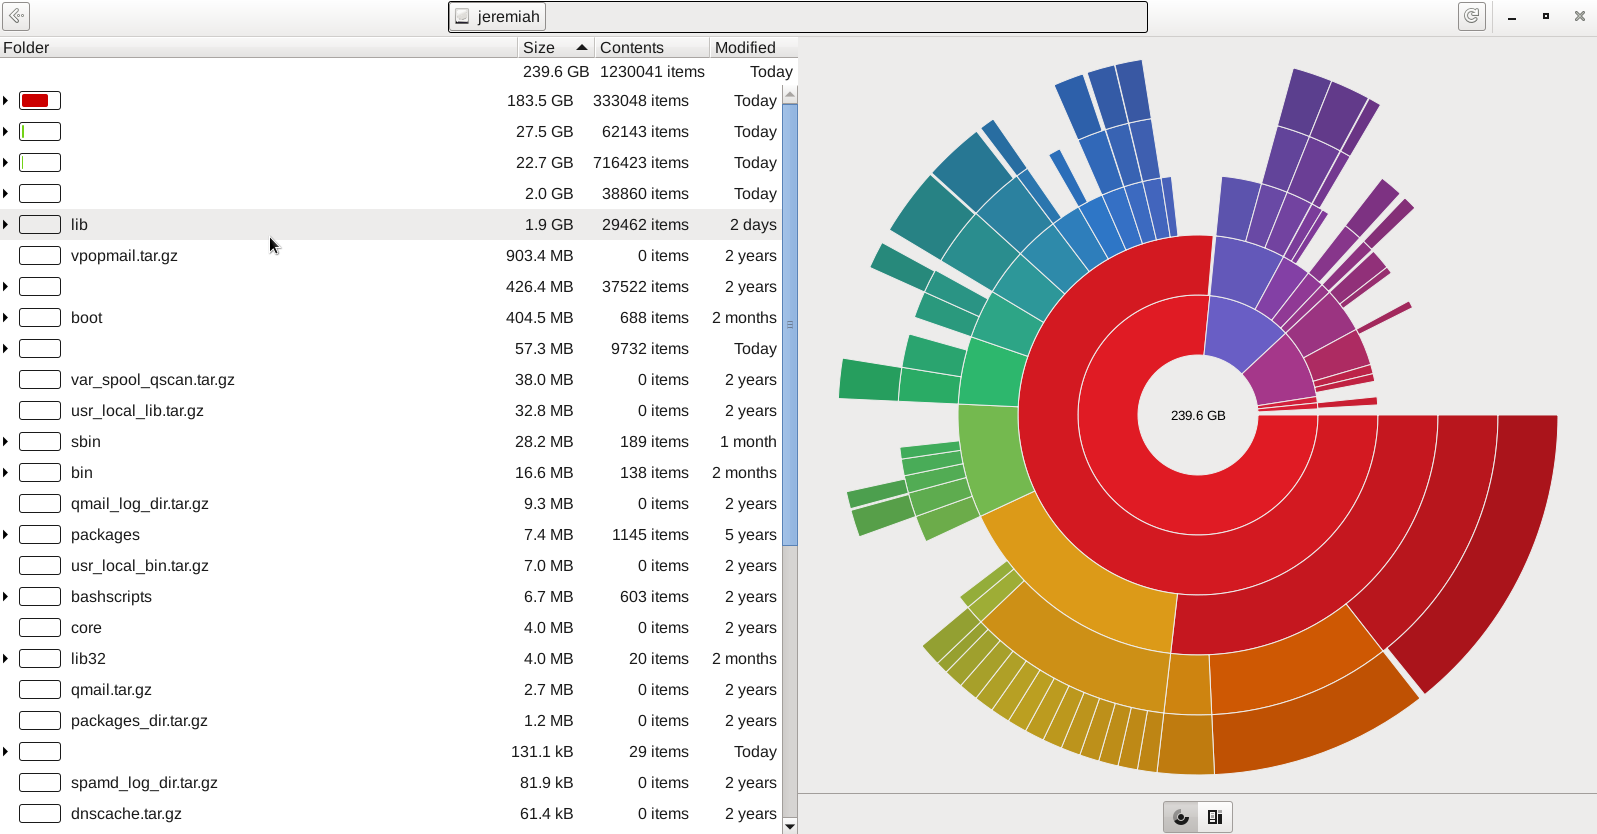
4. GNOME DIsk Usage Analyzer Baobab GUI tool

For those being a GNOME / Mate / Budgie / Cinnamon Graphical interface users baobab shold be the program to use as it uses the famous LibGD library.

unix-desktop:~# apt-cache show baobab|grep -i description-en -A10
Description-en: GNOME disk usage analyzer
 Disk Usage Analyzer is a graphical, menu-driven application to analyse
 disk usage in a GNOME environment. It can easily scan either the whole
 filesystem tree, or a specific user-requested directory branch (local or
 remote).
 .
 It also auto-detects in real-time any changes made to your home
 directory as far as any mounted/unmounted device. Disk Usage Analyzer
 also provides a full graphical treemap window for each selected folder.
Description-md5: 5f6072b89ebb1dc83433fa7658814dc6
Homepage: https://wiki.gnome.org/Apps/Baobab


gnome-disk-analyzer-baobab-tool-screenshot-of-hard-disk-directory-locations-sorted-by-size

5. Qdirstat graphical application to show where your disk space has gone on Linux

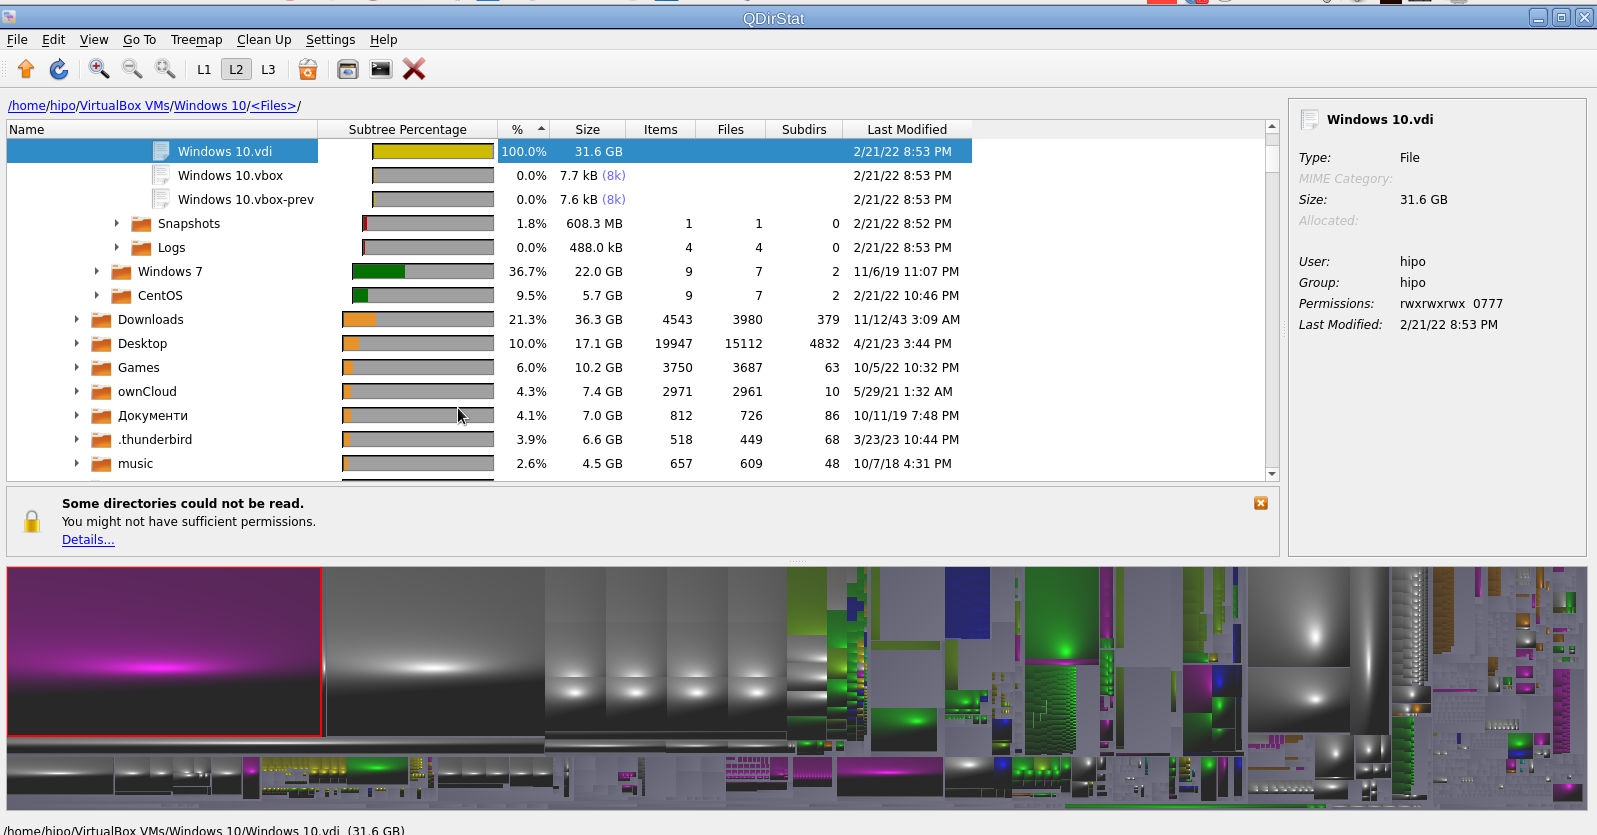
Qdirstat is perhaps well known tool to track disk space issues on Linux desktop hosts, known by the hardcore KDE / LXDE / LXQT / DDE GUI interface / environment lovers and as a KDE tool uses the infamous Qt library. I personally don't like it and don't put it on machines I use because I never use kde and don't want to waste my disk space with additional libraries such as the QT Library which historically was not totally free in terms of licensing and even now is in both free and non free licensing GPL / LGPL and QT Commercial Licensing license.

unix-desktop:~# apt-cache show qdirstat|grep -i description-en -A10
Description-en: Qt-based directory statistics
 QDirStat is a graphical application to show where your disk space has gone and
 to help you to clean it up.
 .
 QDirStat has a number of new features compared to KDirStat. To name a few:
  * Multi-selection in both the tree and the treemap.
  * Unlimited number of user-defined cleanup actions.
  * Properly show errors of cleanup actions (and their output, if desired).
  * File categories (MIME types) and their treemap color are now configurable.
  * Exclude rules for directories are easily configurable.
  * Desktop-agnostic; no longer relies on KDE or any other specific desktop.


qdirstat-linux-screenshot-show-what-directory-uses-most-hard-disk-space

That shiny fuzed graphics is actually a repsesantation of all directories the bigger and if one scrolls on the colorful gamma a text with directory and size or file will appear. Though the graphical represantation is really c00l to me it is a bit unreadable, thus I prefer and recommend the other two GUI tools filelight or baobab instead.

6. Finding duplicate files on Linux system with duff command tool

Talking about big unknown left-over files on your hard drives, it is appropriate to mention one tool here that is a console one but very useful to anyone willing to get rid of old duplicate files that are hanging around on the disk. Sometimes such copies are produced while copying large amount of files from place to place or simply by mistake while copying Photo / Video files from your Smart Phone to Linux desktop etc. 

This is where the duff command line utility might be super beneficial for you.

unix-desktop:~# apt-cache show duff|grep -i description-en -A3
Description-en: Duplicate file finder
 Duff is a command-line utility for identifying duplicates in a given set of
 files.  It attempts to be usably fast and uses the SHA family of message
 digests as a part of the comparisons.

Using duff tool is very straight forward to see all the duplicate files hanging in a directory lets say your home folder.

unix-desktop:~#  duff -rP /home/hipo

/home/hipo/music/var/Quake II Soundtrack – Kill Ratio.mp3
/home/hipo/mp3/Quake II Soundtrack – Kill Ratio.mp3
2 files in cluster 44 (7913472 bytes, digest 98f38be49e2ffcbf90927f9357b3e24a81d5a649)
/home/hipo/music/var/HYPODIL_01-Scakauec.mp3
/home/hipo/mp3/HYPODIL_01-Scakauec.mp3
2 files in cluster 45 (2807808 bytes, digest ce9067ce1f132fc096a5044845c7fac73e99c0ed)
/home/hipo/music/var/Quake II Suondtrack – March Of The Stoggs.mp3
/home/hipo/mp3/Quake II Suondtrack – March Of The Stoggs.mp3
2 files in cluster 46 (3506176 bytes, digest efcc401b4ebda9b0b2367aceb8e334c8ba1a357d)
/home/hipo/music/var/Quake II Suondtrack – Quad Machine.mp3
/home/hipo/mp3/Quake II Suondtrack – Quad Machine.mp3
2 files in cluster 47 (7917568 bytes, digest 0905c1d790654016c2ecf2949f78d47a870c3822)
/home/hipo/music/var/Cyberpunk Group – Futureshock!.mp3
/home/hipo/mp3/Cyberpunk Group – Futureshock!.mp3

-r (Recursively search into all specified directories.)

P (Don't follow any symbolic links.  This overrides any previous -H or -L option.  This is the default.  Note that this only applies to directories, as sym‐
             bolic links to files are never followed.)

7. Deleting duplicate files with duff

If you're absolutely sure you know what you're doing and you have a backup in case if something messes up during duplicate teletions, to get rid of lets say any duplicate Picture files found by duff run sommething like:

# duff -e0 -r /home/hipo/Pictures/ | xargs -0 rm

!!! Please note that using duff is for those who absolutely know what they're doing and have their data recent data. Deleting the wrong data by mistake with the tool might put you in the first grade and you'll be the only one to blame  🙂 !!!

Wrap it Up

Filling up the disk with unknown large files is a task to resolve that happens often. For the unlazy on Linux / BSD / Mac OS and other UNIX like OS-es the easiest way is to use find or du with some one liner command. For the lazy Windows addicted Graphical users filelightqdirstat or baobab GUI disk usage analysis tools are there.
If you have a lot of files and many of thems are duplicates you can use duff to check them out and remove all unneded duplicates and save space. 
Hope this article, was helpful for someone.
That's all folks, enjoy your data profilactics, if you know any other good easy command or GUI tools or hints for drive disk space profilactics please share.

How to install Viber client on Debian GNU / Linux / Ubuntu / Mint in 2022 and enable Bulgarian language cyrillic phonetic keyboard

Tuesday, October 4th, 2022

How to install Viber client on Debian GNU / Linux / Ubuntu / Mint in 2022 and enable Bulgarian language cyrillic phonetic keyboard

how-to-install-and-use-viber-on-gnu-linux-desktop-viber-logo-tux-for-audio-video-communication-with-nonfree-world

So far I've always used Viber on my mobile phone earlier on my Blu H1 HD and now after my dear friend Nomen give me his old iPhone X, i have switched to the iOS version which i find still a bit strangely looking.
Using Viber on the phone and stretching for the Phone all day long is really annoying especially if you work in the field of Information technology like me as System Administrator programmer. Thus having a copy of Viber on your Linux desktop that is next to you is a must.
Viber is proprietary software on M$ Windows its installation is a piece of cake, you install confirm that you want to use it on a secondary device by scanning the QR and opening the URL with your phone and you're ready to Chat and Viber Call with your friends or colleagues

As often on Linux, it is a bit more complicated as the developers of Viber, perhaps did not put too much effort to port it to Linux or did not have much knowledge of how Linux is organized or they simply did not have the time to put for enough testing, and hence installing the Viber on Linux does not straight supported the Bulgarian traditional cyrillic. I've done some small experimentation and installed Viber on Linux both as inidividual package from their official Linux .deb package as well as of a custom build flatpak. In this small article, i'll put it down how i completed that as well as how managed to workaround the language layout problems with a simple setxkbmap cmd.

How to install Viber client on Debian GNU / Linux / Ubuntu / Mint in 2022 and enable Bulgarian language cyrillic phonetic

1.Install and use Viber as a standard Desktop user Linux application

Download latest Debian AMD64 .deb binary from official Viber website inside some dir with Opera / Chrome / Firefox browser and store it in:

hipo@jericho: ~$ cd /usr/local/src

Alternatively you can run the above wget command, but this is not the recommended way since you might end up with Viber Linux version that is older.

hipo@jericho: ~$ sudo wget http://download.cdn.viber.com/cdn/desktop/Linux/viber.deb
hipo@jericho: ~$ su – root

1.2. Resolve the required Viber .deb package dependecies

To resolve the required dependencies of viber.deb package, easiest way is to use gdebi-core # apt-cache show gdebi-core|grep Description-en -A4 Description-en: simple tool to install deb files  gdebi lets you install local deb packages resolving and installing  its dependencies. apt does the same, but only for remote (http, ftp)  located packages. # apt-get install gdebi-core … # apt-get install -f ./viber

1.3. Setting the default language for Viber to support non-latin languages like Cyrillic

I'm Bulgarian and I use the Phonetic Traidional BG keyboard that is UTF8 compatible but cyrillic and non latin. However Viber developers seems to not put much effort and resolve that the Bulgarian Phonetic Traditional keyboard added in my Mate Desktop Environment to work out of the box with Viber on Linux. So as usual in Linux you need a hack ! The hack consists of using setxkbmap to set supported keyboard layouts for Viber US,BG and Traditional Phonetic. This can be done with above command:

setxkbmap -layout 'us,bg' -variant ' ,phonetic' -option 'grp:lalt_lshift_toggle'

To run it everytime together with the Viber binary executable that is stored in location /opt/viber/Viber as prepared by the package developer by install and post-install scripts in the viber.deb, prepared also a 3 liner tine script:

# cat start_viber.sh
#!/bin/bash
cd /opt/viber; setxkbmap -layout 'us,bg' -variant ' ,phonetic' -option 'grp:lalt_lshift_toggle'
./Viber


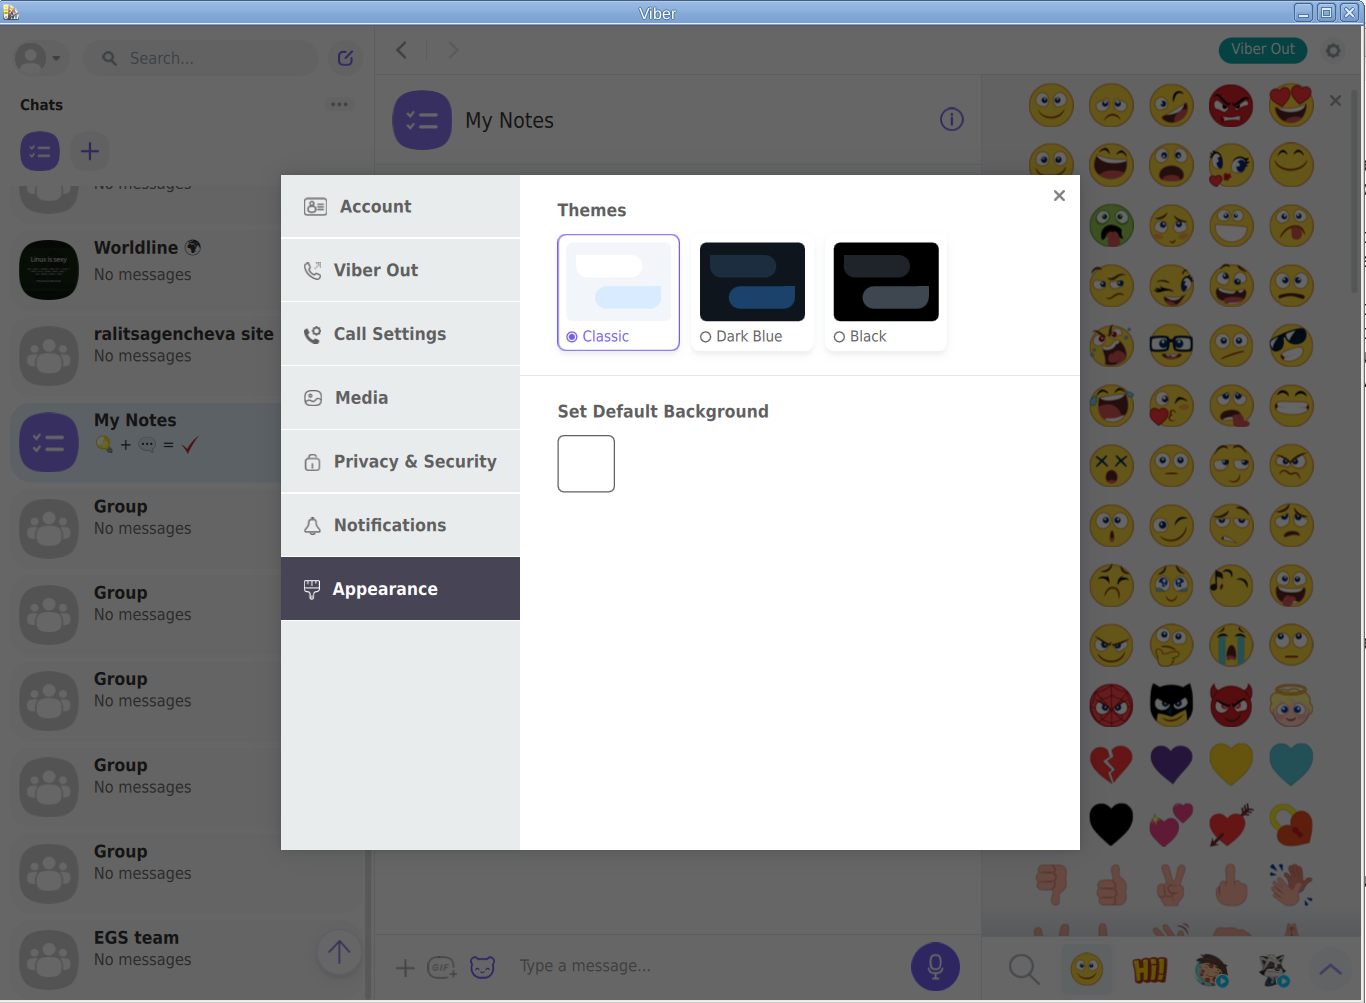
viber-appearance-menu-screenshot-linux


2. Install Viber in separated isolated sandbox from wider system

Second way if you don't trust a priorietary third party binary of Viber (and don't want for Viber to be able to possibly read data of your login GNOME / KDE user, e.g. not be spied by KGB 🙂

For those curious why i'm saying that Viber is mostly used mainly in the ex Soviet Union and in the countries that used to be Soviet satellite ones for one or another reason and though being developed in Israel some of its development in the past was done in Belarus as far as I remember one of the main 3 members (Ukraine, Belarus and Russia) that took the decision to dissolve the USSR 🙂

Talking about privacy if you're really concerned about privacy the best practice is not to use neither WhatApp nor Viber at all on any OS, but this is hard as usually most people are already "educated" to use one of the two. 
For the enthusiasts however I do recommend just to use the Viber / WhatsApp free GPLed software alternative for Vital communication that you don't want to have been listened to by the China / USA / Russia etc. 
Such a good free software alternative is Jitsy and it has both a Web interface that can be used very easily straight inside a browser or you could install a desktop version for PC / iOS and Android and more.
An interesting and proud fact to mention about Jitsy is that its main development that led the project to the state it is now is being done by a buddy Bulgarian ! Good Job man ! 🙂

If you want to give jitsy a try in web with a friend just clik over my pc-freak home lab machine has installed usable version on meet.pc-freak.net

In the same way people in most countries with American and English free world use the WhatsApp which is a another free spy and self analysis software offered by America most likely collecting your chat data and info about you in the (US Central Intelligence Agency) CIA databases. But enough blant so to minimize a bit the security risks of having the binary run directly as a process you can use a containerization like docker to run it inside and isolate from the rest of your Linux desktop. flatpak is a tool developed exactly for that.


hipo@jeremiah:/opt/viber$ apt-cache show flatpak|grep -i Description-en -A 13

Description-en: Application deployment framework for desktop apps
 Flatpak installs, manages and runs sandboxed desktop application bundles.
 Application bundles run partially isolated from the wider system, using
 containerization techniques such as namespaces to prevent direct access
 to system resources. Resources from outside the sandbox can be accessed
 via "portal" services, which are responsible for access control; for
 example, the Documents portal displays an "Open" dialog outside the
 sandbox, then allows the application to access only the selected file.
 .
 Each application uses a specified "runtime", or set of libraries, which is
 available as /usr inside its sandbox. This can be used to run application
 bundles with multiple, potentially incompatible sets of dependencies within
 the same desktop environment.

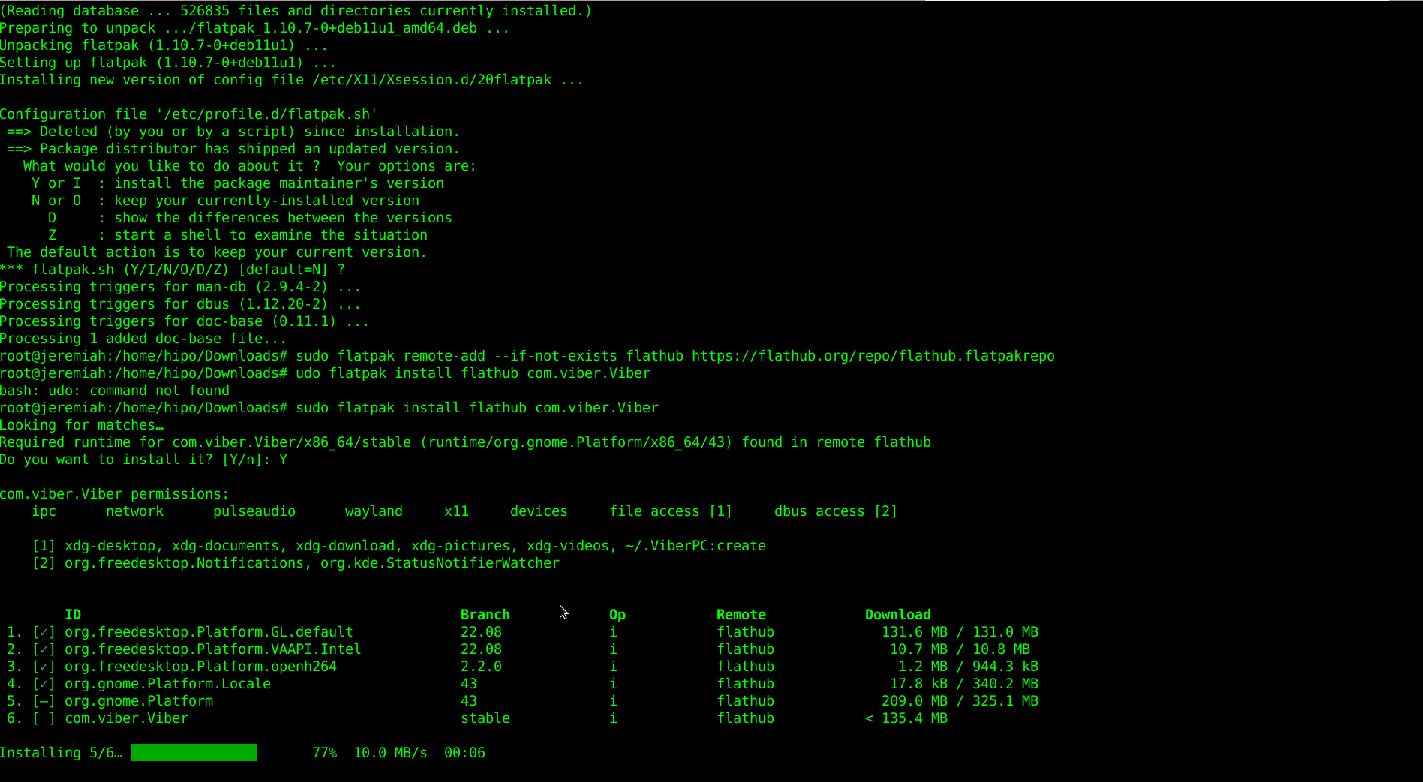
Having Viber installed on Linux inside a container with flatpak is as simple as to adding, repository and installing the flatpak package
already bundled and stored inside flathub repository, e.g.:
 

2.1. Install flatpak 

# sudo apt install flatpak


flatpak-viber-installation-linux-screenshot
 

2.2. Add flathub install repository

flatpak is pretty much like dockerhub, it contains images of containered sandbox copies of software, the main advantage of flatpak is its portability, scalability and security.
Of course if you're a complete security freak you can prepare yourself an own set of Viber and add it to flathub and use instead of the original one 🙂
 

# sudo flatpak remote-add –if-not-exists flathub https://flathub.org/repo/flathub.flatpakrepo

2.3. Install Flatpak-ed Viber 

#sudo flatpak install flathub com.viber.Viber


Reboot the PC and to test Viber will run containerized normally issue below flapak start command:

# /usr/bin/flatpak run –branch=stable –arch=x86_64 –command=viber com.viber.Viber


Viber-inside-flatpak-sandbox-on-debian-linux-screenshot-running

! NOTE !  The Linux version of Viber is missing Backups options, exclusively the Settings -> Account -> Viber backup menus is missing, but the good news is that if you're using the Viber client
as a secondary device message client, on first login you'll be offered to Synchronize your Viber data with your 1st Active device (usually your Smart Phone). Just click on it and allow the synchronization from your phone and in a while the Contacts and message history should be on the Linux Viber client.

That's it Enjoy your Viber Sound and Video on Linux ! 🙂

List and fix failed systemd failed services after Linux OS upgrade and how to get full info about systemd service from jorunal log

Friday, February 25th, 2022

systemd-logo-unix-linux-list-failed-systemd-services

I have recently upgraded a number of machines from Debian 10 Buster to Debian 11 Bullseye. The update as always has some issues on some machines, such as problem with package dependencies, changing a number of external package repositories etc. to match che Bullseye deb packages. On some machines the update was less painful on others but the overall line was that most of the machines after the update ended up with one or more failed systemd services. It could be that some of the machines has already had this failed services present and I never checked them from the previous time update from Debian 9 -> Debian 10 or just some mess I've left behind in the hurry when doing software installation in the past. This doesn't matter anyways the fact was that I had to deal to a number of systemctl services which I managed to track by the Failed service mesage on system boot on one of the physical machines and on the OpenXen VTY Console the rest of Virtual Machines after update had some Failed messages. Thus I've spend some good amount of time like an overall of a day or two fixing strange failed services. This is how this small article was born in attempt to help sysadmins or any home Linux desktop users, who has updated his Debian Linux / Ubuntu or any other deb based distribution but due to the chaotic nature of Linux has ended with same strange Failed services and look for a way to find the source of the failures and get rid of the problems. 
Systemd is a very complicated system and in my many sysadmin opinion it makes more problems than it solves, but okay for today's people's megalomania mindset it matches well.

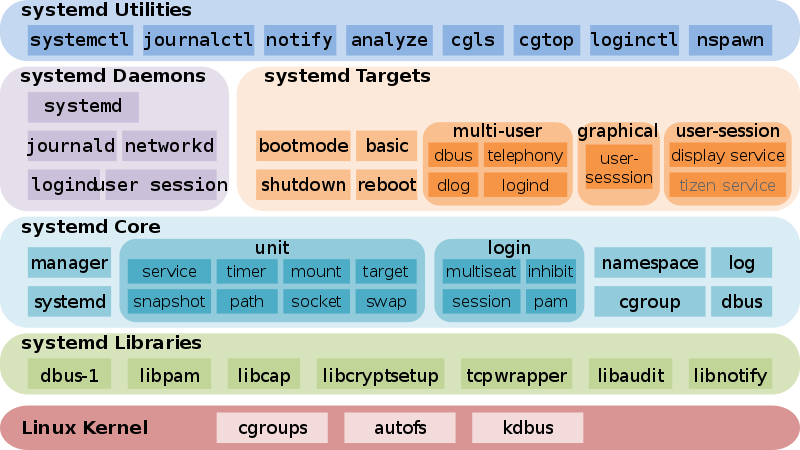
Systemd_components-systemd-journalctl-cgroups-loginctl-nspawn-analyze.svg


1. Check the journal for errors, running service irregularities and so on
 

First thing to do to track for errors, right after the update is to take some minutes and closely check,, the journalctl for any strange errors, even on well maintained Unix machines, this journal log would bring you to a problem that is not fatal but still some process or stuff is malfunctioning in the background that you would like to solve:
 

root@pcfreak:~# journalctl -x
Jan 10 10:10:01 pcfreak CRON[17887]: pam_unix(cron:session): session closed for user root
Jan 10 10:10:01 pcfreak audit[17887]: USER_END pid=17887 uid=0 auid=0 ses=340858 subj==unconfined msg='op=PAM:session_close grantors=pam_loginuid,pam_env,pam_env,pam_permit>
Jan 10 10:10:01 pcfreak audit[17888]: CRED_DISP pid=17888 uid=0 auid=0 ses=340860 subj==unconfined msg='op=PAM:setcred grantors=pam_permit acct="root" exe="/usr/sbin/cron" >
Jan 10 10:10:01 pcfreak CRON[17888]: pam_unix(cron:session): session closed for user root
Jan 10 10:10:01 pcfreak audit[17888]: USER_END pid=17888 uid=0 auid=0 ses=340860 subj==unconfined msg='op=PAM:session_close grantors=pam_loginuid,pam_env,pam_env,pam_permit>
Jan 10 10:10:01 pcfreak audit[17884]: CRED_DISP pid=17884 uid=0 auid=0 ses=340855 subj==unconfined msg='op=PAM:setcred grantors=pam_permit acct="root" exe="/usr/sbin/cron" >
Jan 10 10:10:01 pcfreak CRON[17884]: pam_unix(cron:session): session closed for user root
Jan 10 10:10:01 pcfreak audit[17884]: USER_END pid=17884 uid=0 auid=0 ses=340855 subj==unconfined msg='op=PAM:session_close grantors=pam_loginuid,pam_env,pam_env,pam_permit>
Jan 10 10:10:01 pcfreak audit[17886]: CRED_DISP pid=17886 uid=0 auid=33 ses=340859 subj==unconfined msg='op=PAM:setcred grantors=pam_permit acct="www-data" exe="/usr/sbin/c>
Jan 10 10:10:01 pcfreak CRON[17886]: pam_unix(cron:session): session closed for user www-data
Jan 10 10:10:01 pcfreak audit[17886]: USER_END pid=17886 uid=0 auid=33 ses=340859 subj==unconfined msg='op=PAM:session_close grantors=pam_loginuid,pam_env,pam_env,pam_permi>
Jan 10 10:10:08 pcfreak NetworkManager[696]:  [1641802208.0899] device (eth1): carrier: link connected
Jan 10 10:10:08 pcfreak kernel: r8169 0000:03:00.0 eth1: Link is Up – 100Mbps/Full – flow control rx/tx
Jan 10 10:10:08 pcfreak kernel: r8169 0000:03:00.0 eth1: Link is Down
Jan 10 10:10:19 pcfreak NetworkManager[696]:
 [1641802219.7920] device (eth1): carrier: link connected
Jan 10 10:10:19 pcfreak kernel: r8169 0000:03:00.0 eth1: Link is Up – 100Mbps/Full – flow control rx/tx
Jan 10 10:10:20 pcfreak kernel: r8169 0000:03:00.0 eth1: Link is Down
Jan 10 10:10:22 pcfreak NetworkManager[696]:
 [1641802222.2772] device (eth1): carrier: link connected
Jan 10 10:10:22 pcfreak kernel: r8169 0000:03:00.0 eth1: Link is Up – 100Mbps/Full – flow control rx/tx
Jan 10 10:10:23 pcfreak kernel: r8169 0000:03:00.0 eth1: Link is Down
Jan 10 10:10:33 pcfreak sshd[18142]: Unable to negotiate with 66.212.17.162 port 19255: no matching key exchange method found. Their offer: diffie-hellman-group14-sha1,diff>
Jan 10 10:10:41 pcfreak NetworkManager[696]:
 [1641802241.0186] device (eth1): carrier: link connected
Jan 10 10:10:41 pcfreak kernel: r8169 0000:03:00.0 eth1: Link is Up – 100Mbps/Full – flow control rx/tx

If you want to only check latest journal log messages use the -x -e (pager catalog) opts

root@pcfreak;~# journalctl -xe

Feb 25 13:08:29 pcfreak audit[2284920]: USER_LOGIN pid=2284920 uid=0 auid=4294967295 ses=4294967295 subj==unconfined msg='op=login acct=28696E76616C>
Feb 25 13:08:29 pcfreak sshd[2284920]: Received disconnect from 177.87.57.145 port 40927:11: Bye Bye [preauth]
Feb 25 13:08:29 pcfreak sshd[2284920]: Disconnected from invalid user ubuntuuser 177.87.57.145 port 40927 [preauth]

Next thing to after the update was to get a list of failed service only.


2. List all systemd failed check services which was supposed to be running

root@pcfreak:/root # systemctl list-units | grep -i failed
● certbot.service                                                                                                       loaded failed failed    Certbot
● logrotate.service                                                                                                     loaded failed failed    Rotate log files
● maldet.service                                                                                                        loaded failed failed    LSB: Start/stop maldet in monitor mode
● named.service                                                                                                         loaded failed failed    BIND Domain Name Server


Alternative way is with the –failed option

hipo@jeremiah:~$ systemctl list-units –failed
  UNIT                        LOAD   ACTIVE SUB    DESCRIPTION
● haproxy.service             loaded failed failed HAProxy Load Balancer
● libvirt-guests.service      loaded failed failed Suspend/Resume Running libvirt Guests
● libvirtd.service            loaded failed failed Virtualization daemon
● nvidia-persistenced.service loaded failed failed NVIDIA Persistence Daemon
● sqwebmail.service           masked failed failed sqwebmail.service
● tpm2-abrmd.service          loaded failed failed TPM2 Access Broker and Resource Management Daemon
● wd_keepalive.service        loaded failed failed LSB: Start watchdog keepalive daemon

LOAD   = Reflects whether the unit definition was properly loaded.
ACTIVE = The high-level unit activation state, i.e. generalization of SUB.
SUB    = The low-level unit activation state, values depend on unit type.
7 loaded units listed.


root@jeremiah:/etc/apt/sources.list.d#  systemctl list-units –failed
  UNIT                        LOAD   ACTIVE SUB    DESCRIPTION
● haproxy.service             loaded failed failed HAProxy Load Balancer
● libvirt-guests.service      loaded failed failed Suspend/Resume Running libvirt Guests
● libvirtd.service            loaded failed failed Virtualization daemon
● nvidia-persistenced.service loaded failed failed NVIDIA Persistence Daemon
● sqwebmail.service           masked failed failed sqwebmail.service
● tpm2-abrmd.service          loaded failed failed TPM2 Access Broker and Resource Management Daemon
● wd_keepalive.service        loaded failed failed LSB: Start watchdog keepalive daemon


To get a full list of objects of systemctl you can pass as state:
 

# systemctl –state=help
Full list of possible load states to pass is here
Show service properties


Check whether a service is failed or has other status and check default set systemd variables for it.

root@jeremiah~:# systemctl is-failed vboxweb.service
inactive

# systemctl show haproxy
Type=notify
Restart=always
NotifyAccess=main
RestartUSec=100ms
TimeoutStartUSec=1min 30s
TimeoutStopUSec=1min 30s
TimeoutAbortUSec=1min 30s
TimeoutStartFailureMode=terminate
TimeoutStopFailureMode=terminate
RuntimeMaxUSec=infinity
WatchdogUSec=0
WatchdogTimestampMonotonic=0
RootDirectoryStartOnly=no
RemainAfterExit=no
GuessMainPID=yes
SuccessExitStatus=143
MainPID=304858
ControlPID=0
FileDescriptorStoreMax=0
NFileDescriptorStore=0
StatusErrno=0
Result=success
ReloadResult=success
CleanResult=success

Full output of the above command is dumped in show_systemctl_properties.txt


3. List all running systemd services for a better overview on what's going on on machine
 

To get a list of all properly systemd loaded services you can use –state running.

hipo@jeremiah:~$ systemctl list-units –state running|head -n 10
  UNIT                              LOAD   ACTIVE SUB     DESCRIPTION
  proc-sys-fs-binfmt_misc.automount loaded active running Arbitrary Executable File Formats File System Automount Point
  cups.path                         loaded active running CUPS Scheduler
  init.scope                        loaded active running System and Service Manager
  session-2.scope                   loaded active running Session 2 of user hipo
  accounts-daemon.service           loaded active running Accounts Service
  anydesk.service                   loaded active running AnyDesk
  apache-htcacheclean.service       loaded active running Disk Cache Cleaning Daemon for Apache HTTP Server
  apache2.service                   loaded active running The Apache HTTP Server
  avahi-daemon.service              loaded active running Avahi mDNS/DNS-SD Stack


It is useful thing is to list all unit-files configured in systemd and their state, you can do it with:


root@pcfreak:~# systemctl list-unit-files
UNIT FILE                                                                 STATE           VENDOR PRESET
proc-sys-fs-binfmt_misc.automount                                         static          –            
-.mount                                                                   generated       –            
backups.mount                                                             generated       –            
dev-hugepages.mount                                                       static          –            
dev-mqueue.mount                                                          static          –            
media-cdrom0.mount                                                        generated       –            
mnt-sda1.mount                                                            generated       –            
proc-fs-nfsd.mount                                                        static          –            
proc-sys-fs-binfmt_misc.mount                                             disabled        disabled     
run-rpc_pipefs.mount                                                      static          –            
sys-fs-fuse-connections.mount                                             static          –            
sys-kernel-config.mount                                                   static          –            
sys-kernel-debug.mount                                                    static          –            
sys-kernel-tracing.mount                                                  static          –            
var-www.mount                                                             generated       –            
acpid.path                                                                masked          enabled      
cups.path                                                                 enabled         enabled      


root@pcfreak:~# systemctl list-units –type service –all
  UNIT                                   LOAD      ACTIVE   SUB     DESCRIPTION
  accounts-daemon.service                loaded    inactive dead    Accounts Service
  acct.service                           loaded    active   exited  Kernel process accounting
● alsa-restore.service                   not-found inactive dead    alsa-restore.service
● alsa-state.service                     not-found inactive dead    alsa-state.service
  apache2.service                        loaded    active   running The Apache HTTP Server
● apparmor.service                       not-found inactive dead    apparmor.service
  apt-daily-upgrade.service              loaded    inactive dead    Daily apt upgrade and clean activities
 apt-daily.service                      loaded    inactive dead    Daily apt download activities
  atd.service                            loaded    active   running Deferred execution scheduler
  auditd.service                         loaded    active   running Security Auditing Service
  auth-rpcgss-module.service             loaded    inactive dead    Kernel Module supporting RPCSEC_GSS
  avahi-daemon.service                   loaded    active   running Avahi mDNS/DNS-SD Stack
  certbot.service                        loaded    inactive dead    Certbot
  clamav-daemon.service                  loaded    active   running Clam AntiVirus userspace daemon
  clamav-freshclam.service               loaded    active   running ClamAV virus database updater
..


linux-systemd-components-diagram-linux-kernel-system-targets-systemd-libraries-daemons


4. Finding out more on why a systemd configured service has failed


Usually getting info about failed systemd service is done with systemctl status servicename.service
However, in case of troubles with service unable to start to get more info about why a service has failed with (-l) or (–full) options


root@pcfreak:~# systemctl -l status logrotate.service
● logrotate.service – Rotate log files
     Loaded: loaded (/lib/systemd/system/logrotate.service; static)
     Active: failed (Result: exit-code) since Fri 2022-02-25 00:00:06 EET; 13h ago
TriggeredBy: ● logrotate.timer
       Docs: man:logrotate(8)
             man:logrotate.conf(5)
    Process: 2045320 ExecStart=/usr/sbin/logrotate /etc/logrotate.conf (code=exited, status=1/FAILURE)
   Main PID: 2045320 (code=exited, status=1/FAILURE)
        CPU: 2.479s

Feb 25 00:00:06 pcfreak logrotate[2045577]: 2022/02/25 00:00:06| WARNING: For now we will assume you meant to write /32
Feb 25 00:00:06 pcfreak logrotate[2045577]: 2022/02/25 00:00:06| ERROR: '0.0.0.0/0.0.0.0' needs to be replaced by the term 'all'.
Feb 25 00:00:06 pcfreak logrotate[2045577]: 2022/02/25 00:00:06| SECURITY NOTICE: Overriding config setting. Using 'all' instead.
Feb 25 00:00:06 pcfreak logrotate[2045577]: 2022/02/25 00:00:06| WARNING: (B) '::/0' is a subnetwork of (A) '::/0'
Feb 25 00:00:06 pcfreak logrotate[2045577]: 2022/02/25 00:00:06| WARNING: because of this '::/0' is ignored to keep splay tree searching predictable
Feb 25 00:00:06 pcfreak logrotate[2045577]: 2022/02/25 00:00:06| WARNING: You should probably remove '::/0' from the ACL named 'all'
Feb 25 00:00:06 pcfreak systemd[1]: logrotate.service: Main process exited, code=exited, status=1/FAILURE
Feb 25 00:00:06 pcfreak systemd[1]: logrotate.service: Failed with result 'exit-code'.
Feb 25 00:00:06 pcfreak systemd[1]: Failed to start Rotate log files.
Feb 25 00:00:06 pcfreak systemd[1]: logrotate.service: Consumed 2.479s CPU time.


systemctl -l however is providing only the last log from message a started / stopped or whatever status service has generated. Sometimes systemctl -l servicename.service is showing incomplete the splitted error message as there is a limitation of line numbers on the console, see below


root@pcfreak:~# systemctl status -l certbot.service
● certbot.service – Certbot
     Loaded: loaded (/lib/systemd/system/certbot.service; static)
     Active: failed (Result: exit-code) since Fri 2022-02-25 09:28:33 EET; 4h 0min ago
TriggeredBy: ● certbot.timer
       Docs: file:///usr/share/doc/python-certbot-doc/html/index.html
             https://certbot.eff.org/docs
    Process: 290017 ExecStart=/usr/bin/certbot -q renew (code=exited, status=1/FAILURE)
   Main PID: 290017 (code=exited, status=1/FAILURE)
        CPU: 9.771s

Feb 25 09:28:33 pcfrxen certbot[290017]: The error was: PluginError('An authentication script must be provided with –manual-auth-hook when using th>
Feb 25 09:28:33 pcfrxen certbot[290017]: All renewals failed. The following certificates could not be renewed:
Feb 25 09:28:33 pcfrxen certbot[290017]:   /etc/letsencrypt/live/mail.pcfreak.org-0003/fullchain.pem (failure)
Feb 25 09:28:33 pcfrxen certbot[290017]:   /etc/letsencrypt/live/www.eforia.bg-0005/fullchain.pem (failure)
Feb 25 09:28:33 pcfrxen certbot[290017]:   /etc/letsencrypt/live/zabbix.pc-freak.net/fullchain.pem (failure)
Feb 25 09:28:33 pcfrxen certbot[290017]: 3 renew failure(s), 5 parse failure(s)
Feb 25 09:28:33 pcfrxen systemd[1]: certbot.service: Main process exited, code=exited, status=1/FAILURE
Feb 25 09:28:33 pcfrxen systemd[1]: certbot.service: Failed with result 'exit-code'.
Feb 25 09:28:33 pcfrxen systemd[1]: Failed to start Certbot.
Feb 25 09:28:33 pcfrxen systemd[1]: certbot.service: Consumed 9.771s CPU time.


5. Get a complete log of journal to make sure everything configured on server host runs as it should

Thus to get more complete list of the message and be able to later google and look if has come with a solution on the internet  use:

root@pcfrxen:~#  journalctl –catalog –unit=certbot

— Journal begins at Sat 2022-01-22 21:14:05 EET, ends at Fri 2022-02-25 13:32:01 EET. —
Jan 23 09:58:18 pcfrxen systemd[1]: Starting Certbot…
░░ Subject: A start job for unit certbot.service has begun execution
░░ Defined-By: systemd
░░ Support: https://www.debian.org/support
░░ 
░░ A start job for unit certbot.service has begun execution.
░░ 
░░ The job identifier is 5754.
Jan 23 09:58:20 pcfrxen certbot[124996]: Traceback (most recent call last):
Jan 23 09:58:20 pcfrxen certbot[124996]:   File "/usr/lib/python3/dist-packages/certbot/_internal/renewal.py", line 71, in _reconstitute
Jan 23 09:58:20 pcfrxen certbot[124996]:     renewal_candidate = storage.RenewableCert(full_path, config)
Jan 23 09:58:20 pcfrxen certbot[124996]:   File "/usr/lib/python3/dist-packages/certbot/_internal/storage.py", line 471, in __init__
Jan 23 09:58:20 pcfrxen certbot[124996]:     self._check_symlinks()
Jan 23 09:58:20 pcfrxen certbot[124996]:   File "/usr/lib/python3/dist-packages/certbot/_internal/storage.py", line 537, in _check_symlinks

root@server:~# journalctl –catalog –unit=certbot|grep -i pluginerror|tail -1
Feb 25 09:28:33 pcfrxen certbot[290017]: The error was: PluginError('An authentication script must be provided with –manual-auth-hook when using the manual plugin non-interactively.')


Or if you want to list and read only the last messages in the journal log regarding a service

root@server:~# journalctl –catalog –pager-end –unit=certbot


If you have disabled a failed service because you don't need it to run at all on the machine with:

root@rhel:~# systemctl stop rngd.service
root@rhel:~# systemctl disable rngd.service

And you want to clear up any failed service information that is kept in the systemctl service log you can do it with:
 

root@rhel:~# systemctl reset-failed

Another useful systemctl option is cat, you can use it to easily list a service it is useful to quickly check what is a service, an actual shortcut to save you from giving a full path to the service e.g. cat /lib/systemd/system/certbot.service

root@server:~# systemctl cat certbot
# /lib/systemd/system/certbot.service
[Unit]
Description=Certbot
Documentation=file:///usr/share/doc/python-certbot-doc/html/index.html
Documentation=https://certbot.eff.org/docs
[Service]
Type=oneshot
ExecStart=/usr/bin/certbot -q renew
PrivateTmp=true


After failed SystemD services are fixed, it is best to reboot the machine and check put some more time to inspect rawly the complete journal log to make sure, no error  was left behind.


Closure
 

As you can see updating a machine from a major to a major version even if you follow the official documentation and you have plenty of experience is always more or a less a pain in the ass, which can eat up much of your time banging your head solving problems with failed daemons issues with /etc/rc.local (which I have faced becase of #/bin/sh -e (which would make /etc/rc.local) to immediately quit if any error from command $? returns different from 0 etc.. The  logical questions comes then;
1. Is it really worthy to update at all regularly, especially if you don't know of a famous major Vulnerability 🙂 ?
2. Or is it worthy to update from OS major release to OS major release at all?  
3. Or should you only try to patch the service that is exposed to an external reachable computer network or the internet only and still the the same OS release until End of Life (LTS = Long Term Support) as called in Debian or  End Of Life  (EOL) Cycle as called in RPM based distros the period until the OS major release your software distro has official security patches is reached.

Anyone could take any approach but for my own managed systems small network at home my practice was always to try to keep up2date everything every 3 or 6 months maximum. This has caused me multiple days of irritation and stress and perhaps many white hairs and spend nerves on shit.


4. Based on the company where I'm employed the better strategy is to patch to the EOL is still offered and keep the rule First Things First (FTF), once the EOL is reached, just make a copy of all servers data and configuration to external Data storage, bring up a new Physical or VM and migrate the services.
Test after the migration all works as expected if all is as it should be change the DNS records or Leading Infrastructure Proxies whatever to point to the new service and that's it! Yes it is true that migration based on a full OS reinstall is more time consuming and requires much more planning, but usually the result is much more expected, plus it is much less stressful for the guy doing the job.

How to add colorful random ASCII art picture and a bible verse on each SSH server login, joyout sysadmins life with cowsay, fortune, caca-utils and others

Tuesday, November 24th, 2020

Jesus-Christ-loves-the-world-ascii-art

There are pleny of console ASCII stuff out there that can make your console sysadmin boring life a little bit more funny and cherish some memories from the old times of 8 bit computers :).

One of this as I blogged earlier is cowsay and cowthink to generate a ascii picture with a cow with your custom message.
I've earlier blogged about that in my previous article Create ASCII Art Text bannners in Linux console / terminal with figlet and toilet

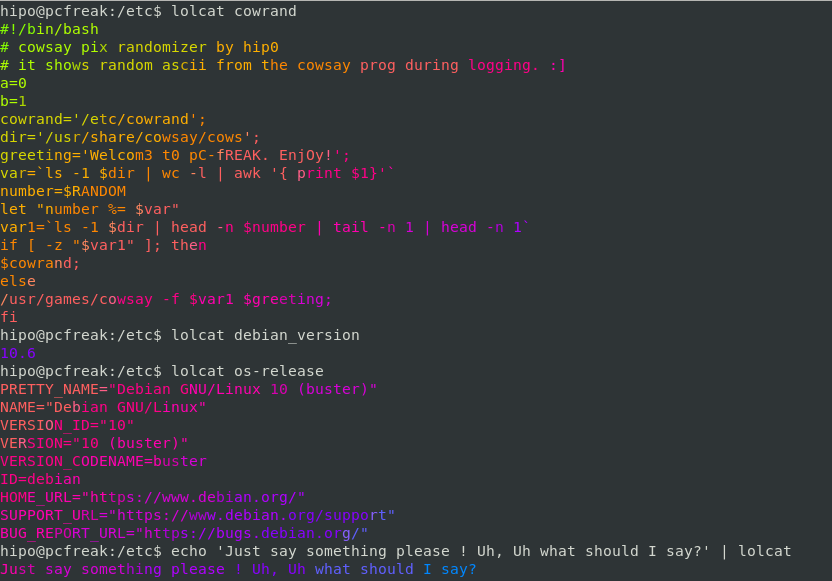
One of this cool things I'm using daily on my servers  is a cowsay console goodie together with a bash shell script that does visualize a random ASCII picture from a preset of pictures on each and every ssh login to my server.
The script I use is cowrand below is code:

#!/bin/bash
# cowsay pix randomizer by hip0
# it shows random ascii from the cowsay prog during logging. :]
a=0
b=1
cowrand='/etc/cowrand';
dir='/usr/share/cowsay/cows';
var=`ls -1 $dir | wc -l | awk '{ print $1}'`
#RANGE=$var
number=$RANDOM
let "number %= $var"
var1=`ls -1 $dir | head -n $number | tail -n 1 | head -n 1`
if [ -z “$var1” ]; then
$cowrand;
else
/usr/bin/cowsay -f $var1 Welc0m3 t0 pC-fREAK … Enj0y.
fi


The script is set as executable under /etc/cowrand

hipo@pcfreak:~$ ls -al /etc/cowrand
-rwxr-xr-x 1 hipo hipo 432 Nov 24 19:21 /etc/cowrand*

I've set this script to my /etc/profile to auto start on every login on my Debian Linux systems right after the comments like so:

hipo@pcfreak:~$ grep -i cowrand -A 2 -B 3 /etc/profile
# /etc/profile: system-wide .profile file for the Bourne shell (sh(1))
# and Bourne compatible shells (bash(1), ksh(1), ash(1), …).
echo '';
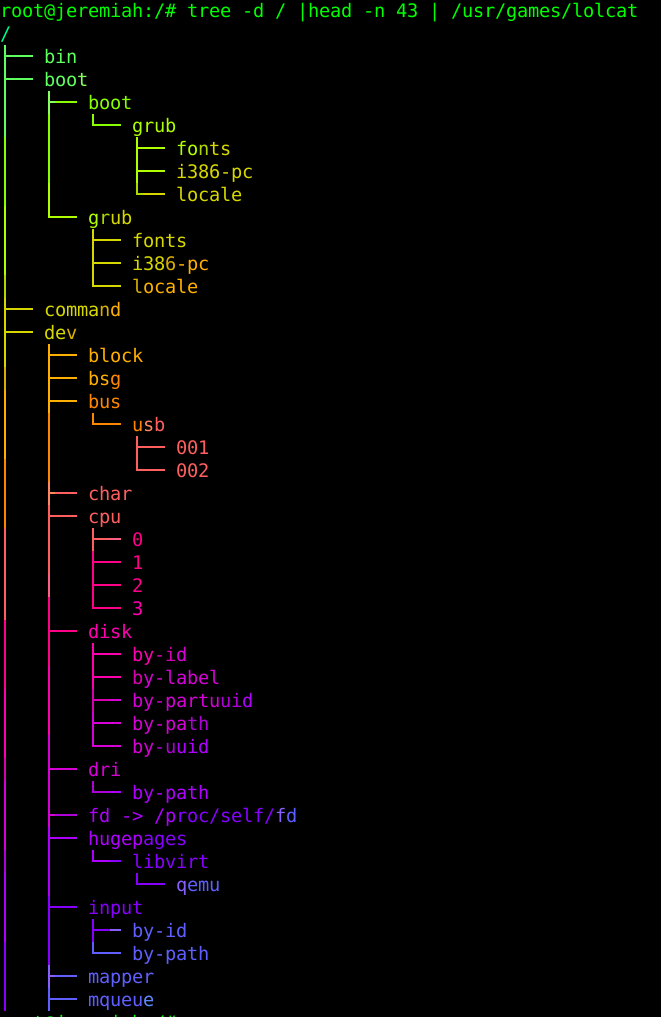
/etc/cowrand | lolcat
echo '';
#/usr/bin/verse

As you can see to make my life even more funnier, I've installed another fun command lolcat

lolcat-screenshot

hipo@pcfreak:~$ apt-cache show lolcat |grep -i desc -A 3
Description-en: colorful `cat`
 lolcat concatenates files like the UNIX `cat` program, but colors it for the
 lulz in a rainbow animation. Terminals with 256 colors and animations are
 supported.

Description-md5: 86f992d66ac74197cda39e0bbfcb549d
Homepage: https://github.com/busyloop/lolcat
Ruby-Versions: all
Section: games


You can think of lolcat as a standard cat command that has been made to print in colors, this gives a funny results.

cowrand-script-lolcat-os-release-how-to-make-your-linux-login-prompt-funnier

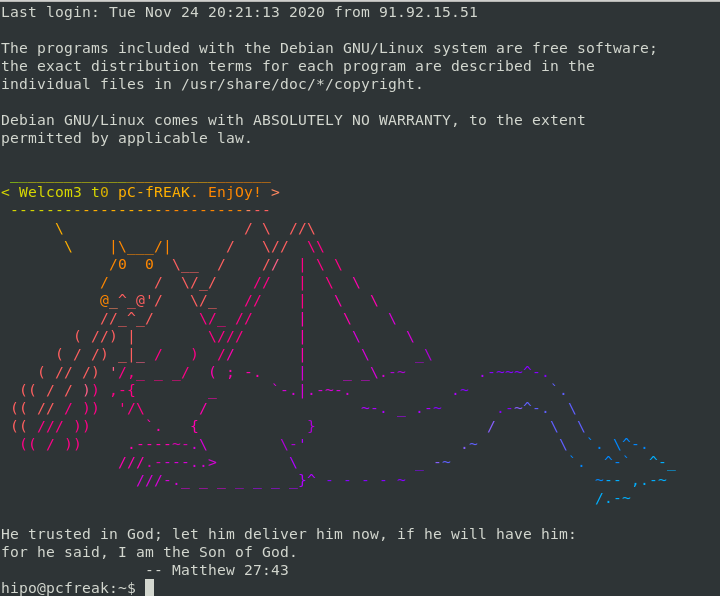
To add some spice to everything nice as a recipee for thethe creation of powerpuff girls, I've come up with a way to use fortune
console tool that uses to print quotes out of a database to use as a source a big database containing the Holy Bible books of Old and New Testament Books. The fortune prints me out a quote extract from the bible on each and every remote SSH login to my machine. The content of this bible database for fortune bible_quotes_fortune.tar.gz can be downloaded and used from here.

The command used to print out a verse from the holy bible is:


hipo@pcfreak:~$ /usr/games/fortune -s /usr/local/fortune/
For if thou refuse to let them go, and wilt hold them still,
        — Exodus 9:2
hipo@pcfreak:~$ /usr/games/fortune -s /usr/local/fortune/
And when the queen of Sheba heard of the fame of Solomon concerning
the name of the LORD, she came to prove him with hard questions.
        — 1 Kings 10:1
hipo@pcfreak:~$ /usr/games/fortune -s /usr/local/fortune/
And Shelemiah, and Nathan, and Adaiah,
        — Ezra 10:39
hipo@pcfreak:~$ /usr/games/fortune -s /usr/local/fortune/
For by thee I have run through a troop: by my God have I leaped
over a wall.
        — 2 Samuel 22:30
hipo@pcfreak:~$ /usr/games/fortune -s /usr/local/fortune/
Unto the place of the altar, which he had make there at the first:
and there Abram called on the name of the LORD.
        — Genesis 13:4
hipo@pcfreak:~$ /usr/games/fortune -s /usr/local/fortune/
And there shall dwell in Judah itself, and in all the cities thereof
together, husbandmen, and they that go forth with flocks.
        — Jeremiah 31:24
hipo@pcfreak:~$ /usr/games/fortune -s /usr/local/fortune/
And he hath put a new song in my mouth, even praise unto our God:
many shall see it, and fear, and shall trust in the LORD.
        — Psalms 40:3
hipo@pcfreak:~$ /usr/games/fortune -s /usr/local/fortune/
And Jehoshaphat made peace with the king of Israel.
        — 1 Kings 22:44


The fortune is really awesome as it reminds me often of a verses from Holy Bible I often forget, the database is using the all famous King James Bible famous as (KJB) / (KJV) from 1611 this bible version that is like a protestant standard nowadays takes its name after James VI and I (James Charles Stuart; 19 June 1566 – 27 March 1625 – King of Scotland and Ireland) who was the sponsor of KJV collection and print.

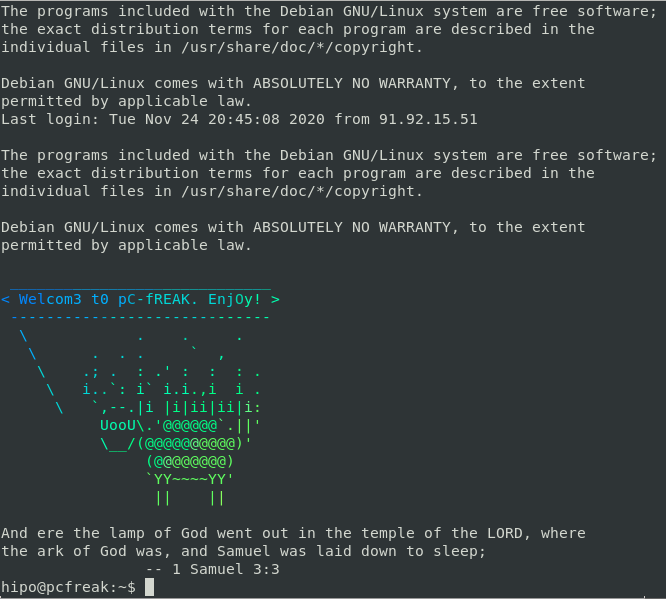
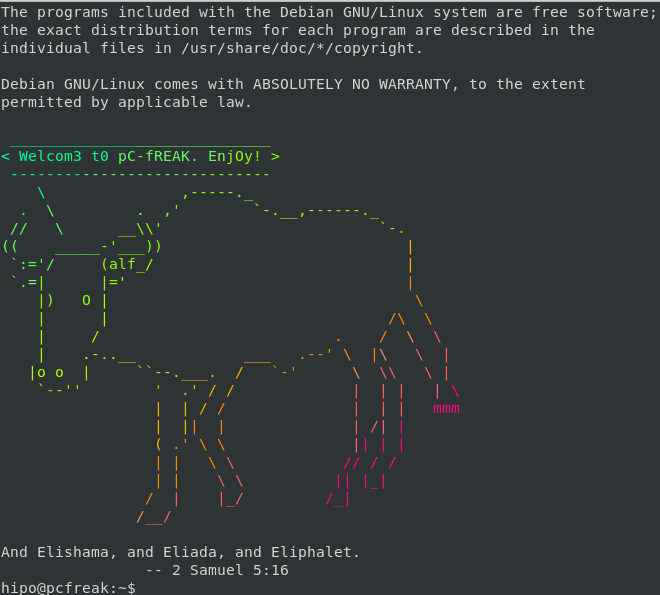
Finally after adding the /usr/games/fortune -s /usr/local/fortune/ to the beginning of /etc/profile together with cowsay and cowrand I got this beautiful and educational result that combines fun with wisdom, below is example of what you will get after you  do a remote ssh login;


ssh your-machine.com

cowrand-script-lolcat-os-release-how-to-make-your-linux-login-prompt-funnier_1

cowrand-script-lolcat-os-release-how-to-make-your-linux-login-prompt-funnier_2

cowrand-script-lolcat-os-release-how-to-make-your-linux-login-prompt-funnier_3

Those who have a Linux Graphical Environment desktop might also enjoy xcowsay

Another must I recommend to the text geeks is the caca-utils package which contains cool things such as aafire (cacafire)

cacaview-fire-screenshot-ascii-art

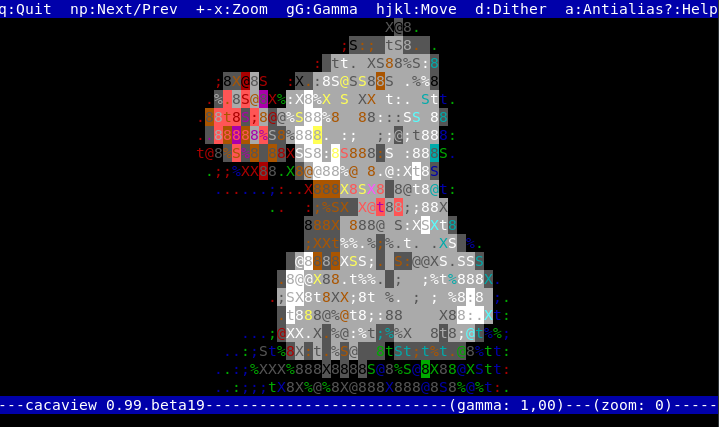
Or (Image to text converter) img2txt / cacaview (a text console picture viewer) that could give you a raw idea on how a png / jpg picture looks like (or at least the picture shapes) without a need for a GUI picture viewer such as Eye of the Gnome.

bear-for-you-picture-rose

Here is a original bear

cacaview-a-bear-for-you-picture-in-plain-text-ascii

And here is the one you'll see in cacaview 🙂
To read more about cacaview I have and its uses, check my previous article Viewing JPEG,GIF and PNG in ASCII with cacaview in Linux.
If you want to show off even more as a '1337 h4x0r' you might also show your sysadm 1337 5K!11Z to colleagues by showng them how you check weather via console (i've a separate article for how to ASCII art check colorful weather forecast via console / terminal ).

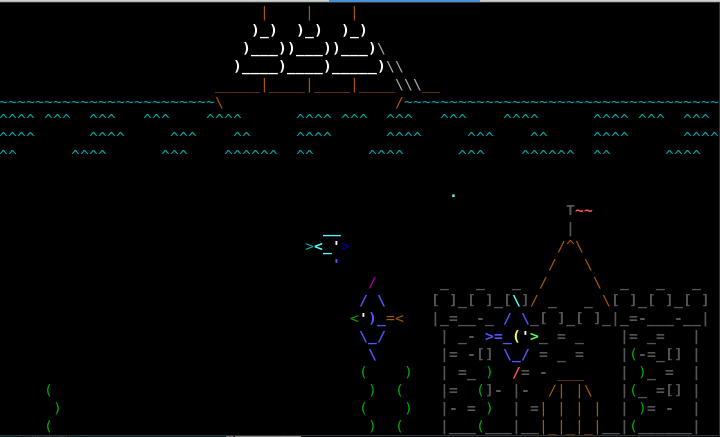
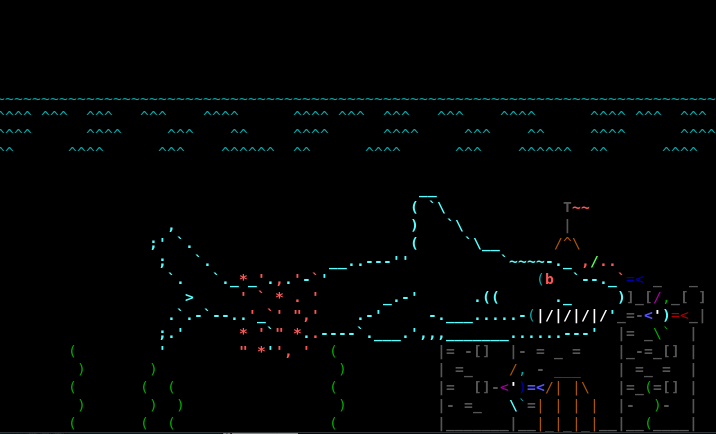
If you're too bored in your daily sys admin job, you might make some fun and take some useless effort to install ASCII Art Aquarium ASCIIQUARIUM

asciiquarium1

asciiquarium2

asciiquarium3

If you're crazy enough and want to torture your other sysadmin colleagues and a get a nice prank, you might install and set asciiquarium to auto run for their specific account on each and every login to some server until they control C or if you're a bit evil you can even set a small auto load on account login via ~/.bashrc shell script to 'Disable CTRL + C' combination 🙂
 

Of course there is plenty of other cool ASCII games and stuff. I've collected some of them by launching the Play Cool Ascii games service on my machine for ASCII art geeks to test out some ASCII games here.


Deny DHCP Address by MAC on Linux

Thursday, October 8th, 2020

Deny DHCP addresses by MAC ignore MAC to not be DHCPD leased on GNU / Linux howto

I have not blogged for a long time due to being on a few weeks vacation and being in home with a small cute baby. However as a hardcore and a bit of dumb System administrator, I have spend some of my vacation and   worked on bringing up the the www.pc-freak.net and the other Websites hosted as a high availvailability ones living on a 2 Webservers running on a Master to Master MySQL Replication backend database, this is oll hosted on  servers, set to run as a round robin DNS hosts on 2 servers one old Lenove ThinkCentre Edge71 as well as a brand new real Lenovo server Lenovo ThinkServer SD350 with 24 CPUs and a 32 GB of RAM
To assure Internet Connectivity is having a good degree of connectivity and ensure websites hosted on both machines is not going to die if one of the 2 pair configured Fiber Optics Internet Providers Bergon.NET has some Issues, I've rented another Internet Provider Line is set bought from the VIVACOM Mobile Fiber Internet provider – that is a 1 Gigabit Fiber Optics Line.
Next to that to guarantee there is no Database, Webserver, MailServer, Memcached and other running services did not hit downtimes due to Electricity power outage, two Powerful Uninterruptable Power Supplies (UPS)  FPS Fortron devices are connected to the servers each of which that could keep the machine and the connected switches and Servers for up to 1 Hour.

The machines are configured to use dhcpd to distributed IP addresses and the Main Node is set to distribute IPs, however as there is a local LAN network with more of a personal Work PCs, Wireless Devices and Testing Computers and few Virtual machines in the Network and the IPs are being distributed in a consequential manner via a ISC DHCP server.

As always to make everything work properly hence, I had again some a bit weird non-standard requirement to make some of the computers within the Network with Static IP addresses and the others to have their IPs received via the DHCP (Dynamic Host Configuration Protocol) and add some filter for some of the Machine MAC Addresses which are configured to have a static IP addresses to prevent the DHCP (daemon) server to automatically reassign IPs to this machines.

After a bit of googling and pondering I've done it and some of the machines, therefore to save others the efforts to look around How to set Certain Computers / Servers Network Card MAC (Interfaces) MAC Addresses  configured on the LAN network to use Static IPs and instruct the DHCP server to ingnore any broadcast IP addresses leases – if they're to be destined to a set of IGNORED MAcs, I came up with this small article.

Here is the DHCP server /etc/dhcpd/dhcpd.conf from my Debian GNU / Linux (Buster) 10.4


option domain-name "pcfreak.lan";
option domain-name-servers 8.8.8.8, 8.8.4.4, 208.67.222.222, 208.67.220.220;
max-lease-time 891200;
authoritative;
class "black-hole" {
    match substring (hardware, 1, 6);
    ignore booting;
}
subclass "black-hole" 18:45:91:c3:d9:00;
subclass "black-hole" 70:e2:81:13:44:11;
subclass "black-hole" 70:e2:81:13:44:12;
subclass "black-hole" 00:16:3f:53:5d:11;
subclass "black-hole" 18:45:9b:c6:d9:00;
subclass "black-hole" 16:45:93:c3:d9:09;
subclass "black-hole" 16:45:94:c3:d9:0d;/etc/dhcpd/dhcpd.conf
subclass "black-hole" 60:67:21:3c:20:ec;
subclass "black-hole" 60:67:20:5c:20:ed;
subclass "black-hole" 00:16:3e:0f:48:04;
subclass "black-hole" 00:16:3e:3a:f4:fc;
subclass "black-hole" 50:d4:f5:13:e8:ba;
subclass "black-hole" 50:d4:f5:13:e8:bb;
subnet 192.168.0.0 netmask 255.255.255.0 {
        option routers                  192.168.0.1;
        option subnet-mask              255.255.255.0;
}
host think-server {
        hardware ethernet 70:e2:85:13:44:12;
        fixed-address 192.168.0.200;
}
default-lease-time 691200;
max-lease-time 891200;
log-facility local7;

To spend you copy paste efforts a file with Deny DHCP Address by Mac Linux configuration is here
/home/hipo/info
Of course I have dumped the MAC Addresses to omit a data leaking but I guess the idea behind the MAC ADDR ignore is quite clear

The main configuration doing the trick to ignore a certain MAC ALenovo ThinkServer SD350ddresses that are reachable on the Connected hardware switch on the device is like so:

class "black-hole" {
    match substring (hardware, 1, 6);
    ignore booting;
}
subclass "black-hole" 18:45:91:c3:d9:00;


The Deny DHCP Address by MAC is described on isc.org distribution lists here but it seems the documentation on the topic on how to Deny / IGNORE DHCP Addresses by MAC Address on Linux has been quite obscure and limited online.

As you can see in above config the time via which an IP is freed up and a new IP lease is done from the server is severely maximized as often DHCP servers do use a max-lease-time like 1 hour (3600) seconds:, the reason for increasing the lease time to be to like 10 days time is that the IPs in my network change very rarely so it is a waste of CPU cycles to do a frequent lease.

default-lease-time 691200;
max-lease-time 891200;


As you see to Guarantee resolving works always as expected I have configured – Google Public DNS and OpenDNS IPs

option domain-name-servers 8.8.8.8, 8.8.4.4, 208.67.222.222, 208.67.220.220;


One hint to make is, after setting up all my desired config in the standard config location /etc/dhcp/dhcpd.conf it is always good idea to test configuration before reloading the running dhcpd process.


root@pcfreak: ~# /usr/sbin/dhcpd -t
Internet Systems Consortium DHCP Server 4.4.1
Copyright 2004-2018 Internet Systems Consortium.
All rights reserved.
For info, please visit https://www.isc.org/software/dhcp/
Config file: /etc/dhcp/dhcpd.conf
Database file: /va/home/hipo/infor/lib/dhcp/dhcpd.leases
PID file: /var/run/dhcpd.pid
 

That's all folks with this sample config the IPs under subclass "black-hole", which are a local LAN Static IP Addresses will never be offered leasess anymore from the ISC DHCP.
Hope this stuff helps someone, enjoy and in case if you need a colocation of a server or a website hosting for a really cheap price on this new set High Availlability up described machines open an inquiry on https://web.www.pc-freak.net.


Howto Pass SSH traffic through a Secured Corporate Proxy server with corkscrew, using sshd as a standalone proxy service with no proxy installed on remote Linux server or VPS

Tuesday, November 19th, 2019

howto pass ssh traffic through proxy to remote server use remote machine as a proxy for connecting to the Internet

Working in the big bad corporate world (being employed in  any of the Fortune 500) companies, especially in an IT delivery company is a nasty thing in terms of User Personal Data Privacy because usually when employeed in any of a corporation, the company ships you with a personal Computer with some kind of pre-installed OS (most often this is Windows) and the computer is not a standalone one but joined in Active Directory (AD) belonging to Windows Domain and centrally administered by whoever.

As part of the default deplyed configuration in this pre-installed OS and software is that part or all your network traffic and files is being monitored in some kind of manner as your pre-installed Windows or Linux notebook given by the Corporation is having a set of standard software running in the background, and even though you have Windows Administrator there are many things you have zero control or even if you have changed it once the Domain Policy is triggered your custom made changes / Installed Programs that happen to be against the company policy are being automatically deleted, any registry changes made are being rewinded etc. Sometimes even by trying to manually clean up your PC from the corporate crapware,  you might breaks access to the corporate DMZ firewalled network. A common way to secure their employee PC data large companies have a Network seperation, your PC when not connected to the Corporate VPN is having a certain IP configuration and once connected to the Demilitarized Zone VPN those configuration changes and the PC have access to internal company infrastructure servers / router / switches / firewalls / SANs etc. Access to corporate Infrastructure is handled via crypted VPN clinet such as Cisco AnyConnect Secure Mobility Client which is perhaps one of the most used ones out there.

Part of the common software installed to Monitor your PC for threats / viruses / trojans among which is MCafee / EMET (Enhandced Mitigation Experience Toolkit) the PC is often prebundled with some kind of anti-malware (crapware) :). But the tip of the iceberg on user surveillance where most of surveillance happens is the default installed proxy on the PC which usually does keep track of all your remote accessed HTTP Website URLs accessed in plain text – traffic flowing on Port 80 and crypted one on standard (SSL) Port 443. This Web Traffic is handled by the Central Corporate proxy that is being deployed via some kind of Domain policy, every time the Computer joins the Windows domain. 

This of course is a terrible thing for your Browsing security and together with the good security practice to run your browser in Incognito mode, which makes all your browsing activity such as access URLs History or Saved Cookies data to be cleared up on a Browser close it is important to make sure you run your own personal traffic via a separate browser which you will use only for your own concern browsing such as Accessing your Bank Money Accounts to check your Monthly Sallary / Purchase things online via Amazon.com / Ebay.com, whether all of the rest traffic company related is trafficed via the default set corporate central proxy.
This is relatively easy sometimes in companies, where security is not of a top concern but in corporations with tightened security accessing remote proxy, or accessing even common daily news and Public Email websites or social media sites  Gmail.com / Twitter / Youtube will be filtered so the only way to reach them will be via some kind of Proxy and often this proxy is the only way out to the Free world from the corporate jail.

Here is where the good old SSH comes as a saving grace as it turns out SSH traffic could be trafficed over a proxy. In below article I will give you a short insight on how Proxy through SSH could be achieved to Secure your dailty web traffic and use SSH to reach your own server on the Internet as well as how you can copy securely data via SSH through corporate Proxy. 
 

1. How to view your corporate used (default) proxy / Check Proxy.pac file definitions


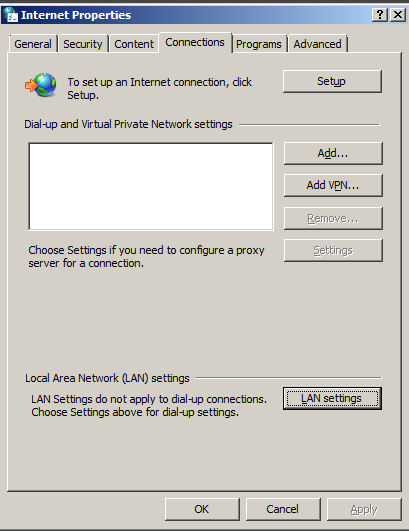
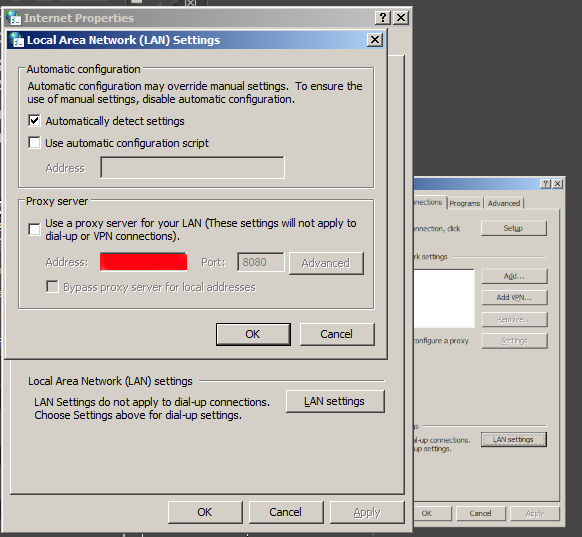
To get an idea what is the used proxy on your Corporate PC (as most corporate employee given notebooks are running some kind of M$ Windows)  you can go to:

Windows Control Panel -> Internet Options -> Connections -> Lan Settings


internet-properties-microsoft-windows-screenshot

Under the field Proxy server (check out the Proxy configured Address and Port number )

local-area-network-lan-settings-screenshot-windows-1
 

Having that as browsers venerate the so-called Proxy.pac file, to be rawly aware on some general Company Proxy configured definitions you can access in a browser the proxy itself fething the proxy.pac file for example.


http://your-corporate-firewall-rpoxy-url:8080/proxy.pac


This is helpful as some companies Proxies have some proxy rules that reveal some things about its Internet architecture and even some have some badly configured proxy.pac files which could be used to fool the proxy under some circumstances 🙂
 

2. Few of the reasons corporations proxy all their employee's work PC web traffic


The corporate proxying of traffic has a number of goals, some of which are good hearted and others are for mostly spying on the users.


1. Protect Corporate Employees from malicious Viruses / Trojans Horses / Malware / Badware / Whatever ware – EXCELLENT
2. Prevent users from acessing a set of sources that due to the corporate policy are considered harmful (e.g. certain addresses 
of information or disinformation of competitors, any Internet source that might preach against the corporation, hacking ralated websites etc.) – NOT GOOD (for the employee / user) and GOOD for the company
3.Spy on the users activity and be able to have evidence against the employee in case he decided to do anything harmful to the company evidences from proxy could even later be used in court if some kind of corpoate infringment occurs due to misbehave of the employee. – PERFECT FOR COMPANY and Complete breach of User privacy and IMHO totally against European Union privacy legislation such as GDRP
4. In companies that are into the field of Aritificial Intelligence / Users behavior could even be used to advance Self-learning bots and mechanisms – NASTY ! YAECKES


3. Run SSH Socks proxy to remote SSHd server running on common SSL 443 port


Luckily sysadmins who were ordered the big bosses to sniff on your Web behaviour and preferences could be outsmarted with some hacks.

To protect your Browsing behaviours and Secure your privacy perhaps the best option is to use the Old but gold practice o Securing your Networkf traffic using SSH Over Proxy and SSH Dynamic tunnel as a Proxy as explained in my previous article here.

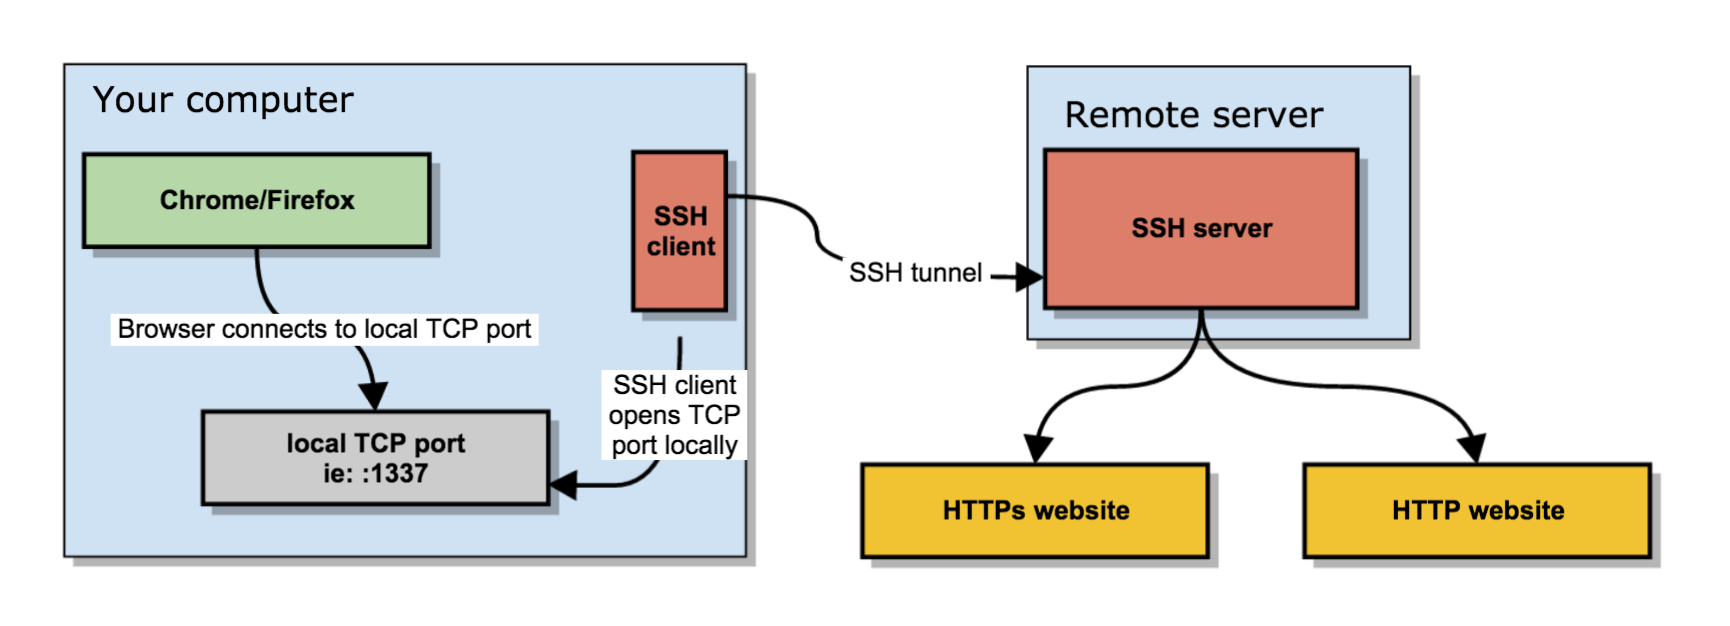
how-to-use-sshd-server-as-a-proxy-without-a-real-proxy-ssh-socks5_proxy_linux
 

In short the quest way to have your free of charge SOCKS  Remote proxy to your Home based Linux installed OS server / VPN with a Public Internet address is to use ssh as so:


ssh -D 3128 UserName@IP-of-Remote-SSHD-Host -p 443


This will start the SOCKS Proxy tunnel from Corporate Work PC to your Own Home brew server.

For some convenience it is useful to set up an .alias (for cygwin) / linux users in .bashrc file:


alias proxy='ssh -D 3128 UserName@IP-of-Remote-SSHD-Host -p 443';


To start using the Proxy from browser, I use a plugin called FoxyProxy in Chrome and Firefox browsers
set-up to connect to localhost – 127.0.0.1:3128 for All Protocols as a SOCKs v5 Proxy.

The sshd Socks proxy can be used for multiple others for example, using it you can also pass on traffic from Mail client such as Thunderbird to your Email server if you're behind a firewall prohibiting access to the common POP3 port 110 or IMAP port TCP 143. 

4. How to access SSH through Proxy using jumphost SSH hop


If you're like me and you have on your Home Linux machine only one Internet address and you have already setupped an SSL enabled service (lets say Webmail) to listen to that Public Internet IP and you don't have the possibility to run another instance of /usr/bin/sshd on port 443 via configuration or manually one time by issuing:


/usr/sbin/sshd -p 443


Then you can use another ssh another Linux server as a jump host to your own home Linux sshd server. This can be done even by purchasing a cheap VPS server for lets say 3 dollars month etc. or even better if you have a friend with another Linux home server, you can ask him to run you sshd on TCP port 443 and add you an ssh account.
Once you have the second Linux machine as JumpHost to reach out to your own machine use:


ssh -J Your-User@Your-jump-host.com:443 hipo@your-home-server.com -v


To easify this a bit long line it is handy to use some kind of alias like:


alias sshhome='ssh -J Your-User@Your-jump-host.com:443 hipo@your-home-server.com -v'


The advantage here is just by issuing this sshd tunnel and keeping it open in a terminal or setting it up as Plink Putty tunnel you have all your Web Traffic Secured
between your Work Corporate PC and your Home Brew Server, keeping the curious eyes of your Company Security Officers from your own Web traffic, hence
separating the corporate privacy from your own personal privacy. Using the just established own SSH Proxy Tunnel to home for your non-work stuff browsing habits
from the corporate systems which are accessed by switching with a button click in FoxyProxy to default proxy settings.
 

5. How to get around paranoid corporate setup where only remote access to Corporate proxy on TCP Port 80 and TCP 443 is available in Browser only


Using straight ssh and to create Proxy will work in most of the cases but it requires SSH access to your remote SSH running server / VPS on TCP Port 22, however under some Fort-Nox like financial involved institutions and companies for the sake of tightened security, it is common that all Outbound TCP Ports are prohibited except TCP Port 80 and SSL 443 as prior said, so what can you do then to get around this badful firewall and access the Internet via your own server Proxy? 
The hack to run SSH server either on tcp port 80 or tcp port 443 on remote Host and use 443 / 80 to acess SSHD should work, but then even for the most paranoid corporations the ones who are PCI Compliant – PCI stands for (Payment Card Industry), e.g. works with Debit and Credit Card data etc, accessing even 80 or 443  ports with something like telnet client or netcat will be impossible. 
Once connected to the corporate VPN,  this 2 two ports firewall exceptions will be only accessible via the Corporate Proxy server defined in a Web Browser (Firefox / IE / Chrome etc.) as prior explained in article.

The remedy here is to use a 3rd party tools such as httptunnel or corkscrew that  are able to TUNNEL SSH TRAFFIC VIA CORPORATE PROXY SERVER and access your own resource out of the DMZ.

Both httptunnel and corkscrew are installable both on most Linux distros or for Windows users via CygWin for those who use MobaXterm.

Just to give you better idea on what corkscrew and (hts) httptunnel does, here is Debian packages descriptions.

# apt-cache show​ corkscrew
" corkscrew is a simple tool to tunnel TCP connections through an HTTP
 proxy supporting the CONNECT method. It reads stdin and writes to
 stdout during the connection, just like netcat.
 .
 It can be used for instance to connect to an SSH server running on
 a remote 443 port through a strict HTTPS proxy.
"


# apt-cache show httptunnel|grep -i description -A 7
Description-en: Tunnels a data stream in HTTP requests
 Creates a bidirectional virtual data stream tunnelled in
 HTTP requests. The requests can be sent via a HTTP proxy
 if so desired.
 .
 This can be useful for users behind restrictive firewalls. If WWW
 access is allowed through a HTTP proxy, it's possible to use
 httptunnel and, say, telnet or PPP to connect to a computer

Description-md5: ed96b7d53407ae311a6c5ef2eb229c3f
Homepage: http://www.nocrew.org/software/httptunnel.html
Tag: implemented-in::c, interface::commandline, interface::daemon,
 network::client, network::server, network::vpn, protocol::http,
 role::program, suite::gnu, use::routing
Section: net
Priority: optional
Filename: pool/main/h/httptunnel/httptunnel_3.3+dfsg-4_amd64.deb

Windows cygwin users can install the tools with:
 

apt-cyg install –yes corkscrew httptunnel


Linux users respectively with:

apt-get install –yes corkscrew httptunnel

or 

yum install -y corkscrew httptunnel


You will then need to have the following configuration in your user home directory $HOME/.ssh/config file
 

Host host-addrs-of-remote-home-ssh-server.com
ProxyCommand /usr/bin/corkscrew your-corporate-firewall-rpoxy-url 8080 %h %p


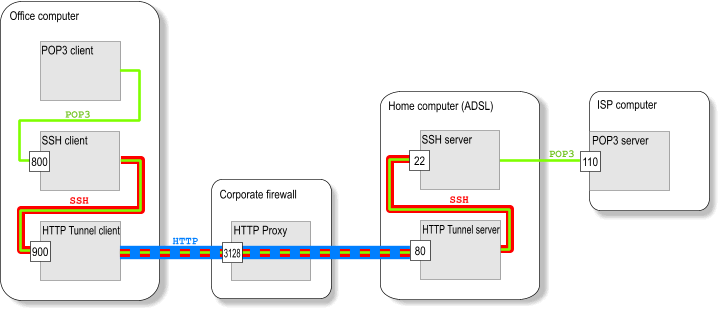
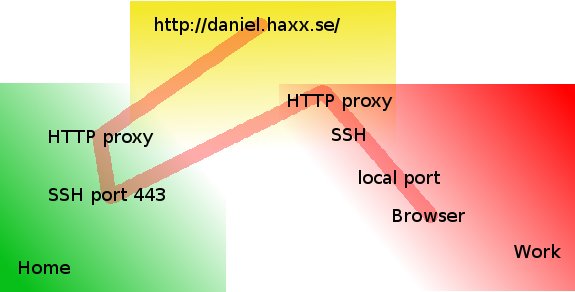
howto-transfer-ssh-traffic-over-proxy

Picture Copyright by Daniel Haxx

The best picture on how ssh traffic is proxied is the one found on Daniel Haxx's website which is a great quick tutorial which originally helped to get the idea of how corkscrew works in proxying traffic I warmly recommend you take a quick look at his SSH Through or over Proxy article.

Host-addrs-of-remote-home-ssh-server.com could be also and IP if you don't have your own domain name in case if using via some cheap VPN Linux server with SSH, or alternatively
if you don't want to spend money on buying domain for SSH server (assuming you don't have such yet) you can use Dyn DNS or NoIP.

Another thing is to setup the proper http_proxy / https_proxy / ftp_proxy variable exports in $HOME/.bashrc in my setup I have the following:
 

export ftp_proxy="http://your-corporate-firewall-rpoxy-url:8080"
export https_proxy="https://your-corporate-firewall-rpoxy-url:8080"
export http_proxy="http://your-corporate-firewall-rpoxy-url:8080"
export HTTP_PROXY="http://your-corporate-firewall-rpoxy-url:8080"
export HTTPS_PROXY="http://your-corporate-firewall-rpoxy-url:8080"


6. How to Transfer Files / Data via SSH Protocol through  Proxy with SCP and SFTP


Next logical question is how to Transfer your own personal encrypted files (that contains no corporate sensitive information) between your Work laptop and home brew Linux ssh server or cheap VPN.

It took me quite a lot of try-outs until finally I got it how Secure Copy (scp) command can be used toto transfer files between my Work Computer and my Home brew server using JumpHost, here is how:
 

scp -o 'ProxyJump Username@Jumpt-Host-or-IP.com:443' ~/file-or-files-to-copy* Username@home-ssh-server.com:/path/where/to/copy/files


I love using sftp (Secure FTP) command Linux client to copy files and rarely use scp so I have a lot of try-outs to connect interacitvely via the Corporate Proxy server over a Jump-Host:443 to my Destination home machine, 


I've tried using netcat as it was pointed in many articles online, like so to traffic my sftp traffic via my localhost binded SSH Socks proxy on :3128 together with netcat as shown in article prior example, using following line:
 

sftp -oProxyCommand='/bin/nc -X connect -x 127.0.0.1:3128 %h %p' Username@home-ssh-server.com 22


Also tried proxy connect like this:


sftp -o ProxyCommand="proxy-connect -h localhost -p 3128 %h %p" Username@home-ssh-server.com


Moreover, tried to use the ssh  command (-s) argument capability to invoke SSH protocol subsystem feature which is used to facilitiate use of SSH secure transport for other application
 

ssh -v -J hipo@Jump-Host:443 -s sftp root@home-ssh-server.com -v

open failed: administratively prohibited: open failed


Finally decided to give a try to the same options arguments as in scp and thanks God it worked and I can even access via the Corporate Proxy through the Jump Host SSH interactively via Secure FTP 🙂

!! THE FINAL WORKING SFTP THROUGH PROXY VIA SSH JUMPHOST !!
 

sftp -o 'ProxyJump Username@Jumpt-Host-or-IP.com:443' Username@home-ssh-server.com


To save time from typing this long line every time, I've setup the following alias to ~/.bashrc
 

alias sftphome='sftp -o 'ProxyJump Username@Jumpt-Host-or-IP.com:443' Username@home-ssh-server.com'


Conclusion

Of course using own Proxy via your Home brew SSH Machine as well as transferring your data securely from your Work PC (notebook) to Home does not completely make you Surveillance free, as the Corporate Windows installed OS image is perhaps prebundled with its own integrated Keylogger as well as the Windows Domain administrators have certainly access to connect to your PC and run various commands, so this kind of Security is just an attempt to make company has less control and know less on your browsing habits and the best solution where possible to secure your privacy and separate your Personal Space form Work space by using a second computer (if having the ability to work from home) with a KVM Switch device and switch over your Work PC and Home PC via it or in some cases (where companies) allows it, setup something like VNC server (TightVNC / RealVNC) on work PC and leave it all time running in office and connect remotely with vncviewer from your own controlled secured computer.

In article I've explained shortly common scenario found in corporate Work computers proxy setup, designed to Surveil all your move, mentioned few common softwares running by default to protect from Viruses and aimed to Protect user from malicious hacking tools, explained how to view your work notebook configured Proxy, shortly mentioned on Proxy.pac and hinted how to view proxy.pac config as well as gave few of the reasons why all web traffic is being routed over central proxy.

That's all folks, Enjoy the Freedom to be less surveilled !

Virtualbox Shared folder set up on Linux between Host and Guest OS – Set up Virtualbox shared folder to Copy files from PC Host to Guest

Wednesday, September 12th, 2018

mount-shares-between-host-OS-and-guest-virtual-machine-howto-virtualbox-vbox-logo

How to set-up Virtualbox shared folder to Copy files from PC Host  and Guest Virtualized OS?

Running VirtualBox Host is an easy thing to set-up across all Operating Systems.  Once you have it sooner or later you will need to copy files from the VM Host OS (that in my case is GNU / Linux) to the virtualized Guest operating system (again in my case that's again another Linux ISO running indide the Virtual Machine).

Below are steps to follow To use Virtualbox Shared Folder functionality to copy files between VBox and your Desktop / server Linux install.

1. Install Virtualbox Guest Additions CD Image ISO

I've explained how to add the Guest Additions CD image thoroughfully in my previous article Howto enable Copy / Paste Virtualbox betwen Linux guest and Host OS
Anyways I'll repeat myself below for sake of clarity:

To do so use Oracle VBox menus (on the booted virtualized OS VBox window):


Devices -> Insert Guest additions CD Image


Mount the ISO inside the Linux Virtual Machine:

root@debian:~# mount /media/cdrom1/
 

If the mount fails and there are no files inside the mount point it might be because the virtualbox-dkms and virtualbox-guest-dkms packages might be missing on the Host OS.

To install them (on Debian GNU / Linux) assuming that you're using virtualbox default distro packages /etc/apt/sources.list :
 

apt-get install –yes -qq virtualbox-dkms virtualbox-guest-dkms


and run:


root@debian:/media/cdrom1# cd /media/cdrom1; sh VBoxLinuxAdditions.run


2. Create directory for Shared Folder that will be used to access Host / OS files from the Guest Virtualized OS
 

root@debian:~# mkdir /mnt/shared_folder


3. Map from VBox program interface Shared folder settings and Mount /mnt/shared_folder location

virtualbox-virtual-machine-devices-shared-folders-shared-folder-settings-linux-screenshot


Devices -> Shared Folder -> Shared Folder settings -> Transient Folders (click blue folder add small button right)


From Transient Folders add whatever directory you want to be shared from your local notebook / PC to the VM.

virtualbox-devices-Shared-Folder-Add-Shared-Folder-add-share-linux-screenshotDepending on whether you would like to mount the shared folder only for reading files (choose Read Only) to make it a permanent shared folder (and not just for the one session of current running Virtual Machine until its killed use Make Permanent) or check Auto-Mount tick if you want the shared_folder mapping to be mounted on every VM boot.
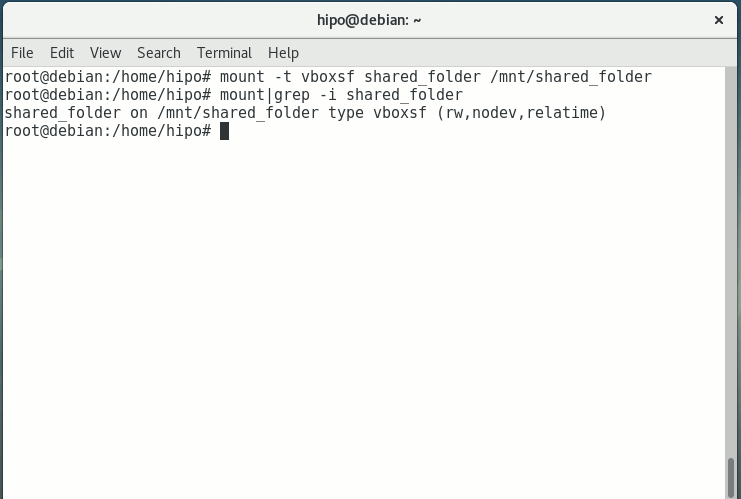
Once the shared_folder directory location is set-up from GUI menu click OK and in order for the settings to take effect, you'll need to restart the VM Guest with Linux (use halt command from terminal) or Power Off the Machine via the VBox menus.

To mount use command like:

mount -t vboxsf name_of_folder_linked_from_vbox  /mnt/name_folder_guest_os/


mount-vboxsf-shared-folder-mnt-shared-linux-guest-screenshot

In my case I wanted to share home folder /home so the command I used is:

root@debian:~# mount -t vboxsf  shared_folder /mnt/shared_folder


If everything is fine your Host OS file content from /home will be visible (for read and write if you Mapped it so) 
under /mnt/shared_folder …

And as Turtles Ninja used to heavily say Cowabunga !!! 🙂
You have it mounted and ready for file share between Desktop -> Virtualized OS.


Bear in mind that above mount command has to run as root (superuser) to succeed.

You now could copy files from your Host OS (running the Virtual Machine) and the Guest OS (Virtualized OS) using /mnt/shared_folder mount point without problems.

The example is if you want to share files between VirtualBox installed Linux and the Guest (Desktop / server) OS, however at many cases mounting your Host OS directory for root users might be not very practical but, instead you might prefer to do the mount for specific non admin user, for example I prefer to do the shared folder mount with my pointed non-root username hipo.

Here is how to do above VM shared_folder mount for non-root user:

First you need to know the exact UID / GID (User ID / Group ID) of user, you can get that with id command:


hipo@linux:~$  id
uid=1000(hipo) gid=1000(hipo) groups=1000(hipo),24(cdrom),25(floppy),29(audio),30(dip),44(video),46(plugdev),108(netdev),114(bluetooth),115(lpadmin),119(scanner)


As you see UID / GID in my case are 1000 / 1000

hipo@linux:~$ sudo mount -t vboxsf -o rw,uid=1000,gid=1000 shared_folder /mnt/shared_folder


mount-virtual-box-shared_folder-with-non-administration-permissions-non-root-permissions-id-and-mount-command-screenshot-linux


4. Mounting configured shared_folder to automatically mount into the Guest OS Linux on every boot

a) Configuring shared_folder auto-mount using /etc/rc.local

If you need the shared_folder to automatically mount next-time you boot the virtual machine quickest way is to add the mount command to /etc/rc.local (on Debian 8 and Debian 9 and newer Ubuntu Linuxes rc.local is missing by default to enable it to work like it worked before read follow my previous article ).

b) Configuring auto-mount for shared_folder through /etc/fstab

The more professional way to auto-mount on emulated OS VM boot time,  you could add the vboxsf mount definitions to /etc/fstab with your favourite text-editor mcedit, nano, joe etc. … (for me that's vim).

Syntax of /etc/fstab is as follows:
 

<Device> <Mount Point> <Type> <Options> <Dump> <Pass>

root@linux:~# vim /etc/fstab


shared_folder /mnt/shared_folder                                vboxsf rw,uid=1000,gid=1000 0 0

Note that you will want to change 1000 / 1000, id / gid with the ones of the non-admin user you would like to add to mount it for.

A quick way to add it to /etc/fstab with a shell one-liner is with command
 

root@linux:~# echo 'shared_folder /mnt/shared_folder                                vboxsf rw,uid=1000,gid=1000 0  0' >> /etc/fstab

An alternative way to add a user to have permissions for vboxsf file system (without specifying the long -o uid=1000,gid=1000 options is to simply add the username in question to group vboxsf like so:

c) Adding non super user username to vboxsf group

root@linux:~# usermod -G vboxsf hipo
root@linux:~# grep -i vboxsf /etc/group
vboxsf:x:999:hipo


hipo@linux:~$ sudo mount -t vboxsf  shared_folder /mnt/shared_folder


without the extra arguments and the options to pass to /etc/fstab (for eventual requirement to auto mount the shared_folder) would be more simple e.g.:


echo 'shared_folder /mnt/shared_folder                                vboxsf ' >> /etc/fstab


One note to make here is if the uesr is added to vboxsf the line for /etc/fstab to auto mount to mount for root user and non-root will be identical.

Then you can get the /etc/fstab auto-mount configured tested by running:

c) Checking auto-mount is working

hipo@linux:~# mount -a
hipo@linux:~# mount |grep -i vboxsf
shared_folder on /mnt/shared_folder type vboxsf (rw,nodev,relatime)


5. What if you end up with mounting failed errors ? – What might be causing the mounting failed Protocol error (a few things to check to solve)


In case of troubles with the mount you might get an error like:

hipo@linux:~# mount -t vboxsf  share_folder /mnt/shared_folder

/sbin/mount.vboxsf: mounting failed with the error: Protocol error


This error might be caused because of Insert Guest Additions CD Image might be not properly enabled and installed using the ISO provided VBoxLinuxAdditions.sh shell script.
Other common reason you might get this error if you have mistyped the Folder name: given in Shared Folders -> Folder Path -> Add Share for example I have given shared_folder as a Map name but as you can see in above mount -t vboxsf, I've mistyped share_folder instead of the correct one shared_folder inserted.
In some VBox releases this error was caused by bugs in the Virtual Machine.
 

virtualbox-virtual-machine-shared-folder-transient-folder-add-folder-linux-VM-guest-linux

One useful tip is to be able to check whether a Virtualbox Virtual Machine has a configured shared_folder (if you're logging to manage the machine on remote server – nomatter whether you have logged in with VNC / Teamviewer / Citrix etc. or via SSH session.

To do so use VBoxControl as of time of writting usually located on most distributions under (/usr/bin/VBoxControl)


hipo@linux:~# VBoxControl sharedfolder list -automount
Oracle VM VirtualBox Guest Additions Command Line Management Interface Version 5.2.18
(C) 2008-2018 Oracle Corporation
All rights reserved.


Auto-mounted Shared Folder mappings (0):

No Shared Folders available.

You can use VBoxControl command to get set and list a number of settings on the VBox VM, here is an useful example with it where you get information about numerous VBox info values:


root@linux:~# VBoxControl guestproperty enumerate
Oracle VM VirtualBox Guest Additions Command Line Management Interface Version 5.2.18
(C) 2008-2018 Oracle Corporation
All rights reserved.


Name: /VirtualBox/GuestInfo/OS/Product, value: Linux, timestamp: 1536681633430852000, flags: <NULL>
Name: /VirtualBox/GuestInfo/Net/0/V4/IP, value: 10.0.2.15, timestamp: 1536681633438717000, flags: <NULL>
Name: /VirtualBox/HostInfo/GUI/LanguageID, value: en_US, timestamp: 1536697521395621000, flags: RDONLYGUEST
Name: /VirtualBox/GuestInfo/Net/0/MAC, value: 08002762FA1C, timestamp: 1536681633442120000, flags: <NULL>
Name: /VirtualBox/GuestInfo/OS/ServicePack, value: <NULL>, timestamp: 1536681633431259000, flags: <NULL>
Name: /VirtualBox/HostInfo/VBoxVerExt, value: 5.2.18, timestamp: 1536681619002646000, flags: TRANSIENT, RDONLYGUEST
Name: /VirtualBox/GuestInfo/Net/0/V4/Netmask, value: 255.255.255.0, timestamp: 1536681633440157000, flags: <NULL>
Name: /VirtualBox/GuestInfo/OS/Version, value: #1 SMP Debian 4.9.110-3+deb9u2 (2018-08-13), timestamp: 1536681633431125000, flags: <NULL>
Name: /VirtualBox/GuestAdd/VersionExt, value: 5.2.18, timestamp: 1536681633431582000, flags: <NULL>
Name: /VirtualBox/GuestAdd/Revision, value: 124319, timestamp: 1536681633432515000, flags: <NULL>
Name: /VirtualBox/HostGuest/SysprepExec, value: <NULL>, timestamp: 1536681619002355000, flags: TRANSIENT, RDONLYGUEST
Name: /VirtualBox/GuestInfo/OS/LoggedInUsers, value: 1, timestamp: 1536681673447293000, flags: TRANSIENT, TRANSRESET
Name: /VirtualBox/GuestInfo/Net/0/Status, value: Up, timestamp: 1536681633443911000, flags: <NULL>
Name: /VirtualBox/GuestInfo/Net/0/Name, value: enp0s3, timestamp: 1536681633445302000, flags: <NULL>
Name: /VirtualBox/HostGuest/SysprepArgs, value: <NULL>, timestamp: 1536681619002387000, flags: TRANSIENT, RDONLYGUEST
Name: /VirtualBox/GuestAdd/Version, value: 5.2.18, timestamp: 1536681633431419000, flags: <NULL>
Name: /VirtualBox/HostInfo/VBoxRev, value: 124319, timestamp: 1536681619002668000, flags: TRANSIENT, RDONLYGUEST
Name: /VirtualBox/GuestInfo/Net/0/V4/Broadcast, value: 10.0.2.255, timestamp: 1536681633439531000, flags: <NULL>
Name: /VirtualBox/HostInfo/VBoxVer, value: 5.2.18, timestamp: 1536681619002613000, flags: TRANSIENT, RDONLYGUEST
Name: /VirtualBox/GuestInfo/OS/LoggedInUsersList, value: hipo, timestamp: 1536681673446498000, flags: TRANSIENT, TRANSRESET
Name: /VirtualBox/GuestInfo/Net/Count, value: 1, timestamp: 1536698949773993000, flags: <NULL>
Name: /VirtualBox/GuestInfo/OS/Release, value: 4.9.0-7-amd64, timestamp: 1536681633431001000, flags: <NULL>
Name: /VirtualBox/GuestInfo/OS/NoLoggedInUsers, value: false, timestamp: 1536681673447965000, flags: TRANSIENT, TRANSRESET
Name: /VirtualBox/GuestAdd/HostVerLastChecked, value: 5.2.18, timestamp: 1536681702832389000, flags: <NULL>

Hope you enjoyed ! Have phun! 🙂

How to turn keyboard backlight on GNU / Linux, keyboard no backlight solution

Friday, October 20th, 2017

how-to-make-CM_Storm_Devastator-keyboard_backlight-work-on-linux-enabled-disable-keyboard-glowing-gnu-linux

If you're a GNU / Linux user and you happen to buy a backlighted keyboard, some nice new laptop whose keyboard supports the more and more modern keyboard growing or if you happen to install a GNU / Linux for a Gamer friend no matter the Linux distribution, you might encounter sometimes  problem even in major Linux distributions Debian / Ubuntu / Mint / Fedora with keyboard backlight not working.

Lets say you buy a Devastator II backlighted keyboard or any other modern keyboard you plug it into the Linux machine and there is no nice blinking light coming out of the keyboard, all the joy is gone yes I know. The free software coolness would have been even more grandiose if your keyboard was shiny and glowing in color / colors 🙂

But wait, there is hope for your joy to be made complete.

To make the keyboard backlight switch on Just issue commands:


xmodmap -e 'add mod3 = Screen_Lock'


# Turn on the keyboard bright lamps
xset led on

# Turns off the keyboard bright lamps
xset led off


If you want to make the keyboard backlight be enabled permanent the easiest solution is to

– add the 3 command lines to /etc/rc.local

E.g. to do so open /etc/rc.local and before exit 0 command just add the lines:


vim /etc/rc.local


xmodmap -e 'add mod3 = Screen_Lock'

# Turn on the keyboard bright lamps
xset led on

# Turns off the keyboard bright lamps
xset led off


If you prefer to have the keyboard colorful backlight enable and disabled from X environment on lets say GNOME , here is how to make yourself an icon that enabled and disables the colors.

That's handy because at day time it is a kind of meaningless for the keyboard to glow.

Here is the shell script:

#!/bin/bash
sleep 1
xset led 3
xmodmap -e 'add mod3 = Scroll_Lock'


I saved it as /home/hipo/scripts/backlight.sh

(don't forget to make it executable!, to do so run):


chmod +x /home/hipo/scripts/backlight.sh


Then create  the .desktop file at /etc/xdg/autostart/backlight.desktop so that it runs the new shell script, like so:

[Desktop Entry]
Type=Application
Name=Devastator Backlight
Exec=/home/hipo/scripts/backlight.sh
Icon=system-run
X-GNOME-Autostart-enabled=true

Share SCREEN terminal session in Linux / Screen share between two or more users howto

Wednesday, October 11th, 2017

share-screen-terminal-session-in-linux-share-linux-unix-shell-between-two-or-more-users


1. Short Intro to Screen command and what is Shared Screen Session

Do you have friends who want to learn some GNU / Linux or BSD basics remotely? Do you have people willing to share a terminal session together for educational purposes within a different network? Do you just want to have some fun and show off yourself between two or more users?

If the answer to the questions is yes, then continue on reading, otherwise if you're already aware how this is being done, just ignore this article and do something more joyful.

So let me start.

Some long time ago when I was starting to be a Free Software user and dedicated enthusiast, I've been given by a friend an interesting freeshell hosting access and I stumbled upon / observed an interesting phenomenon, multiple users like 5 or 10 were connected simultaneously to the same shell sharing their command line.

I can't remember what kind of shell I happen to be sharing with the other logged in users with the same account, was that bash / csh / zsh or another one but it doesn't matter, it was really cool to find out multiple users could be standing together on GNU / Linux and *BSD with the same account and use the regular shell for chatting or teaching each others  new Linux / Unix commands e.g. being able to type in shell simultaneously.

The multiple shared shell session was possible thanks to the screen command

For those who hear about screen for a first time, here is the package description:


# apt-cache show screen|grep -i desc -A 1
Description-en: terminal multiplexer with VT100/ANSI terminal emulation
 GNU Screen is a terminal multiplexer that runs several separate "screens" on

Description-md5: 2d86b86ed6058a04c540802e49312f40
Homepage: https://savannah.gnu.org/projects/screen
root@jericho:/usr/local/src/pure-python-otr# apt-cache show screen|grep -i desc -A 2
Description-en: terminal multiplexer with VT100/ANSI terminal emulation
 GNU Screen is a terminal multiplexer that runs several separate "screens" on
 a single physical character-based terminal. Each virtual terminal emulates a


Description-md5: 2d86b86ed6058a04c540802e49312f40
Homepage: https://savannah.gnu.org/projects/screen
Tag: hardware::input:keyboard, implemented-in::c, interface::text-mode,


There is plenty of things to use screen for as it provides you a way to open Virtual Terminals into a single ssh or physical console TTY login session and I've been in love with screen command since day 1 I found out about it.

To start using screen just invoke it into a shell and enter a screen command combinations that make various stuff for you.


2. Some of the most useful Daily Screen Key Combinations for the Sys Admin


To do use the various screen options, use the escape sequence (CTRL + Some Word), following by the command. For a full list of all of the available commands, run man screen, however
for the sake of interest below short listing shows some of most useful screen key combination invoked commands:


Ctrl-a a Passes a Ctrl-a through to the terminal session running within screen.
Ctrl-a c Create a new Virtual shell screen session within screen
Ctrl-a d Detaches from a screen session.
Ctrl-a f Toggle flow control mode (enable/disable Ctrl-Q and Ctrl-S pass through).
Ctrl-a k Detaches from and kills (terminates) the screen session.
Ctrl-a q Passes a Ctrl-q through to the terminal session running within screen (or use Ctrl-a f to toggle whether screen captures flow control characters).
Ctrl-a s Passes a Ctrl-s through to the terminal session running within screen (or use Ctrl-a f to toggle whether screen captures flow control characters).
Ctrl-a :kill Also detaches from and kills (terminates) the screen session.
Ctrl-a :multiuser on Make the screen session a multi-user session (so other users can attach).
Ctrl-a :acladd USER Allow the user specified (USER) to connect to a multi-user screen session.
Ctrl-a p Move around multiple opened Virtual terminals in screen (Move to previous)
Ctrl-a n Move backwards in multiple opened screen sessions under single shell connection


I have to underline strongly for me personally, I'm using the most


CTRL + A + D (to detach session),

CTRL + A + C to open new session within screen (I tend to open multiple sessions for multiple ssh connections with this),

CTRL + A + P, CTRL +  A + N – I use this twoto move around all my open screen Virtual sessions.
 

3. HOW TO ACTUALLY SHARE TERMINAL SESSION BETWEEN MULTIPLE USERS?


3.1 Configuring Shared Sessions so other users can connect

You need to  have a single user account on a Linux or Unix like server lets say that might be the /etc/passwd, /etc/shadow, /etc/group account screen and you have to give the password to all users to be participating into the shared screen shell session.

E.g. create new system account screen

root@jericho:~# adduser screen
Adding user `screen' …
Adding new group `screen' (1001) …
Adding new user `screen' (1001) with group `screen' …
The home directory `/home/screen' already exists.  Not copying from `/etc/skel'.
Enter new UNIX password:
Retype new UNIX password:
passwd: password updated successfully
Changing the user information for screen
Enter the new value, or press ENTER for the default
    Full Name []: Screen user to give users shared access to /bin/bash
    Room Number []:
    Work Phone []:
    Home Phone []:
    Other []:
Is the information correct? [Y/n] Y

Now distribute the user / pass pair around all users who are to be sharing the same virtual bash session via screen and instruct each of them to run:

hipo@jericho:~$  screen -d -m -S shared-session
hipo@jericho:~$

hipo@jericho:~$ screen -list

There is a screen on:
    4095.shared-session    (10.10.2017 20:22:22)    (Detached)
1 Socket in /run/screen/S-hipo.


3.2. Attaching to just created session
 

Simply login with as many users you need with SSH to the remote server and instruct them to run the following command to re-attach to the just created new session by you:

hipo@jericho:~$ screeen -x

That's all folks now everyone can type in simultaneously and enjoy the joys of the screen shared session.

If for some reasons more than one session is created by the simultaneously logged in users either as an exercise or by mistake i.e.:

hipo@jericho:~$ screen -list

There are screens on:
    4880.screen-session    (10.10.2017 20:30:09)    (Detached)
    4865.another-session    (10.10.2017 20:29:58)    (Detached)
    4847.hey-man    (10.10.2017 20:29:49)    (Detached)
    4831.another-session1    (10.10.2017 20:29:45)    (Detached)
4 Sockets in /run/screen/S-hipo.

You have to instruct everyone to connect actually to the exact session we need, as screen -x will ask them to what session they like to connect.

In that case to connect to screen-session, each user has to run with their account:

hipo@jericho:~$ screen -x shared-session


If under some circumstances it happened that there is more than one opened shared screen virtual session, for example screen -list returns:


hipo@jericho:~$ screen -list
There are screens on:
    5065.screen-session    (10.10.2017 20:33:20)    (Detached)
    4095.screen-session    (10.10.2017 20:30:08)    (Detached)

All users have to connect to the exact screen-session created name and ID, like so:

hipo@jericho:~$ screen -x 4095.screen-session


Here is the meaning of used options


-d option instructs screen to detach,
-m makes it multiuser session so other users can attach
-S argument is just to give the screen session a name
-list Sesssion gives the screen-session ID

Once you're over with screen session (e.g. all users that are learning and you show them stuff and ask them to test by themselves and have completed, scheduled tasks), to kill it just press CTRL + A + K
 

4. Share screen /bin/bash shell session with another user

Sharing screen session between different users is even more useful to the shared session of one user as you might have a *nix server with many users who might attach to your opened session directly, instead of being beforehand instructed to connect with a single user.

That's perfect also for educational purposes if you want to learn some Linux to a class of people, as you can use their ordinary accounts and show them stuff on a Linux / BSD  machine.

Assuming that you follow and created already screen-session with screen cmd

hipo@jericho:~$ screen -list
There is a screen on:
        5560.screen-session      (10.10.2017 20:41:06)   (Multi, attached)
1 Socket in /run/screen/S-hipo.

hipo@jericho:~$

Next attach to the session

bunny@jericho:~$ screen -r shared-session
bunny@jericho:~$ Ctrl-a :multiuser on
bunny@jericho:~$ Ctrl-a :acladd user2
bunny@jericho:~$ screen -x UserNameHere/shared-session
 

Here are 2 screenshots on what should happen if you had done above command combinations correctly:

screen-share-session-to-multi-users-screenshot-multiuser-on-on-gnome-terminal2

screen-share-session-to-multi-users-screenshot-multiuser-on-on-gnome-terminal3

In order to be able to share screen Virtual terminal ( VTY ) sessions between separate (different) logged in users, you have to have screen command be suid (SUID bit for screen is disabled in most Linux distributions for security reasons).

Without making SUID the screen binary file, you are to get the error:

hipo@jericho:/home/hipo$ screen -x hipo/shared

Must run suid root for multiuser support.

If you are absolutely sure you know what you're doing here is how to make screen command sticky bit:


root@jericho:/home/hipo# which screen
root@jericho:/home/hipo# /usr/bin/screen
root@jericho:/home/hipo# root@jericho:/home/hipo# root@jericho:/home/hipo# chmod u+s $(which screen)
chmod 755 /var/run/screen
root@jericho:/home/hipo# rm -fr /var/run/screen/*
exit