Posts Tagged ‘default location’

Linux: How to set KVM Virtual Machine to autostart on system boot

Thursday, July 15th, 2021

linux-kvm-set-vm-to-automatically-boot-on-linux-system-boot

Recently I've written a short article on how to make auto boot OpenVZ container Virtual Machine if system gets rebooted as I had the task to do so in daily job as sysadmin.
Few days ago after some power outage in one of Frankfurt based Data Centers, some Rack tech equipment has been temporary powered of and once the electricity was up again, some Linux servers  running Kernel Based Virtualization ( KVM ) some of the virtual machines did not managed to automatically start up and we had to manually start them one by one.
To manually start each of the machines that did not start up had to do the trivial:

[root@hypervisor ~]# virsh list
 Id    Name                           State
—————————————————-
 3     VM500                   running

[root@hypervisor ~]# virsh dominfo VM500
Id:             3
Name:           VM500
UUID:           82075903-a4ce-5ec0-a3d8-9ee83d85fc75
OS Type:        hvm
State:          running
CPU(s):         2
CPU time:       247407.9s
Max memory:     2097152 KiB
Used memory:    2097152 KiB
Persistent:     yes
Autostart:      disable
Managed save:   no
Security model: selinux
Security DOI:   0
Security label: system_u:system_r:svirt_t:s0:c447,c723 (permissive)

[root@hypervisor ~]# virsh start VM_domain_Name

Of course logcally to prevent future issues in case if Linux server gets suddenly rebooted due to whatever reason, we had to configure the machines in questions to automatically boot on OS system boot.

In some rare cases if above start command does not help you might want to check what is the status of libvirtd and investigate the logs in /var/log/libvirt/ i.e. /var/log/libvirt/libvirt.log

An alternative but more complicated way to set virtual machine to automatically start on boot is by using default location for automatic VM start just like OpenXEn has its /etc/xen/auto/ dirtory from where each soft symlinked VM configuration from /etc/xen/VM_name.cfg is started in KVM Hypervisor hosts to auto boot a certain vm you have to link /etc/libvirt/qemu/VM-to-autoboot-name.xml to /etc/libvirt/qemu/autostart/VM-to-autoboot-name.xml

[root@hypervisor ~]# systemctl status libvirtd
● libvirtd.service – Virtualization daemon
   Loaded: loaded (/usr/lib/systemd/system/libvirtd.service; enabled; vendor preset: enabled)
   Active: active (running) since Tue 2021-06-29 10:21:30 CEST; 2 weeks 2 days ago
     Docs: man:libvirtd(8)
           https://libvirt.org
 Main PID: 1809 (libvirtd)
    Tasks: 22 (limit: 32768)
   CGroup: /system.slice/libvirtd.service
           ├─1809 /usr/sbin/libvirtd
           ├─2335 /usr/sbin/dnsmasq –conf-file=/var/lib/libvirt/dnsmasq/default.conf –leasefile-ro –dhcp-script=/us…
           ├─2336 /usr/sbin/dnsmasq –conf-file=/var/lib/libvirt/dnsmasq/default.conf –leasefile-ro –dhcp-script=/us…
           ├─2386 /usr/sbin/dnsmasq –conf-file=/var/lib/libvirt/dnsmasq/Host-Only.conf –leasefile-ro –dhcp-script=/…
           └─2387 /usr/sbin/dnsmasq –conf-file=/var/lib/libvirt/dnsmasq/Host-Only.conf –leasefile-ro –dhcp-script=/…

If for some reason libvirtd is not running or disabled state you will have to enable it with:

[root@hypervisor ~]# systemctl enable libvirtd

If the virtualization is running on some RPM based distribtuion OpenSuse whatever and libvirtd is controlled via chkconfig (redhat runlevel alternative system), you will have to :

[root@hypervisor ~]# chkconfig libvirtd on

Disabling KVM Virtual Machine from auto start on server boot

[root@hypervisor ~]# virsh autostart Debian10 –disable
Domain Debian10 unmarked as autostarted
Configure rsyslog buffering on Linux to avoid message lost to Central Logging server

Wednesday, January 13th, 2021

rsyslog-Centralized-Logging-System-using-Rsyslog_logo

1. Rsyslog Buffering

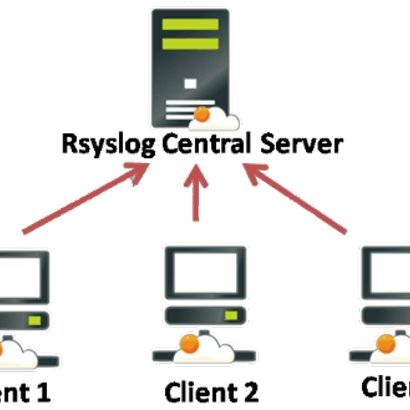
One of the best practice about logs management is to send syslog to a central server. However, a logging system should be capable of avoiding message loss in situations where the server is not reachable. To do so, unsent data needs to be buffered at the client when central server is not available. You might have recently noticed that many servers forwarding logs messages to a central server do not have buffering functionalities activated. Thus I strongly advise you to have look to this documentation to know how to check your configuration: http://www.rsyslog.com/doc/rsyslog_reliable_forwarding.html

Rsyslog buffering with TCP/UDP configured

In rsyslog, every action runs on its own queue and each queue can be set to buffer data if the action is not ready. Of course, you must be able to detect that "the action is not ready", which means the remote server is offline. This can be detected with plain TCP syslog and RELP, but not with UDP. So you need to use either of the two. In this howto, we use plain TCP syslog.

– Version requirement

Please note that we are using rsyslog-specific features. The are required on the client, but not on the server. So the client system must run rsyslog (at least version 3.12.0), while on the server another syslogd may be running, as long as it supports plain tcp syslog.

How To Setup rsyslog buffering on Linux

First, you need to create a working directory for rsyslog. This is where it stores its queue files (should need arise). You may use any location on your local system. Next, you need to do is instruct rsyslog to use a disk queue and then configure your action. There is nothing else to do. With the following simple config file, you forward anything you receive to a remote server and have buffering applied automatically when it goes down. This must be done on the client machine.

# Example:
# $ModLoad imuxsock             # local message reception
# $WorkDirectory /rsyslog/work  # default location for work (spool) files
# $ActionQueueType LinkedList   # use asynchronous processing
# $ActionQueueFileName srvrfwd  # set file name, also enables disk mode
# $ActionResumeRetryCount -1    # infinite retries on insert failure
# $ActionQueueSaveOnShutdown on # save in-memory data if rsyslog shuts down
# *.*       @@server:port

xorg on Toshiba Satellite L40 14B with Intel GM965 video hangs up after boot and the worst fix ever / How to reinstall Ubuntu by keeping the old personal data and programs

Wednesday, April 27th, 2011

black screen ubuntu troubles

I have updated Ubuntu version 9.04 (Jaunty) to 9.10 and followed the my previous post update ubuntu from 9.04 to Latest Ubuntu

I expected that a step by step upgrade from a release to release will work like a charm and though it does on many notebooks it doesn't on Toshiba Satellite L40

The update itself went fine, whether I used the update-manager -d and followed the above pointed tutorial, however after a system restart the PC failed to boot the X server properly, a completely blank screen with blinking cursor appeared and that was all.

I restarted the system into the 2.6.35-28-generic kernel rescue-mode recovery kernel in order to be able to enter into physical console.

Logically the first thing I did is to check /var/log/messages and /var/log/Xorg.0.log but I couldn't find nothing unusual or wrong there.

I suspected something might be wrong with /etc/X11/xorg.conf so I deleted it:

ubuntu:~# rm -f /etc/X11/xorg.conf

and attempted to re-create the xorg.conf X configuration with command:

ubuntu:~# dpkg-reconfigure xserver-xorg

This command was reported to be the usual way to reconfigure the X server settings from console, but in my case (for unknown reasons) it did nothing.

Next the command which was able to re-generate the xorg.conf file was:

ubuntu:~# X -configure

The command generates a xorg.conf sample file in /root/xorg.conf.* so I used the conf to put it in /etc/X11/xorg.conf X's default location and restarted in hope that this would fix the non-booting issue.

Very sadly again the black screen of death appeared on the notebook toshiba screen.
I further thought of completely wipe out the xorg.conf in hope that at least it might boot without the conf file but this worked out neither.

I attempted to run the Xserver with a xorg.conf configured to work with vesa as it's well known vesa X server driver is supposed to work on 99% of the video cards, as almost all of them nowdays are compatible with the vesa standard, but guess what in my case vesa worked not!

The only version of X I can boot in was the failsafe X screen mode which is available through the grub's boot menu recovery mode.

Further on I decided to try few xorg.conf which I found online and were reported to work fine with Intel GM965 internal video , and yes this was also unsucessful.

Some of my other futile attempts were: to re-install the xorg server with apt-get, reinstall the xserver-xorg-video-intel driver e.g.:

ubuntu:~# apt-get install --reinstall xserver-xorg xserver-xorg-video-intel

As nothing worked out I was completely pissed off and decided to take an alternative approach which will take a lot of time but at least will probably be succesful, I decided to completely re-install the Ubuntu from a CD after backing up the /home directory and making a list of available packages on the system, so I can further easily run a tiny bash one-liner script to install all the packages which were previously existing on the laptop before the re-install:

Here is how I did it:

First I archived the /home directory:

ubuntu:/# tar -czvf home.tar.gz home/
....

For 12GB of data with some few thousands of files archiving it took about 40 minutes.

The tar spit archive became like 9GB and I hence used sftp to upload it to a remote FTP server as I was missing a flash drive or an external HDD where I can place the just archived data.

Uploading with sftp can be achieved with a command similar to:

sftp user@yourhost.com
Password:
Connected to yourhost.com.
sftp> put home.tar.gz

As a next step to backup in a file the list of all current installed packages, before I can further proceed to boot-up with the Ubuntu Maverich 10.10 CD and prooceed with the fresh install I used command:

for i in $(dpkg -l| awk '{ print $2 }'); do
echo $i; done >> my_current_ubuntu_packages.txt

Once again I used sftp as in above example to upload my_current_update_packages.txt file to my FTP host.

After backing up all the stuff necessery, I restarted the system and booted from the CD-rom with Ubuntu.
The Ubuntu installation as usual is more than a piece of cake and even if you don't have a brain you can succeed with it, so I wouldn't comment on it 😉

Right after the installation I used the sftp client once again to fetch the home.tar.gz and my_current_ubuntu_packages.txt

I placed the home.tar.gz in /home/ and untarred it inside the fresh /home dir:

ubuntu:/home# tar -zxvf home.tar.gz

Eventually the old home directory was located in /home/home so thereon I used Midnight Commander ( the good old mc text file explorer and manager ) to restore the important user files to their respective places.

As a last step I used the my_current_ubuntu_packages.txt in combination with a tiny shell script to install all the listed packages inside the file with command:

ubuntu:~# for i in $(cat my_current_ubuntu_packagespackages.txt); do
apt-get install --yes $i; sleep 1;
done

You will have to stay in front of the computer and manually answer a ncurses interface questions concerning some packages configuration and to be honest this is really annoying and time consuming.

Summing up the overall time I spend with this stupid Toshiba Satellite L40 with the shitty Intel GM965 was 4 days, where each day I tried numerous ways to fix up the X and did my best to get through the blank screen xserver non-bootable issue, without a complete re-install of the old Ubuntu system.
This is a lesson for me that if I stumble such a shitty issues I will straight proceed to the re-install option and not loose my time with non-sense fixes which would never work.

Hope the article might be helpful to somebody else who experience some problems with Linux similar to mine.

After all at least the Ubuntu Maverick 10.10 is really good looking in general from a design perspective.
What really striked me was the placement of the close, minimize and maximize window buttons , it seems in newer Ubuntus the ubuntu guys decided to place the buttons on the left, here is a screenshot:

Left button positioning of navigation Buttons in Ubuntu 10.10

I believe the solution I explain, though very radical and slow is a solution that would always work and hence worthy 😉
Let me hear from you if the article was helpful.

How to Block Facebook access on Microsoft Windows XP / Vista / 7 and 8

Friday, July 26th, 2013

Disable facebook on Windows computers using windows hosts fileIn Office home network, there is a Windows XP computer which is spending all his official work time in facebook.
Hanging in facebook makes this social network freak work quite inefficient so something had to be done immediately … and guess who had to do it …

 Usually I do facebook filtering via iptables rules directly from Linux NAT router, but filtering facebook https (port 443 traffic) is real pain in the ass and moreover facebook has a bunch of hosts so filtering from Linux i-net router is not always best solution. In this specific case the Linux router deliving internet to the Win host was also having complete routing so filtering with iptables wasn't so easy.
To save myself from loosing few hours trying to discover why I can't manage to filter facebook from Linux router, checked online if it possible to filter facebook using standard Windows method.
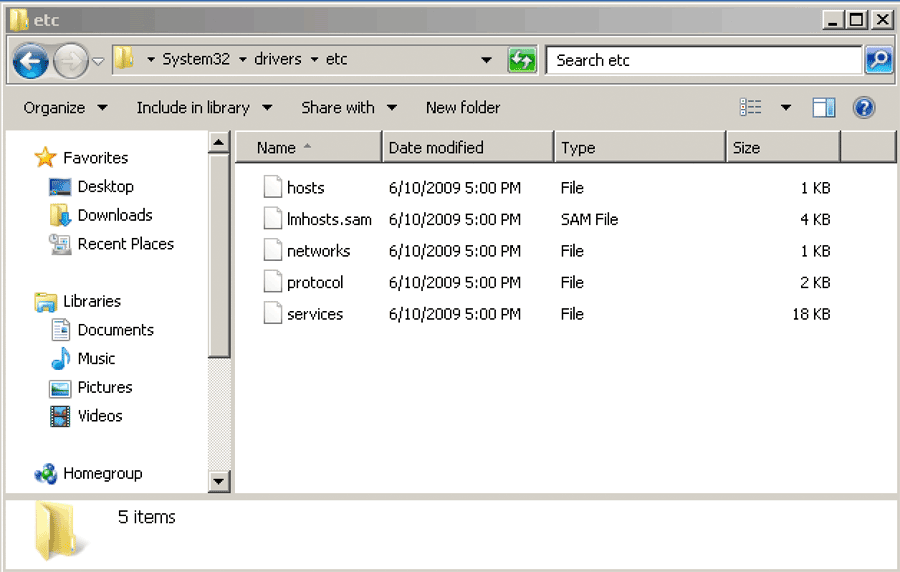
It turns out on Windows computer it is possible filter facebook by simply mapping all Facebook main hosts to localhost (127.0.0.1) using hosts map file. In my case Win computer was running Windows XP, however on All Windows XP / Vista / 7 and 8, default location of hosts file is in: 

  
C:\WINDOWS\system32\drivers\etc\hosts

Microsoft Windows c:\system32\drivers\etc\hosts file Windows explorer screenshot

Therefore I used  Windows Explorer, navigated to C:\WINDOWS\system32\drivers\etc\ copied hosts file to Desktop, edited with Notepad and placed at the end of it following lines:

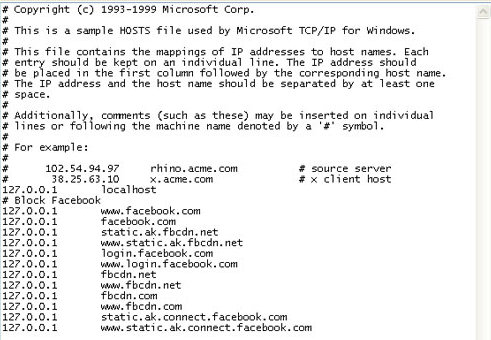
# Block Facebook
127.0.0.1 api.facebook.com 
127.0.0.1 connect.facebook.net
127.0.0.1 facebook.com
127.0.0.1 www.facebook.com
127.0.0.1 graph.facebook.com
127.0.0.1 profile-b.xx.fbcdn.net
127.0.0.1 s-static.ak.facebook.com
127.0.0.1 static.ak.connect.facebook.com
127.0.0.1 static.ak.facebook.com
127.0.0.1 static.ak.fbcdn.net
127.0.0.1 www.fbcdn.com
127.0.0.1 static.facebook.com
127.0.0.1 www.static.ak.connect.facebook.com
127.0.0.1 www.login.facebook.com
127.0.0.1 login.facebook.com

how to block facebook Windows hosts file opened in Notepad

Then copied the new modified hosts files from Desktop back to C:\WINDOWS\system32\drivers\etc
Following same logic, its possible to disable access to any host on the Internet. There are even some software like SpyBot which does by default change Windows default hosts file with pre-mapped well known spammer / spyware / malware hosts to prevent viruses and spyware to download more of themselves.

 Finally to make Windows re-read new hosts file I had to restart the PC, and Voila! Facebook access was cut 🙂