Posts Tagged ‘systemctl’

Disable NetworkManager automatic Ethernet Interface Management on Redhat Linux , CentOS 6 / 7 / 8

Friday, February 5th, 2021

rhel-centos-fedora-network-manager-disable-automatic-lan-interface-management

Most of Linux distributions had introduced the NetworkManager service and are slowly trying to push out the old ways and use entirely it to manage network configs. Though at times this is very helpful stuff especially if you have Linux running on Laptop on servers is a guarantee for troubles.

If you are a system administrator like me and you need that needs to configure a New server with lets say 8 (Ethernet interface) LAN cards each to be configured with different IPs and you have a mixture of configuration where some eth1,eth2 etc. (4 of the interface IPs has to be static IPs and others has to be taken from a DHCP lease. NetworkManager is not something that you will want as usually you don't expect soon a network IP topology change. Below is example from a Living Hypervisor server machine that has 8 Network Interfaces configured together with few Virtual Interfaces used by the running KVM Virtual Machines.
 

[root@redhat :~ ]# ip address show |grep ": <"
1: lo: <LOOPBACK,UP,LOWER_UP> mtu 65536 qdisc noqueue state UNKNOWN group default qlen 1000
2: ens1f0: <BROADCAST,MULTICAST,UP,LOWER_UP> mtu 1500 qdisc mq master team0 state UP group default qlen 1000
3: eno1: <BROADCAST,MULTICAST,UP,LOWER_UP> mtu 1500 qdisc mq master team0 state UP group default qlen 1000
4: ens1f1: <BROADCAST,MULTICAST,UP,LOWER_UP> mtu 1500 qdisc mq master br2 state UP group default qlen 1000
5: ens1f2: <BROADCAST,MULTICAST> mtu 1500 qdisc noop state DOWN group default qlen 1000
6: eno2: <BROADCAST,MULTICAST,UP,LOWER_UP> mtu 1500 qdisc mq master br1 state UP group default qlen 1000
7: ens1f3: <BROADCAST,MULTICAST> mtu 1500 qdisc noop state DOWN group default qlen 1000
8: eno3: <BROADCAST,MULTICAST> mtu 1500 qdisc noop state DOWN group default qlen 1000
9: eno4: <BROADCAST,MULTICAST> mtu 1500 qdisc noop state DOWN group default qlen 1000
10: venet0: <BROADCAST,POINTOPOINT,NOARP,UP,LOWER_UP> mtu 1500 qdisc noqueue state UNKNOWN group default
11: br1: <BROADCAST,MULTICAST,UP,LOWER_UP> mtu 1500 qdisc noqueue state UP group default qlen 1000
12: br2: <BROADCAST,MULTICAST,UP,LOWER_UP> mtu 1500 qdisc noqueue state UP group default qlen 1000
13: team0: <BROADCAST,MULTICAST,UP,LOWER_UP> mtu 1500 qdisc noqueue master br0 state UP group default qlen 1000
14: br0: <BROADCAST,MULTICAST,UP,LOWER_UP> mtu 1500 qdisc noqueue state UP group default qlen 1000
15: host-routed: <BROADCAST,MULTICAST> mtu 1500 qdisc noop state DOWN group default qlen 1000
16: virbr0: <NO-CARRIER,BROADCAST,MULTICAST,UP> mtu 1500 qdisc noqueue state DOWN group default qlen 1000
17: virbr0-nic: <BROADCAST,MULTICAST> mtu 1500 qdisc pfifo_fast master virbr0 state DOWN group default qlen 1000
18: virbr1: <NO-CARRIER,BROADCAST,MULTICAST,UP> mtu 1500 qdisc noqueue state DOWN group default qlen 1000
19: virbr1-nic: <BROADCAST,MULTICAST> mtu 1500 qdisc pfifo_fast master virbr1 state DOWN group default qlen 1000
26: vme52540019e701: <BROADCAST,MULTICAST,UP,LOWER_UP> mtu 1500 qdisc pfifo_fast master br0 state UNKNOWN group default qlen 1000
27: vme52540081868b: <BROADCAST,MULTICAST,UP,LOWER_UP> mtu 1500 qdisc pfifo_fast master br1 state UNKNOWN group default qlen 1000
28: vme525400a13f03: <BROADCAST,MULTICAST,UP,LOWER_UP> mtu 1500 qdisc pfifo_fast master br2 state UNKNOWN group default qlen 1000


Having a NM managing so many LAN connected Ethernets can create you A LOT of surprises even if your servers are in a Highly Secured data center where chance of sudden IP change or network misbehaves are minimal. Even minimal some in Housing might do something wrong on the Rack mixing up with another server or switch andyour server might end up easily with unexplainable Network problems because of this NM service which is trying 'to balance' any network issues according to some algorithms …

Thus to save yourlself the troubles and completely disable NetworkManager (NM) Ethernets handling.

As a hint some of the troubles you might get especially if the System Hardware has issues with the Integrated Motherboard LAN Controllers such as of Dell PowerEdge R640 Rack Server.
I've recently observed one such Dell Rack mounted machine I had to configure from scratch which has out of the box 
NM preinstalled by a colleague and was doing strange stuff with the routings causing it to become remotely inacessible after reboot.
Even though I have started configuring the IPs and have double and triple check the configuration and machine had proper set of /etc/sysconfig/network-scripts/ifcfg-* configuration it still failed to boot with a network properly brought up and become unreachable via remote SSH connection immediately after sending machine to init 6 with /usr/sbin/init 6 (alias for shutdown -r now or reboot -f now :)

On Redhat 8 / CentOS 8 to Disabling permanently NM you have to disable NM systemd services permanently and add NM_CONTROLLED=no to each of the Ethernet configurations listed in network-scripts/ifcfg-eno3 eno4 eno1np0 etc. ifaces.

1. Disable completely Network Manager service and mask it

[root@redhat :~ ]# systemctl mask NetworkManager.service
[root@redhat :~ ]# systemctl stop NetworkManager.service
[root@redhat :~ ]# systemctl disable NetworkManager.service

2. Check if all systemd networkmanager components scripts are really disabled

# systemctl list-unit-files | grep NetworkManager

NetworkManager-dispatcher.service disabled
NetworkManager-wait-online.service enabled
NetworkManager.service disabled


NetworkManager-wait-online.service seems to be also enabled so we have to disable it.

[root@redhat :~ ]#  systemctl mask NetworkManager-wait-online.service
[root@redhat :~ ]#  systemctl disable NetworkManager-wait-online.service

Double check NM services

[root@redhat :~ ]#  systemctl list-unit-files | grep NetworkManager
  …

3. Install / Enable old (legacy) network-scripts 


network-scripts is disabled by default due to it doesn't play well with NM.
Install the rpm package to enable it back
 

[root@redhat :~ ]#  yum install -y network-scripts 

4. Test if network-scripts is really enabled


Use Redhat's nmcli command for controlling network manager if it reports NM not running then you're fine

[root@redhat :~ ]#  nmcli device
Error: NetworkManager is not running.

5. Disable legacy use network-scripts print outs


Bring down some interface with ifdown Redhat script frontend to ifconfig and bring it up with ifup iface-name
 

# ifup eno4
WARN      : [ifup] You are using 'ifup' script provided by 'network-scripts', which are now deprecated.
WARN      : [ifup] 'network-scripts' will be removed in one of the next major releases of RHEL.
WARN      : [ifup] It is advised to switch to 'NetworkManager' instead – it provides 'ifup/ifdown' scripts as well.


Notice the warnings they're harmless and safe to ignore however it is pretty annoying to see them, to disable them:

[root@redhat :~ ]#  touch /etc/sysconfig/disable-deprecation-warnings

6. Use network.service old-fashioned systemd service


From now on you can start using the good old well known and properly working network.service

[root@redhat :~ ]#  systemctl status network


To enable the network service to start after boot:

[root@redhat :~ ]#  systemctl enable network

7. Disable NetworkManager use from Network configuration scripts ifcfg-* for all server available configured ethernet cards


Open with text editor every network script and append NM_CONTROLLED="no" to the end of the file.
 

[root@redhat :~ ]#  vi /etc/sysconfig/network-scripts/ifcfg-ethernetX
NM_CONTROLLED="no"

To save yourself the time if you want to disable NetworkManager use for all /etc/sysconfig/network-scripts/ifcfg-* use a simple shell loop:
 

[root@redhat :~ ]# cd /etc/sysconfig/network-scripts/
[root@redhat :/etc/sysconfig/network-scripts ]# for i in *ifcfg*; do echo NM_CONTROLLED="no" >> $i; done


To load the new network settings do another network reload / restart
 

[root@redhat :~ ]# systemctl restart network


To disable NetworkManager on older CentOS 6 / Redhat 6 / SuSE / Fedora Linux where the OS still not systemd enabled instead of using systemctl you can straight do it with old and well known chkconfig redhat script.
 

[root@centos6 :~ ]# service NetworkManager stop
[root@centos6 :~ ]# chkconfig NetworkManager off
Howto Upgrade IBM Spectrum Protect Backup Client TSM 7.X to 8.1.8, Update Tivoli 8.1.8 to 8.1.11 on CentOS and Redhat Linux

Thursday, December 3rd, 2020


IBM-spectrum-protect-backup-logo-tivoli-tsm-logo

Having another day of a system administrator boredom, we had a task to upgrade some Tivoli TSM Backup clients running on a 20+ machines powered by CentOS and RHEL Linux to prepare the systems to be on the latest patched IBM Spectrum Backup client version available from IBM. For the task of patching I've used a central server where, I've initially downloaded the provided TSM client binaries archives. From this machine, we have copied TivSM*.tar to each and every system that needs to be patched and then patched. The task is not too complex as the running TSM in the machines are all at the same version and all running a recent patched version of Linux. Hence to make sure all works as expected we have tested TSM is upgraded from 7.X.X to 8.X.X on one machine and then test 8.1.8 to 8.1.11 upgrade on another one. Once having confirmed that Backups works as expected after upgrade. We have proceeded to do it massively on each of the rest 20+ hosts.
Below article's goal is to help some lazy sysadmin with the task to prepare an TSM Backup upgrade procedure to standartize TSM Upgrade, which as many of the IBM's softwares is very specific and its upgrade requires, a bit of manual work and extra cautious as there seems to be no easy way (or at least I don't know it), to do the upgrade by simply adding an RPM repository and doing, something like yum install tivsm*.


0. Check if there is at least 2G free of space

According to documentation the minimum space you need to a functional install without having it half installed or filling up your filesystem is 2 Gigabytes of Free Memory on a filesystem where the .tar and rpms will be living.

Thus check what is the situation with your filesystem where you wills store the .tar archice and extract .RPM files / install the RPM files.

# df -h

1. Download the correct tarball with 8.1 Client

On one central machine you would need to download the Tivoli you can do that via wget / curl / lynx whatever is at hand on the Linux server.

As of time of writting this article TSM's 8.1.11 location is at
URL:

http://public.dhe.ibm.com/storage/tivoli-storage-management/maintenance/client/v8r1/Linux/LinuxX86/BA/v8111/

I've made a local download mirror of Tivoli TSM 8.1.11 here.
In case you need to install IBM Spectrum Backup Client to a PCI secured environment to a DMZ-ed LAN network from a work PC you can Download it first from your local PC and via Citrix client upload program or WinSCP upload it to a central replication host from where you will later copy to each of the other server nodes that needs to be upgraded.

Lets Copy archive to all Server hosts where you want it later installed, using a small hack

Assuming you already have an Excel document or a Plain text document with all the IPs of the affected hosts where you will need to get TSM upgraded. Extract this data and from it create a plain text file /home/user/hosts.txt containing all the machine IPs lined up separated with carriage return separations (\n), so you can loop over each one and use scp to send the files.

– Replicate Tivoli tar to all machine hosts where you want to get IBM Spectrum installed or upgraded.
Do it with a loop like this:

# for i in $(cat hosts.txt); do scp 8.1.11.0-TIV-TSMBAC-LinuxX86.tar user@$i:/home/user/; done

 Copy to a Copy buffer temporary your server password assuming all your passwords to each machine are identical and paste your login user pass for each host to initiate transfer
 

2. SSH to each of the Machine hosts IPs

Once you login to the host you want to upgrade
Go to your user $HOME /home/user and create files where we'll temporary store Tivoli archive files and extract RPMs

[root@linux-server user]# mkdir -p ~/tsm/TSM_BCK/
[root@linux-server user]# mv 8.1.11.0-TIV-TSMBAC-LinuxX86.tar ~/tsm
[root@linux-server user]# cd tsm
[root@linux-server user]# tar -xvvf 8.1.11.0-TIV-TSMBAC-LinuxX86.tar
gskcrypt64-8.0.55.17.linux.x86_64.rpm
GSKit.pub.pgp
gskssl64-8.0.55.17.linux.x86_64.rpm
README_api.htm
README.htm
RPM-GPG-KEY-ibmpkg
TIVsm-API64.x86_64.rpm
TIVsm-APIcit.x86_64.rpm
TIVsm-BAcit.x86_64.rpm
TIVsm-BAhdw.x86_64.rpm
TIVsm-BA.x86_64.rpm
TIVsm-filepath-source.tar.gz
TIVsm-JBB.x86_64.rpm
TIVsm-WEBGUI.x86_64.rpm
update.txt

3. Create backup of old backup files

It is always a good idea to keep old backup files

[root@linux-server tsm]# cp -av /opt/tivoli/tsm/client/ba/bin/dsm.opt ~/tsm/TSM_BCK/dsm.opt_bak_$(date +'%Y_%M_%H')
[root@linux-server tsm]# cp -av /opt/tivoli/tsm/client/ba/bin/dsm.sys ~/tsm/TSM_BCK/dsm.sys_bak_$(date +'%Y_%M_%H')

[root@linux-server tsm]# [[ -f /etc/adsm/TSM.PWD ]] && cp -av /etc/adsm/TSM.PWD ~/TSM_BCK/ || echo 'file doesnt exist'

/etc/adsm/TSM.PWD this file is only there as legacy for TSM it contained encrypted passwords inver 7 for updates. In TSM v.8 encryption file is not there as new mechanism for sensitive data was introduced.
Be aware that from Tivoli 8.X it will return error
exist'

!! Note – if dsm.opt , dsm.sys files are on different locations – please use correct full path locations !!

4. Stop  dsmcad – TSM Service daemon

[root@linux-server tsm]# systemctl stop dsmcad

5. Locate and deinstall all old Clients

Depending on the version to upgrade if you're upgrading from TSM version 7 to 8, you will get output like.

[root@linux-server tsm]# rpm -qa | grep 'TIVsm-'
TIVsm-BA-7.1.6-2.x86_64
TIVsm-API64-7.1.6-2.x86_64

If you're one of this paranoid admins you can remove TIVsm packs  one by one.

[root@linux-server tsm]# rpm -e TIVsm-BA-7.1.6-2.x86_64
[root@linux-server tsm]# rpm -e TIVsm-API64-7.1.6-2.x86_64

Instead if upgrading from version 8.1.8 to 8.1.11 due to the Security CVE advisory recently published by IBM e.g. (IBM Runtime Vulnerability affects IBM Spectrum Backup archive Client) and  vulnerability in Apache Commons Log4J affecting IBM Spectrum Protect Backup Archive Client.

[root@linux-server tsm]# rpm -qa | grep 'TIVsm-'
TIVsm-API64-8.1.8-0.x86_64
TIVsm-BA-8.1.8-0.x86_64

Assuming you're not scared of a bit automation you can straight do it with below one liner too 🙂

# rpm -e $(rpm -qa | grep TIVsm)

[root@linux-server tsm]# rpm -qa | grep gsk
[root@linux-server tsm]# rpm -e gskcrypt64 gskssl64

6. Check uninstallation success:

[root@linux-server tsm]# rpm -qa | grep TIVsm
[root@linux-server tsm]# rpm -qa | grep gsk

Here you should an Empty output, if packages are not on the system, e.g. Empty output is good output ! 🙂

7. Install new client IBM Spectrum Client (Tivoli Storage Manager) and lib dependencies

[root@linux-server tsm]# rpm -ivh gskcrypt64-8.0.55.4.linux.x86_64.rpm
[root@linux-server tsm]# rpm -ivh gskssl64-8.0.55.4.linux.x86_64.rpm

 If you're lazy to type you can do as well

[root@linux-server tsm]# rpm -Uvh gsk*

Next step is to install main Tivoli SM components the the API files and BA (The Backup Archive Client)

[root@linux-server tsm]# rpm -ivh TIVsm-API64.x86_64.rpm
[root@linux-server tsm]# rpm -ivh TIVsm-BA.x86_64.rpm

If you have to do it on multiple servers and you do it manually following a guide like this, you might instead want to install them with one liner.

[root@linux-server tsm]# rpm -ivh TIVsm-API64.x86_64.rpm TIVsm-BA.x86_64.rpm

There are some Not mandatory "Common Inventory Technology" components (at some cases if you're using the API install it we did not need that), just for the sake if you need them on your servers due to backup architecture, install also below commented rpm files.

## rpm -ivh TIVsm-APIcit.x86_64.rpm

## rpm -ivh TIVsm-BAcit.x86_64.rpm

These packages not needed only for operation WebGUI TSM GUI management, (JBB) Journal Based Backup, BAhdw (the ONTAP library)


— TIVsm-WEBGUI.x86_64.rpm
— TIVsm-JBB.x86_64.rpm
— TIVsm-BAhdw.x86_64.rpm

8. Start and enable dsmcad service

[root@linux-server tsm]# systemctl stop dsmcad

You will get

##Warning: dsmcad.service changed on disk. Run 'systemctl daemon-reload' to reload units.

[root@linux-server tsm]# systemctl daemon-reload

[root@linux-server tsm]# systemctl start dsmcad


## enable dsmcad – it is disabled by default after install

[root@linux-server ~]# systemctl enable dsmcad

[root@linux-server tsm]# systemctl status dsmcad

9. Check dmscad service is really running

Once enabled IBM TSM will spawn a process in the bacground dmscad if it started properly you should have the process backgrounded.

[root@linux-server tsm]# ps -ef|grep -i dsm|grep -v grep
root      2881     1  0 18:05 ?        00:00:01 /usr/bin/dsmcad

If process is not there there might be some library or something not at place preventing the process to start …

10. Check DSMCAD /var/tsm logs for errors

After having dsmcad process enabled and running in background

[root@linux-server tsm]# grep -i Version /var/tsm/sched.log|tail -1
12/03/2020 18:06:29   Server Version 8, Release 1, Level 10.000


[root@linux-server tsm]# cat /var/tsm/dsmerror.log

To see the current TSM configuration files we can  grep out comments *

[root@linux-server tsm]# grep -v '*' /opt/tivoli/tsm/client/ba/bin/dsm.sys

Example Configuration of the agent:
—————————————————-
   *TSM SERVER NODE Location
   Servername           tsm_server
   COMMmethod           TCPip
   TCPPort              1400
   TCPServeraddress     tsmserver2.backuphost.com
   NodeName             NODE.SERVER-TO-BACKUP-HOSTNAME.COM
   Passwordaccess       generate
   SCHEDLOGNAME         /var/tsm/sched.log
   SCHEDLOGRETENTION    21 D
   SCHEDMODE            POLLING
   MANAGEDServices      schedule
   ERRORLOGNAME         /var/tsm/dsmerror.log
   ERRORLOGRETENTION    30 D
   INCLEXCL             /opt/tivoli/tsm/client/ba/bin/inclexcl.tsm

11. Remove tsm install directory tar ball and rpms to save space on system

The current version of Tivoli service manager is 586 Megabytes.

[root@linux-server tsm]# du -hsc 8.1.11.0-TIV-TSMBAC-LinuxX86.tar
586M    8.1.11.0-TIV-TSMBAC-LinuxX86.tar

Some systems are on purpose configured to have less space under their /home directory,
hence it is a good idea to clear up unnecessery files after completion.

Lets get rid of all the IBM Spectrum archive source files and the rest of RPMs used for installation.

[root@linux-server tsm]# rm -rf ~/tsm/{*.tar,*.rpm,*.gpg,*.htm,*.txt}

12. Check backups are really created on the configured remote Central backup server

To make sure after the upgrade the backups are continuously created and properly stored on the IBM Tivoly remote central backup server, either manually initiate a backup or wait for lets say a day and run dsmc client to show all created backups from previous day. To make sure you'll not get empty output you can on purpose modify some file by simply opening it and writting over without chaning anything e.g. modify your ~/.bashrc or ~/.bash_profile

## List all backups for '/' root directory from -fromdate='DD/MM/YY'

[root@linux-server tsm]# dsmc
Protect>
IBM Spectrum Protect
Command Line Backup-Archive Client Interface
  Client Version 8, Release 1, Level 11.0
  Client date/time: 12/03/2020 18:14:03
(c) Copyright by IBM Corporation and other(s) 1990, 2020. All Rights Reserved.

Node Name: NODE.SERVER-TO-BACKUP-HOSTNAME.COM
Session established with server TSM2_SERVER: AIX
  Server Version 8, Release 1, Level 10.000
  Server date/time: 12/03/2020 18:14:04  Last access: 12/03/2020 18:06:29
 
Protect> query backup -subdir=yes "/" -fromdate=12/3/2020
           Size        Backup Date                Mgmt Class           A/I File
           —-        ———–                ———-           — —-
         6,776  B  12/03/2020 01:26:53             DEFAULT              A  /etc/freshclam.conf
         6,685  B  12/03/2020 01:26:53             DEFAULT              A  /etc/freshclam.conf-2020-12-02
         5,602  B  12/03/2020 01:26:53             DEFAULT              A  /etc/hosts
         5,506  B  12/03/2020 01:26:53             DEFAULT              A  /etc/hosts-2020-12-02
           398  B  12/03/2020 01:26:53             DEFAULT              A  /opt/tivoli/tsm/client/ba/bin/tsmstats.ini
       114,328  B  12/03/2020 01:26:53             DEFAULT              A  /root/.bash_history
           403  B  12/03/2020 01:26:53             DEFAULT              A  /root/.lesshst

Set all logs to log to to physical console /dev/tty12 (tty12) on Linux

Wednesday, August 12th, 2020

tty linux-logo how to log everything to last console terminal tty12

Those who administer servers from the days of birth of Linux and who used actively GNU / Linux over the years or any other UNIX knows how practical could be to configure logging of all running services / kernel messages / errors and warnings on a physical console.

Traditionally from the days I was learning Linux basics I was shown how to do this on an old Debian Sarge 3.0 Linux without systemd and on all Linux distributions Redhat 9.0 / Calderas and Mandrakes I've used either as a home systems or for servers. I've always configured output of all messages to go to the last easy to access console /dev/tty12 (for those who never use it console switching under Linux plain text console mode is done with key combination of CTRL + ALT + F1 .. F12.

In recent times however with the introduction of systemd pretty much things changed as messages to console are not handled by /etc/inittab which was used to add and refresh physical consoles tty1, tty2 … tty7 (the default added one on Linux were usually 7), but I had to manually include more respawn lines for each console in /etc/inittab.
Nowadays as of year 2020 Linux distros /etc/inittab is no longer there being obsoleted and console print out of INPUT / OUTPUT messages are handled by systemd.
 

1. Enable Physical TTYs from TTY8 till TTY12 etc.


The number of default consoles existing in most Linux distributions I've seen is still from tty1 to tty7. Hence to add more tty consoles and be ready to be able to switch out  not only towards tty7 but towards tty12 once you're connected to the server via a remote ILO (Integrated Lights Out) / IdRAC (Dell Remote Access Controller) / IPMI / IMM (Imtegrated Management Module), you have to do it by telling systemd issuing below systemctl commands:


 # systemctl enable getty@tty8.service Created symlink /etc/systemd/system/getty.target.wants/getty@tty8.service -> /lib/systemd/system/getty@.service.

systemctl enable getty@tty9.service

Created symlink /etc/systemd/system/getty.target.wants/getty@tty9.service -> /lib/systemd/system/getty@.service.

systemctl enable getty@tty10.service

Created symlink /etc/systemd/system/getty.target.wants/getty@tty10.service -> /lib/systemd/system/getty@.service.

systemctl enable getty@tty11.service

Created symlink /etc/systemd/system/getty.target.wants/getty@tty11.service -> /lib/systemd/system/getty@.service.

systemctl enable getty@tty12.service

Created symlink /etc/systemd/system/getty.target.wants/getty@tty12.service -> /lib/systemd/system/getty@.service.


Once the TTYS tty7 to tty12 are enabled you will be able to switch to this consoles either if you have a physical LCD / CRT monitor or KVM switch connected to the machine mounted on the Rack shelf once you're in the Data Center or will be able to see it once connected remotely via the Management IP Interface (ILO) remote console.
 

2. Taking screenshot of the physical console TTY with fbcat


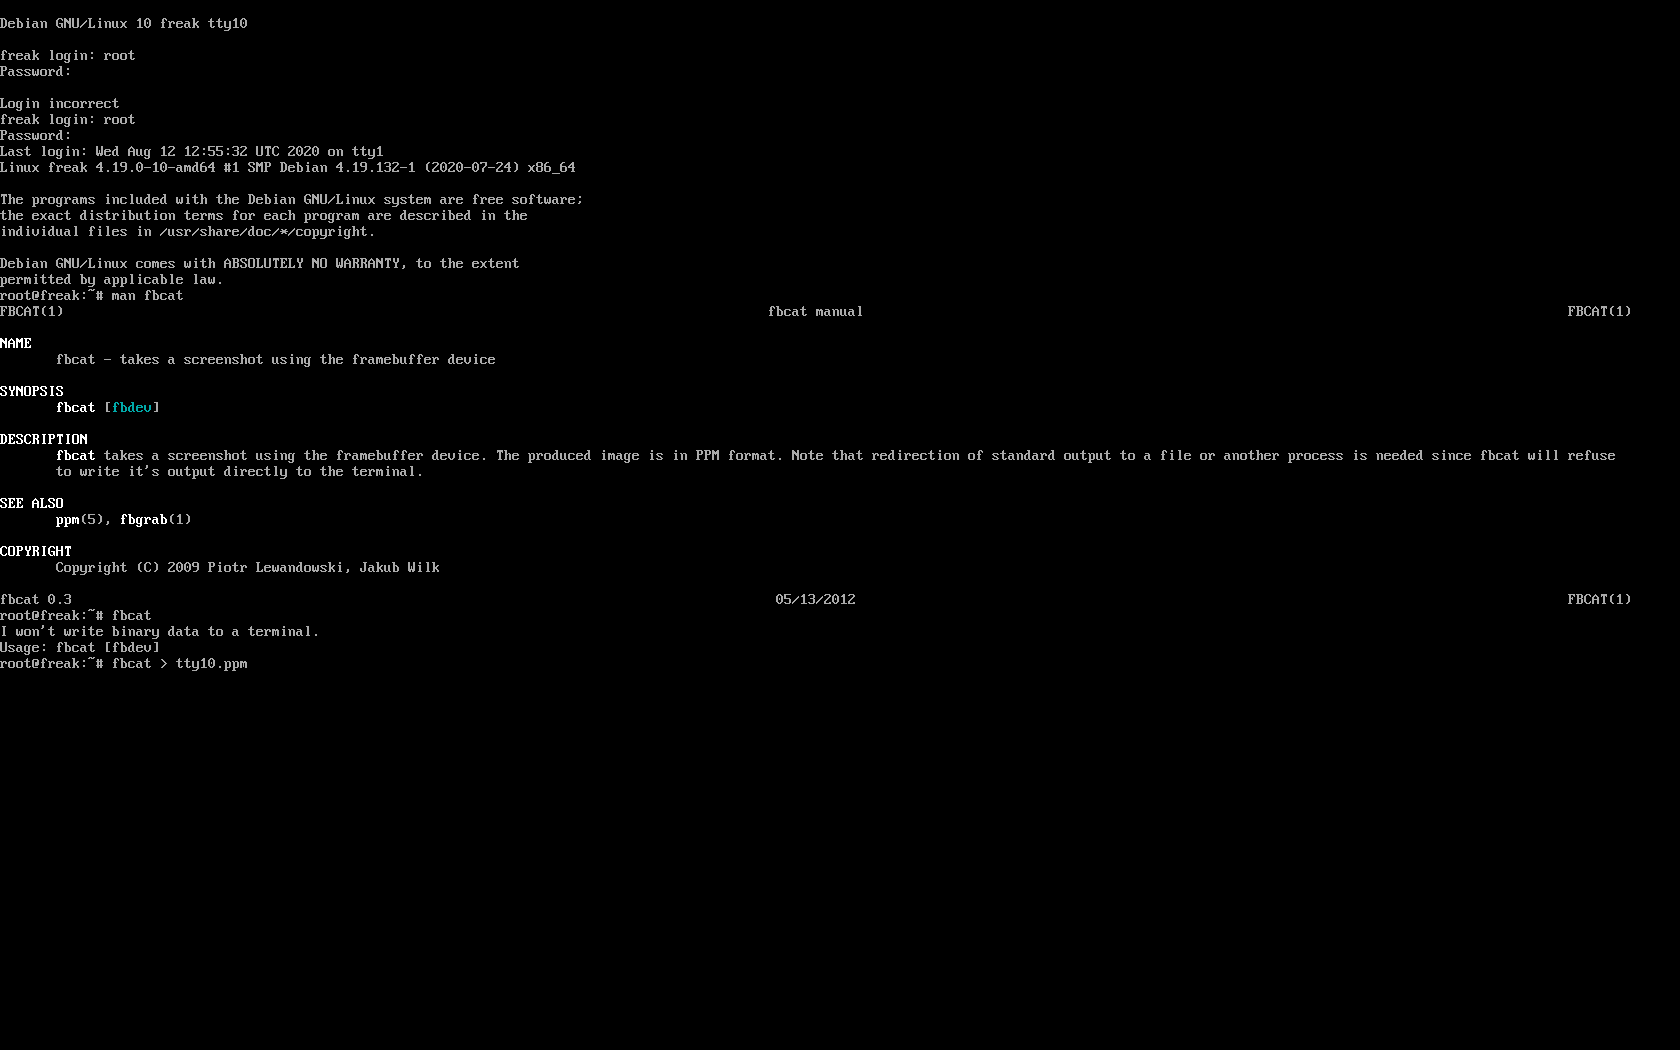
For example below is a screenshot of the 10th enabled tty10:

tty10-linux-screenshot-fbcat-how-to-screenshot-console

As you can in the screenshot I've used the nice tool fbcat that can be used to make a screenshot of remote console. This is very useful especially if remote access via a SSH client such as PuTTY / MobaXterm is not there but you have only a physical attached monitor access on a DCs that are under a heavy firewall that is preventing anyone to get to the system remotely. For example screenshotting the physical console in case if there is a major hardware failure occurs and you need to dump a hardware error message to a flash drive that will be used to later be handled to technicians to analyize it and exchange the broken server hardware part.

Screenshots of the CLI with fbcat is possible across most Linux distributions where as usual.

In Debian you have to first instal the tool via :
 

# apt install –yes fbcat


and on RedHats / CentOS / Fedoras

# yum install -y fbcat


Taking screenshot once tool is on the server of whatever you have printed on console is as easy as

# fbcat > tty_name.ppm


Note that you might want to convert the .ppm created picture to png with any converter such as imagemagick's convert command or if you have a GUI perhaps with GNU Image Manipulation Tool (GIMP).

3. Enabling every rsyslog handled message to log to Physical TTY12


To make everything such as errors, notices, debug, warning messages  become instantly logging towards above added new /dev/tty12.

Open /etc/rsyslog.conf and to the end of the file append below line :
 

daemon,mail.*;\
   news.=crit;news.=err;news.=notice;\
   *.=debug;*.=info;\
   *.=notice;*.=warn   /dev/tty12


To make rsyslog load its new config restart it:


# systemctl status rsyslog


rsyslog.service – System Logging Service
   Loaded: loaded (/lib/systemd/system/rsyslog.service; enabled; vendor preset: enabled)
   Active: active (running) since Mon 2020-08-10 04:09:36 EEST; 2 days ago
     Docs: man:rsyslogd(8)
           https://www.rsyslog.com/doc/
 Main PID: 671 (rsyslogd)
    Tasks: 4 (limit: 4915)
   Memory: 12.5M
   CGroup: /system.slice/rsyslog.service
           └─671 /usr/sbin/rsyslogd -n -iNONE


авг 12 00:00:05 pcfreak rsyslogd[671]:  [origin software="rsyslogd" swVersion="8.1901.0" x-pid="671" x-info="https://www.rsyslo
Warning: Journal has been rotated since unit was started. Log output is incomplete or unavailable.


systemctl restart rsyslog


That's all folks navigate by pressing simultaneously CTRL + ALT + F12 to get to TTY12 or use ALT + LEFT / ALT + RIGHT ARROW (console switch commands) till you get to the console where everything should be now logged.

Enjoy and if you like this article share to tell your sysadmin friends about this nice hack  ! 🙂


How to install GUI on CentOS 7 Minimal and set Gnome Graphical Environment to automatically load on system boot

Wednesday, July 22nd, 2020

centos-linux-logo

I have installed CentOS 7.7 Minimal Server Linux on a VirtualBox Virtual Environment as a test bed machine.

The system got installed easily succesfully with the standard CentOS python based graphical installer, however I needed to place various software which was not there
and for that of course I needed to have a network enabled.

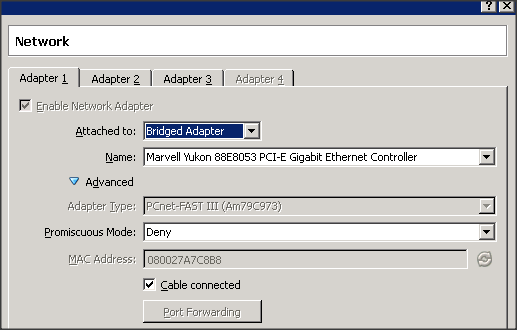
To make network working instead of the default Network NAT configuration for the Virtual Machine I needed to use the Network to be Attached to a Bridged Adapter in order to make
my Windows machine to provide network and (internet) access to VirtualMachine.

virtualbox-virtualmachine-bridged-networking-configuration-screenshot

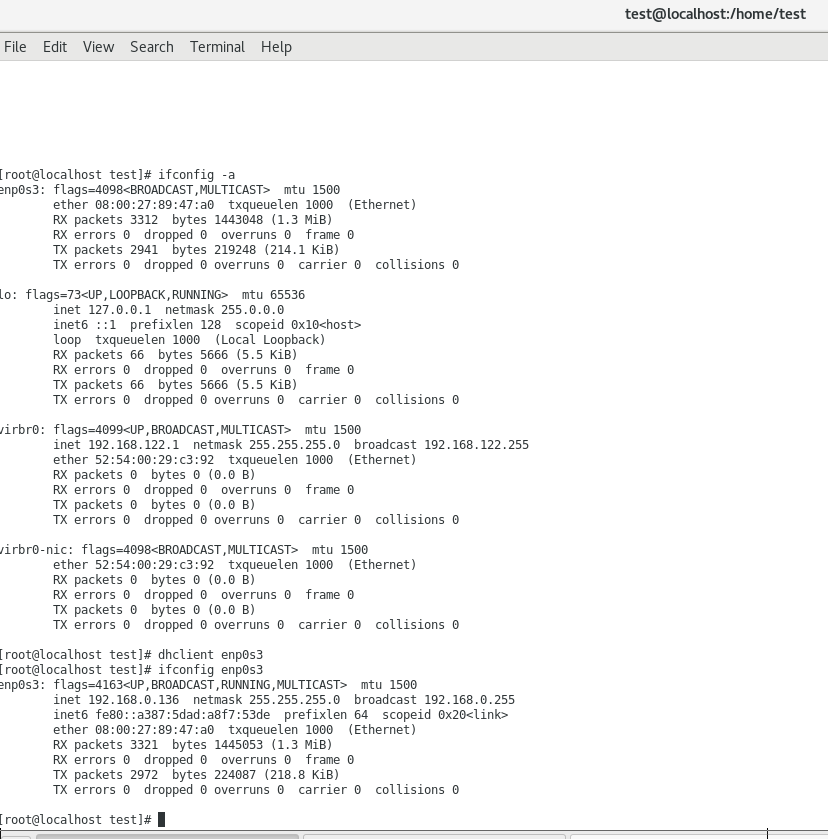
Then to make networking work after booting into CentOS I had to manually fetch IP via DHCP protocol with command:
 

[root@centos :~]# dhclient enp0s3


ethernet0-interface-dhclient-get-ip-linux

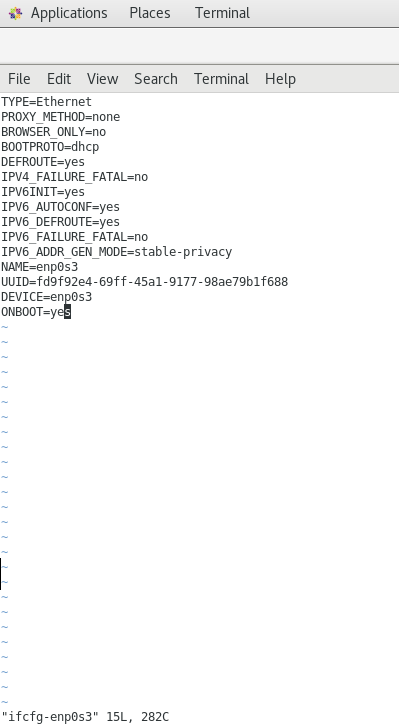
To make the setting permanent I had to also of course modify /etc/sysconfig/network-scripts/ifcfg-enp0s3 file and change 


ONBOOT=no


to 

ONBOOT=yes


enable-dhclient-centos-linux-shot

On next reboot CentOS boots normally with networking as expected

As by default CentOS Minimal does not provide any graphical environment however I needed to have it in my VM in order to be able to use VboxLinuxAdditions.run (VirtualBox Guest Additions plugins) that enabled the CentOS Operating System to show in Virtualbox in fullscreen and to enable the Copy / Paste buffers to work from The Hypervisor (Windows in that case) and the Guest VM (the CentOS VM).

In CentOS terminology metapackages (a  grouped package under a certain name, alias) are called simply groups) there is a "GNOME Desktop" group that can be used to install the GNOME Graphical Command from that point on with yum, like so:
 

[root@centos :~]# yum -y groups install "GNOME Desktop"


In a while the graphical environment will be in place, the command will install about 1300+ RPM packages, this will take about 5 minutes or so depending on your bandwidth connectivity. Once all is installed and configured succesfully you can use the good old startx command to launch GNOME.


[root@centos :~]# startx


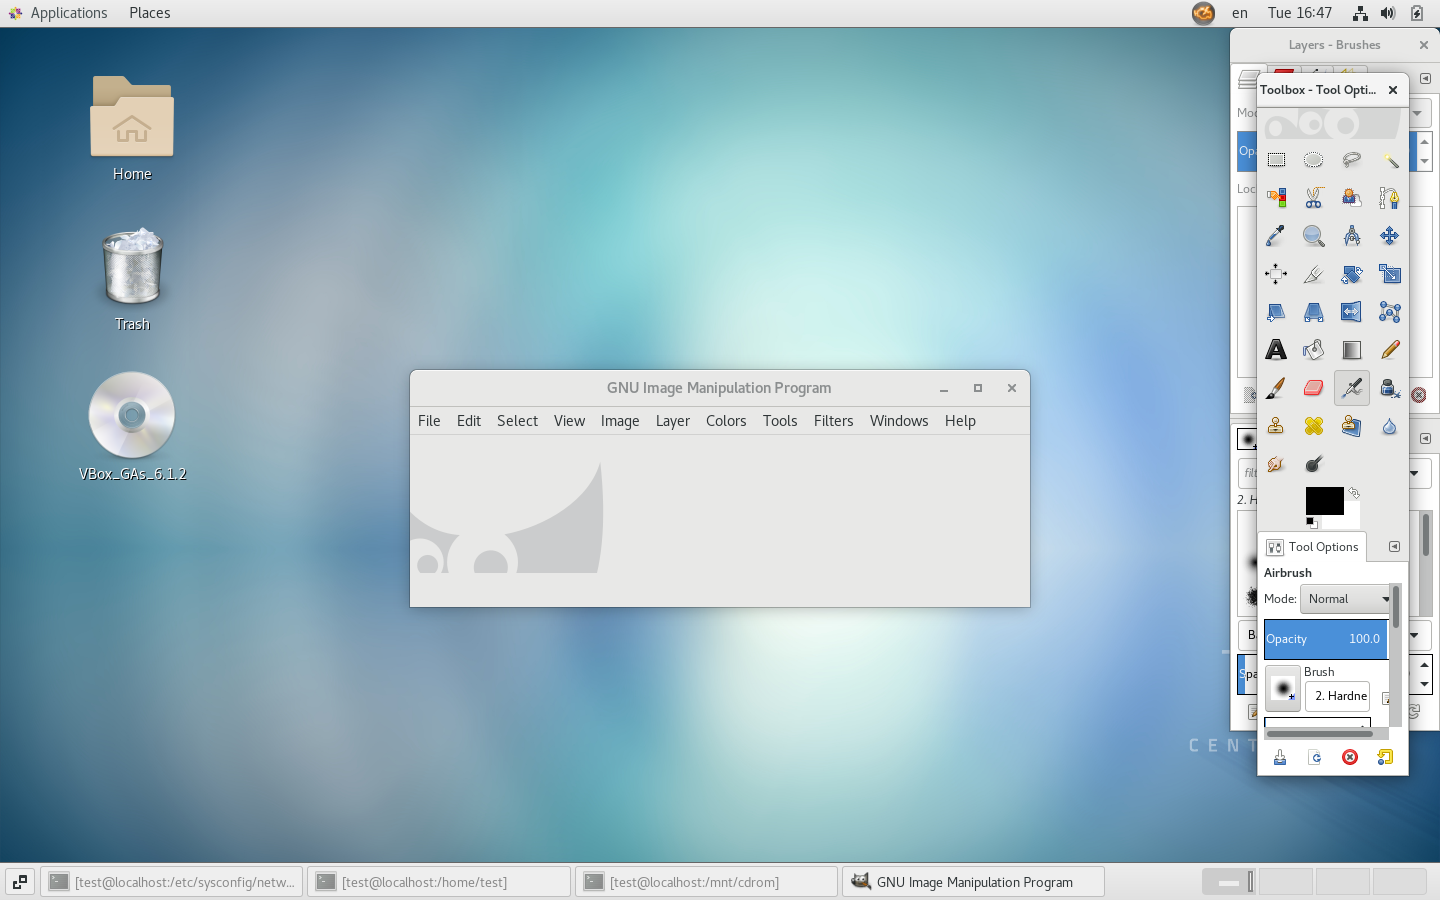
centos7-linux-graphical-environment-screenshot

This of course will make Xserver and GNOME to run one time and on next reboot, you will end up in a plain text mode environment, so perhaps you will need to make the autolaunch of GNOME environment automatically on each boot in CentOS just like in most modern Linux distributions that use SYSTEMD to handle runlevels, you will need to configure it by changing the systemd default configured target via systemctl:


[root@centos :~]# systemctl list-units –type target | egrep "eme|res|gra|mul" 
graphical.target       loaded active active Graphical Interface
multi-user.target      loaded active active Multi-User System


[root@centos :~]# systemctl set-default graphical.target
multi-user.target


[root@centos :~]# systemctl set-default
graphical.target


[root@centos :~]# systemctl set-default graphical.target
graphical.target


Next step was to enable the Guest Additions to do so I had to install in advance 2 RPM packages kernel-headers and kernel-devel


[root@centos :~]# yum install -y kernel-headers kernel-devel

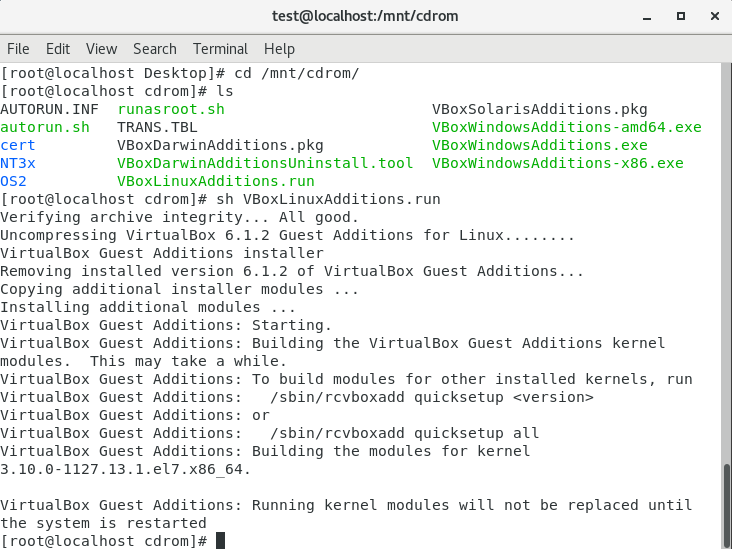
Then I had to mount and run the VboxLinuxAdditions.run script to enable them, i.e.:


[root@centos :~]# mkdir /mnt/cdrom
[root@centos :~]# mount /dev/cdrom /mnt/cdrom

[root@centos :~]# cd /mnt/cdrom/
[root@centos :~]# sh VboxLinuxAdditions.run


virtualbox-linux-additions-install-screenshot-centos-7-linux