Posts Tagged ‘Enjoy’

The Gospel of the Second Resurrection (John 20:19–26) Bright Monday Gospel reading interpretation

Sunday, April 12th, 2026

Resurrection-of-Christ-Bulgarian-Eastern_Orthodox-Christian-Miracle-making-icon
Christ is Risen ! Truly he is Risen ! 

Another year to celebrate Resurrection day, I great all my readers with the Holy and Glorious day of The Resurrection of Christ !
Happy Resurrection day, Happy Easter to All faithful Christians and all Technology Freaks out there who look for the Universal truth and meaning of life !

Happy Resurrection to those who are searching it and those who find it, as I tend to find more and more that more technological literate people came to become Christian and find the Light and truthfulness of Holy Orthodox Christian Faith !
 

In Orthodox Christianity, the Second Resurrection Service often called Agape Vespers is a deeply symbolic and joyful service celebrated on the afternoon or evening of Pascha, the feast of Christ’s Resurrection, an event that changed history forever and made the Time to be counted on Age before Christ and Age after him Anno Domini ( A.D. ) Christ's victory over death and importance of the Resurrection has become a turning stone for whole world and has one time forever changed the history to Bring the Light of Heaven on earth again after the fall of man in Eden's garden. 
In Orthodox Christian tradition the feast of Resurrection is being celebrated Staring from the Day of Pascha (The Resurrection of Christ) towards his Ascension on the Day of Ascension on the 40th Day. Many might not today, that the first 7 days Week of Pascha is actually a whole period of celebration like a day who marks The Resurrection and the whole week in Orthodox tradition is considered as one single day. The first 3 days when the Lord Jesus Christ raised to the death after being in Hell with his soul to Save and Save all the waiting souls of prophets and old testamental times of old righteous people and those who repented (on Holy Saturday) the Next day after Crucifix (on Holy Friday) are the Most glorious and important days of the whole 40 days period of the Resurrection till time the Lord Ascended to Heaven with his Glorious Resurrectied Body

The Paschal Church service of the Resurrection of Christ which is celebrated with serving Saint Basyl's Holy Liturgy in Orthodox Christian tradition always starts exactly at Midnight. In many traditions nowdays like also in Bulgarian tradition, the Holy Fire is brought by Plane to the Synodal Palace of the Church from hence it is distributed across local Pariches Churches to bring the Light of the Miracle of Jerusalem of Holy Fire that happen once and only for Eastern Orthodox Christians, when a Light of Heaven comes to light up the Candle of Jerusalem's Eastern Orthodox Christian patriarch as a eternal confirmation of the Truthfulness of the Resurrection of Christ (a God's sign for Unbelievers to think and study the Orthtoxy). The miracle of Holy Fire happened even this year in Jerusalem in the Holy Sepulcher Church (built on top of the Place of Resurrection of Christ). Thanks God even though humanity sinfulness (and the escalating wars) which by Miracle and God's grace and great Mercy has been temporary suspended for the World to mark the Feast of the Feast of The Resurrection. It is a clear miracle that this temporary peace in Ukraine and Russia as well as Israel and Iran happened exactly on the days of the Eastern Orthodox Christian resurrection, which is this year as most years one week later than the Roman Catholic pascha (as we at the Orthodox Church still do venerate righteously the rule of The first Church Council of Nicea.).

The reason to follow Easter differently for Eastern Orthodox Chrsitians from Western Roman Catholic Christians is often misunderstood and puts great confusion to explain especially to modern people from East and West faith that work together in corporations, thus I'll put a short explanation on why we Eastern Orthodox Christians celebrate Pascha often differently than Roman Catholics?:
There are 3 main reasons that sted from the Ecumenical council of Nicea:


  1. Separation from Jewish Timing: The Council mandated that Christians should no longer rely on Jewish calculations for the 14th of Nisan. The Emperor Constantine, in a letter following the council, argued that it was "unworthy" for Christians to follow the custom of those who had rejected Christ.
  2. Solar-Lunar Formula: To remain independent, the Council adopted the "Alexandrian method": Pascha must fall on the first Sunday after the first full moon occurring on or after the vernal equinox.
  3. Biblical Sequence: While the council's surviving canons do not explicitly state "after Passover," the Orthodox Church maintains that the Nicene intent was to preserve the Biblical sequence of events. Since the Resurrection happened after the Jewish Passover in the Gospels, the Orthodox calculation ensures Pascha never precedes or coincides with the start of the Jewish festival. 

On the next day after we celebrate the Feast of Resurrection (Velikden as called in Eastern tradition) is Bright Monday. The day is very special as the Night Vigil and Morning Service with Holy Liturgy ends up very late around 3, 3-30 A.M. And the service is created by Holy Fathers of the Church inspired by God as a way to experience for second time (on the same day)the Joy of the Resurrection, so the spiritual joy be even more multiplied and well undestood b the Church members.

The Bright Monday or Easter Monday in Eastern Orthodox Christian tradition is marked by what is often called the “Second Resurrection”service. 

The service is a continuation of the joy of Pascha, emphasizing the universal proclamation of Christ’s victory over death.

At the heart of this celebration is the Gospel reading from John 20:19–26, which recounts Christ’s first appearances to His disciples after the Resurrection. What is unique for the service is this is the only day in year when the One and Holy Universal Eastern Orthodox Church shows its universality and union and acceptance of all languages as a mean to proclaim the Good new of Salvation way the Holy Gospel introduced for everyone who believed in the name of the Jesus Christ as a Son of God and Savior of the World by Having introduced the reading of a Gospel reading in different nation languages 

Here is a selection of the Text reading as translated in different languages, might be helpful if you belong to one of those Churches abroad, to read the text on "Second Resurrection", bright monday Service:
 

English (King James Version)
John 20:19–26

Then the same day at evening, being the first day of the week, when the doors were shut where the disciples were assembled for fear of the Jews, came Jesus and stood in the midst, and saith unto them, Peace be unto you.
And when he had so said, he shewed unto them his hands and his side. Then were the disciples glad, when they saw the Lord.
Then said Jesus to them again, Peace be unto you: as my Father hath sent me, even so send I you.
And when he had said this, he breathed on them, and saith unto them, Receive ye the Holy Ghost:
Whose soever sins ye remit, they are remitted unto them; and whose soever sins ye retain, they are retained.
But Thomas, one of the twelve, called Didymus, was not with them when Jesus came.
The other disciples therefore said unto him, We have seen the Lord. But he said unto them, Except I shall see in his hands the print of the nails, and put my finger into the print of the nails, and thrust my hand into his side, I will not believe.
And after eight days again his disciples were within, and Thomas with them: then came Jesus, the doors being shut, and stood in the midst, and said, Peace be unto you.

Bulgarian (Synodal translation) 
Йоан 20:19–26

Вечерта в същия ден, първия на седмицата, когато вратите, дето бяха събрани учениците, бяха заключени от страх от юдеите, дойде Иисус, застана посред и им каза: Мир вам!

И като рече това, показа им ръцете и ребрата Си. Учениците се зарадваха, като видяха Господа.
Иисус пак им рече: Мир вам! Както Ме прати Отец, така и Аз ви пращам.
Като каза това, духна и им рече: Приемете Духа Светаго.
На които простите греховете, ще им се простят; на които задържите, ще се задържат.
А Тома, един от дванайсетте, наречен Близнак, не беше с тях, когато дойде Иисус.
Другите ученици му казваха: Видяхме Господа. А той им рече: Ако не видя на ръцете Му белега от гвоздеите и не туря пръста си в раните от гвоздеите и не туря ръката си в ребрата Му, няма да повярвам.
След осем дни учениците Му пак бяха вътре и Тома с тях. Дойде Иисус, когато вратите бяха заключени, застана посред и рече: Мир вам!

 Russian (Synodal) 
От Иоанна 20:19–26

В тот же первый день недели вечером, когда двери дома, где собирались ученики Его, были заперты из опасения от Иудеев, пришел Иисус, и стал посреди, и говорит им: мир вам!
Сказав это, Он показал им руки и ребра Свои. Ученики обрадовались, увидев Господа.
Иисус же сказал им вторично: мир вам! как послал Меня Отец, так и Я посылаю вас.
Сказав это, дунул, и говорит им: примите Духа Святаго.
Кому простите грехи, тому простятся; на ком оставите, на том останутся.
Фома же, один из двенадцати, называемый Близнец, не был тут с ними, когда приходил Иисус.
Другие ученики сказали ему: мы видели Господа. Но он сказал им: если не увижу на руках Его ран от гвоздей и не вложу перста моего в раны от гвоздей и не вложу руки моей в ребра Его, не поверю.
После восьми дней опять были в доме ученики Его, и Фома с ними. Пришел Иисус, когда двери были заперты, стал посреди их и сказал: мир вам!

Ἐκ τοῦ κατὰ Ἰωάννην ἁγίου Εὐαγγελίου τὸ ἀνάγνωσμα.
Greek (Κοινή / Patriarchal Text – Orthodox usage) 

Οὔσης οὖν ὀψίας τῇ ἡμέρᾳ ἐκείνῃ τῇ μιᾷ σαββάτων, καὶ τῶν θυρῶν κεκλεισμένων ὅπου ἦσαν οἱ μαθηταὶ συνηγμένοι διὰ τὸν φόβον τῶν Ἰουδαίων, ἦλθεν ὁ Ἰησοῦς καὶ ἔστη εἰς τὸ μέσον καὶ λέγει αὐτοῖς· Εἰρήνη ὑμῖν.
καὶ τοῦτο εἰπὼν ἔδειξεν αὐτοῖς τὰς χεῖρας καὶ τὴν πλευρὰν αὐτοῦ. ἐχάρησαν οὖν οἱ μαθηταὶ ἰδόντες τὸν Κύριον.
εἶπεν οὖν αὐτοῖς πάλιν ὁ Ἰησοῦς· Εἰρήνη ὑμῖν· καθὼς ἀπέσταλκέ με ὁ Πατήρ, κἀγὼ πέμπω ὑμᾶς.
καὶ τοῦτο εἰπὼν ἐνεφύσησε καὶ λέγει αὐτοῖς· Λάβετε Πνεῦμα Ἅγιον·
ἄν τινων ἀφῆτε τὰς ἁμαρτίας, ἀφίενται αὐτοῖς· ἄν τινων κρατῆτε, κεκράτηνται.
Θωμᾶς δὲ εἷς ἐκ τῶν δώδεκα, ὁ λεγόμενος Δίδυμος, οὐκ ἦν μετ’ αὐτῶν ὅτε ἦλθεν ὁ Ἰησοῦς.
ἔλεγον οὖν αὐτῷ οἱ ἄλλοι μαθηταί· Ἑωράκαμεν τὸν Κύριον. ὁ δὲ εἶπεν αὐτοῖς· Ἐὰν μὴ ἴδω ἐν ταῖς χερσὶν αὐτοῦ τὸν τύπον τῶν ἥλων καὶ βάλω τὸν δάκτυλόν μου εἰς τὸν τύπον τῶν ἥλων καὶ βάλω τὴν χεῖρά μου εἰς τὴν πλευρὰν αὐτοῦ, οὐ μὴ πιστεύσω.
καὶ μεθ’ ἡμέρας ὀκτὼ πάλιν ἦσαν ἔσω οἱ μαθηταὶ αὐτοῦ καὶ Θωμᾶς μετ’ αὐτῶν. ἔρχεται ὁ Ἰησοῦς τῶν θυρῶν κεκλεισμένων καὶ ἔστη εἰς τὸ μέσον καὶ εἶπεν· Εἰρήνη ὑμῖν.

 Serbian (Епископски / Orthodox usage)
Јован 20:19–26

А у вече тог првог дана седмице, кад су врата где беху ученици сабрани била затворена од страха од Јудејаца, дође Исус и стаде међу њих и рече им: Мир вам!
И ово рекавши, показа им руке и ребра Своја. Тада се обрадоваше ученици видевши Господа.
Тада им Исус опет рече: Мир вам! Као што је Отац послао Мене, и Ја шаљем вас.
И ово рекавши, дуну и рече им: Примите Духа Светога.
Којима опростите грехе, опраштају им се; којима задржите, задржани су.
А Тома, један од дванаесторице, звани Близанац, не беше с њима кад дође Исус.
Тада му други ученици говораху: Видели смо Господа. А он им рече: Ако не видим на рукама Његовим ране од клинова и не ставим прст свој у ране од клинова и не ставим руку своју у ребра Његова, нећу веровати.

И после осам дана опет беху унутра ученици Његови и Тома с њима. Дође Исус кад врата беху затворена, стаде међу њих и рече: Мир вам!

 Romanian (Biblia sinodală – Orthodox)
Ioan 20:19–26

Și fiind seară, în ziua aceea, cea dintâi a săptămânii, și ușile fiind încuiate unde erau ucenicii adunați de frica iudeilor, a venit Iisus și a stat în mijloc și le-a zis: Pace vouă!
Și zicând aceasta, le-a arătat mâinile și coasta Sa. Deci s-au bucurat ucenicii, văzând pe Domnul.
Și le-a zis iarăși Iisus: Pace vouă! Precum M-a trimis pe Mine Tatăl, vă trimit și Eu pe voi.
Și zicând aceasta, a suflat asupra lor și le-a zis: Luați Duh Sfânt.
Cărora veți ierta păcatele, le vor fi iertate; și cărora le veți ține, vor fi ținute.
Iar Toma, unul din cei doisprezece, numit Geamănul, nu era cu ei când a venit Iisus.
Deci ceilalți ucenici îi ziceau: Am văzut pe Domnul. Dar el le-a zis: Dacă nu voi vedea în mâinile Lui semnul cuielor și nu voi pune degetul meu în semnul cuielor și nu voi pune mâna mea în coasta Lui, nu voi crede.
Și după opt zile, ucenicii Lui erau iarăși înăuntru, și Toma împreună cu ei. A venit Iisus, ușile fiind încuiate, și a stat în mijloc și a zis: Pace vouă!


German (Luther tradition / Orthodox-used standard translation style)
Johannes 20,19–26

Und am Abend desselben ersten Tages der Woche, als die Türen verschlossen waren, wo die Jünger versammelt waren aus Furcht vor den Juden, kam Jesus und trat mitten unter sie und spricht zu ihnen: Friede sei mit euch!

Und als er das gesagt hatte, zeigte er ihnen die Hände und seine Seite. Da wurden die Jünger froh, dass sie den Herrn sahen.

Da sprach Jesus abermals zu ihnen: Friede sei mit euch! Gleichwie mich der Vater gesandt hat, so sende ich euch.

Und als er das gesagt hatte, hauchte er sie an und spricht zu ihnen: Empfangt den Heiligen Geist!

Welchen ihr die Sünden erlasst, denen sind sie erlassen; und welchen ihr sie behaltet, denen sind sie behalten.

Thomas aber, einer der Zwölf, der Zwilling genannt wird, war nicht bei ihnen, als Jesus kam.

Da sagten ihm die anderen Jünger: Wir haben den Herrn gesehen. Er aber sprach zu ihnen: Wenn ich nicht in seinen Händen die Nägelmale sehe und meinen Finger in die Nägelmale lege und meine Hand in seine Seite lege, so will ich nicht glauben.

Und nach acht Tagen waren seine Jünger abermals drinnen, und Thomas war bei ihnen. Kommt Jesus, als die Türen verschlossen waren, und tritt mitten unter sie und spricht: Friede sei mit euch!

Arabic (بطريركي / Orthodox liturgical usage)
إنجيل يوحنا 20:19–2

ولما كانت عشية ذلك اليوم، وهو أول الأسبوع، وكانت الأبواب مغلقة حيث كان التلاميذ مجتمعين خوفًا من اليهود، جاء يسوع ووقف في الوسط وقال لهم: سلام لكم.

ولما قال هذا أراهم يديه وجنبه، ففرح التلاميذ إذ رأوا الرب.

فقال لهم يسوع ثانية: سلام لكم. كما أرسلني الآب أرسلكم أنا أيضًا.

ولما قال هذا نفخ فيهم وقال لهم: اقبلوا الروح القدس.

من غفرتم خطاياه تُغفر له، ومن أمسكتم خطاياه أُمسكت.

أما توما، أحد الاثني عشر، الذي يُدعى التوأم، فلم يكن معهم حين جاء يسوع.

فقال له التلاميذ الآخرون: قد رأينا الرب. فقال لهم: إن لم أبصر في يديه أثر المسامير وأضع إصبعي في أثر المسامير وأضع يدي في جنبه لا أؤمن.

وبعد ثمانية أيام كان تلاميذه أيضًا داخلًا، وكان توما معهم. جاء يسوع والأبواب مغلقة، ووقف في الوسط وقال: سلام لكم!

Georgian (საქართველოს მართლმადიდებელი ეკლესია)
იოანე 20:19–26

და იყო მწუხრი იმ დღესა, კვირის პირველ დღეს, და კარნი დახშულნი იყვნენ, სადაც მოწაფენი იყვნენ შეკრებილნი იუდეველთა შიშისგან, მოვიდა იესო და დადგა მათ შორის და ჰრქუა მათ: მშვიდობა თქუენდა.
და ეს რომ თქვა, უჩვენა მათ ხელნი და გვერდი თვისი. და გაიხარეს მოწაფეებმა, იხილეს რა უფალი.
მაშინ კვლავ უთხრა მათ იესომ: მშვიდობა თქუენდა; როგორც მამამ მომავლინა მე, მეც თქვენ მოგავლინებთ.
და ეს რომ თქვა, შეუბერა მათ და უთხრა: მიიღეთ სული წმინდა.
ვისაც მიუტევებთ ცოდვებს, მიეტევებათ მათ; და ვისაც დაუკავებთ, დაუკავდებათ.
ხოლო თომა, ერთი თორმეტთაგანი, რომელსაც ეწოდებოდა ტყუპი, არ იყო მათთან, როცა მოვიდა იესო.
უთხრეს მას სხვა მოწაფეებმა: ვიხილეთ უფალი. ხოლო მან უთხრა მათ: თუ არ ვიხილავ მის ხელებზე ფრჩხილების ნიშანს და არ შევიტან ჩემს თითს ფრჩხილების ნიშანში და არ შევიტან ჩემს ხელს მის გვერდში, არ ვირწმუნებ.
და რვა დღის შემდეგ კვლავ იყვნენ შინ მისი მოწაფენი და თომაც მათთან. მოვიდა იესო, კარნი დახშულნი იყვნენ, დადგა მათ შორის და უთხრა: მშვიდობა თქუენდა.


Albanian (Orthodox Albanian Bible usage)
Gjoni 20:19–26

Dhe kur u bë mbrëmje në atë ditë, ditën e parë të javës, dhe dyert ishin të mbyllura ku ishin mbledhur dishepujt nga frika e judenjve, erdhi Jezusi dhe qëndroi në mes dhe u tha atyre: Paqe juve!
Dhe pasi tha këtë, u tregoi duart dhe brinjën e Tij. Atëherë dishepujt u gëzuan kur panë Zotin.
Dhe Jezusi u tha përsëri: Paqe juve! Sikurse më dërgoi Ati, ashtu ju dërgoj edhe unë juve.
Dhe pasi tha këtë, fryu mbi ta dhe u tha: Merrni Frymën e Shenjtë.
Kujt t’ia falni mëkatet, do t’u falen; kujt t’ia mbani, do t’u mbeten.
Por Thomai, një nga të dymbëdhjetët, i quajtur Binjaku, nuk ishte me ta kur erdhi Jezusi.
Dishepujt e tjerë i thoshin: E pamë Zotin. Por ai u tha: Nëse nuk shoh në duart e Tij shenjat e gozhdëve dhe nuk vë gishtin tim në shenjat e gozhdëve dhe nuk vë dorën time në brinjën e Tij, nuk do të besoj.
Dhe pas tetë ditësh, dishepujt e Tij ishin përsëri brenda dhe Thomai me ta. Erdhi Jezusi, kur dyert ishin të mbyllura, dhe qëndroi në mes dhe tha: Paqe juve!

Czech (Český ekumenický / Orthodox-used translation style)
Jan 20,19–26

Když byl večer onoho dne, prvního dne v týdnu, a dveře, kde byli učedníci shromážděni ze strachu před Židy, byly zavřeny, přišel Ježíš, postavil se doprostřed a řekl jim: Pokoj vám!

A když to řekl, ukázal jim ruce a svůj bok. Učedníci se zaradovali, když viděli Pána.
Ježíš jim znovu řekl: Pokoj vám! Jako Otec poslal mne, tak já posílám vás.
A když to řekl, dechl na ně a řekl jim: Přijměte Ducha Svatého.
Komu odpustíte hříchy, budou mu odpuštěny; komu je zadržíte, budou zadrženy.
Tomáš, jeden z dvanácti, zvaný Didymos, nebyl s nimi, když přišel Ježíš.
Ostatní učedníci mu říkali: Viděli jsme Pána. Ale on jim řekl: Jestliže neuvidím na jeho rukou jizvy po hřebech a nevložím svůj prst do jizev po hřebech a nevložím svou ruku do jeho boku, neuvěřím.
A po osmi dnech byli jeho učedníci opět uvnitř a Tomáš s nimi. Přišel Ježíš, když byly dveře zavřeny, postavil se doprostřed a řekl: Pokoj vám!

Slovak (Orthodox-used / liturgical style)
Ján 20,19–26

Keď bol večer toho prvého dňa v týždni a dvere, kde boli učeníci zhromaždení zo strachu pred Židmi, boli zavreté, prišiel Ježiš, postavil sa doprostred a povedal im: Pokoj vám!
A keď to povedal, ukázal im ruky a svoj bok. Učeníci sa zaradovali, keď videli Pána.
Ježiš im znova povedal: Pokoj vám! Ako mňa poslal Otec, aj ja posielam vás.
A keď to povedal, dýchol na nich a povedal im: Prijmite Ducha Svätého.
Komu odpustíte hriechy, budú mu odpustené; komu ich zadržíte, budú zadržané.
Tomáš, jeden z dvanástich, zvaný Didymus, nebol s nimi, keď prišiel Ježiš.
Ostatní učeníci mu hovorili: Videli sme Pána. Ale on im povedal: Ak neuvidím na jeho rukách stopy po klincoch a nevložím svoj prst do stôp po klincoch a nevložím svoju ruku do jeho boku, neuverím.
A po ôsmich dňoch boli jeho učeníci znova vnútri a Tomáš s nimi. Prišiel Ježiš, keď boli dvere zatvorené, postavil sa doprostred a povedal: Pokoj vám!

The Meaning of the Passage

This Gospel takes place on the evening of the Resurrection:

“Peace be with you.” (John 20:19)

The disciples are gathered in fear, behind closed doors. Yet Christ appears among them not as a ghost, but in His glorified body. His greeting, “Peace be with you,” is not merely comforting, it is transformative. It signals reconciliation between God and humanity.

Christ then shows His wounds, proving that the Crucified One is truly the Risen One.

The Gift of the Holy Spirit

One of the most profound moments in this passage is when Christ breathes on the disciples:

“Receive the Holy Spirit.” (John 20:22)

This act recalls the creation of Adam, when God breathed life into humanity. Here, the Risen Christ inaugurates a new creation—restoring and renewing mankind.

He also grants the apostles authority:

“If you forgive the sins of any, they are forgiven…” (John 20:23)

This becomes the foundation of the Church’s sacramental life.

The Absence of Thomas

Thomas is not present during this first appearance. His absence becomes spiritually significant, he represents all who struggle with doubt.

When told of the Resurrection, Thomas responds:

“Unless I see… I will not believe.” (John 20:25)

This honest doubt sets the stage for the next encounter (read the following Sunday), where faith is deepened through experience.

Why It Is Called the “Second Resurrection Gospel” ?

This Gospel reading done in multiple languages during Easter Monday services, is very adequate in international Church communities such as Orthodox Church pariches in Western Europe and America where, there are church members from virtually every nationality. 
Those reading is conduceted in Church Pariches by people whos native language is the language of reading or by anyone in the Church community that can speak or read the language. Thus the Church assemblyy shows clearly to the World:

1. The universality of the Resurrection for All Mankind and a reference to the Primal Language of Edem which in New Testamental times after Christ is the Language of Love and virtues as given by Christ.
2. The spreading of the Gospel to all nations (for which the apostles and every Christian has been called by the Saviour
The unity of the Church across cultures and tongues
3. The unity of the Church across cultures and tongues and the one saving truth that if practiced as prescribed will lead humanity and each individual to Christs faith and salvation.

Closing words
 

Hopefully this article was interseting for tech guys and some diversity from the boredom of tech stuff. I hope it shed some light love, faith, hope and peace and understanding for anyone who searches for the Truth.

I will close it with the Great and glorious and spiritually rich Paschal Sermon of Saint John Crysostom, that is being red on the Easter Service (at some Churches it is practice to read this sermon over the first three days Church services of Pasche).

The Catechetical Sermon of St. John Chrysostom reading Matins of Pascha.

The_Descent-of-Jesus-Christ-in-Hades-to-save-all-in-Hell-saint-Ekaterina-monastery-from-years-around-1500s

The descent to Hades of Christ – Saint Ekaterina Monastery ancient of Resurrection

If any man be devout and love God, let him enjoy this fair and radiant triumphal feast.
If any man be a wise servant, let him rejoicing enter into the joy of his Lord.
If any have labored long in fasting, let him now receive his recompense.
If any have wrought from the first hour, let him today receive his just reward.
If any have come at the third hour, let him with thankfulness keep the feast.
If any have arrived at the sixth hour, let him have no misgivings; because he shall in nowise be deprived thereof.
If any have delayed until the ninth hour, let him draw near, fearing nothing.
If any have tarried even until the eleventh hour, let him, also, be not alarmed at his tardiness; for the Lord, who is jealous of his honor, will accept the last even as the first; He gives rest unto him who comes at the eleventh hour, even as unto him who has wrought from the first hour.

And He shows mercy upon the last, and cares for the first; and to the one He gives, and upon the other He bestows gifts.
And He both accepts the deeds, and welcomes the intention, and honors the acts and praises the offering.
Wherefore, enter you all into the joy of your Lord; and receive your reward, both the first, and likewise the second.
You rich and poor together, hold high festival. You sober and you heedless, honor the day.
Rejoice today, both you who have fasted and you who have disregarded the fast.
The table is full-laden; feast ye all sumptuously.
The calf is fatted; let no one go hungry away.

Enjoy ye all the feast of faith: Receive ye all the riches of loving-kindness.
Let no one bewail his poverty, for the universal kingdom has been revealed.
Let no one weep for his iniquities, for pardon has shown forth from the grave.
Let no one fear death, for the Savior’s death has set us free.
He that was held prisoner of it has annihilated it. By descending into Hell, He made Hell captive.
He embittered it when it tasted of His flesh.
And Isaiah, foretelling this, did cry: Hell, said he, was embittered, when it encountered Thee in the lower regions.
It was embittered, for it was abolished. It was embittered, for it was mocked.
It was embittered, for it was slain. It was embittered, for it was overthrown.
It was embittered, for it was fettered in chains.
It took a body, and met God face to face.
It took earth, and encountered Heaven.
It took that which was seen, and fell upon the unseen.

O Death, where is your sting? O Hell, where is your victory?
Christ is risen, and you are overthrown.
Christ is risen, and the demons are fallen.
Christ is risen, and the angels rejoice.
Christ is risen, and life reigns.
Christ is risen, and not one dead remains in the grave.
For Christ, being risen from the dead, is become the first fruits of those who have fallen asleep.
To Him be glory and dominion unto ages of ages.
Amen.

How to Optimize Debian Linux on old Computers to Get improved overall Speed, Performance and Stability

Tuesday, December 30th, 2025

tuning-debian-linux-to-work-quickly-and-smooth-on-old-pc-laptop-hardware


How to optimize Debian version 12.12 Linux OS to work responsive on Old ThinkPad laptops like from year 2008 Thinkpad R61 with Window Maker, zram, SSD etc.

Old computers aren’t obsolete but most worthy if you dont want to spend on extra hardware.

With the right setup, Debian Linux can run smoothly on hardware that’s more than a decade old. This article walks through a real-world, proven configuration using a classic ThinkPad R61 (Core 2 Duo, 4 GB RAM, SSD), but the principles apply to many older PCs as well.

Why use Debian Linux on old hardware?

Debian Stable is ideal for old hardware because it offers:

  • Low baseline resource usage
  • Long-term stability
  • Minimal background activity
  • Excellent support for lightweight desktops
  • Flexible and well organized and relatively easy to tune

Paired with a minimal window manager, Debian easily outperforms many “lightweight” distros that still ship heavy defaults.

Hardware Baseline PC setup

Test system:

  • Laptop: ThinkPad R61
  • CPU: Intel Core 2 Duo
  • RAM: 4 GB
  • Storage: SATA SSD
  • Graphics: Intel X3100 / NVIDIA NVS 140M
  • Desktop: Window Maker

This is a common configuration for late-2000s business laptops.

1. Desktop Environment: Keep It Simple

Heavy desktop environments is the main factor to slow down an old PC.
Where possible dont use the Desktop environment at all and stick to console.

Recommended:

  • Window Maker (used by myself)
  • Openbox
  • Fluxbox
  • IceWM

Avoid:

  • GNOME
  • KDE Plasma
  • Cinnamon

Window Maker is especially effective: no compositing, no animations, minimal memory usage.

2. Terminal Choice Matters

For console-based applications (games, tools, system utilities), use a terminal that correctly reports its size. Lets say you use xterm:

$ xterm

You can force a usable terminal size like this:

$ xterm -geometry 80×32 &

This avoids common issues with console applications failing due to incorrect terminal dimensions.

Install urxvt (best choice for terminal productivity)

Open a terminal and run:

apt update
# apt install rxvt-unicode

Optional (if you want tabbed terminal use suckless):

# sudo apt install suckless-tools

  • rxvt-unicode-256color → main terminal (n/a in debian) have to install third party  
  • rxvt-unicode-256color-perl → Perl extensions (tabs, URL click, etc.) (n/a in debian, installable via third party)
  • suckless-tools → includes tabbed, can be used as an alternative for tabs

a. Configure .Xresources

Create or edit ~/.Xresources:

$ vim~/.Xresources

Example for beautiful setup with tabs, transparency, and fonts:

! Basic appearance
! URxvt.font: xft:FiraCode Nerd Font Mono:size=12
 URxvt.background: [90]#1c1c1c
 URxvt.foreground: #c0c0c0
! URxvt.cursorColor: #ff5555
! URxvt.saveLines: 10000
! URxvt.scrollBar: false
! URxvt.borderLess: true

! Enable tabs using built-in tabbed extension
URxvt.perl-ext-common: default,tabbed

! Tab colors
URxvt.tabbed.tabbar-fg: 15
URxvt.tabbed.tabbar-bg: 0
URxvt.tabbed.tab-fg: 2
URxvt.tabbed.tab-bg: 8

! Keybindings for tabs
! Ctrl+Shift+N → new tab
URxvt.keysym.Control-Shift-N: perl:tabbed:new_tab
! Ctrl+Shift+W → close tab
URxvt.keysym.Control-Shift-W: perl:tabbed:close_tab
! Ctrl+Tab → next tab
URxvt.keysym.Control-Tab: perl:tabbed:next_tab
! Ctrl+Shift+Tab → previous tab
URxvt.keysym.Control-Shift-Tab: perl:tabbed:prev_tab
! Tabs keybindings
URxvt.keysym.Control-N: perl:tabbed:new_tab
URxvt.keysym.Control-W: perl:tabbed:close_tab


b. Apply .Xresources changes

Run:

$ xrdb ~/.Xresources

Then launch urxvt:

$ rxvt

  • Ctrl+Shift+T → new tab
  • Ctrl+Shift+W → close tab

c. Optional: Make it even cooler

  1. Install powerline fonts or Nerd Fonts (for fancy prompt icons):

# apt install fonts-firacode

  1. Enable URL clicking and clipboard (already enabled above)

  2. Combine with tmux for extra tabs/panes, session management, and more shortcuts.

3. Retain only last 500MB from journald

Retain only the past 500 MB:

# journalctl –vacuum-size=500M

This is exteremely useful as sometimes failing services might generate ton of unnecessery logs and might flood up the old machine hard disk.

4. Reduce journal memory footprint

# vim /etc/systemd/journald.conf

Set Storage=volatile
Set RuntimeMaxUse=50M

# systemctl restart systemd-journald

5. Trim services boot times

# systemd-analyze blame
# systemd-analyze critical-chain

This tells you which services slow down your boot the most.

6. Disable Unnecessary Services

Old systems benefit massively from disabling unused background services.

Check what’s enabled:

# systemctl list-unit-files –state=enabled

Common candidates to disable (if not needed):

# systemctl disable bluetooth
# systemctl disable cups
#systemctl disable avahi-daemon

#systemctl disable ModemManager

Each disabled service saves RAM and CPU cycles.

7. Dirty Page Tuning (Reduces Freezes)

Defaults favor servers, not laptops.

Edit:

vim /etc/sysctl.conf

Add:

vm.dirty_background_ratio=5
vm.dirty_ratio=10

This forces writeback earlier, preventing sudden stalls.

8. Memory Tuning: zram Done Right

Does zram make sense with 4 GB RAM and an SSD?

Yes it could, but only in moderation.

zram compresses memory in RAM and acts as fast swap. On a Core 2 Duo, compression overhead is small and the benefit is smoother multitasking.

Recommended zram configuration

Install zram-tools deb package:

# apt install zram-tools

Edit:

# vim /etc/default/zramswap

Set:

PERCENT=15

This creates ~600 MB of compressed swap — enough to absorb memory spikes without wasting RAM.

9. Keep Disk Swap (But Small)

Even with zram, disk swap is useful as a fallback.

Recommended:

  • 1–2 GB swap on SSD
  • zram should have higher priority than disk swap

Check:

# swapon –show

10. Swappiness and Cache Pressure

Tune the kernel to prefer RAM and zram first:

# vim /etc/sysctl.conf

Add:

vm.swappiness=10
vm.vfs_cache_pressure=50

Apply:

# sysctl -p

This prevents early swapping and keeps the system responsive.

11. CPU Governor: A Hidden Performance Win

Older ThinkPads often run conservative CPU governors.

Install tools:

# apt install cpufrequtils

Set a balanced governor:

# echo 'GOVERNOR="ondemand"' | sudo tee /etc/default/cpufrequtils

# systemctl restart cpufrequtils

This allows the CPU to ramp up quickly when needed.

12. Power and Thermal Management (ThinkPad-Specific)

Install TLP:

# apt install tlp
# systemctl enable tlp
# systemctl start tlp

TLP improves:

  • Battery life
  • Thermal behavior
  • SSD longevity

Defaults are usually perfect – no heavy tuning required.

13. Disable Watchdogs (If You Don’t Debug Kernels)

Watchdogs waste cycles on old CPUs.

Check:

# lsmod | grep watchdog

Disable:

# vim /etc/modprobe.d/blacklist.conf

Add:

blacklist iTCO_wdt
blacklist iTCO_vendor_support

Reboot.

14. Reduce systemd Noise

systemd logs aggressively by default.

Edit:

#vim/etc/systemd/journald.conf

Set:

Storage=volatile
RuntimeMaxUse=50M

Then:

#systemctl restart systemd-journald

Less disk I/O, faster boots.

15. Use tmpfs for caching and Volatile Junk

Put garbage in RAM, not SSD.

Edit:

# vim /etc/fstab

Add:

tmpfs /tmp tmpfs noatime,nosuid,nodev,mode=1777,size=256M 0 0

Optional:

tmpfs /var/tmp tmpfs noatime,nosuid,nodev,size=128M 0 0
# mount -a

16. IRQ Balance: Disable It (might slow down machine)

On single-socket old laptops, irqbalance can hurt.

Disable:

# systemctl disable irqbalance

Test performance; re-enable if needed.

17. Reduce systemd Timeout Delays

Old laptops often wait forever on dead hardware.

Edit:

# vim /etc/systemd/system.conf

Set:

DefaultTimeoutStartSec=10s
DefaultTimeoutStopSec=10s

18. Strip Kernel Modules You Don’t Use

If you don’t use:

  • FireWire
  • Bluetooth
  • Webcam

Blacklist them:

# vim /etc/modprobe.d/blacklist-extra.conf

Example:

blacklist firewire_ohci
blacklist firewire_core
blacklist uvcvideo
blacklist bluetooth


Faster boot, fewer interrupts.

19. X11 Performance Tweaks (Intel Graphics)

Create:

# vim/etc/X11/xorg.conf.d/20-intel.conf

Add:

Section "Device"
Identifier "Intel Graphics"
Driver "intel"
Option "TearFree" "false"
Option "AccelMethod" "sna"
EndSection

20. Disable IPv6 (if not used)

Saves a little RAM and startup time.

Edit:

# vim/etc/sysctl.conf

Add:

net.ipv6.conf.all.disable_ipv6=1
net.ipv6.conf.default.disable_ipv6=1

21.Lower Kernel Log Level verbosity

Stop kernel spam.

# dmesg -n 3

Make permanent:

# vim/etc/sysctl.conf

Add:

kernel.printk=3 4 1 3

22.Scheduler Latency (Advanced)

For desktop interactivity:

# vim/etc/sysctl.conf

Add:

kernel.sched_autogroup_enabled=1

Helps UI responsiveness under load.

23.Kill Browser Bloat (Biggest Win)

For Firefox ESR:

  • Disable telemetry
  • Enable tab unloading

browser.sessionstore.interval = 300000

No kernel tweak beats this.


a. Enable tab unloading (automatic tab discard)

  1. Open Firefox ESR
    Type

  2. about:config

  3. in the address bar.
  4. Accept the warning: “This might void your warranty.”

  5. Search for the following preference:

browser.tabs.unloadOnLowMemory

  • Default: false
  • Set to: true
     

This enables Firefox to unload inactive tabs automatically when memory is low.

b. Optional tuning

Some other preferences you can tweak:

Preference

Description

Suggested value


browser.tabs.maxSuspendedTabs


Maximum number of tabs that can be suspended

10–20


browser.tabs.autoHide


Auto-hide tabs while suspended (older ESR versions)

true


browser.tabs.loadInBackground


Background tabs load in suspended state

true


browser.sessionstore.interval


How often session is saved (ms)

15000

These may vary slightly depending on ESR version.

24. Graphics Considerations

ThinkPad R61 models typically have:

  • Intel X3100 → works well out of the box
  • NVIDIA NVS 140M → use nouveau driver

Recommendations:

  • Avoid proprietary legacy NVIDIA drivers
  • No compositing
  • Simple themes only

25. Extremely for Geeks, Build a Custom Kernel (Optional)

Only if you have plenty of time and you have a developers background and maniacal tendencies 🙂

Benefits:

  • Smaller kernel
  • Faster boot
  • Fewer interrupts

Cost:

  • Maintenance burden

26. Application Choices Matter More Than Tweaks

Keep in mind the application choices matter more than tweeks.
Even the best-tuned system can be ruined by heavy applications.

Recommended software:

  • Browser: Firefox ESR
  • File manager: PCManFM
  • Terminal: xterm, rxvt
  • Editor: nano, geany

Limit browser tabs and disable unnecessary extensions.

27. Things Not to Do

Avoid:

  • Huge zram sizes (50%+)
  • Do not Disable swap entirely
  • Beware of Aggressive kernel “performance hacks”
  • Disable any Heavy desktop effects if choosing to run MATE or alike GUI environment

Stability beats micro-optimizations.

Final Recommended Configuration

For a ThinkPad R61 with 4 GB RAM and SSD perhaps the best Linux configuration would be:

  • Debian Stable
  • Window Maker
  • zram: 15%
  • SSD swap: 1–2 GB
  • swappiness: 10
  • TLP enabled
  • No compositor
     

This setup would deliver:

  • Smooth multitasking
  • No UI lag
  • Minimal CPU overhead
  • Long-term stability

Conclusion

Old PCs don’t need to be fast necessery, but can be made work slightly faster, though the limits if used in a proper way with the right software and without out the eye candy nonse of today, they be still fully functionally used.

With Debian, a lightweight window manager, and sensible memory tuning, even 15-year-old + old hardware remains useful today for common daily tasks, and makes it not only useful but fun and different especially if you are a sysadmin or a developer who needs mostly console and a browser.

It gives you another perspective on how to do your computing in a simplier and more minimalistic way.

Of course do not expect the Old Hardware PC to be the perfect station for youtube maniacs, heavy gamers or complete newbies, who dont honor the old PC limited resources and don't want to have a bit of experimental approach to the PC.

Anyways by implementing before mentioned tweaks, they will reward you with reliability and simplicity  – something modern over complicated OS and Apps often lack.

Enjoy and Happy Christmas 2025 and Happy New Year 2026 soon ! 🙂

How to Deploy a Docker Container with Apache on Debian Linux and assign container static IP address

Friday, February 14th, 2025

deploy-docker-container-with-static-ip-on-debian-linux-howto-logo

Deploying a Docker container with Apache on Debian Linux is an efficient way to manage web servers in isolated environments. Docker provides a convenient way to package and run applications, and when combined with Apache, it can be used for hosting websites or web applications. In this guide, we’ll walk through the necessary steps to set up and run an Apache web server inside a Docker container on a Debian Linux machine.

Prerequisites

Before starting, ensure that you have the following prerequisites in place:

  • A Debian-based Linux system (e.g., Debian 10, Debian 11).
  • Docker installed on your system. If you don’t have Docker installed, follow the installation steps below.
  • Basic knowledge of Linux commands and Docker concepts.

Step 1: Install Docker on Debian

First, you need to install Docker if it is not already installed on your Debian machine. Here’s how to install Docker on Debian:

  1. Update the package database:
     

    # apt update

  2. Install the required dependencies:

    apt install apt-transport-https ca-certificates curl gnupg lsb-release

  3. Add Docker’s official GPG key:

    # curl -fsSL https://download.docker.com/linux/debian/gpg | sudo gpg --dearmor -o /usr/share/keyrings/docker-archive-keyring.gpg

  4. Set up the stable Docker repository:
     

    # echo "deb [arch=amd64 signed-by=/usr/share/keyrings/docker-archive-keyring.gpg] \
    https://download.docker.com/linux/debian $(lsb_release -cs) stable" \
    | tee /etc/apt/sources.list.d/docker.list > /dev/null 


  5. Install Docker Engine:
     

    # apt update sudo apt install docker-ce docker-ce-cli containerd.io


  6. Start Docker and enable it to run on boot:
     

    systemctl start docker
    # systemctl enable docker

  7. Verify Docker installation:
     

    # docker --version

    This should display the installed Docker version, confirming that Docker is installed successfully.
     

Step 2: Pull Apache Docker Image or whatever docker image you want to have installed

Now that Docker is set up, you need to pull the official Apache image from Docker Hub. The Apache image is maintained by the Docker team and comes pre-configured for running Apache in a container.
 

  1. Pull the Apache HTTP Server image:

    # docker pull httpd

    This will download the official Apache HTTP server image ( httpd ) from Docker Hub.

Step 3: Run Apache Container

Once the Apache image is pulled, you can start a Docker container running Apache.

  1. Run the Docker container:

    # docker run -d --name apache-container -p 80:80 httpd

    Here’s what the options mean:

    • -d : Runs the container in detached mode (in the background).
    • --name apache-container : Names the container apache-container .
    • -p 80:80 : Maps port 80 on the host to port 80 in the container (so you can access the Apache web server through port 80).
    • httpd : The name of the image you want to run (the Apache HTTP server).
  2. Verify the container is running:

    # docker ps

    This will show a list of running containers. You should see the apache-container running.

  3. Test the Apache server:

    Open a web browser and go to http://<your-server-ip> . You should see the default Apache welcome page, indicating that Apache is running successfully in the Docker container.

Step 4: Customize Apache Configuration (Optional)

You may want to customize the Apache configuration or serve your own website inside the container. Here’s how to do it:


. Run the Apache Docker Container with a Specific IP Address

To bind the container to a specific IP address, use the --add-host or --publish flag while running the container.

  • If you want to bind Apache to a specific IP address on the host (for example, 192.168.1.100 ), use the --publish option:

# docker run -d --name apache-container -p 192.168.1.100:80:80 apache-container


This command tells Docker to bind port 80 in the container to port 80 on the host's IP address 192.168.1.100 . Replace 192.168.1.100 with the desired IP address of your system.

  1. Create a directory for your custom website:

    # mkdir -p /home/user/my-website

  2. Add an index.html file or whatever PHP / Perl whatever files will be served:

    Create a simple HTML file in the directory:
     

    # echo '<html><body><h1>Hello, Apache on Docker!</h1></body></html>' > /home/user/my-website/index.html

  3. Stop the running Apache container:

    # docker stop apache-container

  4. Remove the stopped container:

    # docker rm apache-container

  5. Run a new container with your custom website:

    Now, you can mount your custom directory into the container as a volume:

    # docker run -d --name apache-container -p 80:80 -v /home/user/my-website:/usr/local/apache2/htdocs/ httpd

    The -v option mounts the local directory /home/user/my-website to the Apache server’s default document root directory ( /usr/local/apache2/htdocs/ ).

  6. Verify the custom website:

    Reload the web page in your browser. Now, you should see the "Hello, Apache on Docker!" message, confirming that your custom website is being served from the Docker container.

Step 5: Manage Docker Containers

You can manage the running Apache container with the following commands:

  • Stop the container:

    # docker stop apache-container

  • Start the container:

    # docker start apache-container

  • Remove the container (if needed):

    # docker rm apache-container

  • View logs for troubleshooting:

    # docker logs apache-container

Step 6: Automating Docker Container Deployment (Optional step)

If you want the Apache container to restart automatically after a system reboot, you can add the --restart flag to the docker run command.

For example, to make the container restart automatically unless it is manually stopped, use:
 

# docker run -d --name apache-container -p 80:80 --restart unless-stopped \
-v /home/user/my-website:/usr/local/apache2/htdocs/ httpd 

Conclusion

By following these steps, you can easily deploy Apache inside a Docker container on a Debian Linux machine. Docker allows you to run your Apache web server or whatever docker app you need to have in a lightweight and isolated environment, which is useful development, testing, and production environments. You can further customize this setup by adding additional configurations, integrating with databases, or automating deployments with Docker Compose or Kubernetes.

Enjoy your new Dockerized Apache setup!

Debug and Fix QMAIL Mail Server qmail-inject: fatal: qq temporary problem (#4.3.0) and ‘reformime[1648048]: segfault at 0 ip 00007fea608bef28 sp 00007fff3c8d4bc0 error 4’ errors after update from Debian 11 to Debian 12

Monday, September 2nd, 2024

finding-qmail-install-problems-common-reasons-for-unworking-qmail-debugging-qmail

For a legacy reasons and lack of time and fact once Qmail is run on a server it works almost forever if you don't do very major upgrades and you still to the same version I have few Qmail SMTP servers that are nowadays are there for historical reasons.

After the last major version upgrade from Debian 11 to Debian 12, I've got the qmail smtpd not completely running fine and I have to follow some of my previous blog notes on how to recover in that situations as well as some common logic to resolve it.

After the upgrade I started getting every few minutes a repeating really annoying error due to reformime crashing in /var/log/messages as well as in qmail logs, the exact error was as so

Sep  1 22:15:34 pcfr_hware_local_ip kernel: [366799.585663] Code: eb e1 48 8d 15 31 96 13 00 e9 04 00 00 00 0f 1f 40 00 41 55 49 89 d5 41 54 49 89 f4 55 53 48 89 fb 48 83 ec 08 48 85 ff 74 58 <80> 3b 00 74 46 4c 89 e6 48 89 df e8 58 61 f8 ff 48 8d 2c 03 80 7d
Sep  1 22:17:50 pcfr_hware_local_ip kernel: [366935.524185] reformime[1647438]: segfault at 0 ip 00007f0b9beeff28 sp 00007fff4ffd5850 error 4 in libc.so.6[7f0b9be76000+155000] likely on CPU 1 (core 1, socket 0)
Sep  1 22:17:50 pcfr_hware_local_ip kernel: [366935.524207] Code: eb e1 48 8d 15 31 96 13 00 e9 04 00 00 00 0f 1f 40 00 41 55 49 89 d5 41 54 49 89 f4 55 53 48 89 fb 48 83 ec 08 48 85 ff 74 58 <80> 3b 00 74 46 4c 89 e6 48 89 df e8 58 61 f8 ff 48 8d 2c 03 80 7d
Sep  1 22:18:44 pcfr_hware_local_ip kernel: [366989.796532] reformime[1647577]: segfault at 0 ip 00007fe8e14bef28 sp 00007ffc000e9040 error 4 in libc.so.6[7fe8e1445000+155000] likely on CPU 1 (core 1, socket 0)
Sep  1 22:18:44 pcfr_hware_local_ip kernel: [366989.796554] Code: eb e1 48 8d 15 31 96 13 00 e9 04 00 00 00 0f 1f 40 00 41 55 49 89 d5 41 54 49 89 f4 55 53 48 89 fb 48 83 ec 08 48 85 ff 74 58 <80> 3b 00 74 46 4c 89 e6 48 89 df e8 58 61 f8 ff 48 8d 2c 03 80 7d
Sep  1 22:20:08 pcfr_hware_local_ip kernel: [367072.889786] reformime[1647888]: segfault at 0 ip 00007efcaa6bef28 sp 00007ffdfe793560 error 4 in libc.so.6[7efcaa645000+155000] likely on CPU 1 (core 1, socket 0)
Sep  1 22:20:08 pcfr_hware_local_ip kernel: [367072.889809] Code: eb e1 48 8d 15 31 96 13 00 e9 04 00 00 00 0f 1f 40 00 41 55 49 89 d5 41 54 49 89 f4 55 53 48 89 fb 48 83 ec 08 48 85 ff 74 58 <80> 3b 00 74 46 4c 89 e6 48 89 df e8 58 61 f8 ff 48 8d 2c 03 80 7d
Sep  1 22:21:14 pcfr_hware_local_ip kernel: [367139.010116] reformime[1648048]: segfault at 0 ip 00007fea608bef28 sp 00007fff3c8d4bc0 error 4 in libc.so.6[7fea60845000+155000] likely on CPU 1 (core 1, socket 0)
Sep  1 22:21:14 pcfr_hware_local_ip kernel: [367139.010139] Code: eb e1 48 8d 15 31 96 13 00 e9 04 00 00 00 0f 1f 40 00 41 55 49 89 d5 41 54 49 89 f4 55 53 48 89 fb 48 83 ec 08 48 85 ff 74 58 <80> 3b 00 74 46 4c 89 e6 48 89 df e8 58 61 f8 ff 48 8d 2c 03 80 7d
Sep  1 22:22:43 pcfr_hware_local_ip rsyslogd: — MARK —

To debug more concretely what exactly was happening with reformime and why it was crashing with the libc segfault error, I've used the journalctl log with this cmd:

# journalctl -p 3 -xb

сеп 01 22:10:27 pcfrxen qmail-scanner-queue.pl[2170438]: X-Qmail-Scanner-2.10st:[pcfrxen17252178278122170438] d_m: output spotted from /usr/bin/reformime  -x/var/spool/qscan/tmp/pcfrxen17252178278122170438/ (Segmentation fau>
                                                            ) – that shouldn't happen!
сеп 01 22:11:11 pcfrxen qmail-scanner-queue.pl[2170631]: X-Qmail-Scanner-2.10st:[pcfrxen17252178718122170631] d_m: output spotted from /usr/bin/reformime  -x/var/spool/qscan/tmp/pcfrxen17252178718122170631/ (Segmentation fau>
                                                            ) – that shouldn't happen!
сеп 01 22:15:32 pcfrxen qmail-scanner-queue.pl[2171777]: X-Qmail-Scanner-2.10st:[pcfrxen17252181328122171777] d_m: output spotted from /usr/bin/reformime  -x/var/spool/qscan/tmp/pcfrxen17252181328122171777/ (Segmentation fau>
                                                            ) – that shouldn't happen!
сеп 01 22:15:35 pcfrxen qmail-scanner-queue.pl[2171793]: X-Qmail-Scanner-2.10st:[pcfrxen17252181358122171793] d_m: output spotted from /usr/bin/reformime  -x/var/spool/qscan/tmp/pcfrxen17252181358122171793/ (Segmentation fau>
                                                            ) – that shouldn't happen!
сеп 01 22:21:21 pcfrxen qmail-scanner-queue.pl[2173427]: X-Qmail-Scanner-2.10st:[pcfrxen17252184788122173427] d_m: output spotted from /usr/bin/reformime  -x/var/spool/qscan/tmp/pcfrxen17252184788122173427/ (Segmentation fau>
                                                            ) – that shouldn't happen!


As you can see this showed that the problem is with reformime's passing on -x argument, and some temporary directory, thus to make sure the crash is not a cause of some mixed permissions, I've had to check the /var/spool/qscan permissions, and clamd permissions and few other permissions of the qmail install, and the wrong permissions (perhaps after the update of clamav after the Debian Linux migration was with /var/lib/clamav which was incorrectly owned by user clamav group clamav instead of the qscand / qscand user group, thus to resolve, I've run:

chown qscand:qscand /var/lib/clamav/ -R


Another thing I've had to correct was the /var/log/qmail permissions which was too permissive (perhaps due to some old install time hurry up stupidity done), so to correct, them:

# chmod 750 /var/log/qmail/


First thing i tried to resolve is of course to reinstall maildrop debian package that provides /usr/bin/reformime binary. 

root@pcfreak:/usr/local/bin# dpkg -l |grep -i maildrop
rc  courier-maildrop                      0.68.2-1                                                                   amd64        Courier mail server – mail delivery agent
ii  maildrop                              2.9.3-2.1                                                                  amd64        mail delivery agent with filtering abilities (set-GID=mail)

In an old post of mine on a similar error Fixing Qmail 451 qq temporary problem (#4.3.0) / @4000000050587780174c60dc status: qmail-todo stop processing asap / status: exiting, part of the solution was to reinstall maildrop, so tried this one:

root@pcfreak:/usr/local/bin# apt install –reinstall maildrop


Of course to try it out restarted qmail with the usual 

# qmailctl restart

Sadly enough this doesn't solve it, so I had to look up for other solutions and spend about 3 / 4 hours reading online just to convince myself that finding any meaningful in the classical human way, is becoming pretty much impossible task. As the content of information on the Internet has grown tremendously over the last years, it seems the quality of posts and commited data is exponentially detereorating. So the only way to solve crashes of binaries is either to stick to a debugger such as gdb or simply try rebuild the .deb binary from scratch and see whether a recompile from source might makes a difference.

After even more digging up online, found out some Gentoo forums threads, where people described thethe issue was also connected to the failing reformime libc use bug, with an applied C patch, found threads on Ubuntu and Debian users complaining about mysterious errors with libc with maildrop and even a bug report that this is some kind of libc bug, related to the precompiled version of maildrop shipped by default deb based repos.

Hence, My approach to resolve it was to recompile maildrop from source code, which even though looking a tedious task came with plenty of dependencies, I had to install plenty of developlment libraries and tools, compilers etc. as well as the following libs.

# apt install pcre2-utils
# apt install libpcre2-dev
# apt install libidn11
# apt install libidn2-dev
# apt install libcourier-unicode-dev
# apt install libcourier-unicode4

Then had to download and install from source the latest available versions of courier-authlib and its dependencies courier-unicode and once having those two recompiled with

# links https://sourceforge.net/projects/courier/files/courier/1.3.12/courier-1.3.12.tar.bz2/download
# links https://sourceforge.net/projects/courier/files/maildrop/3.1.8/maildrop-3.1.8.tar.bz2/download
# links https://sourceforge.net/projects/courier/files/authlib/0.72.3/courier-authlib-0.72.3.tar.bz2/download
# links https://sourceforge.net/projects/courier/files/courier-unicode/2.3.1/courier-unicode-2.3.1.tar.bz2/download

# tar -jxvf courier-unicode-2.3.1.tar.bz2
# tar -jxvvf courier-authlib-0.72.3.tar.bz2
# tar -jxvvf maildrop-3.1.8.tar.bz2

# cd courier-unicode-2.0/
# ./configure && make && make install

# cd ..
# cd courier-authlib-0.72.3
​# ./configure && make && make install
# cd ..

# cd maildrop-3.1.8/
​# ./configure && make && make install

I've took the time to also preinstall a bunch of perl modules deb packages which rawly are the ones found in file, i've built with the binaries perl-modules-for-qmail-needed.txt

To reinstall the binaries, run a small shell loop:

# for i in $(cat perl-modules-for-qmail-needed.txt); do apt install –reinstall $i –yes; done


Have to say also identified an issue with /var/qmail/bin/qmail-scanner-queue.pl with qmail-inject failing after testing qmail-scanner-queue installation with:

# /downloads/qmail-scanner-2.11st/contrib/test_installation.sh -doit
 

# ./test_installation.sh -doit

Sending standard test message – no viruses… 1/4
qmail-inject: fatal: qq temporary problem (#4.3.0)
Bad error. qmail-inject died


Anyone who ever administrated Qmail Mail server knows pretty well, about the Terrible error:

qmail-inject: fatal: qq temporary problem (#4.3.0)


and that it could be mostly anything, thus anyways to find out what might be the cause I've continued to Debug.

# ldd qmail-inject
        linux-vdso.so.1 (0x00007ffc43f5a000)
        libc.so.6 => /lib/x86_64-linux-gnu/libc.so.6 (0x00007fcc2099b000)
        /lib64/ld-linux-x86-64.so.2 (0x00007fcc20ba1000)


To succed debug the QMAIL issues with qmail I found as very useful something from another old post of mine on debugging qmail errors – Testing Qmail installation for problems: Common reasons for unworking qmail / How to debug Qmail mail server failing to delivery or send emails, the following log debug loop:

# for i in $(ls -d /var/log/qmail/*qmail*/); do tail -n 10 $i/current|tai64nlocal; sleep 5; done


Finally the last step resolve the qmail-inject error, was to modify /var/qmail/bin/qmail-scanner-queue.pl and exchange PATH of /usr/bin/reformime default shipped debian repository to new custom built /usr/local/bin/reformime.


After retesting the qmail-scanner installation all seemed fine onwards:
 

# /downloads/qmail-scanner-2.11st/contrib/test_installation.sh -doit

Sending standard test message – no viruses… 1/4
done!

Sending eicar test virus – should be caught by perlscanner module… 2/4
done!

Sending eicar test virus with altered filename – should only be caught by commercial anti-virus modules (if you have any)… 3/4
done!

Sending bad spam message for anti-spam testing – In case you are using SpamAssassin… 4/4


If you have enabled $sa_quarantine, $sa_delete or $sa_reject the
spam-message wont't arrive to the recipients. But if you have enabled
(good idea!) 'debug' you should check
/var/spool/qscan/qmail-queue.log (or where ever you have the log).


        Done!

Finished test. Now go and check Email sent to postmaster@mail.pc-freak.net and/or the log..

Thibs Qmail install qmr_inst_check script also reported my server qmail install scripts as in good state:
 

# /downloads/scripts/qmr_inst_check
! vpopmail database do not exist!

So Hip Hip Hooray my Qmails works again ! Me fixed it again ! 
if you need help with fixing your company Professional Mail QMAIL server or Postfix, contact me via the contact form. Enjoy


DNS Monitoring: Check and Alert if DNS nameserver resolver of Linux machine is not properly resolving shell script. Monitor if /etc/resolv.conf DNS runs Okay

Thursday, March 14th, 2024

linux-monitor-check-dns-is-resolving-fine

If you happen to have issues occasionally with DNS resolvers and you want to keep up an eye on it and alert if DNS is not properly resolving Domains, because sometimes you seem to have issues due to network disconnects, disturbances (modifications), whatever and you want to have another mean to see whether a DNS was reachable or unreachable for a time, here is a little bash shell script that does the "trick".

Script work mechacnism is pretty straight forward as you can see we check what are the configured nameservers if they properly resolve and if they're properly resolving we write to log everything is okay, otherwise we write to the log DNS is not properly resolvable and send an ALERT email to preconfigured Email address.

Below is the check_dns_resolver.sh script:


#!/bin/bash
# Simple script to Monitor DNS set resolvers hosts for availability and trigger alarm  via preset email if any of the nameservers on the host cannot resolve
# Use a configured RESOLVE_HOST to try to resolve it via available configured nameservers in /etc/resolv.conf
# if machines are not reachable send notification email to a preconfigured email
# script returns OK 1 if working correctly or 0 if there is issue with resolving $RESOLVE_HOST on $SELF_HOSTNAME and mail on $ALERT_EMAIL
# output of script is to be kept inside DNS_status.log

ALERT_EMAIL='your.email.address@email-fqdn.com';
log=/var/log/dns_status.log;
TIMEOUT=3; DNS=($(grep -R nameserver /etc/resolv.conf | cut -d ' ' -f2));  

SELF_HOSTNAME=$(hostname –fqdn);
RESOLVE_HOST=$(hostname –fqdn);

for i in ${DNS[@]}; do dns_status=$(timeout $TIMEOUT nslookup $RESOLVE_HOST  $i); 

if [[ “$?” == ‘0’ ]]; then echo "$(date "+%y.%m.%d %T") $RESOLVE_HOST $i on host $SELF_HOST OK 1" | tee -a $log; 
else 
echo "$(date "+%y.%m.%d %T")$RESOLVE_HOST $i on host $SELF_HOST NOT_OK 0" | tee -a $log; 

echo "$(date "+%y.%m.%d %T") $RESOLVE_HOST $i DNS on host $SELF_HOST resolve ERROR" | mail -s "$RESOLVE_HOST /etc/resolv.conf $i DNS on host $SELF_HOST resolve ERROR";

fi

 done

Download check_dns_resolver.sh here set the script to run via a cron job every lets say 5 minutes, for example you can set a cronjob like this:
 

# crontab -u root -e
*/5 * * * *  check_dns_resolver.sh 2>&1 >/dev/null


Then Voila, check the log /var/log/dns_status.log if you happen to run inside a service downtime and check its output with the rest of infrastructure componets, network switch equipment, other connected services etc, that should keep you in-line to proof during eventual RCA (Root Cause Analysis) if complete high availability system gets down to proof your managed Linux servers was not the reason for the occuring service unavailability.

A simplified variant of the check_dns_resolver.sh can be easily integrated to do Monitoring with Zabbix userparameter script and DNS Check Template containing few Triggers, Items and Action if I have time some time in the future perhaps, I'll blog a short article on how to configure such DNS zabbix monitoring, the script zabbix variant of the DNS monitor script is like this:

[root@linux-server bin]# cat check_dns_resolver.sh 
#!/bin/bash
TIMEOUT=3; DNS=($(grep -R nameserver /etc/resolv.conf | cut -d ' ' -f2));  for i in ${DNS[@]}; do dns_status=$(timeout $TIMEOUT nslookup $(hostname –fqdn) $i); if [[ “$?” == ‘0’ ]]; then echo "$i OK 1"; else echo "$i NOT OK 0"; fi; done

[root@linux-server bin]#


Hope this article, will help someone to improve his Unix server Infrastucture monitoring.

Enjoy and Cheers !

Create Bootable Windows installer USB from a MAC PC, MacBook host or Linux Desktop computer

Thursday, February 8th, 2024

Creating Windows bootable installer with Windows Media Creation tool is easy, but sometimes if you're a geek like me you don't have a Windows personal PC at home and your Work PC is so paranoidly restricted by its administrator through paranoid Domain Controller Policies, that you can only copy from a USB drive towards the Win PC but you cannot write to the USB. 

1. Preparing Linux installer USB via Mac's Boot Camp Assistant

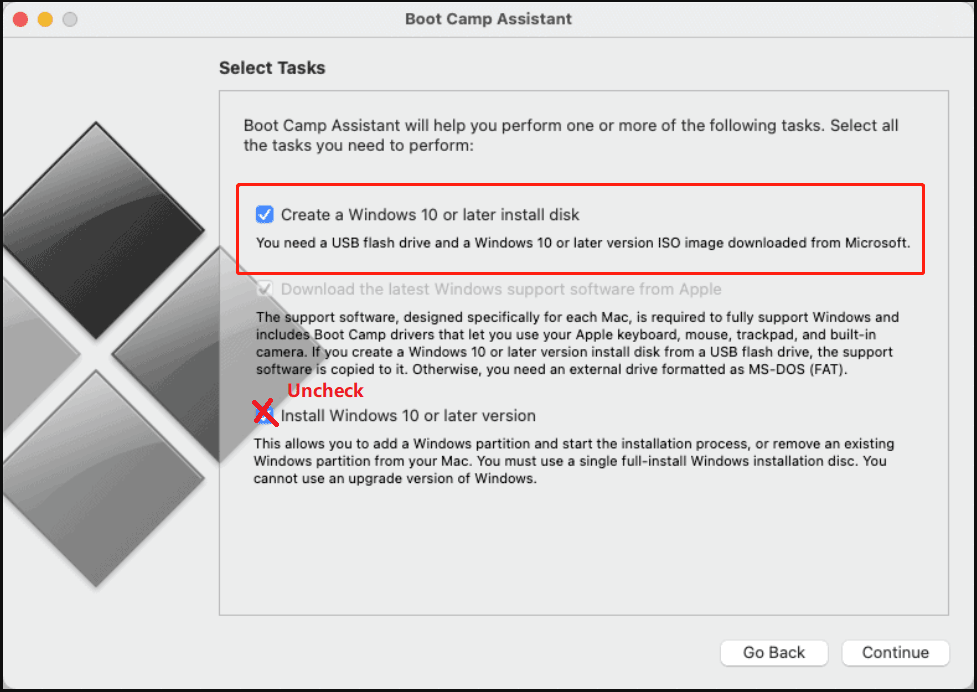
If you're lucky you might have a MAC Book Air or some kind of other mac PC, if that is the case you can burn the Windows Installer iso, with the Native Mac tool called BootCamp Assistant, by simply downloading the Win Boot ISO, launching the app and burning it:

Finder > Applications > Utilities and open Boot Camp Assistant.

create-windows-10-bootable-installer-usb-mac-screenshot.png

2. Preparing Bootable Windows installer on Linux host machine

On DEBIAN / UBUNTU and other Deb based Linuxes

# apt install gddrescue 

On CENTOS / FEDORA :

# dnf install ddrescue

To install the Windows Image to the right USB drive, first find it out with fdisk and list it:

# fdisk -l
 

Disk /dev/sdb: 14.41 GiB, 15472047104 bytes, 30218842 sectors
Disk model: DataTraveler 3.0
Units: sectors of 1 * 512 = 512 bytes
Sector size (logical/physical): 512 bytes / 512 bytes
I/O size (minimum/optimal): 512 bytes / 512 bytes
Disklabel type: dos
Disk identifier: 0xc23dc587

Device     Boot    Start      End  Sectors  Size Id Type
/dev/sdb1           8192 30216793 30208602 14.4G  7 HPFS/NTFS/exFAT
/dev/sdb2       30216794 30218841     2048    1M  e W95 FAT16 (LBA)

Then Use ddrescue to create the bootable MS windows Installer USB disk.

# ddrescue windows10.iso /dev/sd1 –force -D

3. Using GUI Linux tool WoeUSB-ng to prepare Microsoft Windows start up USB drive

If you're a lazy Linux user and you plan to prepare up to date Windows image files regularly, perhaps the WoeUSB-ng Graphical tool will suit you better, to use it you will have to install a bunch of python libraries.
 

On Ubuntu Linux:

# apt install git p7zip-full python3-pip python3-wxgtk4.0 grub2-common grub-pc-bin
# pip3 install WoeUSB-ng

On Fedora Linux:

dnf install git p7zip p7zip-plugins python3-pip python3-wxpython4
# sudo pip3 install WoeUSB-ng

Launch the WoeUSB-ng program :


$ python3 /usr/local/bin/woeusbgui


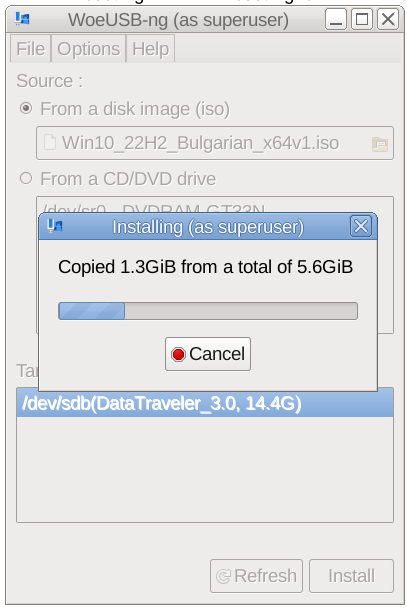
Download, the latest Version of Windows Installer .ISO IMAGE file, plug in your USB flash disk and let the program burn the ISO and create the GRUB boot loader, that will make WIndows installer bootable on your PC.

WoeUSB-ng-python-burn-windows-installer.-tool-screenshot

With WoeUSB-ng you have to be patient, it will take some time to prepare and copy the Windows installer content and will take about 15 to 20 minutes from my experience to finalize the GRUB records required, that will make the new burnt ISO bootable.


Then just plug it in to your Desktop PC or laptop, virtual machine, whatever where you would like to install the Windows from its latest installation Source image and Go on with doing the necessery evil to have Microsoft Spy on you permanently.

P.S. I just learned, from colleagues from Kvant Serviz (a famous hardware second hand, shop and repair shop here in Bulgaria, that nowadays Windows has evolved to the points, they can and they actually do overwrite the PC BIOS / UEFI as part of updates without any asking the end user !!!
At first I disbelived that, but after a short investigation online it turned out this is true, 
there are discussions online from people complaining, that WIndows updates has ovewritten their current BIOS settings and people complaining BIOS versions are ovewritten.

Enjoy your new personal Spy OS ! 🙂

How to install Viber client on Debian GNU / Linux / Ubuntu / Mint in 2022 and enable Bulgarian language cyrillic phonetic keyboard

Tuesday, October 4th, 2022

How to install Viber client on Debian GNU / Linux / Ubuntu / Mint in 2022 and enable Bulgarian language cyrillic phonetic keyboard

how-to-install-and-use-viber-on-gnu-linux-desktop-viber-logo-tux-for-audio-video-communication-with-nonfree-world

So far I've always used Viber on my mobile phone earlier on my Blu H1 HD and now after my dear friend Nomen give me his old iPhone X, i have switched to the iOS version which i find still a bit strangely looking.
Using Viber on the phone and stretching for the Phone all day long is really annoying especially if you work in the field of Information technology like me as System Administrator programmer. Thus having a copy of Viber on your Linux desktop that is next to you is a must.
Viber is proprietary software on M$ Windows its installation is a piece of cake, you install confirm that you want to use it on a secondary device by scanning the QR and opening the URL with your phone and you're ready to Chat and Viber Call with your friends or colleagues

As often on Linux, it is a bit more complicated as the developers of Viber, perhaps did not put too much effort to port it to Linux or did not have much knowledge of how Linux is organized or they simply did not have the time to put for enough testing, and hence installing the Viber on Linux does not straight supported the Bulgarian traditional cyrillic. I've done some small experimentation and installed Viber on Linux both as inidividual package from their official Linux .deb package as well as of a custom build flatpak. In this small article, i'll put it down how i completed that as well as how managed to workaround the language layout problems with a simple setxkbmap cmd.

How to install Viber client on Debian GNU / Linux / Ubuntu / Mint in 2022 and enable Bulgarian language cyrillic phonetic

1.Install and use Viber as a standard Desktop user Linux application

Download latest Debian AMD64 .deb binary from official Viber website inside some dir with Opera / Chrome / Firefox browser and store it in:

hipo@jericho: ~$ cd /usr/local/src

Alternatively you can run the above wget command, but this is not the recommended way since you might end up with Viber Linux version that is older.

hipo@jericho: ~$ sudo wget http://download.cdn.viber.com/cdn/desktop/Linux/viber.deb
hipo@jericho: ~$ su – root

1.2. Resolve the required Viber .deb package dependecies

To resolve the required dependencies of viber.deb package, easiest way is to use gdebi-core # apt-cache show gdebi-core|grep Description-en -A4 Description-en: simple tool to install deb files  gdebi lets you install local deb packages resolving and installing  its dependencies. apt does the same, but only for remote (http, ftp)  located packages. # apt-get install gdebi-core … # apt-get install -f ./viber

1.3. Setting the default language for Viber to support non-latin languages like Cyrillic

I'm Bulgarian and I use the Phonetic Traidional BG keyboard that is UTF8 compatible but cyrillic and non latin. However Viber developers seems to not put much effort and resolve that the Bulgarian Phonetic Traditional keyboard added in my Mate Desktop Environment to work out of the box with Viber on Linux. So as usual in Linux you need a hack ! The hack consists of using setxkbmap to set supported keyboard layouts for Viber US,BG and Traditional Phonetic. This can be done with above command:

setxkbmap -layout 'us,bg' -variant ' ,phonetic' -option 'grp:lalt_lshift_toggle'

To run it everytime together with the Viber binary executable that is stored in location /opt/viber/Viber as prepared by the package developer by install and post-install scripts in the viber.deb, prepared also a 3 liner tine script:

# cat start_viber.sh
#!/bin/bash
cd /opt/viber; setxkbmap -layout 'us,bg' -variant ' ,phonetic' -option 'grp:lalt_lshift_toggle'
./Viber


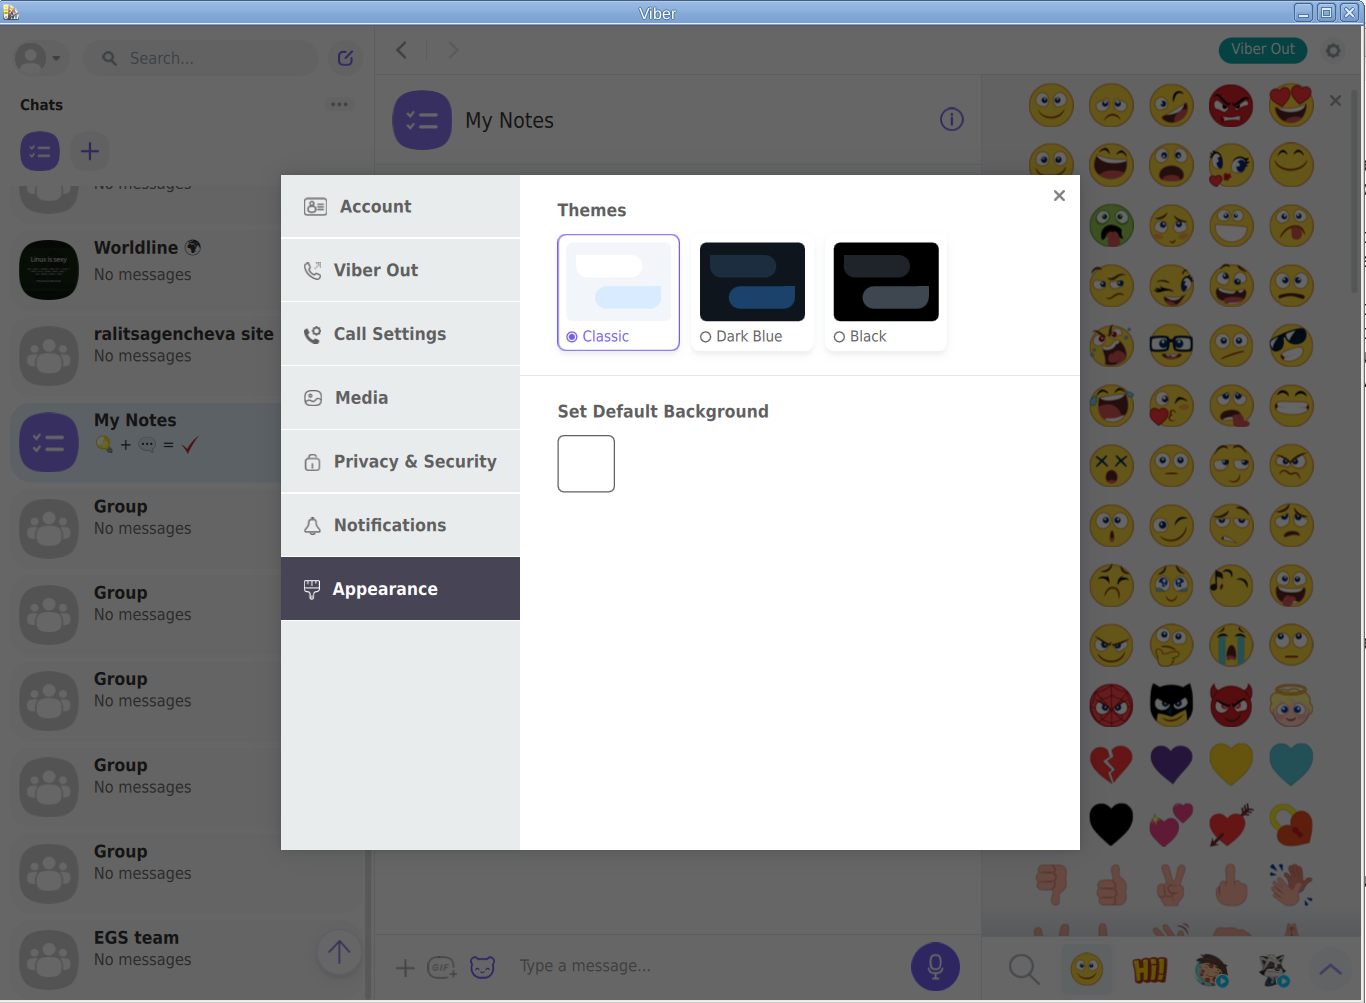
viber-appearance-menu-screenshot-linux


2. Install Viber in separated isolated sandbox from wider system

Second way if you don't trust a priorietary third party binary of Viber (and don't want for Viber to be able to possibly read data of your login GNOME / KDE user, e.g. not be spied by KGB 🙂

For those curious why i'm saying that Viber is mostly used mainly in the ex Soviet Union and in the countries that used to be Soviet satellite ones for one or another reason and though being developed in Israel some of its development in the past was done in Belarus as far as I remember one of the main 3 members (Ukraine, Belarus and Russia) that took the decision to dissolve the USSR 🙂

Talking about privacy if you're really concerned about privacy the best practice is not to use neither WhatApp nor Viber at all on any OS, but this is hard as usually most people are already "educated" to use one of the two. 
For the enthusiasts however I do recommend just to use the Viber / WhatsApp free GPLed software alternative for Vital communication that you don't want to have been listened to by the China / USA / Russia etc. 
Such a good free software alternative is Jitsy and it has both a Web interface that can be used very easily straight inside a browser or you could install a desktop version for PC / iOS and Android and more.
An interesting and proud fact to mention about Jitsy is that its main development that led the project to the state it is now is being done by a buddy Bulgarian ! Good Job man ! 🙂

If you want to give jitsy a try in web with a friend just clik over my pc-freak home lab machine has installed usable version on meet.pc-freak.net

In the same way people in most countries with American and English free world use the WhatsApp which is a another free spy and self analysis software offered by America most likely collecting your chat data and info about you in the (US Central Intelligence Agency) CIA databases. But enough blant so to minimize a bit the security risks of having the binary run directly as a process you can use a containerization like docker to run it inside and isolate from the rest of your Linux desktop. flatpak is a tool developed exactly for that.


hipo@jeremiah:/opt/viber$ apt-cache show flatpak|grep -i Description-en -A 13

Description-en: Application deployment framework for desktop apps
 Flatpak installs, manages and runs sandboxed desktop application bundles.
 Application bundles run partially isolated from the wider system, using
 containerization techniques such as namespaces to prevent direct access
 to system resources. Resources from outside the sandbox can be accessed
 via "portal" services, which are responsible for access control; for
 example, the Documents portal displays an "Open" dialog outside the
 sandbox, then allows the application to access only the selected file.
 .
 Each application uses a specified "runtime", or set of libraries, which is
 available as /usr inside its sandbox. This can be used to run application
 bundles with multiple, potentially incompatible sets of dependencies within
 the same desktop environment.

Having Viber installed on Linux inside a container with flatpak is as simple as to adding, repository and installing the flatpak package
already bundled and stored inside flathub repository, e.g.:
 

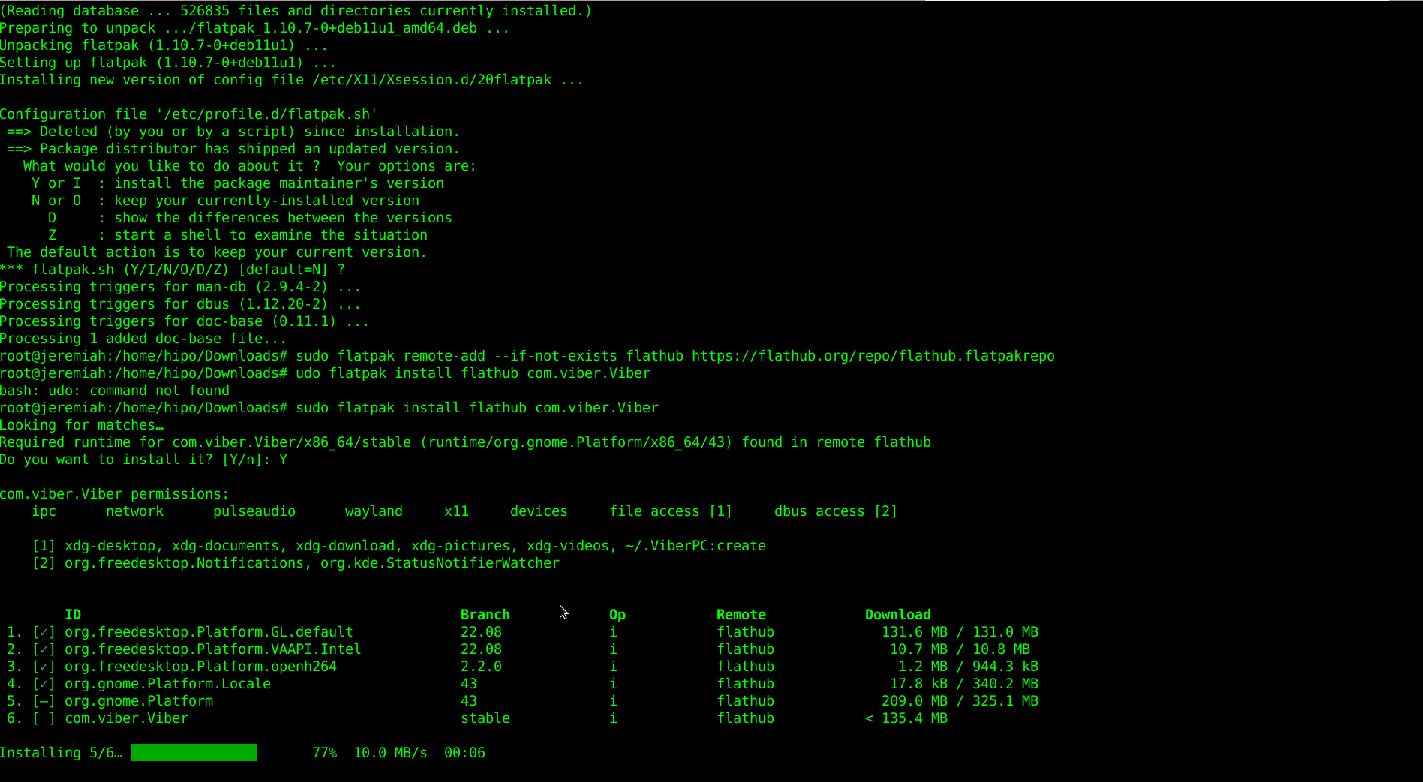
2.1. Install flatpak 

# sudo apt install flatpak


flatpak-viber-installation-linux-screenshot
 

2.2. Add flathub install repository

flatpak is pretty much like dockerhub, it contains images of containered sandbox copies of software, the main advantage of flatpak is its portability, scalability and security.
Of course if you're a complete security freak you can prepare yourself an own set of Viber and add it to flathub and use instead of the original one 🙂
 

# sudo flatpak remote-add –if-not-exists flathub https://flathub.org/repo/flathub.flatpakrepo

2.3. Install Flatpak-ed Viber 

#sudo flatpak install flathub com.viber.Viber


Reboot the PC and to test Viber will run containerized normally issue below flapak start command:

# /usr/bin/flatpak run –branch=stable –arch=x86_64 –command=viber com.viber.Viber


Viber-inside-flatpak-sandbox-on-debian-linux-screenshot-running

! NOTE !  The Linux version of Viber is missing Backups options, exclusively the Settings -> Account -> Viber backup menus is missing, but the good news is that if you're using the Viber client
as a secondary device message client, on first login you'll be offered to Synchronize your Viber data with your 1st Active device (usually your Smart Phone). Just click on it and allow the synchronization from your phone and in a while the Contacts and message history should be on the Linux Viber client.

That's it Enjoy your Viber Sound and Video on Linux ! 🙂

Configure own Media streaming minidlna Linux server to access data from your Smart TV

Friday, February 18th, 2022

dlna-media-minidlna-server-linux-logo

If you happen to buy or already own or just have to install a Smart TV to be connected with a LAN Network to a Linux based custom built NAS (Network Attached Storage) server. You might benefit of the smart TV to Share and Watching the Disk Storage Pictures, Music, Video files from the NAS  to the Smart TV using the Media Server protocol.

You have certainly already faced the Media Server at your life on many locations in stores and Mall Buildings, because virtually any reoccuring advertisements, movies projected on the TVs, Kids entertainment or Floor and Buildings Room location schedules or timeline promition schedules are streamed using the Media Server protocol, for many years now. Thus having a brief idea about Media Server proto existence is foundamental stuff to be aware of for sysadmins and programmers.

Shortly about DLNA UPnP Media Streaming Protocol

Assuming that your Smart TV has been already connected to your Wireless Router 2.4Ghz or 5Ghz Wifi, one would think that the easiest way to share the files with the SmartTV is via something like a simple SAMBA Linux server via smb:// cifs:// protocols or via the good old NFS Server, however most of Samsung Smart TV and many other in year 2022 does not have embedded support for Samba SMB / CIFS Protocol but instead have support for the DLNA (Digital Living Network Alliance) streaming support. DLNA is part of the UPnP (Universal Plug and Play) Protocols, UPnP is also known to those using and familiar with Windows Operating Systems realm simply as UPnP AV Media server or Windows Media server.
Windows Media server for those who never heard it or used it 
 allows you to build a Playlists with Media files Video and Audio data files, that can be then later played remotely via a Local LAN or even long distance over TCP / IP remote side connected Internet network.
 

1. Set up and Stream data via Media server on  Windows PC / notebook with integrated Windows Media server 

Windows Media server configuration on Windows 7, 10 and 11 is a relatively easy to configure via:

Network and Sharing Center -> Media Streaming Options -> Turn on Media Streaming 


Then you have to define the name of the Media Library, configure whether Media server should show
on the Local Netework
for other conected devices and Allow or Block access from the other network present devices.


 2. Using a more advanced Media Server to get rid about the limitation of DLNA set of supported file codecs.
 

The Windows default embedded DLNA server is the easiest and fastest one to set up, but it’s not necessarily the best option.
Due to the way DLNA works, you can only stream certain types of media codecs supported by the server. If you have other types of media not defaultly supported and defined by DLNA win server, it just won’t work.

Thus thanksfully it was developed other DLNA servers improve this by offering real-time transcoding.
If you try to play an unsupported file, they’ll transcode it on-the-fly, streaming the video in a supported format to your DLNA device.
Just to name few of the DLNA Media Streaming servers that have supported for larger MPG Video, MP3 / MP4 and other Audio formats encodings,
you can try Plex or the Universal Media Server both of which are free to use under freeware license and have versions for Linux and Mac OS.
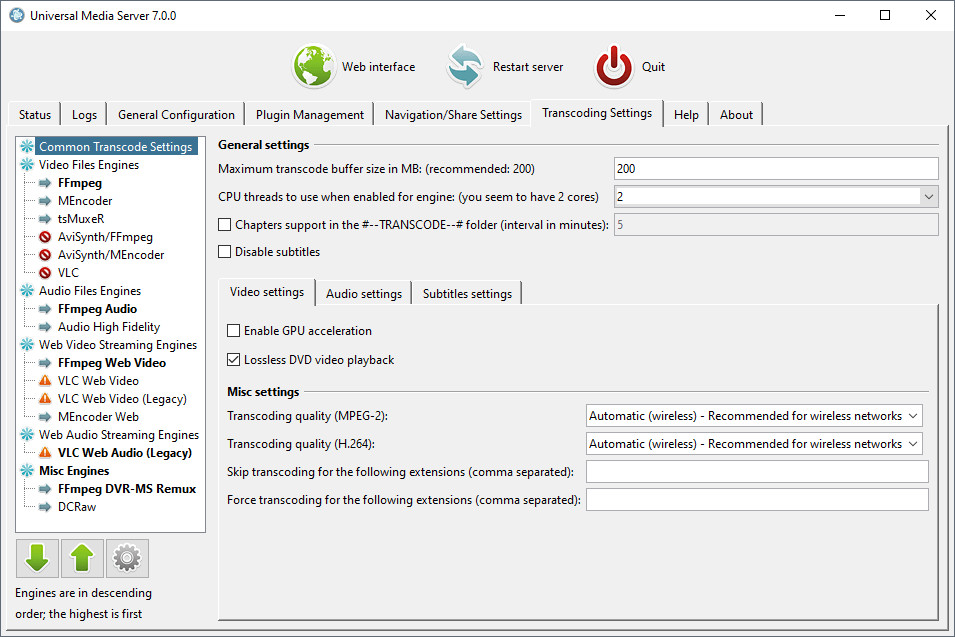

Universal_media_server-windows-screenshot-stream-media-data-on-network


3. Setting up a free as in freedom DLNA server MiniDLNA (ReadyMedia) on GNU / Linux


ReadyMedia (formerly known as MiniDLNA) is a simple media server software, with the aim of being fully compliant with DLNA/UPnP-AV clients. It was originally developed by a NETGEAR employee for the ReadyNAS product line.

MiniDNLA daemon serves media files (music, pictures, and video) to clients on a network. Linux Media servers clients you can use to test or scan your network for existent Media servers are multiple perhaps the most famous ones are applications such as totem (for QT users) and Kodi (for KDE).
The devices that can be used with minidlna are devices such as portable media players (iPod), Smartphones, Televisions, Tablets, and gaming systems (such as PS3 and Xbox 360) etc.
 

ReadyMedia is a simple, lightweight, the downside of it is It does not have a web interface for administration and must be configured by editing a text file. But for a simple Video streaming in most cases does a great job.


3.1 Install the minidlna software package 

Minidlna is available out of the box on most linux distributions (Fedora / CentOS / Debian / Ubuntu etc.) as of year 2022.

  • Install on Debian Linux (Deb based distro)

media-server:~# apt install minidlna –yes

  • Install on Fedora / CentOS (other RPM based distro)

media-server:~# yum install -y minidlna


3.2 Configure minidlna

– /etc/minidlna.conf – main config file
Open with text editor and set user= ,  media_dir= ,  port=, friendly_name= ,  network_interface= variables as minimum.
To be add minidlnad support symlinks to external file locations, set also wide_links=yes

media-server:~# vim /etc/minidlna.conf

#user=minidlna
user=root
media_dir=/var/www/owncloud/data
network_interface=eth0,eth1

# Port number for HTTP traffic (descriptions, SOAP, media transfer).
# This option is mandatory (or it must be specified on the command-line using
# "-p").
port=8200
# Name that the DLNA server presents to clients.
# Defaults to "hostname: username".
#friendly_name=
friendly_name=DLNAServer Linux
# set this to yes to allow symlinks that point outside user-defined media_dirs.
wide_links=yes
# Automatic discovery of new files in the media_dir directory.
#inotify=yes

Keep in mind that it is supported to provide separete media_dir and provide different USB / External Hard Drive or SD Card sources separated only by content be it Video, Audio or Pictures short named in config as (A,V,P).

media_dir=P,/media/usb/photos
media_dir=V,/media/external-disk/videos
media_dir=A,/media/sd-card/music

You might want to diasble / ineable the inotify depending on your liking, if you don't plan to place new files automated to the NAS and don't care to get indexed and streamed from the Media server you can disable it with inotify=no otherwise keep that on.

– /etc/default/minidlna – additional startup config to set minidlnad (daemon) options such as setup to run with admin superuser root:root 
(usually it is safe to leave it empty and set the user=root, whether needed straight from /etc/minidlna.conf
That's all now go on and launch the minidlna and enable it to automatically boot on Linux boot.

media-server:~# systemctl start minidlna
media-server:~# systemctl enable minidlna
media-server:~# systemctl status minidlna


3.3 Rebuilt minidlna database with data indexed files

If you need to re- generate minidlna's database.
To do so stop the minidlna server with the
 

media-server:~# systemctop stop minidlna


 command, then issue the following command (both commands should be run as root):

media-server:~# minidlna -R

Since this command might kept in the background and keep the minidlna server running with incorrect flags, after a minute or two kill minidlna process and relaunch the server via sysctl.

media-server:~#  killall -9 minidlna
media-server:~#  systemctl start minidlna


3.4 Permission Issues / Scanning issues

If you plan to place files in /home directory. You better have a seperate partition or folder *outside* your "home" directory devoted to your media. Default user with which minidlna runs is minidlna, this could prevent some files with root or other users being red. So either run minidlna daemon as root or as other user with whom all media files should be accessible.
If service runs as root:root, and still getting some scanning issues, check permissions on your files and remove special characters from file names.
 

media-server:~# tail -10 /var/log/minidlna/minidlna.log 
[2022/02/17 22:51:36] scanner.c:489: warn: Unsuccessful getting details for /var/www/owncloud/data/Videos/Family-Videos/FILE006.MPG
[2022/02/17 22:52:08] scanner.c:819: warn: Scanning /var/www/owncloud/data finished (10637 files)!
[2022/02/17 22:52:08] playlist.c:135: warn: Parsing playlists…
[2022/02/17 22:52:08] playlist.c:269: warn: Finished parsing playlists.
minidlna.c:1126: warn: Starting MiniDLNA version 1.3.0.
minidlna.c:1186: warn: HTTP listening on port 8200
scanner.c:489: warn: Unsuccessful getting details for /var/www/owncloud/data/admin/files/origin/External SD card/media/Viber Images/IMG-4477de7b1eee273d5e6ae25236c5c223-V.jpg
scanner.c:489: warn: Unsuccessful getting details for /var/www/owncloud/data/Videos/Family-Video/FILE006.MPG
playlist.c:135: warn: Parsing playlists…
playlist.c:269: warn: Finished parsing playlists.


3.5. Fix minidlna Inotify errors

In /etc/sysctl.conf 

Add:

fs.inotify.max_user_watches=65536

in a blank line at end of file and do 

media-server:~# sysctl -p

Debugging minidlna problems, index errors, warnings etc

minidlna does write by default to /var/log/minidlna/minidlna.log inspect the log closely and you should get most of the time what is wrong with it.
Note that some files might not get indexed because minidlna won't support the strange file codecs such as SWF encoding, if you have some important files to stream that are not indexed by minidlna, then install and try one of the more sophisticated free software Media Servers for Linux:
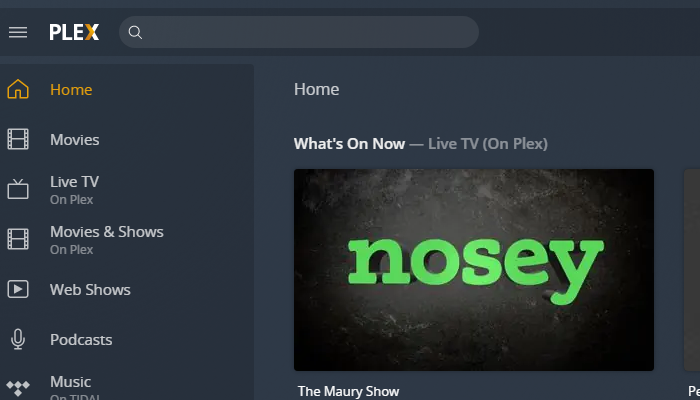
plex-media-streaming-server-screenshot

Note that most Linux users from my quick research shows, MediaTomb is the preferred advanced features Open Source Linux Media Server of choice for most of the guys.
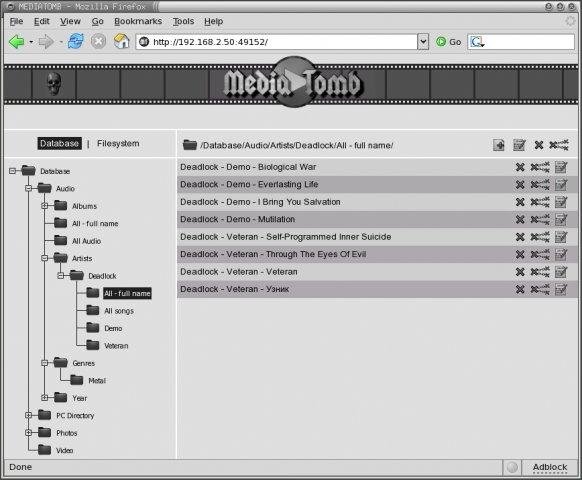
mediatomb-linux-media-streaming-server-picture.jpg.webp


4. Test minidlna Linux servers works, getting information of other DLNA Servers on the network

media-server:~# lynx -dump  http://127.0.0.1:8200
MiniDLNA status

  Media library

   Audio files 0
   Video files 455
   Image files 10182

  Connected clients

   ID Type                   IP Address    HW Address        Connections
   0  Samsung Series [CDEFJ] 192.168.1.11  7C:0A:3D:88:A6:FA 0
   1  Generic DLNA 1.5       192.168.0.241 00:16:4E:1D:48:05 0
   2  Generic DLNA 1.5       192.168.1.18  00:16:3F:0D:45:05 0
   3  Unknown                127.0.0.1     FF:FF:FF:FF:FF:FF 0

   -1 connections currently open
 

Note that there is -1 connections (no active connections) currently to the server. 
The 2 Generic DLNA 1.5 IPs are another DLNA servers provided by a OpenXEN hosted Windows 7 Virtual machines, that are also broadcasting their existence in the network. The Samsung Series [CDEFJ] is the DLNA client on the Samsung TV found, used to detect and stream data from the just configured Linux dlna server.

The DLNA Protocol enabled devices on a network as you can see are quite easy to access, querying localhost on the 8200 server dumps, what minidlna knows, the rest of IPs connecting should not be able to receive this info. But anyways since the minidlna does not have a special layers of security to access it, but the only way to restrict is filtering the 8200 port, it is a very good idea to put a good iptables firewall on the machine to allow only the devices that should have access to the data.

Further more if you happen to need to access the Media files on Linux from GUI you might use some client as upmentioned totem, VLC or if you need something more feature rich Java eezUPnP .
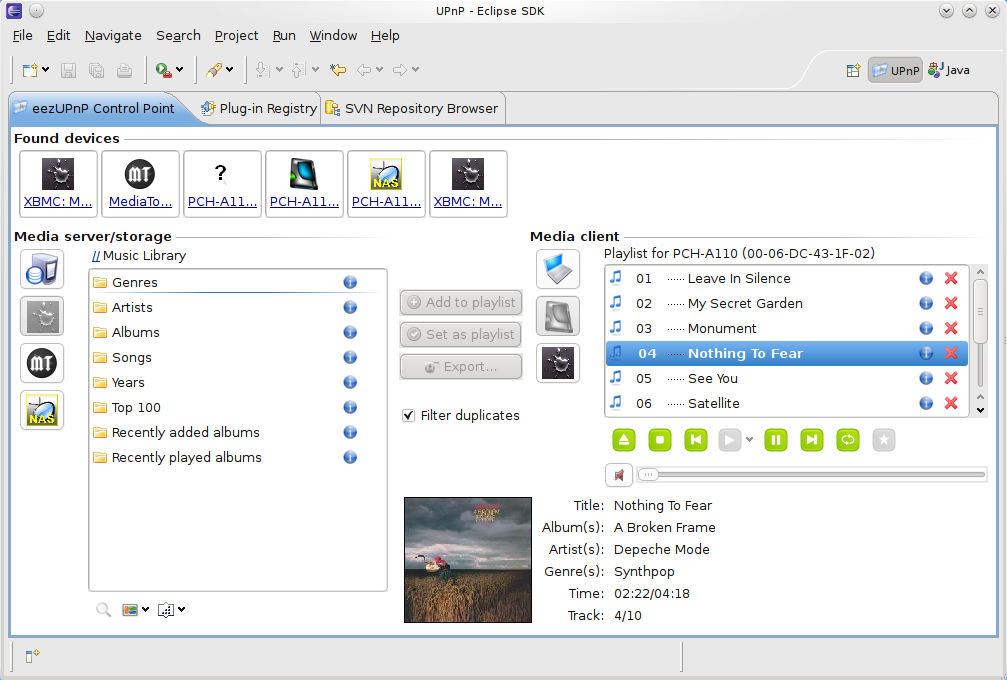
eeZUPnP-screenshot-java-client-for-media-server

That's all folks !
Enjoy your media on the TV 🙂
Set all logs to log to to physical console /dev/tty12 (tty12) on Linux

Wednesday, August 12th, 2020

tty linux-logo how to log everything to last console terminal tty12

Those who administer servers from the days of birth of Linux and who used actively GNU / Linux over the years or any other UNIX knows how practical could be to configure logging of all running services / kernel messages / errors and warnings on a physical console.

Traditionally from the days I was learning Linux basics I was shown how to do this on an old Debian Sarge 3.0 Linux without systemd and on all Linux distributions Redhat 9.0 / Calderas and Mandrakes I've used either as a home systems or for servers. I've always configured output of all messages to go to the last easy to access console /dev/tty12 (for those who never use it console switching under Linux plain text console mode is done with key combination of CTRL + ALT + F1 .. F12.

In recent times however with the introduction of systemd pretty much things changed as messages to console are not handled by /etc/inittab which was used to add and refresh physical consoles tty1, tty2 … tty7 (the default added one on Linux were usually 7), but I had to manually include more respawn lines for each console in /etc/inittab.
Nowadays as of year 2020 Linux distros /etc/inittab is no longer there being obsoleted and console print out of INPUT / OUTPUT messages are handled by systemd.
 

1. Enable Physical TTYs from TTY8 till TTY12 etc.


The number of default consoles existing in most Linux distributions I've seen is still from tty1 to tty7. Hence to add more tty consoles and be ready to be able to switch out  not only towards tty7 but towards tty12 once you're connected to the server via a remote ILO (Integrated Lights Out) / IdRAC (Dell Remote Access Controller) / IPMI / IMM (Imtegrated Management Module), you have to do it by telling systemd issuing below systemctl commands:


 # systemctl enable getty@tty8.service Created symlink /etc/systemd/system/getty.target.wants/getty@tty8.service -> /lib/systemd/system/getty@.service.

systemctl enable getty@tty9.service

Created symlink /etc/systemd/system/getty.target.wants/getty@tty9.service -> /lib/systemd/system/getty@.service.

systemctl enable getty@tty10.service

Created symlink /etc/systemd/system/getty.target.wants/getty@tty10.service -> /lib/systemd/system/getty@.service.

systemctl enable getty@tty11.service

Created symlink /etc/systemd/system/getty.target.wants/getty@tty11.service -> /lib/systemd/system/getty@.service.

systemctl enable getty@tty12.service

Created symlink /etc/systemd/system/getty.target.wants/getty@tty12.service -> /lib/systemd/system/getty@.service.


Once the TTYS tty7 to tty12 are enabled you will be able to switch to this consoles either if you have a physical LCD / CRT monitor or KVM switch connected to the machine mounted on the Rack shelf once you're in the Data Center or will be able to see it once connected remotely via the Management IP Interface (ILO) remote console.
 

2. Taking screenshot of the physical console TTY with fbcat


For example below is a screenshot of the 10th enabled tty10:

tty10-linux-screenshot-fbcat-how-to-screenshot-console

As you can in the screenshot I've used the nice tool fbcat that can be used to make a screenshot of remote console. This is very useful especially if remote access via a SSH client such as PuTTY / MobaXterm is not there but you have only a physical attached monitor access on a DCs that are under a heavy firewall that is preventing anyone to get to the system remotely. For example screenshotting the physical console in case if there is a major hardware failure occurs and you need to dump a hardware error message to a flash drive that will be used to later be handled to technicians to analyize it and exchange the broken server hardware part.

Screenshots of the CLI with fbcat is possible across most Linux distributions where as usual.

In Debian you have to first instal the tool via :
 

# apt install –yes fbcat


and on RedHats / CentOS / Fedoras

# yum install -y fbcat


Taking screenshot once tool is on the server of whatever you have printed on console is as easy as

# fbcat > tty_name.ppm


Note that you might want to convert the .ppm created picture to png with any converter such as imagemagick's convert command or if you have a GUI perhaps with GNU Image Manipulation Tool (GIMP).

3. Enabling every rsyslog handled message to log to Physical TTY12


To make everything such as errors, notices, debug, warning messages  become instantly logging towards above added new /dev/tty12.

Open /etc/rsyslog.conf and to the end of the file append below line :
 

daemon,mail.*;\
   news.=crit;news.=err;news.=notice;\
   *.=debug;*.=info;\
   *.=notice;*.=warn   /dev/tty12


To make rsyslog load its new config restart it:


# systemctl status rsyslog


rsyslog.service – System Logging Service
   Loaded: loaded (/lib/systemd/system/rsyslog.service; enabled; vendor preset: enabled)
   Active: active (running) since Mon 2020-08-10 04:09:36 EEST; 2 days ago
     Docs: man:rsyslogd(8)
           https://www.rsyslog.com/doc/
 Main PID: 671 (rsyslogd)
    Tasks: 4 (limit: 4915)
   Memory: 12.5M
   CGroup: /system.slice/rsyslog.service
           └─671 /usr/sbin/rsyslogd -n -iNONE


авг 12 00:00:05 pcfreak rsyslogd[671]:  [origin software="rsyslogd" swVersion="8.1901.0" x-pid="671" x-info="https://www.rsyslo
Warning: Journal has been rotated since unit was started. Log output is incomplete or unavailable.


systemctl restart rsyslog


That's all folks navigate by pressing simultaneously CTRL + ALT + F12 to get to TTY12 or use ALT + LEFT / ALT + RIGHT ARROW (console switch commands) till you get to the console where everything should be now logged.

Enjoy and if you like this article share to tell your sysadmin friends about this nice hack  ! 🙂


How to stop REDSHIFT night light brightness and color saturation eye strain protection on GNU / Linux

Tuesday, August 7th, 2018

http://jonls.dk/assets/redshift-icon-256

You know on most operating systems such as Windows 8 / 10 ,  Mac OS X as well as  GNU / Linux / BSDs (FreeBSD) etc. with graphical environments such as  GNOME / KDE etc. , there is this default functionality nowadays that is helping to reduce eye strain and improve night sleep by modifying the light and brightness as well as coloring eminated by the monitor. 

On Windows this technology is called Night Light and is easily enabled by nagivating through menus:


Start  > Settings  > System > Display > Night light > Night light settings.


set-your-display-windows-night-time-windows-os-10

Windows 10 Night Time settings shot

On GNU / Linux and BSD-es the eye strain application that comes preinstalled by default on most distributions is redshift – for more what is redshift check out my previous article get more peaceful night sleep on Ubuntu, Mint and Xubuntu Linux.

There is also the alternative to use F.lux (which by the way is used to prevent eye strain on Mac OS X and was the program of choice to prevent eye strain in older Windows versions)

Even though Night Light / and redshift monitor color warmth change is often mostly useful and have a positive impact improving sleep as well removes eye strain on Linux my experience with it is not too positive as it changes the monitor color gamma and makes it often quite reddish and annoying even through a normal day and not only night time.
This makes the work experience on the computer not pleasurable thus just removing it for me and I guess for many would be a must.

Assuming that you have installed Free software OS such as Linux with redshift (note that on on older releases of Deb and RPM package based distributions: you will have to manually install it with something like:)

On Debian based distros with:
 

root@debian:~# apt-get install –yes redshift redshift-gtk


On RPM Fedora / Cent OS, Redhat Enterprise Linux etc. with a command like:


[root@fedora]# yum install –yes redshift redshift-gtk

redshift-on-KDE-settings-menu

Redshift settings on Linux with KDE GUI

So in order to remove redshift it completely from Linux which usually on most GNU / Linux distros is running as a default process

redshift-change-monitor-brightness-to-reduce-eye-strain-gnome


1. * Make sure you kill all processes called redshift and redshift-gtk


to do so check processes with same name and KILL 'EM ALL!:
 

root@linux:~# ps aux|grep -i redshift
hipo     44058  2.8  0.5 620980 42340 pts/2    Sl+  20:33   0:00 /usr/bin/python3 /usr/bin/redshift-gtk
hipo     44059  0.1  0.0 295712  6476 pts/2    Sl+  20:33   0:00 /usr/bin/redshift -v

root@linux:~# kill -9 44058 44059


2. * Set the color temperature of the Monitor / Screen back to 6500K (this can be done either by the button menu that most screens have)


or manually with redshift itself by executing command:


root@linux:~# redshift -O 6500


As the screen is back to normal color gamma, its now time to completely remove redshift in order to prevent it to mess up with your monitor colors, on next PC boot or on Gnome / Mate whatever UI used session logout.

To do so issue commands:


root@linux:~# dpkg –purge redshift redshift-gtk
(Reading database … 516053 files and directories currently installed.)
Removing redshift-gtk (1.11-1) …
Purging configuration files for redshift-gtk (1.11-1) …
Removing redshift (1.11-1) …
Processing triggers for man-db (2.8.3-2) …
Processing triggers for hicolor-icon-theme (0.17-2) …
Processing triggers for mime-support (3.61) …
Processing triggers for gnome-menus (3.13.3-11) …
Processing triggers for desktop-file-utils (0.23-3) …
Processing triggers for menu (2.1.47+b1) …

3. Enjoy normal colors on your monitor  Goodbye Forever REDSHIFT, goodbuy dark crappy Screen during the day. Hello normal Screen light !!! 🙂