Posts Tagged ‘root root’

Debian Linux: Installing and monitoring servers with Icanga (Nagios fork soft)

Monday, June 3rd, 2013

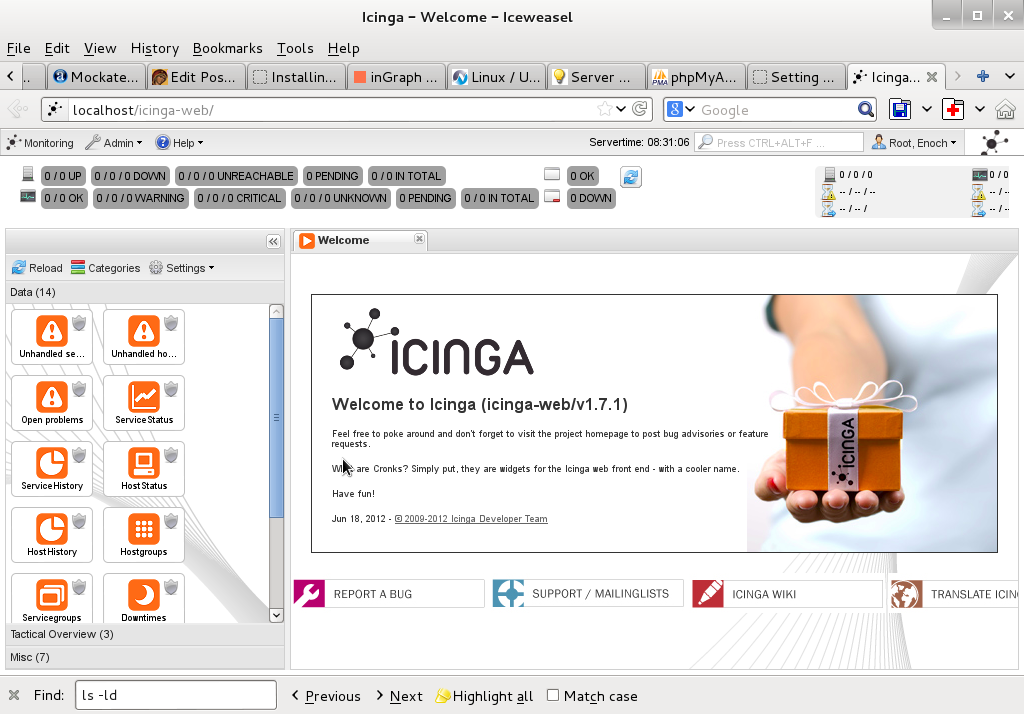
icinga-monitoring-processes-and-servers-linux-logo

There is plenty of software for monitoring how server performs and whether servers are correctly up and running. There is probably no Debian Linux admin who didn't already worked or at least tried Nagios and Mointor to monitor and notify whether server is unreachable or how server services operate. Nagios and Munin are play well together to prevent possible upcoming problems with Web / Db / E-mail services or get notify whether they are completely inaccessible. One similar "next-generation" and less known software is Icanga.
The reason, why to use Icinga  instead of Nagios is  more features a list of what does Icinga supports more than Nagios is on its site here
I recently heard of it and decided to try it myself. To try Icanga I followed Icanga's install tutorial on Wiki.Icanga.Org here
In Debian Wheezy, Icinga is already part of official repositories so installing it like in Squeeze and Lenny does not require use of external Debian BackPorts repositories.

1. Install Icinga pre-requirement packages

debian:# apt-get --yes install php5 php5-cli php-pear php5-xmlrpc php5-xsl php5-gd php5-ldap php5-mysql

2. Install Icanga-web package

debian:~# apt-get --yes install icinga-web

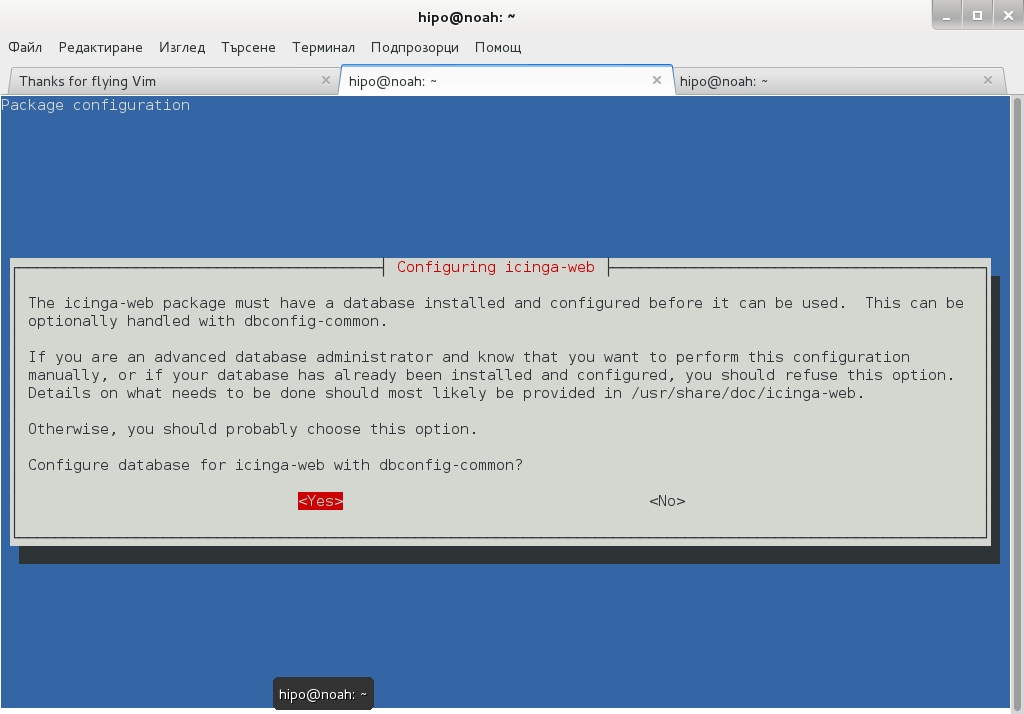
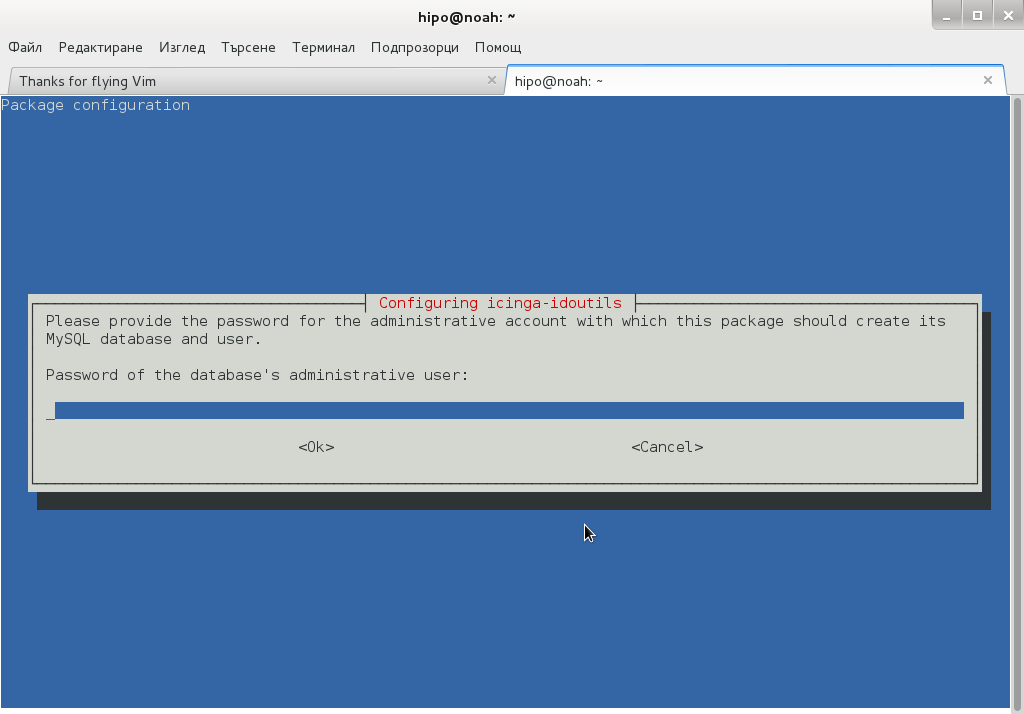
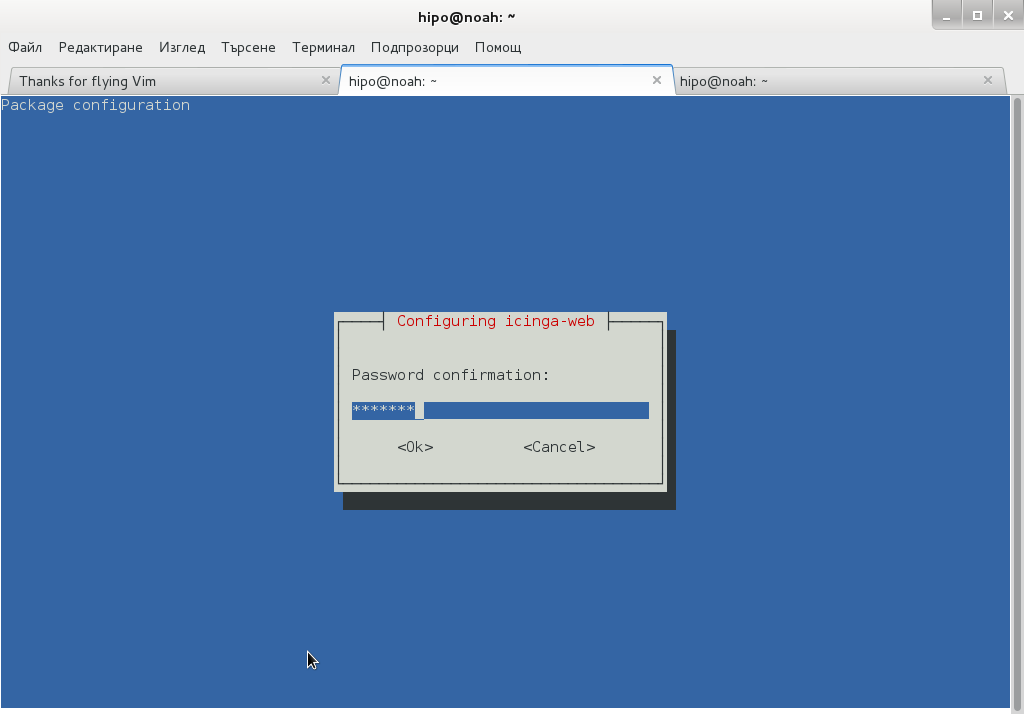
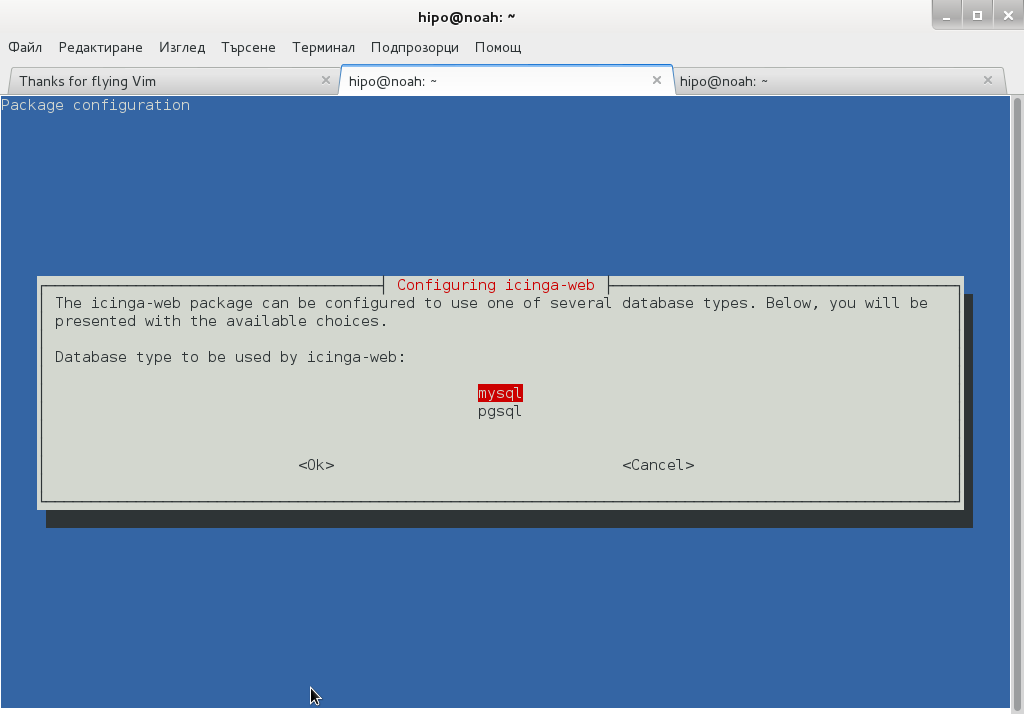
Here you will be prompted a number of times to answer few dialog questions important for security, as well as fill in MySQL server root user / password as well as SQL password that will icinga_web mySQL user use.

icinga-choosing-database-type

configuring-icinga-web-debian-linux-configuring-database-shot

debian-config-screenshot-configuring-icinga-idoutils

icinga-password-confirmation-debian-linux
….

Setting up icinga-idoutils (1.7.1-6) …
dbconfig-common: writing config to /etc/dbconfig-common/icinga-idoutils.conf
granting access to database icinga for icinga-idoutils@localhost: success.
verifying access for icinga-idoutils@localhost: success.
creating database icinga: success.
verifying database icinga exists: success.
populating database via sql…  done.
dbconfig-common: flushing administrative password
Setting up icinga-web (1.7.1+dfsg2-6) …
dbconfig-common: writing config to /etc/dbconfig-common/icinga-web.conf

Creating config file /etc/dbconfig-common/icinga-web.conf with new version
granting access to database icinga_web for icinga_web@localhost: success.
verifying access for icinga_web@localhost: success.
creating database icinga_web: success.
verifying database icinga_web exists: success.
populating database via sql…  done.
dbconfig-common: flushing administrative password

Creating config file /etc/icinga-web/conf.d/database-web.xml with new version
database config successful: /etc/icinga-web/conf.d/database-web.xml

Creating config file /etc/icinga-web/conf.d/database-ido.xml with new version
database config successful: /etc/icinga-web/conf.d/database-ido.xml
enabling config for webserver apache2…
Enabling module rewrite.
To activate the new configuration, you need to run:
  service apache2 restart
`/etc/apache2/conf.d/icinga-web.conf' -> `../../icinga-web/apache2.conf'
[ ok ] Reloading web server config: apache2 not running.
root password updates successfully!
Basedir: /usr Cachedir: /var/cache/icinga-web
Cache already purged!

3. Enable Apache mod_rewrite


debian:~# a2enmod rewrite
debian:~# /etc/init.d/apache2 restart


4. Icinga documentation files

Some key hints on Enabling some more nice Icinga features are mentioned in Icinga README files, check out, all docs files included with Icinga separate packs are into:
 

debian:~# ls -ld *icinga*/
drwxr-xr-x 3 root root 4096 Jun  3 10:48 icinga-common/
drwxr-xr-x 3 root root 4096 Jun  3 10:48 icinga-core/
drwxr-xr-x 3 root root 4096 Jun  3 10:48 icinga-idoutils/
drwxr-xr-x 2 root root 4096 Jun  3 10:48 icinga-web/

debian:~# less /usr/share/doc/icinga-web/README.Debian debian:~# less /usr/share/doc/icinga-idoutils/README.Debian

5. Configuring Icinga

Icinga configurations are separated in two directories:

debian:~# ls -ld *icinga*

drwxr-xr-x 4 root root 4096 Jun  3 10:50 icinga
drwxr-xr-x 3 root root 4096 Jun  3 11:07 icinga-web

>

etc/icinga/ – (contains configurations files for on exact icinga backend server behavior)


/etc/icinga-web – (contains all kind of Icinga Apache configurations)
Main configuration worthy to look in after install is /etc/icinga/icinga.cfg.

6. Accessing newly installed Icinga via web

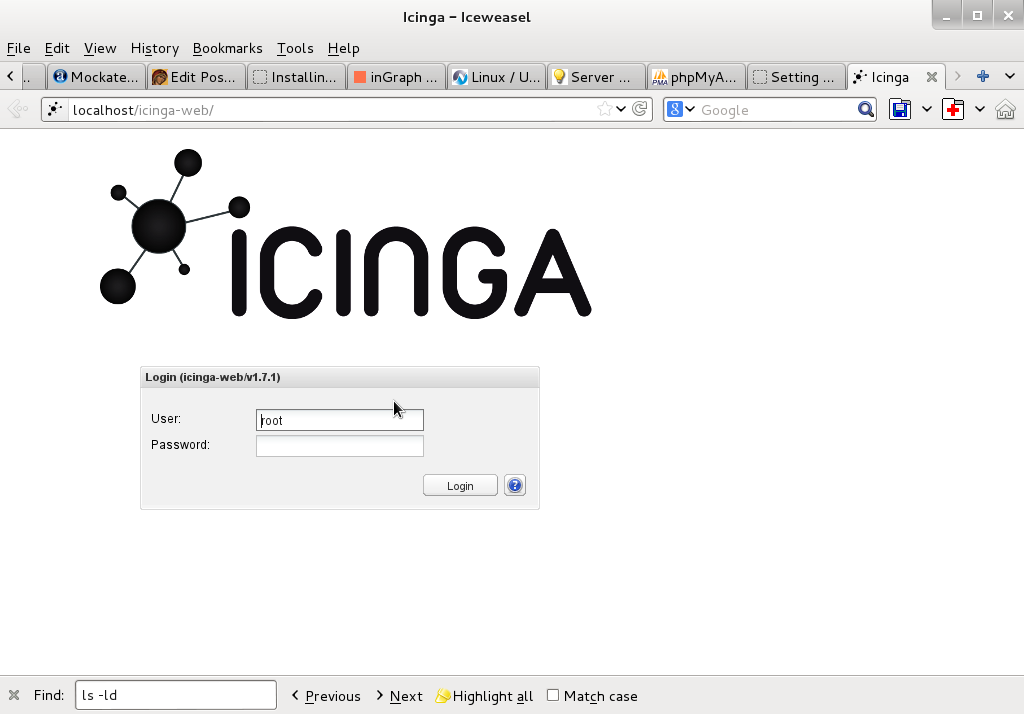
To access just installed Icinga, open in browser URL – htp://localhost/icinga-web

icinga web login screen in browser debian gnu linux

logged in inside Icinga / Icinga web view and control frontend


7. Monitoring host services with Icinga (NRPE)

As fork of Nagios. Icinga has similar modular architecture and uses number of external plugins to Monitor external host services list of existing plugins is on Icinga's wiki here.
Just like Nagios Icinga supports NRPE protocol (Nagios Remote Plugin Executor). To setup NRPE, nrpe plugin from nagios is used (nagios-nrpe-server). 

To install NRPE on any of the nodes to be tracked;
debian: ~# apt-get install –yes nagios-nrpe-server

 Then to configure NRPE edit /etc/nagios/nrpe_local.cfg


Once NRPE is supported in Icinga, you can install on Windows or Linux hosts NRPE clients like in Nagios to report on server processes state and easily monitor if server disk space / load or service is in critical state.

How to make a mysql root user to login interactive with mysql cli passwordless

Wednesday, June 29th, 2011

MySQL Logo Passwordless root login .my.cnf

I’m using access to the mysql servers via localhost with mysql cli on daily basis.
With time I’ve figured out that it’s pretty unahandy to always login with my root mysql password, I mean each time to enter it, e.g.:

root@mysql-server:~# mysql -u root
Enter password:
...

Thus to make my life a way easier I decided to store my mysql root password in order to allow my root admin user to be able to login to my mysql server without asking for password. This saves time and nerves, as I’m not supposed to look up for the password file I store my server mysql root pass.

To allow my mysql cli interface, to login passwordless to the SQL server I had to create the file /root/.my.cnf readable only for my root user and store my MySQL username and password there.

Here is a sample /root/.my.cnf file:

root@mysql-server:~# cat /root/.my.cnf
[client]
user="root"
pass="mysecretMySQLPasswordgoeshere"

Now next time I use the mysql console interface to access my mysql server I don’t have to supply the password, here is how easier is the mysql login afterwards:

root@mysql-server:~# mysql -u root
Welcome to the MySQL monitor. Commands end with ; or g.
Your MySQL connection id is 3520
Server version: 5.0.77 Source distribution

Type ‘help;’ or ‘h’ for help. Type ‘c’ to clear the buffer.

mysql>

The only downside of using .my.cnf to store permanently the mysql server root and password is from security standpoint.
If for instance somebody roots my servers, where I have stored my root user/pwds in .my.cnf , he will be able immediately to get access to the MySQL server.

Another possible security flaw with using the mysql passwordless login “trick” is if somebody forgets to set proper file permissions to, .my.cnf

Once again the file should possess the permissons of:

root@mysql-server:~# ls -al /root/.my.cnf
-rw------- 1 root root 90 Apr 2 00:05 /root/.my.cnf

Any other permissons might allow non-privileged users to read the file and gain unathorized admin access to the SQL server.
 

Captured crackers sslog mysqljackpot MySQL bruteforcer tool / exploit – Xzibit Rootkit and HIDDEN Processes Found: 1 False Positive reports

Monday, October 29th, 2012

XZibit false positive .depend.boot mysqljackpot script kiddie mysql admin user bruteforcer tool and 3 scenarios on how a server could have been hacked
I've noticed some kind of script kiddie gained access somehow on one of the servers, I administrate. A MS-SQL Scanner tool called sslog, was downloaded in tmp and run with root user credentials.

The cracked victim host is running Debian Linux Squeeze and last security update, I've made about few months ago. Inside /tmp/.a/ directory, I've found 0day MS-SQL scanner called mysqljackpot. Maybe the tool is still private exploit scanner because on the Internet I couldn't find it anywhere.:

# ls -al /tmp/.a
total 52
drwxr-xr-x 5 root root 4096 Oct 29 01:10 ./
drwxrwxrwt 10 root root 36864 Oct 29 14:46 ../
drwxr-xr-x 3 root root 4096 Oct 27 21:46 mysqljackpot/
drwxr-xr-x 3 root root 4096 Oct 28 16:58 new/
drwxr-xr-x 3 root root 4096 Oct 29 12:48 pass-multe/
# ls -al /tmp/.a/new/
total 12
drwxr-xr-x 3 root root 4096 Oct 28 16:58 ./
drwxr-xr-x 5 root root 4096 Oct 29 01:10 ../
drwxr-xr-x 3 root root 4096 Oct 29 00:58 mysqljackpot/

After further investigations, I've realized ./sslog is actually a frontend scanner program (Synscan 5.02):

root@host:/tmp/.a/new/mysqljackpot/scanner# ./sslog
Synscan 5.02 (http://www.digit-labs.org/files/tools/synscan/)
by John Anderson ,
Neil Kettle .
./sslog: getuid(): UID or EUID of 0 required

As you see in order for the scanner to run it requires to be root with superuser privileges.

mysqljackpot is actually a brute force tool which as explained in a file (README.mysql), found in its directory :

Here is content of README.mysql:

MySQL Login Scanner
By Kingcope
REQUIRES A FAST SCANSERVER!!! DONT TRY TO RUN THIS FROM A SLOW CONNECTION! ***

Scans for open mysql servers with the following credentials:
root <nopass>
root mysql
root root
admin <nopass>
admin admin
admin mysql
mysql <nopass>
mysql mysql

Runs on linux.
Requirements: mysql development libraries and headers
Compile (try one of the following depending on your system):
$ ./configure LIBS=-lmysqlclient
OR
$ ./configure LIBS="-L/usr/lib/mysql" -lmysqlclient
OR
$ ./configure LIBS="-L/usr/lib64/mysql" -lmysqlclient
OR
$ ./configure CFLAGS="-lmysqlclient"

afterwards type

$ make linux

Run:
terminal 1:
./sslog -v
terminal 2:
./synscan -b <ip block> -p 3306

Inspect Logfile "mysqljack.pot" for open servers.
 

There is one other README in /tmp/.a/new/mysqljackpot/README, here is what I found in it:

less README
Oracle MySQL on Windows Remote SYSTEM Level Exploit zeroday
All owned By Kingcope

Installation Instructions
=============================

1. Install mysql client libraries and headers (UNIX)
RedHat based (e.g. CentOS):
yum install mysql mysql-devel

2. Compile the standalone exploit
issue commands:
gcc mysqljackpot.c -o mysqljackpot -L/usr/lib/mysql -lmysqlclient

3. Compile the reverse shell payload (this is required!)
required because the connect back ip and port are hardcoded in the dll:
use mingw on windows or wine
change REVERSEIP and REVERSEPORT to suit your needs. If you change REVERSEPORT you have
to change the port in mysqljackpot.c too (default port: 443).
issue commands:
set PATH=%PATH%;c:\MinGW\bin\
gcc -c payload.c
gcc -shared -o payload.dll payload.o -lws2_32
copy the payload.dll into the mysqljackpot exploit folder

4. Run The Exploit
./mysqljackpot -u root -p "" -t 99.99.99.99
A valid database admin user and his password are required
for the exploit to work properly.
This exploit is especially useful when used in connection
to a MySQL login scanner, see scanner/README.mysql inside this package.
Be sure to have the firewall open on the desired reverse port
on the attacking machine.

5. Enjoy your SYSTEM Shell!!!

Yours Sincerely,

— Kingcope


Here is also the header from mysqljackpot.c mysql username brute force tool:

/* Oracle MySQL on Windows Remote SYSTEM Level Exploit zeroday
 * Copyright (C) 2012 Kingcope
 *
 * Thanks to danny.
 */
 

After thinking over the security breach I thought of  few scenarios on how the attacker entered and run as root superuser. One is;

  •   Cracker entered directly via SSH after sniffing somehow the root password.

After however, a review of last cmd, I've concluded this case is not very likely, e.g.:

# last |grep -i root

did not found any logs, of unusual root logins, neither there seem to be any unusual activity with logins with other non-root users. Of course it is possible someone logged in as root and used some tool to clean, his tracks with some kind of user log-cleaner tool like the one I've written in past in bash this doesn't seem very likely however because. It seem the /tmp/.a/, directory was created by some amateur script kiddie, a professional one would create some a bit smarter directory like for example just few empty spaces , i.e. would create it with, lets say::

# mkdir "   "

instead of the so trivial

# mkdir /tmp/.a/

Also the name of the directory containing the script kiddie tool /tmp/.a is not selected intelligently, but just done in a hurry, hence I even assume /tmp/.a, is created by some automated SK tool writen in hurry by some Romanian SK Cracker 🙂

On the host there was webmin and usermin running. So;

  • my second assumption was it could be someone sniffed a login password via encrypted SSL connection, whether the root logged in via webmin, or somehow exploited usermin (though I should say usermin (which listens by default on port number 20000)
     

TCP port 20000 on which usermin listens by default is filtered by an iptables rules for all hosts incoming connections, whether webmin logins are permitted only from few IP addresses. Thus this scenario, though more possible than a direct SSH login with root sniffed password still seems to me not very probable.

  • Therefore as a third scenario (most likely what happened), I assume some of the PHP forms on the server or some other undefined PHP excecutable via Apache variable script was missing definition.


Actually saw in /var/log/apache2/error.log plenty of re-occuring warnings of existing undefined variables:

[Mon Oct 29 16:30:43 2012] [error] [client 213.149.142.73] PHP Notice:  Undefined variable: not_assign in /home/site_dir/www/modules/start.mod.php on line 121, referer: http://site-domain-name.com/start?qid=3&answered_id=4
[Mon Oct 29 16:30:43 2012] [error] [client 213.149.142.73] PHP Notice:  Undefined variable: counter_cookie in /home/site_dir/www/modules/start.mod.php on line 130, referer: http://site-domain-name.com/start?qid=3&answered_id=4
[Mon Oct 29 16:30:43 2012] [error] [client 213.149.142.73] PHP Notice:  Undefined variable: campaign_cukie in /home/site_dir/www/modules/start.mod.php on line 135, referer: http://site-domain-name.com/start?qid=3&answered_id=4
[Mon Oct 29 16:30:43 2012] [error] [client 213.149.142.73] PHP Notice:  Undefined index: actions in /home/site_dir/www/counter/count.php on line 11, referer: http://site-domain-name/start?qid=3&answered_id=4
[Mon Oct 29 16:30:43 2012] [error] [client 213.149.142.73] PHP Notice:  Undefined variable: flag2 in /home/site_dir/www/counter/count.php on line 52, referer: http://iqtest.bg/start?qid=3&answered_id=4
 

Taking this in consideration, I assume the attacker, entered the system finding about the undefined variables, defining them and somehow achieving access to the www-data Apache user shell, and through this shell running some 0day Linux kernel exploit to gain root access and download and install mysqljackpot exploit scanner tool.

Logically as it is common in situations like this, I used rkhunter, chkrootkit and unhide tools to check if the server's main binaries and kernel modules are compromised and is there a rootkit installed (earlier written a post on that here)

In short to do checks, installed rkhunter, chkrootkit and unhide with apt-get (as this is a Debian Squeeze server):

apt-get install --yes rkhunter unhide chkrootkit
….


Afterwards run in a row:
 

# for i in $(echo proc sys brute); do unhide $i; done
....
......
# chkrootkit
...
.....
# rkhuter --check
...
....

Reports, of the three ones are like so:

Unhide 20100201
http://www.security-projects.com/?Unhide

[*]Searching for Hidden processes through /proc scanning
# for i in $(echo proc sys brute); do unhide $i; done

[*]Starting scanning using brute force against PIDS with fork()

Unhide 20100201
http://www.security-projects.com/?Unhide

[*]Searching for Hidden processes through kill(..,0) scanning

[*]Searching for Hidden processes through  comparison of results of system calls

[*]Searching for Hidden processes through getpriority() scanning

[*]Searching for Hidden processes through getpgid() scanning

[*]Searching for Hidden processes through getsid() scanning

[*]Searching for Hidden processes through sched_getaffinity() scanning

[*]Searching for Hidden processes through sched_getparam() scanning

[*]Searching for Hidden processes through sched_getscheduler() scanning

[*]Searching for Hidden processes through sched_rr_get_interval() scanning

[*]Searching for Hidden processes through sysinfo() scanning

HIDDEN Processes Found: 1
Unhide 20100201
http://www.security-projects.com/?Unhide

Found HIDDEN PID: 4994
Found HIDDEN PID: 13374
Found HIDDEN PID: 14931
Found HIDDEN PID: 18292
Found HIDDEN PID: 19199
Found HIDDEN PID: 22651
[*]Starting scanning using brute force against PIDS with Threads

Found HIDDEN PID: 3296
Found HIDDEN PID: 30790

# chkrootkit -q

/usr/lib/pymodules/python2.5/.path /usr/lib/pymodules/python2.6/.path /lib/init/rw/.ramfs

# rkhunter –check

System checks summary
=====================

File properties checks…
    Files checked: 137
    Suspect files: 0

Rootkit checks…
    Rootkits checked : 245
    Possible rootkits: 2
    Rootkit names    : Xzibit Rootkit, Xzibit Rootkit

Applications checks…
    All checks skipped

The system checks took: 1 minute and 5 seconds

All results have been written to the log file (/var/log/rkhunter.log)

One or more warnings have been found while checking the system.
Please check the log file (/var/log/rkhunter.log)


Reports from unhide and chkrootkit,  not seem troubling, however I was concerned about the report from rkhunter – Rootkit names    : Xzibit Rootkit, Xzibit Rootkit.

To get some more info on why chkrootkit, thinks, system is infected with Xzibit (which by the way is an artistic alias of a RAP singer from the 1980's 🙂 I check in /var/log/rkhunter.log


# grep -i xzibit /var/log/rkhunter.log
[16:52:48] Checking for Xzibit Rootkit...
[16:52:48] Xzibit Rootkit                                    [ Not found ]
[16:52:56]          Found string 'hdparm' in file '/etc/init.d/hdparm'. Possible rootkit: Xzibit Rootkit
[16:52:56]          Found string 'hdparm' in file '/etc/init.d/.depend.boot'. Possible rootkit: Xzibit Rootkit
[16:53:01] Rootkit names    : Xzibit Rootkit, Xzibit Rootkit
 

Onwards I checked content of hdparm and .depend.boot and there I don't see nothing irregular. They both are files from legitimate Debian install, I've checked if they belong to a deb packages as well if they are existing on other Debian Squeeze servers I administer as well as on my Debian Desktop notebook, everywhere they're present, hdparm is part of hdparm deb and .depend.boot is loaded by /etc/init.d/rc script, containing some user string references:

# grep -rli .depend.boot *
rc
 

# dpkg -S /etc/init.d/hdparm
# hdparm: /etc/init.d/hdparm
  /etc/init.d/.depend.boot
# dpkg -S /etc/init.d/.depend.boot
dpkg: /etc/init.d/.depend.boot not found.


Another troubling thing was unhide's return:

HIDDEN Processes Found: 1


After a close examination of the system as well as research on the internet, I've figured out this is also a false positive. For sake of not distributing, Script Kiddie tools, which might put in danger other system administrators I will not put a download link to mysqljackpot publicly. Anyways if someone is willing to have it for study purposes, just drop me a mail and I will post you temporary download link to it.


Also as webmin and usermin is not frequently used, I've decided to completely stop and disable them to load on boot.

I've done also a clamav scan with (lowered priority) over the whole file system with:

# nice -19 clamscan -r /*

in order to determine, if there is no PHPShell or some kind of other remote admin Script kiddie script in perl / php etc. installed.
Tomorrow, I will continue investigatin what is happening and hopefully once I got, how the abuser entered the server will update this post.

How to change Debian GNU / Linux console (tty) language to Bulgarian or Russian Language

Wednesday, April 25th, 2012

Debian has a package language-env. I haven't used my Linux console for a long time. So I couldn't exactly remember how I used to be making the Linux console to support cyrillic language (CP1251, bg_BG.UTF-8) etc.

I've figured out for the language-env existence in Debian Book on hosted on OpenFMIBulgarian Faculty of Mathematics and Informatics website.
The package info with apt-cache show displays like that:

hipo@noah:~/Desktop$ apt-cache show language-env|grep -i -A 3 description
Description: simple configuration tool for native language environment
This tool adds basic settings for natural language environment such as
LANG variable, font specifications, input methods, and so on into
user's several dot-files such as .bashrc and .emacs.

What is really strange, is the package maintainer is not Bulgarian, Russian or Ukrainian but Japanese.
As you see the developer is weirdly not Bulgarian but Japanese Kenshi Muto. What is even more interesting is that it is another japanese that has actually written the script set-language-env contained within the package. Checking the script in the header one can see him, Tomohiro KUBOTA

Before I've found about the language-env existence, I knew I needed to have the respective locales installed on the system with:

# dpkg-reconfigure locales

So I run dpkg-reconfigure to check I have existing the locales for adding the Bulgarian language support.
Checking if the bulgarian locale is installed is also possible with /bin/ls:

# ls -al /usr/share/i18n/locales/*|grep -i bg
-rw-r--r-- 1 root root 8614 Feb 12 21:10 /usr/share/i18n/locales/bg_BG

The language-env contains a perl script called set-language-env which is doing the actual Debian Bulgarization / cyrillization. The set-language-env author is another Japanese and again not Slavonic person.

Actually set-language-env script is not doing the Bulgariazation but is a wrapper script that uses a number of "hacks" to make the console support cyrillic.

Further on to make the console support cyrillic, execute:

hipo@noah:~$ set-language-env
Setting up users' native language environment
by modifying their dot-files.
Type "set-language-env -h" for help.
1 : be (Bielaruskaja,Belarusian)
2 : bg (Bulgarian)
3 : ca (Catala,Catalan)
4 : da (Dansk,Danish)
5 : de (Deutsch,German)
6 : es (Espanol,Spanish)
7 : fr (Francais,French)
8 : ja (Nihongo,Japanese)
9 : ko (Hangul,Korean)
10 : lt (Lietuviu,Lithuanian)
11 : mk (Makedonski,Macedonian)
12 : pl (Polski,Polish)
13 : ru (Russkii,Russian)
14 : sr (Srpski,Serbian)
15 : th (Thai)
16 : tr (Turkce,Turkish)
17 : uk (Ukrajins'ka,Ukrainian)
Input number > 2

There are many questions in cyrillic list necessery to be answered to exactly define if you need cyrillic language support for GNOME, pine, mutt, console etcetera.
The script will create or append commands to a number of files on the system like ~/.bash_profile
The script uses the cyr command part of the Debian console-cyrillic package for the actual Bulgarian Linux localization.

As said it was supposed to also do a localization in the past of many Graphical environment programs, as well as include Bulgarian support for GNOME desktop environment. Since GNOME nowdays is already almost completely translated through its native language files, its preferrable that localization to be done on Linux install time by selecting a country language instead of later doing it with set-language-env. If you failed to set the GNOME language during Linux install, then using set-language-env will still work. I've tested it and even though a lot of time passed since set-language-env was heavily used for bulgarization still the GUI env bulgarization works.

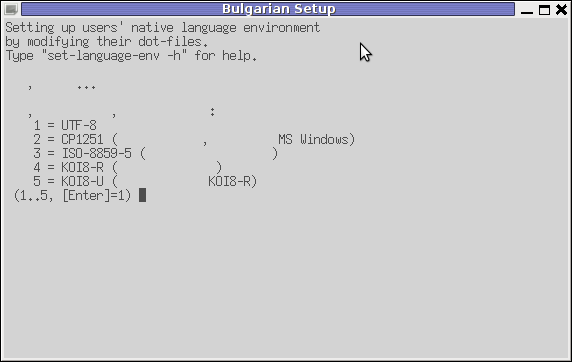
If set-language-env is run in gnome-terminal the result, the whole set of question dialogs will pop-up in new xterm and due to a bug, questions imposed will be unreadable as you can see in below screenshot:

set-language-env command screenshot in Debian GNU / Linux gnome-terminal

If you want to remove the bulgarization, later at certain point, lets you don't want to have the cyrillic console or programs support use:

# set-language-env -r
Setting up users native language environment' 

For anyone who wish to know more in depth, how set-language-env works check the README files in /usr/share/doc/language-env/ one readme written by the author of the Bulgarian localization part of the package Anton Zinoviev is /usr/share/doc/language-env/README.be-bg-mk-sr-uk

How to encrypt files with GPG and OpenSSL on GNU / Linux

Friday, November 25th, 2011

Encrypt files and directories with OpenSSL and GPG (GNUPG), OpenSSL and GPG encryption logo

I have just recently found out that it is possible to use openssl to encrypt files to tighten your security.
Why would I want to encrypt files? Well very simple, I have plain text files where I write down my passwords for servers or account logins for services I use on the internet.

Before this very day I use gpg to encrypt and decrypt my sensitive information files and archives. The way to encrypt files with GPG is very simple, here is an example:

server:~# ls -al test.txt
-rw-r--r-- 1 root root 12 Nov 25 16:50 test.txt
server:~# gpg -c test.txt > test.txt.gpg
Enter passphrase:
Repeat passphrase:

Typing twice the same password produces the encrypted file test.txt.gpg . In order to later decrypt the gpg password protected file I use cmd:

server:~# gpg -d test.txt.gpg >test.txt
Enter passphrase:
Repeat passphrase:
gpg: CAST5 encrypted data
gpg: encrypted with 1 passphrase
gpg: WARNING: message was not integrity protected

As one can see from above output by default gpg uses the CAST5 algorithm to encrypt the data. For all those curious on what kind of encryption does CAST5 provide and where the CAST5 origins are, in short CAST5 is a GNU invented cryptographic algorithm, the short description of the algorithm is as follows:

“…a DES-like Substitution-Permutation Network (SPN) cryptosystem which appears to have good resistance to differential cryptanalysis, linear cryptanalysis, and related-key cryptanalysis. This cipher also possesses a number of other desirable cryptographic properties, including avalanche, Strict Avalanche Criterion (SAC), Bit Independence Criterion (BIC), no complementation property, and an absence of weak and semi-weak keys.”

Anyways, for all those who trust more the DES128 encryption as an encryption algorithm to keep your data secret, the openssl command tool provides another mean to encrypt sensitive data.
To encrypt a file using the openssl’s DES encryption capabilities:

server:~# openssl des -salt -in test.txt -out test.txt.des
enter des-cbc encryption password:
Verifying - enter des-cbc encryption password:

As you can see to encrypt with the DES-CBC its necessery to type twice the secret password “salt” keyword which will be used as an encryption key.

To decrypt later on the DES encrypted file the cmd is:

server:~# openssl des -d -salt -in file.des -out file

In order to encrypt a whole directory earlier compressed with tar zip:

server:~# tar -czf - directory | openssl des -salt -out directory.tar.gz.des

Where directory is the name of directory which will be tarred and crypted.

To later decrypt with openssl the above encrypted tar.gz.des file:

server:~# openssl des -d -salt -in directory.tar.gzdes | tar -x
 

How to mount directory in memory on GNU / Linux and FreeBSD / Mount directory in RAM memory to increase performance on Linux and BSD

Tuesday, October 11th, 2011

One of the websites hosted on a server I currently manage has a cache directory which doesn’t take much space but tens of thousands of tiny files. Each second a dozen of files are created in the cache dir. Hence using a hard disk directory puts some serious load on the server consequence of the many fopen and fclose HDD I/O operations.

To get through the problem, the solution was obvious use a directory which stores its information in memory.
There are of course other benefits of using a memory to store data in as we all know as access to RAM is so many times faster.

GNU/Linux is equipped with a tmpfs since kernel version 2.4.x, primary usage of tmpfs file system across many G / Linux distributious is the /tmp directory.

Some general tmpfs information about tmpfs is explained in mount’s manual e.g.: man mount, a good other reading is the tmpfs kernel documentation file

An implementation of tmpfs is /dev/shm .

/dev/shm is a standard memory device used among Linuces, its actually an ordinary directory one can list with ls . /dev/shm is used as a “virtual directory” memory space. Below is an output of /dev/shm from my notebook, one can see few files stored in memory which belong to the pulse audio linux architecture:

linux:~$ ls -al /dev/shm
ls -al /dev/shm/total 7608drwxrwxrwt 2 root root 160 Oct 10 18:05 .
drwxr-xr-x 16 root root 3500 Oct 10 10:57 ..
p-w------- 1 root root 0 Oct 10 10:57 acpi_fakekey
-r-------- 1 hipo hipo 67108904 Oct 10 17:20 pulse-shm-2067018443
-r-------- 1 hipo hipo 67108904 Oct 10 10:59 pulse-shm-2840042043
-r-------- 1 hipo hipo 67108904 Oct 10 10:59 pulse-shm-3215031142
-r-------- 1 hipo hipo 67108904 Oct 10 18:05 pulse-shm-4157723670
-r-------- 1 hipo hipo 67108904 Oct 10 18:06 pulse-shm-702872358

To measure the size of /dev/shm across different Linux distriubtions one can use the usual df cmd, e.g.:

[root@centos: ~]$ df -h /dev/shm
Filesystem Size Used Avail Use% Mounted on
tmpfs 16G 0 16G 0% /dev/shm

Above I show a df -h /dev/shm output from a CentOS server equipped with 32 GB of memory, as you can see CentOS has reserved half of the size of the system memory (16GB) for the purposes of creating files in memory through /dev/shm. The memory is dynamically assigned, so if its not use the assigned memory by it can still be used for the purposes of the services running (which by the way is very nice).

Accoring to what, I’ve read in wikipedia about tmpfs, tmpfs defaults in Linux to half of the system physical memory.
However I’ve noticed Debian Linux hosts usually reserve less memory for /dev/shm, on my personal notebook Debian /dev/shm is only 1 Giga, where on a Debian running server, Debian automatically has set it to the humble 2GB. Setting less by the way as with the Debian example, is a rather good idea since not many desktop or server applications are written to get actively advantage of the virtual /dev/shm directory.

One can directly drop files in /dev/shm which will immediately be stored in memory, and after a system reboot the files will disappear.
Let’s say you zip archive file, testing.zip and you like to store the file in memory to do so, just copy the file in /dev/shm.

linux:~$ cp -rpf testing.zip /dev/shm

You don’t even need to be root to copy files in the “virtual memory directory”. This is a reason many crackers (script kiddies), are storing their cracking tools in /dev/shm 😉

A rather funny scenario, I’ve witness before is when you list /dev/shm on some Linux server and suddenly you see a tons of brute forcing tools and all kind of “hack” related stuff belonging to some system user. Sometimes even this malicious script tools belong to the root user…

Now as I’ve said a few words on how linux’s tmpfs works here is how to mount a directory which cache content will be stored in volatile memory:

linux:~# mount -t tmpfs -o size=3G,mode=0755 tmpfs /var/www/site/cache

As you can see the above command will dynamically assign a tmpfs directory taking up from the system RAM mem which could expand up to 3GB within the system memory.

Of course before mounting, its necessery to create the /var/www/site/cache and set proper permissions in the above example I use /var/www/site/cache with a default permissions of 755 which is owned by the use with which the Apache server is running, e.g.:

linux:~# mkdir -p /var/www/site/cache
linux:~# chown -R www-data:www-data /var/www/site/cache
linux:~# chmod -R 755 /var/www/site/cache

Using a tmpfs is very handy and have many advantages, however one should be very careful with the data stored inside a tmpfs dir resource, all data will be lost in case of sudden system restart as the data is stored in the memory.
One other problems one might expect with tmpfs would be if the assigned virtual disk space gets filled with data. It never happened to me but, I’ve red online some stories that in the past this led to system crashes, today as the dox I’ve checked prescribed overfilling it will start swapping make the system terribly sluggish and eventually afred depleting the reserver swap space will start killing processes.

Using tmpfs as a cache directory is very useful on servers running Apache+PHP/Perl/Python/Ruby etc. as it can be used for stroring script generated temorary data.

Using a tmpfs can signifantly decrease server i/o created disk overheads.

Some other application I can think of though, I haven’t tested it would be if tmpfs mounted directory is used to store scripting executable files, copied after restart. Executing the script reading it directly from the “virtual directory” could for sure have very good impact especially on huge websites.
One common service which takes advantage of the elegancy of tmpfs nowdays almost all modern GNU/Linux has is udevd – The Linux dynamic device management. By the way (man udev) is a very good and must read manual especially for Linux novices to get a good basic idea on how /dev/ mamagement occurs via udev.

To make permenant directory contained in memory on Linux the /etc/fstab file should be used.

In order to mount permanently a directory as a memory device of a size of 3GB with 0755 permissions in /var/www/site/cache, as shown in the earlier example, one can use the command:

linux:~# echo 'tmpfs /var/www/site/cache/ tmpfs size=3G,mode=0755 0 0' >> /etc/fstab

This will assure the directory stored in memory would be recreated on next boot.

Nowdays the use of tmpfs is constantly growing, I’ve seen it to be used as a way to substitute ordinary disk based /tmp with a tmpfs directory contained in memory in Cloud Linux OS.
The applications of tmpfs is pretty much to the imagination of the one who wants to get advantage of it. For sure using tmpfs will be seen by the Linux GUI programs.

Going to FreeBSD and the BSD world, tmpfs is also available, however it is still considered a bit experimental. To get use of tmpfs to gain some performance, one should first enable it via bsd’s /etc/rc.conf:

freebsd# echo 'tmpfs_load="YES"' >> /etc/rc.conf

Mounting a directory permanently using tmpfs persmanently it again is doable via /etc/fstab to add a new directory inside memory with tmpfs: is done with adding:

freebsd# echo 'tmpfs /var/www/site/cache tmpfs rw 0 0' >> /etc/fstab

The native equivallent of tmpfs in FreeBSD is called mdmfs.
As I said it is slower than tmpfs but rock solid.

To mount a 4gigabyte size mdmfs “ram directory” on BSD from csh:

freebsd# mdmfs -s 4g md /var/www/site/cache

Mounting a directory permanently using tmpfs persmanently it again is doable via /etc/fstab to add a new directory inside memory with tmpfs: is done with adding:

freebsd# echo 'md /var/www/site/cache mfs rw,-s4G 2 0' >> /etc/fstab There are some reports of users who presumable use it to increase the ports / kernel compile times, but I haven’t tried it yet so I don’t know for sure

In huge corporations like Google and Yahoo tmpfs is certanly used a lot as this technology can dramatically can improve access times to information.I’m curious to know for some good ways to get use of tmpfs to improve efficiency.
If someone has some readings or has some idea please shar with me 😉