
Users who are novice to Linux should be probably interested on how to get a decent Hardware System Information. Getting system info on Windows is quite straight forward, however on Linux and especially on Linux servers it is a bit confusing at first and even for people who spend years administrating Linux servers, or even have a Linux desktop it is very likely after a period of time to forget how exactly last time got the hardware system information. I'm administrating Linux servers and running a linux desktop for already almost 11 years and often it happened I'm away from configuring a new server for a year, or even when configuring a new server I don't need to get exact system information from command line, as I know it already from the server hardware manual. However whether managing a bunch of dedicated servers or purchasing new systems which are physically away and someone pre-configured the server with some basis Linux install, often a very raw info is provided by the Dedicated Provider on exact server metrics. Other situation, where it is good idea to have a precise system hardware vendor information on a server, is if you just joined a company with a bunch of existing dedicated servers, whose exact hardware configuration is no documented anywhere and suddenly some RAID or piece of hardware located on 1 of the 100 dedicated servers starts misbehaving causing hour down-times and client important data loss.
In any of those cases it always takes me few times of research to find out what exact methodology I used to get the hardware info last time. To make my life for future times easier and not loose the few minutes of research and reading on how to get Linux server system information I decided to write this short article, which might hopefully be useful to others out there who face similar periodic questioning on what was the command to get hardware system info.
Of course the general commands to get some general overview on a Linux server as anyone knows are:
a. dmesg

b. cat /proc/cpuinfo

c. lspci

d. lsusb

c. free -m
A note to make here is that in order to have lsusb and lspci commands present you will have to have installed the deb packs lsusb and pciutils.
However as I prior said, this tools output is not enough or the output is not enough systematic and hard to read and understand especially for lazy or short memory admins like me. Thus it is worthy to mention few others which can be installed as a separate packages and gives more structured and very precised information on what kind of machine hardware you're accessing through ssh.
Here is the list of all of profiled hardware detection progs and scripts:
1. dmidecode
2. lshw
3. x86info
4. hwinfo
5. hardinfo
6. biosdecode
To install all of them in a raw with apt-get do:
debian:~# apt-get install --yes dmidecode lshw x86info hwinfo hardinfo superiotool

Reading package lists... Done

Building dependency tree

Reading state information... Done

dmidecode is already the newest version.

hardinfo is already the newest version.

lshw is already the newest version.

The following extra packages will be installed:

  libhd16

The following NEW packages will be installed:

  hwinfo libhd16 superiotool x86info

0 upgraded, 4 newly installed, 0 to remove and 9 not upgraded.

Need to get 827 kB of archives.

After this operation, 4,506 kB of additional disk space will be used.

Get:1 http://ftp.uk.debian.org/debian/ squeeze/main libhd16 amd64 16.0-2 [696 kB]

Get:2 http://ftp.uk.debian.org/debian/ squeeze/main hwinfo amd64 16.0-2 [46.6 kB]

Get:3 http://ftp.uk.debian.org/debian/ squeeze/main superiotool amd64 0.0+r5050-1 [43.0 kB]

Get:4 http://ftp.uk.debian.org/debian/ squeeze/main x86info amd64 1.25-1 [40.9 kB]

Fetched 827 kB in 2s (378 kB/s)

Selecting previously deselected package libhd16.

(Reading database ... 85783 files and directories currently installed.)

Unpacking libhd16 (from .../libhd16_16.0-2_amd64.deb) ...

Selecting previously deselected package hwinfo.

Unpacking hwinfo (from .../hwinfo_16.0-2_amd64.deb) ...

Selecting previously deselected package superiotool.

Unpacking superiotool (from .../superiotool_0.0+r5050-1_amd64.deb) ...

Selecting previously deselected package x86info.

Unpacking x86info (from .../x86info_1.25-1_amd64.deb) ...

Processing triggers for man-db ...

Setting up libhd16 (16.0-2) ...

Setting up hwinfo (16.0-2) ...

Setting up superiotool (0.0+r5050-1) ...

Setting up x86info (1.25-1) ...
Next just try to launch the tools one by one and check the content of the output, in my view the most useful one and maybe also the most popular is dmidecode, the rest however might be useful to get specific hardware debug info.
1. hwinfo
debian:~# hwinfo |tee -a server-hardware-info.txt

....
hwinfo will provide you a very long list of very thoroughful information on hardware. A lot of the info it shows however is not so useful for regular admins, but will be of high value to people who need to develop a new Linux driver for respective hardware.
2. lswh
debian:~# lshw > linux-hw-info.txt
lshw provides long list of debug information and if the output is not redirected to a file the screen gets flooded, if not piped to less. For that reason I will not paste output here.
3. x86info
debian:~# x86info
x86info v1.25. Dave Jones 2001-2009
Feedback to <davej@redhat.com>.
Found 2 CPUs
————————————————————————–
CPU #1
EFamily: 0 EModel: 2 Family: 6 Model: 42 Stepping: 7
CPU Model: Unknown model.
Processor name string: Intel(R) Pentium(R) CPU G630 @ 2.70GHz
Type: 0 (Original OEM) Brand: 0 (Unsupported)
Number of cores per physical package=8
Number of logical processors per socket=16
Number of logical processors per core=2
APIC ID: 0x0 Package: 0 Core: 0 SMT ID 0
————————————————————————–
CPU #2
EFamily: 0 EModel: 2 Family: 6 Model: 42 Stepping: 7
CPU Model: Unknown model.
Processor name string: Intel(R) Pentium(R) CPU G630 @ 2.70GHz
Type: 0 (Original OEM) Brand: 0 (Unsupported)
Number of cores per physical package=8
Number of logical processors per socket=16
Number of logical processors per core=2
APIC ID: 0x2 Package: 0 Core: 0 SMT ID 2
————————————————————————–
WARNING: Detected SMP, but unable to access cpuid driver.
Used Uniprocessor CPU routines. Results inaccurate.
As you see x86info, mainly provides information on CPU Cache, exact model, family AND APIC (don't mix it with ACPI – advanced power management interface)
APIC is a chip that remaps IOs and IRQs of your computer to the CPU(s), thus in most cases it is more of not so needed debug information.
4. biosdecode
debian:~# biosdecode
# biosdecode 2.9
ACPI 2.0 present.
OEM Identifier: LENOVO
RSD Table 32-bit Address: 0xBCD9C028
XSD Table 64-bit Address: 0x00000000BCD9C068
SMBIOS 2.6 present.
Structure Table Length: 2233 bytes
Structure Table Address: 0x000EBB70
Number Of Structures: 59
Maximum Structure Size: 184 bytes
PNP BIOS 1.0 present.
Event Notification: Not Supported
Real Mode 16-bit Code Address: F000:BC66
Real Mode 16-bit Data Address: F000:0000
16-bit Protected Mode Code Address: 0x000FBC8E
16-bit Protected Mode Data Address: 0x000F0000
PCI Interrupt Routing 1.0 present.
Router ID: 00:1f.0
Exclusive IRQs: None
Compatible Router: 8086:27b8
Slot Entry 1: ID 00:1f, on-board
Slot Entry 2: ID 00:1b, on-board
Slot Entry 3: ID 00:16, on-board
Slot Entry 4: ID 00:1c, on-board
Slot Entry 5: ID 02:00, slot number 21
Slot Entry 6: ID 00:01, on-board
Slot Entry 7: ID 00:06, on-board
Slot Entry 8: ID 00:1d, on-board
Slot Entry 9: ID 00:1a, on-board
Slot Entry 10: ID 03:00, on-board
Slot Entry 11: ID 00:02, on-board
Slot Entry 12: ID 00:00, on-board
As you see biosdecode, also provides a lot of hex addresses, also reports on the exact CPU architecture on the system.
The line XSD Table 64-bit Address: 0x00000000BCD9C068, indicated the host is running a 64 bit CPU, most of the rest info like Slot entries IDs etc. is not so useful.
The most useful info that biosdecode provides is the exact type of BIOS (Basic Input Output System) bundled with the system in my case the BIOS is running on a Lenovo host and is vendored by Lenovo, thus it shows in the cmd output:
OEM Identifier: LENOVO
5. hardinfo
debian:~# hardinfo | tee -a hardware-info.txt
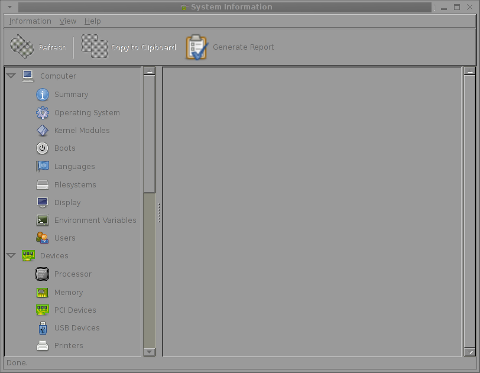
HardInfo is the GNOME GTK+ program which displays robust and thouroughful info in same was as Windows System Info does on GNOME Desktop. If however you run it under console or via ssh it does display what it detects as:
Computer hardware, operating system, kernel modules, supported system languages, existing filesystems, Display, set environment variables, Existing system users, Processor type, Memory, PCI and USB devices, Printers (if attached), Battery type (if run on laptop), Storage, Other Input devices
hardinfo, does a few benchmarking tests using CPU stress test algorithms to do Blowfish encryption, CryptoHash, Fibonacci, N-Queens, FPU FFT and FPU raytracing. This benchmark values, if run on a couple of hosts can be used to compare different hardware performances.
6. dmidecode
debian: # dmidecode > system-hware-info.txt
The output from dmidecode is very very detailed and verbose. Though along with the useful info there is plenty of debug information, the debug information it provides is much user friendly / user comprehensible than the rest of tools, thus I guess dmidecode is nowadays preferred by me and probably most of the Linux sys admins.
debian:~# dmidecode |head -n 34
# dmidecode 2.9
SMBIOS 2.6 present.
59 structures occupying 2233 bytes.
Table at 0x000EBB70.
Handle 0x0000, DMI type 0, 24 bytes
BIOS Information
Vendor: LENOVO
Version: 9QKT37AUS
Release Date: 02/14/2012
Address: 0xF0000
Runtime Size: 64 kB
ROM Size: 2560 kB
Characteristics:
PCI is supported
BIOS is upgradeable
BIOS shadowing is allowed
Boot from CD is supported
Selectable boot is supported
BIOS ROM is socketed
EDD is supported
5.25"/1.2 MB floppy services are supported (int 13h)
3.5"/720 KB floppy services are supported (int 13h)
3.5"/2.88 MB floppy services are supported (int 13h)
Print screen service is supported (int 5h)
8042 keyboard services are supported (int 9h)
Serial services are supported (int 14h)
Printer services are supported (int 17h)
ACPI is supported
USB legacy is supported
BIOS boot specification is supported
Targeted content distribution is supported
BIOS Revision: 0.37
Though it is the most useful tool on some hardware configurations it might not display any data because the BIOS is lacking a DMI implementation.
In almost all cases dmidecode is enough to check what kind of hardware you have ssh-ed to. dmidecode is available also not only on Debian but on Fedora and almost all (if not all Linux distros), through default repositories.


