Posts Tagged ‘img’

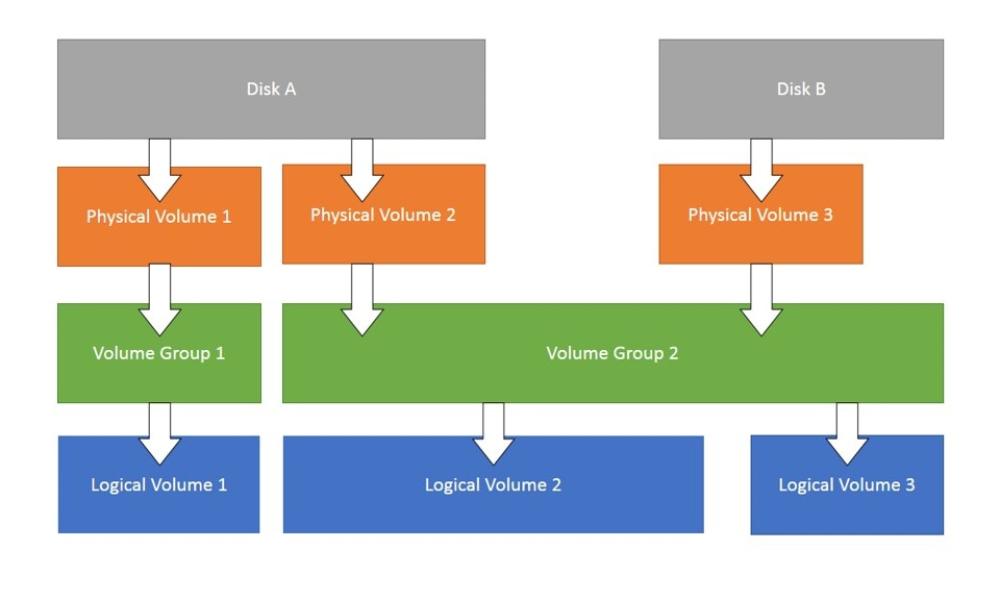
Resize KVM .img QCOW Image file and Create new LVM partition and ext4 filesystem inside KVM Virtual Machine

Friday, November 10th, 2023

LVM-add-space-to-RHEL-Linux-on-KVM_Virtual_machine-howto

Part of migration project for a customer I'm working on is migration of a couple of KVM based Guest virtual machine servers. The old machines has a backup solution stratetegy using IBM's TSM and the new Machines should use the Cheaper solution adopted by the Customer company using the CommVault backup solution (an enterprise software thath is used for data backup and recovery not only to local Tape Library / Data blobs on central backup servers infra but also in Cloud infrastructure.

To install the CommVault software on the Redhat Linux-es, the official install documentation (prepared by the team who prepared the CommVault) infrastructure for the customer recommends to have a separate partition for the CommVault backups under /opt directory  (/opt/commvault) and the partition should be as a minumum at least 10 Gigabytes of size. 

Unfortunately on our new prepared KVM VM guest machines, it was forgotten to have the separate /opt of 10GB prepared in advanced. And we ended up with Virtual Machines that has a / (root directory) of 68GB size and a separate /var and /home LVM parititons. Thus to correct the issues it was required to find a way to add another separate LVM partition inside the KVM VirtualMachine.img (QCOW Image file). 

This seemed to be an easy task at first as that might be possible with simple .img partition mount with losetup command kpartx and simple lvreduce command in some way such as

# mount /dev/loop0 /mnt/test/

# kpartx -a /dev/loop0
# kpartx -l /dev/loop0
# ls -al /dev/mapper/*

… 

# lvreduce 

etc. however unfortunately kpartx though not returning error did not provided the new /dev/mapper devices to be used with LVM tools and this approach seems to not be possible on RHEL 8.8 as the kpartx couldn't list.


A colleague of mine Mr. Paskalev suggested that we can perhaps try to mount the partition with default KVM tool to mount .img partitions which is guestmount but unfortunately
with a command like:
 

# guestmount -a /kvm/VM.img -i –rw /mnt/test/

But unfortunately this mounted the filesystem in fuse filesystem and the LVM /dev/mapper of the VM can't be seen so we decided to abondon this method.

After some pondering with Dimitar Paskalev and Dimitar Hristov, thanks to joint efforts we found the way to do it, below are the steps we followed to succeed in creating new LVM ext4 partition required.
One would wonder how many system
 

1. Check enough space is available on the HV machine


The VMs are held under /kvm so in this case:

[root@hypervisor-host ~]# df -h|grep -i /kvm
/dev/mapper/vg00-vmprivate  206G   27G  169G  14% /kvm


2. Shutdown the running VM and make sure it is stopped
 

[root@hypervisor-host ~]# virsh shutdown vm-host


[root@hypervisor-host ~]# virsh list –all
 Id   Name       State
————————–
 4    lpdkv01f   running
 5    vm-host   shut off


3. Check current Space status of VM


[root@hypervisor-host ~]# qemu-img info /kvm/vm-host.img       
image: /kvm/vm-host.img
file format: qcow2
virtual size: 100 GiB (107374182400 bytes)
disk size: 8.62 GiB
cluster_size: 65536
Format specific information:
    compat: 1.1
    compression type: zlib
    lazy refcounts: true
    refcount bits: 16
    corrupt: false
    extended l2: false


4. Resize (extend VM) with whatever size you want    
 

[root@hypervisor-host ~]# qemu-img resize /kvm/vm-host.img +10G


5. Start VM    
 

[root@hypervisor-host ~]# virsh start vm-host


7. Check the LVM and block devices on HVs (not necessery but good for an overview)
 

[root@hypervisor-host ~]# pvs
  PV         VG   Fmt  Attr PSize   PFree 
  /dev/sda2  vg00 lvm2 a–  277.87g 19.87g
  
[root@hypervisor-host ~]# vgs
  VG   #PV #LV #SN Attr   VSize   VFree 
  vg00   1  11   0 wz–n- 277.87g 19.87g


[root@hypervisor-host ~]# lsblk 
NAME               MAJ:MIN RM   SIZE RO TYPE MOUNTPOINT
sda                  8:0    0 278.9G  0 disk 
├─sda1               8:1    0     1G  0 part /boot
└─sda2               8:2    0 277.9G  0 part 
  ├─vg00-root      253:0    0    15G  0 lvm  /
  ├─vg00-swap      253:1    0     1G  0 lvm  [SWAP]
  ├─vg00-var       253:2    0     5G  0 lvm  /var
  ├─vg00-spool     253:3    0     2G  0 lvm  /var/spool
  ├─vg00-audit     253:4    0     3G  0 lvm  /var/log/audit
  ├─vg00-opt       253:5    0     2G  0 lvm  /opt
  ├─vg00-home      253:6    0     5G  0 lvm  /home
  ├─vg00-tmp       253:7    0     5G  0 lvm  /tmp
  ├─vg00-log       253:8    0     5G  0 lvm  /var/log
  ├─vg00-cache     253:9    0     5G  0 lvm  /var/cache
  └─vg00-vmprivate 253:10   0   210G  0 lvm  /vmprivate

  
8 . Check logical volumes on Hypervisor host
 

[root@hypervisor-host ~]# lvdisplay 
  — Logical volume —
  LV Path                /dev/vg00/swap
  LV Name                swap
  VG Name                vg00
  LV UUID                3tNa0n-HDVw-dLvl-EC06-c1Ex-9jlf-XAObKm
  LV Write Access        read/write
  LV Creation host, time hypervisor-host, 2023-08-07 13:47:45 +0200
  LV Status              available
  # open                 2
  LV Size                1.00 GiB
  Current LE             256
  Segments               1
  Allocation             inherit
  Read ahead sectors     auto
  – currently set to     8192
  Block device           253:1
   
  — Logical volume —
  LV Path                /dev/vg00/var
  LV Name                var
  VG Name                vg00
  LV UUID                JBerim-fxVv-jU10-nDmd-figw-4jVA-8IYdxU
  LV Write Access        read/write
  LV Creation host, time hypervisor-host, 2023-08-07 13:47:45 +0200
  LV Status              available
  # open                 1
  LV Size                5.00 GiB
  Current LE             1280
  Segments               1
  Allocation             inherit
  Read ahead sectors     auto
  – currently set to     8192
  Block device           253:2
   
  — Logical volume —
  LV Path                /dev/vg00/spool
  LV Name                spool
  VG Name                vg00
  LV UUID                nFlmp2-iXg1-tFxc-FKaI-o1dA-PO70-5Ve0M9
  LV Write Access        read/write
  LV Creation host, time hypervisor-host, 2023-08-07 13:47:45 +0200
  LV Status              available
  # open                 1
  LV Size                2.00 GiB
  Current LE             512
  Segments               1
  Allocation             inherit
  Read ahead sectors     auto
  – currently set to     8192
  Block device           253:3
   
  — Logical volume —
  LV Path                /dev/vg00/audit
  LV Name                audit
  VG Name                vg00
  LV UUID                e6H2OC-vjKS-mPlp-JOmY-VqDZ-ITte-0M3npX
  LV Write Access        read/write
  LV Creation host, time hypervisor-host, 2023-08-07 13:47:46 +0200
  LV Status              available
  # open                 1
  LV Size                3.00 GiB
  Current LE             768
  Segments               1
  Allocation             inherit
  Read ahead sectors     auto
  – currently set to     8192
  Block device           253:4
   
  — Logical volume —
  LV Path                /dev/vg00/opt
  LV Name                opt
  VG Name                vg00
  LV UUID                oqUR0e-MtT1-hwWd-MhhP-M2Y4-AbRo-Kx7yEG
  LV Write Access        read/write
  LV Creation host, time hypervisor-host, 2023-08-07 13:47:46 +0200
  LV Status              available
  # open                 1
  LV Size                2.00 GiB
  Current LE             512
  Segments               1
  Allocation             inherit
  Read ahead sectors     auto
  – currently set to     8192
  Block device           253:5
   
  — Logical volume —
  LV Path                /dev/vg00/home
  LV Name                home
  VG Name                vg00
  LV UUID                ehdsH7-okS3-gPGk-H1Mb-AlI7-JOEt-DmuKnN
  LV Write Access        read/write
  LV Creation host, time hypervisor-host, 2023-08-07 13:47:47 +0200
  LV Status              available
  # open                 1
  LV Size                5.00 GiB
  Current LE             1280
  Segments               1
  Allocation             inherit
  Read ahead sectors     auto
  – currently set to     8192
  Block device           253:6
   
  — Logical volume —
  LV Path                /dev/vg00/tmp
  LV Name                tmp
  VG Name                vg00
  LV UUID                brntSX-IZcm-RKz2-CP5C-Pp00-1fA6-WlA7lD
  LV Write Access        read/write
  LV Creation host, time hypervisor-host, 2023-08-07 13:47:47 +0200
  LV Status              available
  # open                 1
  LV Size                5.00 GiB
  Current LE             1280
  Segments               1
  Allocation             inherit
  Read ahead sectors     auto
  – currently set to     8192
  Block device           253:7
   
  — Logical volume —
  LV Path                /dev/vg00/log
  LV Name                log
  VG Name                vg00
  LV UUID                ZerDyL-birP-Pwck-yvFj-yEpn-XKsn-sxpvWY
  LV Write Access        read/write
  LV Creation host, time hypervisor-host, 2023-08-07 13:47:47 +0200
  LV Status              available
  # open                 1
  LV Size                5.00 GiB
  Current LE             1280
  Segments               1
  Allocation             inherit
  Read ahead sectors     auto
  – currently set to     8192
  Block device           253:8
   
  — Logical volume —
  LV Path                /dev/vg00/cache
  LV Name                cache
  VG Name                vg00
  LV UUID                bPPfzQ-s4fH-4kdT-LPyp-5N20-JQTB-Y2PrAG
  LV Write Access        read/write
  LV Creation host, time hypervisor-host, 2023-08-07 13:47:48 +0200
  LV Status              available
  # open                 1
  LV Size                5.00 GiB
  Current LE             1280
  Segments               1
  Allocation             inherit
  Read ahead sectors     auto
  – currently set to     8192
  Block device           253:9
   
  — Logical volume —
  LV Path                /dev/vg00/root
  LV Name                root
  VG Name                vg00
  LV UUID                mZr3p3-52R3-JSr5-HgGh-oQX1-B8f5-cRmaIL
  LV Write Access        read/write
  LV Creation host, time hypervisor-host, 2023-08-07 13:47:48 +0200
  LV Status              available
  # open                 1
  LV Size                15.00 GiB
  Current LE             3840
  Segments               1
  Allocation             inherit
  Read ahead sectors     auto
  – currently set to     8192
  Block device           253:0
   
  — Logical volume —
  LV Path                /dev/vg00/vmprivate
  LV Name                vmprivate
  VG Name                vg00
  LV UUID                LxNRWV-le3h-KIng-pUFD-hc7M-39Gm-jhF2Aj
  LV Write Access        read/write
  LV Creation host, time hypervisor-host, 2023-09-18 11:54:19 +0200
  LV Status              available
  # open                 1
  LV Size                210.00 GiB
  Current LE             53760
  Segments               1
  Allocation             inherit
  Read ahead sectors     auto
  – currently set to     8192
  Block device           253:10

9. Check Hypervisor existing partitions and space
 

[root@hypervisor-host ~]# fdisk -l
Disk /dev/sda: 278.9 GiB, 299439751168 bytes, 584843264 sectors
Units: sectors of 1 * 512 = 512 bytes
Sector size (logical/physical): 512 bytes / 512 bytes
I/O size (minimum/optimal): 512 bytes / 512 bytes
Disklabel type: dos
Disk identifier: 0x0581e6e2

Device     Boot   Start       End   Sectors   Size Id Type
/dev/sda1  *       2048   2099199   2097152     1G 83 Linux
/dev/sda2       2099200 584843263 582744064 277.9G 8e Linux LVM


Disk /dev/mapper/vg00-root: 15 GiB, 16106127360 bytes, 31457280 sectors
Units: sectors of 1 * 512 = 512 bytes
Sector size (logical/physical): 512 bytes / 512 bytes
I/O size (minimum/optimal): 512 bytes / 512 bytes


Disk /dev/mapper/vg00-swap: 1 GiB, 1073741824 bytes, 2097152 sectors
Units: sectors of 1 * 512 = 512 bytes
Sector size (logical/physical): 512 bytes / 512 bytes
I/O size (minimum/optimal): 512 bytes / 512 bytes


Disk /dev/mapper/vg00-var: 5 GiB, 5368709120 bytes, 10485760 sectors
Units: sectors of 1 * 512 = 512 bytes
Sector size (logical/physical): 512 bytes / 512 bytes
I/O size (minimum/optimal): 512 bytes / 512 bytes


Disk /dev/mapper/vg00-spool: 2 GiB, 2147483648 bytes, 4194304 sectors
Units: sectors of 1 * 512 = 512 bytes
Sector size (logical/physical): 512 bytes / 512 bytes
I/O size (minimum/optimal): 512 bytes / 512 bytes


Disk /dev/mapper/vg00-audit: 3 GiB, 3221225472 bytes, 6291456 sectors
Units: sectors of 1 * 512 = 512 bytes
Sector size (logical/physical): 512 bytes / 512 bytes
I/O size (minimum/optimal): 512 bytes / 512 bytes


Disk /dev/mapper/vg00-opt: 2 GiB, 2147483648 bytes, 4194304 sectors
Units: sectors of 1 * 512 = 512 bytes
Sector size (logical/physical): 512 bytes / 512 bytes
I/O size (minimum/optimal): 512 bytes / 512 bytes


Disk /dev/mapper/vg00-home: 5 GiB, 5368709120 bytes, 10485760 sectors
Units: sectors of 1 * 512 = 512 bytes
Sector size (logical/physical): 512 bytes / 512 bytes
I/O size (minimum/optimal): 512 bytes / 512 bytes


Disk /dev/mapper/vg00-tmp: 5 GiB, 5368709120 bytes, 10485760 sectors
Units: sectors of 1 * 512 = 512 bytes
Sector size (logical/physical): 512 bytes / 512 bytes
I/O size (minimum/optimal): 512 bytes / 512 bytes


Disk /dev/mapper/vg00-log: 5 GiB, 5368709120 bytes, 10485760 sectors
Units: sectors of 1 * 512 = 512 bytes
Sector size (logical/physical): 512 bytes / 512 bytes
I/O size (minimum/optimal): 512 bytes / 512 bytes


Disk /dev/mapper/vg00-cache: 5 GiB, 5368709120 bytes, 10485760 sectors
Units: sectors of 1 * 512 = 512 bytes
Sector size (logical/physical): 512 bytes / 512 bytes
I/O size (minimum/optimal): 512 bytes / 512 bytes


Disk /dev/mapper/vg00-vmprivate: 210 GiB, 225485783040 bytes, 440401920 sectors
Units: sectors of 1 * 512 = 512 bytes
Sector size (logical/physical): 512 bytes / 512 bytes
I/O size (minimum/optimal): 512 bytes / 512 bytes


10. List block devices on VM
 

[root@vm-host ~]# lsblk 
NAME               MAJ:MIN RM  SIZE RO TYPE MOUNTPOINT
sr0                 11:0    1 1024M  0 rom  
vda                252:0    0  100G  0 disk 
├─vda1             252:1    0    1G  0 part /boot
├─vda2             252:2    0   88G  0 part 
│ ├─vg00-root      253:0    0   68G  0 lvm  /
│ ├─vg00-home      253:2    0   10G  0 lvm  /home
│ └─vg00-var       253:3    0   10G  0 lvm  /var
├─vda3             252:3    0    1G  0 part [SWAP]
└─vda4             252:4    0   10G  0 part 


11. Create new LVM partition with fdisk or cfdisk
 

If there is no cfdisk new resized space with qemu-img could be setup with a fdisk, though I personally always prefer to use cfdisk

[root@vm-host ~]# fdisk /dev/vda
# > p (print)
# > m (manfile)
# > n
# … follow on screen instructions to select start and end blocks
# > t (change partition type)
# > select and set to 8e
# > w (write changes)

[root@vm-host ~]# cfdisk /dev/vda


Setup new partition from Free space as [ primary ] partition and Choose to be of type LVM


12. List partitions to make sure new LVM partition is present
 

[root@vm-host ~]# fdisk -l
Disk /dev/vda: 100 GiB, 107374182400 bytes, 209715200 sectors
Units: sectors of 1 * 512 = 512 bytes
Sector size (logical/physical): 512 bytes / 512 bytes
I/O size (minimum/optimal): 512 bytes / 512 bytes
Disklabel type: dos
Disk identifier: 0xe7b2d9fd

Device     Boot     Start       End   Sectors Size Id Type
/dev/vda1  *         2048   2099199   2097152   1G 83 Linux
/dev/vda2         2099200 186646527 184547328  88G 8e Linux LVM
/dev/vda3       186646528 188743679   2097152   1G 82 Linux swap / Solaris
/dev/vda4       188743680 209715199  20971520  10G 8e Linux LVM

The extra added 10 Giga is seen under /dev/vda4.
  — Physical volume —
  PV Name               /dev/vda4
  VG Name               vg01
  PV Size               10.00 GiB / not usable 4.00 MiB
  Allocatable           yes (but full)
  PE Size               4.00 MiB
  Total PE              2559
  Free PE               0
  Allocated PE          2559
  PV UUID               yvMX8a-sEka-NLA7-53Zj-fFdZ-Jd2K-r0Db1z
   
  — Physical volume —
  PV Name               /dev/vda2
  VG Name               vg00
  PV Size               <88.00 GiB / not usable 3.00 MiB
  Allocatable           yes (but full)
  PE Size               4.00 MiB
  Total PE              22527
  Free PE               0
  Allocated PE          22527
  PV UUID               i4UpGr-h9Cd-iKBu-KqEI-15vK-CGc1-DwRPj8
   
[root@vm-host ~]# 


13. List LVM Physical Volumes
 

[root@vm-host ~]# pvdisplay 
  — Physical volume —
  PV Name               /dev/vda2
  VG Name               vg00
  PV Size               <88.00 GiB / not usable 3.00 MiB
  Allocatable           yes (but full)
  PE Size               4.00 MiB
  Total PE              22527
  Free PE               0
  Allocated PE          22527
  PV UUID               i4UpGr-h9Cd-iKBu-KqEI-15vK-CGc1-DwRPj8


  Notice the /dev/vda4 is not seen in pvdisplay (Physical Volume display command) because not created yet, so lets create it.
 

14. Initialize new Physical Volume to be available for use by LVM
 

[root@vm-host ~]# pvcreate /dev/vda4


15. Inform the OS for partition table changes
 

If partprobe is not available as command on the host, below obscure command should do the trick.
 

[root@vm-host ~]# echo "- – -" | tee /sys/class/scsi_host/host*/scan

However usually, better to use partprobe to inform the Operating System of partition table changes

[root@vm-host ~]# partprobe


16. Use lsblk again to see the new /dev/vda4 LVM is listed into "vda" root block device
 

[root@vm-host ~]# 
[root@vm-host ~]# lsblk
NAME          MAJ:MIN RM  SIZE RO TYPE MOUNTPOINT
sr0            11:0    1 1024M  0 rom  
vda           252:0    0  100G  0 disk 
├─vda1        252:1    0    1G  0 part /boot
├─vda2        252:2    0   88G  0 part 
│ ├─vg00-root 253:0    0   68G  0 lvm  /
│ ├─vg00-home 253:1    0   10G  0 lvm  /home
│ └─vg00-var  253:2    0   10G  0 lvm  /var
├─vda3        252:3    0    1G  0 part [SWAP]
└─vda4        252:4    0   10G  0 part 
[root@vm-host ~]# 


17. Create new Volume Group (VG) on /dev/vda4 block device
 

Before creating a new VG, list what kind of VG is on the machine to be sure the new created one will not be already present.
 

[root@vm-host ~]# vgdisplay 
  — Volume group —
  VG Name               vg00
  System ID             
  Format                lvm2
  Metadata Areas        1
  Metadata Sequence No  4
  VG Access             read/write
  VG Status             resizable
  MAX LV                0
  Cur LV                3
  Open LV               3
  Max PV                0
  Cur PV                1
  Act PV                1
  VG Size               <88.00 GiB
  PE Size               4.00 MiB
  Total PE              22527
  Alloc PE / Size       22527 / <88.00 GiB
  Free  PE / Size       0 / 0   
  VG UUID               oyo1oY-saSm-0IKk-gZnf-Knwz-utO7-Aw8c60

vg00 is existing only, so we can use vg01 as a Volume Group name for the new volume group where the fresh 10GB LVM partition will lay

[root@vm-host ~]# vgcreate vg01 /dev/vda4
  Volume group "vg01" successfully created


18. Create new Logical Volume (LV) and extend it to occupy the full space available on Volume Group vg01


[root@vm-host ~]# lvcreate -n commvault -l 100%FREE vg01
  Logical volume "commvault" created.

  An alternative way to create the same LV is by running:

lvcreate -n commvault -L 10G vg01


19. Relist block devices with lsblk to make sure the new created Logical Volume commvault is really present and seen, in case of it missing re-run again partprobe cmd
 

[root@vm-host ~]# lsblk 
NAME               MAJ:MIN RM  SIZE RO TYPE MOUNTPOINT
sr0                 11:0    1 1024M  0 rom  
vda                252:0    0  100G  0 disk 
├─vda1             252:1    0    1G  0 part /boot
├─vda2             252:2    0   88G  0 part 
│ ├─vg00-root      253:0    0   68G  0 lvm  /
│ ├─vg00-home      253:1    0   10G  0 lvm  /home
│ └─vg00-var       253:2    0   10G  0 lvm  /var
├─vda3             252:3    0    1G  0 part [SWAP]
└─vda4             252:4    0   10G  0 part 
  └─vg01-commvault 253:3    0   10G  0 lvm  


As it is not mounted yet, the VG will be not seen in df free space but will be seen as a volume group with vgdispaly
 

[root@vm-host ~]# df -h
Filesystem                  Size  Used Avail Use% Mounted on
devtmpfs                    2.8G     0  2.8G   0% /dev
tmpfs                       2.8G   33M  2.8G   2% /dev/shm
tmpfs                       2.8G   17M  2.8G   1% /run
tmpfs                       2.8G     0  2.8G   0% /sys/fs/cgroup
/dev/mapper/vg00-root        67G  2.4G   61G   4% /
/dev/mapper/vg00-var        9.8G 1021M  8.3G  11% /var
/dev/mapper/vg00-home       9.8G   24K  9.3G   1% /home
/dev/vda1                   974M  242M  665M  27% /boot
tmpfs                       569M     0  569M   0% /run/user/0


[root@vm-host ~]# vgdisplay 
  — Volume group —
  VG Name               vg01
  System ID             
  Format                lvm2
  Metadata Areas        1
  Metadata Sequence No  2
  VG Access             read/write
  VG Status             resizable
  MAX LV                0
  Cur LV                1
  Open LV               0
  Max PV                0
  Cur PV                1
  Act PV                1
  VG Size               <10.00 GiB
  PE Size               4.00 MiB
  Total PE              2559
  Alloc PE / Size       2559 / <10.00 GiB
  Free  PE / Size       0 / 0   
  VG UUID               nYP0tv-IbFw-fBVT-slBB-H1hF-jD0h-pE3V0S
   
  — Volume group —
  VG Name               vg00
  System ID             
  Format                lvm2
  Metadata Areas        1
  Metadata Sequence No  4
  VG Access             read/write
  VG Status             resizable
  MAX LV                0
  Cur LV                3
  Open LV               3
  Max PV                0
  Cur PV                1
  Act PV                1
  VG Size               <88.00 GiB
  PE Size               4.00 MiB
  Total PE              22527
  Alloc PE / Size       22527 / <88.00 GiB
  Free  PE / Size       0 / 0   
  VG UUID               oyo1oY-saSm-0IKk-gZnf-Snwz-utO7-Aw8c60


20. Create new ext4 filesystem on the just created vg01-commvault   
 

[root@vm-host ~]# mkfs.ext4 /dev/mapper/vg01-commvault 

[root@vm-host ~]# mkfs.ext4 /dev/mapper/vg01-commvault 
mke2fs 1.45.6 (20-Mar-2020)
Discarding device blocks: done                            
Creating filesystem with 2620416 4k blocks and 655360 inodes
Filesystem UUID: 1491d8b1-2497-40fe-bc40-5faa6a2b2644
Superblock backups stored on blocks: 
        32768, 98304, 163840, 229376, 294912, 819200, 884736, 1605632

Allocating group tables: done                            
Writing inode tables: done                            
Creating journal (16384 blocks): done
Writing superblocks and filesystem accounting information: done 


21. Mount vg01-commvault into /opt directory
 

[root@vm-host ~]# mkdir -p /opt/

[root@vm-host ~]# mount /dev/mapper/vg01-commvault /opt/


22. Check mount is present on VM guest OS
 

[root@vm-host ~]# mount|grep -i /opt
/dev/mapper/vg01-commvault on /opt type ext4 (rw,relatime)
[root@vm-host ~]# 

[root@vm-host ~]# df -h|grep -i opt
/dev/mapper/vg01-commvault  9.8G   24K  9.3G   1% /opt
[root@vm-host ~]# 
 

23. Add vg01-commvault to be auto mounted via /etc/fstab on next Virtual Machine reboot
 

[root@vm-host ~]# echo '/dev/mapper/vg01-commvault /opt         ext4            defaults        1        2' >> /etc/fstab

[root@vm-host ~]# rpm -ivh commvault-fs.Instance001-11.0.0-80.240.0.3589820.240.4083067.el8.x86_64.rpm

[root@vm-host ~]# systemctl status commvault
● commvault.Instance001.service – commvault Service
   Loaded: loaded (/etc/systemd/system/commvault.Instance001.service; enabled; vendor preset: disabled)
   Active: active (running) since Fri 2023-11-10 15:13:59 CET; 27s ago
  Process: 9972 ExecStart=/opt/commvault/Base/Galaxy start direct -focus Instance001 (code=exited, status=0/SUCCESS)
    Tasks: 54
   Memory: 155.5M
   CGroup: /system.slice/commvault.Instance001.service
           ├─10132 /opt/commvault/Base/cvlaunchd
           ├─10133 /opt/commvault/Base/cvd
           ├─10135 /opt/commvault/Base/cvfwd
           └─10137 /opt/commvault/Base/ClMgrS

Nov 10 15:13:57 vm-host.ffm.de.int.atosorigin.com systemd[1]: Starting commvault Service…
Nov 10 15:13:58 vm-host.ffm.de.int.atosorigin.com Galaxy[9972]: Cleaning up /opt/commvault/Base/Temp …
Nov 10 15:13:58 vm-host.ffm.de.int.atosorigin.com Galaxy[9972]: Starting Commvault services for Instance001 …
Nov 10 15:13:59 vm-host.ffm.de.int.atosorigin.com Galaxy[9972]: [22B blob data]
Nov 10 15:13:59 vm-host.ffm.de.int.atosorigin.com systemd[1]: Started commvault Service.
[root@vm-host ~]# 


24. Install Commvault backup client RPM in new mounted LVM under /opt

[root@vm-host ~]#  rpm -ivh commvault.rpm

How to test RAM Memory for errors in Linux / UNIX OS servers. Find broken memory RAM banks

Friday, December 3rd, 2021

test-ram-memory-for-errors-linux-unix-find-broken-memory-logo


1. Testing the memory with motherboard integrated tools
 

Memory testing has been integral part of Computers for the last 50 years. In the dawn of computers those older perhaps remember memory testing was part of the computer initialization boot. And this memory testing was delaying the boot with some seconds and the user could see the memory numbers being counted up to the amount of memory. With the increased memory modern computers started to have and the annoyance to wait for a memory check program to check the computer hardware memory on modern computers this check has been mitigated or completely removed on some hardware.
Thus under some circumstances sysadmins or advanced computer users might need to check the memory, especially if there is some suspicion for memory damages or if for example a home PC starts crashing with Blue screens of Death on Windows without reason or simply the PC or some old arcane Linux / UNIX servers gets restarted every now and then for now apparent reason. When such circumstances occur it is an idea to start debugging the hardware issue with a simple memory check.

There are multiple ways to test installed memory banks on a server laptop or local home PC both integrated and using external programs.
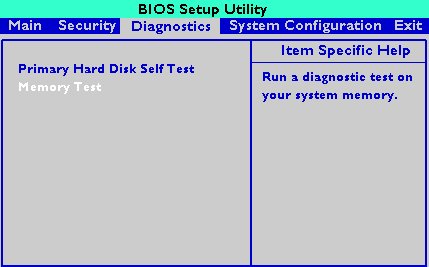
On servers that is usually easily done from ILO or IPMI or IDRAC access (usually web) interface of the vendor, on laptops and home usage from BIOS or UEFI (Unified Extensible Firmware Interface) acces interface on system boot that is possible as well.

memtest-hp
HP BIOS Setup

An old but gold TIP, more younger people might not know is the


Prolonged SHIFT key press which once held with the user instructs the machine to initiate a memory test before the computer starts reading what is written in the boot loader.

So before anything else from below article it might be a good idea to just try HOLD SHIFT for 15-20 seconds after a complete Shut and ON from the POWER button.

If this test does not triggered or it is triggered and you end up with some corrupted memory but you're not sure which exact Memory bank is really crashing and want to know more on what memory Bank and segments are breaking up you might want to do a more thorough testing. In below article I'll try to explain shortly how this can be done.


2. Test the memory using a boot USB Flash Drive / DVD / CD 
 

Say hello to memtest86+. It is a Linux GRUB boot loader bootable utility that tests physical memory by writing various patterns to it and reading them back. Since memtest86+ runs directly off the hardware it does not require any operating system support for execution. Perhaps it is important to mention that memtest86 (is PassMark memtest86)and memtest86+ (An Advanced Memory diagnostic tool) are different tools, the first is freeware and second one is FOSS software.

To use it all you'll need is some version of Linux. If you don't already have some burned in somewhere at your closet, you might want to burn one.
For Linux / Mac users this is as downloading a Linux distribution ISO file and burning it with

# dd if=/path/to/iso of=/dev/sdbX bs=80M status=progress


Windows users can burn a Live USB with whatever Linux distro or download and burn the latest versionof memtest86+ from https://www.memtest.org/  on Windows Desktop with some proggie like lets say UnetBootIn.
 

2.1. Run memtest86+ on Ubuntu

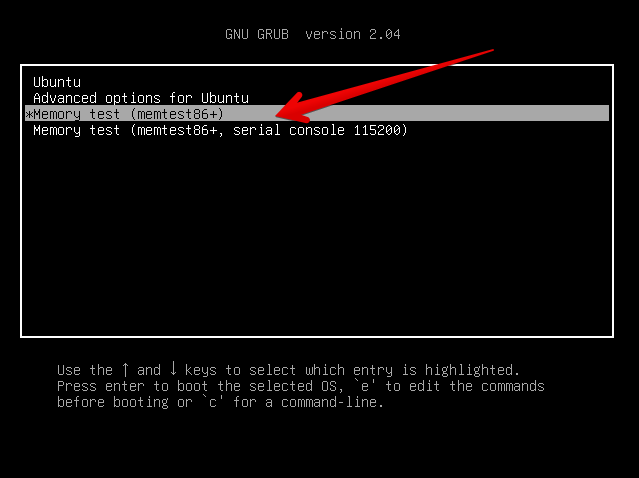
Many Linux distributions such as Ubuntu 20.0 comes together with memtest86+, which can be easily invoked from GRUB / GRUB2 Kernel boot loader.
Ubuntu has a separate menu pointer for a Memtest.

ubuntu-grub-2-04-boot-loader-memtest86-menu-screenshot

Other distributions RPM based distributions such as CentOS, Fedora Linux, Redhat things differ.

2.2. memtest86+ on Fedora


Fedora used to have the memtest86+ menu at the GRUB boot selection prompt, but for some reason removed it and in newest Fedora releases as of time such as Fedora 35 memtest86+ is preinstalled and available but not visible, to start on  already and to start a memtest memory test tool:

  •   Boot a Fedora installation or Rescue CD / USB. At the prompt, type "memtest86".

boot: memtest86

2.3 memtest86+ on RHEL Linux

The memtest86+tool is available as an RPM package from Red Hat Network (RHN) as well as a boot option from the Red Hat Enterprise Linux rescue disk.
And nowadays Red Hat Enterprise Linux ships by default with the tool.

Prior redhat (now legacy) releases such as on RHEL 5.0 it has to be installed and configure it with below 3 commands.

[root@rhel ~]# yum install memtest86+
[root@rhel ~]# memtest-setup
[root@rhel ~]# grub2-mkconfig -o /boot/grub2/grub.cfg


    Again as with CentOS to boot memtest86+ from the rescue disk, you will need to boot your system from CD 1 of the Red Hat Enterprise Linux installation media, and type the following at the boot prompt (before the Linux kernel is started):

boot: memtest86

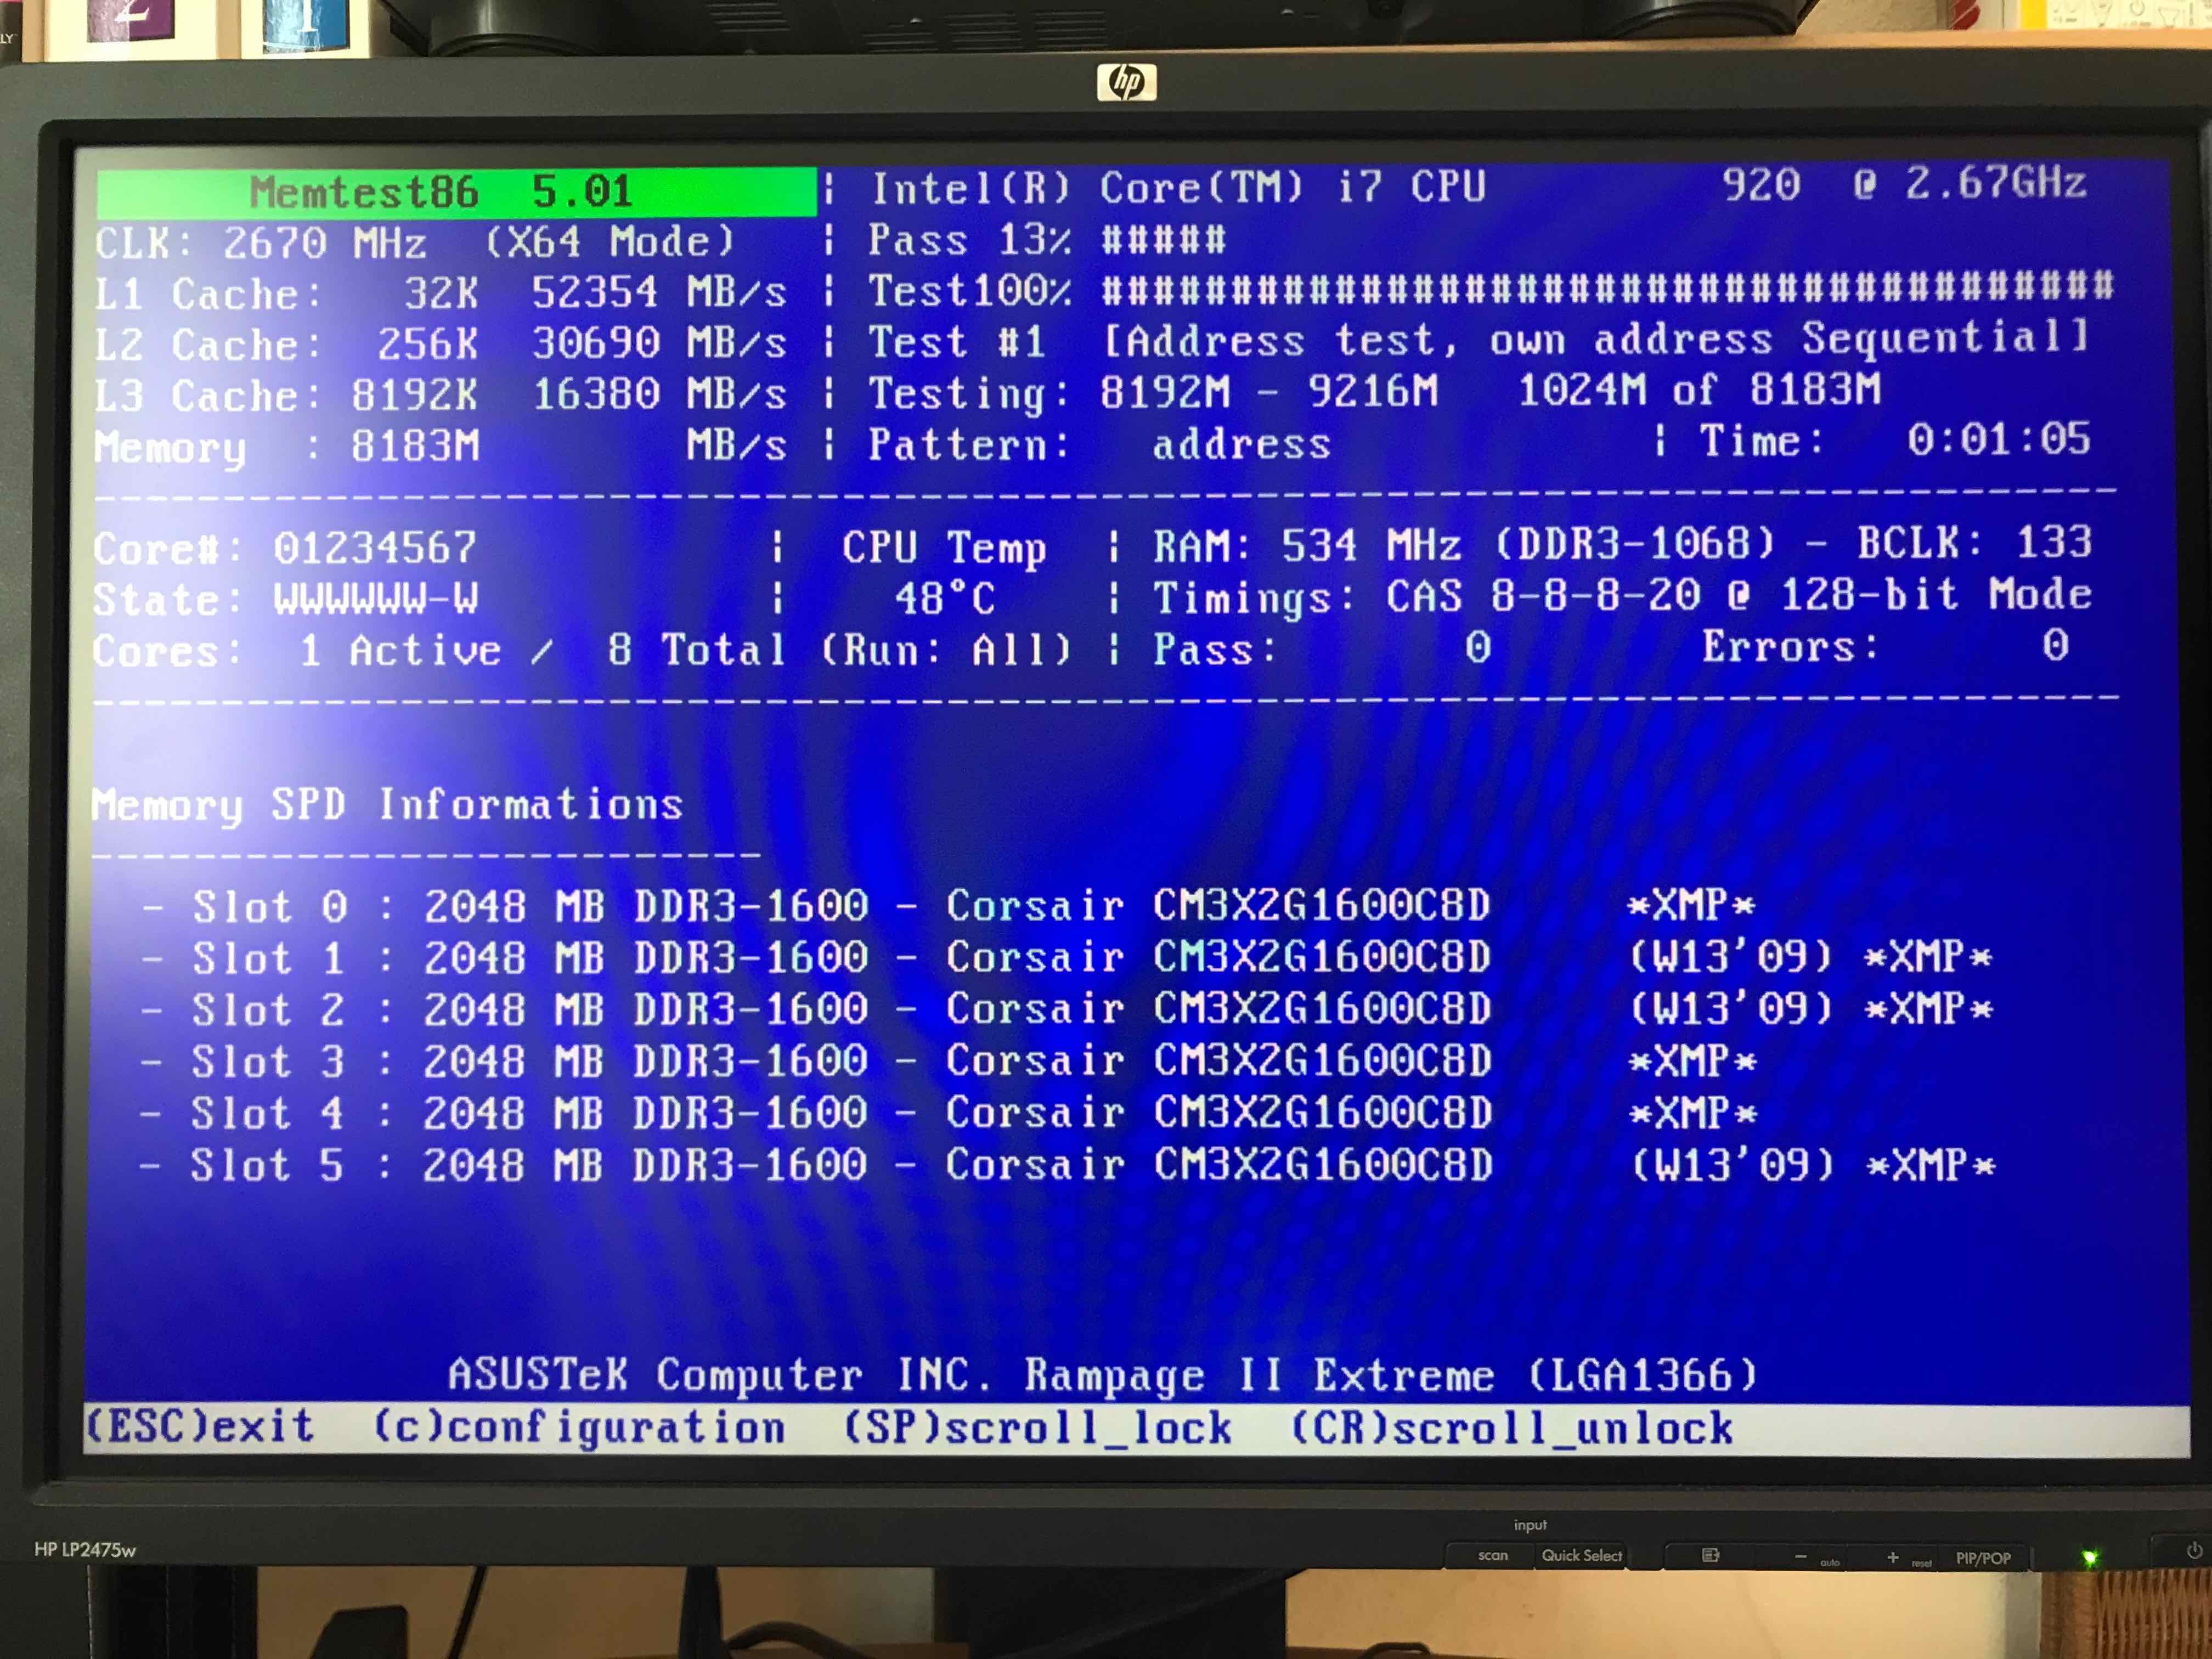
memtestx86-8gigabytes-of-memory-boot-screenshot
memtest86+ testing 5 memory slots

As you see all on above screenshot the Memory banks are listed as Slots. There are a number of Tests to be completed until
it can be said for sure memory does not have any faulty cells. 
The

Pass: 0
Errors: 0 

Indicates no errors, so in the end if memtest86 does not find anything this values should stay at zero.
memtest86+ is also usable to detecting issues with temperature of CPU. Just recently I've tested a PC thinking that some memory has defects but it turned out the issue on the Computer was at the CPU's temperature which was topping up at 80 – 82 Celsius.

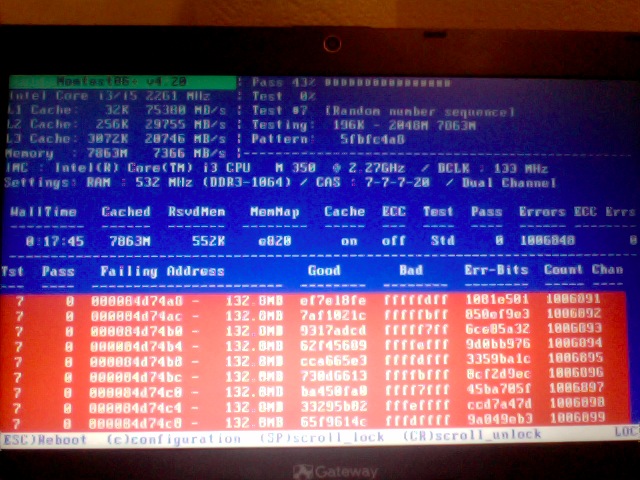
If you're unfortunate and happen to get some corrupted memory segments you will get some red fields with the memory addresses found to have corrupted on Read / Write test operations:

memtest86-returning-memory-address-errors-screenshot


2.4. Install and use memtest and memtest86+ on Debian / Mint Linux

You can install either memtest86+ or just for the fun put both of them and play around with both of them as they have a .deb package provided out of debian non-free /etc/apt/sources.list repositories.


root@jeremiah:/home/hipo# apt-cache show memtest86 memtest86+
Package: memtest86
Version: 4.3.7-3
Installed-Size: 302
Maintainer: Yann Dirson <dirson@debian.org>
Architecture: amd64
Depends: debconf (>= 0.5) | debconf-2.0
Recommends: memtest86+
Suggests: hwtools, memtester, kernel-patch-badram, grub2 (>= 1.96+20090523-1) | grub (>= 0.95+cvs20040624), mtools
Description-en: thorough real-mode memory tester
 Memtest86 scans your RAM for errors.
 .
 This tester runs independently of any OS – it is run at computer
 boot-up, so that it can test *all* of your memory.  You may want to
 look at `memtester', which allows testing your memory within Linux,
 but this one won't be able to test your whole RAM.
 .
 It can output a list of bad RAM regions usable by the BadRAM kernel
 patch, so that you can still use you old RAM with one or two bad bits.
 .
 This is the last DFSG-compliant version of this software, upstream
 has opted for a proprietary development model starting with 5.0.  You
 may want to consider using memtest86+, which has been forked from an
 earlier version of memtest86, and provides a different set of
 features.  It is available in the memtest86+ package.
 .
 A convenience script is also provided to make a grub-legacy-based
 floppy or image.

Description-md5: 0ad381a54d59a7d7f012972f613d7759
Homepage: http://www.memtest86.com/
Section: misc
Priority: optional
Filename: pool/main/m/memtest86/memtest86_4.3.7-3_amd64.deb
Size: 45470
MD5sum: 8dd2a4c52910498d711fbf6b5753bca9
SHA256: 09178eca21f8fd562806ccaa759d0261a2d3bb23190aaebc8cd99071d431aeb6

Package: memtest86+
Version: 5.01-3
Installed-Size: 2391
Maintainer: Yann Dirson <dirson@debian.org>
Architecture: amd64
Depends: debconf (>= 0.5) | debconf-2.0
Suggests: hwtools, memtester, kernel-patch-badram, memtest86, grub-pc | grub-legacy, mtools
Description-en: thorough real-mode memory tester
 Memtest86+ scans your RAM for errors.
 .
 This tester runs independently of any OS – it is run at computer
 boot-up, so that it can test *all* of your memory.  You may want to
 look at `memtester', which allows to test your memory within Linux,
 but this one won't be able to test your whole RAM.
 .
 It can output a list of bad RAM regions usable by the BadRAM kernel
 patch, so that you can still use your old RAM with one or two bad bits.
 .
 Memtest86+ is based on memtest86 3.0, and adds support for recent
 hardware, as well as a number of general-purpose improvements,
 including many patches to memtest86 available from various sources.
 .
 Both memtest86 and memtest86+ are being worked on in parallel.
Description-md5: aa685f84801773ef97fdaba8eb26436a
Homepage: http://www.memtest.org/

Tag: admin::benchmarking, admin::boot, hardware::storage:floppy,
 interface::text-mode, role::program, scope::utility, use::checking
Section: misc
Priority: optional
Filename: pool/main/m/memtest86+/memtest86+_5.01-3_amd64.deb
Size: 75142
MD5sum: 4f06523532ddfca0222ba6c55a80c433
SHA256: ad42816e0b17e882713cc6f699b988e73e580e38876cebe975891f5904828005


root@jeremiah:/home/hipo# apt-get install –yes memtest86+

root@jeremiah:/home/hipo# apt-get install –yes memtest86

Reading package lists… Done
Building dependency tree       
Reading state information… Done
Suggested packages:
  hwtools kernel-patch-badram grub2 | grub
The following NEW packages will be installed:
  memtest86
0 upgraded, 1 newly installed, 0 to remove and 21 not upgraded.
Need to get 45.5 kB of archives.
After this operation, 309 kB of additional disk space will be used.
Get:1 http://ftp.de.debian.org/debian buster/main amd64 memtest86 amd64 4.3.7-3 [45.5 kB]
Fetched 45.5 kB in 0s (181 kB/s)     
Preconfiguring packages …
Selecting previously unselected package memtest86.
(Reading database … 519985 files and directories currently installed.)
Preparing to unpack …/memtest86_4.3.7-3_amd64.deb …
Unpacking memtest86 (4.3.7-3) …
Setting up memtest86 (4.3.7-3) …
Generating grub configuration file …
Found background image: saint-John-of-Rila-grub.jpg
Found linux image: /boot/vmlinuz-4.19.0-18-amd64
Found initrd image: /boot/initrd.img-4.19.0-18-amd64
Found linux image: /boot/vmlinuz-4.19.0-17-amd64
Found initrd image: /boot/initrd.img-4.19.0-17-amd64
Found linux image: /boot/vmlinuz-4.19.0-8-amd64
Found initrd image: /boot/initrd.img-4.19.0-8-amd64
Found linux image: /boot/vmlinuz-4.19.0-6-amd64
Found initrd image: /boot/initrd.img-4.19.0-6-amd64
Found linux image: /boot/vmlinuz-4.19.0-5-amd64
Found initrd image: /boot/initrd.img-4.19.0-5-amd64
Found linux image: /boot/vmlinuz-4.9.0-8-amd64
Found initrd image: /boot/initrd.img-4.9.0-8-amd64
Found memtest86 image: /boot/memtest86.bin
Found memtest86+ image: /boot/memtest86+.bin
Found memtest86+ multiboot image: /boot/memtest86+_multiboot.bin
File descriptor 3 (pipe:[66049]) leaked on lvs invocation. Parent PID 22581: /bin/sh
done
Processing triggers for man-db (2.8.5-2) …


After this both memory testers memtest86+ and memtest86 will appear next to the option of booting a different version kernels and the Advanced recovery kernels, that you usually get in the GRUB boot prompt.

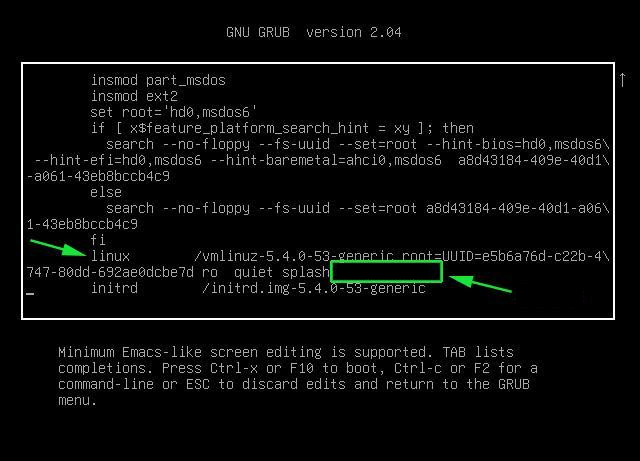
2.5. Use memtest embedded tool on any Linux by adding a kernel variable

Edit-Grub-Parameters-add-memtest-4-to-kernel-boot

2.4.1. Reboot your computer

# reboot

2.4.2. At the GRUB boot screen (with UEFI, press Esc).

2.4.3 For 4 passes add temporarily the memtest=4 kernel parameter.
 

memtest=        [KNL,X86,ARM,PPC,RISCV] Enable memtest
                Format: <integer>
                default : 0 <disable>
                Specifies the number of memtest passes to be
                performed. Each pass selects another test
                pattern from a given set of patterns. Memtest
                fills the memory with this pattern, validates
                memory contents and reserves bad memory
                regions that are detected.


3. Install and use memtester Linux tool
 

At some condition, memory is the one of the suspcious part, or you just want have a quick test. memtester  is an effective userspace tester for stress-testing the memory subsystem.  It is very effective at finding intermittent and non-deterministic faults.

The advantage of memtester "live system check tool is", you can check your system for errors while it's still running. No need for a restart, just run that application, the downside is that some segments of memory cannot be thoroughfully tested as you already have much preloaded data in it to have the Operating Sytstem running, thus always when possible try to stick to rule to test the memory using memtest86+  from OS Boot Loader, after a clean Machine restart in order to clean up whole memory heap.

Anyhow for a general memory test on a Critical Legacy Server  (if you lets say don't have access to Remote Console Board, or don't trust the ILO / IPMI Hardware reported integrity statistics), running memtester from already booted is still a good idea.


3.1. Install memtester on any Linux distribution from source

wget http://pyropus.ca/software/memtester/old-versions/memtester-4.2.2.tar.gz
# tar zxvf memtester-4.2.2.tar.gz
# cd memtester-4.2.2
# make && make install

3.2 Install on RPM based distros


On Fedora memtester is available from repositories however on many other RPM based distros it is not so you have to install it from source.

[root@fedora ]# yum install -y memtester


3.3. Install memtester on Deb based Linux distributions from source
 

To install it on Debian / Ubuntu / Mint etc. , open a terminal and type:
 

root@linux:/ #  apt install –yes memtester

The general run syntax is:

memtester [-p PHYSADDR] [ITERATIONS]


You can hence use it like so:

hipo@linux:/ $ sudo memtester 1024 5

This should allocate 1024MB of memory, and repeat the test 5 times. The more repeats you run the better, but as a memtester run places a great overall load on the system you either don't increment the runs too much or at least run it with  lowered process importance e.g. by nicing the PID:

hipo@linux:/ $ nice -n 15 sudo memtester 1024 5


  • If you have more RAM like 4GB or 8GB, it is upto you how much memory you want to allocate for testing.
  • As your operating system, current running process might take some amount of RAM, Please check available Free RAM and assign that too memtester.
  • If you are using a 32 Bit System, you cant test more than 4 GB even though you have more RAM( 32 bit systems doesnt support more than 3.5 GB RAM as you all know).
  • If your system is very busy and you still assigned higher than available amount of RAM, then the test might get your system into a deadlock, leads to system to halt, be aware of this.
  • Run the memtester as root user, so that memtester process can malloc the memory, once its gets hold on that memory it will try to apply lock. if specified memory is not available, it will try to reduce required RAM automatically and try to lock it with mlock.
  • if you run it as a regular user, it cant auto reduce the required amount of RAM, so it cant lock it, so it tries to get hold on that specified memory and starts exhausting all system resources.


If you have 8 Gigas of RAM plugged into the PC motherboard you have to multiple 1024*8 this is easily done with bc (An arbitrary precision calculator language) tool:

root@linux:/ # bc -l
bc 1.07.1
Copyright 1991-1994, 1997, 1998, 2000, 2004, 2006, 2008, 2012-2017 Free Software Foundation, Inc.
This is free software with ABSOLUTELY NO WARRANTY.
For details type `warranty'. 
8*1024
8192


 for example you should run:

root@linux:/ # memtester 8192 5

memtester version 4.3.0 (64-bit)
Copyright (C) 2001-2012 Charles Cazabon.
Licensed under the GNU General Public License version 2 (only).

pagesize is 4096
pagesizemask is 0xfffffffffffff000
want 8192MB (2083520512 bytes)
got  8192MB (2083520512 bytes), trying mlock …Loop 1/1:
  Stuck Address       : ok        
  Random Value        : ok
  Compare XOR         : ok
  Compare SUB         : ok
  Compare MUL         : ok
  Compare DIV         : ok
  Compare OR          : ok
  Compare AND         : ok
  Sequential Increment: ok
  Solid Bits          : ok        
  Block Sequential    : ok        
  Checkerboard        : ok        
  Bit Spread          : ok        
  Bit Flip            : ok        
  Walking Ones        : ok        
  Walking Zeroes      : ok        
  8-bit Writes        : ok
  16-bit Writes       : ok

Done.


4. Shell Script to test server memory for corruptions
 

If for some reason the machine you want to run a memory test doesn't have connection to the external network such as the internet and therefore you cannot configure a package repository server and install memtester, the other approach is to use a simple memory test script such as memtestlinux.sh
 

#!/bin/bash
# Downloaded from https://www.srv24x7.com/memtest-linux/
echo "ByteOnSite Memory Test"
cpus=`cat /proc/cpuinfo | grep processor | wc -l`
if [ $cpus -lt 6 ]; then
threads=2
else
threads=$(($cpus / 2))
fi
echo "Detected $cpus CPUs, using $threads threads.."
memory=`free | grep 'Mem:' | awk {'print $2'}`
memoryper=$(($memory / $threads))
echo "Detected ${memory}K of RAM ($memoryper per thread).."
freespace=`df -B1024 . | tail -n1 | awk {'print $4'}`
if [ $freespace -le $memory ]; then
echo You do not have enough free space on the current partition. Minimum: $memory bytes
exit 1
fi
echo "Clearing RAM Cache.."
sync; echo 3 > /proc/sys/vm/drop_cachesfile
echo > dump.memtest.img
echo "Writing to dump file (dump.memtest.img).."
for i in `seq 1 $threads`;
do
# 1044 is used in place of 1024 to ensure full RAM usage (2% over allocation)
dd if=/dev/urandom bs=$memoryper count=1044 >> dump.memtest.img 2>/dev/null &
pids[$i]=$!
echo $i
done
for pid in "${pids[@]}"
do
wait $pid
done

echo "Reading and analyzing dump file…"
echo "Pass 1.."
md51=`md5sum dump.memtest.img | awk {'print $1'}`
echo "Pass 2.."
md52=`md5sum dump.memtest.img | awk {'print $1'}`
echo "Pass 3.."
md53=`md5sum dump.memtest.img | awk {'print $1'}`
if [ “$md51” != “$md52” ]; then
fail=1
elif [ “$md51” != “$md53” ]; then
fail=1
elif [ “$md52” != “$md53” ]; then
fail=1
else
fail=0
fi
if [ $fail -eq 0 ]; then
echo "Memory test PASSED."
else
echo "Memory test FAILED. Bad memory detected."
fi
rm -f dump.memtest.img
exit $fail

Nota Bene !: Again consider the restults might not always be 100% trustable if possible restart the server and test with memtest86+

Consider also its important to make sure prior to script run,  you''ll have enough disk space to produce the dump.memtest.img file – file is created as a test bed for the memory tests and if not scaled properly you might end up with a full ( / ) root directory!


4.1 Other memory test script with dd and md5sum checksum

I found this solution on the well known sysadmin site nixCraft cyberciti.biz, I think it makes sense and quicker.

First find out memory site using free command.
 

# free
             total       used       free     shared    buffers     cached
Mem:      32867436   32574160     293276          0      16652   31194340
-/+ buffers/cache:    1363168   31504268
Swap:            0          0          0


It shows that this server has 32GB memory,
 

# dd if=/dev/urandom bs=32867436 count=1050 of=/home/memtest


free reports by k and use 1050 is to make sure file memtest is bigger than physical memory.  To get better performance, use proper bs size, for example 2048 or 4096, depends on your local disk i/o,  the rule is to make bs * count > 32 GB.
run

# md5sum /home/memtest; md5sum /home/memtest; md5sum /home/memtest


If you see md5sum mismatch in different run, you have faulty memory guaranteed.
The theory is simple, the file /home/memtest will cache data in memory by filling up all available memory during read operation. Using md5sum command you are reading same data from memory.


5. Other ways to test memory / do a machine stress test

Other good tools you might want to check for memory testing is mprime – ftp://mersenne.org/gimps/ 
(https://www.mersenne.org/ftp_root/gimps/)

  •  (mprime can also be used to stress test your CPU)

Alternatively, use the package stress-ng to run all kind of stress tests (including memory test) on your machine.
Perhaps there are other interesting tools for a diagnosis of memory if you know other ones I miss, let me know in the comment section.

How to improve Linux kernel security with GrSecurity / Maximum Linux kernel security with GrSecurity

Tuesday, May 3rd, 2011

In short I’ll explain here what is Grsecurity http://www.grsecurity.net/ for all those who have not used it yet and what kind of capabilities concerning enhanced kernel security it has.

Grsecurity is a combination of patches for the Linux kernel accenting at the improving kernel security.

The typical application of GrSecurity is in the field of Linux systems which are administered through SSH/Shell, e.g. (remote hosts), though you can also configure grsecurity on a normal Linux desktop system if you want a super secured Linux desktop ;).

GrSecurity is used heavily to protect server system which require a multiple users to have access to the shell.

On systems where multiple user access is required it’s a well known fact that (malicious users, crackers or dumb script kiddies) get administrator (root) privileges with a some just poped in 0 day root kernel exploit.
If you’re an administrator of a system (let’s say a web hosting) server with multiple users having access to the shell it’s also common that exploits aiming at hanging in certain daemon service is executed by some of the users.
In other occasions you have users which are trying to DoS the server with some 0 day Denial of Service exploit.
In all this cases GrSecurity having a kernel with grsecurity is priceless.

Installing grsecurity patched kernel is an easy task for Debian and Ubuntu and is explained in one of my previous articles.
This article aims to explain in short some configuration options for a GrSecurity tightened kernel, when one have to compile a new kernel from source.

I would skip the details on how to compile the kernel and simply show you some picture screens with GrSecurity configuration options which are working well and needs to be set-up before a make command is issued to compile the new kernel.

After preparing the kernel source for compilation and issuing:

linux:/usr/src/kernel-source$ make menuconfig

You will have to select options like the ones you see in the pictures below:

[nggallery id=”8″]

After completing and saving your kernel config file, continue as usual with an ordinary kernel compilation, e.g.:

linux:/usr/src/kernel-source$ make
linux:/usr/src/kernel-source$ make modules
linux:/usr/src/kernel-source$ su root
linux:/usr/src/kernel-source# make modules_install
linux:/usr/src/kernel-source# make install
linux:/usr/src/kernel-source# mkinitrd -o initrd.img-2.6.xx 2.6.xx

Also make sure the grub is properly configured to load the newly compiled and installed kernel.

After a system reboot, if all is fine you should be able to boot up the grsecurity tightened newly compiled kernel, but be careful and make sure you have a backup solution before you reboot, don’t blame me if your new grsecurity patched kernel fails to boot! You’re on your own boy 😉
This article is written thanks to based originally on his article in Bulgarian. If you’re a Bulgarian you might also checkout static’s blog

How to disable ACPI on productive Linux servers to decrease kernel panics and increase CPU fan lifespan

Tuesday, May 15th, 2012

Linux TUX ACPI logo / Tux Hates ACPI logohttps://www.pc-freak.net/images/linux_tux_acpi_logo-tux-hates-acpi.png

Why would anyone disable ACPI support on a server machine??
Well  ACPI support kernel loaded code is just another piece of code constantly being present in the memory,  that makes the probability for a fatal memory mess up leading to  a fatal bug resulting in system crash (kernel panic) more likely.

Many computers ship with buggy or out of specifications ACPI firmware which can cause a severe oddities on a brand new bought piece of comp equipment.

One such oddity related to ACPI motherboard support problems is if you notice your machine randomly powering off or failing to boot with a brand new Linux installed on it.

Another reason to switch off ACPI code will would to be prevent the CPU FAN rotation from being kernel controlled.

If the kernel controls the CPU fan on  high CPU heat up it will instruct the fan to rotate quickly and on low system loads it will bring back the fan to loose speed.
 This frequent switch of FAN from high speed to low speed  increases the probability for a short fan damage due to frequent changes of fan speed. Such a fan damage leads often to  system outage due to fan failure to rotate properly.

Therefore in my view it is better ACPI support is switched off completely on  servers. On some servers ACPI is useful as it can be used to track CPU temperature with embedded motherboard sensors with lm_sensors or any piece of hardwre vendor specific software provided. On many machines, however lm_sensors will not properly recognize the integrated CPU temperature sensors and hence ACPI is mostly useless.

There are 3 ways to disable fully or partially ACPI support.

- One is to disable it straight for BIOS (best way IMHO)
- Disable via GRUB or LILO passing a kernel parameter
- Partial ACPI off-ing - /disabling the software that controls the CPU fan/

1. Disable ACPI in BIOS level

Press DEL, F1, F2, F10 or whatever the enter bios key combination is go through all the different menus (depending on the vios BENDOR) and make sure every occurance of ACPI is set to off / disable whatever it is called.

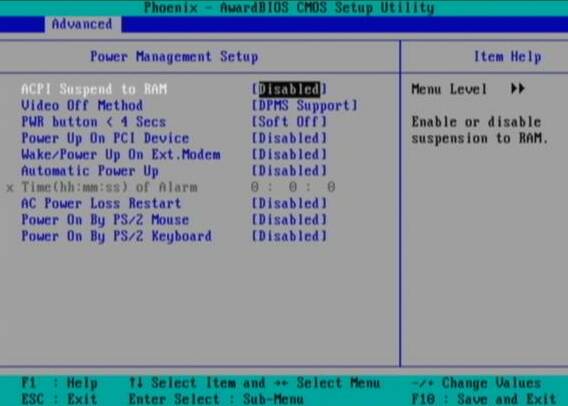
Below is a screenshot of menus with ACPI stuff on a motherboard equipped with Phoenix AwardBIOS:

BIOS ACPI Disable power Off Phoenix BIOS

This is the in my opinon best and safest way to disable ACPI power saving, Unfortunately some newer PCs lack the functionality to disable ACPI; (probably due to the crazy "green" policy the whole world is nowdays mad of).

If that's the case with you, thanksfully there is a "software way" to disable ACPI via passing kernel options via GRUB and LILO boot loaders.

2. Disabling ACPI support on kernel boot level through GRUB boot loader config

There is a tiny difference in command to pass in order to disable  ACPI depending on the Linux installed  GRUB ver. 1.x or GRUB 2.x.

a) In GRUB 0.99 (GRUB version 1)

Edit file /etc/grub/menu.lst or /etc/grub/grub.conf (location differs across Linux distribution). Therein append:

acpi=off

to the end of kernel command line.

Here is an example of a kernel command line with ACPI not disabled (example taken from CentOS server grub.conf):

[root@centos ~]# grep -i title -A 4 /etc/grub/grub.conf
title Red Hat Enterprise Linux Server (2.6.18-36.el5)
root (hd0,0)
kernel /vmlinuz-2.6.18-36.el5 ro root=/dev/VolGroup00/LogVol00 console=ttyS0,115200n8
initrd /initrd-2.6.18-36.el5.img

The edited version of the file with acpi=off included should look like so:

title Red Hat Enterprise Linux Server (2.6.18-36.el5)
root (hd0,0)
kernel /vmlinuz-2.6.18-36.el5 ro root=/dev/VolGroup00/LogVol00 console=ttyS0,115200n8 acpi=off
initrd /initrd-2.6.18-36.el5.img

The kernel option root=/dev/VolGroup00/LogVol00 means the the server is configured to use LVM (Logical Volume Manager).

b) Disabling ACPI on GRUB version 1.99 +

This version is by default installed on newer Ubuntu and Debian Linux-es.

In grub 1.99 on latest Debian Squeeze, the file to edit is located in /boot/grub/grub.cfg. The file is more messy than with its predecessor menu.lst (grub 0.99).
Thanks God there is no need to directly edit the file (though this is possible), but on newer Linuces (as of time of writting the post), there is another simplied grub config file /etc/grub/config

Hence to add the acpi=off to 1.99 open /etc/grub/config find the line reading:

GRUB_CMDLINE_LINUX_DEFAULT="quiet"

and append the "acpi=off" option, e.g. the line has to change to:

GRUB_CMDLINE_LINUX_DEFAULT="quiet acpi=off"

On some servers it might be better to also disable APIC along with ACPI:

Just in case you don't know what is the difference between ACPI and APIC, here is a short explanation:

ACPI = Advanced Configuration and Power Interface

APIC = Advanced Programmable Interrupt Controllers

ACPI is the system that controls your dynamic speed fans, the power button behavior, sleep states, etc.

APIC is the replacement for the old PIC chip that used to come imbedded on motherboards that allowed you to setup interrupts for your soundcard, ide controllers, etc.

Hence on some machines experiencing still problems with even ACPI switched off, it is helpful  to disable the APIC support too, by using:

acpi=off noapic noacpi

Anyways, while doing the changes, be very very cautious or you might end up with un-boot-able server. Don't blame me if this happens :); be sure you have a backup option if server doesn't boot.

To assure faultless kernel boot, GRUB has ability to be configured to automatically load up a second kernel if 1st one fails to boot, if you need that read the grub documentation on that.

To load up the kernel with the new setting, give it a restart:

[root@centos ~]# shutdown -r now
....

3. Disable ACPI support on kernel boot time on Slackware or other Linuxes still booting kernel with LILO

Still, some Linux distros like Slackware, decided to keep the old way and use LILO (LInux LOader) as a default boot loader.

Disabling ACPI support in LILO is done through /etc/lilo.conf

By default in /etc/lilo.conf, there is a line:

append= acpi=on

it should be changed to:

append= acpi=off

Next to load up the new acpi disabled setting, lilo has to be reloaded:

slackware:~# /sbin/lilo -c /etc/lilo.conf
....

Finally a reboot is required:

slackware:~# reboot
....

(If you don't have a physical access or someone near the server you better not 🙂 )

4. Disable ACPI fan control support on a running Linux server without restart

This is the most secure work-around, to disabling the ACPI control over the machine CPU fan, however it has a downside that still the ACPI code will be loaded in the kernel and could cause kernel issues possibly in the long run – lets say the machine has uptime of more than 2 years…

The acpi support on a user level  is controlled by acpid or haldaemon (depending on the Linux distro), hence to disable the fan control on servers this services has to be switched off:

a) disabling ACPI on Debian and deb based Linux-es

As of time of writting on Debian Linux servers acpid (Advanced Configuration and Power Interface event daemon) is there to control how power management will be handled. To disable it stop it as a service (if running):

debian:~# /etc/init.d/acpid stop

To permanently remove acpid from boot up on system boot disable it with update-rc.d:

debian:~# update-rc.d acpid disable 2 3 4 5
update-rc.d: using dependency based boot sequencing
insserv: Script iptables is broken: incomplete LSB comment.
insserv: missing `Required-Start:' entry: please add even if empty.
insserv: warning: current start runlevel(s) (empty) of script `acpid' overwrites defaults (2 3 4 5).
insserv: warning: current stop runlevel(s) (2 3 4 5) of script `acpid' overwrites defaults (empty).
insserv: missing `Required-Start:' entry: please add even if empty.

b) disabling ACPI on RHEL, Fedora and other Redhat-s (also known as RedHacks 🙂 )

I'm not sure if this is safe,as many newer rpm based server system services,  might not work properly with haldaemon disabled.

Anyways you can give it a try if when it is stopped there are issues just bring it up again.

[root@rhel ~]# /etc/init.d/haldaemon stop

If all is fine with the haldaemon switched off (hope so), you can completely disable it to load on start up with:

[root@centos ~]# /sbin/chkconfig --level 2 3 4 5 haldaemon off

Disabling ACPI could increase a bit your server bills, but same time decrease losses from downtimes, so I guess it worths its costs 🙂


Converting JPEG Images to ASCII Art text (picture) in Microsoft Windows (2000 / XP / Vista / 7)

Friday, May 18th, 2012

A friend of mine, just mentioned about a program ASCIIPic – capable of converting graphic images in JPEG to plain text ASCII in Microsoft Windows OSes.
Yesterday I blogged about caca-utils (img2txt) – console tool to convert picture graphics to plain text ASCII , so knowing of the Windows freeware ASCIIPic existence catched my attention and I decided to give it a try to get idea what is situation with Images to ASCII text convertion in Windows? 🙂.

1. Generating ASCII from JPEG images with ASCII Pic

As I don't have a Microsoft Windows OS at hand, I downloaded it and run it on my Debian notebook with WINE (Wine Is Not an Emulator) MS-Windows emulator.

For my surprise the program run succesfuly its GUI interface and worked pretty smooth even emulated on Linux.

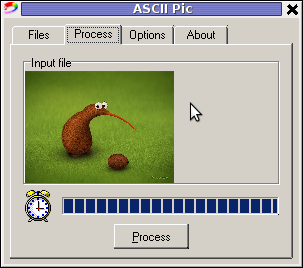
ASCII Pic 2.0 JPG PNG GIF to ASCII text MS Windows Convertor screenshot

As of time of writting, the latest version of the freeware program available is 2.0. You see in above screenshot the program is pretty intutive to use. You select an Input file, an Output file and you're ready to Process the image to TXT.
One small note to make here is the program couldn't recognize as Input files images in PNG or GIF formats, it seems the only image formats the program recognizes as input are JPEG and BMP.

ASCII Pic Windows image to ASCII program picture shot

The converted images to ASCII results are quite unsatisfactory, I tried converting few pictures originally in size 1024×768 but the produced ASCII was messy huge (the program didn't automatically set height / width dimensions to 60×80 and therefore, when I revied the produced pictures, they were very ugly and hardly readable. It could be the same image looks better if reviewed in MS-Windows Notepad but I seriously doubt that …

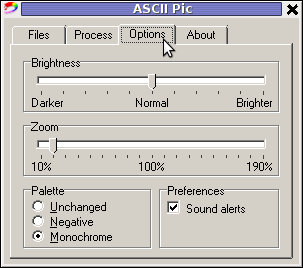
I thought some improvement to the produced ASCII image might be possible from the app options so I played around with the Zoom, Negation, Brightness and Monochrome options, none of them had a drastic change on the output. Using any of the program options didn't make the output TXT "image" to look closer riginal JPEGs..

ASCII Pic 2.0 Windows picture to ASCII Program options screenshot

ASCII Pic official website contains a number of other tiny tools, like WinKill and RemoteShut, however most of the tools are already too obslete and useless just like ASCII Pic

If I have to compare ASCIIPic produced ASCII Images to libcaca's Linux img2txt, asciipic's ASCII images are a piece of crap.

2. jp2a command line tool image to ASCII generator

As of time of writting a good alternative program I found for Windows is jp2a
jp2a is a free GPL-ed software available for all major operating system architectures Linux, BSD, Mac OS X, Windows.
jp2a is a command line tool and lacks any GUI interface but if compared to ASCII Pic the output ASCII image is awesome.

jp2a Windows binary can be downloaded from here , also I've made a mirror of windows jp2a bin in case if it disappears here

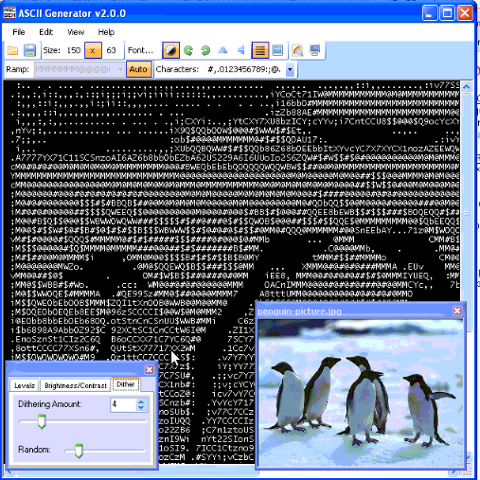
3. ASCII Generator 2 (asc2gen) – Windows GUI Images to ASCII generator

ASC 2 Gen is actually the best I can find program to convert images to ascii in Win as of time of writting.
Just like img2txt it generates pretty decent looking text images.

ASC2Gen failed to run emulated on my Linux host with wine version 1.0.1, hence to test it I used a a Windows host via teamviewer.

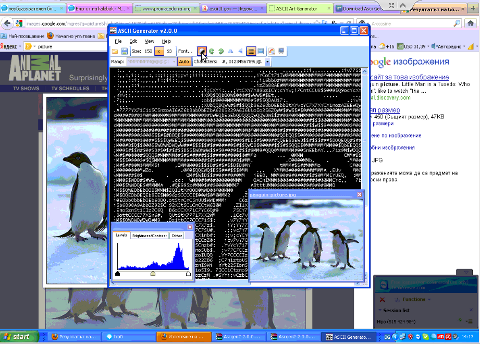
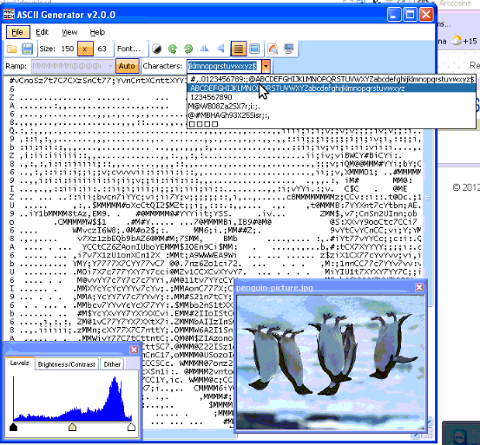
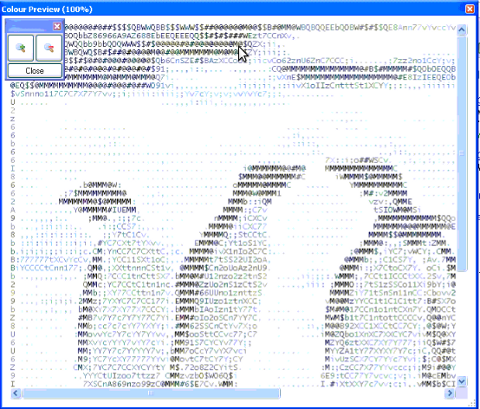
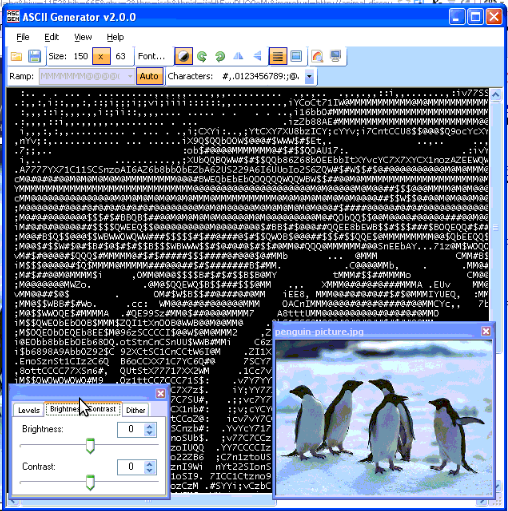
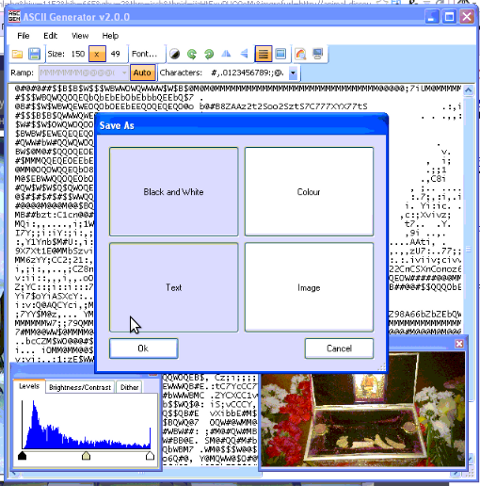
Below are few screenshots illustrating most of the options ASCII2GEN provides:

asc2gen Microsoft Windows image to ascii generator inverted penguins screenshot

asc2gen penguins in inverted color set (black color text background)

ASC2Gen backhead penguins ascii picture screenshot

ASC2GEN flipped backhed generated image to ASCII

ascii2gen generate images to ascii in colors Microsoft Windows shot

Picture to ASCII text converted with ASCII colors

Dithering Windows image to ascii text generated picture ASCII

ascii2gen dithering level option shot

asc2gen jpeg, png, gif to plain text ascii brightness contrast screenshot pic

asc2gen contrast / brigthness atune shot

ascii2gen penguins converted images to plain text inverted with capital letters for picture

asc2gen save as options shot

Something else nice is it supports a lot of image file formats as input including (BMP and GIF) images.
I've also made a mirror of asc2gen v. 2.0.0 here

While researching online, I found plenty of other Image to ASCII geneartors, however as I didn't tested them I can't say if they are  better ones.
Anyways I will be happy to hear if anyone knows other good ASCII generator alternative progs for Winblows?

The Legend of the Christmas Tree and Why do we put Christmas trees at home in Christmas time? :)

Thursday, January 12th, 2012

Why we put Pine tree / Fir in Christmas origins of Christmas tree / Legends for the Christmas Tree
 

Christmas has just passed away. As a Christian I was curious what is the reason in so many Christian countries, we decorate Pine trees and I did a quick research on the topic. In this small article, I'll present my findings.

Observing the Christmas Pine Tree tradition has been quite ancient and probably according to many sources dates back to the XIIth century.
The first written records of a Christmas tree are of an anonymous Frenchman who visited Strasbourg, Germany in 1601. His description of the decoratd pine tree says like "wafers and golden sugar-twists (Barley sugar), roses cut out of many-colored paper, apples, gold foil and sweets."

Later in the 1800s, the local German Christmas pine tree tradition was spread across America by German emmigrants.
In UK the Pine tree decorating tradition appeard in 1841, where a royalty (Prince Albert) decorated his castle (Winston Castle).

A little later after the Queen Victoria adopted the pine tree, United Kingdom citizens started to decorate pine trees for themselves, folliwng the highly regarded Queen.
Usually the pine tree has historically been decorated with gifts as well as an Bright star is put atop.

One of the Christian interpretations for the Christmas tree is that it represents the same Cross (tree) on which Christ was crucifixed. Then after Christ's resurrection because of (or through that) tree, the humanity received the Lord big spiritual blessings. These blessings are represented by the gifts decorated on the Fir tree. The pine tree itself is in Christianity a reference for the symbol of Salvation that we received came from the Holy Cross, where our saviour was crucified.

The Fir is decorated with lights to represent the joy and the lights of Christmas (that burns in our hearts), the star atop the tree is a reminder of the Star that rised in the East during the night of Christ's birth as we read in the gospels.

Roman Catholic Church Christmas Pine Trees
Decorating Pine trees is commonly observed mostly in Roman Catholic Church and often followed by some protestant denominations and less used in Orthodox Church (though this is changing nowdays).

In Eastern Europe, the Christmas tree appeared quite Legends about the Christmas Fir Treelate and the whole concept was unknown in the Orthodox Christian countries, just until the end of the 19th century.

With the recent severe globalization the pine tree was silenty adopted in almost all parts of the world, including even communist countries and even sometimes in muslim ones.
Enormous Fir Tree in Tarnovo city hill Bulgaria

Unfortunately, the relation between the Fir tree and our Christian faith is little known today and with the years to come it will be less and less associated with Christianity.

Here are few interesting legends which I found explaining, some of the possible roots of the Christmas tree decoration:

Legends about the Christmas Fir Tree

1. Legend of the Pine Tree Saving the Holy Family

When the Holy family was pursued by Herod's soldiers, many plants offered to provide them with shelter.
One such plant was the Pine tree. With Mary too weary to travel any longer, the family stopped at the edge of a forest to rest.
A gnarled old Pine which had grown hollow with the years invited them to rest within its trunk.
Then, it closed its branches down upon them, keeping the family safe until the soldiers had passed.
Upon leaving, the Christ Child blessed the Pine and the imprint of his tiny hand was left forever in the tree's fruit… the Pine cone.
If a cone is cut lengthwise, the hand may still be seen.

2. Pine tree and Easter Legend
 

Pine tree on cones on Easter forms Cross shape

There is a legend that pine trees "know" when it's Easter.
The pine trees start their new growth in the weeks before Easter.
If you look at the tops of the pine trees two weeks before Easter you'll see the yellow shoots.
As the days get closer to Easter Sunday, the tallest shoot will branch off and form a cross.
By the time Easter Sunday comes around, you will see that most of the pine trees will have small yellow crosses on all of the tallest shoots.
This really happens we live where there are lots of pines,
and each year this actually happens, it is amazing to watch,
and the process of the new growth appears as crosses on the ends
of each branch.

I've not personally observed that, but according to people who live in pine tree forest areas this is a fact.

3. Legend about M. Luther and the Pine tree

Martin Luther, founder of the Protestant religion, was taking a stroll through the woods late one night.
The sky was clear and many stars were shining through the branches of the trees,
giving the impression of twinkling lights.
Luther was so captivated and inspired by the beautiful brilliance of the sight
that he cut down a small evergreen and brought it home.
He recreated the stars by placing candles upon the tree's branches to imitate
their radiance and presented it to his children.

This story explains why, the pine tree become so wide spread initially in the "western world", as it gives some connection between the Pine tree and Protestant Christianity.

4. The Children Legend of the Fir Tree (Kids Story)

On the night of the Christ Child's birth, all living creatures, both flora and fauna, traveled to Bethlehem bearing gifts.
The Olive tree, for example, brought its fruit and the Palm tree its dates.
But the little Fir tree had no gift and was so tired that it was unable to resist when the larger trees pushed it into the background and hid it from view.
But then, a nearby Angel took pity and commanded a cluster of stars to descend and rest upon its delicate boughs.
When the Baby Jesus beheld this lovely lighted tree, he smiled and blessed it,
declaring henceforth that Fir trees should always be filled with lights at
Christmastime to please little children.
When Christianity first came to Northern Europe, three personages representing
virtues were dispatched from Heaven to place lights on the original Christmas tree.
These personages were Faith, Hope and Charity.
Their search was long, since they were required to find a tree as high as hope, as great as love and as sweet as charity.
In addition, the tree had to bear the sign of the cross on every bough.
Their search finally ended in the forests of the North where they found the Fir.
Lit by the radiance of the stars, it became the first Christmas tree.
The triangular design of the Fir has also been usedto describe the Holy Trinity of God the Father, The Son and The Holy Spirit.
Eventually, converts began to revere the Fir as God's Tree…as they had once revered the Oak.
By the Twelfth Century it was being hung, upside-down, from ceilings at Christmastime
in Central Europe, as a symbol of Christianity.

5. The Paradise Tree Legend

A very old and delightful European custom centers around decorating a Fir tree with apples and small white wafers which represents the Holy Eucharist.
These wafers were later replaced by small pieces of pastry cut into the shapes of stars, angels, hearts, flowers and bells.
Eventually additional pastries were introduced bearing the shapes of men, birds, roosters and other animals.

During the middle Ages, around the Eleventh century, religious theater was born.
One of the most popular plays …
The German mystery play concerned Adam and Eve and their fall and expulsion from the Garden of Eden, represented by a Fir tree hung with apples.
This tree was symbolic of both the Tree of Life and the Tree of Discernment of Good and Evil, which stood in the center of Paradise.
The play ended with the prophecy of a coming Saviour. For this reason, it was often enacted during Advent.

The one piece of scenery, the "Paradeisbaum" or "Paradise Tree" become a popular object and was often set up in churches.
Eventually it also found its way in private homes and became symbol of the Saviour.
Since the tree was representative not only to Paradise and the fall of man, but also the premise of salvation.
It was hung not merely with apples, but with bread of wafers (Holy Eucharist) and often sweet to represent the sweetness of redemption.
In some areas of Bavaria, fir branches and little trees decorated with lights, apples and tinsel are still called "Paradeis".

According to some other Christian legends, it was a Fir tree that grew as the Tree of Life in the Garden of Eden.
When Eve plucked its fruit, the foliage and flowers shrank to nothing but needles.
Only on the night of Nativity would the Fir tree bloom again a moment marked perhaps by the Christmas tree we Christians use.

Of course these are just legends and as with every legend there is plenty of romantism included.
Nevertheless I consider most legends similar to proverbs contain deep truth and contain truthful facts. Moreover knowing the legends of our forefathers connect us to who and what we are and from antropological point of view is precious knowledge, we should try to sustain and spread to our children.
 

Abe’s Amazing Adventure, A Dangerous Dave 2 like GNU Linux / FreeBSD Arcade Game substitute

Wednesday, December 14th, 2011

Abe's Amazing Adventure Game menu screenshot, A Dangerous Dave like Linux arcade game
While looking over the installable packages in System -> Administration -> Software Center on my my Debian powered notebook, I’ve accidently rolled over a game called Abe’s Amazing Adventure , as a big oldschool arcade game fan, I’ve immediately clicked on Install being impatient to see the overall game atmosphere and gameplay as well as storyline.

Abe’s Amazing Adventure is available under the debian package name abe and can be installed by issuing:

debian:~# apt-get install abe I was pleasently surprised to find out the gameplay and the overall game feels like the golden classical arcade game Dangerous Dave

For youngsters who never played the amazing absolute killing arcade ! as well as for people who feel nostalgic about Dangerous Dave 2 here is a nice gameplay screenshot:

Dangerous Dave 2 screenshot

Here is also a screenshot of Abe’s Amazing Adventure gameplay:

Abes Amazing Adventure Dangerous Dave like Linux / BSD Arcade Game like screenshot

You can see the great resemblense between the two games even by the screenshot; In both games you have to collect keys to open doors and diamonds which gives you points. Of course there are some differences as you can see Abe’s Amazing Adventure ‘s graphics has some additional items like Baloons with which your main character can fly over distances (for a limited time). There is also more diversity in the enemy types you face on the road to unlock the different doors. The game has also a red stars which while taken saves the game so if you quit the game on next game load up starting the game automatically starts you from the last save point.

Abes Amazing Adventure Star gameplay Screenshot on Debian

The ( 6 ) baloons seen in the screenshot on the left upper corner can be used occasionally to fly some distance by pressing Enter .
There are health recovery kits one can take to recover, some health damaged by hitting obstacles on the way.
The game story is short but entertaining, just like the general game feel:

Abes amazing adventure game storyThe game music is relaxing and more or less in the spirit of arcade games, the keyboard interactivety is pretty good as well.One thing I see can be improved to make the game better are the graphics, they’re a bit childish and too cubical, where sometimes some more general characters and obstacles animation will give the game a better look. Anyways for the year 2003 and for a free software arcade the game is not bad. For children and growing kids the game is just perfect, even for big kids like me its good to spend an hour of jump and run fun 😉
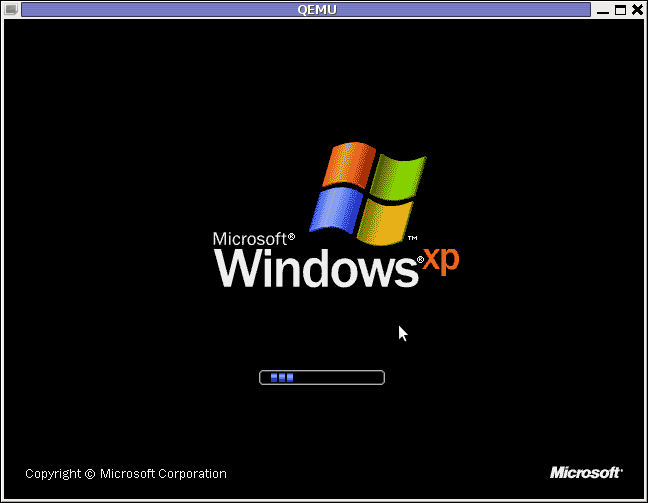
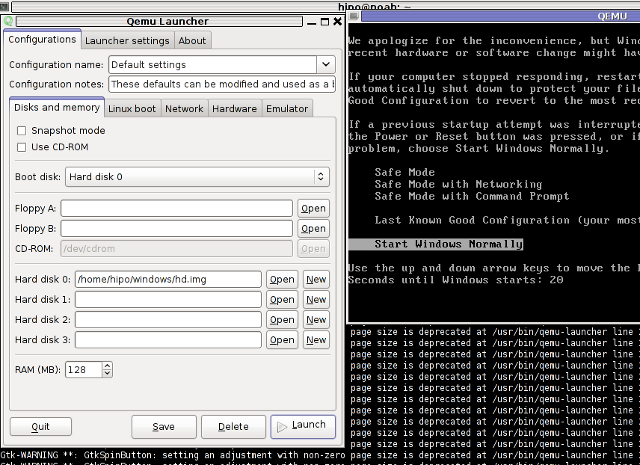
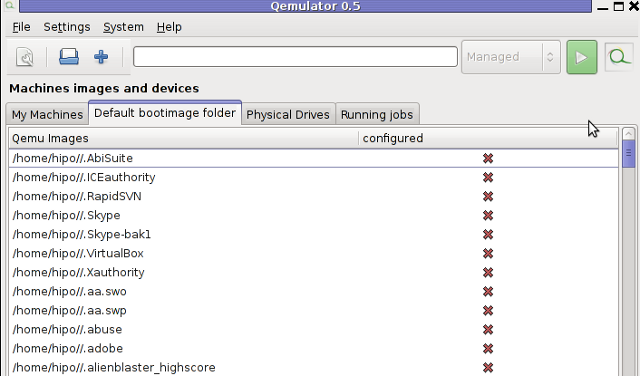
How to install Microsoft Windows XP SP3 on Debian GNU / Linux Squeeze

Thursday, December 1st, 2011

Windows XP Service Pack 3 QEMU Debian Squeeze

I have never did a proper install of Windows XP on Debian before hand. Even though I experimented once long time ago. I had zero success with installing Windows XP Service Pack 2 . The only Windows I can make correctly working before hand on these early days on my Debian powered notebook with qemu virtual machine emulator was Windows 2000 .

I decided to give it another go today as I hoped the qemu has advanced and I’ve seen many reports online of people who were able to correctly make Windows XP SP2 work out.

As I’ve seen many blog posts online of people who succesfully run with qemu Windows XP SP2, in order to escape from repeating the other guys experience and conduct a fresh experiment, I decided to give qemu a try with Microsoft.Windows.XP.Professional.SP3.Integrated.June.2011.Corporate

Before I proceed with using latest qemu I,

1. Installed qemu using the usual:

debian:~# apt-get install --yes qemu qemu-keymaps qemu-system qemu-user qemu-utils uml-utilities
...

Afterwards,

2. Created a new directory where the qemu Windows image will be stored:

debian:~# su hipo
hipo@noah:~$ mkdir windows
hipo@noah:~$ cd windows
hipo@noah:/home/hipo/windows$

As a following step I loaded the tun kernel module which is necessery for Qemu to properly handle the Windows LAN networking.

3. Load and set proper permissions for tun kernel module

In case if /dev/net is not existing first step is to create the proper device, however in most cases /dev/net should be there:

debian:~# mkdir -p /dev/net
debian:~# mknod /dev/net/tun c 10 200

As a next step its necessery to load tun kernel module and set the proper permissions:

debian:~# modprobe tun
debian:~# echo 'tun' >> /etc/modules
debian:~# chgrp users /dev/net/tun
debian:~# chmod g+w /dev/net/tun

Next step is to create an image file with dd or with qemu-img which will be holding the Virtual Machine Windows installation.

4. Create image file for Windows using dd

I decided to create a the image file to be with a size of 5 Gigabytes, this is of course custom so other people might prefer having it less or more the absolute minimum for a proper Windows XP SP3 install is 2000 Megabytes.

debian:~# su hipo -; cd windows;
debian:/home/hipo/windows$ dd of=hd.img bs=1024 seek=5000000 count=0
0+0 records in
0+0 records out
0 bytes (0 B) copied, 1.5505e-05 s, 0.0 kB/s

Notice here that the file dd will create will appear like 0 kb file until the Windows install from a BootCD is run with qemu.

5. Download an image of Microsoft.Windows.XP.Professional.SP3.Integrated.June.2011.Corporate from thepiratebay.org

Microsoft.Windows.XP.Professional.SP3.Integrated.June.2011.Corporate is currently available for download from the thepiratebay.org if in the times to come it is not available it will most likely be available from torrentz.net, isohunt.com etc. so I’ll skip more explanations with this step and let you use your favourite torrent program of choice to download the MS Windows iso. Just to make a note here I used transmission as this is my favourite torrent client. After downloading the iso I used K3B to burn the Image file as Bootable ISO. I’m naturally a GNOME user so to burn it as Image I just open it with K3B by using the GNOME menu and selecting Open with K3B

Next I instructed qemu to boot from the just burnt CD.

6. Boot windows Installation with Qemu from the Boot CD

debian:/home/hipo/windows$ qemu -boot d -cdrom /dev/cdrom -hda hd.img

Notice here that I’m running the qemu virtual machine emulator with a non-privileged reasons. This is important as qemu might have holes in the emulation of Windows Networking stack which if executed as root superuser. Can allow some malicious attacker to remotely compromise your GNU / Linux PC …

Qemu window will pop-up where one installs the Windows as it will install it using an ordinary PC. To switch qemu to fullscreen mode to have the complete feeling like installing Windows on an non-emulated PC ctrl + alt + f can be pressed.

The Windows installation took like 1 hour 20 minutes on my dual core 1.8 Ghz notebook with 2 GB of RAM. But I should say while installing I had multiple applications running; xmms, transmission, epiphany, icedove, evince etc. probably if I just run the Virtual Machine with no other applications to extra load my PC, probably the Windows install would have been done in max 50 minutes time.

After the installation is complete. To

7. Further run the installed Windows debian:/home/hipo/windows$ qemu -hda hd.img -boot c
...

As a next step its necessery to;

8. Bring up the tap0 interface and configure it for the user

I’m running my qemu emulator with my user hipo , so I run cmds:

debian:/home/hipo/windows$ su - root
debian:~# tunctl -u hipo
Set 'tap0' persistent and owned by uid 1000

9. Enable ip_forwarding and arp proxy and for wlan0 and tap0

debian:~# echo 1 > /proc/sys/net/ipv4/conf/wlan0/proxy_arp
debian:~# echo 1 > /proc/sys/net/ipv4/conf/tap0/proxy_arp

10. Install the proper Network Drivers inside Windows

That’s just in case, if they’re not supported by the Windows default existing drivers.
To do so, I downloaded my LAN drivers from the Vendor and put it on USB and sticked the USB drive to my laptop. In order to make the Kingston USB drive I used to transfer my LAN and Video drivers. I had to restart qemu with the parameter -usb -usbdevice host:0951:1625 , where I used lsusb to check and get the correct USB ID 0951:1625, like shown in the command below:

debian:~# lsusb |grep -i kingston
Bus 001 Device 006: ID 0951:1625 Kingston Technology DataTraveler 101 II

After on I booted again the Windows XP with the following command line in order to make qemu detect the USB Drive:

debian:/home/hipo/windows# sudo qemu -boot c -hda hd.img -usb -usbdevice host:0951:1625

One oddity here is that in order for qemu to detect the USB stick, I had to run it via sudo with super user privileges.Don’t ask me why this is the only way it worked …
Next on used the Windows device manager from Control Panel -> System -> Device Manager to point my undetected hardware to the correct Win drivers.

For the GUI preferring user qemu has a nice GNOME GUI interface called qemu-launcher, if you like to use qemu via it instead of scripting the qemu launcher commands, you can install and use via:

debian:~# apt-get install --yes qemu-launcher qemuctl
...
debian:/home/hipo/windows$ qemu-launcher

QEMU-Launcher Debian Squeeze Screenshot

Another GUI alternative to qemu-launcher, which easifys the work with qemu is qemulator; here is a screenshot:

Qemulator 0.5 - Qemu GUI Screenshot Debian Squeeze

Burj Al Arab, Towers of the Arabs and my bathing in Arab Sea

Saturday, September 17th, 2011

Burj Al Arab and Dubai shoe pciture

Burj Al Arab is probably the symbol of Dubai and is the 4th tallest hotel in the world as well as 5 star hotel.
The hotel is a majestic peace of modern architecture and is built on artificially made island near Jumeirah beach where the aparment where I sojourn in Dubai is situated ;).

I saw Burj Al Arab hotel building from some distance and it looks really majestic too bad I would not have the time to go closer to it as I would be going on a Safari in the desert. That’s right, they organize a Safari in the desert here with a dinner, they let you ride a camel and even have a belly dancers.
I’m very excited on going to the Safari, as I love Camels and I’ve never been in the wild desert 😉 Thanks God for letting my eyes see this things.
I’ve also tested the Beach here for a second time and the experience is way inferior if compared to any of the Black Sea Resorts we have in Bulgaria and possibly in many locations in Europe.
The Sun here is too strong, so its not a good idea to stay exposed to the sun for more than an hour, also the sea is too salty so if your eyes are directly exposede to water its a bit painful for the eyes.
Besides that the sea water is really too warm so it feels a bit like entering in soup stew. Going for a swim in Arabian sea does give you a hot bath after the excessive sun and does not cool you.
I found it interesting the Arab woman bath up in Sea here in UAE with a special long swimming suit (burkas) as they’re called in Arabic.
Here is a picture I’ve found online two Arab woman bathing in sea in Burkas.
Arab woman swimming in Burkas in Arab Sea, United Arab Emirates

Arab Woman Swimming in Burkas in Arab Sea the UAE

By the way the Arab woman look very beautiful wearing these black traditional dress (burka). Also in my view from Christian perspective it’s very righteous kind of think as covering the body and hiding the face reduces the sexual associations one does when seeing a woman and hence should be good from a spiritual perspective.<br><br>However wearing this burkas in the background of all this internationaliazation looks a bit strange. Anyways its worthy for admiration that they were able to keep this pious tradition for so many years, so instead of mocking the Arabs for asking their wifes to wear the burkas I think its we better learn from them and suggest our european woman to be a bit less sexually opened and more pious ;)<br></p>