Posts Tagged ‘yum’

Install specific zabbix-agent version / Downgrade Zabbix Agent client to exact preferred old RPM version on CentOS / Fedora / RHEL Linux from repo

Wednesday, June 7th, 2023

zabbix-update-downgrade-on-centos-rhel-fedora-and-other-rpm-based-linux-zabbix-logo


In below article, I'll give you the short Update zabbix procedure to specific version release, if you need to have it running in tandem with rest of zabbix infra, as well as expain shortly how to downgrade zabbix version to a specific release number
to match your central zabbix-serveror central zabbix proxies.

The article is based on personal experience how to install / downgrade the specific zabbuix-agent  release on RPM based distros.
I know this is pretty trivial stuff but still, hope this might be useful to some sysadmin out there thus I decided to quickly blog it.


1. Prepare backup of zabbix_agentd.conf
 

cp -rpf /etc/zabbix/zabbix_agentd.conf /home/your-user/zabbix_agentd.conf.bak.$(date +"%b-%d-%Y")


2. Create zabbix repo source file in yum.repos.d directory

cd /etc/yum.repos.d/
vim zabbix.repo 


[zabbix-5.0]

name=Zabbix 5.0 repo

baseurl=http://zabixx-rpm-mirrors-site.com/centos/external/zabbix-5.0/8/x86_64/

enabled=1

gpgcheck=0


3. Update zabbix-agent to a specific defined version

yum search zabbix-agent –enablerepo zabbix-5.0

To update zabbix-agent for RHEL 7.*

# yum install zabbix-agent-5.0.34-1.el7.x86_64


For RHEL 8.*

# yum install zabbix-agent-5.0.34-1.el8.x86_64


4. Restart zabbix-agentd and check its status to make sure it works correctly
 

systemctl status zabbix-agentd
systemctl restart zabbix-agentd
# systemctl status zabbix-agentd


Go to zabbix-server WEB GUI interface and check that data is delivered as normally in Latest Data for the host fom recent time, to make sure host monitoring is continuing flawlessly as before change.

NB !: If yum use something like versionlock is enabled remove the versionlock for package and update then, otherwise it will (weirldly look) look like the package is missing.
I'm saying that because I've hit this issue and was wondering why i cannot install the zabbix-agent even though the version is listed, available and downloadable from the repository.


5. Downgrade agent-client to specific version (Install old version of Zabbix from Repo)
 

Sometimes by mistake you might have raised the Zabbix-agent version to be higher release than the zabbix-server's version and thus breach out the Zabbix documentation official recommendation to keep
up the zabbix-proxy, zabbix-server and zabbix-agent at the exactly same version major and minor version releases. 

If so, then you would want to decrease / downgrade the version, to match your Zabbix overall infrastructure exact version for each of Zabbix server -> Zabbix Proxy server -> Agent clients.

To downgrade the version, I prefer to create some backups, just in case for all /etc/zabbix/ configurations and userparameter scripts (from experience this is useful as sometimes some RPM binary update packages might cause /etc/zabbix/zabbix_agentd.conf file to get overwritten. To prevent from restoring zabbix_agentd.conf from your most recent backup hence, I prefer to just crease the zabbix config backups manually.
 

# cd /root

# mkdir -p /root/backup/zabbix-agent 

# tar -czvf zabbix_agent.tar.gz /etc/zabbix/

# tar -xzvf zabbix_agent.tar.gz 


Then list the available installable zabbix-agent versions
 

[root@sysadminshelp:~]# yum –showduplicates list zabbix-agent
Заредени плъгини: fastestmirror
Determining fastest mirrors
 * base: centos.uni-sofia.bg
 * epel: fedora.ipacct.com
 * extras: centos.uni-sofia.bg
 * remi: mirrors.uni-ruse.bg
 * remi-php74: mirrors.uni-ruse.bg
 * remi-safe: mirrors.uni-ruse.bg
 * updates: centos.uni-sofia.bg
Инсталирани пакети
zabbix-agent.x86_64                                                     5.0.30-1.el7                                                     @zabbix
Налични пакети
zabbix-agent.x86_64                                                     5.0.0-1.el7                                                      zabbix
zabbix-agent.x86_64                                                     5.0.1-1.el7                                                      zabbix
zabbix-agent.x86_64                                                     5.0.2-1.el7                                                      zabbix
zabbix-agent.x86_64                                                     5.0.3-1.el7                                                      zabbix
zabbix-agent.x86_64                                                     5.0.4-1.el7                                                      zabbix
zabbix-agent.x86_64                                                     5.0.5-1.el7                                                      zabbix
zabbix-agent.x86_64                                                     5.0.6-1.el7                                                      zabbix
zabbix-agent.x86_64                                                     5.0.7-1.el7                                                      zabbix
zabbix-agent.x86_64                                                     5.0.8-1.el7                                                      zabbix
zabbix-agent.x86_64                                                     5.0.9-1.el7                                                      zabbix
zabbix-agent.x86_64                                                     5.0.10-1.el7                                                     zabbix
zabbix-agent.x86_64                                                     5.0.11-1.el7                                                     zabbix
zabbix-agent.x86_64                                                     5.0.12-1.el7                                                     zabbix
zabbix-agent.x86_64                                                     5.0.13-1.el7                                                     zabbix
zabbix-agent.x86_64                                                     5.0.14-1.el7                                                     zabbix
zabbix-agent.x86_64                                                     5.0.15-1.el7                                                     zabbix
zabbix-agent.x86_64                                                     5.0.16-1.el7                                                     zabbix
zabbix-agent.x86_64                                                     5.0.17-1.el7                                                     zabbix
zabbix-agent.x86_64                                                     5.0.18-1.el7                                                     zabbix
zabbix-agent.x86_64                                                     5.0.19-1.el7                                                     zabbix
zabbix-agent.x86_64                                                     5.0.20-1.el7                                                     zabbix
zabbix-agent.x86_64                                                     5.0.21-1.el7                                                     zabbix
zabbix-agent.x86_64                                                     5.0.22-1.el7                                                     zabbix
zabbix-agent.x86_64                                                     5.0.23-1.el7                                                     zabbix
zabbix-agent.x86_64                                                     5.0.24-1.el7                                                     zabbix
zabbix-agent.x86_64                                                     5.0.25-1.el7                                                     zabbix
zabbix-agent.x86_64                                                     5.0.26-1.el7                                                     zabbix
zabbix-agent.x86_64                                                     5.0.27-1.el7                                                     zabbix
zabbix-agent.x86_64                                                     5.0.28-1.el7                                                     zabbix
zabbix-agent.x86_64                                                     5.0.29-1.el7                                                     zabbix
zabbix-agent.x86_64                                                     5.0.30-1.el7                                                     zabbix
zabbix-agent.x86_64                                                     5.0.31-1.el7                                                     zabbix
zabbix-agent.x86_64                                                     5.0.32-1.el7                                                     zabbix
zabbix-agent.x86_64                                                     5.0.33-1.el7                                                     zabbix
zabbix-agent.x86_64                                                     5.0.34-1.el7                                                     zabbix


Next lets install the most recent zabbix-versoin from the CentOS repo, which for me as of time of writting this article is 5.0.34.

# yum downgrade -y zabbix-agent-5.0.34-1.el7

# cp -rpf /root/backup/zabbix-agent/etc/zabbix/zabbix_agentd.conf /etc/zabbix/

# systemctl start zabbix-agent.service

# systemctl enable  zabbix-agent.service
 

# zabbix_agentd -V
zabbix_agentd (daemon) (Zabbix) 5.0.30
Revision 2c96c38fb4b 28 November 2022, compilation time: Nov 28 2022 11:27:43

Copyright (C) 2022 Zabbix SIA
License GPLv2+: GNU GPL version 2 or later <https://www.gnu.org/licenses/>.
This is free software: you are free to change and redistribute it according to
the license. There is NO WARRANTY, to the extent permitted by law.

This product includes software developed by the OpenSSL Project
for use in the OpenSSL Toolkit (http://www.openssl.org/).

Compiled with OpenSSL 1.0.1e-fips 11 Feb 2013
Running with OpenSSL 1.0.1e-fips 11 Feb 2013


That's all folks you should be at your custom selected preferred version of zabbix-agent.
Enjoy ! 🙂

Megaraid SAS software installation on CentOS Linux

Saturday, October 20th, 2012

With a standard el5 on a new Dell server, it may be necessary to install the Dell Raid driver, otherwise the OMSA always reports an error and hardware monitoring is therefore obsolete:

Previously, the megaraid_sys package was now called mptlinux

For this we need the following packages in advance:

# yum install gcc kernel-devel
Now the driver stuff:

# yum install dkms mptlinux
That should have built the new module, better test it:

# modinfo mptsas

# dkms status
After a kernel update it may be necessary to build the driver for the new version:

# dkms build -m mptlinux -v 4.00.38.02

# dkms install -m mptlinux -v 4.00.38.02

Install Zabbix Agent client on CentOS 9 Stream Linux, Disable Selinux and Firewalld on CentOS9 to make zabbix-agentd send data to server

Thursday, April 14th, 2022

https://pc-freak.net/images/zabbix_agent_active_passive-zabbix-agent-centos-9-install-howto

Installing Zabbix is usually a trivial stuff, you either use the embedded distribution built packages if such are available this is for example defetch the right zabbix release repository  that configures the Zabbix official repo in the system, configure the Zabbix server or Proxy if such is used inside /etc/zabbix/zabbix_agentd.conf and start the client, i.e. I expected that it will be a simple and straight forward also on the freshly installed CentOS 9 Linux cause placing a zabbix-agent monitroing is a trivial stuff however installing came to error:

Key import failed (code 2). Failing package is: zabbix-agent-6.0.3-1.el8.x86_64


This is what I've done

1. Download and install zabbix-release-6.0-1.el8.noarch.rpm directly from zabbix

I've followed the official documentation from zabbix.com and ran:
 

[root@centos9 /root ]# rpm -Uvh https://repo.zabbix.com/zabbix/6.0/rhel/8/x86_64/zabbix-release-6.0-1.el8.noarch.rpm


2. Install  the zabbix-agent RPM package from the repositry

[root@centos9 rpm-gpg]# yum install zabbix-agent -y
Last metadata expiration check: 0:02:46 ago on Tue 12 Apr 2022 08:49:34 AM EDT.
Dependencies resolved.
=============================================
 Package                               Architecture                Version                              Repository                      Size
=============================================
Installing:
 zabbix-agent                          x86_64                      6.0.3-1.el8                          zabbix                         526 k
Installing dependencies:
 compat-openssl11                      x86_64                      1:1.1.1k-3.el9                       appstream                      1.5 M
 openldap-compat                       x86_64                      2.4.59-4.el9                         baseos                          14 k

Transaction Summary
==============================================
Install  3 PackagesTotal size: 2.0 M
Installed size: 6.1 M
Downloading Packages:
[SKIPPED] openldap-compat-2.4.59-4.el9.x86_64.rpm: Already downloaded
[SKIPPED] compat-openssl11-1.1.1k-3.el9.x86_64.rpm: Already downloaded
[SKIPPED] zabbix-agent-6.0.3-1.el8.x86_64.rpm: Already downloaded
Zabbix Official Repository – x86_64                                                                          1.6 MB/s | 1.7 kB     00:00
Importing GPG key 0xA14FE591:
 Userid     : "Zabbix LLC <packager@zabbix.com>"
 Fingerprint: A184 8F53 52D0 22B9 471D 83D0 082A B56B A14F E591
 From       : /etc/pki/rpm-gpg/RPM-GPG-KEY-ZABBIX-A14FE591
Key import failed (code 2). Failing package is: zabbix-agent-6.0.3-1.el8.x86_64
 GPG Keys are configured as: file:///etc/pki/rpm-gpg/RPM-GPG-KEY-ZABBIX-A14FE591
The downloaded packages were saved in cache until the next successful transaction.
You can remove cached packages by e
xecuting 'yum clean packages'.
Error: GPG check FAILED


3. Work around to skip GPG to install zabbix-agent 6 on CentOS 9

With Linux everything becomes more and more of a hack …
The logical thing to was to first,  check and it assure that the missing RPM GPG key is at place

[root@centos9 rpm-gpg]# ls -al  /etc/pki/rpm-gpg/RPM-GPG-KEY-ZABBIX-A14FE591
-rw-r–r– 1 root root 1719 Feb 11 16:29 /etc/pki/rpm-gpg/RPM-GPG-KEY-ZABBIX-A14FE591

Strangely the key was in place.

Hence to have the key loaded I've tried to import the gpg key manually with gpg command:

[root@centos9 rpm-gpg]# gpg –import /etc/pki/rpm-gpg/RPM-GPG-KEY-ZABBIX-A14FE591


And attempted install again zabbix-agent once again:
 

[root@centos9 rpm-gpg]# yum install zabbix-agent -y
Last metadata expiration check: 0:02:46 ago on Tue 12 Apr 2022 08:49:34 AM EDT.
Dependencies resolved.
==============================================
 Package                               Architecture                Version                              Repository                      Size
==============================================
Installing:
 zabbix-agent                          x86_64                      6.0.3-1.el8                          zabbix                         526 k
Installing dependencies:
 compat-openssl11                      x86_64                      1:1.1.1k-3.el9                       appstream                      1.5 M
 openldap-compat                       x86_64                      2.4.59-4.el9                         baseos                          14 k

Transaction Summary
==============================================
Install  3 Packages

Total size: 2.0 M
Installed size: 6.1 M
Downloading Packages:
[SKIPPED] openldap-compat-2.4.59-4.el9.x86_64.rpm: Already downloaded
[SKIPPED] compat-openssl11-1.1.1k-3.el9.x86_64.rpm: Already downloaded
[SKIPPED] zabbix-agent-6.0.3-1.el8.x86_64.rpm: Already downloaded
Zabbix Official Repository – x86_64                                                                          1.6 MB/s | 1.7 kB     00:00
Importing GPG key 0xA14FE591:
 Userid     : "Zabbix LLC <packager@zabbix.com>"
 Fingerprint: A184 8F53 52D0 22B9 471D 83D0 082A B56B A14F E591
 From       : /etc/pki/rpm-gpg/RPM-GPG-KEY-ZABBIX-A14FE591
Key import failed (code 2). Failing package is: zabbix-agent-6.0.3-1.el8.x86_64
 GPG Keys are configured as: file:///etc/pki/rpm-gpg/RPM-GPG-KEY-ZABBIX-A14FE591
The downloaded packages were saved in cache until the next successful transaction.
You can remove cached packages by executing 'yum clean packages'.
Error: GPG check FAILED


Unfortunately that was not a go, so totally pissed off I've disabled the gpgcheck for packages completely as a very raw bad and unrecommended work-around to eventually install the zabbix-agentd like that.

Usually the RPM gpg key failures check on RPM packages could be could be workaround with in dnf, so I've tried that one without success.

[root@centos9 rpm-gpg]# dnf update –nogpgcheck
Total                                                                                                        181 kB/s | 526 kB     00:02
Zabbix Official Repository – x86_64                                                                          1.6 MB/s | 1.7 kB     00:00
Importing GPG key 0xA14FE591:
 Userid     : "Zabbix LLC <packager@zabbix.com>"
 Fingerprint: A184 8F53 52D0 22B9 471D 83D0 082A B56B A14F E591
 From       : /etc/pki/rpm-gpg/RPM-GPG-KEY-ZABBIX-A14FE591
Is this ok [y/N]: y
Key import failed (code 2). Failing package is: zabbix-agent-6.0.3-1.el8.x86_64
 GPG Keys are configured as: file:///etc/pki/rpm-gpg/RPM-GPG-KEY-ZABBIX-A14FE591
The downloaded packages were saved in cache until the next successful transaction.
You can remove cached packages by executing 'dnf clean packages'.
Error: GPG check FAILED

Further tried to use the –nogpgpcheck 
which according to its man page:


–nogpgpcheck 
Skip checking GPG signatures on packages (if RPM policy allows).


In yum the nogpgcheck option according to its man yum does exactly the same thing


[root@centos9 rpm-gpg]# yum install zabbix-agent –nogpgcheck -y
 

Dependencies resolved.
===============================================
 Package                             Architecture                  Version                               Repository                     Size
===============================================
Installing:
 zabbix-agent                        x86_64                        6.0.3-1.el8                           zabbix                        526 k

Transaction Summary
===============================================

Total size: 526 k
Installed size: 2.3 M
Is this ok [y/N]: y
Downloading Packages:

Running transaction check
Transaction check succeeded.
Running transaction test
Transaction test succeeded.
Running transaction
  Preparing        :                                                                                                                     1/1
  Running scriptlet: zabbix-agent-6.0.3-1.el8.x86_64                                                                                     1/2
  Reinstalling     : zabbix-agent-6.0.3-1.el8.x86_64                                                                                     1/2
  Running scriptlet: zabbix-agent-6.0.3-1.el8.x86_64                                                                                     1/2
  Running scriptlet: zabbix-agent-6.0.3-1.el8.x86_64                                                                                     2/2
  Cleanup          : zabbix-agent-6.0.3-1.el8.x86_64                                                                                     2/2
  Running scriptlet: zabbix-agent-6.0.3-1.el8.x86_64                                                                                     2/2
  Verifying        : zabbix-agent-6.0.3-1.el8.x86_64                                                                                     1/2
  Verifying        : zabbix-agent-6.0.3-1.el8.x86_64                                                                                     2/2

Installed:
  zabbix-agent-6.0.3-1.el8.x86_64

Complete!
[root@centos9 ~]#

Voila! zabbix-agentd on CentOS 9 Install succeeded!

Yes I know disabling a GPG check is not really secure and seems to be an ugly solution but since I'm cut of time in the moment and it is just for experimental install of zabbix-agent on CentOS
plus we already trusted the zabbix package repository anyways, I guess it doesn't much matter.

4. Configure Zabbix-agent on the machine

Once you choose how the zabbix-agent should sent the data to the zabbix-server (e.g. Active or Passive) mode the The minimum set of configuration you should
have at place should be something like mine:

[root@centos9 ~]# grep -v '\#' /etc/zabbix/zabbix_agentd.conf | sed /^$/d
PidFile=/var/run/zabbix/zabbix_agentd.pid
LogFile=/var/log/zabbix/zabbix_agentd.log
LogFileSize=0
Server=192.168.1.70,127.0.0.1
ServerActive=192.168.1.70,127.0.0.1
Hostname=centos9
Include=/etc/zabbix/zabbix_agentd.d/*.conf

5. Start and Enable zabbix-agent client

To have it up and running

[root@centos9 ~]# systemct start zabbix-agent
[root@centos9 ~]# systemctl enable zabbix-agent

6. Disable SELinux to prevent it interfere with zabbix-agentd 

Other amazement was that even though I've now had configured Active check and a Server and correct configuration the Zabbix-Server could not reach the zabbix-agent for some weird reason.
I thought that it might be selinux and checked it and seems by default in the fresh installed CentOS 9 Linux selinux is already automatically set to enabled.

After stopping it i made sure, SeLinux would block for security reasons client connectivity to the zabbix-server until you either allow zabbix exception in SeLinux or until completely disable it.
 

[root@centos9 ~]# sestatus

SELinux status:                 enabled
SELinuxfs mount:                /sys/fs/selinux
SELinux root directory:         /etc/selinux
Loaded policy name:             targeted
Current mode:                   enforcing
Mode from config file:          enforcing
Policy MLS status:              enabled
Policy deny_unknown status:     allowed
Memory protection checking:     actual (secure)
Max kernel policy version:      31

To temporarily change the mode from its default targeted to permissive mode 

[root@centos9 ~]# setenforce 0

[root@centos9 ~]# sestatus

SELinux status:                 enabled
SELinuxfs mount:                /sys/fs/selinux
SELinux root directory:         /etc/selinux
Loaded policy name:             targeted
Current mode:                   permissive
Mode from config file:          permissive
Policy MLS status:              enabled
Policy deny_unknown status:     allowed
Memory protection checking:     actual (secure)
Max kernel policy version:      31


That would work for current session but won't take affect on next reboot, thus it is much better to disable selinux on next boot:

[root@centos9 ~]# cat /etc/selinux/config
# This file controls the state of SELinux on the system.
# SELINUX= can take one of these three values:
#     enforcing – SELinux security policy is enforced.
#     permissive – SELinux prints warnings instead of enforcing.
#     disabled – No SELinux policy is loaded.
SELINUX=permissive
# SELINUXTYPE= can take one of these three values:
#     targeted – Targeted processes are protected,
#     minimum – Modification of targeted policy. Only selected processes are protected. 
#     mls – Multi Level Security protection.
SELINUXTYPE=targeted


To disable selinux change:

SELINUXTYPE=disabled

[root@centos9 ~]# grep -v \# /etc/selinux/config

SELINUX=disabled
SELINUXTYPE=targeted


To make the OS disable selinux and test it is disabled you will have to reboot 

[root@centos9 ~]# reboot


Check its status again, it should be:

[root@centos9 ~]# sestatus
SELinux status:                 disabled


7. Enable zabbix-agent through firewall or disable firewalld service completely

By default CentOS 9 has the firewalld also enabled and either you have to enable zabbix to communicate to the remote server host.

To enable access for from and to zabbix-agentd in both Active / Passive mode:

#firewall settings:
[root@centos9 rpm-gpg]# firewall-cmd –permanent –add-port=10050/tcp
[root@centos9 rpm-gpg]# firewall-cmd –permanent –add-port=10051/tcp
[root@centos9 rpm-gpg]# firewall-cmd –reload
[root@centos9 rpm-gpg]# systemctl restart firewalld
[root@centos9 rpm-gpg]# systemctl restart zabbix-agent


If the machine is in a local DMZ-ed network with tightly configured firewall router in front of it, you could completely disable firewalld.

[root@centos9 rpm-gpg]# systemctl stop firewalld
[root@centos9 rpm-gpg]# systemctl disable firewalld
Removed /etc/systemd/system/multi-user.target.wants/firewalld.service.
Removed /etc/systemd/system/dbus-org.fedoraproject.FirewallD1.service.


Next login to Zabbix-server web interface with administrator and from Configuration -> Hosts -> Create the centos9 hostname and add it a template of choice. The data from the added machine should shortly appear after another zabbix restart:

[root@centos9 rpm-gpg]#  systemctl restart zabbix-agentd


8. Tracking other oddities with the zabbix-agent through log

If anyways still zabbix have issues connectin to remote node, increase the debug log level section
 

[root@centos9 rpm-gpg]# vim /etc/zabbix/zabbix_agentd.conf
DebugLevel 5

### Option: DebugLevel
#       Specifies debug level:
#       0 – basic information about starting and stopping of Zabbix processes
#       1 – critical information
#       2 – error information
#       3 – warnings
#       4 – for debugging (produces lots of information)
#       5 – extended debugging (produces even more information)
#
# Mandatory: no
# Range: 0-5
# Default:
# DebugLevel=3

[root@centos9 rpm-gpg]# systemctl restart zabbix-agent

Keep in mind that debugging will be too verbose, so once you make the machine being seen in zabbix, don't forget to comment out the line and restart agent to turn it off.

9. Testing zabbix-agent, How to send an alert to specific item key

Usually when writting userparameter scripts, data collected from scripts is being sent to zabbix serveria via Item keys.
Thus one way to check the zabbix-agent -> zabbix server data send works fine is to send some simultaneous data via a key
Once zabbix-agent is configured on the machine 

In this case we will use something like ApplicationSupport-Item as an item.
 

[root@centos9 rpm-gpg]# /usr/bin/zabbix_sender -c "/etc/zabbix/zabbix_agentd.conf" -k "ApplicationSupport-Item" -o "here is the message"

Assuming you have created the newly prepared zabbix-agent host into Zabbix Server, you should be shortly able to see the data come in Latest data.

How to filter dhcp traffic between two networks running separate DHCP servers to prevent IP assignment issues and MAC duplicate addresses

Tuesday, February 8th, 2022

how-to-filter-dhcp-traffic-2-networks-running-2-separate-dhcpd-servers-to-prevent-ip-assignment-conflicts-linux
Tracking the Problem of MAC duplicates on Linux routers
 

If you have two networks that see each other and they're not separated in VLANs but see each other sharing a common netmask lets say 255.255.254.0 or 255.255.252.0, it might happend that there are 2 dhcp servers for example (isc-dhcp-server running on 192.168.1.1 and dhcpd running on 192.168.0.1 can broadcast their services to both LANs 192.168.1.0.1/24 (netmask 255.255.255.0) and Local Net LAN 192.168.1.1/24. The result out of this is that some devices might pick up their IP address via DHCP from the wrong dhcp server.

Normally if you have a fully controlled little or middle class home or office network (10 – 15 electronic devices nodes) connecting to the LAN in a mixed moth some are connected via one of the Networks via connected Wifi to 192.168.1.0/22 others are LANned and using static IP adddresses and traffic is routed among two ISPs and each network can see the other network, there is always a possibility of things to go wrong. This is what happened to me so this is how this post was born.

The best practice from my experience so far is to define each and every computer / phone / laptop host joining the network and hence later easily monitor what is going on the network with something like iptraf-ng / nethogs  / iperf – described in prior  how to check internet spepeed from console and in check server internet connectivity speed with speedtest-cliiftop / nload or for more complex stuff wireshark or even a simple tcpdump. No matter the tools network monitoring is only part on solving network issues. A very must have thing in a controlled network infrastructure is defining every machine part of it to easily monitor later with the monitoring tools. Defining each and every host on the Hybrid computer networks makes administering the network much easier task and  tracking irregularities on time is much more likely. 

Since I have such a hybrid network here hosting a couple of XEN virtual machines with Linux, Windows 7 and Windows 10, together with Mac OS X laptops as well as MacBook Air notebooks, I have followed this route and tried to define each and every host based on its MAC address to pick it up from the correct DHCP1 server  192.168.1.1 (that is distributing IPs for Internet Provider 1 (ISP 1), that is mostly few computers attached UTP LAN cables via LiteWave LS105G Gigabit Switch as well from DHCP2 – used only to assigns IPs to servers and a a single Wi-Fi Access point configured to route incoming clients via 192.168.0.1 Linux NAT gateway server.

To filter out the unwanted IPs from the DHCPD not to propagate I've so far used a little trick to  Deny DHCP MAC Address for unwanted clients and not send IP offer for them.

To give you more understanding,  I have to clear it up I don't want to have automatic IP assignments from DHCP2 / LAN2 to DHCP1 / LAN1 because (i don't want machines on DHCP1 to end up with IP like 192.168.0.50 or DHCP2 (to have 192.168.1.80), as such a wrong IP delegation could potentially lead to MAC duplicates IP conflicts. MAC Duplicate IP wrong assignments for those older or who have been part of administrating large ISP network infrastructures  makes the network communication unstable for no apparent reason and nodes partially unreachable at times or full time …

However it seems in the 21-st century which is the century of strangeness / computer madness in the 2022, technology advanced so much that it has massively started to break up some good old well known sysadmin standards well documented in the RFCs I know of my youth, such as that every electronic equipment manufactured Vendor should have a Vendor Assigned Hardware MAC Address binded to it that will never change (after all that was the idea of MAC addresses wasn't it !). 
Many mobile devices nowadays however, in the developers attempts to make more sophisticated software and Increase Anonimity on the Net and Security, use a technique called  MAC Address randomization (mostly used by hackers / script kiddies of the early days of computers) for their Wi-Fi Net Adapter OS / driver controlled interfaces for the sake of increased security (the so called Private WiFi Addresses). If a sysadmin 10-15 years ago has seen that he might probably resign his profession and turn to farming or agriculture plant growing, but in the age of digitalization and "cloud computing", this break up of common developed network standards starts to become the 'new normal' standard.

I did not suspected there might be a MAC address oddities, since I spare very little time on administering the the network. This was so till recently when I accidently checked the arp table with:

Hypervisor:~# arp -an
192.168.1.99     5c:89:b5:f2:e8:d8      (Unknown)
192.168.1.99    00:15:3e:d3:8f:76       (Unknown)

..


and consequently did a network MAC Address ARP Scan with arp-scan (if you never used this little nifty hacker tool I warmly recommend it !!!)
If you don't have it installed it is available in debian based linuces from default repos to install

Hypervisor:~# apt-get install –yes arp-scan


It is also available on CentOS / Fedora / Redhat and other RPM distros via:

Hypervisor:~# yum install -y arp-scan


Hypervisor:~# arp-scan –interface=eth1 192.168.1.0/24

192.168.1.19    00:16:3e:0f:48:05       Xensource, Inc.
192.168.1.22    00:16:3e:04:11:1c       Xensource, Inc.
192.168.1.31    00:15:3e:bb:45:45       Xensource, Inc.
192.168.1.38    00:15:3e:59:96:8e       Xensource, Inc.
192.168.1.34    00:15:3e:d3:8f:77       Xensource, Inc.
192.168.1.60    8c:89:b5:f2:e8:d8       Micro-Star INT'L CO., LTD
192.168.1.99     5c:89:b5:f2:e8:d8      (Unknown)
192.168.1.99    00:15:3e:d3:8f:76       (Unknown)

192.168.x.91     02:a0:xx:xx:d6:64        (Unknown)
192.168.x.91     02:a0:xx:xx:d6:64        (Unknown)  (DUP: 2)

N.B. !. I found it helpful to check all available interfaces on my Linux NAT router host.

As you see the scan revealed, a whole bunch of MAC address mess duplicated MAC hanging around, destroying my network topology every now and then 
So far so good, the MAC duplicates and strangely hanging around MAC addresses issue, was solved relatively easily with enabling below set of systctl kernel variables.
 

1. Fixing Linux ARP common well known Problems through disabling arp_announce / arp_ignore / send_redirects kernel variables disablement


Linux answers ARP requests on wrong and unassociated interfaces per default. This leads to the following two problems:

ARP requests for the loopback alias address are answered on the HW interfaces (even if NOARP on lo0:1 is set). Since loopback aliases are required for DSR (Direct Server Return) setups this problem is very common (but easy to fix fortunately).

If the machine is connected twice to the same switch (e.g. with eth0 and eth1) eth2 may answer ARP requests for the address on eth1 and vice versa in a race condition manner (confusing almost everything).

This can be prevented by specific arp kernel settings. Take a look here for additional information about the nature of the problem (and other solutions): ARP flux.

To fix that generally (and reboot safe) we  include the following lines into


Hypervisor:~# cp -rpf /etc/sysctl.conf /etc/sysctl.conf_bak_07-feb-2022
Hypervisor:~# cat >> /etc/sysctl.conf

# LVS tuning
net.ipv4.conf.lo.arp_ignore=1
net.ipv4.conf.lo.arp_announce=2
net.ipv4.conf.all.arp_ignore=1
net.ipv4.conf.all.arp_announce=2

net.ipv4.conf.all.send_redirects=0
net.ipv4.conf.eth0.send_redirects=0
net.ipv4.conf.eth1.send_redirects=0
net.ipv4.conf.default.send_redirects=0

Press CTRL + D simultaneusly to Write out up-pasted vars.


To read more on Load Balancer using direct routing and on LVS and the arp problem here


2. Digging further the IP conflict / dulicate MAC Problems

Even after this arp tunings (because I do have my Hypervisor 2 LAN interfaces connected to 1 switch) did not resolved the issues and still my Wireless Connected devices via network 192.168.1.1/24 (ISP2) were randomly assigned the wrong range IPs 192.168.0.XXX/24 as well as the wrong gateway 192.168.0.1 (ISP1).
After thinking thoroughfully for hours and checking the network status with various tools and thanks to the fact that my wife has a MacBook Air that was always complaining that the IP it tried to assign from the DHCP was already taken, i"ve realized, something is wrong with DHCP assignment.
Since she owns a IPhone 10 with iOS and this two devices are from the same vendor e.g. Apple Inc. And Apple's products have been having strange DHCP assignment issues from my experience for quite some time, I've thought initially problems are caused by software on Apple's devices.
I turned to be partially right after expecting the logs of DHCP server on the Linux host (ISP1) finding that the phone of my wife takes IP in 192.168.0.XXX, insetad of IP from 192.168.1.1 (which has is a combined Nokia Router with 2.4Ghz and 5Ghz Wi-Fi and LAN router provided by ISP2 in that case Vivacom). That was really puzzling since for me it was completely logical thta the iDevices must check for DHCP address directly on the Network of the router to whom, they're connecting. Guess my suprise when I realized that instead of that the iDevices does listen to the network on a wide network range scan for any DHCPs reachable baesd on the advertised (i assume via broadcast) address traffic and try to connect and take the IP to the IP of the DHCP which responds faster !!!! Of course the Vivacom Chineese produced Nokia router responded DHCP requests and advertised much slower, than my Linux NAT gateway on ISP1 and because of that the Iphone and iOS and even freshest versions of Android devices do take the IP from the DHCP that responds faster, even if that router is not on a C class network (that's invasive isn't it??). What was even more puzzling was the automatic MAC Randomization of Wifi devices trying to connect to my ISP1 configured DHCPD and this of course trespassed any static MAC addresses filtering, I already had established there.

Anyways there was also a good think out of tthat intermixed exercise 🙂 While playing around with the Gigabit network router of vivacom I found a cozy feature SCHEDULEDING TURNING OFF and ON the WIFI ACCESS POINT  – a very useful feature to adopt, to stop wasting extra energy and lower a bit of radiation is to set a swtich off WIFI AP from 12:30 – 06:30 which are the common sleeping hours or something like that.
 

3. What is MAC Randomization and where and how it is configured across different main operating systems as of year 2022?

Depending on the operating system of your device, MAC randomization will be available either by default on most modern mobile OSes or with possibility to have it switched on:

  • Android Q: Enabled by default 
  • Android P: Available as a developer option, disabled by default
  • iOS 14: Available as a user option, disabled by default
  • Windows 10: Available as an option in two ways – random for all networks or random for a specific network

Lately I don't have much time to play around with mobile devices, and I do not my own a luxury mobile phone so, the fact this ne Androids have this MAC randomization was unknown to me just until I ended a small mess, based on my poor configured networks due to my tight time constrains nowadays.

Finding out about the new security feature of MAC Randomization, on all Android based phones (my mother's Nokia smartphone and my dad's phone, disabled the feature ASAP:


4. Disable MAC Wi-Fi Ethernet device Randomization on Android

MAC Randomization creates a random MAC address when joining a Wi-Fi network for the first time or after “forgetting” and rejoining a Wi-Fi network. It Generates a new random MAC address after 24 hours of last connection.

Disabling MAC Randomization on your devices. It is done on a per SSID basis so you can turn off the randomization, but allow it to function for hotspots outside of your home.

  1. Open the Settings app
  2. Select Network and Internet
  3. Select WiFi
  4. Connect to your home wireless network
  5. Tap the gear icon next to the current WiFi connection
  6. Select Advanced
  7. Select Privacy
  8. Select "Use device MAC"
     

5. Disabling MAC Randomization on MAC iOS, iPhone, iPad, iPod

To Disable MAC Randomization on iOS Devices:

Open the Settings on your iPhone, iPad, or iPod, then tap Wi-Fi or WLAN


  1. Tap the information button next to your network
  2. Turn off Private Address
  3. Re-join the network


Of course next I've collected their phone Wi-Fi adapters and made sure the included dhcp MAC deny rules in /etc/dhcp/dhcpd.conf are at place.

The effect of the MAC Randomization for my Network was terrible constant and strange issues with my routings and networks, which I always thought are caused by the openxen hypervisor Virtualization VM bugs etc.

That continued for some months now, and the weird thing was the issues always started when I tried to update my Operating system to the latest packetset, do a reboot to load up the new piece of software / libraries etc. and plus it happened very occasionally and their was no obvious reason for it.


6. How to completely filter dhcp traffic between two network router hosts
IP 192.168.0.1 / 192.168.1.1 to stop 2 or more configured DHCP servers
on separate networks see each other

To prevent IP mess at DHCP2 server side (which btw is ISC DHCP server, taking care for IP assignment only for the Servers on the network running on Debian 11 Linux), further on I had to filter out any DHCP UDP traffic with iptables completely.
To prevent incorrect route assignments assuming that you have 2 networks and 2 routers that are configurred to do Network Address Translation (NAT)-ing Router 1: 192.168.0.1, Router 2: 192.168.1.1.

You have to filter out UDP Protocol data on Port 67 and 68 from the respective source and destination addresses.

In firewall rules configuration files on your Linux you need to have some rules as:

# filter outgoing dhcp traffic from 192.168.1.1 to 192.168.0.1
-A INPUT -p udp -m udp –dport 67:68 -s 192.168.1.1 -d 192.168.0.1 -j DROP
-A OUTPUT -p udp -m udp –dport 67:68 -s 192.168.1.1 -d 192.168.0.1 -j DROP
-A FORWARD -p udp -m udp –dport 67:68 -s 192.168.1.1 -d 192.168.0.1 -j DROP

-A INPUT -p udp -m udp –dport 67:68 -s 192.168.0.1 -d 192.168.1.1 -j DROP
-A OUTPUT -p udp -m udp –dport 67:68 -s 192.168.0.1 -d 192.168.1.1 -j DROP
-A FORWARD -p udp -m udp –dport 67:68 -s 192.168.0.1 -d 192.168.1.1 -j DROP

-A INPUT -p udp -m udp –sport 67:68 -s 192.168.1.1 -d 192.168.0.1 -j DROP
-A OUTPUT -p udp -m udp –sport 67:68 -s 192.168.1.1 -d 192.168.0.1 -j DROP
-A FORWARD -p udp -m udp –sport 67:68 -s 192.168.1.1 -d 192.168.0.1 -j DROP


You can download also filter_dhcp_traffic.sh with above rules from here


Applying this rules, any traffic of DHCP between 2 routers is prohibited and devices from Net: 192.168.1.1-255 will no longer wrongly get assinged IP addresses from Network range: 192.168.0.1-255 as it happened to me.


7. Filter out DHCP traffic based on MAC completely on Linux with arptables

If even after disabling MAC randomization on all devices on the network, and you know physically all the connecting devices on the Network, if you still see some weird MAC addresses, originating from a wrongly configured ISP traffic router host or whatever, then it is time to just filter them out with arptables.

## drop traffic prevent mac duplicates due to vivacom and bergon placed in same network – 255.255.255.252
dchp1-server:~# arptables -A INPUT –source-mac 70:e2:83:12:44:11 -j DROP


To list arptables configured on Linux host

dchp1-server:~# arptables –list -n


If you want to be paranoid sysadmin you can implement a MAC address protection with arptables by only allowing a single set of MAC Addr / IPs and dropping the rest.

dchp1-server:~# arptables -A INPUT –source-mac 70:e2:84:13:45:11 -j ACCEPT
dchp1-server:~# arptables -A INPUT  –source-mac 70:e2:84:13:45:12 -j ACCEPT


dchp1-server:~# arptables -L –line-numbers
Chain INPUT (policy ACCEPT)
1 -j DROP –src-mac 70:e2:84:13:45:11
2 -j DROP –src-mac 70:e2:84:13:45:12

Once MACs you like are accepted you can set the INPUT chain policy to DROP as so:

dchp1-server:~# arptables -P INPUT DROP


If you later need to temporary, clean up the rules inside arptables on any filtered hosts flush all rules inside INPUT chain, like that
 

dchp1-server:~#  arptables -t INPUT -F

Adding proxy to yum repository on Redhat / Fedora / CentOS and other RPM based Linux distributions, Listing and enabling new RPM repositories

Tuesday, September 7th, 2021

yum-add-proxy-host-for-redhat-linux-centos-list-rpm-repositories-enable-disable-repositories

Sometimes if you work in a company that is following PCI standards with very tight security you might need to use a custom company prepared RPM repositories that are accessible only via a specific custom maintained repositories or alternatively you might need the proxy node  to access an external internet repository from the DMZ-ed firewalled zone where the servers lays .
Hence to still be able to maintain the RPM based servers up2date to the latest security patches and install software with yumone very useful feature of yum package manager is to use a proxy host through which you will reach your Redhat Package Manager files  files.

1. The http_proxy and https_proxy shell variables 

To set  a proxy host you need to define there the IP / Hostname or the Fully Qualified Domain Name (FQDN).

By default "http_proxy and https_proxy are empty. As you can guess https_proxy is used if you have a Secure Socket Layer (SSL) certificate for encrypting the communication channel (e.g. you have https:// URL).

[root@rhel: ~]# echo $http_proxy
[root@rhel: ~]#

2. Setting passwordless or password protected proxy host via http_proxy, https_proxy variables

There is a one time very straight forward to configure proxying of traffic via a specific remote configured server with server bourne again  shell (BASH)'s understood variables:
 

a.) Set password free open proxy to shell environment.

[root@centos: ~]# export https_proxy="https://remote-proxy-server:8080"


Now use yum as usual to update the available installabe package list or simply upgrade to the latest packages with lets say:

[root@rhel: ~]# yum check-update && yum update

b.) Configuring password protected proxy for yum

If your proxy is password protected for even tigher security you can provide the password on the command line as well.

[root@centos: ~]# export http_proxy="http://username:pAssW0rd@server:port/"

Note that if you have some special characters you will have to pass the string inside single quotes or escape them to make sure the password will properly handled to server, before trying out the proxy with yum, echo the variable.

[root@centos: ~]# export http_proxy='http://username:p@s#w:E@192.168.0.1:3128/'
  [root@centos: ~]# echo $http_proxy
http://username:p@s#w:E@server:port/

Then do whatever with yum:

[root@centos: ~]# yum check-update && yum search sharutils


If something is wrong and proxy is not properly connected try to reach for the repository manually with curl or wget

[root@centos: ~]# curl -ilk http://download.fedoraproject.org/pub/epel/7/SRPMS/ /epel/7/SRPMS/
HTTP/1.1 302 Found
Date: Tue, 07 Sep 2021 16:49:59 GMT
Server: Apache
X-Frame-Options: SAMEORIGIN
X-Xss-Protection: 1; mode=block
X-Content-Type-Options: nosniff
Referrer-Policy: same-origin
Location: http://mirror.telepoint.bg/epel/7/SRPMS/
Content-Type: text/plain
Content-Length: 0
AppTime: D=2264
X-Fedora-ProxyServer: proxy01.iad2.fedoraproject.org
X-Fedora-RequestID: YTeYOE3mQPHH_rxD0sdlGAAAA80
X-Cache: MISS from pcfreak
X-Cache-Lookup: MISS from pcfreak:3128
Via: 1.1 pcfreak (squid/4.6)
Connection: keep-alive


Or if you need, you can test the user, password protected proxy with wget as so:

[root@centos: ~]# wget –proxy-user=USERNAME –proxy-password=PASSWORD http://your-proxy-domain.com/optional-rpms/


If you have lynx installed on the machine you can do the remote proxy successful authentication check with it with less typing:

[root@centos: ~]# lynx -pauth=USER:PASSWORD http://proxy-domain.com/optional-rpm/


3. Making yum proxy connection permanent via /etc/yum.conf


Perhaps the easiest and quickest way to add the http_proxy / https_proxy configured is to store it to automatically load on each server ssh login in your admin user (root) in /root/.bashrc or /root/.bash_profile or in the global /etc/profile or /etc/profile.d/custom.sh etc.

However if you don't want to have hacks and have more cleanness on the systems, the recommended "Redhat way" so to say is to store the configuration inside /etc/yum.conf

To do it via /etc/yum.conf you have to have some records there like:

# The proxy server – proxy server:port number 
proxy=http://mycache.mydomain.com:3128 
# The account details for yum connections 
proxy_username=yum-user 
proxy_password=qwerty-secret-pass

4. Listing RPM repositories and their state

As I had to install sharutils RPM package to the server which contains the file /bin/uuencode (that is provided on CentOS 7.9 Linux from Repo: base/7/x86_64 I had to check whether the repository was installed on the server.

To get a list of all yum repositories avaiable 

[root@centos:/etc/yum.repos.d]# yum repolist all
Loaded plugins: fastestmirror
Loading mirror speeds from cached hostfile
 * base: centos.telecoms.bg
 * epel: mirrors.netix.net
 * extras: centos.telecoms.bg
 * remi: mirrors.netix.net
 * remi-php74: mirrors.netix.net
 * remi-safe: mirrors.netix.net
 * updates: centos.telecoms.bg
repo id                                repo name                                                                         status
base/7/x86_64                          CentOS-7 – Base                                                                   enabled: 10,072
base-debuginfo/x86_64                  CentOS-7 – Debuginfo                                                              disabled
base-source/7                          CentOS-7 – Base Sources                                                           disabled
c7-media                               CentOS-7 – Media                                                                  disabled
centos-kernel/7/x86_64                 CentOS LTS Kernels for x86_64                                                     disabled
centos-kernel-experimental/7/x86_64    CentOS Experimental Kernels for x86_64                                            disabled
centosplus/7/x86_64                    CentOS-7 – Plus                                                                   disabled
centosplus-source/7                    CentOS-7 – Plus Sources                                                           disabled
cr/7/x86_64                            CentOS-7 – cr                                                                     disabled
epel/x86_64                            Extra Packages for Enterprise Linux 7 – x86_64                                    enabled: 13,667
epel-debuginfo/x86_64                  Extra Packages for Enterprise Linux 7 – x86_64 – Debug                            disabled
epel-source/x86_64                     Extra Packages for Enterprise Linux 7 – x86_64 – Source                           disabled
epel-testing/x86_64                    Extra Packages for Enterprise Linux 7 – Testing – x86_64                          disabled
epel-testing-debuginfo/x86_64          Extra Packages for Enterprise Linux 7 – Testing – x86_64 – Debug                  disabled
epel-testing-source/x86_64             Extra Packages for Enterprise Linux 7 – Testing – x86_64 – Source                 disabled
extras/7/x86_64                        CentOS-7 – Extras                                                                 enabled:    500
extras-source/7                        CentOS-7 – Extras Sources                                                         disabled
fasttrack/7/x86_64                     CentOS-7 – fasttrack                                                              disabled
remi                                   Remi's RPM repository for Enterprise Linux 7 – x86_64                             enabled:  7,229
remi-debuginfo/x86_64                  Remi's RPM repository for Enterprise Linux 7 – x86_64 – debuginfo                 disabled
remi-glpi91                            Remi's GLPI 9.1 RPM repository for Enterprise Linux 7 – x86_64                    disabled
remi-glpi92                            Remi's GLPI 9.2 RPM repository for Enterprise Linux 7 – x86_64                    disabled
remi-glpi93                            Remi's GLPI 9.3 RPM repository for Enterprise Linux 7 – x86_64                    disabled
remi-glpi94                            Remi's GLPI 9.4 RPM repository for Enterprise Linux 7 – x86_64                    disabled
remi-modular                           Remi's Modular repository for Enterprise Linux 7 – x86_64                         disabled
remi-modular-test                      Remi's Modular testing repository for Enterprise Linux 7 – x86_64                 disabled
remi-php54                             Remi's PHP 5.4 RPM repository for Enterprise Linux 7 – x86_64                     disabled
remi-php55                             Remi's PHP 5.5 RPM repository for Enterprise Linux 7 – x86_64                     disabled
remi-php55-debuginfo/x86_64            Remi's PHP 5.5 RPM repository for Enterprise Linux 7 – x86_64 – debuginfo         disabled
!remi-php56                            Remi's PHP 5.6 RPM repository for Enterprise Linux 7 – x86_64                     disabled
remi-php56-debuginfo/x86_64            Remi's PHP 5.6 RPM repository for Enterprise Linux 7 – x86_64 – debuginfo         disabled
remi-php70                             Remi's PHP 7.0 RPM repository for Enterprise Linux 7 – x86_64                     disabled
remi-php70-debuginfo/x86_64            Remi's PHP 7.0 RPM repository for Enterprise Linux 7 – x86_64 – debuginfo         disabled
remi-php70-test                        Remi's PHP 7.0 test RPM repository for Enterprise Linux 7 – x86_64                disabled
remi-php70-test-debuginfo/x86_64       Remi's PHP 7.0 test RPM repository for Enterprise Linux 7 – x86_64 – debuginfo    disabled
remi-php71                             Remi's PHP 7.1 RPM repository for Enterprise Linux 7 – x86_64                     disabled
remi-php71-debuginfo/x86_64            Remi's PHP 7.1 RPM repository for Enterprise Linux 7 – x86_64 – debuginfo         disabled
remi-php71-test                        Remi's PHP 7.1 test RPM repository for Enterprise Linux 7 – x86_64                disabled
remi-php71-test-debuginfo/x86_64       Remi's PHP 7.1 test RPM repository for Enterprise Linux 7 – x86_64 – debuginfo    disabled
!remi-php72                            Remi's PHP 7.2 RPM repository for Enterprise Linux 7 – x86_64                     disabled
remi-php72-debuginfo/x86_64            Remi's PHP 7.2 RPM repository for Enterprise Linux 7 – x86_64 – debuginfo         disabled
remi-php72-test                        Remi's PHP 7.2 test RPM repository for Enterprise Linux 7 – x86_64                disabled
remi-php72-test-debuginfo/x86_64       Remi's PHP 7.2 test RPM repository for Enterprise Linux 7 – x86_64 – debuginfo    disabled
remi-php73                             Remi's PHP 7.3 RPM repository for Enterprise Linux 7 – x86_64                     disabled
remi-php73-debuginfo/x86_64            Remi's PHP 7.3 RPM repository for Enterprise Linux 7 – x86_64 – debuginfo         disabled
remi-php73-test                        Remi's PHP 7.3 test RPM repository for Enterprise Linux 7 – x86_64                disabled
remi-php73-test-debuginfo/x86_64       Remi's PHP 7.3 test RPM repository for Enterprise Linux 7 – x86_64 – debuginfo    disabled
remi-php74                             Remi's PHP 7.4 RPM repository for Enterprise Linux 7 – x86_64                     enabled:    423
remi-php74-debuginfo/x86_64            Remi's PHP 7.4 RPM repository for Enterprise Linux 7 – x86_64 – debuginfo         disabled
remi-php74-test                        Remi's PHP 7.4 test RPM repository for Enterprise Linux 7 – x86_64                disabled
remi-php74-test-debuginfo/x86_64       Remi's PHP 7.4 test RPM repository for Enterprise Linux 7 – x86_64 – debuginfo    disabled
remi-php80                             Remi's PHP 8.0 RPM repository for Enterprise Linux 7 – x86_64                     disabled
remi-php80-debuginfo/x86_64            Remi's PHP 8.0 RPM repository for Enterprise Linux 7 – x86_64 – debuginfo         disabled
remi-php80-test                        Remi's PHP 8.0 test RPM repository for Enterprise Linux 7 – x86_64                disabled
remi-php80-test-debuginfo/x86_64       Remi's PHP 8.0 test RPM repository for Enterprise Linux 7 – x86_64 – debuginfo    disabled
remi-safe                              Safe Remi's RPM repository for Enterprise Linux 7 – x86_64                        enabled:  4,549
remi-safe-debuginfo/x86_64             Remi's RPM repository for Enterprise Linux 7 – x86_64 – debuginfo                 disabled
remi-test                              Remi's test RPM repository for Enterprise Linux 7 – x86_64                        disabled
remi-test-debuginfo/x86_64             Remi's test RPM repository for Enterprise Linux 7 – x86_64 – debuginfo            disabled
updates/7/x86_64                       CentOS-7 – Updates                                                                enabled:  2,741
updates-source/7                       CentOS-7 – Updates Sources                                                        disabled
zabbix/x86_64                          Zabbix Official Repository – x86_64                                               enabled:    178
zabbix-debuginfo/x86_64                Zabbix Official Repository debuginfo – x86_64                                     disabled
zabbix-frontend/x86_64                 Zabbix Official Repository frontend – x86_64                                      disabled
zabbix-non-supported/x86_64            Zabbix Official Repository non-supported – x86_64                                 enabled:      5
repolist: 39,364

[root@centos:/etc/yum.repos.d]# yum repolist all|grep -i 'base/7/x86_64'
base/7/x86_64                       CentOS-7 – Base              enabled: 10,072


As you can see in CentOS 7 sharutils is enabled from default repositories, however this is not the case on Redhat 7.9, hence to install sharutils there you can one time enable RPM repository to install sharutils 

[root@centos:/etc/yum.repos.d]# yum –enablerepo=rhel-7-server-optional-rpms install sharutils

To install zabbix-agent on the same Redhat server, without caring that I need precisely  know the RPM repository that is providing zabbix agent that in that was (Repo: 3party/7Server/x86_64)  I had to:

[root@centos:/etc/yum.repos.d]# yum –enablerepo \* install zabbix-agent zabbix-sender


Permanently enabling repositories of course is possible via editting or creating fresh new file configuration manually on CentOS / Fedora under directory /etc/yum.repos.d/
On Redhat Enterprise Linux  servers it is easier to use the subscription-manager command instead, like this:
 

[root@rhel:/root]# subscription-manager repos –disable=epel/7Server/x86_64

[root@rhel:/root]# subscription-manager repos –enable=rhel-6-server-optional-rpms

Remove old unused kernels and cleanup orphaned packages on CentOS / RHEL/ Fedora and Debian Linux

Friday, October 23rd, 2020

remove-old-unused-kernel-on-centos-redhat-rhel-fedora-linux-howto-delete-orphaned-packages

If you administer CentOS 7 / CentOS  8 bunch of servers it is very likely after one of the scheduled Patch days every 6 months or so, you end up with a multiple Linux OS kernels installed on the system.
In normal situation on a freshly installed CentOS machine only one rpm package is installed on the system with the kernel release shipped with CentOS / RHEL / Fedora distro:
The reason to remove the old unused kernels is very simple, you don't want to have a messy installation and after some of the updates to boot up in a revert back old kernel or if you're pedantic to simply save few megas of space.
Some people choose to have more than one kernel just to make sure, if the new installed one doesn't boot, after a restart from ILO / IDRAC remote console interface you can select to boot the proper kernel. I agree having the old kernel before the system *kernel* upgrade as backup recovery is a good thing but this is a good thing to the point the system gets booted after reboot (you know we sysadmins usually after each major system package upgrade), we like to reboot the system warmly praying and hoping it will boot up next time 🙂
 

1. Remove CentOS last XX kernels from the OS

Of course removal of old kernels could be managed by a simple

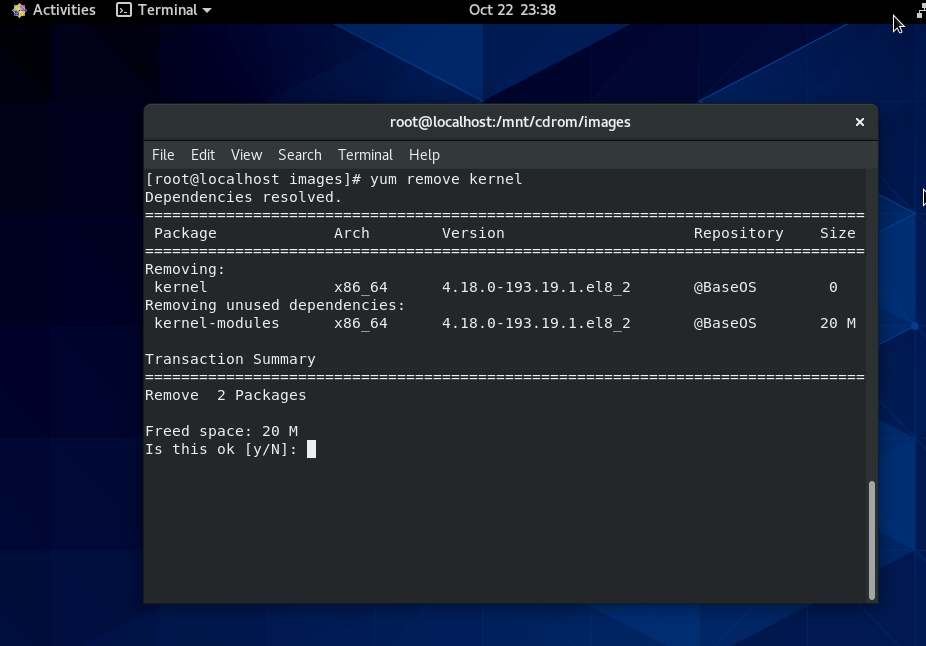
yum remove kernel


yum-kernel-remove-centos-linux

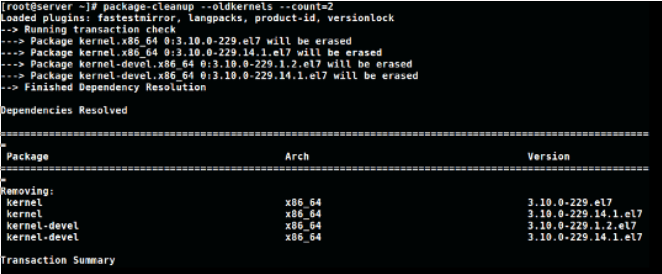
One more than one kernel is present you can hence leave only lets say the last 2 installed kernel on the CentOS host (some people prefer to have only one) but just for the sake of having a backup kernel I like more to have last two kernels installed present, to do so run package-cleanup which is contained in yum-utils rpm package CentOS – this is CentOS / Redhat ( RHEL) specific command.
 

[root@centos ~ ]:# package-cleanup –oldkernels –count=2

package-cleanup-centos-linux-screenshot-1

–count=number argument – tells how many from the  latest version kernels to get removed.

Note if you don't have the package-cleanup command install yum-utils package:

[root@centos ~ :]#  yum install -y yum-utils

cleanup-old-kernels-linux-leave-only-set-of-2-kernels-active-on-centos-rhel-fedora


2. RemoveOld kernels from Fedora Linux – leave only the latest 3 installed

This is done with dnf by setting the –-latest-limit arg to negative value to how many last kernels want to keep

[root@fedora ~ ]:# dnf remove $(dnf repoquery –installonly –latest-limit=-3 -q)


3. Set how many kernels you want to be present on system all the time after package upgrades

It is possible to tell CentOS / RHEL / Fedora's on how many kernels show be kept installed on the system, the default configured on Operating system install time is to keep the last 5 installed kernel on the OS. This is controlled from installonly_limit=5 value that is usually as of year 2020 RPM based distributions found under /etc/yum.conf (on CentOS / RHEL) and in /etc/dnf/dnf.conf (in Fedora) configuration file and sets the desired number of kernels present on system after issuing commands yum upgrade / dnf upgrade –refresh etc.
The minimum number to give to  installonly_limit is 2.
 

4. Remove orphan rpm packages from server

The next thing to do is to check the installed orphan packages to see if we can safely remove them; by orphaned packages we mean all packages which no longer serve a purpose of package dependencies.
Orphan packages are packages who left over from some old dependencies that are no longer needed on the system but just take up space and impose a possible security risk as some of them might end up with time with a public well known and hacked CVE vulnearbility.

Let me try to explain this concept with a quick example: package A is depended on package B, thus, in order to install package A the package B must also be installed. Once the package A is removed the package B might still be installed, hence the package B is now orphaned package.
Here’s how we can safely see the orphan packages we do have on our system:

[root@centos ~ :]#  package-cleanup –quiet –leaves –exclude-bin

And here’s how we can delete them:

[root@centos ~ :]# package-cleanup –quiet –leaves –exclude-bin | xargs yum remove -y


The above commands should be launched multiple times, because the packages deleted with the first batch could create additional orphan packages, and so on: be sure to perform these tasks until no orphan packages appear anymore after the first package-cleanup command.


5. Delete Old Kernels and keep only last three ones on Debian / Ubuntu Linux

To do the same on a debian based distribution there is a command is provided by a deb package byobu, if you want to clean up old kernels on Debians :

$ sudo purge-old-kernels –keep 3


That's all folks enjoy ! 🙂


Procedure Instructions to safe upgrade CentOS / RHEL Linux 7 Core to latest release

Thursday, February 13th, 2020

safe-upgrade-CentOS-and_Redhat_Enterprise_Linux_RHEL-7-to-latest-stable-release

Generally upgrading both RHEL and CentOS can be done straight with yum tool just we're pretty aware and mostly anyone could do the update, but it is good idea to do some
steps in advance to make backup of any old basic files that might help us to debug what is wrong in case if the Operating System fails to boot after the routine Machine OS restart
after the upgrade that is usually a good idea to make sure that machine is still bootable after the upgrade.

This procedure can be shortened or maybe extended depending on the needs of the custom case but the general framework should be useful anyways to someone that's why
I decided to post this.

Before you go lets prepare a small status script which we'll use to report status of  sysctl installed and enabled services as well as the netstat connections state and
configured IP addresses and routing on the system.

The script show_running_services_netstat_ips_route.sh to be used during our different upgrade stages:
 

# script status ###
echo "STARTED: $(date '+%Y-%m-%d_%H-%M-%S'):" | tee /root/logs/yumcheckupdate-$(hostname)-$(date '+%Y-%m-%d_%H-%M-%S').out
systemctl list-unit-files –type=service | grep enabled
systemctl | grep ".service" | grep "running"
netstat -tulpn
netstat -r
ip a s
/sbin/route -n
echo "ENDED $(date '+%Y-%m-%d_%H-%M-%S'):" | tee /root/logs/yumcheckupdate-$(hostname)-$(date '+%Y-%m-%d_%H-%M-%S').out
####


– Save the script in any file like /root/status.sh

– Make the /root/logs directoriy.
 

[root@redhat: ~ ]# mkdir /root/logs
[root@redhat: ~ ]# vim /root/status.sh
[root@redhat: ~ ]# chmod +x /root/status.sh


1. Get a dump of CentOS installed version release and grub-mkconfig generated os_probe


[root@redhat: ~ ]# cat /etc/redhat-release  > /root/logs/redhat-release-vorher-$(hostname)-$(date '+%Y-%m-%d_%H-%M-%S').out
[root@redhat: ~ ]# cat /etc/grub.d/30_os-prober > /root/logs/grub2-efi-vorher-$(hostname)-$(date '+%Y-%m-%d_%H-%M-%S').out


2. Clear old versionlock marked RPM packages (if there are such)


On servers maintained by multitude of system administrators just like the case is inside a Global Corporations and generally in the corporate world , where people do access the systems via LDAP and more than a single person
has superuser privileges. It is a good prevention measure to use yum package management  functionality to RPM based Linux distributions called  versionlock.
versionlock for those who hear it for a first time is locking the versions of the installed RPM packages so if someone by mistake or on purpose decides to do something like :

[root@redhat: ~ ]# yum install packageversion

Having the versionlock set will prevent the updated package to be installed with a different branch package version.

Also it will prevent a playful unknowing person who just wants to upgrade the system without any deep knowledge to be able to
run

[root@redhat: ~ ]# yum upgrade

update and leave the system in unbootable state, that will be only revealed during the next system reboot.

If you haven't used versionlock before and you want to use it you can do it with:

[root@redhat: ~ ]# yum install yum-plugin-versionlock

To add all the packages for compiling C code and all the interdependend packages, you can do something like:


[root@redhat: ~ ]# yum versionlock gcc-*

If you want to clear up the versionlock, once it is in use run:

[root@redhat: ~ ]#  yum versionlock clear
[root@redhat: ~ ]#  yum versionlock list


3.  Check RPC enabled / disabled


This step is not necessery but it is a good idea to check whether it running on the system, because sometimes after upgrade rpcbind gets automatically started after package upgrade and reboot. 
If we find it running we'll need to stop and mask the service.


# check if rpc enabled
[root@redhat: ~ ]# systemctl list-unit-files|grep -i rpc
var-lib-nfs-rpc_pipefs.mount                                      static
auth-rpcgss-module.service                                        static
rpc-gssd.service                                                  static
rpc-rquotad.service                                               disabled
rpc-statd-notify.service                                          static
rpc-statd.service                                                 static
rpcbind.service                                                   disabled
rpcgssd.service                                                   static
rpcidmapd.service                                                 static
rpcbind.socket                                                    disabled
rpc_pipefs.target                                                 static
rpcbind.target                                                    static

[root@redhat: ~ ]# systemctl status rpcbind.service
● rpcbind.service – RPC bind service
   Loaded: loaded (/usr/lib/systemd/system/rpcbind.service; disabled; vendor preset: enabled)
   Active: inactive (dead)


[root@redhat: ~ ]# systemctl status rpcbind.socket
● rpcbind.socket – RPCbind Server Activation Socket
   Loaded: loaded (/usr/lib/systemd/system/rpcbind.socket; disabled; vendor preset: enabled)
   Active: inactive (dead)
   Listen: /var/run/rpcbind.sock (Stream)
           0.0.0.0:111 (Stream)
           0.0.0.0:111 (Datagram)
           [::]:111 (Stream)
           [::]:111 (Datagram)


4. Check any previously existing downloaded / installed RPMs (check yum cache)


yum install package-name / yum upgrade keeps downloaded packages via its operations inside its cache directory structures in /var/cache/yum/*.
Hence it is good idea to check what were the previously installed packages and their count.


[root@redhat: ~ ]# cd /var/cache/yum/x86_64/;
[root@redhat: ~ ]# find . -iname '*.rpm'|wc -l


5. List RPM repositories set on the server


 [root@redhat: ~ ]# yum repolist
Loaded plugins: fastestmirror, versionlock
Repodata is over 2 weeks old. Install yum-cron? Or run: yum makecache fast
Determining fastest mirrors
repo id                                                                                 repo name                                                                                                            status
!atos-ac/7/x86_64                                                                       Atos Repository                                                                                                       3,128
!base/7/x86_64                                                                          CentOS-7 – Base                                                                                                      10,019
!cr/7/x86_64                                                                            CentOS-7 – CR                                                                                                         2,686
!epel/x86_64                                                                            Extra Packages for Enterprise Linux 7 – x86_64                                                                          165
!extras/7/x86_64                                                                        CentOS-7 – Extras                                                                                                       435
!updates/7/x86_64                                                                       CentOS-7 – Updates                                                                                                    2,500


This step is mandatory to make sure you're upgrading to latest packages from the right repositories for more concretics check what is inside in confs /etc/yum.repos.d/ ,  /etc/yum.conf 
 

6. Clean up any old rpm yum cache packages


This step is again mandatory but a good to follow just to have some more clearness on what packages is our upgrade downloading (not to mix up the old upgrades / installs with our newest one).
For documentation purposes all deleted packages list if such is to be kept under /root/logs/yumclean-install*.out file

[root@redhat: ~ ]# yum clean all |tee /root/logs/yumcleanall-$(hostname)-$(date '+%Y-%m-%d_%H-%M-%S').out


7. List the upgradeable packages's latest repository provided versions


[root@redhat: ~ ]# yum check-update |tee /root/logs/yumcheckupdate-$(hostname)-$(date '+%Y-%m-%d_%H-%M-%S').out


Then to be aware how many packages we'll be updating:


[root@redhat: ~ ]#  yum check-update | wc -l


8. Apply the actual uplisted RPM packages to be upgraded


[root@redhat: ~ ]# yum update |tee /root/logs/yumupdate-$(hostname)-$(date '+%Y-%m-%d_%H-%M-%S').out


Again output is logged to /root/logs/yumcheckupate-*.out 


9. Monitor downloaded packages count real time


To make sure yum upgrade is not in some hanging state and just get some general idea in which state of the upgrade is it e.g. Download / Pre-Update / Install  / Upgrade/ Post-Update etc.
in mean time when yum upgrade is running to monitor,  how many packages has the yum upgrade downloaded from remote RPM set repositories:


[root@redhat: ~ ]#  watch "ls -al /var/cache/yum/x86_64/7Server/…OS-repository…/packages/|wc -l"


10. Run status script to get the status again


[root@redhat: ~ ]# sh /root/status.sh |tee /root/logs/status-before-$(hostname)-$(date '+%Y-%m-%d_%H-%M-%S').out


11. Add back versionlock for all RPM packs


Set all RPM packages installed on the RHEL / CentOS versionlock for all packages.


#==if needed
# yum versionlock \*


12. Get whether old software configuration is not messed up during the Package upgrade (Lookup the logs for .rpmsave and .rpmnew)


During the upgrade old RPM configuration is probably changed and yum did automatically save .rpmsave / .rpmnew saves of it thus it is a good idea to grep the prepared logs for any matches of this 2 strings :
 

[root@redhat: ~ ]#   grep -i ".rpm" /root/logs/yumupdate-server-host-2020-01-20_14-30-41.out
[root@redhat: ~ ]#  grep -i ".rpmsave" /root/logs/yumupdate-server-host-2020-01-20_14-30-41.out
[root@redhat: ~ ]#  grep -i ".rpmnew" /root/logs/yumupdate-server-host-2020-01-20_14-30-41.out


If above commands returns output usually it is fine if there is is .rpmnew output but, if you get grep output of .rpmsave it is a good idea to review the files compare with the original files that were .rpmsaved with the 
substituted config file and atune the differences with the changes manually made for some program functionality.

What are the .rpmsave / .rpmnew files ?
This files are coded files that got triggered by the RPM install / upgrade due to prewritten procedures on time of RPM build.


If a file was installed as part of a rpm, it is a config file (i.e. marked with the %config tag), you've edited the file afterwards and you now update the rpm then the new config file (from the newer rpm) will replace your old config file (i.e. become the active file).
The latter will be renamed with the .rpmsave suffix.

If a file was installed as part of a rpm, it is a noreplace-config file (i.e. marked with the %config(noreplace) tag), you've edited the file afterwards and you now update the rpm then your old config file will stay in place (i.e. stay active) and the new config file (from the newer rpm) will be copied to disk with the .rpmnew suffix.
See e.g. this table for all the details. 

In both cases you or some program has edited the config file(s) and that's why you see the .rpmsave / .rpmnew files after the upgrade because rpm will upgrade config files silently and without backup files if the local file is untouched.

After a system upgrade it is a good idea to scan your filesystem for these files and make sure that correct config files are active and maybe merge the new contents from the .rpmnew files into the production files. You can remove the .rpmsave and .rpmnew files when you're done.


If you need to get a list of all .rpmnew .rpmsave files on the server do:

[root@redhat: ~ ]#  find / -print | egrep "rpmnew$|rpmsave$


13. Reboot the system 

To check whether on next hang up or power outage the system will boot normally after the upgrade, reboot to test it.


you can :


[root@redhat: ~ ]#  reboot


either

[root@redhat: ~ ]#  shutdown -r now


or if on newer Linux with systemd in ues below systemctl reboot.target.

[root@redhat: ~ ]#  systemctl start reboot.target


14. Get again the system status with our status script after reboot

[root@redhat: ~ ]#  sh /root/status.sh |tee /root/logs/status-after-$(hostname)-$(date '+%Y-%m-%d_%H-%M-%S').out


15. Clean up any versionlocks if earlier set


[root@redhat: ~ ]# yum versionlock clear
[root@redhat: ~ ]# yum versionlock list


16. Check services and logs for problems


After the reboot Check closely all running services on system make sure every process / listening ports and services on the system are running fine, just like before the upgrade.
If the sytem had firewall,  check whether firewall rules are not broken, e.g. some NAT is not missing or anything earlier configured to automatically start via /etc/rc.local or some other
custom scripts were run and have done what was expected. 
Go through all the logs in /var/log that are most essential /var/log/boot.log , /var/log/messages … yum.log etc. that could reveal any issues after the boot. In case if running some application server or mail server check /var/log/mail.log or whenever it is configured to log.
If the system runs apache closely check the logs /var/log/httpd/error.log or php_errors.log for any strange errors that occured due to some issues caused by the newer installed packages.
Usually most of the cases all this should be flawless but a multiple check over your work is a stake for good results.
 

Monitor General Server / Desktop system health in console on Linux and FreeBSD

Tuesday, October 4th, 2011

slurm-output-monitoring-networking
saidar
is a text based ncurses program to display live statistics about general system health.

It displays in one refreshable screen (similar to top) statistics about server state of:
CPU, Load, Memory, Swap, Network, I/O disk operations
Besides that saidar supports a ncurses console colors, which makes it more funny to look at.
Saidar extracts the statistics for system state based on libgstrap cross platform statistics library about pc system health.

On Debian, Ubuntu, Fedora, CentOS Linuxes saider is available for install straight from distribution repositories.
On Debian and Ubuntu saidar is installed with cmd:

debian:~# apt-get install saidar
...

On CentOS and Fedora saidar is bundled as a part of statgrab-tools rpm package.
Installing it on 64 bit CentOS with yum is with command:

[root@centos ~]# yum install statgrab-tools.x86_64

Saidar is also available on FreeBSD as a part of the /usr/ports/devel/libgstrab, hence to use on my FreeBSD I had to install the libgstrab port:

freebsd# cd /usr/ports/devel/libstatgrab
freebsd# make install clean

Here is saidar running on my Desktop Debian on Thinkpad in color output:

debian:~# saidar -c

Saidar Linux General statistics Screenshot

I've seen many people, who use various shell scripts to output system monitoring information, this scripts however are often written to just run without efficiency in mind and they put some let's say 1% extra load on the system CPU. This is not the case with saidar which is written in C and hence the program is optimized well for what it does.

Update: Next to saidar I recommend you check out Slurm (Real Time Network Interface Monitor) it can visualizes network interface traffic using ascii graph such as on top of the article. On Debian and Ubuntu Slurm is available and easily installable via simple:
 

apt-get install –yes slurm


luckyBackup Linux GUI back-up and synchronization tool

Wednesday, May 14th, 2014

luckybackup_best-linux-graphical-tool-for-backup_linux_gui-defacto-standard-tool
If you're a using GNU / Linux  for Desktop and you're already tired of creating backups by your own hacks using terminal and you want to make your life a little bit more easier and easily automate your important files back up through GUI program take a look at luckyBackup.

Luckibackup is a GUI frontend to the infamous rsync command line backup  tool. Luckibackup is available as a package in almost all modern Linux distributions its very easy to setup and can save you a lot of time especially if you have to manage a number of your Workplace Desktop Office Linux based computers.
Luckibackup is an absolute must have program for Linux Desktop start-up users. If you're migrating from Microsoft Windows realm and you're used to BackupPC, Luckibackup is probably the defacto Linux BackupPC substitute.

The sad news for Linux GNOME Desktop users is luckibackup is written in QT and it using it will load up a bit your notebook.
It is not installed by default so once a new Linux Desktop is installed you will have to install it manually on Debian and Ubuntu based Linux-es to install Luckibackup apt-get it.

debian:~# apt-get install --yes luckibackup
...

On Fedora and CentOS Linux install LuckiBackup via yum rpm package manager

[root@centos :~]# yum -y install luckibackup
.

Luckibackup is also ported for OpenSuSE Slackware, Gentoo, Mandriva and ArchLinux. In 2009 Luckibackup won the prize of Sourceforge Community Choice Awards for "best new project".

luckyBackup copies over only the changes you've made to the source directory and nothing more.
You will be surprised when your huge source is backed up in seconds (after the first backup).

Whatever changes you make to the source including adding, moving, deleting, modifying files / directories etc, will have the same effect to the destination.
Owner, group, time stamps, links and permissions of files are preserved (unless stated otherwise).

Luckibackup creates different multiple backup "snapshots".Each snapshot is an image of the source data that refers to a specific date-time.
Easy rollback to any of the snapshots is possible. Besides that luckibackup support Sync (just like rsync) od any directories keeping the files that were most recently modified on both of them.

Useful if you modify files on more than one PCs (using a flash-drive and don't want to bother remembering what did you use last. Luckibackup is capable of excluding certain files or directories from backupsExclude any file, folder or pattern from backup transfer.

After each operation a logfile is created in your home folder. You can have a look at it any time you want.

luckyBackup can run in command line if you wish not to use the gui, but you have to first create the profile that is going to be executed.
Type "luckybackup –help" at a terminal to see usage and supported options.
There is also TrayNotification – Visual feedback at the tray area informs you about what is going on.