Posts Tagged ‘boot time’

CentOS disable SELinux permanently or one time on grub Linux kernel boot time

Saturday, July 24th, 2021

selinux-artistic-penguin-logo-protect-data


1. Office 365 cloud connected computer and a VirtualBox hosted machine with SELINUX preventing it to boot

At my job we're in process of migrating my old Lenovo Laptop Thinkpad model L560 Laptop to Dell Latitude 5510 wiith Intel Core i5 vPro CPU and 256 Gb SSD Hard Drive.  The new laptops are generally fiine though they're not even a middle class computers and generally I prefer thinkpads. The sad thing out of this is our employee decided to migrate to Office 365 (again perhaps another stupid managerial decision out of an excel sheet wtih a balance to save some money … 

As you can imagine Office 365 is not really PCI Standards compliant and not secure since our data is stored in Microsoft cloud and theoretically Microsoft has and owns our data or could wipe loose the data if they want to. The other obvious security downside I've noticed with the new "Secure PCI complaint laptop" is the initial PC login screen which by default offers fingerprint authentication or the even worse  and even less secure face recognition, but obviosly everyhing becomes more and more crazy and people become less and less cautious for security if that would save money or centralize the data … In the name of security we completely waste security that is very dubious paradox I don't really understand but anyways, enough rant back to the main topic of this article is how to and I had to disable selinux?

As part of Migration I've used Microsoft OneDrive to copy old files from the Thinkpad to the Latitude (as on the old machine USB's are forbidden and I cannot copy over wiith a siimple USB driive, as well as II have no right to open the laptop and copy data from the Hard driive, and even if we had this right without breaking up some crazy company policy that will not be possible as the hard drive data on old laptop is encrypted, the funny thing is that the new laptop data comes encrypted and there is no something out of the box as BitDefender or McAffee incryption (once again, obviously our data security is a victim of some managarial decisions) …
 

2. OneDrive copy problems unable to sync some of the copied files to Onedrive


Anyways as the Old Laptop's security is quite paranoid and we're like Fort Nox, only port 80 and port 443 connections to the internet can be initiated to get around this harsh restrictions it was as simple to use a Virtualbox Virtual Machine. So on old laptop I've installed a CentOS 7 image which I used so far and I used one drive to copy my vbox .vdi image on the new laptop work machine.

The first head buml was the .vdi which seems to be prohibited to be copied to OneDrive, so to work around this I had to rename the origianl CentOS7.vdi to CentOS7.vdi-renamed on old laptop and once the data is in one drive copy my Vitualbox VM/ directory from one drive to the Dell Latitude machine and rename the .vdi-named towards .vdi as well as import it from the latest installed VirtualBox on the new machine.
 

3. Disable SELINUX from initial grub boot


So far so good but as usual happens with miigrations I've struck towards another blocker, the VM image once initiated to boot from Virtualbox badly crashed with some complains that selinux cannot be loaded.
Realizing CentOS 7 has the more or less meaningless Selinux, I've took the opportunity to disable SeLinux.

To do so I've booted the Kernel with Selinux disabled from GRUB2 loader prompt before Kernel and OS Userland boots.


I thought I need to type the information on the source in grub. What I did is very simple, on the Linux GRUB boot screen I've pressed

'e' keyboard letter

that brought the grub boot loader into edit mode.

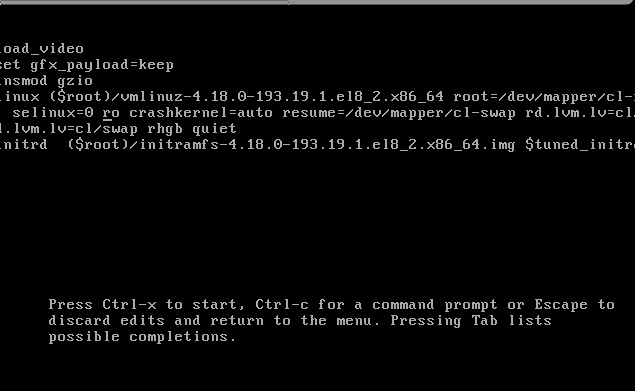
Then I had to add selinux=0 on the edited selected kernel version, as shown in below screenshot:

selinux-disable-from-grub.png

Next to boot the Linux VM without Selinux enabled one time,  just had to press together

Ctrl+X then add selinux=0 on the edited selected kernel version, that should be added as shown in the screenshot somewhere after the line of
root=/dev/mapper/….

4. Permanently Disable Selinux on CentOS 7


Once I managed to boot Virtual Machine properly with Oracle Virtualbox, to permanently disabled selinux I had to:


Once booted into CentOS, to check the status of selinux run:


# sestatus
Copy
SELinux status:                 enabled
SELinuxfs mount:                /sys/fs/selinux
SELinux root directory:         /etc/selinux
Loaded policy name:             targeted
Current mode:                   enforcing
Mode from config file:          enforcing
Policy MLS status:              enabled
Policy deny_unknown status:     allowed
Max kernel policy version:      31


5. Disable SELinux one time with setenforce command


You can temporarily change the SELinux mode from targeted to permissive with the following command:


# setenforce 0


Next o permanently disable SELinux on your CentOS 7 next time the system boots, Open the /etc/selinux/config file and set the SELINUX mod parameter to disabled.

On CentOS 7 you can  edit the kernel parameters in /etc/default/grub (in the GRUB_CMDLINE_LINUX= key) and set selinux=0 so on next VM / PC boot we boot with a SELINUX disabled for example add   RUB_CMDLINE_LINUX=selinux=0 to the file then you have to regenerate your Grub config like this:
 

# grub2-mkconfig -o /etc/grub2.cfg
# grub2-mkconfig -o /etc/grub2-efi.cfg


Further on to disable SeLinux on OS level edit /etc/selinux
 

Default /etc/selinux/config with selinux enabled should look like so:

# This file controls the state of SELinux on the system.
# SELINUX= can take one of these three values:
#       enforcing – SELinux security policy is enforced.
#       permissive – SELinux prints warnings instead of enforcing.
#       disabled – No SELinux policy is loaded.
SELINUX=enforcing
# SELINUXTYPE= can take one of these two values:
#       targeted – Targeted processes are protected,
#       mls – Multi Level Security protection.
SELINUXTYPE=targeted


To disable SeLinux modify the file to be something like:

# This file controls the state of SELinux on the system.
# SELINUX= can take one of these three values:
#       enforcing – SELinux security policy is enforced.
#       permissive – SELinux prints warnings instead of enforcing.
#       disabled – No SELinux policy is loaded.
SELINUX=disabled
# SELINUXTYPE= can take one of these two values:
#       targeted – Targeted processes are protected,
#       mls – Multi Level Security protection.
SELINUXTYPE=targeted

6. Check SELINUX status is disabled

# sestatus

SELinux status:                 disabled

So in this article shottly was explained shortly the fake security adopted by using Microsoft Cloud environment Offiice 365, my faced OneDrive copy issues (which prevented even my old laptop Virtual Machine to boot properly and the handy trick to rename the file that is unwilling to get copied from old PC towards m$ OneDrive as well as the grub trick to disable Selinux permanently from grub2.

How to configure bond0 bonding and network bridging for KVM Virtual machines on Redhat / CentOS / Fedora Linux

Tuesday, February 16th, 2021

configure-bond0-bonding-channel-with-bridges-on-hypervisor-host-for-guest-KVM-virtual-machines-howto-sample-Hypervisor-Virtual-machines-pic
 1. Intro to Redhat RPM based distro /etc/sysconfig/network-scripts/* config vars shortly explained

On RPM based Linux distributions configuring network has a very specific structure. As a sysadmin just recently I had a task to configure Networking on 2 Machines to be used as Hypervisors so the servers could communicate normally to other Networks via some different intelligent switches that are connected to each of the interfaces of the server. The idea is the 2 redhat 8.3 machines to be used as  Hypervisor (HV) and each of the 2 HVs to each be hosting 2 Virtual guest Machines with preinstalled another set of Redhat 8.3 Ootpa. I've recently blogged on how to automate a bit installing the KVM Virtual machines with using predefined kickstart.cfg file.

The next step after install was setting up the network. Redhat has a very specific network configuration well known under /etc/sysconfig/network-scripts/ifcfg-eno*# or if you have configured the Redhats to fix the changing LAN card naming ens, eno, em1 to legacy eth0, eth1, eth2 on CentOS Linux – e.g. to be named as /etc/sysconfig/network-scripts/{ifcfg-eth0,1,2,3}.

The first step to configure the network from that point is to come up with some network infrastrcture that will be ready on the HV nodes server-node1 server-node2 for the Virtual Machines to be used by server-vm1, server-vm2.

Thus for the sake of myself and some others I decide to give here the most important recognized variables that can be placed inside each of the ifcfg-eth0,ifcfg-eth1,ifcfg-eth2 …

A standard ifcfg-eth0 confing would look something this:
 

[root@redhat1 :~ ]# cat /etc/sysconfig/network-scripts/ifcfg-eth0
TYPE=Ethernet
BOOTPROTO=none
DEFROUTE=yes
IPV4_FAILURE_FATAL=no
IPV6INIT=yes
IPV6_AUTOCONF=yes
IPV6_DEFROUTE=yes
IPV4_FAILURE_FATAL=no
NAME=eth0
UUID=…
ONBOOT=yes
HWADDR=0e:a4:1a:b6:fc:86
IPADDR0=10.31.24.10
PREFIX0=23
GATEWAY0=10.31.24.1
DNS1=192.168.50.3
DNS2=10.215.105.3
DOMAIN=example.com
IPV6_PEERDNS=yes
IPV6_PEERROUTES=yes


Lets say few words to each of the variables to make it more clear to people who never configured Newtork on redhat without the help of some of the console ncurses graphical like tools such as nmtui or want to completely stop the Network-Manager to manage the network and thus cannot take the advantage of using nmcli (a command-line tool for controlling NetworkManager).

Here is a short description of each of above configuration parameters:

TYPE=device_type: The type of network interface device
BOOTPROTO=protocol: Where protocol is one of the following:

  • none: No boot-time protocol is used.
  • bootp: Use BOOTP (bootstrap protocol).
  • dhcp: Use DHCP (Dynamic Host Configuration Protocol).
  • static: if configuring static IP

EFROUTE|IPV6_DEFROUTE=answer

  • yes: This interface is set as the default route for IPv4|IPv6 traffic.
  • no: This interface is not set as the default route.

Usually most people still don't use IPV6 so better to disable that

IPV6INIT=answer: Where answer is one of the following:

  • yes: Enable IPv6 on this interface. If IPV6INIT=yes, the following parameters could also be set in this file:

IPV6ADDR=IPv6 address

IPV6_DEFAULTGW=The default route through the specified gateway

  • no: Disable IPv6 on this interface.

IPV4_FAILURE_FATAL|IPV6_FAILURE_FATAL=answer: Where answer is one of the following:

  • yes: This interface is disabled if IPv4 or IPv6 configuration fails.
  • no: This interface is not disabled if configuration fails.

ONBOOT=answer: Where answer is one of the following:

  • yes: This interface is activated at boot time.
  • no: This interface is not activated at boot time.

HWADDR=MAC-address: The hardware address of the Ethernet device
IPADDRN=address: The IPv4 address assigned to the interface
PREFIXN=N: Length of the IPv4 netmask value
GATEWAYN=address: The IPv4 gateway address assigned to the interface. Because an interface can be associated with several combinations of IP address, network mask prefix length, and gateway address, these are numbered starting from 0.
DNSN=address: The address of the Domain Name Servers (DNS)
DOMAIN=DNS_search_domain: The DNS search domain (this is the search Domain-name.com you usually find in /etc/resolv.conf)

Other interesting file that affects how routing is handled on a Redhat Linux is

/etc/sysconfig/network

[root@redhat1 :~ ]# cat /etc/sysconfig/network
# Created by anaconda
GATEWAY=10.215.105.

Having this gateway defined does add a default gateway

This file specifies global network settings. For example, you can specify the default gateway, if you want to apply some network settings such as routings, Alias IPs etc, that will be valid for all configured and active configuration red by systemctl start network scripts or the (the network-manager if such is used), just place it in that file.

Other files of intesresting to control how resolving is being handled on the server worthy to check are 

/etc/nsswitch.conf

and

/etc/hosts

If you want to set a preference of /etc/hosts being red before /etc/resolv.conf and DNS resolving for example you need to have inside it, below is default behavior of it.
 

root@redhat1 :~ ]#   grep -i hosts /etc/nsswitch.conf
#     hosts: files dns
#     hosts: files dns  # from user file
# Valid databases are: aliases, ethers, group, gshadow, hosts,
hosts:      files dns myhostname

As you can see the default order is to read first files (meaning /etc/hosts) and then the dns (/etc/resolv.conf)
hosts: files dns

Now with this short intro description on basic values accepted by Redhat's /etc/sysconfig/network-scripts/ifcfg* prepared configurations.


I will give a practical example of configuring a bond0 interface with 2 members which were prepared based on Redhat's Official documentation found in above URLs:

https://access.redhat.com/documentation/en-us/red_hat_enterprise_linux/8/html/configuring_and_managing_networking/configuring-network-bonding_configuring-and-managing-networking
 

# Bonding on RHEL 7 documentation
https://access.redhat.com/documentation/en-us/red_hat_enterprise_linux/7/html/networking_guide/sec-network_bonding_using_the_command_line_interface

https://access.redhat.com/documentation/en-us/red_hat_enterprise_linux/7/html/networking_guide/sec-verifying_network_configuration_bonding_for_redundancy

https://access.redhat.com/documentation/en-us/red_hat_enterprise_linux/6/html/deployment_guide/s2-networkscripts-interfaces_network-bridge

# Network Bridge with Bond documentation
https://access.redhat.com/documentation/en-us/red_hat_enterprise_linux/6/html/deployment_guide/sec-Configuring_a_VLAN_over_a_Bond

https://docs.fedoraproject.org/en-US/Fedora/24/html/Networking_Guide/sec-Network_Bridge_with_Bond.html


2. Configuring a single bond connection on eth0 / eth2 and setting 3 bridge interfaces bond -> br0, br1 -> eth1, br2 -> eth2

The task on my machines was to set up from 4 lan cards one bonded interface as active-backup type of bond with bonded lines on eth0, eth2 and 3 other 2 eth1, eth2 which will be used for private communication network that is connected via a special dedicated Switches and Separate VLAN 50, 51 over a tagged dedicated gigabit ports.

As said the 2 Servers had each 4 Broadcom Network CARD interfaces each 2 of which are paired (into a single card) and 2 of which are a solid Broadcom NetXtreme Dual Port 10GbE SFP+ and Dell Broadcom 5720 Dual Port 1Gigabit Network​.

2-ports-broadcom-netxtreme-dual-port-10GBe-spf-plus

On each of server-node1 and server-node2 we had 4 Ethernet Adapters properly detected on the Redhat

root@redhat1 :~ ]# lspci |grep -i net
01:00.0 Ethernet controller: Broadcom Inc. and subsidiaries NetXtreme BCM5720 2-port Gigabit Ethernet PCIe
01:00.1 Ethernet controller: Broadcom Inc. and subsidiaries NetXtreme BCM5720 2-port Gigabit Ethernet PCIe
19:00.0 Ethernet controller: Broadcom Inc. and subsidiaries BCM57412 NetXtreme-E 10Gb RDMA Ethernet Controller (rev 01)
19:00.1 Ethernet controller: Broadcom Inc. and subsidiaries BCM57412 NetXtreme-E 10Gb RDMA Ethernet Controller (rev 01)


I've already configured as prerogative net.ifnames=0 to /etc/grub2/boot.cfg and Network-Manager service disabled on the host (hence to not use Network Manager you'll see in below configuration NM_CONTROLLED="no" is telling the Redhat servers is not to be trying NetworkManager for more on that check my previous article Disable NetworkManager automatic Ethernet Interface Management on Redhat Linux , CentOS 6 / 7 / 8.

3. Types of Network Bonding

mode=0 (balance-rr)

This mode is based on Round-robin policy and it is the default mode. This mode offers fault tolerance and load balancing features. It transmits the packets in Round robin fashion that is from the first available slave through the last.

mode-1 (active-backup)

This mode is based on Active-backup policy. Only one slave is active in this band, and another one will act only when the other fails. The MAC address of this bond is available only on the network adapter part to avoid confusing the switch. This mode also provides fault tolerance.

mode=2 (balance-xor)

This mode sets an XOR (exclusive or) mode that is the source MAC address is XOR’d with destination MAC address for providing load balancing and fault tolerance. Each destination MAC address the same slave is selected.

mode=3 (broadcast)

This method is based on broadcast policy that is it transmitted everything on all slave interfaces. It provides fault tolerance. This can be used only for specific purposes.

mode=4 (802.3ad)

This mode is known as a Dynamic Link Aggregation mode that has it created aggregation groups having same speed. It requires a switch that supports IEEE 802.3ad dynamic link. The slave selection for outgoing traffic is done based on a transmit hashing method. This may be changed from the XOR method via the xmit_hash_policy option.

mode=5 (balance-tlb)

This mode is called Adaptive transmit load balancing. The outgoing traffic is distributed based on the current load on each slave and the incoming traffic is received by the current slave. If the incoming traffic fails, the failed receiving slave is replaced by the MAC address of another slave. This mode does not require any special switch support.

mode=6 (balance-alb)

This mode is called adaptive load balancing. This mode does not require any special switch support.

Lets create the necessery configuration for the bond and bridges

[root@redhat1 :~ ]# cat ifcfg-bond0
DEVICE=bond0
NAME=bond0
TYPE=Bond
BONDING_MASTER=yes
#IPADDR=10.50.21.16
#PREFIX=26
#GATEWAY=10.50.0.1
#DNS1=172.20.88.2
ONBOOT=yes
BOOTPROTO=none
BONDING_OPTS="mode=1 miimon=100 primary=eth0"
NM_CONTROLLED="no"
BRIDGE=br0


[root@redhat1 :~ ]# cat ifcfg-bond0.10
DEVICE=bond0.10
BOOTPROTO=none
ONPARENT=yes
#IPADDR=10.50.21.17
#NETMASK=255.255.255.0
VLAN=yes

[root@redhat1 :~ ]# cat ifcfg-br0
STP=yes
BRIDGING_OPTS=priority=32768
TYPE=Bridge
PROXY_METHOD=none
BROWSER_ONLY=no
BOOTPROTO=none
DEFROUTE=yes
IPV4_FAILURE_FATAL=no
#IPV6INIT=yes
#IPV6_AUTOCONF=yes
#IPV6_DEFROUTE=yes
#IPV6_FAILURE_FATAL=no
#IPV6_ADDR_GEN_MODE=stable-privacy
IPV6_AUTOCONF=no
IPV6_DEFROUTE=no
IPV6_FAILURE_FATAL=no
IPV6_ADDR_GEN_MODE=stable-privacy
NAME=br0
UUID=4451286d-e40c-4d8c-915f-7fc12a16d595
DEVICE=br0
ONBOOT=yes
IPADDR=10.50.50.16
PREFIX=26
GATEWAY=10.50.0.1
DNS1=172.20.0.2
NM_CONTROLLED=no

[root@redhat1 :~ ]# cat ifcfg-br1
STP=yes
BRIDGING_OPTS=priority=32768
TYPE=Bridge
PROXY_METHOD=none
BROWSER_ONLY=no
BOOTPROTO=none
DEFROUTE=no
IPV4_FAILURE_FATAL=no
#IPV6INIT=yes
#IPV6_AUTOCONF=yes
#IPV6_DEFROUTE=yes
#IPV6_FAILURE_FATAL=no
#IPV6_ADDR_GEN_MODE=stable-privacy
IPV6INIT=no
IPV6_AUTOCONF=no
IPV6_DEFROUTE=no
IPV6_FAILURE_FATAL=no
IPV6_ADDR_GEN_MODE=stable-privacy
NAME=br1
UUID=40360c3c-47f5-44ac-bbeb-77f203390d29
DEVICE=br1
ONBOOT=yes
##IPADDR=10.50.51.241
PREFIX=28
##GATEWAY=10.50.0.1
##DNS1=172.20.0.2
NM_CONTROLLED=no

[root@redhat1 :~ ]# cat ifcfg-br2
STP=yes
BRIDGING_OPTS=priority=32768
TYPE=Bridge
PROXY_METHOD=none
BROWSER_ONLY=no
BOOTPROTO=none
DEFROUTE=no
IPV4_FAILURE_FATAL=no
#IPV6INIT=yes
#IPV6_AUTOCONF=yes
#IPV6_DEFROUTE=yes
#IPV6_FAILURE_FATAL=no
#IPV6_ADDR_GEN_MODE=stable-privacy
IPV6INIT=no
IPV6_AUTOCONF=no
IPV6_DEFROUTE=no
IPV6_FAILURE_FATAL=no
IPV6_ADDR_GEN_MODE=stable-privacy
NAME=br2
UUID=fbd5c257-2f66-4f2b-9372-881b783276e0
DEVICE=br2
ONBOOT=yes
##IPADDR=10.50.51.243
PREFIX=28
##GATEWAY=10.50.0.1
##DNS1=172.20.10.1
NM_CONTROLLED=no
NM_CONTROLLED=no
BRIDGE=br0

[root@redhat1 :~ ]# cat ifcfg-eth0
TYPE=Ethernet
NAME=bond0-slaveeth0
BOOTPROTO=none
#UUID=61065574-2a9d-4f16-b16e-00f495e2ee2b
DEVICE=eth0
ONBOOT=yes
MASTER=bond0
SLAVE=yes
NM_CONTROLLED=no

[root@redhat1 :~ ]# cat ifcfg-eth1
TYPE=Ethernet
NAME=eth1
UUID=b4c359ae-7a13-436b-a904-beafb4edee94
DEVICE=eth1
ONBOOT=yes
BRIDGE=br1
NM_CONTROLLED=no

[root@redhat1 :~ ]#  cat ifcfg-eth2
TYPE=Ethernet
NAME=bond0-slaveeth2
BOOTPROTO=none
#UUID=821d711d-47b9-490a-afe7-190811578ef7
DEVICE=eth2
ONBOOT=yes
MASTER=bond0
SLAVE=yes
NM_CONTROLLED=no

[root@redhat1 :~ ]#  cat ifcfg-eth3
TYPE=Ethernet
PROXY_METHOD=none
BROWSER_ONLY=no
#BOOTPROTO=dhcp
BOOTPROTO=none
DEFROUTE=no
IPV4_FAILURE_FATAL=no
#IPV6INIT=yes
#IPV6_AUTOCONF=yes
#IPV6_DEFROUTE=yes
#IPV6_FAILURE_FATAL=no
#IPV6_ADDR_GEN_MODE=stable-privacy
IPV6INIT=no
IPV6_AUTOCONF=no
IPV6_DEFROUTE=no
IPV6_FAILURE_FATAL=no
IPV6_ADDR_GEN_MODE=stable-privacy
BRIDGE=br2
NAME=eth3
UUID=61065574-2a9d-4f16-b16e-00f495e2ee2b
DEVICE=eth3
ONBOOT=yes
NM_CONTROLLED=no

[root@redhat2 :~ ]# cat ifcfg-bond0
DEVICE=bond0
NAME=bond0
TYPE=Bond
BONDING_MASTER=yes
#IPADDR=10.50.21.16
#PREFIX=26
#GATEWAY=10.50.21.1
#DNS1=172.20.88.2
ONBOOT=yes
BOOTPROTO=none
BONDING_OPTS="mode=1 miimon=100 primary=eth0"
NM_CONTROLLED="no"
BRIDGE=br0

# cat ifcfg-bond0.10
DEVICE=bond0.10
BOOTPROTO=none
ONPARENT=yes
#IPADDR=10.50.21.17
#NETMASK=255.255.255.0
VLAN=yes
NM_CONTROLLED=no
BRIDGE=br0

[root@redhat2 :~ ]# cat ifcfg-br0
STP=yes
BRIDGING_OPTS=priority=32768
TYPE=Bridge
PROXY_METHOD=none
BROWSER_ONLY=no
BOOTPROTO=none
DEFROUTE=yes
IPV4_FAILURE_FATAL=no
#IPV6INIT=yes
#IPV6_AUTOCONF=yes
#IPV6_DEFROUTE=yes
#IPV6_FAILURE_FATAL=no
#IPV6_ADDR_GEN_MODE=stable-privacy
IPV6_AUTOCONF=no
IPV6_DEFROUTE=no
IPV6_FAILURE_FATAL=no
IPV6_ADDR_GEN_MODE=stable-privacy
NAME=br0
#UUID=f87e55a8-0fb4-4197-8ccc-0d8a671f30d0
UUID=4451286d-e40c-4d8c-915f-7fc12a16d595
DEVICE=br0
ONBOOT=yes
IPADDR=10.50.21.17
PREFIX=26
GATEWAY=10.50.21.1
DNS1=172.20.88.2
NM_CONTROLLED=no

[root@redhat2 :~ ]#  cat ifcfg-br1
STP=yes
BRIDGING_OPTS=priority=32768
TYPE=Bridge
PROXY_METHOD=none
BROWSER_ONLY=no
BOOTPROTO=none
DEFROUTE=no
IPV4_FAILURE_FATAL=no
#IPV6INIT=no
#IPV6_AUTOCONF=no
#IPV6_DEFROUTE=no
#IPV6_FAILURE_FATAL=no
#IPV6_ADDR_GEN_MODE=stable-privacy
IPV6INIT=no
IPV6_AUTOCONF=no
IPV6_DEFROUTE=no
IPV6_FAILURE_FATAL=no
IPV6_ADDR_GEN_MODE=stable-privacy
NAME=br1
UUID=40360c3c-47f5-44ac-bbeb-77f203390d29
DEVICE=br1
ONBOOT=yes
##IPADDR=10.50.21.242
PREFIX=28
##GATEWAY=10.50.21.1
##DNS1=172.20.88.2
NM_CONTROLLED=no

[root@redhat2 :~ ]# cat ifcfg-br2
STP=yes
BRIDGING_OPTS=priority=32768
TYPE=Bridge
PROXY_METHOD=none
BROWSER_ONLY=no
BOOTPROTO=none
DEFROUTE=no
IPV4_FAILURE_FATAL=no
#IPV6INIT=no
#IPV6_AUTOCONF=no
#IPV6_DEFROUTE=no
#IPV6_FAILURE_FATAL=no
#IPV6_ADDR_GEN_MODE=stable-privacy
IPV6INIT=no
IPV6_AUTOCONF=no
IPV6_DEFROUTE=no
IPV6_FAILURE_FATAL=no
IPV6_ADDR_GEN_MODE=stable-privacy
NAME=br2
UUID=fbd5c257-2f66-4f2b-9372-881b783276e0
DEVICE=br2
ONBOOT=yes
##IPADDR=10.50.21.244
PREFIX=28
##GATEWAY=10.50.21.1
##DNS1=172.20.88.2
NM_CONTROLLED=no

[root@redhat2 :~ ]# cat ifcfg-eth0
TYPE=Ethernet
NAME=bond0-slaveeth0
BOOTPROTO=none
#UUID=ee950c07-7eb2-463b-be6e-f97e7ad9d476
DEVICE=eth0
ONBOOT=yes
MASTER=bond0
SLAVE=yes
NM_CONTROLLED=no

[root@redhat2 :~ ]# cat ifcfg-eth1
TYPE=Ethernet
NAME=eth1
UUID=ffec8039-58f0-494a-b335-7a423207c7e6
DEVICE=eth1
ONBOOT=yes
BRIDGE=br1
NM_CONTROLLED=no

[root@redhat2 :~ ]# cat ifcfg-eth2
TYPE=Ethernet
NAME=bond0-slaveeth2
BOOTPROTO=none
#UUID=2c097475-4bef-47c3-b241-f5e7f02b3395
DEVICE=eth2
ONBOOT=yes
MASTER=bond0
SLAVE=yes
NM_CONTROLLED=no


Notice that the bond0 configuration does not have an IP assigned this is done on purpose as we're using the interface channel bonding together with attached bridge for the VM. Usual bonding on a normal physical hardware hosts where no virtualization use is planned is perhaps a better choice. If you however try to set up an IP address in that specific configuration shown here and you try to reboot the machine, you will end up with inacessible machine over the network like I did and you will need to resolve configuration via some kind of ILO / IDRAC interface.

4. Generating UUID for ethernet devices bridges and bonds

One thing to note is the command uuidgen you might need that to generate UID identificators to fit in the new network config files.

Example:
 

[root@redhat2 :~ ]#uuidgen br2
e7995e15-7f23-4ea2-80d6-411add78d703
[root@redhat2 :~ ]# uuidgen br1
05e0c339-5998-414b-b720-7adf91a90103
[root@redhat2 :~ ]# uuidgen br0
e6d7ff74-4c15-4d93-a150-ff01b7ced5fb


5. How to make KVM Virtual Machines see configured Network bridges (modify VM XML)

To make the Virtual machines installed see the bridges I had to

[root@redhat1 :~ ]#virsh edit VM_name1
[root@redhat1 :~ ]#virsh edit VM_name2

[root@redhat2 :~ ]#virsh edit VM_name1
[root@redhat2 :~ ]#virsh edit VM_name2

Find the interface network configuration and change it to something like:

    <interface type='bridge'>
      <mac address='22:53:00:56:5d:ac'/>
      <source bridge='br0'/>
      <model type='virtio'/>
      <address type='pci' domain='0x0000' bus='0x01' slot='0x00' function='0x0'/>
    </interface>
    <interface type='bridge'>
      <mac address='22:53:00:2a:5f:01'/>
      <source bridge='br1'/>
      <model type='virtio'/>
      <address type='pci' domain='0x0000' bus='0x07' slot='0x00' function='0x0'/>
    </interface>
    <interface type='bridge'>
      <mac address='22:34:00:4a:1b:6c'/>
      <source bridge='br2'/>
      <model type='virtio'/>
      <address type='pci' domain='0x0000' bus='0x08' slot='0x00' function='0x0'/>
    </interface>


6. Testing the bond  is up and works fine

# ip addr show bond0
The result is the following:


4: bond0: <BROADCAST,MULTICAST,MASTER,UP,LOWER_UP> mtu 1500 qdisc noqueue state UP group default qlen 1000
    link/ether 52:54:00:cb:25:82 brd ff:ff:ff:ff:ff:ff


The bond should be visible in the normal network interfaces with ip address show or /sbin/ifconfig


# cat /proc/net/bonding/bond0
Ethernet Channel Bonding Driver: v3.7.1 (April 27, 2011)

Bonding Mode: fault-tolerance (active-backup)
Primary Slave: None
Currently Active Slave: eth0
MII Status: up
MII Polling Interval (ms): 100
Up Delay (ms): 0
Down Delay (ms): 0

Slave Interface: eth2
MII Status: up
Speed: 10000 Mbps
Duplex: full
Link Failure Count: 0
Permanent HW addr: 00:0c:29:ab:2a:fa
Slave queue ID: 0


According to the output eth0 is the active slave.

The active slaves device files (eth0 in this case) is found in virtual file system /sys/

# find /sys -name *eth0
/sys/devices/pci0000:00/0000:00:15.0/0000:03:00.0/net/eth0
/sys/devices/virtual/net/bond0/lower_eth0
/sys/class/net/eth0


You can remove a bond member say eth0 by 


 cd to the pci* directory
Example: /sys/devices/pci000:00/000:00:15.0


# echo 1 > remove


At this point the eth0 device directory structure that was previously located under /sys/devices/pci000:00/000:00:15.0 is no longer there.  It was removed and the device no longer exists as seen by the OS.

You can verify this is the case with a simple ifconfig which will no longer list the eth0 device.
You can also repeat the cat /proc/net/bonding/bond0 command from Step 1 to see that eth0 is no longer listed as active or available.
You can also see the change in the messages file.  It might look something like this:

2021-02-12T14:13:23.363414-06:00 redhat1  device eth0: device has been deleted
2021-02-12T14:13:23.368745-06:00 redhat1 kernel: [81594.846099] bonding: bond0: releasing active interface eth0
2021-02-12T14:13:23.368763-06:00 redhat1 kernel: [81594.846105] bonding: bond0: Warning: the permanent HWaddr of eth0 – 00:0c:29:ab:2a:f0 – is still in use by bond0. Set the HWaddr of eth0 to a different address to avoid conflicts.
2021-02-12T14:13:23.368765-06:00 redhat1 kernel: [81594.846132] bonding: bond0: making interface eth1 the new active one.


Another way to test the bonding is correctly switching between LAN cards on case of ethernet hardware failure is to bring down one of the 2 or more bonded interfaces, lets say you want to switch from active-backup from eth1 to eth2, do:
 

# ip link set dev eth0 down


That concludes the test for fail over on active slave failure.

7. Bringing bond updown (rescan) bond with no need for server reboot

You know bonding is a tedious stuff that sometimes breaks up badly so only way to fix the broken bond seems to be a init 6 (reboot) cmd but no actually that is not so.

You can also get the deleted device back with a simple pci rescan command:

# echo 1 > /sys/bus/pci/rescan


The eth0 interface should now be back
You can see that it is back with an ifconfig command, and you can verify that the bond sees it with this command:

# cat /proc/net/bonding/bond0


That concludes the test of the bond code seeing the device when it comes back again.

The same steps can be repeated only this time using the eth1 device and file structure to fail the active slave in the bond back over to eth0.

8. Testing the bond with ifenslave command (ifenslave command examples)

Below is a set of useful information to test the bonding works as expected with ifenslave command  comes from "iputils-20071127" package

– To show information of all the inerfaces

                  # ifenslave -a
                  # ifenslave –all-interfaces 


– To change the active slave

                  # ifenslave -c bond0 eth1
                  # ifenslave –change-active bond0 eth1 


– To remove the slave interface from the bonding device

                  # ifenslave -d eth1
                  # ifenslave –detach bond0 eth1 


– To show master interface info

                  # ifenslave bond0 


– To set the bond device down and automatically release all the slaves

                  # ifenslave bond1 down 

– To get the usage info

                  # ifenslave -u
                  # ifenslave –usage 

– To set to verbose mode

                  # ifenslave -v
                  # ifenslave –verbose 

9. Testing the bridge works fine

Historically over the years all kind of bridges are being handled with the brctl part of bridge-utils .deb / .rpm installable package.

The classical way to check a bridge is working is to do

# brctl show
# brctl show br0; brctl show br1; brctl show br2

# brctl showmacs br0
 

etc.

Unfortunately with redhat 8 this command is no longer available so to get information about configured bridges you need to use instead:


# bridge link show
3:eth0: <BROADCAST,MULTICAST,UP,LOWER_UP> mtu 1500 master bridge0 state forwarding priority 32 cost 100
4:eth2: <BROADCAST,MULTICAST,UP,LOWER_UP> mtu 1500 master bridge0 state listening priority 32 cost 100


10. Troubleshooting network connectivity issues on bond bridges and LAN cards

Testing the bond connection and bridges can route proper traffic sometimes is a real hassle so here comes at help the good old tcpdump

If you end up with issues with some of the ethernet interfaces between HV1 and HV2 to be unable to talk to each other and you have some suspiciousness that some colleague from the network team has messed up a copper (UTP) cable or there is a connectivity fiber optics issues. To check the VLAN tagged traffic headers on the switch you can listen to each and every bond0 and br0, br1, br2 eth0, eth1, eth2, eth3 configured on the server like so:

# tcpdump -i bond0 -nn -e vlan


Some further investigation on where does a normal ICMP traffic flows once everything is setup is a normal thing to do, hence just try to route a normal ping via the different server interfaces:

# ping -I bond0 DSTADDR

# ping -i eth0 DSTADDR

# ping -i eth1 DSTADDR

# ping -i eth2 DSTADDR


After conducting the ping do the normal for network testing big ICMP packages (64k) ping to make sure there are no packet losses etc., e.g:

# ping -I eth3 -s 64536  DSTADDR


If for 10 – 20 seconds the ping does not return package losses then you should be good.

How to Remove / Add SuSE Linux start service command

Thursday, July 2nd, 2015

opensuse-remove-add-new-service-geeko-suse-linux-mini-logo
If you happen to administer SUSE LINUX Enterprise Server 9 (x86_64) and you need to add or remove already existing /etc/init.d script or custom created Apache / Tomcat .. etc. service and you're already familiar with Fedora's / RHEL chkconfig, then the good news chkconfig is also available on SuSE and you can use in same way chkconfig to start / stop / enable / disable boot time services.

To list all available boot time init.d services use:
 

suse-linux:/etc # chkconfig –list


SuSEfirewall2_final       0:off  1:off  2:off  3:off  4:off  5:off  6:off
SuSEfirewall2_init        0:off  1:off  2:off  3:off  4:off  5:off  6:off
SuSEfirewall2_setup       0:off  1:off  2:off  3:off  4:off  5:off  6:off
Tivoli_lcfd1.bkp          0:off  1:off  2:off  3:off  4:off  5:off  6:off
activate_web_all          0:off  1:off  2:off  3:on   4:off  5:on   6:off
alsasound                 0:off  1:off  2:on   3:on   4:off  5:on   6:off
apache2                   0:off  1:off  2:off  3:off  4:off  5:off  6:off
apache2-eis               0:off  1:off  2:off  3:on   4:off  5:off  6:off
atd                       0:off  1:off  2:off  3:off  4:off  5:off  6:off
audit                     0:off  1:off  2:off  3:off  4:off  5:off  6:off
autofs                    0:off  1:off  2:off  3:off  4:off  5:off  6:off
autoyast                  0:off  1:off  2:off  3:off  4:off  5:off  6:off
boot.clock                0:off  1:off  2:off  3:off  4:off  5:off  6:off
boot.crypto               0:off  1:off  2:off  3:off  4:off  5:off  6:off
boot.device-mapper        0:off  1:off  2:off  3:off  4:off  5:off  6:off
boot.evms                 0:off  1:off  2:off  3:off  4:off  5:off  6:off
boot.idedma               0:off  1:off  2:off  3:off  4:off  5:off  6:off
boot.ipconfig             0:off  1:off  2:off  3:off  4:off  5:off  6:off
boot.isapnp               0:off  1:off  2:off  3:off  4:off  5:off  6:off
boot.klog                 0:off  1:off  2:off  3:off  4:off  5:off  6:off
boot.ldconfig             0:off  1:off  2:off  3:off  4:off  5:off  6:off
boot.loadmodules          0:off  1:off  2:off  3:off  4:off  5:off  6:off
boot.localfs              0:off  1:off  2:off  3:off  4:off  5:off  6:off
boot.localnet             0:off  1:off  2:off  3:off  4:off  5:off  6:off
boot.lvm                  0:off  1:off  2:off  3:off  4:off  5:off  6:off
boot.md                   0:off  1:off  2:off  3:off  4:off  5:off  6:off
boot.multipath            0:off  1:off  2:off  3:off  4:off  5:off  6:off
boot.proc                 0:off  1:off  2:off  3:off  4:off  5:off  6:off
boot.restore_permissions  0:off  1:off  2:off  3:off  4:off  5:off  6:off
boot.rootfsck             0:off  1:off  2:off  3:off  4:off  5:off  6:off
boot.sched                0:off  1:off  2:off  3:off  4:off  5:off  6:off
boot.scpm                 0:off  1:off  2:off  3:off  4:off  5:off  6:off
boot.scsidev              0:off  1:off  2:off  3:off  4:off  5:off  6:off
boot.shm                  0:off  1:off  2:off  3:off  4:off  5:off  6:off
boot.swap                 0:off  1:off  2:off  3:off  4:off  5:off  6:off
boot.sysctl               0:off  1:off  2:off  3:off  4:off  5:off  6:off
boot.udev                 0:off  1:off  2:off  3:off  4:off  5:off  6:off
coldplug                  0:off  1:on   2:on   3:on   4:off  5:on   6:off


To then stop the service:
 

suse-linux:/etc # chkconfig gtiweb off


If you prefer to do it the SuSE way and learn a bit more on SuSE boot time process check out:


suse-linux:/etc # man insserv


Removing already existing SuSE start-up script from init.d start up with insserv is done with:

suse-linux:/etc # cd /etc/init.d/
suse-linux:etc/init.d # insserv -r gtiweb
insserv: script ipmi.hp: service ipmidrv already provided!
insserv: script boot.multipath.2008-10-29: service boot.multipath already provided!


To install a new custom written and placed into /etc/inti.d/ on SuSE's server boot time with insserv:


suse-linux:/etc/init.d/ # insserv your_custom_script_name

Fix “Approaching the limit on PV entries, consider increasing either the vm.pmap.shpgperproc or the vm.pmap.pv_entry_max tunable.” in FreeBSD

Monday, May 21st, 2012

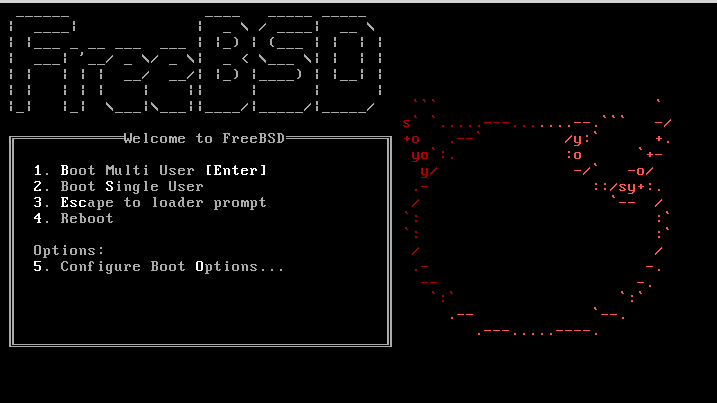
bsdinstall-newboot-loader-menu-pv_entries_consider_increasing_vm_pmap_shpgrepproc

I'm running FreeBSD with Apache and PHP on it and I got in dmesg (kernel log), following error:

freebsd# dmesg|grep -i vm.pmap.shpgperproc
Approaching the limit on PV entries, consider increasing either the vm.pmap.shpgperproc or the vm.pmap.pv_entry_max tunable.

The exact FreeBSD, Apache and php versions I have installed are:
 

freebsd# uname -a ; httpd -V ; php –version
FreeBSD pcfreak 7.2-RELEASE-p4 FreeBSD 7.2-RELEASE-p4 #0: Fri Oct 2 12:21:39 UTC 2009 root@i386-builder.daemonology.net:/usr/obj/usr/src/sys/GENERIC i386
Server version: Apache/2.0.64
Server built: Mar 13 2011 23:36:25Server's Module Magic Number: 20050127:14
Server loaded: APR 0.9.19, APR-UTIL 0.9.19
Compiled using: APR 0.9.19, APR-UTIL 0.9.19
Architecture: 32-bit
Server compiled with….
-D APACHE_MPM_DIR="server/mpm/prefork"
-D APR_HAS_SENDFILE
-D APR_HAS_MMAP
-D APR_HAVE_IPV6 (IPv4-mapped addresses enabled)
-D APR_USE_FLOCK_SERIALIZE
-D APR_USE_PTHREAD_SERIALIZE
-D SINGLE_LISTEN_UNSERIALIZED_ACCEPT
-D APR_HAS_OTHER_CHILD
-D AP_HAVE_RELIABLE_PIPED_LOGS
-D HTTPD_ROOT="/usr/local"
-D SUEXEC_BIN="/usr/local/bin/suexec"
-D DEFAULT_PIDLOG="/var/run/httpd.pid"
-D DEFAULT_SCOREBOARD="logs/apache_runtime_status"
-D DEFAULT_LOCKFILE="/var/run/accept.lock"
-D DEFAULT_ERRORLOG="logs/error_log"
-D AP_TYPES_CONFIG_FILE="etc/apache2/mime.types"
-D SERVER_CONFIG_FILE="etc/apache2/httpd.conf"
PHP 5.3.5 with Suhosin-Patch (cli) (built: Mar 14 2011 00:29:17)
Copyright (c) 1997-2009 The PHP Group
Zend Engine v2.3.0, Copyright (c) 1998-2010 Zend Technologies
with eAccelerator v0.9.6.1, Copyright (c) 2004-2010 eAccelerator, by eAccelerator

After a bunch of research a FreeBSD forums thread , I've found the fix suggested by a guy.

The solution suggested in the forum is to raise up vm.pmap.pv_entry_ma to vm.pmap.pv_entry_max=1743504, however I've noticed this value is read only and cannot be changed on the BSD running kernel;

freebsd# sysctl vm.pmap.pv_entry_max=1743504
sysctl: oid 'vm.pmap.pv_entry_max' is read only

Instead to solve the;

Approaching the limit on PV entries, consider increasing either the vm.pmap.shpgperproc or the vm.pmap.pv_entry_max tunable.
, I had to add in /boot/loader.conf

vm.pmap.pde.mappings=68
vm.pmap.shpgperproc=500
vm.pmap.pv_entry_max=1743504

Adding this values through /boot/loader.conf set them on kernel boot time. I've seen also in the threads the consider increasing either the vm.pmap.shpgperproc is also encountered on FreeBSD hosts running Squid, Dansguardion and other web proxy softwares on busy hosts.

This problems are not likely to happen for people who are running latest FreeBSD releases (>8.3, 9.x), I've read in same above post in newer BSD kernels the vm.pmap is no longer existing in newer kernels.

How to stop / start services in boot time and install / remove / update SuSE SLES (Suse Enterprise Linux Server)?

Friday, February 6th, 2015

Suse-Logo-stop-start-services-on-linux-boot-time-howto-chkconfig
If you're long time Linux sysadmin but you haven't need to adminster SuSE Linux still and your company buys other business / company which already owns some SuSE servers and you need to deal with them, even though you're just starting up with SuSE Linux but you had already plenty of experience with other Linux distributions Fedora / RHEL / CentOS, don't worry set up / stop / start a service (daemon) to boot on Linux boot time is just the same as any other Redhat (RPM) Linux based distributions. it is done by multiple shell scripts located in /etc/init.d directory which can be manually stopped start by issuing the script with an argument e.g
 

suse:/etc/init.d# cd /etc/init.d/
suse:/etc/init.d# ./snmpd 
Usage: ./snmpd {start|stop|try-restart|restart|force-reload|reload|status}


To configure how each of the /etc/init.d/ existent service boots you can the use good old /sbin/chkconfig (a script written in perl) – which you already know from Fedora / CentOS and other RPM distros.

1. Get a list of all enabled on boot SuSE Linux services

To get a list of all set up to run on boot SuSE server services with chkconfig:


suse:/etc/init.d# /sbin/chkfong –list 

Makefile                  0:off  1:off  2:off  3:off  4:off  5:off  6:off
OVCtrl                    0:off  1:off  2:off  3:on   4:on   5:on   6:off
SuSEfirewall2_init        0:off  1:off  2:off  3:off  4:off  5:off  6:off
SuSEfirewall2_setup       0:off  1:off  2:off  3:off  4:off  5:off  6:off
Tivoli_lcfd1              0:off  1:off  2:on   3:on   4:off  5:on   6:off
Tivoli_lcfd1.bkp          0:off  1:off  2:off  3:off  4:off  5:off  6:off
aaeventd                  0:off  1:off  2:off  3:off  4:off  5:off  6:off
acpid                     0:off  1:off  2:on   3:on   4:off  5:on   6:off
alsasound                 0:off  1:off  2:on   3:on   4:off  5:on   6:off
apache2-eis               0:off  1:off  2:off  3:off  4:off  5:off  6:off
atd                       0:off  1:off  2:off  3:off  4:off  5:off  6:off
auditd                    0:off  1:off  2:off  3:on   4:off  5:on   6:off
autofs                    0:off  1:off  2:off  3:off  4:off  5:off  6:off
autoyast                  0:off  1:off  2:off  3:off  4:off  5:off  6:off
boot.apparmor             0:off  1:off  2:on   3:on   4:off  5:on   6:off  B:on
cron                      0:off  1:off  2:on   3:on   4:off  5:on   6:off
dbus                      0:off  1:off  2:off  3:on   4:off  5:on   6:off
earlykbd                  0:off  1:off  2:off  3:off  4:off  5:on   6:off
earlysyslog               0:off  1:off  2:off  3:off  4:off  5:on   6:off
esound                    0:off  1:off  2:off  3:off  4:off  5:off  6:off
evms                      0:off  1:off  2:off  3:off  4:off  5:off  6:off
fbset                     0:off  1:on   2:on   3:on   4:off  5:on   6:off
firstboot                 0:off  1:off  2:off  3:off  4:off  5:off  6:off
fixperms                  0:off  1:off  2:off  3:off  4:off  5:off  6:off
gpm                       0:off  1:off  2:off  3:off  4:off  5:off  6:off
gssd                      0:off  1:off  2:off  3:off  4:off  5:off  6:off
gwproxy                   0:off  1:off  2:on   3:on   4:off  5:on   6:off
haldaemon                 0:off  1:off  2:off  3:on   4:off  5:on   6:off
hp-health                 0:off  1:off  2:on   3:on   4:on   5:on   6:off
hp-ilo                    0:off  1:off  2:off  3:on   4:off  5:on   6:off
hp-snmp-agents            0:off  1:off  2:on   3:on   4:on   5:on   6:off
hpsmhd                    0:off  1:off  2:off  3:on   4:on   5:on   6:off
idmapd                    0:off  1:off  2:off  3:off  4:off  5:off  6:off
ipmi                      0:off  1:off  2:off  3:off  4:off  5:off  6:off
ipmi.hp                   0:off  1:off  2:off  3:off  4:off  5:off  6:off
irq_balancer              0:off  1:on   2:on   3:on   4:off  5:on   6:off
itcaIBMTivoliCommonAgent0  0:off  1:off  2:on   3:on   4:off  5:on   6:off
jboss                     0:off  1:off  2:off  3:off  4:off  5:off  6:off
joystick                  0:off  1:off  2:off  3:off  4:off  5:off  6:off
kadmind                   0:off  1:off  2:off  3:off  4:off  5:off  6:off
kbd                       0:off  1:on   2:on   3:on   4:off  5:on   6:off  S:on
kdump                     0:off  1:off  2:off  3:off  4:off  5:off  6:off
kpropd                    0:off  1:off  2:off  3:off  4:off  5:off  6:off
krb524d                   0:off  1:off  2:off  3:off  4:off  5:off  6:off
krb5kdc                   0:off  1:off  2:off  3:off  4:off  5:off  6:off
ldap                      0:off  1:off  2:off  3:on   4:off  5:on   6:off
lm_sensors                0:off  1:off  2:off  3:off  4:off  5:off  6:off
lw_agt                    0:off  1:off  2:off  3:off  4:off  5:off  6:off
mdadmd                    0:off  1:off  2:off  3:off  4:off  5:off  6:off
microcode                 0:off  1:on   2:on   3:on   4:off  5:on   6:off  S:on
multipathd                0:off  1:off  2:off  3:off  4:off  5:off  6:off
mysql                     0:off  1:off  2:off  3:off  4:off  5:off  6:off
network                   0:off  1:off  2:on   3:on   4:off  5:on   6:off
nfs                       0:off  1:off  2:off  3:on   4:off  5:on   6:off
nfsboot                   0:off  1:off  2:off  3:on   4:off  5:on   6:off
nfsserver                 0:off  1:off  2:off  3:off  4:off  5:off  6:off
nohup.out                 0:off  1:off  2:off  3:off  4:off  5:off  6:off
novell-zmd                0:off  1:off  2:off  3:off  4:off  5:off  6:off
nscd                      0:off  1:off  2:off  3:on   4:off  5:on   6:off
ntp                       0:off  1:off  2:on   3:on   4:off  5:on   6:off
openct                    0:off  1:off  2:off  3:off  4:off  5:off  6:off
opsware-agent             0:off  1:off  2:off  3:on   4:on   5:on   6:off
osddownt                  0:off  1:off  2:off  3:on   4:on   5:on   6:off
ovpa                      0:on   1:off  2:on   3:on   4:off  5:on   6:off
pcscd                     0:off  1:off  2:off  3:off  4:off  5:off  6:off
pctl                      0:off  1:off  2:on   3:on   4:off  5:on   6:off
portmap                   0:off  1:off  2:off  3:on   4:off  5:on   6:off
postfix                   0:off  1:off  2:off  3:on   4:off  5:on   6:off
powerd                    0:off  1:off  2:off  3:off  4:off  5:off  6:off
powersaved                0:off  1:off  2:off  3:off  4:off  5:off  6:off
random                    0:off  1:off  2:on   3:on   4:off  5:on   6:off
raw                       0:off  1:off  2:off  3:off  4:off  5:off  6:off
resmgr                    0:off  1:off  2:on   3:on   4:off  5:on   6:off
rpasswdd                  0:off  1:off  2:off  3:off  4:off  5:off  6:off
rpmconfigcheck            0:off  1:off  2:off  3:off  4:off  5:off  6:off
rrdtools                  0:off  1:off  2:off  3:on   4:off  5:on   6:off
rsyncd                    0:off  1:off  2:off  3:off  4:off  5:off  6:off
saslauthd                 0:off  1:off  2:off  3:off  4:off  5:off  6:off
skeleton.compat           0:off  1:off  2:off  3:off  4:off  5:off  6:off
slurpd                    0:off  1:off  2:off  3:off  4:off  5:off  6:off
smartd                    0:off  1:off  2:off  3:off  4:off  5:off  6:off
smpppd                    0:off  1:off  2:off  3:off  4:off  5:off  6:off
snmpd                     0:off  1:off  2:on   3:on   4:off  5:on   6:off
splash                    0:off  1:on   2:on   3:on   4:off  5:on   6:off  S:on
splash_early              0:off  1:off  2:on   3:on   4:off  5:on   6:off
sshd                      0:off  1:off  2:off  3:on   4:off  5:on   6:off
suseRegister              0:off  1:off  2:off  3:off  4:off  5:off  6:off
svcgssd                   0:off  1:off  2:off  3:off  4:off  5:off  6:off
syslog                    0:off  1:off  2:on   3:on   4:off  5:on   6:off
sysstat                   0:off  1:off  2:off  3:off  4:off  5:off  6:off
tecad_logfile             0:off  1:off  2:off  3:on   4:off  5:on   6:off
tomcat55                  0:off  1:off  2:off  3:off  4:off  5:off  6:off
tomcat_eis                0:off  1:off  2:off  3:off  4:off  5:off  6:off
tpmgwproxy.sh             0:off  1:off  2:on   3:on   4:off  5:on   6:off
uc4_smgrp                 0:off  1:off  2:off  3:on   4:off  5:on   6:off
uc4_smgrq1                0:off  1:off  2:off  3:on   4:off  5:on   6:off
xbis-ldap-tool            0:off  1:off  2:off  3:off  4:off  5:off  6:off
xdm                       0:off  1:off  2:off  3:off  4:off  5:on   6:off
xfs                       0:off  1:off  2:off  3:off  4:off  5:off  6:off
xinetd                    0:off  1:off  2:off  3:off  4:off  5:off  6:off
ypbind                    0:off  1:off  2:off  3:off  4:off  5:off  6:off
xinetd based services:
        chargen:            off
        chargen-udp:        off
        daytime:            off
        daytime-udp:        off
        echo:               off
        echo-udp:           off
        netstat:            off
        rsync:              off
        servers:            off
        services:           off
        systat:             off
        time:               off
        time-udp:           off


2. Stop / Disable a service in all Linux boot runlevels or in a concrete one

As you should know already in Linux there are multiple runlevels in which server can boot, under normal circumstances SuSE servers (as of time of writting) this article boots into runlevel 3, if you'r'e  unsure about the runlevel you can check it with runlevel command:
 

 suse:/etc/init.d# /sbin/runlevel
N 3

To stop a service on all possible boot runlevels – 1,2,3,4,5
 

suse:/etc/init.d# /sbin/chkconfig xinetd off


If you want to stop xinetd or any other service just for certain runlevels (lets say run-level 3,4,5):
 

suse:/etc/init.d# chkconfig –level 345 xinetd off


3. Start / Enable a service for a runlevel or all boot levels 1,2,3,4,5

To disable boot.apparmor on all boot runlevels –  kernel enhancement that enabled to set a limited set of resources for services (good for tightened security, but often creating issues with some external server configured services).
 

suse:/etc/init.d# chkconfig boot.apparmor off


Or for single boot modes again with –level option:
 

suse:/etc/init.d# chkconfig –level 345 boot.apparmor off


suse:/etc/init.d# chkconfig xfs off 


4. SuSE Linux Package management zypper console tool

If you need / wonder how to install /remove / update a service on a SuSE Linux server, take a look at zypper tool.
zypper is  a  command-line  interface to ZYPP system management library.

To install a package / service with zypper the syntax is very much like yum, for example:
 

suse: ~# zypper install vim -emacs


will remove emacs editor and install Vi Improved

The equivalent of yum -y  Fedora command in SuSE Enterprise Linux is –non-interactive option


suse:~# zypper –non-interactive install


In SuSE it is pretty annoying when you're asked for accepting licensing on some proprietary (external vendor) non-free software packages to get around this:
 

suse:~# zypper patch –auto-agree-with-licenses


To keep the SuSE server up2date – i.e. SLES equivalent of CentOS's yum update && yum upgrade


suse:~# zypper list-patches
Loading repository data…
Reading installed packages…
 
Repository                          | Name      | Version | Category | Status
————————————+———–+———+———-+——-
Updates for openSUSE 11.3 11.3-1.82 | lxsession | 2776    | security | needed


suse:~# zypper patch-check
Loading repository data…
Reading installed packages…
5 patches needed (1 security patch)


To look for a certain package with Zypper (equivalent of yum search packagename)

suse: ~# zypper search apache


To verify whether an RPM installed package dependecies are OK:
 

suse:~# zypper verify


The equivalent of Fedora yum update command in SuSE (SLES) are:

suse:~# zypper refresh


To force a complete refresh and rebuild of the database, including a forced download of raw metadata.
 

suse:~# zypper refresh -fdb


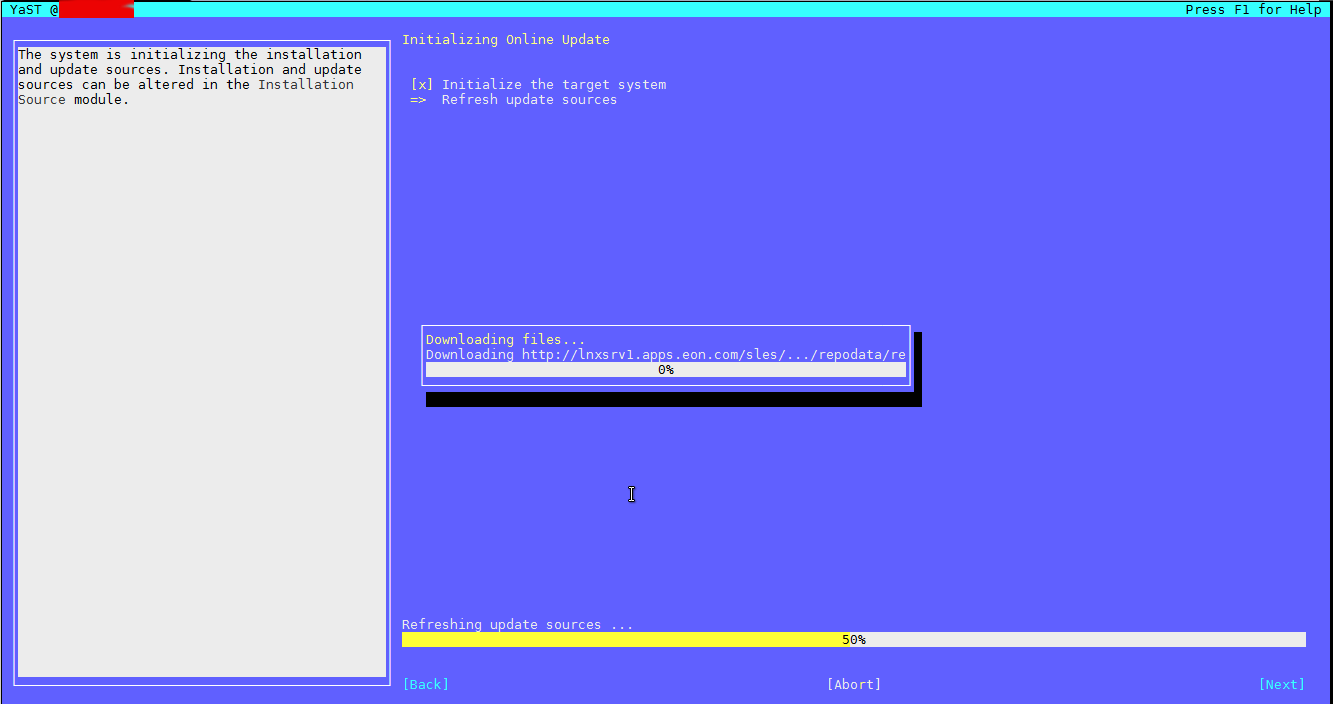
For people that are used to ncurses (midnight commander) like text interface you can also use yoast2 (text GUI) package manager:
 

suse:~# yoast2


update-linux-suse-server-with-yoast2-ncurses-package-text-gui-management-tool

If a package is messed you can always go back and use good old RPM (Redhat Package Manager) to solve it.


Set ISP provider default DNS to overwrite DHCP settings on Debian / Ubuntu Linux

Monday, February 11th, 2013

dhcp linux ovewrite dns settings from console and terminal Debian Ubuntu Fedora CentOS Linux
 

These days, almost every home wireless ISP network router, ADSL modem etc. has its own local running DNS service. Generally this is very good as it puts off the burden of  Internet Service Provider DNS servers and "saves" multitude of users from so common overloads with ISP DNS Servers – caused by ISP DNS Service unable to handle the incoming user DNS (Domain resolve) traffic. Common scenario, where ISP DNS servers is unable to handle DNS traffic is when few thousands of users belonging to ISP gets infected with a Worm, Trojan horse or Virus doing plenty of DNS Spoofs and distributed DDoS attacks.

Though local DNS service (daemons) on local Cable and Wireless Network Routers is something designed to be good it becomes another bottleneck for DNS resolve problems, Calling the ISP tech support for help is often loose of time, as  in ISPs it is so rare to find someone understanding Linux Networking.

The periodic issues with DNS resolving from home routers in my observations has 3 main reasons;

  • Local Cheap network Wireless routers with slow hardware (CPU) and little memory are unable to handle DNS requests, because of torrent Downloads
     
  • DNS Wireless Router can't handle DNS requests to its DNS local service, because a small local network of computers with a landline and wireless (lets say 5 to 10) is trying to access the Internet (browsing) – again due to its low hardware paremeters router CPU heats up cause of multitude of DNS requests


  • Something is wrong with general network topology of PCs behind the router. Often people buy a router and use it shared with their neighbors – tampering with Router settings messing it up.

DNS resolving problems are even harder to track whether Internet provider has policy to deliver Internet via automated IP assignment protocol (DHCP),

A very common scenario, I've seen is Internet coming via ISP ADSL / Network router installed at home and mis-configured due to a custom user installation,   or because of ISP technician who installed router in hurry or lacked good competency and messed up with Router Network configuration.

During the years I had to install various Linux distributions for Desktop use in networks located behind such mis-configured Network Hubs. Because of this mis-configured DNS, even though Linux hosts succesfully graps the IP addresses for host IP, Gateway and DNS, they occasionally create problems with Internet Connection leaving the user with impression that Linux is not ready for Desktop use or somehow it is the the Linux distro fault.

After giving an introduction I will continue further to exact problem I've faced with one such mis-configured just today. The same issue has happened in my sysadmin practice over and over again so many times. So finally I decided to write this small story explaining the whole scenario, its causes and fix.

I'm writing this little post from another Linux installation like this which is living on a small local network served by a Vivacom ISP through ADSL Commtrend SmartAX MT882 Router.

The Commtrend does NAT (Network Address Translation)-ting for whole local network, auto-assigning some DNS server to Natted IP PCs local Network addresses in IP raneg; (172.16.0.0-255). The DNS the router assigns for internet is with IP (172.16.0.1), where in reality the DNS on the router is run on Network interface with IP 1921.68.1.1, in other words belonging to the router from another network. Thus PCs connected via a UTP land-line cable connection does not see 192.168.1.1 – meaning Domain name resolving works not at all.
The solution is to assign a static IP address for DNS of Google Public DNS or Open DNS, while leaving the Linux host to automatically assign LAN IP and Gateway using DHCP – (Dynamic Host Configuration Protocol).

By default most Linux distributions use DNS configured in /etc/resolv.conf as a host DNS servers, however as CommTrend Network Router does provide settings for DNS Servers to be used for resolving along with other settings on each Linux host boot settings from /etc/resolv.conf gets ovewritted with the unreachable (from 172.16.0.255), nameserver 192.168.1.1.

Thus to work-around this on most all Linux distributions you can set /etc/resolv.conf to be overwritten adding a line to /etc/rc.local script (before its last line – exit 0);

echo 'nameserver 8.8.8.8' > /etc/resolv.conf
echo 'nameserver 8.8.4.4' >> /etc/resolv.conf

This method is universal, but the problem with it arises, if on the Linux host is planned to run 24 hours a day. DHCP Servers on router has configured DHCP Expiry lease time, which is different on different routers but usually few hours i.e. (4 hrs). Thus in 4 hours, due to DHCP Lease expiry the Linux host will question the DHCP Server for IP, getting together with DHCP IP and Gateway Settings also a DNS IP (overwritting again /etc/resolv.conf – with local running ISP Router IP – 192.168.1.1). One stupid solution of course is to use good old Windows philosophy (reboot it and it will work).

Other little more intelligent but not very efficient solution to problem is to set a cronjob, to run every 1 minute and overwrite /etc/resolv.conf DNS setting.

# crontab -u root -e

*/1 * * * * echo -e 'nameserver 8.8.8.8\nnameserver 8.8.4.4' > /etc/resolv.conf >/dev/null 2>&1

Since the cronjob to overwrite DNS IPs runs every one minute it is possible the host ends up without internet from few secs to 1 minute, this might happen quite rare so for a desktop this is ok. Other inconvenience is it puts a tiny load on system every 1 minute.

Final and best solution is to configure DNS server from /etc/dhcp/dhclient.conf  for Ethernet Interface eth0. Inside /etc/dhcp/dhclient.conf for eth0 make sure you have:

# vi /etc/dhcp/dhclient.conf

interface "eth0" {
prepend domain-name-servers 8.8.8.8;
prepend domain-name-servers 8.8.4.4;
prepend domain-name-servers 208.67.222.222;
prepend domain-name-servers 208.67.220.220;
}

How to disable ACPI (power saving) support in FreeBSD / Disable acpi on BSD kernel boot time

Tuesday, May 15th, 2012

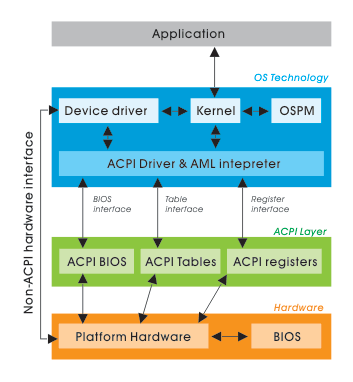
FreeBSD disable ACPI how ACPI Basic works basic diagram

On FreeBSD the default kernel is compiled to support ACPI. Most of the modern PCs has already embedded support for ACPI power saving instructions.
Therefore a default installed FreeBSD is trying to take advantage of this at cases and is trying to save energy.
This is not too useful on servers, because saving energy could have at times a bad impact on server performance if the server is heavy loaded at times and not so loaded at other times of the day.

Besides that on servers saving energy shouldn't be the main motivator but server stability and productivity is. Therefore in my personal view on FreeBSD used on servers it is better to disable complete the ACPI in order to disable CPU fan control to change rotation speeds all the time from low to high rotation cycles and vice versa at times of low / high server load.

Another benefit of removing the ACPI support on a server is this would probably increase the CPU fan life span and possibly prevent the CPU to be severely heated at times.

Moreover, some piece of hardware might have troubles in properly supporting ACPI specifications and thus ACPI could be a reason for unexpected machine hang ups.

With all said I would recommend to anyone willing to use BSD for a server to disable the ACPI (Advanced Configuration and Power Interface), just like I did.

Here is how;

1. Quick review on how ACPI is handled on FreeBSD

acpi support is being handled on FreeBSD by a number of loadable kernel modules, here is a complete list of all the kernel modules dealins with acpi:

freebsd# cd /boot
freebsd# find . -iname '*acpi*.ko'
./kernel/acpi.ko
./kernel/acpi_aiboost.ko
./kernel/acpi_asus.ko
./kernel/acpi_fujitsu.ko
./kernel/acpi_ibm.ko
./kernel/acpi_panasonic.ko
./kernel/acpi_sony.ko
./kernel/acpi_toshiba.ko
./kernel/acpi_video.ko
./kernel/acpi_dock.ko

By default on FreeBSD, if hardware has some support for ACPI the acpi gets activated by acpi.ko kernel module. The specific type of vendors specific ACPI like IBM, ASUS, Fujitsu are controlled by the respective kernel module from the list …

Hence, to control if ACPI is loaded or not on a FreeBSD system with no need to reboot one can use kldload, kldunload module management BSD cmds.

a) Check if acpi is loaded on a BSD

freebsd# kldstatkldstat | grep -i acpi
9 1 0xc9260000 57000 acpi.ko

b) unload kernel enabled ACPI support

freebsd# kldunload acpi

c) Load acpi support (not the case with me but someone might need it, if for instance BSD is running on laptop)

freebsd# kldload acpi

2. Disabling ACPI to load on bootup on BSD

a) In /boot/loader.conf add the following variables:

hint.acpi.0.disabled="1"
hint.p4tcc.0.disabled=1
hint.acpi_throttle.0.disabled=1


b) in /boot/device.hints add:

hint.acpi.0.disabled="1"

c) in /boot/defaults/loader.conf make sure:

##############################################################
### ACPI settings ##########################################
##############################################################
acpi_dsdt_load="NO" # DSDT Overriding
acpi_dsdt_type="acpi_dsdt" # Don't change this
acpi_dsdt_name="/boot/acpi_dsdt.aml"
# Override DSDT in BIOS by this file
acpi_video_load="NO" # Load the ACPI video extension driver

d) disable ACPI thermal monitoring

It is generally a good idea to disable the ACPI thermal monitoring, as many machines hardware does not support it.

To do so in /boot/loader.conf add

debug.acpi.disabled="thermal"

If you want to learn more on on how ACPI is being handled on BDSs check out:

freebsd# man acpi

Other alternative method to permanently wipe out ACPI support is by not compiling ACPI support in the kernel.
If that's the case in /usr/obj/usr/src/sys/GENERIC make sure device acpi is commented, e.g.:

##device acpi


How to install and configure NTP Server (ntpd) to synchronize Linux server clock over the Internet on CentOS, RHEL, Fedora

Thursday, February 9th, 2012

Every now and then I have to work on servers running CentOS or Fedora Linux. Very typical problem that I observe on many servers which I have to inherit is the previous administrator did not know about the existence of NTP (Network Time Protocol) or forgot to install the ntpd server. As a consequence the many installed server services did not have a correct clock and at some specific cases this caused issues for web applications running on the server or any CMS installed etc.

The NTP Daemon is existing in GNU / linux since the early days of Linux and it served quite well so far. The NTP protocol has been used since the early days of the internet and for centuries is a standard protocol for BSD UNIX.

ntp is available in I believe all Linux distributions directly as a precompiled binary and can be installed on Fedora, CentOS with:

[root@centos ~]# yum install ntp

ntpd synchronizes the server clock with one of the /etc/ntp.conf defined RedHat NTP list

server 0.rhel.pool.ntp.org
server 1.rhel.pool.ntp.org
server 2.rhel.pool.ntp.org

To Synchronize manually the server system clock the ntp CentOS rpm package contains a tool called ntpdate :
Hence its a good practice to use ntpdate to synchronize the local server time with a internet server, the way I prefer to do this is via a government owned ntp server time.nist.gov, e.g.

[root@centos ~]# ntpdate time.nist.gov
8 Feb 14:21:03 ntpdate[9855]: adjust time server 192.43.244.18 offset -0.003770 sec

Alternatively if you prefer to use one of the redhat servers use:

[root@centos ~]# ntpdate 0.rhel.pool.ntp.org
8 Feb 14:20:41 ntpdate[9841]: adjust time server 72.26.198.240 offset 0.005671 sec

Now as the system time is set to a correct time via the ntp server, the ntp server is to be launched:

[root@centos ~]# /etc/init.d/ntpd start
...

To permanently enable the ntpd service to start up in boot time issue also:

[root@centos ~]# chkconfig ntpd on

Using chkconfig and /etc/init.d/ntpd cmds, makes the ntp server to run permanently via the ntpd daemon:

[root@centos ~]# ps ax |grep -i ntp
29861 ? SLs 0:00 ntpd -u ntp:ntp -p /var/run/ntpd.pid -g

If you prefer to synchronize periodically the system clock instead of running permanently a network server listening (for increased security), you should omit the above chkconfig ntpd on and /etc/init.d/ntpd start commands and instead set in root crontab the time to get synchronize lets say every 30 minutes, like so:

[root@centos ~]# echo '30 * * * * root /sbin/ntpd -q -u ntp:ntp' > /etc/cron.d/ntpd

The time synchronization via crontab can be also done using the ntpdate cmd. For example if you want to synchronize the server system clock with a network server every 5 minutes:

[root@centos ~]# crontab -u root -e

And paste inside:

*/5 * * * * /sbin/ntpdate time.nist.gov 2>1 > /dev/null

ntp package is equipped with ntpq Standard NTP Query Program. To get very basic stats for the running ntpd daemon use:

[root@centos ~]# ntpq -p
remote refid st t when poll reach delay offset jitter
======================================================
B1-66ER.matrix. 192.43.244.18 2 u 47 64 17 149.280 41.455 11.297
*ponderosa.piney 209.51.161.238 2 u 27 64 37 126.933 32.149 8.382
www2.bitvector. 132.163.4.103 2 u 1 64 37 202.433 12.994 13.999
LOCAL(0) .LOCL. 10 l 24 64 37 0.000 0.000 0.001

The remote field shows the servers to which currently the ntpd service is connected. This IPs are the servers which ntp uses to synchronize the local system server clock. when field shows when last the system was synchronized by the remote time server and the rest is statistical info about connection quality etc.

If the ntp server is to be run in daemon mode (ntpd to be running in the background). Its a good idea to allow ntp connections from the local network and filter incoming connections to port num 123 in /etc/sysconfig/iptables :

-A INPUT -s 192.168.1.0/24 -m state --state NEW -p udp --dport 123 -j ACCEPT
-A INPUT -s 127.0.0.1 -m state --state NEW -p udp --dport 123 -j ACCEPT
-A INPUT -s 0.0.0.0 -m state --state NEW -p udp --dport 123 -j DROP

Restrictions on which IPs can be connected to the ntp server can also be implied on a ntpd level through /etc/ntp.conf. For example if you would like to add the local network IPs range 192.168.0.1/24 to access ntpd, in ntpd.conf should be added policy:

# Hosts on local network are less restricted.
restrict 192.168.0.1 mask 255.255.255.0 nomodify notrap

To deny all access to any machine to the ntpd server add in /etc/ntp.conf:

restrict default ignore

After making any changes to ntp.conf , a server restart is required to load the new config settings, e.g.:

[root@centos ~]# /sbin/service ntpd restart

In most cases I think it is better to imply restrictions on a iptables (firewall) level instead of bothering change the default ntp.conf

Once ntpd is running as daemon, the server listens for UDP connections on udp port 123, to see it use:

[root@centos ~]# netstat -tulpn|grep -i ntp
udp 0 0 10.10.10.123:123 0.0.0.0:* 29861/ntpd
udp 0 0 80.95.28.179:123 0.0.0.0:* 29861/ntpd
udp 0 0 127.0.0.1:123 0.0.0.0:* 29861/ntpd
udp 0 0 0.0.0.0:123 0.0.0.0:* 29861/ntpd


How to enable AUTO fsck (ext3, ext4, reiserfs, LVM filesystems) checking on Linux boot through /etc/fstab

Tuesday, July 12th, 2011

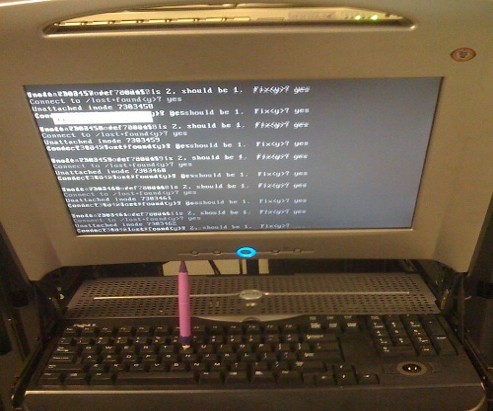
How to auto FSCK manual fsck screenshot

Are you an administrator of servers and it happens a server is DOWN.
You request the Data Center to reboot, however suddenly the server fails to boot properly and you have to request for IPKVM or some web java interface to directly access the server physical terminal …

This is a very normal admin scenario and many people who have worked in the field of remote system administrators (like me), should have experienced that bad times multiple times.

Sadly enough only a insignifant number of administrators try to do their best to reduce this down times to resolve client stuff downtime but prefer spending time playing the ztype! game or watching some porn website 😉

Anyways there are plenty of things like Server Auto Reboot on Crash with software Watchdog etc., that we as sysadmins can do to reduce server downtimes and most of the manual human interactions on server boot time.

In that manner of thougts a very common thing when setting up a new Linux server that many server admins forget or don’t know is to enable all the server partition filesystems to be auto fscked during server boot time.

By not enabling the auto filesystem check options in Linux the server filesystems did not automatically scan and fix hard drive partitions for fs innode inconsistencies.
Even though the filesystems are tuned to automatically get checked on every 38 system reboots, still if some kind of filesystem errors are found that require a manual confirmation the boot process is interrupted and the admin ends up with a server which is not reachable remotely via ssh !

For the remote system administrator, this times are a terrible times of waitings, prayers and hopes that the server hardware is fine 😉 as well as being on hold to get a KVM to get into the server manually and enter the necessery input to fsck prompt.

Many of this bad times can be completely avoided with a very simple fix through /etc/fstab by enabling all server partitions containing any filesystem to be automatically checked and fixed in case if inconsistencies or errors are found by fsck.ext3, fsck.ext4, fsck.reiserfs etc. commands.

A very typical default /etc/fstab file you will find on many servers should look something like:

/dev/sda8 / ext3 errors=remount-ro 0 1
tmpfs /dev/shm tmpfs defaults 0 0
devpts /dev/pts devpts gid=5,mode=620 0 0
sysfs /sys sysfs defaults 0 0
proc /proc proc defaults 0 0
/dev/sda1 /home ext3 defaults 0 0

Notice the line:
/dev/sda1 /home ext3 defaults 0 0

The first column in the example contains the device name, the second one its mount point, third its filesystem type, fourth the mount options, fifth (a number) dump options, and sixth (another number) filesystem check options. Let’s take a closer look at this stuff.

The ones which are interesting to enable auto fsck checking and error resolving is provided usually by the last sixth variable (filesystem check option) which in the above example equals 0 .

When the filesystem check option equals 0 this means the auto fsck and repair for the respective filesystem is disabled.
Some time in the past the dump backup option (5th option in the example) was also used but as far as I can understand today it’s not that important in modern GNU/Linux distributions.

Now having the above sample crontab in order to enable the fsck file checking on Linux boot for /dev/sda1 , we will need to modify the above line’s filesystem check option be 2, e.g. the line would afterwards look like:

/dev/sda1 /home ext3 defaults 0 2

Setting the 2 as an option for filesystem check is necessery for every filesystem which is not mounted as a root filesystem /

In above example /etc/fstab you already see that auto filesystem fsck is enabled for root partition:

/dev/sda8 / ext3 errors=remount-ro 0 1
(notice the 1 in the end of the line)

Finally a modified version of the default sample /etc/fstab which will check the extra /dev/sda1 /home partition would look like so:

/dev/sda8 / ext3 errors=remount-ro 0 1
tmpfs /dev/shm tmpfs defaults 0 0
devpts /dev/pts devpts gid=5,mode=620 0 0
sysfs /sys sysfs defaults 0 0
proc /proc proc defaults 0 0
/dev/sda1 /home ext3 defaults 0 2

Making sure all Linux server partitions has the auto filesystem check option enabled is something absoultely necessery!
Enabling the auto fsck on servers always makes me sleep calmer 😉
Hope it helps your too. 🙂