Archive for January, 2020

Fix eth changing network interface names from new Linux naming scheme ens, eno, em1 to legacy eth0, eth1, eth2 on CentOS Linux

Thursday, January 16th, 2020

Change-systemd-Linux-servers-network-interface-name-ensxx-to-eth0-copy

On CentOS / RHEL 7 / Fedora 19+ and other Linux distributions, the default network eth0, eth1 .. interface naming scheme has been changed and in newer Linux kernels OS-es to names such as – ens3 , eno1, enp5s2, em1 etc.,  well known old scheme for eth* is now considered a legacy.
This new Network card naming in Linux OS is due to changes made in Kernel / modules and udev  rules which resembles how Ethernet ifaces are named on other UNIX like systems.
The weird name is taken depending on the Hardware Network card vendor name and is a standard for years in FreeBSD and Mac OSX, however this was not so over the years,
so for old school sysadmins that's pretty annoying as, we're much used to the eth0 / eth1 / eth2 / eth3 naming standard which brought some clearness on the network card naming.

Also for systems which are upgraded from old Linux OS distro releases to a newer ones, that includes this great new "cool" feature, that fits so well the New age-of computing Cloud craziness.
That behaviour could create a number of problems, especially if the already Production working servers due to failure to bring up some of the network devices after the upgrade or, even if you fix that by editting the /etc/network* / etc/sysconfig/networking/* by hand still there is even more stuff that won't work properly, such as any custom made iptables / ipset firewalls rules, or any kind of custom used third party Shell / Perl scripts that depend on the old-school conventional and (convenient easy to remember!!!) eth0, eth2 etc. naming


For sysadmins who are using some kind of Application Clustering with something like corosync / pacemaker this new fuzzy improvement makes things even worse as having a changed interface name of the card will break the cluster …


1. Get list of the LAN Card Server hardware


To get a better view on the server installed and recognized LAN Cards use lspci / dmidecode commands:

 lspci |grep -i Ether -A1 -B1
01:00.4 USB controller: Hewlett-Packard Company Integrated Lights-Out Standard Virtual USB Controller (r                                                                                                           ev 03)
02:00.0 Ethernet controller: Broadcom Inc. and subsidiaries NetXtreme BCM5719 Gigabit Ethernet PCIe (rev                                                                                                            01)
02:00.1 Ethernet controller: Broadcom Inc. and subsidiaries NetXtreme BCM5719 Gigabit Ethernet PCIe (rev                                                                                                            01)
02:00.2 Ethernet controller: Broadcom Inc. and subsidiaries NetXtreme BCM5719 Gigabit Ethernet PCIe (rev                                                                                                            01)
02:00.3 Ethernet controller: Broadcom Inc. and subsidiaries NetXtreme BCM5719 Gigabit Ethernet PCIe (rev                                                                                                            01)
03:00.0 RAID bus controller: Hewlett-Packard Company Smart Array Gen9 Controllers (rev 01)
05:00.0 Ethernet controller: Broadcom Inc. and subsidiaries NetXtreme BCM5719 Gigabit Ethernet PCIe (rev                                                                                                            01)
05:00.1 Ethernet controller: Broadcom Inc. and subsidiaries NetXtreme BCM5719 Gigabit Ethernet PCIe (rev                                                                                                            01)
05:00.2 Ethernet controller: Broadcom Inc. and subsidiaries NetXtreme BCM5719 Gigabit Ethernet PCIe (rev                                                                                                            01)
05:00.3 Ethernet controller: Broadcom Inc. and subsidiaries NetXtreme BCM5719 Gigabit Ethernet PCIe (rev                                                                                                            01)
7f:08.0 System peripheral: Intel Corporation Xeon E7 v3/Xeon E5 v3/Core i7 QPI Link 0 (rev 02)


lspci reports all attached LAN Cards to server which are plugged in on the Motherbord, since that specific server has a Motherboard integrated LAN Adapters too, we can see this one
via dmidecode.

# dmidecode |grep -i Ether -A 5 -B 5

Handle 0x00C5, DMI type 41, 11 bytes
Onboard Device
        Reference Designation: Embedded LOM 1 Port 3
        Type: Ethernet
        Status: Enabled
        Type Instance: 3
        Bus Address: 0000:XX:00.X

Handle 0x00C6, DMI type 41, 11 bytes
Onboard Device
        Reference Designation: Embedded LOM 1 Port 4
        Type: Ethernet
        Status: Enabled
        Type Instance: 4
        Bus Address: 0000:0X:00.X

Handle 0x00C7, DMI type 41, 11 bytes


       Strings:
                PciRoot(0x0)/Pci(0x2,0x0)/Pci(0x0,0x0)
                NIC.Slot.2.1
                HP Ethernet 1Gb 4-port 331T Adapter – NIC
                Slot 2

Handle 0x00E3, DMI type 203, 34 bytes
OEM-specific Type
        Header and Data:


The illustrate the eth0 changing name issue, here is example taken from server on how eth1 interface is named on a new CentOS install:
 

# ip addr show

…..
eno1: [BROADCAST,MULTICAST,UP,LOWER_UP] mtu 1500 qdisc pfifo_fast state UP qlen 1000
link/ether 6c:0b:84:6c:48:1c brd ff:ff:ff:ff:ff:ff
inet 10.10.9.5/24 brd 10.10.9.255 scope global eno1
inet6 2606:b400:c00:48:6e0b:84ff:fe6c:481c/128 scope global dynamic
valid_lft 2326384sec preferred_lft 339184sec
inet6 fe80::6e0b:84ff:fe6c:481c/64 scope link
valid_lft forever preferred_lft forever


2. Disable Network Manager on the server


To prevent potential problems for future with randomly changing Network card names order on reboots and other mess,
it is generally a good idea to disable Network Manager.


# systemctl disable NetworkManager
rm '/etc/systemd/system/multi-user.target.wants/NetworkManager.service'
rm '/etc/systemd/system/dbus-org.freedesktop.NetworkManager.service'
rm '/etc/systemd/system/dbus-org.freedesktop.nm-dispatcher.service'


3. Check and correct network configuration if necessery in  /etc/sysconfig/network-scripts/ifcfg-*


Either fix the naming across all files ifcfg-* to match eth0 / eth1 / ethXX or even better both change the NAME and DEVICE in files and completely rename the files ifcfg-eno1 to ifcfg-eth1 ..
ifcfg-enoXX to ifcfg-ethXX
 

server:~# cat /etc/sysconfig/network-scripts/ifcfg-eno1
……
NAME=eth0
DEVICE=eth0
……


4. Fix the interface scheme naming through passing a GRUB boot parameter to Kernel


a. Create backup of /etc/default/grub
 

cp -rpf /etc/default/grub /etc/default/grub_bak_date +"%Y_%m_%Y"


b. Edit /etc/default/grub

c. Find config parameter GRUB_CMDLINE_LINUX

d. Add net.ifnames=0 biosdevname=0 to the line


net.ifnames=0 biosdevname=0


After the change the line should look like

GRUB_CMDLINE_LINUX=" crashkernel=auto net.ifnames=0 biosdevname=0 rhgb quiet"


e. Regenerate GRUB loader to have included the new config

server:~# grub2-mkconfig -o /boot/grub2/grub.cfg

f. Reboot the sytem
 

server:~# shutdown -r now


5. Fix auto-generated inconvenient naming by modifying udev rules

The Mellanox Ehternet server card vendor's workaround to the ever changing eth names is modify udev rules to be able to have the ordinary eth0 / eth1 / eth2 … Lan card name scheme.
In short this is recommended for Mellanox but should work on any other Lan card device attached on a Linux powered server.
 

# cat /etc/sysconfig/network-scripts/ifcfg-eth1
DEVICE="eth1"
BOOTPROTO="static"
HWADDR="7c:fe:90:cb:76:02"
IPADDR=10.10.9.2
NETMASK=255.255.255.0
ONBOOT="yes"


# cat /etc/sysconfig/network-scripts/ifcfg-eth2
DEVICE="eth1"
BOOTPROTO="static"
HWADDR="7c:fe:90:cb:76:02"
IPADDR=10.10.99.99
NETMASK=255.255.255.0
ONBOOT="yes"


# vi /etc/udev/rules.d/70-persistent-net.rules

SUBSYSTEM=="net", ACTION=="add", DRIVERS=="?*", ATTR{address}=="7c:fe:90:cb:76:02", ATTR{dev_id}=="0x0", ATTR{type}=="1", KERNEL=="eth*", NAME="eth1"

SUBSYSTEM=="net", ACTION=="add", DRIVERS=="?*", ATTR{address}=="7c:fe:90:cb:76:03", ATTR{dev_id}=="0x0", ATTR{type}=="1", KERNEL=="eth*", NAME="eth2"


Next step is to reboot.
 

# /sbin/reboot


After a while when the server boots check with ip or ifconfig the configuration to make sure the ethXX ordering is proper again.

interface-list-eth1-eth2-screenshot

# /sbin/ifconfig eth1
eth1: flags=4163<UP,BROADCAST,RUNNING,MULTICAST> mtu 1500
inet 10.0.99.99 netmask 255.255.255.0 broadcast 10.10.9.255
inet6 fe80::7efe:90ff:fecb:7602 prefixlen 64 scopeid 0x20<link>
ether 7c:fe:90:cb:76:02 txqueuelen 1000 (Ethernet)
RX packets 0 bytes 0 (0.0 B)
RX errors 0 dropped 0 overruns 0 frame 0
TX packets 23 bytes 3208 (3.1 KiB)
TX errors 0 dropped 0 overruns 0 carrier 0 collisions 0
eth2: flags=4099<UP,BROADCAST,MULTICAST> mtu 1500
ether 7c:fe:90:cb:76:03 txqueuelen 1000 (Ethernet)
RX packets 0 bytes 0 (0.0 B)
RX errors 0 dropped 0 overruns 0 frame 0
TX packets 0 bytes 0 (0.0 B)
TX errors 0 dropped 0 overruns 0 carrier 0 collisions 0

On some Linux distributions, if it happens this udev extra configuration is not venerated, use net.ifnames=0 biosdevname=0 grub configuration.

6. Verify eth interfaces are present    

# ip addr show

…..

eth0: [BROADCAST,MULTICAST,UP,LOWER_UP] mtu 1500 qdisc pfifo_fast state UP qlen 1000

link/ether 6c:0b:84:6c:48:1c brd ff:ff:ff:ff:ff:ff

inet 10.10.9.5/24 brd 10.10.9.255 scope global eno1

inet6 2606:b400:c00:48:6e0b:84ff:fe6c:481c/128 scope global dynamic

valid_lft 2326384sec preferred_lft 339184sec

inet6 fe80::6e0b:84ff:fe6c:481c/64 scope link

valid_lft forever preferred_lft forever

That's all this should put an end to the annoying auto generated naming lan device naming.


Summary


So what was explained up was how to resolve problems caused by autogenerated ethernet interface cards by a new functionality in the Linux kernel, so Network cards are again visible via ip address show / ifconfig again in a proper order eth0 / eth1 / eth2 / eth3 etc. instead of a vendor generated cryptic names as ens / eno / em etc. This is possible via either by editing udev rules or grub configuration. Doing so saves nerves and makes sysadmin life better, at least it did mine.
That's all this should put an end to the annoying auto generated naming.
 

How to debug failing service in systemctl and add a new IP network alias in CentOS Linux

Wednesday, January 15th, 2020

linux-debug-failing-systemctl-systemd-service--add-new-IP-alias-network-cable

If you get some error with some service that is start / stopped via systemctl you might be pondering how to debug further why the service is not up then then you'll be in the situation I was today.
While on one configured server with 8 eth0 configured ethernet network interfaces the network service was reporting errors, when atempted to restart the RedHat way via:
 

service network restart


to further debug what the issue was as it was necessery I had to find a way how to debug systemctl so here is how:


How to do a verbose messages status for sysctlct?


linux:~# systemctl status network

linux:~# systemctl status network


Another useful hint is to print out only log messages for the current boot, you can that with:

# journalctl -u service-name.service -b


if you don't want to have the less command like page separation ( paging ) use the –no-pager argument.


# journalctl -u network –no-pager

Jan 08 17:09:14 lppsq002a network[8515]: Bringing up interface eth5:  [  OK  ]

    Jan 08 17:09:15 lppsq002a network[8515]: Bringing up interface eth6:  [  OK  ]
    Jan 08 17:09:15 lppsq002a network[8515]: Bringing up interface eth7:  [  OK  ]
    Jan 08 17:09:15 lppsq002a systemd[1]: network.service: control process exited, code=exited status=1
    Jan 08 17:09:15 lppsq002a systemd[1]: Failed to start LSB: Bring up/down networking.
    Jan 08 17:09:15 lppsq002a systemd[1]: Unit network.service entered failed state.
    Jan 08 17:09:15 lppsq002a systemd[1]: network.service failed.
    Jan 15 11:04:45 lppsq002a systemd[1]: Starting LSB: Bring up/down networking…
    Jan 15 11:04:45 lppsq002a network[55905]: Bringing up loopback interface:  [  OK  ]
    Jan 15 11:04:45 lppsq002a network[55905]: Bringing up interface eth0:  RTNETLINK answers: File exists
    Jan 15 11:04:45 lppsq002a network[55905]: [  OK  ]
    Jan 15 11:04:45 lppsq002a network[55905]: Bringing up interface eth1:  RTNETLINK answers: File exists
    Jan 15 11:04:45 lppsq002a network[55905]: [  OK  ]
    Jan 15 11:04:46 lppsq002a network[55905]: Bringing up interface eth2:  ERROR     : [/etc/sysconfig/network-scripts/ifup-eth] Device eth2 has different MAC address than expected, ignoring.
    Jan 15 11:04:46 lppsq002a network[55905]: [FAILED]
    Jan 15 11:04:46 lppsq002a network[55905]: Bringing up interface eth3:  RTNETLINK answers: File exists
    Jan 15 11:04:46 lppsq002a network[55905]: [  OK  ]
    Jan 15 11:04:46 lppsq002a network[55905]: Bringing up interface eth4:  ERROR     : [/etc/sysconfig/network-scripts/ifup-eth] Device eth4 does not seem to be present, delaying initialization.
    Jan 15 11:04:46 lppsq002a network[55905]: [FAILED]
    Jan 15 11:04:46 lppsq002a network[55905]: Bringing up interface eth5:  RTNETLINK answers: File exists
    Jan 15 11:04:46 lppsq002a network[55905]: [  OK  ]
    Jan 15 11:04:46 lppsq002a network[55905]: Bringing up interface eth6:  RTNETLINK answers: File exists
    Jan 15 11:04:47 lppsq002a network[55905]: [  OK  ]
    Jan 15 11:04:47 lppsq002a network[55905]: Bringing up interface eth7:  RTNETLINK answers: File exists
    Jan 15 11:04:47 lppsq002a network[55905]: [  OK  ]
    Jan 15 11:04:47 lppsq002a network[55905]: RTNETLINK answers: File exists
    Jan 15 11:04:47 lppsq002a network[55905]: RTNETLINK answers: File exists
    Jan 15 11:04:47 lppsq002a network[55905]: RTNETLINK answers: File exists
    Jan 15 11:04:47 lppsq002a network[55905]: RTNETLINK answers: File exists
    Jan 15 11:04:47 lppsq002a network[55905]: RTNETLINK answers: File exists
    Jan 15 11:04:47 lppsq002a network[55905]: RTNETLINK answers: File exists
    Jan 15 11:04:47 lppsq002a network[55905]: RTNETLINK answers: File exists
    Jan 15 11:04:47 lppsq002a network[55905]: RTNETLINK answers: File exists
    Jan 15 11:04:47 lppsq002a network[55905]: RTNETLINK answers: File exists
    Jan 15 11:04:47 lppsq002a systemd[1]: network.service: control process exited, code=exited status=1
    Jan 15 11:04:47 lppsq002a systemd[1]: Failed to start LSB: Bring up/down networking.
    Jan 15 11:04:47 lppsq002a systemd[1]: Unit network.service entered failed state.
    Jan 15 11:04:47 lppsq002a systemd[1]: network.service failed.
    Jan 15 11:08:22 lppsq002a systemd[1]: Starting LSB: Bring up/down networking…
    Jan 15 11:08:22 lppsq002a network[56841]: Bringing up loopback interface:  [  OK  ]
    Jan 15 11:08:22 lppsq002a network[56841]: Bringing up interface eth0:  RTNETLINK answers: File exists
    Jan 15 11:08:22 lppsq002a network[56841]: [  OK  ]
    Jan 15 11:08:26 lppsq002a network[56841]: Bringing up interface eth1:  RTNETLINK answers: File exists
    Jan 15 11:08:26 lppsq002a network[56841]: [  OK  ]
    Jan 15 11:08:26 lppsq002a network[56841]: Bringing up interface eth2:  ERROR     : [/etc/sysconfig/network-scripts/ifup-eth] Device eth2 has different MAC address than expected, ignoring.
    Jan 15 11:08:26 lppsq002a network[56841]: [FAILED]
    Jan 15 11:08:26 lppsq002a network[56841]: Bringing up interface eth3:  RTNETLINK answers: File exists
    Jan 15 11:08:27 lppsq002a network[56841]: [  OK  ]


2020-01-15-15_42_11-root-server


Another useful thing debug arguments is the -xe to do:

# journalctl -xe –no-pager


  • -x (– catalog)
    Augment log lines with explanation texts from the message catalog.
    This will add explanatory help texts to log messages in the output
    where this is available.
  •  -e ( –pager-end )  Immediately jump to the end of the journal inside the implied pager
      tool.

2020-01-15-15_42_32-root-server

Finally after fixing the /etc/sysconfig/networking-scripts/* IP configuration issues I had all the 8 Ethernet interfaces to work as expected
 

# systemctl status network


2020-01-15-16_15_38-root-server


2. Adding a new IP alias to eth0 interface


Further on I had  to add an IP Alias on the CenOS via its networking configuration, this is done by editing /etc/sysconfig/network-scripts/ifcfg* files.
To create an IP alias for first lan interface eth0, I've had to created a new file named ifcfg-eth0:0
 

linux:~# cd /etc/sysconfig/network-scripts/
linux:~# vim ifcfg-eth0:0


with below content

NAME="eth0:0"
ONBOOT="yes"
BOOTPROTO="none"
IPADDR="10.50.10.5"
NETMASK="255.255.255.0"


Adding this IP address network alias works across all RPM based distributions and should work also on Fedora and Open SuSE as well as Suse Enterprise Linux.
If you however prefer to use a text GUI and do it the CentOS server administration way you can use nmtui (Text User Interface for controlling NetworkManager). tool.
 

linux:~# nmtui


centos7_nmtui-ncurses-network-configuration-sysadmin-tool

nmtui_add_alias_interface-screenshot

How to install jcmd on CentOS 7 to diagnose running Java Virtual Machine crashing applications

Tuesday, January 14th, 2020

how-to-install-jcmd-centos-jcdm-java-logo-1

jcmd utility is well known in the Brane New wonderful world of Java but if you're like me a classical old school sysadmins and non-java developer you probably never heard it hence before going straight into how to install it on CentOS 7 Linux servers, I'll shortly say few words on what it is.
jcmd is used to send diagnostic requests to running Java Virtual Machine (JVM) it is available in both in Oracle Java as well as OpenJDK.
The requests jcmd sends to VM are based on the running Java PID ID and are pretty useful for controlling Java Flight Recordings, troubleshoot, and diagnose JVM and Java Applications. It must be used on the same machine where the JVM is running.

 Used without arguments or with the -l option, jcmd prints the list of running Java processes with their process id, their main class and their command line arguments.
When a main class is specified on the command line, jcmd sends the diagnostic command request to all Java processes for which the command line argument is a substring of the Java process' main class.
jcmd could be useful if the JConsoleJMX (Java Management Extensions) can't be used for some reason on the server or together with Java Visual VM (visual interface for viewing detailed info about Java App).

In most Linux distributionsas as  of year 2020 jcmd is found in  java-*-openjdk-headless.

To have jcmd on lets say Debian GNU / Linux, you're up to something like:


apt-get install –yes openjdk-12-jdk-headless
 

or

apt-get install openjdk-11-jdk-headless
however in CentOS
7 jcmd is not found in java*openjdk*headless but instead to have it on server, thus it take me a while to look up where it is foundso after hearing
from some online post it is part of package java*openjdk*devel* to make sure this so true, I've used the  –download-only option
 

 yum install –downloadonly –downloaddir=/tmp java-1.8.0-openjdk-devel


So the next question was how to inspect the downloaded rpm package into /tmp usually, this is possible via Midnight Commander (mc) easily to view contents, however as this
server did not have installed mc due to security policies I had to do it differently after pondering a while on how to to list the RPM package file content come up using following command


 rpm2cpio java-1.8.0-openjdk-devel-1.8.0.232.b09-0.el7_7.x86_64.rpm |cpio -idmv|grep -i jcmd|less


To then install  java-1.8.0-openjdk-devel-1.8.0.232.b09-0.el7_7.x86_64.rpm to do so run:


yum -y install  java-1.8.0-openjdk-devel-1.8.0*


Once the jcmd, I've created the following bash script  that was set that was tracking for application errors and checking whether the JBoss application server pool-available-count is not filled up and hence jboss refuses to serve connections  through jboss-cli.sh query automatically launching jcmd to get various diagnostic data about Java Virtual Machine (e.g. a running snapshot) – think of it like the UNIX top for debugging or Windows System Monitor but run one time. 


# PID_OF_JAVA=$(pgrep -l java)
# jcmd $PID_OF_JAVA GC.heap_dump GC.heap_dump_file-$(date '+%Y-%m-%d_%H-%M-%S').jfr
# jcmd $PID_OF_JAVA Thread.print > Thread.print-$(date '+%Y-%m-%d_%H-%M-%S').jfr


The produced log files can then be used by the developer to visualize some Java specific stuff "Flight recordings" like in below screenshot:

jcmd-java-tool-dump-jfr-flight-recordings-visualized-java 

If you're interested on some other interesting tools that can be used to Monitor  and Debug a Running Java VM take a look at Java's official documentation Monitoring Tools.
So that's all Mission Accomplished 🙂 Now the Java Application developer could observe the log and tell why exactly the application crashed after the multitude of thrown Exceptions in the JBoss server.log.

Linux show largest sized packages / Which Deb, RPM Linux installed package use most disk space and How to Free Space for critical system updates

Sunday, January 12th, 2020

linux-show-largest-sized-packages-which-deb-rpm-linux-package-use-most-disk-space-to-free-space-for-critical-system-updates

A very common problem that happens on both Linux installed servers and Desktop Linux is a starting to fill / (root partition). This problem could happen due to several reasons just to point few of them out of my experience low disk space (ending free space) could be due to:

– Improper initial partitioning / bad space planning / or OS install made in a hurry (due to time constrains)
– Linux installed on old laptop machine with low Hard Disk Drive capacity (e.g. 80 Giga / 160 GB)
– Custom user partitioning on install time aiming for a small root partition originally and changing space requirements in time
– Due to increasing space taken by Linux updates / user stored files etc / distribution OS Level upgrades dist-upgrades.
– Improperly assigned install time partitions cause of lack of knowledge to understand how partitioning is managed.
– Due to install being made in a hurry

– Linux OS installed on a Cloud based VPN (e.g. running) in a Cloud Instance that is hosted in Amazon EC2, Linode, Digital Ocean, Hostgator etc.

So here is a real time situation that happened me many times, you're launching an apt-get upgrade / apt-get dist-upgrade or yum upgrade the packages are about to start downloading or downloaded and suddenly you get a message of not enough disk space to apply OS package updates …
That's nasty stuff mostly irritating and here there are few approaches to take.

a. perhaps easiest you can ofcourse extend the partition (with a free spaced other Primary or Extended partition) with something like:

parted (the disk partitioning manipulator for Linux), gparted (in case if Desktop with GUI / XOrg server running)

b. if not enough space on the Hard Disk Drive or SSD (Solid State Drive) and you have a budget to buy and free laptop / PC slot to place another physical HDD to clone it to a larger sized HDD and use some kind of partition clone tool, such as:

or any of the other multiple clone tools available in Linux.

But what if you don't have the option for some reason to extend the paritiotn, how can you apply the Critical Security Errata Updates issued to patch security vulnerabilities reported by well known CVEs?
Well you can start with the obvious easy you can start removing unnecessery stuff from the system (if home is also stored on the / – root partiiton) to delete something from there, even delete the /usr/local/man pages if you don't plan to read it free some logs by archiving purging logs from /var/log/* …

But if this is not possible, a better approach is simply try to remove / purge any .deb / .rpm whatever distro package manager packages that are not necessery used and just hanging around, that is often the case especially on Linux installed on Notebooks for a personal home use, where with years you have installed a growing number of packages which you don't actively use but installed just to take a look, while hunting for Cool Linux games and you wanted to give a try to Battle of Wesnoth  / FreeCIV / AlienArena / SuperTux Kart / TuxRacer etc.  or some GUI heavy programs like Krita / Inskape / Audacity etc.

To select which package might be not needed and just takes space hence you need to to list all installed packages on the system ordered by their size this is different in Debian based Linuces e.g. – Debian GNU / Linux / Ubuntu / Mint etc. and RPM based ones Fedora / CentOS / OpenSuSE


1. List all RPM installed packages by Size on CentOS / SuSE
 

Finding how much space each of the installed rpm packages take on the HDD and displaying them in a sorted order is done with:

rpm -qa –queryformat '%10{size} – %-25{name} \t %{version}\n' | sort -n

From the command above,  the '%10{size}' option aligns the size of the package to the right with a padding of 10 characters. The '%-25{name} aligns the name of the package to the left, padded to 25 characters. The '%{version} indicates the version and 'sort -n' flag sorts the packages according to size from the smallest to the largest in bytes.


2. List all installed RPM packages sorted by size on Fedora

Fedora has introduced the dnf package manager instead of yum, to get how much size individual rpm package occupies on system:

dnf info samba
Available Packages
Name        : samba
Arch        : x86_64
Epoch       : 2
Version     : 4.1.20
Release     : 1.fc21
Size        : 558 k
Repo        : updates
Summary     : Server and Client software to interoperate with Windows machines
URL         : http://www.samba.org/
License     : GPLv3+ and LGPLv3+
Description : Samba is the standard Windows interoperability suite of programs
            : for Linux and Unix.


To get a list of all packages on system with their size

dnf info * | grep -i "Installed size" |sort -n


3. List all installed DEB packages on Debian / Ubuntu / Mint etc. with dpkg / aptitude / apt-get and wajig


The most simple way to get a list of largest packages is through dpkg


# dpkg-query -Wf '${Installed-Size}\t${Package}\n' | sort -n
        brscan4
6       default-jre
6       libpython-all-dev
6       libtinfo-dev
6       python-all
6       python-all-dev
6       task-cinnamon-desktop
6       task-cyrillic
6       task-desktop
6       task-english
6       task-gnome-desktop
6       task-laptop
6       task-lxde-desktop
6       task-mate-desktop
6       task-print-server
6       task-ssh-server
6       task-xfce-desktop
8       mysql-client
8       printer-driver-all


207766    libwine
215625    google-chrome-stable
221908    libwine
249401    frogatto-data
260717    linux-image-4.19.0-5-amd64
262512    linux-image-4.19.0-6-amd64
264899    mame
270589    fonts-noto-extra
278903    skypeforlinux
480126    metasploit-framework


above cmd displays packages in size order, largest package last, but the output will include also size of packages, that used to exist,
have been removed but was not purged. Thus if you find  a package that is shown as very large by size but further dpkg -l |grep -i package-name shows package as purged e.g. package state is not 'ii' but 'rc', the quickest work around is to purge all removed packages, that are still not purged and have some configuration remains and other chunks of data that just take space for nothing with:

# dpkg –list |grep "^rc" | cut -d " " -f 3 | xargs sudo dpkg –purge


Be cautious when you execute above command, because if for some reason you uninstalled a package with the idea to keep old configuration files only and in case if you decide to use it some time in future to reuse already custom made configs but do run above purge commands all such package saved kept configs will disappear.
For people who don't want to mess up with, uninstalled but present packages use this to filter out ready to be purged state packages.

# dpkg-query -Wf '${db:Status-Status} ${Installed-Size}\t${Package}\n' | sed -ne 's/^installed //p'|sort -n


aptitude – (high level ncurses interface like to package management) can also be easily used to list largest size packages eating up your hard drive in both interactive or cli mode, like so:


# aptitude search –sort '~installsize' –display-format '%p %I' '~i' | head
metasploit-framework 492 MB
skypeforlinux 286 MB
fonts-noto-extra 277 MB
mame 271 MB
linux-image-4.19.0-6-amd64 269 MB
linux-image-4.19.0-5-amd64 267 MB
frogatto-data 255 MB
libwine 227 MB
google-chrome-stable 221 MB
libwine:i386 213 MB


  • –sort is package sort order, and ~installsize specifies a package sort policy.
  • installsize means 'sort on (estimated) installed size', and the preceding ~ means sort descending (since default for all sort policies is ascending).
  • –display-format changes the <you guessed :->. The format string '%p %I' tells aptitude to output package name, then installed size.
  • '~i' tells aptitude to search only installed packages.

How much a certain .deb package removal will free up on the disk can be seen with apt-get as well to do so for the famous 3D acceleration Graphic Card (enabled) or not  test game extremetuxracer

apt-get –assume-no –purge remove "texlive*" | grep "be freed" | 
   awk '{print $4, $5}'

Perhaps,  the easiest to remember and more human readable output biggest packages occupied space on disk is to install and use a little proggie called wajig to do so


# apt install –yes wajig


Here is how to pick up 10 biggest size packages.

root@jeremiah:/home/hipo# wajig large|tail -n 10
fonts-noto-cjk-extra               204,486      installed
google-chrome-stable               215,625      installed
libwine                            221,908      installed
frogatto-data                      249,401      installed
linux-image-4.19.0-5-amd64         260,717      installed
linux-image-4.19.0-6-amd64         262,512      installed
mame                               264,899      installed
fonts-noto-extra                   270,589      installed
skypeforlinux                      278,903      installed
metasploit-framework               480,126      installed


As above example lists a short package name and no description for those who want get more in depth knowledge on what exactly is the package bundle used for use:

# aptitude search –sort '~installsize' –display-format '%30p %I %r %60d' '~i' |head


%30p %I %r %60d display more information in your format string, or change field widths, enhanced format string

Meaning of parameters is:

  • %30p : package name in field width=30 char
  • %I : estimated install size
  • %r : 'reverse depends count': approximate number of other installed packages which depend upon this package
  • %60d : package's short description in field width=60 char

wajig is capable is a python written and idea is to easify Debian console package management (so you don't have to all time remember when and with which arguments to use apt-get / apt-cache etc.), below is list of commands it accepts.


root@jeremiah:/home/hipo## wajig commands
addcdrom           Add a Debian CD/DVD to APT's list of available sources
addrepo            Add a Launchpad PPA (Personal Package Archive) repository
aptlog             Display APT log file
autoalts           Mark the Alternative to be auto-set (using set priorities)
autoclean          Remove no-longer-downloadable .deb files from the download cache
autodownload       Do an update followed by a download of all updated packages
autoremove         Remove unused dependency packages
build              Get source packages, unpack them, and build binary packages from them.
builddeps          Install build-dependencies for given packages
changelog          Display Debian changelog of a package
clean              Remove all deb files from the download cache
contents           List the contents of a package file (.deb)
dailyupgrade       Perform an update then a dist-upgrade
dependents         Display packages which have some form of dependency on the given package
describe           Display one-line descriptions for the given packages
describenew        Display one-line descriptions of newly-available packages
distupgrade        Comprehensive system upgrade
download           Download one or more packages without installing them
editsources        Edit list of Debian repository locations for packages
extract            Extract the files from a package file to a directory
fixconfigure       Fix an interrupted install
fixinstall         Fix an install interrupted by broken dependencies
fixmissing         Fix and install even though there are missing dependencies
force              Install packages and ignore file overwrites and depends
hold               Place packages on hold (so they will not be upgraded)
info               List the information contained in a package file
init               Initialise or reset wajig archive files
install            Package installer
installsuggested   Install a package and its Suggests dependencies
integrity          Check the integrity of installed packages (through checksums)
large              List size of all large (>10MB) installed packages
lastupdate         Identify when an update was last performed
listall            List one line descriptions for all packages
listalternatives   List the objects that can have alternatives configured
listcache          List the contents of the download cache
listcommands       Display all wajig commands
listdaemons        List the daemons that wajig can start, stop, restart, or reload
listfiles          List the files that are supplied by the named package
listhold           List packages that are on hold (i.e. those that won't be upgraded)
listinstalled      List installed packages
listlog            Display wajig log file
listnames          List all known packages; optionally filter the list with a pattern
listpackages       List the status, version, and description of installed packages
listscripts        List the control scripts of the package of deb file
listsection        List packages that belong to a specific section
listsections       List all available sections
liststatus         Same as list but only prints first two columns, not truncated
localupgrade       Upgrade using only packages that are already downloaded
madison            Runs the madison command of apt-cache
move               Move packages in the download cache to a local Debian mirror
new                Display newly-available packages
newdetail          Display detailed descriptions of newly-available packages
news               Display the NEWS file of a given package
nonfree            List packages that don't meet the Debian Free Software Guidelines
orphans            List libraries not required by any installed package 
policy             From preferences file show priorities/policy (available)
purge              Remove one or more packages and their configuration files
purgeorphans       Purge orphaned libraries (not required by installed packages)
purgeremoved       Purge all packages marked as deinstall
rbuilddeps         Display the packages which build-depend on the given package
readme             Display the README file(s) of a given package
recdownload        Download a package and all its dependencies
recommended        Display packages installed as Recommends and have no dependents
reconfigure        Reconfigure package
reinstall          Reinstall the given packages
reload             Reload system daemons (see LIST-DAEMONS for available daemons)
remove             Remove packages (see also PURGE command)
removeorphans      Remove orphaned libraries
repackage          Generate a .deb file from an installed package
reportbug          Report a bug in a package using Debian BTS (Bug Tracking System)
restart            Restart system daemons (see LIST-DAEMONS for available daemons)
rpm2deb            Convert an .rpm file to a Debian .deb file
rpminstall         Install an .rpm package file
search             Search for package names containing the given pattern
searchapt          Find nearby Debian package repositories
show               Provide a detailed description of package
sizes              Display installed sizes of given packages
snapshot           Generates a list of package=version for all installed packages
source             Retrieve and unpack sources for the named packages
start              Start system daemons (see LIST-DAEMONS for available daemons)
status             Show the version and available versions of packages
statusmatch        Show the version and available versions of matching packages
stop               Stop system daemons (see LISTDAEMONS for available daemons)
tasksel            Run the task selector to install groups of packages
todo               Display the TODO file of a given package
toupgrade          List versions of upgradable packages
tutorial           Display wajig tutorial
unhold             Remove listed packages from hold so they are again upgradeable
unofficial         Search for an unofficial Debian package at apt-get.org
update             Update the list of new and updated packages
updatealternatives Update default alternative for things like x-window-manager
updatepciids       Updates the local list of PCI ids from the internet master list
updateusbids       Updates the local list of USB ids from the internet master list
upgrade            Conservative system upgrade
upgradesecurity    Do a security upgrade
verify             Check package's md5sum
versions           List version and distribution of given packages
whichpackage       Search for files matching a given pattern within packages


4. List installed packages order by size in Arch Linux

ArchLinux is using the funny named package manager – pacman (a nice prank for the good old arcade game).
What is distinctive of pacman uses libalpm (Arch Linux Package Management (ALPM) library) as a back-end to perform all the actions.


# pacman -Qi | awk '/^Name/{name=$3} /^Installed Size/{print $4$5, name}' | sort -hr | head -25
296.64MiB linux-firmware
144.20MiB python
105.43MiB gcc-libs
72.90MiB python2
66.91MiB linux
57.47MiB perl
45.49MiB glibc
35.33MiB icu
34.68MiB git
30.96MiB binutils
29.95MiB grub
18.96MiB systemd
13.94MiB glib2
13.79MiB coreutils
13.41MiB python2-boto
10.65MiB util-linux
9.50MiB gnupg
8.09MiB groff
8.05MiB gettext
7.99MiB texinfo
7.93MiB sqlite
7.15MiB bash
6.50MiB lvm2
6.43MiB openssl
6.33MiB db


There is another mean to list packages by size using a ArchLinux tool called pacgraph


# pacgraph -c | head -25

Autodetected Arch.
Loading package info
Total size: 1221MB
367MB linux
144MB pacgraph
98MB cloud-init
37MB grub
35MB icu
34MB git
31698kB binutils
19337kB pacman
11029kB man-db
8186kB texinfo
8073kB lvm2
7632kB nano
7131kB openssh
5735kB man-pages
3815kB xfsprogs
3110kB sudo
3022kB wget
2676kB tar
2626kB netctl
1924kB parted
1300kB procps-ng
1248kB diffutils


4. Debian Goodies


Most debian users perhaps never hear of debian-goodies package, but I thought it is worthy to mention it as sooner or later as a sysadmin or .deb based Desktop user it might help you somewhere.
 

Debian-goodies is sall toolbox-style utilities for Debian systems
 These programs are designed to integrate with standard shell tools,
 extending them to operate on the Debian packaging system.

 .
  dglob  – Generate a list of package names which match a pattern
           [dctrl-tools, apt*, apt-file*, perl*]
  dgrep  – Search all files in specified packages for a regex
           [dctrl-tools, apt-file (both via dglob)]
 .
 These are also included, because they are useful and don't justify
 their own packages:
 .
  check-enhancements
 
           – find packages which enhance installed packages [apt,
                dctrl-tools]
  checkrestart
 
           – Help to find and restart processes which are using old versions
               of upgraded files (such as libraries) [python3, procps, lsof*]
  debget     – Fetch a .deb for a package in APT's database [apt]
  debman     – Easily view man pages from a binary .deb without extracting
               [man, apt* (via debget)]
  debmany    – Select manpages of installed or uninstalled packages [man |
               sensible-utils, whiptail | dialog | zenity, apt*, konqueror*,
               libgnome2-bin*, xdg-utils*]
  dhomepage  – Open homepage of a package in a web browser [dctrl-tools,
               sensible-utils*, www-browser* | x-www-browser*]
  dman       – Fetch manpages from online manpages.debian.org service [curl,
               man, lsb-release*]
  dpigs      – Show which installed packages occupy the most space
               [dctrl-tools]
  find-dbgsym-packages
             – Get list of dbgsym packages from core dump or PID [dctrl-tools,
               elfutils, libfile-which-perl, libipc-system-simple-perl]
  popbugs    – Display a customized release-critical bug list based on
               packages you use (using popularity-contest data) [python3,
               popularity-contest]
  which-pkg-broke
             – find which package might have broken another [python3, apt]
  which-pkg-broke-build
             – find which package might have broken the build of another
               [python3 (via which-pkg-broke), apt]

Even simpler by that is to use dpigs shell script part of the debian-goodies package which will automatically print out the largest packages.

dpigs command output is exactly the same as 'dpkg-query -Wf '${Installed-Size}\t${Package}\n' | sort -nr | head', but is useful cause you don't have to remember that complex syntax.


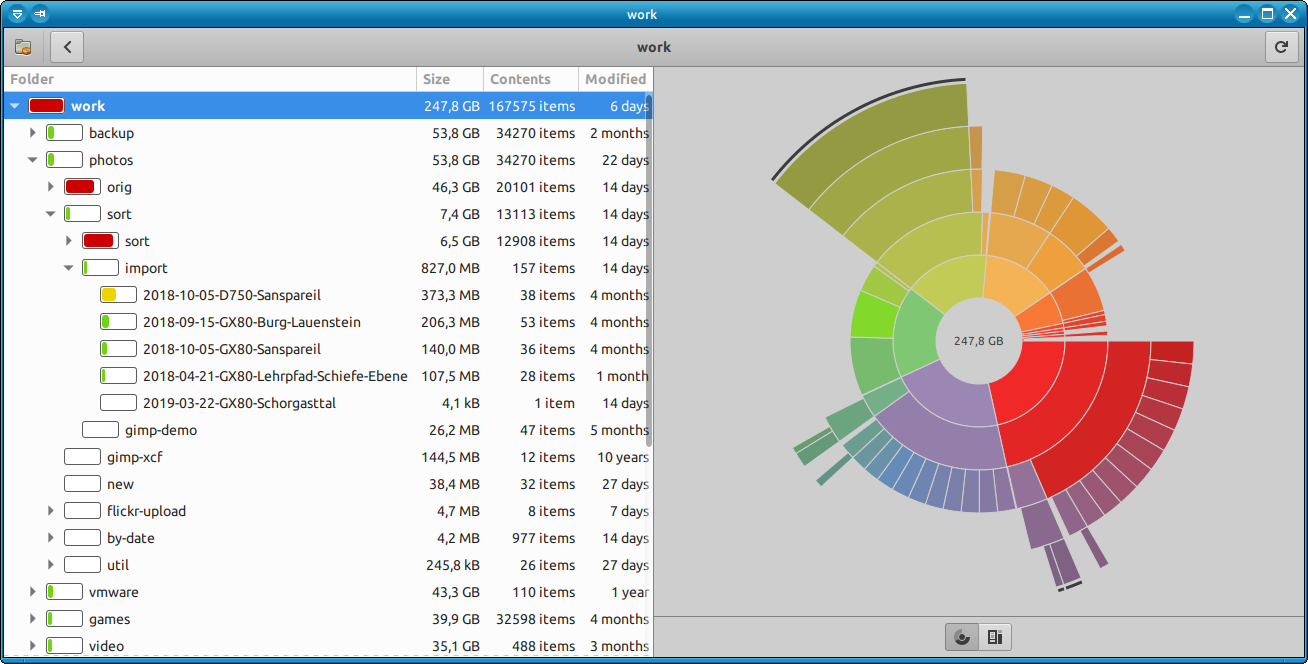
5. Checking where your space is gone in a Spacesniffer like GUI manner with Baobab


In my prior article Must have software on a new installed Windows 2 of the  of the precious tools to set are Spacesniffer and WinDirStat.
Windows users will be highly delighted to know that SpaceSniffer equivallent is already present on Linux – say hello baobab.
Baobab
is simple but useful Graphic disk usage overview program for those who don't want to mess to much with the console / terminal to find out which might be the possible directory candidate for removal. It is very simplistic but it does well what it is aimed for, to install it on a Debian or .deb based OS.

# apt install –yes baobab


baobab-entry-screen-debian-gnu-linux-screenshot

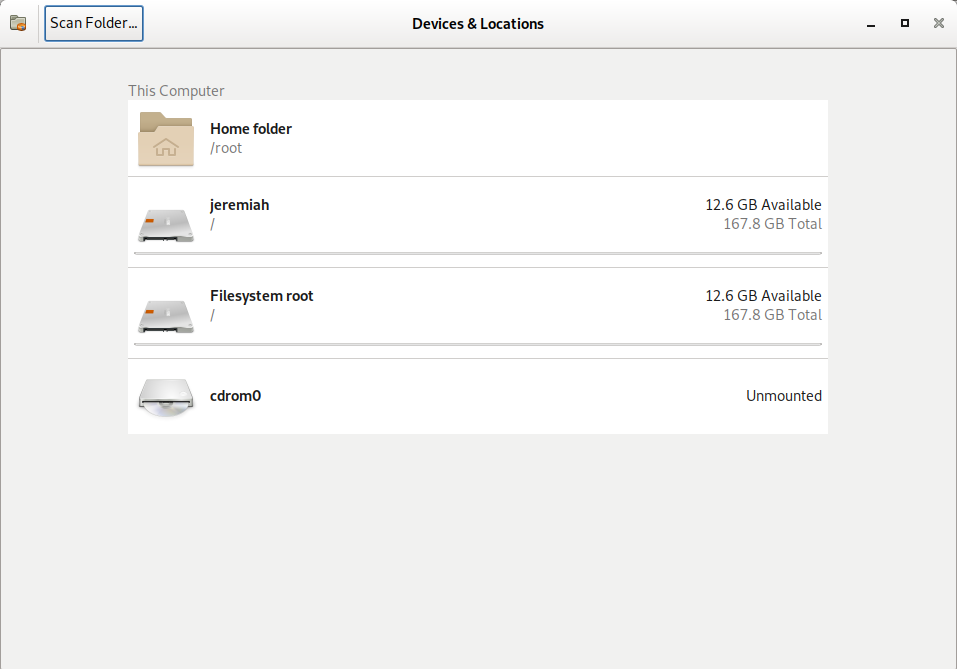
baobab Linux Hard Disk Usage Analyzer for GNOME. – It can easily scan either the whole filesystem or a specific user-requested branch (Iocal or remote)


baobab-entry-screen-debian-gnu-linux-directories-taking-most-space-pie-screenshot

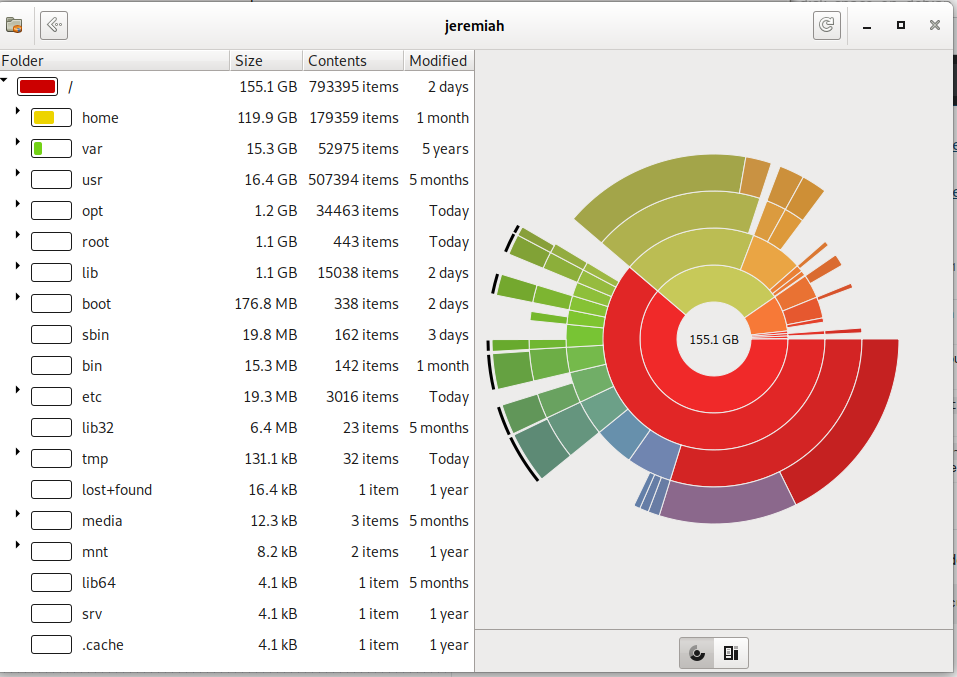
Baobab / (root) directory statistics Rings Chart pie


baobab-entry-screen-debian-gnu-linux-disk-space-by-size-visualized-screenshot

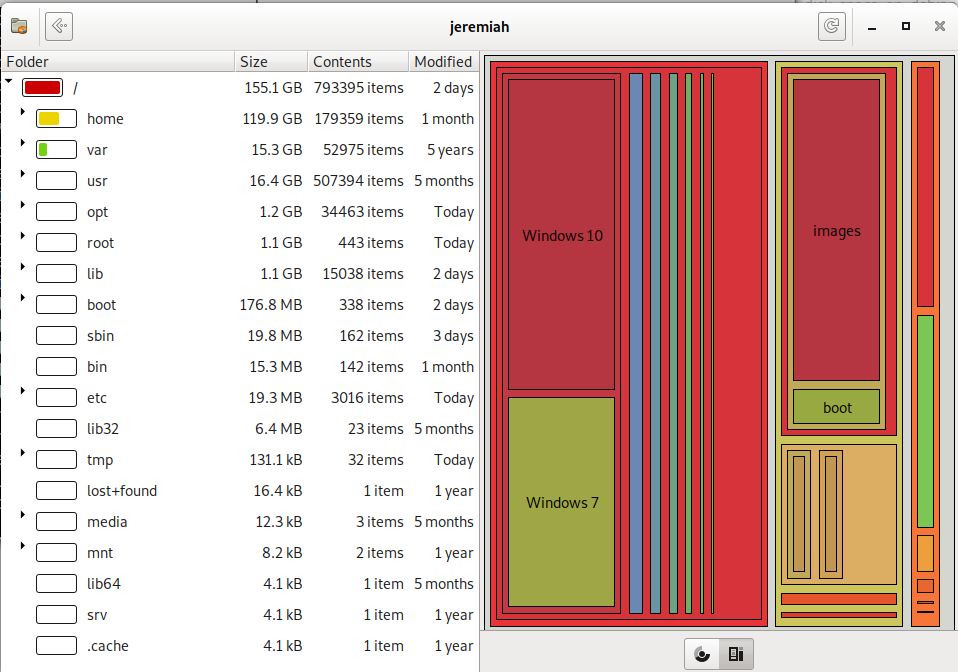
baobab – Treemap Chart for directory usage sorted by size on disk 

!!! Note that before removing any files found as taking up too much space with baobab – make sure this files are not essential parts of a .deb package first, otherwise you might break up your system !!!

KDE (Plasma) QT library users could use Qdirstat instead of baobab 

qdirstat-on-gnu-linur checking what is the disk space bottleneck qdirstat KDE


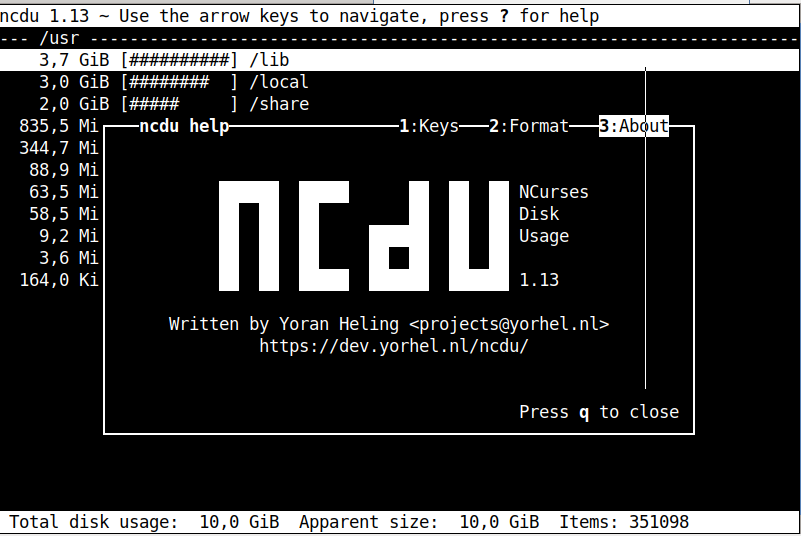
6. Use ncdu or duper perl script tool to generate directory disk usage in ASCII chart bar

ncdu and duper are basicly the same except one is using ncurses and is interactive in a very simplistic interface with midnight commander.
 

# apt install –yes ncdu
# ncdu /root


ncdu-gnu-linux-debian-screenshot


# apt-get install –yes durep
# durep -td 1 /usr

[ /usr    14.4G (0 files, 11 dirs) ]
   6.6G [#############                 ]  45.54% lib/
   5.5G [###########                   ]  38.23% share/
   1.1G [##                            ]   7.94% bin/
 552.0M [#                             ]   3.74% local/
 269.2M [                              ]   1.83% games/
 210.4M [                              ]   1.43% src/
  88.9M [                              ]   0.60% libexec/
  51.3M [                              ]   0.35% sbin/
  41.2M [                              ]   0.28% include/
   8.3M [                              ]   0.06% lib32/
 193.8K [                              ]   0.00% lib64/


Conclusion


In this article, I've shortly explained the few approach you can take to handle low disk space preventing you to update a regular security updates on Linux.
The easiest one is to clone your drive to a bigger (larger) sized SATA HDD or SDD Drive or using a free space left on a hard drive to exnted the current filling up the root partition. 

Further, I looked through the common reasons for endind with a disk being low spaced and a quick work around to free disk space through listing and purging larges sized package, this is made differently in different Linux distributions, because different Linux has different package managers. As I'm primary using Debian, I explained thoroughfully on how this is achieved with apt-get / dpkg-query / dpkg / aptitude and the little known debian-goodies .deb package manager helper pack. For GUI Desktop users there is baobab / qdirstat. ASCII lovers could enjoy durep and ncdu.

That's all folks hope you enjoyed and learned something new. If you know of other cool tools or things this article is missing please share.

Check when Windows Active Directory user expires and set user password expire to Never

Thursday, January 9th, 2020

micorosoft-windows-10-logo-net-user-command-check-expiry-dates

If you're working for a company that is following high security / PCI Security Standards and you're using m$ Windows OS that belongs to the domain it is useful to know when your user is set to expiry
to know how many days are left until you'll be forced to change your Windows AD password.
In this short article I'll explain how to check Windows AD last password set date / date expiry date and how you can list expiry dates for other users, finally will explain how to set your expiry date to Never
to get rid of annoying change password every 90 days.


1. Query domain Username for Password set / Password Expires set dates

To know this info you need to know the Password expiration date for Active Directory user account, to know it just open Command Line Prompt cmd.exe

And run command:


NET USER Your-User-Name /domain


net-user-domain-command-check-AD-user-expiry

Note that, many companies does only connect you to AD for security reason only on a VPN connect with something like Cisco AnyConnect Secure Mobility Client whatever VPN connect tool is used to encrypt the traffic between you and the corporate DMZ-ed network

Below is basic NET USER command usage args:

Net User Command Options
 

Item          Explanation

net user    Execute the net user command alone to show a very simple list of every user account, active or not, on the computer you're currently using.

username    This is the name of the user account, up to 20 characters long, that you want to make changes to, add, or remove. Using username with no other option will show detailed information about the user in the Command Prompt window.

password    Use the password option to modify an existing password or assign one when creating a new username. The minimum characters required can be viewed using the net accounts command. A maximum of 127 characters is allowed1.
*    You also have the option of using * in place of a password to force the entering of a password in the Command Prompt window after executing the net user command.

/add    Use the /add option to add a new username on the system.
options    See Additional Net User Command Options below for a complete list of available options to be used at this point when executing net user.

/domain    This switch forces net user to execute on the current domain controller instead of the local computer.

/delete    The /delete switch removes the specified username from the system.

/help    Use this switch to display detailed information about the net user command. Using this option is the same as using the net help command with net user: net help user.
/?    The standard help command switch also works with the net user command but only displays the basic command syntax. Executing net user without options is equal to using the /? switch.


2. Listing all Active Directory users last set date / never expires and expiration dates


If you have the respective Active Directory rights and you have the Remote Server Administration Tools for Windows (RSAT Tools), you are able to do also other interesting stuff,


such as

– using PowerShell to list all user last set dates, to do so use Open Power Shell and issue:
 

get-aduser -filter * -properties passwordlastset, passwordneverexpires |ft Name, passwordlastset, Passwordneverexpires


get-aduser-properties-passwordlastset-passwordneverexpires1

This should show you info as password last set date and whether password expiration is set for account.

– Using PS to get only the password expirations for all AD existing users is with:


Get-ADUser -filter {Enabled -eq $True -and PasswordNeverExpires -eq $False} –Properties "DisplayName", "msDS-UserPasswordExpiryTimeComputed" |
Select-Object -Property "Displayname",@{Name="ExpiryDate";Expression={[datetime]::FromFileTime($_."msDS-UserPasswordExpiryTimeComputed")}}


If you need the output data to get stored in CSV file delimitered format you can add to above PS commands
 

| export-csv YOUR-OUTPUT-FILE.CSV


3. Setting a user password to never Expiry


If the user was created with NET USER command by default it will have been created to have a password expiration. 
However if you need to create new users for yourself (assuming you have the rights), with passwords that never expire on lets say Windows Server 2016 – (if you don't care about security so much), use:
 

NET USER "Username" /Add /Active:Yes

WMIC USERACCOUNT WHERE "Name='Username' SET PasswordExpires=False


NET-USER-ADD_Active-yes-Microsoft-Windows-screenshot

NET-USER-set-password-policy-to-Never-expiry-MS-Windows

To view the general password policies, type following:
 

NET ACCOUNTS


NET-ACCOUNTS-view-default-Microsoft-Windows-password-policy