Posts Tagged ‘aptitude’

Linux show largest sized packages / Which Deb, RPM Linux installed package use most disk space and How to Free Space for critical system updates

Sunday, January 12th, 2020

linux-show-largest-sized-packages-which-deb-rpm-linux-package-use-most-disk-space-to-free-space-for-critical-system-updates

A very common problem that happens on both Linux installed servers and Desktop Linux is a starting to fill / (root partition). This problem could happen due to several reasons just to point few of them out of my experience low disk space (ending free space) could be due to:

– Improper initial partitioning / bad space planning / or OS install made in a hurry (due to time constrains)
– Linux installed on old laptop machine with low Hard Disk Drive capacity (e.g. 80 Giga / 160 GB)
– Custom user partitioning on install time aiming for a small root partition originally and changing space requirements in time
– Due to increasing space taken by Linux updates / user stored files etc / distribution OS Level upgrades dist-upgrades.
– Improperly assigned install time partitions cause of lack of knowledge to understand how partitioning is managed.
– Due to install being made in a hurry

– Linux OS installed on a Cloud based VPN (e.g. running) in a Cloud Instance that is hosted in Amazon EC2, Linode, Digital Ocean, Hostgator etc.

So here is a real time situation that happened me many times, you're launching an apt-get upgrade / apt-get dist-upgrade or yum upgrade the packages are about to start downloading or downloaded and suddenly you get a message of not enough disk space to apply OS package updates …
That's nasty stuff mostly irritating and here there are few approaches to take.

a. perhaps easiest you can ofcourse extend the partition (with a free spaced other Primary or Extended partition) with something like:

parted (the disk partitioning manipulator for Linux), gparted (in case if Desktop with GUI / XOrg server running)

b. if not enough space on the Hard Disk Drive or SSD (Solid State Drive) and you have a budget to buy and free laptop / PC slot to place another physical HDD to clone it to a larger sized HDD and use some kind of partition clone tool, such as:

or any of the other multiple clone tools available in Linux.

But what if you don't have the option for some reason to extend the paritiotn, how can you apply the Critical Security Errata Updates issued to patch security vulnerabilities reported by well known CVEs?
Well you can start with the obvious easy you can start removing unnecessery stuff from the system (if home is also stored on the / – root partiiton) to delete something from there, even delete the /usr/local/man pages if you don't plan to read it free some logs by archiving purging logs from /var/log/* …

But if this is not possible, a better approach is simply try to remove / purge any .deb / .rpm whatever distro package manager packages that are not necessery used and just hanging around, that is often the case especially on Linux installed on Notebooks for a personal home use, where with years you have installed a growing number of packages which you don't actively use but installed just to take a look, while hunting for Cool Linux games and you wanted to give a try to Battle of Wesnoth  / FreeCIV / AlienArena / SuperTux Kart / TuxRacer etc.  or some GUI heavy programs like Krita / Inskape / Audacity etc.

To select which package might be not needed and just takes space hence you need to to list all installed packages on the system ordered by their size this is different in Debian based Linuces e.g. – Debian GNU / Linux / Ubuntu / Mint etc. and RPM based ones Fedora / CentOS / OpenSuSE


1. List all RPM installed packages by Size on CentOS / SuSE
 

Finding how much space each of the installed rpm packages take on the HDD and displaying them in a sorted order is done with:

rpm -qa –queryformat '%10{size} – %-25{name} \t %{version}\n' | sort -n

From the command above,  the '%10{size}' option aligns the size of the package to the right with a padding of 10 characters. The '%-25{name} aligns the name of the package to the left, padded to 25 characters. The '%{version} indicates the version and 'sort -n' flag sorts the packages according to size from the smallest to the largest in bytes.


2. List all installed RPM packages sorted by size on Fedora

Fedora has introduced the dnf package manager instead of yum, to get how much size individual rpm package occupies on system:

dnf info samba
Available Packages
Name        : samba
Arch        : x86_64
Epoch       : 2
Version     : 4.1.20
Release     : 1.fc21
Size        : 558 k
Repo        : updates
Summary     : Server and Client software to interoperate with Windows machines
URL         : http://www.samba.org/
License     : GPLv3+ and LGPLv3+
Description : Samba is the standard Windows interoperability suite of programs
            : for Linux and Unix.


To get a list of all packages on system with their size

dnf info * | grep -i "Installed size" |sort -n


3. List all installed DEB packages on Debian / Ubuntu / Mint etc. with dpkg / aptitude / apt-get and wajig


The most simple way to get a list of largest packages is through dpkg


# dpkg-query -Wf '${Installed-Size}\t${Package}\n' | sort -n
        brscan4
6       default-jre
6       libpython-all-dev
6       libtinfo-dev
6       python-all
6       python-all-dev
6       task-cinnamon-desktop
6       task-cyrillic
6       task-desktop
6       task-english
6       task-gnome-desktop
6       task-laptop
6       task-lxde-desktop
6       task-mate-desktop
6       task-print-server
6       task-ssh-server
6       task-xfce-desktop
8       mysql-client
8       printer-driver-all


207766    libwine
215625    google-chrome-stable
221908    libwine
249401    frogatto-data
260717    linux-image-4.19.0-5-amd64
262512    linux-image-4.19.0-6-amd64
264899    mame
270589    fonts-noto-extra
278903    skypeforlinux
480126    metasploit-framework


above cmd displays packages in size order, largest package last, but the output will include also size of packages, that used to exist,
have been removed but was not purged. Thus if you find  a package that is shown as very large by size but further dpkg -l |grep -i package-name shows package as purged e.g. package state is not 'ii' but 'rc', the quickest work around is to purge all removed packages, that are still not purged and have some configuration remains and other chunks of data that just take space for nothing with:

# dpkg –list |grep "^rc" | cut -d " " -f 3 | xargs sudo dpkg –purge


Be cautious when you execute above command, because if for some reason you uninstalled a package with the idea to keep old configuration files only and in case if you decide to use it some time in future to reuse already custom made configs but do run above purge commands all such package saved kept configs will disappear.
For people who don't want to mess up with, uninstalled but present packages use this to filter out ready to be purged state packages.

# dpkg-query -Wf '${db:Status-Status} ${Installed-Size}\t${Package}\n' | sed -ne 's/^installed //p'|sort -n


aptitude – (high level ncurses interface like to package management) can also be easily used to list largest size packages eating up your hard drive in both interactive or cli mode, like so:


# aptitude search –sort '~installsize' –display-format '%p %I' '~i' | head
metasploit-framework 492 MB
skypeforlinux 286 MB
fonts-noto-extra 277 MB
mame 271 MB
linux-image-4.19.0-6-amd64 269 MB
linux-image-4.19.0-5-amd64 267 MB
frogatto-data 255 MB
libwine 227 MB
google-chrome-stable 221 MB
libwine:i386 213 MB


  • –sort is package sort order, and ~installsize specifies a package sort policy.
  • installsize means 'sort on (estimated) installed size', and the preceding ~ means sort descending (since default for all sort policies is ascending).
  • –display-format changes the <you guessed :->. The format string '%p %I' tells aptitude to output package name, then installed size.
  • '~i' tells aptitude to search only installed packages.

How much a certain .deb package removal will free up on the disk can be seen with apt-get as well to do so for the famous 3D acceleration Graphic Card (enabled) or not  test game extremetuxracer

apt-get –assume-no –purge remove "texlive*" | grep "be freed" | 
   awk '{print $4, $5}'

Perhaps,  the easiest to remember and more human readable output biggest packages occupied space on disk is to install and use a little proggie called wajig to do so


# apt install –yes wajig


Here is how to pick up 10 biggest size packages.

root@jeremiah:/home/hipo# wajig large|tail -n 10
fonts-noto-cjk-extra               204,486      installed
google-chrome-stable               215,625      installed
libwine                            221,908      installed
frogatto-data                      249,401      installed
linux-image-4.19.0-5-amd64         260,717      installed
linux-image-4.19.0-6-amd64         262,512      installed
mame                               264,899      installed
fonts-noto-extra                   270,589      installed
skypeforlinux                      278,903      installed
metasploit-framework               480,126      installed


As above example lists a short package name and no description for those who want get more in depth knowledge on what exactly is the package bundle used for use:

# aptitude search –sort '~installsize' –display-format '%30p %I %r %60d' '~i' |head


%30p %I %r %60d display more information in your format string, or change field widths, enhanced format string

Meaning of parameters is:

  • %30p : package name in field width=30 char
  • %I : estimated install size
  • %r : 'reverse depends count': approximate number of other installed packages which depend upon this package
  • %60d : package's short description in field width=60 char

wajig is capable is a python written and idea is to easify Debian console package management (so you don't have to all time remember when and with which arguments to use apt-get / apt-cache etc.), below is list of commands it accepts.


root@jeremiah:/home/hipo## wajig commands
addcdrom           Add a Debian CD/DVD to APT's list of available sources
addrepo            Add a Launchpad PPA (Personal Package Archive) repository
aptlog             Display APT log file
autoalts           Mark the Alternative to be auto-set (using set priorities)
autoclean          Remove no-longer-downloadable .deb files from the download cache
autodownload       Do an update followed by a download of all updated packages
autoremove         Remove unused dependency packages
build              Get source packages, unpack them, and build binary packages from them.
builddeps          Install build-dependencies for given packages
changelog          Display Debian changelog of a package
clean              Remove all deb files from the download cache
contents           List the contents of a package file (.deb)
dailyupgrade       Perform an update then a dist-upgrade
dependents         Display packages which have some form of dependency on the given package
describe           Display one-line descriptions for the given packages
describenew        Display one-line descriptions of newly-available packages
distupgrade        Comprehensive system upgrade
download           Download one or more packages without installing them
editsources        Edit list of Debian repository locations for packages
extract            Extract the files from a package file to a directory
fixconfigure       Fix an interrupted install
fixinstall         Fix an install interrupted by broken dependencies
fixmissing         Fix and install even though there are missing dependencies
force              Install packages and ignore file overwrites and depends
hold               Place packages on hold (so they will not be upgraded)
info               List the information contained in a package file
init               Initialise or reset wajig archive files
install            Package installer
installsuggested   Install a package and its Suggests dependencies
integrity          Check the integrity of installed packages (through checksums)
large              List size of all large (>10MB) installed packages
lastupdate         Identify when an update was last performed
listall            List one line descriptions for all packages
listalternatives   List the objects that can have alternatives configured
listcache          List the contents of the download cache
listcommands       Display all wajig commands
listdaemons        List the daemons that wajig can start, stop, restart, or reload
listfiles          List the files that are supplied by the named package
listhold           List packages that are on hold (i.e. those that won't be upgraded)
listinstalled      List installed packages
listlog            Display wajig log file
listnames          List all known packages; optionally filter the list with a pattern
listpackages       List the status, version, and description of installed packages
listscripts        List the control scripts of the package of deb file
listsection        List packages that belong to a specific section
listsections       List all available sections
liststatus         Same as list but only prints first two columns, not truncated
localupgrade       Upgrade using only packages that are already downloaded
madison            Runs the madison command of apt-cache
move               Move packages in the download cache to a local Debian mirror
new                Display newly-available packages
newdetail          Display detailed descriptions of newly-available packages
news               Display the NEWS file of a given package
nonfree            List packages that don't meet the Debian Free Software Guidelines
orphans            List libraries not required by any installed package 
policy             From preferences file show priorities/policy (available)
purge              Remove one or more packages and their configuration files
purgeorphans       Purge orphaned libraries (not required by installed packages)
purgeremoved       Purge all packages marked as deinstall
rbuilddeps         Display the packages which build-depend on the given package
readme             Display the README file(s) of a given package
recdownload        Download a package and all its dependencies
recommended        Display packages installed as Recommends and have no dependents
reconfigure        Reconfigure package
reinstall          Reinstall the given packages
reload             Reload system daemons (see LIST-DAEMONS for available daemons)
remove             Remove packages (see also PURGE command)
removeorphans      Remove orphaned libraries
repackage          Generate a .deb file from an installed package
reportbug          Report a bug in a package using Debian BTS (Bug Tracking System)
restart            Restart system daemons (see LIST-DAEMONS for available daemons)
rpm2deb            Convert an .rpm file to a Debian .deb file
rpminstall         Install an .rpm package file
search             Search for package names containing the given pattern
searchapt          Find nearby Debian package repositories
show               Provide a detailed description of package
sizes              Display installed sizes of given packages
snapshot           Generates a list of package=version for all installed packages
source             Retrieve and unpack sources for the named packages
start              Start system daemons (see LIST-DAEMONS for available daemons)
status             Show the version and available versions of packages
statusmatch        Show the version and available versions of matching packages
stop               Stop system daemons (see LISTDAEMONS for available daemons)
tasksel            Run the task selector to install groups of packages
todo               Display the TODO file of a given package
toupgrade          List versions of upgradable packages
tutorial           Display wajig tutorial
unhold             Remove listed packages from hold so they are again upgradeable
unofficial         Search for an unofficial Debian package at apt-get.org
update             Update the list of new and updated packages
updatealternatives Update default alternative for things like x-window-manager
updatepciids       Updates the local list of PCI ids from the internet master list
updateusbids       Updates the local list of USB ids from the internet master list
upgrade            Conservative system upgrade
upgradesecurity    Do a security upgrade
verify             Check package's md5sum
versions           List version and distribution of given packages
whichpackage       Search for files matching a given pattern within packages


4. List installed packages order by size in Arch Linux

ArchLinux is using the funny named package manager – pacman (a nice prank for the good old arcade game).
What is distinctive of pacman uses libalpm (Arch Linux Package Management (ALPM) library) as a back-end to perform all the actions.


# pacman -Qi | awk '/^Name/{name=$3} /^Installed Size/{print $4$5, name}' | sort -hr | head -25
296.64MiB linux-firmware
144.20MiB python
105.43MiB gcc-libs
72.90MiB python2
66.91MiB linux
57.47MiB perl
45.49MiB glibc
35.33MiB icu
34.68MiB git
30.96MiB binutils
29.95MiB grub
18.96MiB systemd
13.94MiB glib2
13.79MiB coreutils
13.41MiB python2-boto
10.65MiB util-linux
9.50MiB gnupg
8.09MiB groff
8.05MiB gettext
7.99MiB texinfo
7.93MiB sqlite
7.15MiB bash
6.50MiB lvm2
6.43MiB openssl
6.33MiB db


There is another mean to list packages by size using a ArchLinux tool called pacgraph


# pacgraph -c | head -25

Autodetected Arch.
Loading package info
Total size: 1221MB
367MB linux
144MB pacgraph
98MB cloud-init
37MB grub
35MB icu
34MB git
31698kB binutils
19337kB pacman
11029kB man-db
8186kB texinfo
8073kB lvm2
7632kB nano
7131kB openssh
5735kB man-pages
3815kB xfsprogs
3110kB sudo
3022kB wget
2676kB tar
2626kB netctl
1924kB parted
1300kB procps-ng
1248kB diffutils


4. Debian Goodies


Most debian users perhaps never hear of debian-goodies package, but I thought it is worthy to mention it as sooner or later as a sysadmin or .deb based Desktop user it might help you somewhere.
 

Debian-goodies is sall toolbox-style utilities for Debian systems
 These programs are designed to integrate with standard shell tools,
 extending them to operate on the Debian packaging system.

 .
  dglob  – Generate a list of package names which match a pattern
           [dctrl-tools, apt*, apt-file*, perl*]
  dgrep  – Search all files in specified packages for a regex
           [dctrl-tools, apt-file (both via dglob)]
 .
 These are also included, because they are useful and don't justify
 their own packages:
 .
  check-enhancements
 
           – find packages which enhance installed packages [apt,
                dctrl-tools]
  checkrestart
 
           – Help to find and restart processes which are using old versions
               of upgraded files (such as libraries) [python3, procps, lsof*]
  debget     – Fetch a .deb for a package in APT's database [apt]
  debman     – Easily view man pages from a binary .deb without extracting
               [man, apt* (via debget)]
  debmany    – Select manpages of installed or uninstalled packages [man |
               sensible-utils, whiptail | dialog | zenity, apt*, konqueror*,
               libgnome2-bin*, xdg-utils*]
  dhomepage  – Open homepage of a package in a web browser [dctrl-tools,
               sensible-utils*, www-browser* | x-www-browser*]
  dman       – Fetch manpages from online manpages.debian.org service [curl,
               man, lsb-release*]
  dpigs      – Show which installed packages occupy the most space
               [dctrl-tools]
  find-dbgsym-packages
             – Get list of dbgsym packages from core dump or PID [dctrl-tools,
               elfutils, libfile-which-perl, libipc-system-simple-perl]
  popbugs    – Display a customized release-critical bug list based on
               packages you use (using popularity-contest data) [python3,
               popularity-contest]
  which-pkg-broke
             – find which package might have broken another [python3, apt]
  which-pkg-broke-build
             – find which package might have broken the build of another
               [python3 (via which-pkg-broke), apt]

Even simpler by that is to use dpigs shell script part of the debian-goodies package which will automatically print out the largest packages.

dpigs command output is exactly the same as 'dpkg-query -Wf '${Installed-Size}\t${Package}\n' | sort -nr | head', but is useful cause you don't have to remember that complex syntax.


5. Checking where your space is gone in a Spacesniffer like GUI manner with Baobab


In my prior article Must have software on a new installed Windows 2 of the  of the precious tools to set are Spacesniffer and WinDirStat.
Windows users will be highly delighted to know that SpaceSniffer equivallent is already present on Linux – say hello baobab.
Baobab
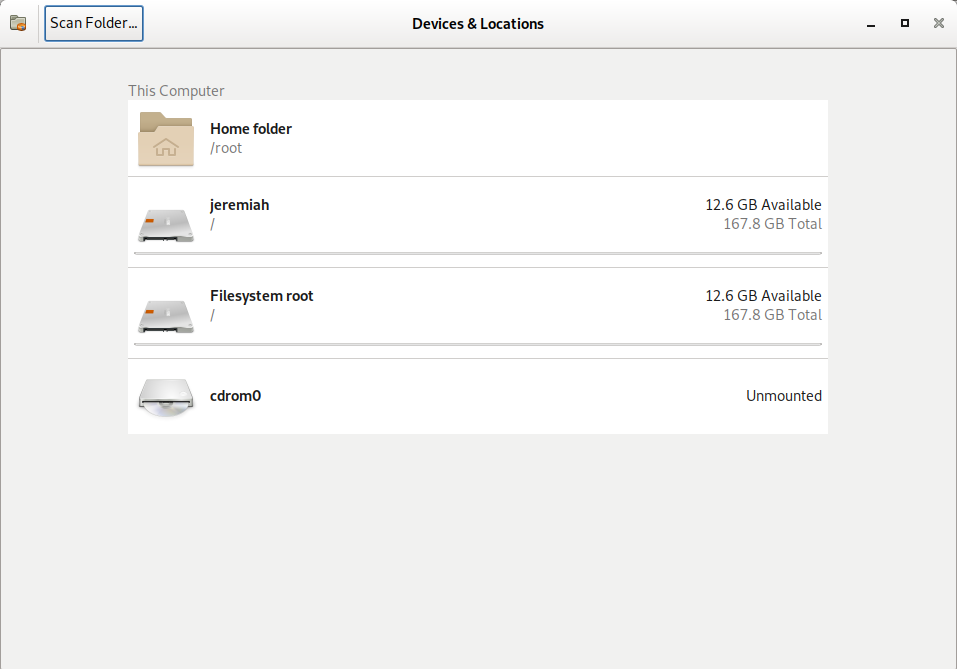
is simple but useful Graphic disk usage overview program for those who don't want to mess to much with the console / terminal to find out which might be the possible directory candidate for removal. It is very simplistic but it does well what it is aimed for, to install it on a Debian or .deb based OS.

# apt install –yes baobab

baobab-entry-screen-debian-gnu-linux-screenshot

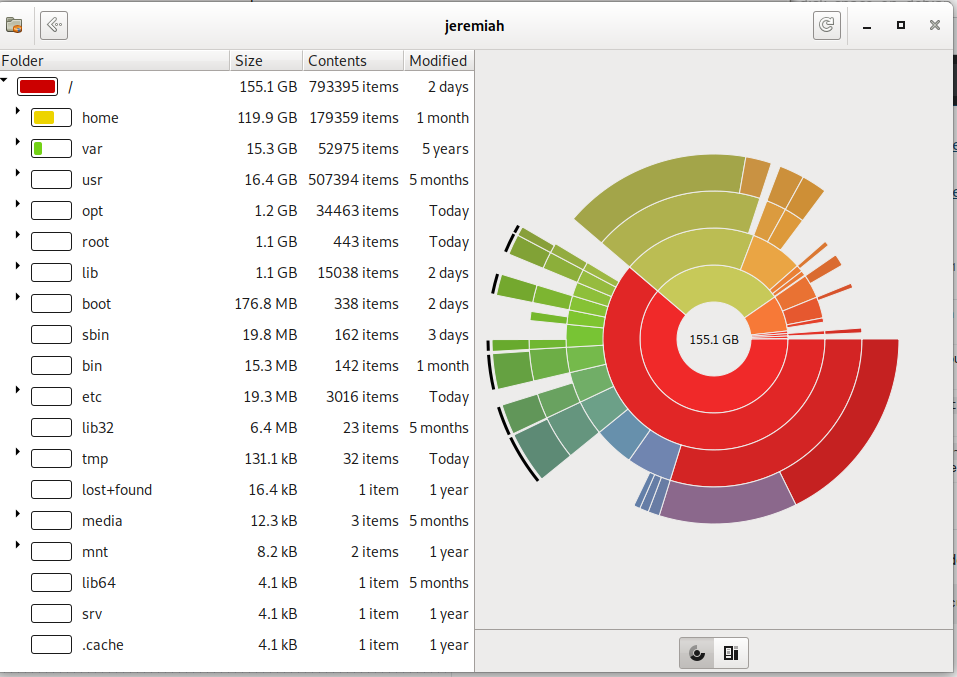
baobab Linux Hard Disk Usage Analyzer for GNOME. – It can easily scan either the whole filesystem or a specific user-requested branch (Iocal or remote)
 

baobab-entry-screen-debian-gnu-linux-directories-taking-most-space-pie-screenshot

Baobab / (root) directory statistics Rings Chart pie
 

baobab-entry-screen-debian-gnu-linux-disk-space-by-size-visualized-screenshot

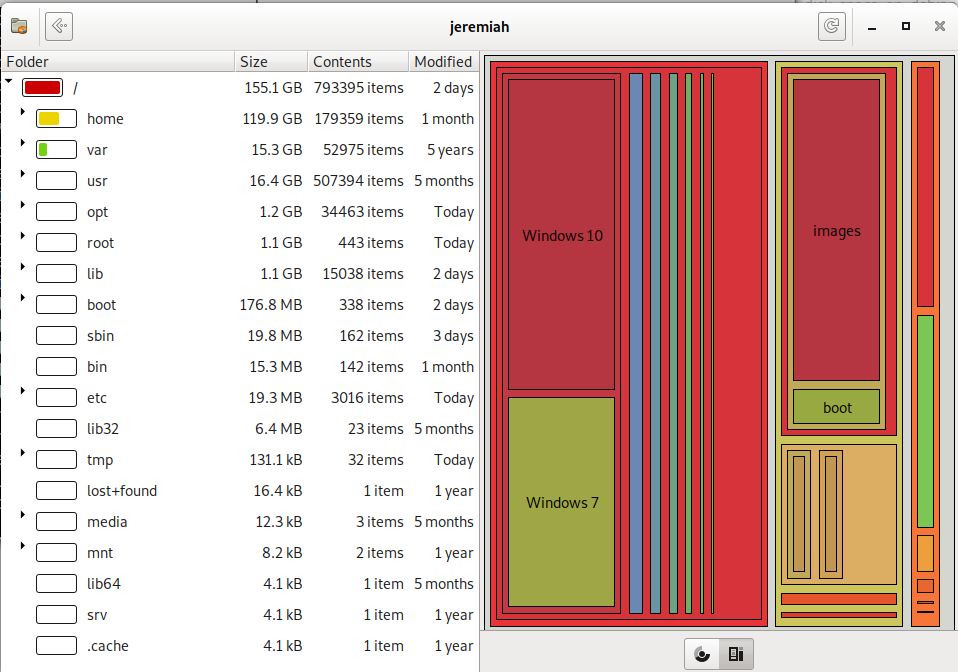
baobab – Treemap Chart for directory usage sorted by size on disk 

!!! Note that before removing any files found as taking up too much space with baobab – make sure this files are not essential parts of a .deb package first, otherwise you might break up your system !!!

KDE (Plasma) QT library users could use Qdirstat instead of baobab 
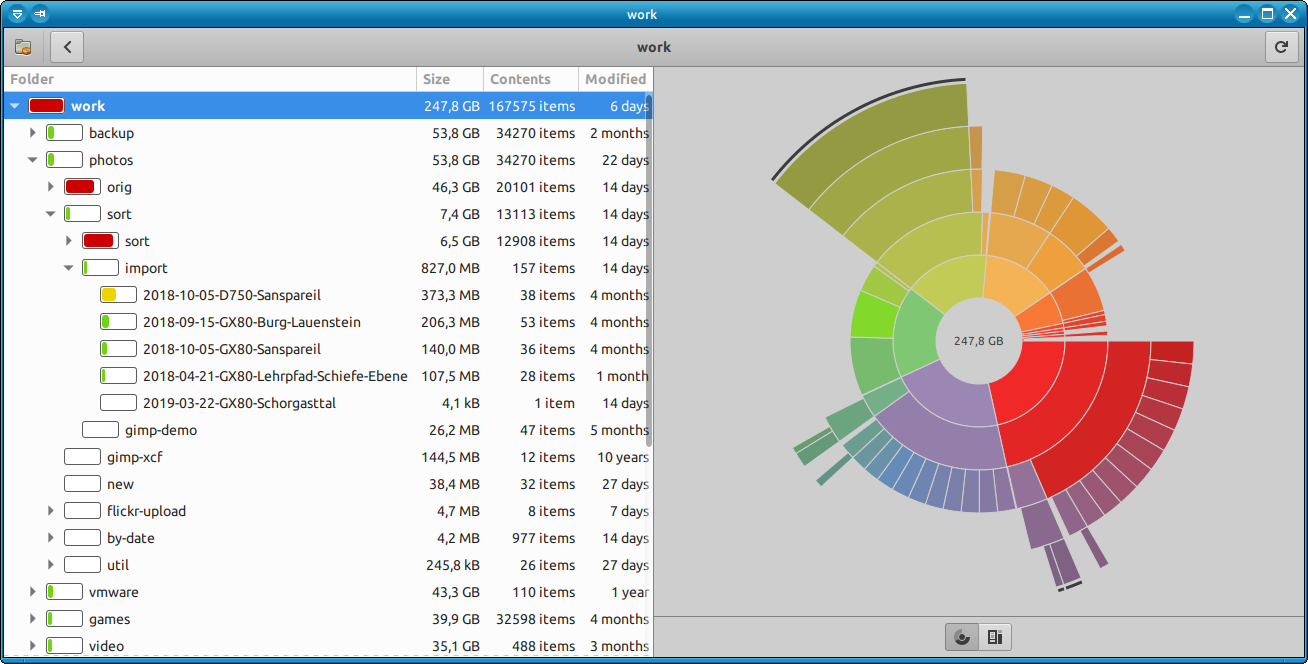
qdirstat-on-gnu-linur checking what is the disk space bottleneck qdirstat KDE


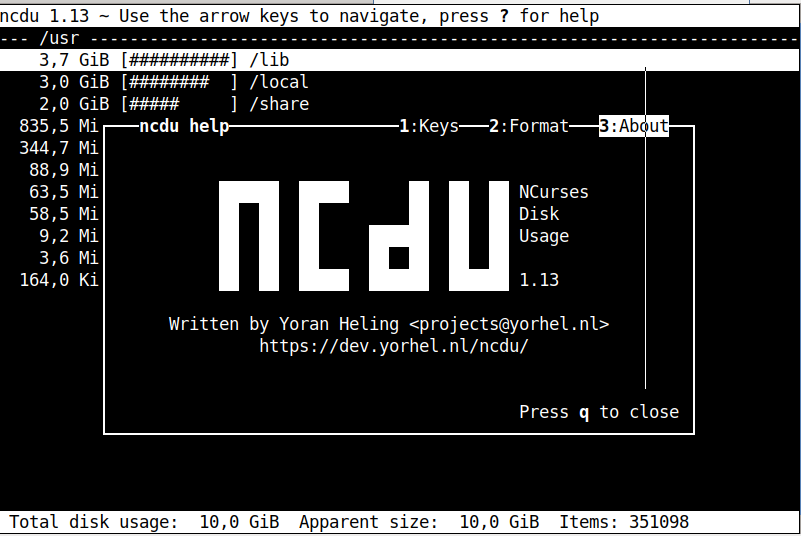
6. Use ncdu or duper perl script tool to generate directory disk usage in ASCII chart bar

ncdu and duper are basicly the same except one is using ncurses and is interactive in a very simplistic interface with midnight commander.
 

# apt install –yes ncdu
# ncdu /root

ncdu-gnu-linux-debian-screenshot


# apt-get install –yes durep
# durep -td 1 /usr

[ /usr    14.4G (0 files, 11 dirs) ]
   6.6G [#############                 ]  45.54% lib/
   5.5G [###########                   ]  38.23% share/
   1.1G [##                            ]   7.94% bin/
 552.0M [#                             ]   3.74% local/
 269.2M [                              ]   1.83% games/
 210.4M [                              ]   1.43% src/
  88.9M [                              ]   0.60% libexec/
  51.3M [                              ]   0.35% sbin/
  41.2M [                              ]   0.28% include/
   8.3M [                              ]   0.06% lib32/
 193.8K [                              ]   0.00% lib64/


Conclusion


In this article, I've shortly explained the few approach you can take to handle low disk space preventing you to update a regular security updates on Linux.
The easiest one is to clone your drive to a bigger (larger) sized SATA HDD or SDD Drive or using a free space left on a hard drive to exnted the current filling up the root partition. 

Further, I looked through the common reasons for endind with a disk being low spaced and a quick work around to free disk space through listing and purging larges sized package, this is made differently in different Linux distributions, because different Linux has different package managers. As I'm primary using Debian, I explained thoroughfully on how this is achieved with apt-get / dpkg-query / dpkg / aptitude and the little known debian-goodies .deb package manager helper pack. For GUI Desktop users there is baobab / qdirstat. ASCII lovers could enjoy durep and ncdu.

That's all folks hope you enjoyed and learned something new. If you know of other cool tools or things this article is missing please share.


How to downgrade package with apt-get on Debian / Ubuntu / Mint Linux

Thursday, October 19th, 2017

how-to-downgrade-debian-package-to-an-older-version-debian_package-box


How can I downgrade a debian package to an older version with apt-get?

Downgrading a package in Debian is not frequently required but sometimes it is a must lets say a package you just upgraded fails to communicate properly to an application, in my case that's Ejabberd server which was working pretty well with Yaxim, Bruno or Xabber Mobile android application clients, unfortunately right after periodic apt-get upgrades I do with apt due to security upgrade of deb package ejabberd=2.1.10-4+deb7u1 to ejabberd=2.1.10-4+deb7u2 it messed up and even though it worked fine with Desktop clients such as Gajim and Pidgin, there was no Android application on my Phone with Android 4.4 which was able to communicate properly with the TLS encrypted Jabber server so my only option was to downgrade back to ejabberd=2.1.10-4+deb7u1.

I looked through duckduckgo.com a short URL is (ddg.gg) but I couldn't find the old deb file to downgrade so I was in a situation …

 Then I duckduck goed (I've recently stopped using Google as Google is collecting too much data and sharing with NSA) and I found following instructions on downgrade

——— 

If you have the version number, or the target release, apt-get supports choosing a particular version or target release. More details can be found on manual page of apt-get. It can also be accessed from terminal by typing man apt-get

sudo apt-get install <package-name>=<package-version-number> OR

sudo apt-get -t=<target release> install <package-name>

is the command to be run. This can be used to down-grade a package to a specific version.

It has been helpfully pointed out in the comments that

    apt-cache showpkg <package-name> – lists all available versions. (h/t Sparhawk)
    apt-mark hold <package-name> "holds" – the package at the current version, preventing automatic upgrades. (h/t Luís de Sousa )


In other words All I had to do is as root superuser is:
 

apt-get install «pkg»=«version»

OR

aptitude install «pkg»=«version»

Where «pkg» is the name of the package, and «version» is the version number.


So I just issued following cmd:

root@pcfreak:~# apt-get install ejabberd=2.1.10-4+deb7u1
Четене на списъците с пакети… Готово
Изграждане на дървото със зависимости       
Четене на информацията за състоянието… Готово
Предложени пакети:
  libunix-syslog-perl
Следните НОВИ пакети ще бъдат инсталирани:
  ejabberd
0 актуализирани, 1 нови инсталирани, 0 за премахване и 3 без промяна.
Необходимо е да се изтеглят 1795 kB архиви.
След тази операция ще бъде използвано 3699 kB допълнително дисково пространство.
Изт:1 http://ftp.uk.debian.org/debian/ wheezy/main ejabberd amd64 2.1.10-4+deb7u1 [1795 kB]


P.S. Sorry for the cyrillic for those who can't read it but it is standard messages that Debian does in package install time.

Analogously you can do it for any other newer package that upgraded, later on to prevent further security updates of the package you will have to put the package on hold, that's as easy as running:
 

root@pcfreak:~# aptitude hold ejabberd
No packages will be installed, upgraded, or removed.
0 packages upgraded, 0 newly installed, 0 to remove and 4 not upgraded.
Need to get 0 B of archives. After unpacking 0 B will be used.


How to fix unfixable broken package dependencies on Debian GNU / Linux – Fix package mismatch

Wednesday, September 27th, 2017

how-to-fix-unfixable-broken-package-dependency-on-debian-ubuntu-linux-icon

I just tried to upgrade my Debian Wheezy 7 to the latest stable Debian Stretch 9 by not thinking too much and just changing the word wheezy with stretch in /etc/apt/sources.list so onwards on it looked like so:
 

cat /etc/apt/sources.list


deb http://ftp.bg.debian.org/debian/ stretch main contrib non-free
deb-src http://ftp.bg.debian.org/debian/ stretch main

deb http://security.debian.org/ stretch/updates main
deb-src http://security.debian.org/ stretch/updates main 

# stretch-updates, previously known as 'volatile'
##deb http://deb.debian.org/debian/ stretch-updates main
deb-src http://deb.debian.org/debian/ stretch-updates main


I also make sure all the defined Google Chrome / Opera / Skype and Squeeze Backports repositories existent in /etc/apt/sources.list.d directory files which in my case were like so;


root@noah:/etc/apt/sources.list.d# ls
google-chrome.list  opera-stable.list  squeeze-backports.list
opera.list          skype-stable.list


 were commented out because they were producing extra apt update errors …

And afterwards ran as usual:


apt-get update
apt-get –yes upgrade


The upgrade command executed fine and a lot of packages got downloaded and reinstalled without much issue, so I thought everything would be fine and just proceeded with the attempt to finalize the distribution major release 7 to major release 9 by running:


apt-get –yes dist-upgrade


But guess what now I got some dependency errors with cron and other installed packages that depend on package versions that are not going to be installed as the apt-get tool informed me.

I tried to out-smart the dpkg dependency system and removed all the packages reporting to have a missing dependencies with a short for bash loop after duming all the problematic packages showing dependency issues with commands such as:

apt-get -f dist-upgrade >> out.txt
for i in $(cat out.txt); awk '{ print $1 }' >> to_delete.txt; done


Before proceeding further I had to manually edit few lines in a text editor to remove some of the junk left from apt-get too.

So i was brave and just removed the dependency missing packages with following other for loop:


for i in $(cat to_delete.txt); do dpkg -r –force-all $i; done


Now I was hoping that rerunning:


apt-get autoremove

dpkg --configure -a

apt-get update -f
apt-get dist-upgrade -f


would no longer complain and I would just install the removed packages in another for shell loop once every other packages gets installed.

But guess what I was wrong … the system entered into another bunch of depedency terribly issues and messed up so badly that there were at least 50 packages reporting to have a missing / broken or uninstallable deb version depedency …

I got totally Angry, I knew already from experience that just trying to jump over while skipping a major release e.g. upgrade Debian 7 to Debian 9, instead of first upgrading to Debian 8 Linux and then upgrading Debian 8 to Debian 9 have always produced the same mess but I was lame and stupid again to f**k it up and I was out of mind swearing (a truly bad habid I'm not proud of) …

So as the notebook with Linux so far was perfectly working with Debian 7 and had a tons of old installed software and I was in a state where if I restart the system it was very likely my Thinkpad r61 laptop won't boot at all, I googled around to find a solution unfortunately without any luck, so finally I used the good old and tested method to DO IT MYSELF and Find the Fix without Uncle Google's help and by God's grace I did, after experimenting a while with the aptitude package / install / remove update tool without much success, finally I find the solution to the totally messed up Debian package dependencies and it all came to a simply reverting back my /etc/apt/source.list to look like following:


# deb cdrom:[Debian GNU/Linux 7.0.0 _Wheezy_ – Official amd64 CD Binary-1 20130504-14:44]/ wheezy main

##deb cdrom:[Debian GNU/Linux 7.0.0 _Wheezy_ – Official amd64 CD Binary-1 20130504-14:44]/ wheezy main

deb http://ftp.bg.debian.org/debian/ wheezy main contrib non-free
deb-src http://ftp.bg.debian.org/debian/ wheezy main

deb http://security.debian.org/ wheezy/updates main
deb-src http://security.debian.org/ wheezy/updates main

# wheezy-updates, previously known as 'volatile'
##deb http://deb.debian.org/debian/ wheezy-updates main
deb-src http://deb.debian.org/debian/ wheezy-updates main
##deb http://www.deb-multimedia.org wheezy main non-free
#deb http://ftp.debian.org/debian/ wheezy-backports main
###deb http://ftp.debian.org/debian/ wheezy-backports main contrib non-free
##deb http://dl.google.com/linux/chrome/deb/ wheezy main
#deb http://ftp2.de.debian.org/debian-volatile wheezy/volatile main
###deb http://www.deb-multimedia.org wheezy main non-free


run of the following two depedency fix commands !!!!


aptitude upgrade –full-resolver

aptitude full-upgrade –full-resolver


After a while a Debian LinuxOS system downgrade was initated and the missing packages were found, downloaded from the correct wheezy repositories and all broken and missing dependencies packages were fixed !!! HOORAY IT WORKS AGAIN!!


How to Fix E: Could not perform immediate configuration on ‘exim4-daemon-light’.

Saturday, March 23rd, 2013

If you get an error like:

E: Could not perform immediate configuration on 'exim4-daemon-light'. Please see man 5 apt.conf under APT::Immediate-Configure for details. (2)

,
During installing Exim with aptitude or apt-get, i.e. # apt-get install exim4-daemon-light

or

# aptitude install exim4-daemon-light

This is due to some kind of mess with other mail server packages (sendmail or postfix) previously installed on the host and some mess with mail servers installed on system, to solve it remove all SMTP server packages sendmail / postfix / exim and then after being sure all SMTP packages are purged from system from clean install Exim light SMTP variant: # apt-get update
# apt-get -f install
# apt-get --purge remove sendmail sendmail-bin
# dpkg --force-all -r postfix
# dpkg --purge exim4-base
# dpkg --purge exim4-config
# dpkg --purge exim4-daemon-light
# apt-get update
# apt-get -f install
# apt-get install exim4-base exim4-config exim4-daemon-light


Get more peaceful night sleep on Ubuntu, Mint and Xubuntu Linux using gtk-redshift

Monday, March 11th, 2013

gtk redshift Xubuntu Linux screenshot sleep peacefully when using computer at late

If you want to have more peaceful night sleep when working on Ubuntu or other Debian based Linux distro, be sure to have gtk-redshift installed.
It is a little program that simply changes the color gamma of screen and makes your screen look more reddish at night. According to many scientific research done on how we humans react, whether using computer late at night. It is concluded that less bright colors and especially reddish color gamma relaxes our eye strain and thus makes it easier for us to get a sleep quickly once in bed. gtk-redshift is available in latest Ubuntu 12.04 as well as on other Ubuntu derivatives (Xubuntu, Mint Linux) etc.

Easiest way to install it is via respective GUI Package Manager or via good old Synaptic (GUI aptitude frontend).
I personally prefer to always install Synaptic on new Desktop Linux PCs, use it as package GUI frontend, for the simple reason it offers one very similar "unified" package Installer outlook across different Linux distros.

The quickest way to use GUI version of Redshift is to install with apt:

root@xubuntu:~# apt-get install --yes gtk-redshift
....

To further use it it needs one time to be run with color gamma paraments, launch it first time via terminal with:
user@xubuntu:~$ gtk-redshift  -l 52.5:13.4

It is a good idea to make a tiny shell script wrapper with good settings for gtk-redshift and later use this shell wrapper as launcher :

root@xubuntu:~# echo '#!/bin/sh' >> /usr/local/bin/gtk-redshift
root@xubuntu:~# echo 'gtk-redshift' >> /usr/local/bin/gtk-redshift
root@xubuntu:~# chmod +x /usr/local/bin/gtk-redshift

From then on, to launch it you can directly open it via terminal

user@xubuntu:~$ /usr/local/bin/gtk-redshift

To make the program permanently work, make it run via respective GUI environment startup . In GNOME add it start-up from:

user@xubuntu:~$ gnome-session-manager

Important note to make about gtk-redshift is that on some older monitor screens, very early in morning the screen becomes too red, making screen look like displaying on very old long time used CRT monitors. For people working in fields like; Web Design, Architecture, or any drawing twisted colors effect will be annoying and will probably interfere with your perception of colors. However for programmers, system administrators and people who use computer mainly for typing and reading gtk-redshift is huge blessing.

Enjoy ! 🙂
 

How to copy / clone installed packages from one Debian server to another

Friday, April 13th, 2012

1. Dump all installed server packages from Debian Linux server1

First it is necessery to dump a list of all installed packages on the server from which the intalled deb packages 'selection' will be replicated.

debian-server1:~# dpkg --get-selections \* > packages.txt

The format of the produced packages.txt file will have only two columns, in column1 there will be the package (name) installed and in column 2, the status of the package e.g.: install or deinstall

Note that you can only use the –get-selections as root superuser, trying to run it with non-privileged user I got:

hipo@server1:~$ dpkg --set-selections > packages.txt
dpkg: operation requires read/write access to dpkg status area

2. Copy packages.txt file containing the installed deb packages from server1 to server2

There is many way to copy the packages.txt package description file, one can use ftp, sftp, scp, rsync … lftp or even copy it via wget if placed in some Apache directory on server1.

A quick and convenient way to copy the file from Debian server1 to server2 is with scp as it can also be used easily for an automated script to do the packages.txt file copying (if for instance you have to implement package cloning on multiple Debian Linux servers).

root@debian-server1:~# scp ./packages.txt hipo@server-hostname2:~/packages.txt
The authenticity of host '83.170.97.153 (83.170.97.153)' can't be established. RSA key fingerprint is 38:da:2a:79:ad:38:5b:64:9e:8b:b4:81:09:cd:94:d4. Are you sure you want to continue connecting (yes/no)? yes Warning: Permanently added '83.170.97.153' (RSA) to the list of known hosts. hipo@83.170.97.153's password:
packages.txt

As this is the first time I make connection to server2 from server1, I'm prompted to accept the host RSA unique fingerprint.

3. Install the copied selection from server1 on server2 with apt-get or dselect

debian-server2:/home/hipo# apt-get update
...
debian-server2:/home/hipo# apt-get upgrade
Reading package lists... Done
Building dependency tree
Reading state information... Done
debian-server2:/home/hipo# dpkg --set-selections < packages.txt
debian-server2:/home/hipo# apt-get -u dselect-upgrade --yes

The first apt-get update command assures the server will have the latest version of the packages currently installed, this will save you from running an outdated versions of the installed packages on debian-server2

Bear in mind that using apt-get sometimes, might create dependency issues. This is depending on the exact package names, being replicated in between the servers

Therefore it is better to use another approach with bash for loop to "replicate" installed packages between two servers, like so:

debian-server2:/home/hipo# for i in $(cat packages.txt |awk '{ print $1 }'); do aptitude install $i; done

If you want to automate the questioning about aptitude operations pass on the -y

debian-server2:/home/hipo# for i in $(cat packages.txt |awk '{ print $1 }'); do aptitude -y install $i; done

Be cautious if the -y is passed as sometimes some packages might be removed from the server to resolve dependency issues, if you need this packages you will have to again install them manually.

4. Mirroring package selection from server1 to server2 using one liner

A quick one liner, that does replicate a set of preselected packages from server1 to server2 is also possible with either a combination of apt, ssh, awk and dpkg or with ssh + dpkg + dselect :

a) One-liner code with apt-get unifying the installed packages between 2 or more servers

debian-server2:~# apt-get --yes install `ssh root@debian-server1 "dpkg -l | grep -E ^ii" | awk '{print $2}'`
...

If it is necessery to install on more than just debian-server2, copy paste the above code to all servers you want to have identical installed packages as with debian-server1 or use a shor for loop to run the commands for each and every host of multiple servers group.

In some cases it might be better to use dselect instead as in some situations using apt-get might not correctly solve the package dependencies, if encountering problems with dependencies better run:

debian-server2:/home/hipo# ssh root@debian-server1 'dpkg --get-selections' | dpkg --set-selections && dselect install

As you can see using this second dselect installed "package" mirroring is also way easier to read and understand than the prior "cryptic" method with apt-get, hence I personally think using dselect method is a better.

Well that's basically it. If you need to synchronize also configurations, either an rsync/scp shell script, should be used with all defined server1 config files or in case if a cloning of packages between identical server machines is necessery dd or some other tool like Norton Ghost could be used.
Hope this helps, someone.

Pingus – A Lemmings like arcade game for GNU / Linux and FreeBSD (Free Lemmings Clone)

Monday, January 2nd, 2012

Some might remember Psychosis Lemmings that we used to enjoy back in the glorious days of DOS 😉 I remember Lemmings used to be among the played game in one line with other top arcades like Dangerous Dave, Commander Keen, Xenon etc.
The game used to be quite unique for the time and it was quite cool that it worked on quite old machines lime my old 8086 XT with 640kb of memory. It even supported two player mode! 😉

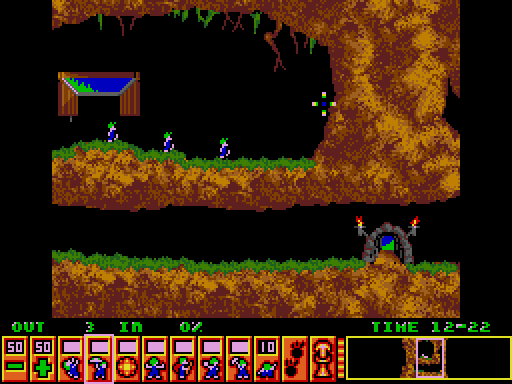
Lemmings arcade screenshot

I was happy to find out actually Lemmings remake is available in the Free Software OS realm . These Lemmings clone game is called Pingus
Instead of governing a group of lemmings which had to move to an exit door by making a save path using various tools and combination of team member character skills, the main heroes in Pingus are cute little penguins 😉

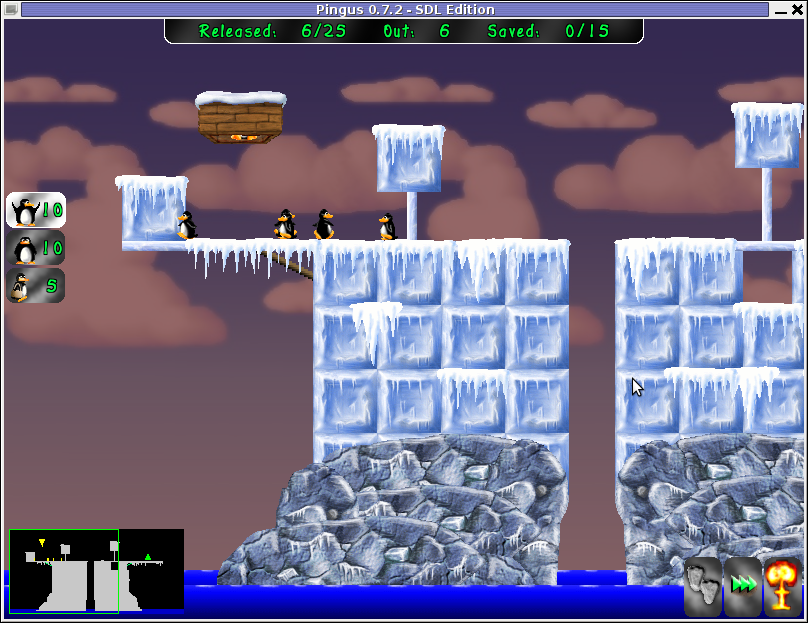
Screenshot Pingus, Lemmings game clone for Linux and FreeBSD

Pingus is built on TOP of SDL libraries and has a combination of awesome graphics and enjoyable music soundtrack and as a game play is a way better than its original predecessor.
If i have to to rank this game I would put it among the best 20 free software games ever produced for Linux / BSD.

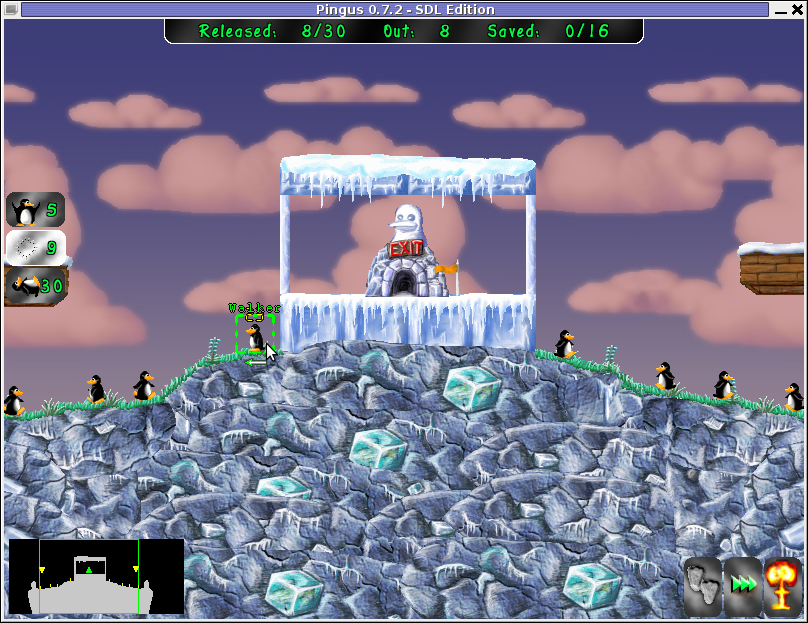
ScreenShot Pingus on Debian Linux

pingus is available for almost all kind of Linux distritubions as well as is included in the FreeBSD port tree:

On Debian its available as a package ready to be installed with aptitude or apt by issuing:

debian:~# aptitude install pingus

For FreeBSD pingus is installed via ports tree, by running cmds:

freebsd# cd /usr/ports/games/pingus
freebsd# make install && make install clean

By default pingus will run in a Windowed mode, to run the game in fullscreen you will have to run it with the -f switch via terminal, or by pressing ALT+F2 in GNOME and typing:

$ pingus -f

The game is quite hard to complete in that resembling the lemmings. It has an embedded Mapeditor , by which new levels can be easily constructed and sent to the game developers (in that way helping the game development).

Pingus is also multi-platform, licensed under GPL2 and is also ported for Mac OSX and MS Windows, allowing others non free software users enjoy.
Pingus Windows and MacOS X binary as well as source can be downloaded here

Pingus Lemmings like Free Software Game for Linux BSD level screenshot

Playing Pingus has few benefits, one is it can be nice to kill some boredom (for sysadmins) or / and bring some good past gaming memories. It's also good for developing some elder people strategic thinking as well as very suitable for little children to help develop their intellectual (thinking) in solving complex consequential tasks. Pingus could also be beneficial for teens to develop organizational and math skills.

Upgrading Skype 2.0 to Skype 2.2 beta on Debian GNU / Linux – Skype Mic hell

Saturday, December 31st, 2011

Making Skype work with Alsa on Debian GNU / Linux

Though, I'm GNU / Linux user for many years now. I have to say, everything is not so perfect as many people present it.
Configuring even simple things related to multimedia on Linux is often a complete nightmare.
An example, today I've decided to upgrade my 32 bit Skype version 2.0 beta for Linux to 64 bit Skype 2.2 beta .
The reason I was motivated to upgrade skype was basicly 2.

a) My Skype run through 32 bit binary emulation with /usr/bin/linux32

b) I had issues with my skype if someone give me a Skype Call, while I have a flash video or some other stream in Browser (let's say Youtube).
Actually being unable to receive a skype call or initiate one while I have some kind of music running in the background or just some kind of Youtube video paused was really annoying. Hence until now, everytime I wanted to speak over skype I had to close all Browser windows or tabs that are using my sound card and then restart my Skype program ….

Just imagine how ridiculous is that especially for a modern Multimedia supporting OS as Linux is. Of course the problems, I've experienced wasn't directly a problem of Linux. The problems are caused by the fact I have to use the not well working proprietary software version of Skype on my Debian GNU / Linux.
I would love to actually boycott Skype as RMS recommends, but unfortunately until now I can't, since many of my friends as well as employers use Skype to connect with me on daily basis.
So in a way I had to migrate to newer version of skype in order to make my Linux experience a bit more desktop like …

Back to the my skype 2.0 to 2.2. beta upgrade story, the overall Skype upgrade procedure was easy and went smootlhy, setting correct capturing later on however was a crazy task ….
Here is the step by step to follow to make my upgraded skype and internal notebook mic play nice together:

1. Download 64 bit Skype for Debian from skype.com

For the sake of preservation in case it disappears in future, I've made a mirror of skype for debian you can download here
My upgrade example below uses directly the 64 bit Skype 2.2beta binary mirror:

Here are the cmds once can issue if he has to upgrade to 2.2beta straight using my mirrored skype:

debian:~# wget https://www.pc-freak.net/files/skype-debian_2.2.0.35-1_amd64.deb
...

2. Remove the old version of skype

In my case I have made my previous skype installation using .tar.bz2 archive and not a debian package, however for some testing I also had a version of skype 2.0beta installed as a deb so for the sake of clarity I removed the existing skype deb install:

debian:~# dpkg -r skype
...

3. Install skype-debian_2.2.0.35-1_amd64.deb downloaded deb

debian:~# dpkg -i skype-debian_2.2.0.35-1_amd64.deb
...

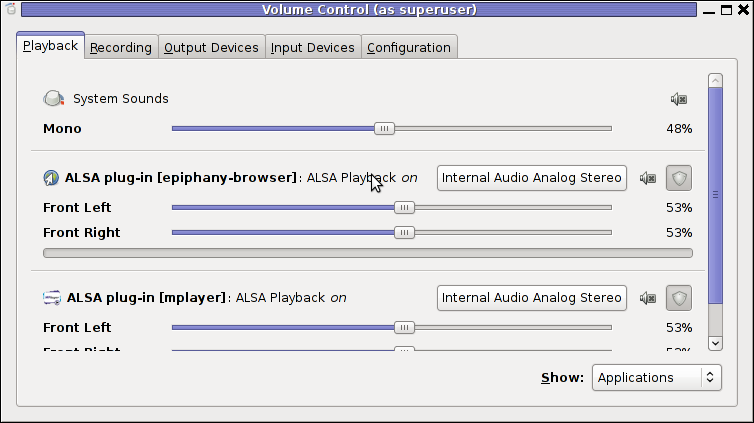
After installing skype, I installed pavucontrol A volume control for the PulseAudio sound server

4. Install pavucontrol

debian:~# apt-get install pavucontrol

PavUcontrol PulseAudio mixer screenshot

Pavucontrol has plenty of sound configurations and enables the user to change many additional settings which cannot be tuned in alsamixer

pavucontrol was necessery to play with until I managed to make my microphone able to record.

5. Build and install latest Debian (Testing) distribution alsa driver

debian:~# aptitude install module-assistant
debian:~# m-a prepare
debian:~# aptitude -t testing install alsa-source
debian:~# m-a build alsa
debian:~# m-a install alsa
debian:~# rmmod snd_hda_intel snd_pcm snd_timer snd soundcore snd_page_alloc
debian:~# modprobe snd_hda_intel
debian:~# echo 'options snd-hda-intel model=auto' >> /etc/modprobe.d/alsa-base.conf

In my case removing the sound drivers and loading them once again did not worked, so I had to reboot my system before the new compiled alsa sound modules gets loaded …
The last line echo 'options snd-hda-intel model=auto' … was necessery for my Thinkpard r61 Intel audio to work out. For some clarity my exact sb model is:

debian:~$ lspci |grep -i audio
00:1b.0 Audio device: Intel Corporation 82801H (ICH8 Family) HD Audio Controller (rev 03)

For other notebooks with different sound drivers echo 'options snd-hda-intel model=auto' … should be omitted.

6. Tune microphone and sound settings in alsamixer

debian:~$ alsamixer

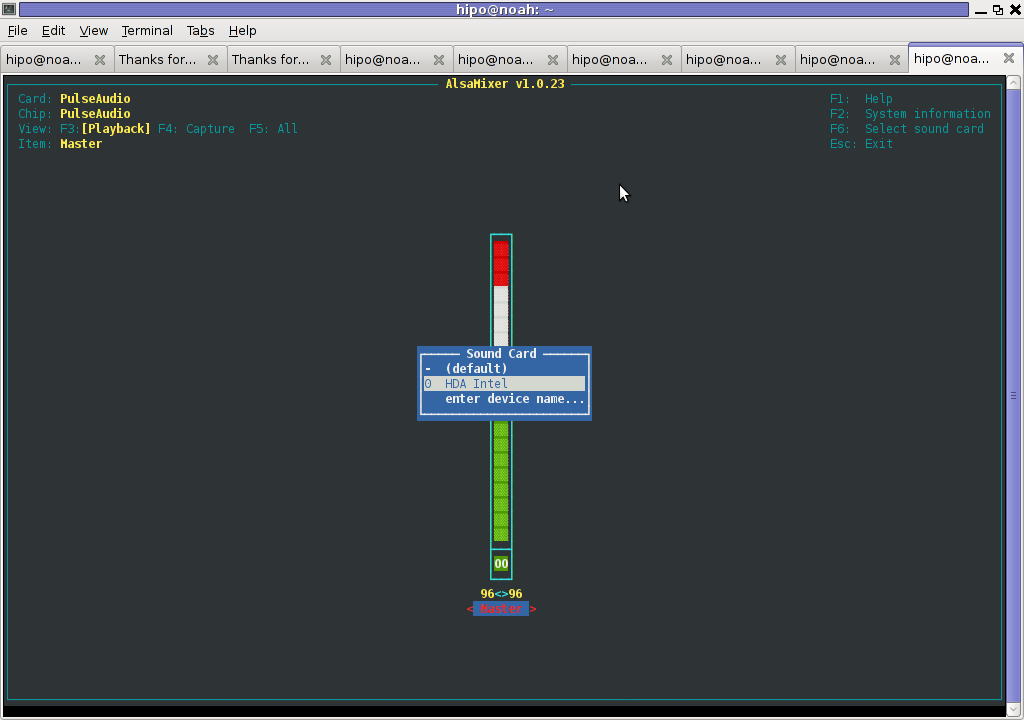
Alsamixer Select Soundcard Debian Linux Screenshot
Right after launching alsamixer I had to press F6: Select Sound Card and choose my sound card (0 HDA Intel).

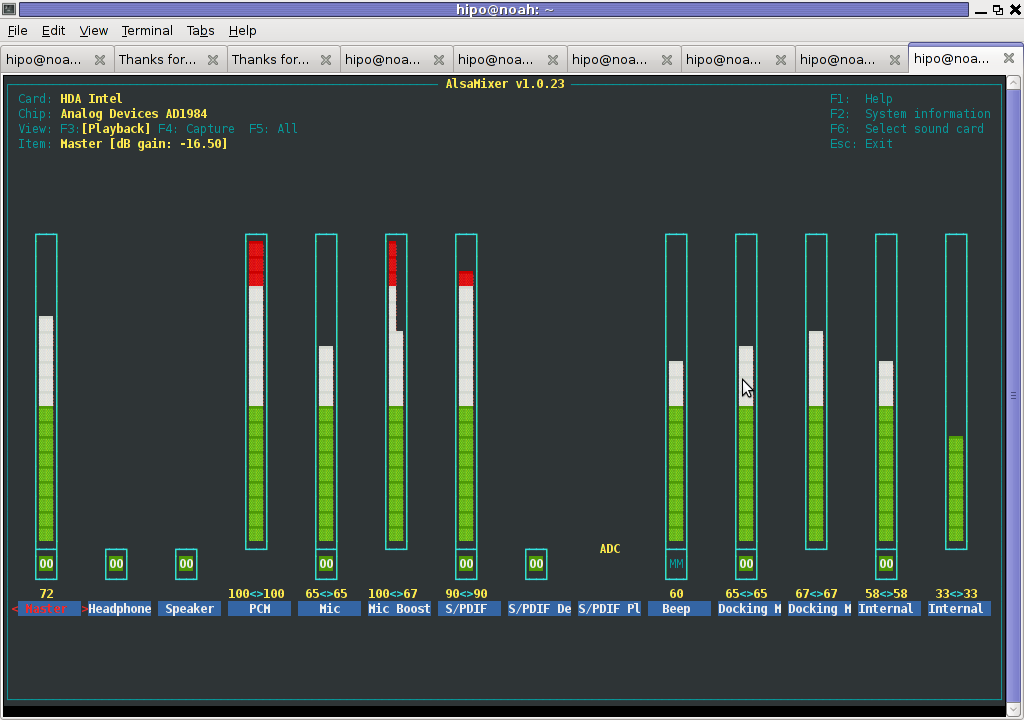
Following my choice I unmuted all the microphones and enabled Microphone Boost as well as did some adjustments to the MIC volume level.

Alsamixer My Intel SoundCard Debian Linux

Setting proper MIC Volume levels is absolutely necessery, otherwise there is a constant noise getting out of the speakers …

7. Use aumix to set some other sound settings

For some unclear reasons, besides alsamixer , I often had to fix stuff in aumix . Honestly I don't understand where exactly aumix fits in the picture with Alsa and my loaded alsa sound blaster module?? If someone can explain I'll be thankful.

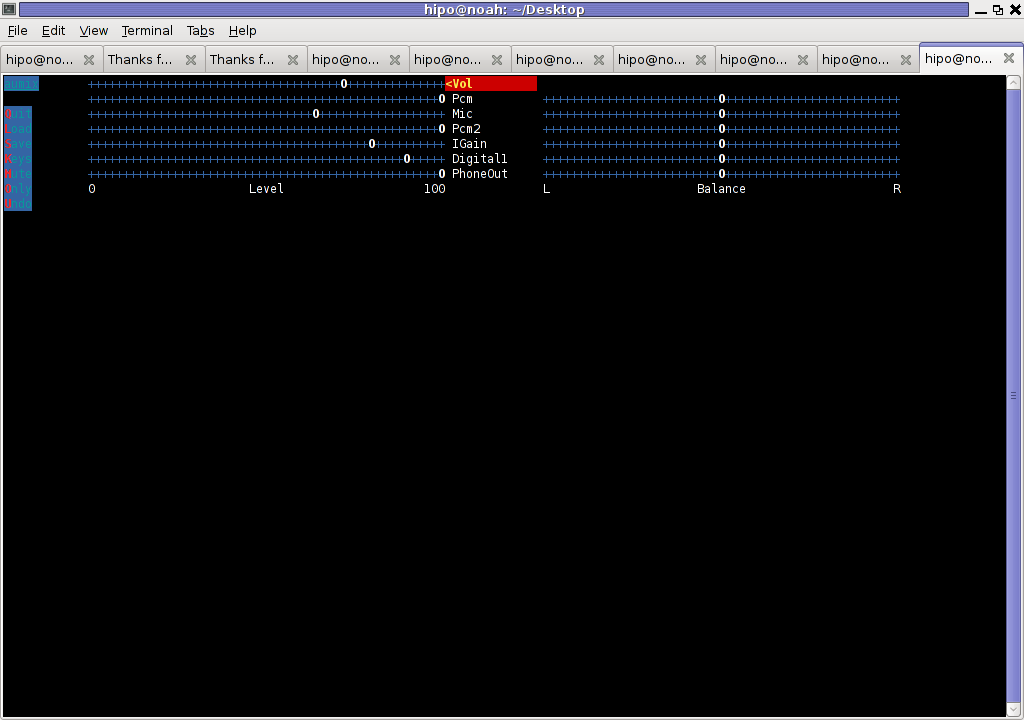
Launch aumix to further adjust some sound settings …

debian:~$ aumix

Aumix Debian GNU Linux Squeeze Screenshot

In above screenshot you see, my current aumix settings which works okay with mic and audio output.

9. Test Microphone the mic is capturing sounds correctly

Set ~/.asoundrc configuration for Skype

Edit ~/.asoundrc and put in:

pcm.pulse {
type pulse
}
ctl.pulse {
type pulse
}
pcm.!default {
type pulse
}
ctl.!default {
type pulse
}
pcm.card0 {
type hw
card 0
}
ctl.card0 {
type hw
card 0
}
pcm.dsp0 { type plug slave.pcm "hw:0,0" }
pcm.dmixout {
# Just pass this on to the system dmix
type plug
slave {
pcm "dmix"
}
}
pcm.skype {
type asym
playback.pcm "skypeout"
capture.pcm "skypein"
}
pcm.skypein {
# Convert from 8-bit unsigned mono (default format set by aoss when
# /dev/dsp is opened) to 16-bit signed stereo (expected by dsnoop)
#
# We cannot just use a "plug" plugin because although the open will
# succeed, the buffer sizes will be wrong and we will hear no sound at
# all.
type route
slave {
pcm "skypedsnoop"
format S16_LE
}
ttable {
0 {0 0.5}
1 {0 0.5}
}
}
pcm.skypeout {
# Just pass this on to the system dmix
type plug
slave {
pcm "dmix"
}
}
pcm.skypedsnoop {
type dsnoop
ipc_key 1133
slave {
# "Magic" buffer values to get skype audio to work
# If these are not set, opening /dev/dsp succeeds but no sound
# will be heard. According to the ALSA developers this is due
# to skype abusing the OSS API.
pcm "hw:0,0"
period_size 256
periods 16
buffer_size 16384
}
bindings {
0 0
}
}
I'm not 100% percent if putting those .asoundrc configurations are necessery. I've seen them on archlinux's wiki as a perscribed fix to multiple issues with Skype sound in / out.

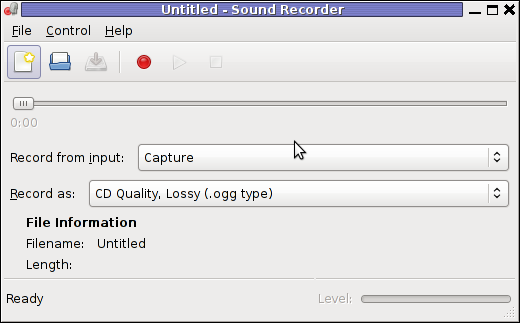
Onwardds, for the sake of test if my sound settings set in pavucontrol enables the internal mic to capture sound I used two programs:

1. gnome-sound-recorder
2. arecord

gnome-sound-recorder GNU / Linux Screenshot
gnome-sound-recorder

gnome-sound-recorder is probably used by most GNOME users, though I'm sure Linux noviced did not play with it yet.

arecord is just a simple console based app to capture sound from the microphone. To test if the microphone works I captured a chunk of sounds with cmd:

debian:~$ arecord cow.wav
Recording WAVE 'cow.wav' : Unsigned 8 bit, Rate 8000 Hz, Mono

Later on I played the file with aplay (part of alsa-utils package in Debian), to check if I'll hear if mic succesfully captured my voice, e.g.:

debian:~$ play cow.wav
cow.wav:
File Size: 22.0k Bit Rate: 64.1k
Encoding: Unsigned PCM
Channels: 1 @ 8-bit
Samplerate: 8000Hz
Replaygain: off
Duration: 00:00:02.75
In:100% 00:00:02.75 [00:00:00.00] Out:22.0k [-=====|=====-] Clip:0
Done.

By the way, the aplay ASCII text equailizer is really awesome 😉 aplay is also capable of playing (Ogg Vorbis .ogg) free sound format.

Further on, I launched the new installed version of skype and tested Skype Calls (Mic capturing), with Skype Echo / Sound Test Service
I'll be glad to hear if this small article, helped anybody to fix any skype Linux related issues ?. I would be happy to hear also from people who had similar issues with a different fixes for skype on Linux.
Its also interesting to hear from Ubuntu and other distributions users if following this tutorial had somehow helped in resolving issues with Skype mic.

Play Nintendo Super Mario Bros on Linux (Secret Mario Chronicles) and SuperTux

Monday, May 2nd, 2011

Super Mario for Linux, Super Mario Chronicles

Are you looking for free software version of the old-school absolute Nintendo classic Super Mario Bros. ? 🙂

If you’re an old-school geek gamer like me you definitely do 😉
I was lucky to find Secret Mario Chronicles a Linux version of Super Mario while I was browsing through all the available for installation Linux games in aptitude .

The game is really great and worthy to be played. It’s even a better copy of the classical arcade game than SuperTux (another Mario like Linux clone game)

Super Tux A Super Mario Bros. clone for Linux

Both Super Mario Chronicles and Super Mario Bros are available for installation as .deb packages in the repositories of Ubuntu and Debian and most likely the other Debian direvative Linux distrubtion.

To install and play the games out of the box, if you’re a Debian or Ubuntu user, just issue:

linux:~# apt-get install smc supertux

The other good news are that both of the games’s engine, music and graphics are GPLed 🙂

To Launch the games after installation in GNOME I’ve used the menus:

Applications -> Games -> Super Mario Chronicles
andApplications -> Games -> Arcade -> SuperTux

The games can also be launched from terminal with commands:

debian:~$ smc
debian:~$ supertux

The only thing I don’t like about Super Mario Chronicles is that it doesn’t have a good music and only sounds, just to compare SuperTux has an awesome level music.
Along with being an absolute classic I should say that these two games are one of the really good arcade games produced for Linux and if I have to rank them as a gamer among all the other boring arcade games today available for Linux this two ones ranks in the top 10 arcade games prdocuced for Linux

Enjoy and drop me a thanks comment 😉 !