These days very often I have to install, plain new Joomla based websites. I’ve realized that since there is no structured guide to follow describing the most essential plugins that every new fresh new joomla installation is required to have.
Thus I took the time and wrote this post, as it will be useful to myself in my future new joomla based websites establishment, I also believe these guide will be useful to other Joomla enthusiasts or administrators in their daily work.
Below I will describe in short the installation, configuration and oddities I’ve faced during installment of the above described bundle of plugins on a plan Joomla 1.5 install.These article will walk through 12 joomla essential plugins that I believe every fresh Joomla installation should be equipped with.
Hope this guide will be helpful to you. Now let’s start it up:
1. JoomlaXplorer – A sophisticated web file explorer for Joomla
One of the basic modules, beneficial with a new joomla CMS install is Joomla Xptplorer . This module enables the joomla admin to browse files in a web file explorer, on the server where the joomla CMS is installed. Below you see how handy the joomla web explorer provided by the plugin is:
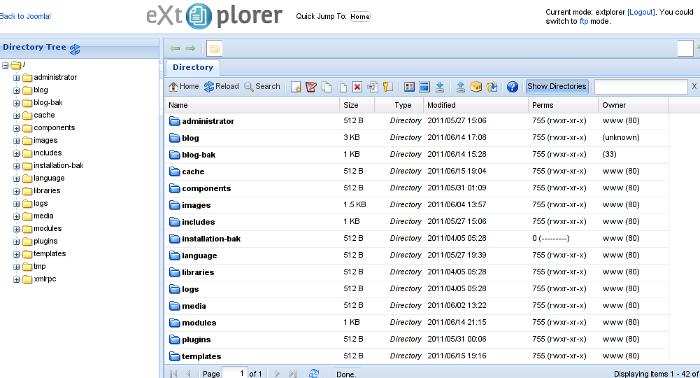
Installing and using the plugin is a piece of cake. To install the plugin:
a. download Joomla file Xplorer from here or from the official plugin website.
b. Install the plugin through the admin joomla menu:
Extensions -> Install/Uninstall
c. Start using the newly installed plugin by following to menus:
Components -> eXtplorer
2. JCrawler Generate easily sitemap.xml to aim the overall Joomla website SEO optimization

I have previously written a very through tutorial on how to install configure and generate website sitemap with Jcrawler module, You can read my article titled: How to build website sitemap.xml in Joomla here
3. sh404SEF – Make your Joomla links and content more user friendly

sh404SEF is a great Joomla plugin, which will seriously improve SEO and could contribute well for a website to be better indexed with major search engines.
I have previously written an article describing thoroughfully the install and use procedures for the module.
You can read the article Making your Joomla URLS Google friendly with sh404sef plugin / Simple Joomla link SEO here
4. Akeeba Backup Joomla solution

Installing a joomla backup solution is very essential if you does take care about your data, it often happens that server hard disk got crashes or a RAID massives got corrupted or some kind of other unexpected disaster hits the server. In these terrible times, having a website backup will save you nerves and data recovery funds, not to mention that in many cases data recovery is impossible.
Joomla has a very easy to use software for creating full website backup called Akeeba Backup
To start using the software one must:
a. Download Akeeba Backup and install it via:
Extensions -> Install/Uninstall
After the Akeeba Backup installation is over, to create your first backup, one needs to navigate to:
Components -> Akeeba Backup -> Backup Now
Each Akeeba backup (a version of the website’s files data and sql info) will be created in an archive file with the extension .jpa
The backup files are created under joomla’s website (main) root directory in directory location administrator/components/com_akeeba/backup
The Akeeba plugin also has capabilities to recover a (.jpa) backup restore point easily.
To recover a backup with the Akeeba plugin one needs to do it once again, via the plugin joomla web interface.
5. Google Analytics (place easy tracking code) in Joomla

a. Download the Google Analytics Tracking Module
The module is available from Joomla Extensions on joomla.org
At the current time of writting you need to download the analytics_tracking15,zip file
b. Install the Google Analytics Tracking Module;
Login as joomla admin and navigate to;
Extensions -> Install
Place the analytics_tracking15.zip url to the Install URL: field.
Again as of time of writting you need to place https://www.pc-freak.net/files/analytics_tracking15.zip;
c. Open the Module Manager
Extensions -> Module Manager
d. Click over Google Analytics Tracking Module
On the right pane you will notice in the Module Parameters the Analytics_uacct_code field. In the uacct_code field you need to paste your UA obtained from your created google-analytics account.
This code is usually something like UA-2101595-10
Now place your code their and press the save green button located near the right top of the screen. You should see the text in blue Item Saved which would indicate your UA code is stored already in the Google Analytics Tracking Module, now press the Cancel button located again on the right top.
As a last step before the Google analytics is set-up on the Joomla you need to enable the plugin to do you need to press over the tick left sided from the text reading Google Analytics Tracking Module in the Module Manager
e. Click over the Enabled button in Module Manager;
Google Analytics Tracking Module -> Enabled
6. Itprism (Facebook, Twitter etc.) Social Network share buttons Joomla plugin

a. to add the itpsocialbuttons to joomla Download the Itpsocialbuttons latest module files from http://itprism.com/free-joomla-extensions/social-buttons-plugin or use my mirrored module files below:
Download mod_itpsocialbuttons .zip file
Download plg_itpsocialbuttons .zip
After having the two files necessery to be installed to make the ITPSocialButtons appear on website, installation is done like with any other installation:
Extensions -> Install/Uninstall -> Upload Package File (Choose File)
Next its necessery to configure the plugin to do so, follow to menus:
Extensions -> Module Manager -> Share
You will notice the Share dialog in the list of Module Name column in Module Manager
Here is a screenshot on how the settings options for ITpsocialbuttons will look like:
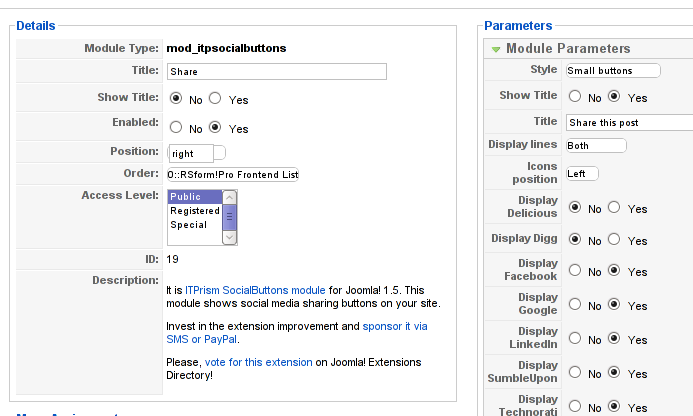
The options which I personally changed was:
Show Title – I set this one to No as I wanted to omit the plugin title text to appear on my website.
Further on I’ve set the Enabled option to Yes to enable the plugin and choose the buttons Style option to be of a Small buttons type.
I’ve also found that the most suitable position for the Social Share buttons were to be of a right – Position .
Here is how the social network itprism share buttons looks like:
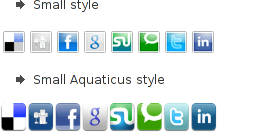
The plugin supports sharing of joomla pages to the following list of social networks:
- Delicios.com
- Digg.com
- Facebook
- Google Bookmarks
- StumbleUpon
- Technorati
- Twitter
- LinkedIn
The module configuration, also allows the user to configure the type of social network buttons, one wants to display on the website.
7. Joomla JCE Content Editor
This content editor is really awesome compared to the default editor TinyMCE. If you want to have an options rich content editor for Joomla, then this is the one for you 🙂
download JCE Content Editor here
After installing the JCE Joomla content editor in order to enable it as a default editor you need to go to the following location:
Site -> Global Configuration -> Default WYSIWYG Editor
There place on Editor TinyMCE and change it with Editor – JCE
Now go to edit some article, and you will see the difference in the editor 🙂
8. Add gallery Joomla capabilities with sigplus (Image Gallery Plus) and Very Simple Image Gallery
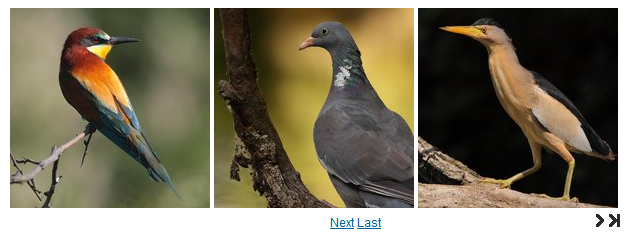
Image Gallery Plus plugin (sigplus) gallery review screenshot
sigplus Image Gallery Plus is a straightforward way to add image or photo galleries to a Joomla article with a simple syntax. It takes a matter of minutes to set up a gallery but those who are looking for a powerful gallery solution will not be disappointed either: sigplus is suitable for both beginner and advanced users.
Download Sigplus Joomla Image Gallery plugin here
Using sigllus is quite easy all one has to do is use Joomla Media Manager from links:
Site -> Media Manager
Create new folder in the stories folder, let’s say New Pictures and further on use Media Manager to upload all desired pictures to be later displayed.
Being done with uploading the images you want to display, go to Article Manager :
Content -> Article Manager
From there choose your article where new uploaded pictures you want to display and type in the article:
{gallery}New Pictures{/gallery}.
Note that New Pictures is the directory just recently created as stated below, it’s important that there is no spacing between {gallery}and New Pictures, if one tries {gallery} New Pictures {/gallery} instead of {gallery}New Pictures{/gallery} an error will occur instead of the pictures being displayed in a scrolled gallery.
Sigplus Image Gallery has also a number of configuration options, which might make it look a bit more decent.
I have to say in my view the default way sigplus displays pictures is awful!
Another alternative if you don’t like Sigplus ‘s way of creating new galleries is to use Very Simple Image Gallery
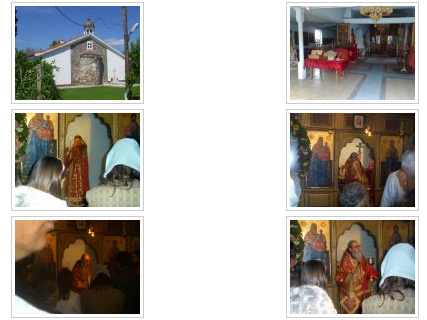
Here is a screenshot on a sample gallery created with Very Simple Image Gallery Joomla Plugin
You can download Very simple image gallery here
After installing the plugin. It’s use is analogous to the Sigplus . To use it likewise sigplus create new directory through Media Manager and in stories and upload your files in let’s say New Pictures1 . Later on in your article place, the code
{vsig}New Pictures1{/vsig}
Gallery will be generated automatically by the plugin. I think Simple Image Gallery is a bit more advanced and gives a better outlook to Galleries, though it’s configuration settings are much less than with SigPlus image gallery.
To add pictures comments e.g. img link alt=” and title=” tib you need to place a code within the Article manager similar to:
{vsig_c}0|Picture_1.JPG|Some sample text|Some other text{/vsig_c}

{vsig_c}0|Picture_2.JPG|Some example text|Some text{/vsig_c}

etc. ..
Note that the 0 in above example specifies the gallery number if you for instance are using a couple of galleries with Simple Image Gallery , the first one you used would be call 0 . The text specified as comments to the picture will also appear after you preview the gallery right below the picture when clicked on as a picture description in a really nice way.
9. Install Google maps plugin for Joomla
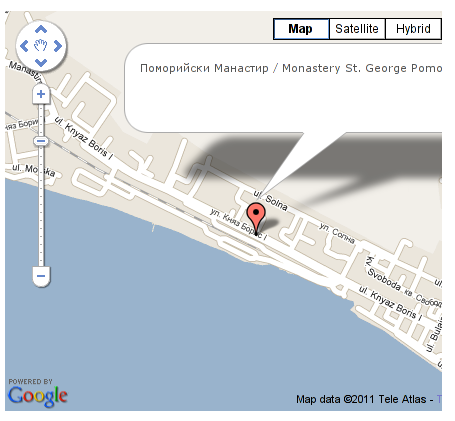
It’s a wise idea that every website has a location map on it’s website, for that reason Google maps is just great.
To install Google maps capability to joomla one can use a plugin called Google Maps .
You can straighly download Joomla’s Googlemap plugin from here
Afterwards use Extension Manager to install the plugin e.g. follow:
Extensions -&gr; Install/Uninstall (Choose File)
and click on Upload File & Install button.
To further enable and configure the Joomla Googlemap plugin you will have to go to the location:
Extensions -> Plugin Manager
Therein you will have to find and enable the Google Maps plugin which is to be found in the column named Plugin Manager
On my Joomla installation the plugin was located in the second page with modules, so if you don’t find the module on the listing with modules on the first page, make sure you scroll to the bottom of the page and click on Next button.
Therein in the list you will most likely notice Google Maps use the Enable button to enable it.
Next step is to configure the plugin, to do so press on the plugin name Google Maps
All configuration necessery here is to place Googlemaps API Key in the respective field (you will see it among config options).
Issuing a new Google Maps api key takes just few seconds, if you already have a gmail account just go to http://code.google.com/apis/maps/signup.html and take few seconds to issue the key.
You will get the key right on your gmail account after being issued (to repeat myself issuing takes few seconds so no worrier here).
One moreOnce having the key place it in the Googlemaps API Key field and configuring Address (which is one of the list of many options the plugin provides) you will be done with configuration.
To display a google map the location you just configured go to the Article Manager , select the article where you want the google maps location picture of your address to appear and type in the Article:
{mosmap|text='Exact street address location'|zoom='15'|zoomType='Large'|zoomNew='0'}
After you save the article a very nice Google map showing you the location’s streets will appear.
You can further conifgure a number of things related to the google map to appear, one thing you might want to play with is the zoom option which as you see in below’s code is equal to 15, e.g. zoom=’15’
Set it to another one if you want to regulate your googlemaps zoom level. For more thoroughful options take a look at the extensive plugin documentation.
10. Joomla Xmap (generating static HTML sitemap) Download Xmap from here , install it the usual plugin way.
Right after installation on the plugin succesful install screen you will notice the link component menu .
Clicking on the component menu you will be leaded to a page showing you few links Sitemap’s URL :
- XML Sitemap:
- HTML Sitemap:
- News Sitemap:
- Images Sitemap:
11. Add Joomla donate Paypal capabilities with Joomla PAYPAL DONATION MODULE

Just recently I’ve written a a post on how to add a paypal donation capabilities to joomla, you can read my previous post here
12. Install Joomla RSForms Module (Advanced Joomla Forms Support)
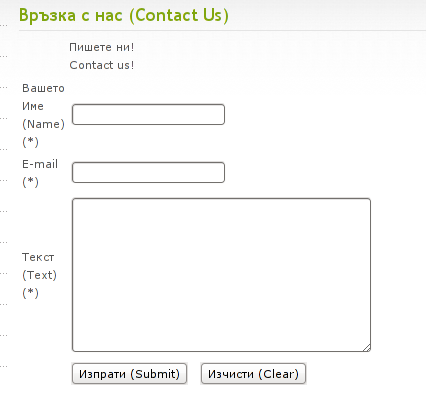
If you’re planning to add a complicated form support for Joomla, there are plenty of plugins, however one that was suggested by a friend of mine which is deep in Joomla world and moreover works good on my joomla installations is RSForms
Joomla – RSForms! is free to download and has great and easy interface to create new joomla forms.
At the time of writting I use these three RSForms components on new Joomla installations:
RSform Pro 1.1.0 com
Mod RsForm for Joomla 1.5
Mod Rsform list for Joomla
For latest release of RSForms! use the link http://www.rsjoomla.com/joomla-components/rsform.html
Installation is like any other module and is done through Extensions -> Install/Uninstall menu.
After installation, setting up a new form is available from the Joomla Menus:
Components -> RSform!Pro -> Manage Forms
I would not enter in details on how to edit the default RSForms or create a new RSForm. Just take some time and learn it by trying 😉
After the rsform is ready, to enable the new form, navigate to Joomla menus:
Menus -> Main Menu
Press the New button located in the buttons bar nearby the page header in the list of options in Select Menu item Type you will notice the RSForm!Pro as an option, press on it to establish the new form in the menus.
A follow up window will appear where one can set a Title: and Alias: for the new form as well as few other options.
After finalizing the settings press on Apply button to save the settings and the new form should appear in Joomla.
Probably there are many more handy plugins, which I’m missing here thus I’ll be glad if readers suggest some more helpful essential (must have plugins) for Joomla.
Feedback on this tutorial is very welcome!
Looking forward to hear for your opinions if my article was helpful to you 😉