Posts Tagged ‘input file’

Save data from failing hard disk on Linux – Rescuing data from failing disk with bad blocks

Wednesday, April 16th, 2014

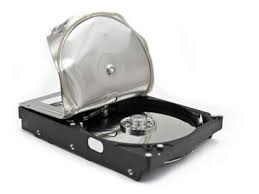
save-data-from-failing-hard-drive-data-recovery-badblocks-linux_1.jpg
Sooner or later your Linux Desktop or Linux server hard drive will start breaking up, whether you have a hardware or software RAID 1, 6 or 10 you can  and good hard disk health monitoring software you can react on time but sometimes as admins we have to take care of old servers which either have RAID 0 or missing RAID configuration and or disk firmware is unable to recognize failing blocks on time and remap them. Thus it is quite useful to have techniques to save data from failing hard disk drives with physical badblocks.

With ddrescue tool there is still hope for your Linux data though disk is full of unrecoverable I/O errors.

apt-cache show ddrescue
 

apt-cache show ddrescue|grep -i description -A 12

Description: copy data from one file or block device to another
 dd_rescue is a tool to help you to save data from crashed
 partition. Like dd, dd_rescue does copy data from one file or
 block device to another. But dd_rescue does not abort on errors
 on the input file (unless you specify a maximum error number).
 It uses two block sizes, a large (soft) block size and a small
 (hard) block size. In case of errors, the size falls back to the
 small one and is promoted again after a while without errors.
 If the copying process is interrupted by the user it is possible
 to continue at any position later. It also does not truncate
 the output file (unless asked to). It allows you to start from
 the end of a file and move backwards as well. dd_rescue does
 not provide character conversions.


To use ddrescue for saving data first thing is to shutdown the Linux host boot the system with a Rescue LiveCD like SystemRescueCD – (Linux system rescue disk), Knoppix (Most famous bootable LiveCD / LiveDVD), Ubuntu Rescue Remix or BackTrack LiveCD – (A security centered "hackers" distro which can be used also for forensics and data recovery), then mount the failing disk (I assume disk is still mountable :). Note that it is very important to mount the disk as read only, because any write operation on hard drive increases chance that it completely becomes unusable before saving your data!

To make backup of your whole hard disk data to secondary mounted disk into /mnt/second_disk

# mkdir /mnt/second_disk/rescue
# mount /dev/sda2 /mnt/second_disk/rescue
# dd_rescue -d -r 10 /dev/sda1 /mnt/second_disk/rescue/backup.img
# mount -o loop /mnt/second_disk/rescue/backup.img

In above example change /dev/sda2 to whatever your hard drive device is named.

Whether you have already an identical secondary drive attached to the Linux host and you would like to copy whole failing Linux partition (/dev/sda) to the identical drive (/dev/sdb) issue:

ddrescue -d -f -r3 /dev/sda /dev/sdb /media/PNY_usb/rescue.logfile

If you got just a few unreadable files and you would like to recover only them then run ddrescue just on the damaged files:

ddrescue -d –R -r 100 /damaged/disk/some_dir/damaged_file /mnt/secondary_disk/some_dir/recoveredfile

-d instructs to use direct I/O
-R retrims the error area on each retry
-r 100 sets the retry limit to 100 (tries to read data 100 times before resign)

Of course this is not always working as on some HDDs recovery is impossible due to hard physical damages, if above command can't recover a file in 10 attempts it is very likely that it never succeeds …

A small note to make here is that there is another tool dd_rescue (make sure you don't confuse them) – which is also for recovery but GNU ddrescue performs better with recovery.
How ddrescue works is it keeps track of the bad sectors, and go back and try to do a slow read of that data in order to read them.
By the way BSD users would happy to know there is ddrescue port already, so data recovery on BSDs *NIX filesystems if you're a Windows user you can use ddrescue to recover data too via Cygwin.
Of course final data recovery is also very much into God's hands so before launching ddrescue, don't forget to say a prayer 🙂
How to check any filesystem for bad blocks using GNU / Linux or FreeBSD with dd

Monday, November 28th, 2011

Check any filesystem partition for BAD BLOCKS with DD on GNU Linux and FreeBSD

Have you looked for a universal physical check up tool to check up any filesystem type existing on your hard drive partitions?
I did! and was more than happy to just recently find out that the small UNIX program dd is capable to check any file system which is red by the Linux or *BSD kernel.

I’ll give an example, I have few partitions on my laptop computer with linux ext3 filesystem and NTFS partition.
My partitions looks like so:

noah:/home/hipo# fdisk -l
Disk /dev/sda: 160.0 GB, 160041885696 bytes
255 heads, 63 sectors/track, 19457 cylinders
Units = cylinders of 16065 * 512 = 8225280 bytes
Sector size (logical/physical): 512 bytes / 512 bytes
I/O size (minimum/optimal): 512 bytes / 512 bytes
Disk identifier: 0x2d92834c
Device Boot Start End Blocks Id System
/dev/sda1 1 721 5786624 27 Unknown
Partition 1 does not end on cylinder boundary.
/dev/sda2 * 721 9839 73237024 7 HPFS/NTFS
/dev/sda3 9839 19457 77263200 5 Extended
/dev/sda5 9839 12474 21167968+ 83 Linux
/dev/sda6 12474 16407 31593208+ 83 Linux
/dev/sda7 16407 16650 1950448+ 82 Linux swap / Solaris
/dev/sda8 16650 19457 22551448+ 83 Linux

For all those unfamiliar with dddd – convert and copy a file this tiny program is capable of copying data from (if) input file to an output file as in UNIX , the basic philosophy is that everything is a file partitions themselves are also files.
The most common use of dd is to make image copies of a partition with any type of filesystem on it and move it to another system
Looking from a Windows user perspective dd is the command line Norton Ghost equivalent for Linux and BSD systems.
The classic way dd is used to copy let’s say my /dev/sda1 partition to another hard drive /dev/hdc1 is by cmds:

noah:/home/hipo# dd if=/dev/sda1 of=/dev/hdc1 bs=16065b

Even though the basic use of dd is to copy files, its flexibility allows a “trick” through which dd can be used to check any partition readable by the operating system kernel for bad blocks

In order to check any of the partitions listed, let’s say the one listed with filesystem HPFS/NTFS on /dev/sda2 using dd

noah:/home/hipo# dd if=/dev/sda2 of=/dev/null bs=1M

As you can see the of (output file) for dd is set to /dev/null in order to prevent dd to write out any output red by /dev/sda2 partition. bs=1M instructs dd to read from /dev/sda2 by chunks of 1 Megabyte in order to accelerate the speed of checking the whole drive.
Decreasing the bs=1M to less will take more time but will make the bad block checking be more precise.
Anyhow in most cases bs of 1 Megabyte will be a good value.

After some minutes (depending on the partition size), dd if, of operations outputs a statistics informing on how dd operations went.
Hence ff some of the blocks on the partition failed to be red by dd this will be shown in the final stats on its operation completion.
The drive, I’m checking does not have any bad blocks and dd statistics for my checked partition does not show any hard drive bad block problems:

71520+1 records in
71520+1 records out
74994712576 bytes (75 GB) copied, 1964.75 s, 38.2 MB/s

The statistics is quite self explanatory my partition of s size 75 GB was scanned for 1964 seconds roughly 32 minutes 46 seconds. The number of records red and written are 71520+1 e.g. (records in / records out). This means that all the records were properly red and wrote to /dev/null and therefore no BAD blocks on my NTFS partition 😉

How to extract Audio Sound and Music from Flash Videos (.flv) files and convert it to (.mp3) on Linux and BSD

Friday, April 15th, 2011

In my quest to know Linux better and use it capabilities to fulfill a multimedia tasks I came across the question:

How can I extract audio sound and music from Flash Videos .flv file format?

After a bit of investigation online I’ve found out in order to achieve this task the quickest way is via the handy ffmpeg conversion tool .

It’s rather easy actually, all necessery to do the conversion is to have the ffmpeg installed.
FFMpeg is part of Debian and Ubuntu repositories, so if you haven’t installed it yet, go straigh and install it with:

debian:~# apt-get install ffmpeg
...

Many modern day Linux distributions already have the ffmpeg pre-installed by default, ffmpeg even have a Windows version so this little tutorial should be directly applied on a Windows host with installed ffmpeg.

Convertion of a .flv file to .mp3 file for example is a real piece of cake to so do issue the command:

debian:~# ffmpeg -i input_file.flv -ab 128 -ar 44100 output_file.mp3

The few mmpeg options meaning is as follows:

-i (specifies input file)
-ab (Set the audio bitrate in bit/s 64k by default)
-ar (Set the audio sampling frequency (default = 44100 Hz).)

For more options checkout the ffmpeg help.

I found ffmpeg to be a bit slower than I expected. A 17 minutes .flv video file is converted to .mp3 for 38 seconds time.

Here is the textual output I got on my Debian Linux while extracting the flash video’s sound and converting it to mp3:

debian:~# time ffmpeg -i g7tvI6JCXD0.flv -ab 128 -ar 44100 output.mp3
FFmpeg version SVN-r25838, Copyright (c) 2000-2010 the FFmpeg developers
built on Jan 21 2011 08:21:58 with gcc 4.4.5
configuration: –enable-libdc1394 –prefix=/usr –extra-cflags=’-Wall -g ‘ –cc=’ccache cc’ –enable-shared –enable-libmp3lame –enable-gpl –enable-libvorbis –enable-pthreads –enable-libfaac –enable-libxvid –enable-postproc –enable-x11grab –enable-libgsm –enable-libtheora –enable-libopencore-amrnb –enable-libopencore-amrwb –enable-libx264 –enable-libspeex –enable-nonfree –disable-stripping –enable-avfilter –enable-libdirac –disable-decoder=libdirac –enable-libschroedinger –disable-encoder=libschroedinger –enable-version3 –enable-libopenjpeg –enable-libvpx –enable-librtmp –extra-libs=-lgcrypt –disable-altivec –disable-armv5te –disable-armv6 –disable-vis
libavutil 50.33. 0 / 50.39. 0
libavcore 0.14. 0 / 0.14. 0
libavcodec 52.97. 2 / 52.97. 2
libavformat 52.87. 1 / 52.87. 1
libavdevice 52. 2. 2 / 52. 2. 2
libavfilter 1.65. 0 / 1.65. 0
libswscale 0.12. 0 / 0.12. 0
libpostproc 51. 2. 0 / 51. 2. 0
[flv @ 0x1336760] Estimating duration from bitrate, this may be inaccurate

Seems stream 0 codec frame rate differs from container frame rate: 2000.00 (2000/1) -> 29.92 (359/12)
Input #0, flv, from ‘g7tvI6JCXD0.flv’:
Metadata:
duration : 1060
starttime : 0
totalduration : 1060
width : 480
height : 360
videodatarate : 76
audiodatarate : 94
totaldatarate : 179
framerate : 30
bytelength : 23723246
canseekontime : true
sourcedata : B5F9E82C6HH1302704673918653
purl :
pmsg :
Duration: 00:17:40.35, start: 0.000000, bitrate: 174 kb/s
Stream #0.0: Video: h264, yuv420p, 480×360 [PAR 1:1 DAR 4:3], 77 kb/s, 29.92 tbr, 1k tbn, 2k tbc
Stream #0.1: Audio: aac, 44100 Hz, stereo, s16, 96 kb/s
WARNING: The bitrate parameter is set too low. It takes bits/s as argument, not kbits/s
Output #0, mp3, to ‘output.mp3’:
Metadata:
duration : 1060
starttime : 0
totalduration : 1060
width : 480
height : 360
videodatarate : 76
audiodatarate : 94
totaldatarate : 179
framerate : 30
bytelength : 23723246
canseekontime : true
sourcedata : B5F9E82C6HH1302704673918653
purl :
pmsg :
TSSE : Lavf52.87.1
Stream #0.0: Audio: libmp3lame, 44100 Hz, stereo, s16, 0 kb/s
Stream mapping:
Stream #0.1 -> #0.0
Press [q] to stop encoding
size= 16576kB time=1060.81 bitrate= 128.0kbits/s
video:0kB audio:16575kB global headers:0kB muxing overhead 0.002404%

real 0m38.489s
user 0m37.126s
sys 0m0.764s

When talking about conversions, another very useful application of ffmpeg is in case if you want to:

Extract Audio from online streams

Let’s say you have a favourite radio, you often listen and there are a podcast you want to capture for later listening, or just catch a few nice songs, using ffmpeg it’s a piece of cake by using the command like:

debian:~# ffmpeg -i http:///xxx.xxx.xxx.xxx/some -ab 128 -ar 44100 captured-radio-sound.mp3

The possible ways of use of ffmpeg is truly versatily, you can use it for instance if you have to convert some kind of audio or video format to another one I have given a very simple example of converting a .flv file to .avi and vice versa in my previous post