Posts Tagged ‘drive’
Thursday, June 5th, 2025
It happens sometimes on Windows that accidently you deleted some files or directory with pressing Shift + DELETE key (not sending it to Trashbin) or by deleting fies / dirs by sending them in Trashbin but you decided you want them back once you have cleared up the Trashbin.
If this is the case it is pretty easy to recover deleted files in Windows using free (freeware) unpaid soft and tools, to do so chooose on of the many options described and follow the some of below methods by the well known and reputable tools pointed next.
1. Use Recuva (Free Version)
Recuva is one of the most popular free file recovery tools from the makers of CCleaner.
Steps:
-
Download from the official site: https://www.ccleaner.com/recuva
-
Install and open Recuva.
-
Select the type of files you want to recover (e.g., pictures, documents).
-
Choose the drive where the file was deleted.
-
Use the Deep Scan option if the regular scan fails.
-
Select files to recover and save them to a different drive to avoid overwriting.
2. Use PhotoRec (Part of TestDisk)
Despite the name, PhotoRec can recover many types of files, not just photos.
Steps:
-
Download TestDisk & PhotoRec: https://www.cgsecurity.org/
-
Extract the archive and run
photorec_win.exe.
-
Select the drive, then the partition.
-
Choose the file system type (typically "Other").
-
Select a destination for recovered files on another drive.
-
Let it scan and recover files.
-
⚠️ PhotoRec runs in a command-line interface but is powerful and completely free.
Note that Photorec is also available and can be used on Linux to recover files and if you're used to do things from command line I strongly recommend to give it a try on Windows as well.
3. Windows File History / Previous Versions (If Enabled)
If File History or System Protection was enabled:
Steps:
-
Right-click the folder where the file was.
-
Choose Restore previous versions.
-
Browse previous versions and restore as needed.
4. Windows File Recovery (Microsoft's Free CLI Tool)
A command-line tool from Microsoft for advanced users is avalable it is called winfr
Steps:
-
Download from Microsoft Store: Windows File Recovery
-
Open Command Prompt as Administrator.
-
To recover just a single file use the command:
C:\>
winfr C: D: /regular /n \Users\YourName\Documents\file.txt
Replace paths as needed.
-
To recover a directory it is pretty much the same except you have to include the directory instead of file
C:\>
winfr C: D: /regular /n \Users\YourName\Documents\YourDeletedFolder\
Replace
C:
and
D:
with the appropriate source and destination drives.
-
C:
= source drive (where the folder was deleted)
-
D:
= destination drive (where recovered files will be saved)
-
/n
= path filter (target folder)
-
/regular
= mode suitable for NTFS drives
Important Tips:
- Stop using the drive where the file was deleted to avoid overwriting it.
- Always recover to a different drive.
- The sooner you act, the higher the recovery success rate.
Tags: command, Deleted, destination, directory, download, drive, ecover, Files, Free, free software restore files, freeware, How to, howto, Important Tips, restore accidently deleted files, restore directory, restore files windows, single file, software, type, unpaid, use, using, Windows, Windows File Recovery Microsoft, wwindows, www
Posted in Backups, Curious Facts, Windows | No Comments »
Monday, March 28th, 2022
Sometimes you have to work with Windows 7 / 8 / 10 PCs etc. that has a very small partition C:\
drive or othertimes due to whatever the disk got filled up with time and has only few megabytes left
and this totally broke up the windows performance as Windows OS becomes terribly sluggish and even
simple things as opening Internet Browser (Chrome / Firefox / Opera ) or Windows Explorer stones the PC performance.
You might of course try to use something like Spacesniffer tool (a great tool to find lost data space on PC s short description on it is found in my previous article how to
delete temporary Internet Files and Folders to to speed up and free disk space ) or use CCleaner to clean up a bit the pc.
Sometimes this is not enough though or it is not possible to do at all the main
partition disk C:\ is anyhow too much low (only 30-50MB are available on HDD) or the Physical or Virtual Machine containing the OS is filled with important data
and you couldn't risk to remove anything including Internet Temporary files, browsing cookies … whatever.
Lets say you are the fate chosen guy as sysadmin to face this uneasy situation and have no easy
way to add disk space from another present free space partition or could not add a new SATA hard drive
SSD drive, what should you do?
The solution wipe off pagefile.sys and hiberfil.sys
Usually every Windows installation has a pagefile.sys and hiberfil.sys.
- pagefile.sys – is the default file that is used as a swap file, immediately once the machine runs out of memory. For Unix / Linux users better understanding pagefile.sys is the equivallent of Linux's swap partition. Of course as the pagefile is in a file and not in separate partition the swapping in Windows is perhaps generally worse than in Linux.
- hiberfil.sys – is used to store data from the machine on machine Hibernation (for those who use the feature)
Pagefile.sys which depending on the configured RAM memory on the OS could takes up up to 5 – 8 GB, there hanging around doing nothing but just occupying space. Thus a temporary workaround that could free you some space even though it will degrade performance and on servers and production machines this is not a good solution on just user machines, where you temporary need to free space any other important task you can free up space
by seriously reducing the preconfigured default size of pagefile.sys (which usually is 1.5 times the active memory on the OS – hence if you have 4GB you would have a 6Gigabytes of pagefile.sys).
Other possibility especially on laptop and movable devices running Win OS is to disable hiberfil.sys, read below how this is done.
The temporary solution here is to simply free space by either reducing the pagefile.sys or completely disabling it
1. Disable pagefile.sys on Windows XP, Windows 7 / 8 / 10 / 11
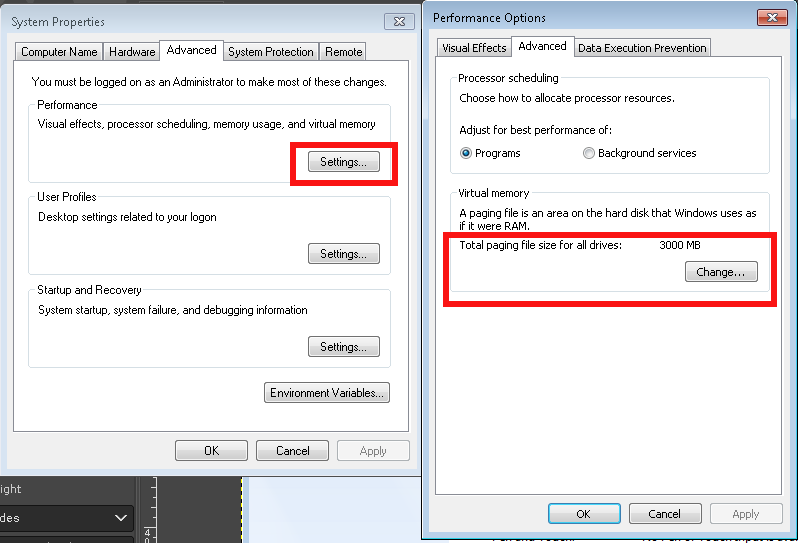
The GUI interface to disable pagefile across all NT based Windows OS-es is quite similar, the only difference is newer versions of Windows has slightly more options.
1.1 Disable pagefile on Windows XP
Quickest way is to find pagefile.sys settings from GUI menus
1. Computer (My Computer) – right click mouse
2. Properties (System Preperties will appear)
3. Advanced (tab)
4. Settings
5. Advanced (tab)
6. Change button
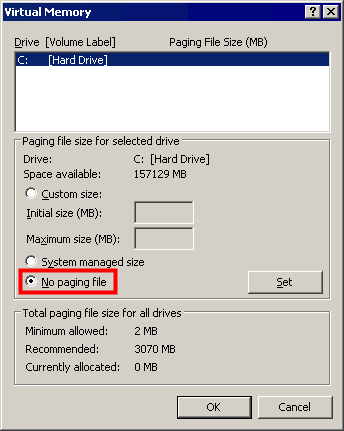
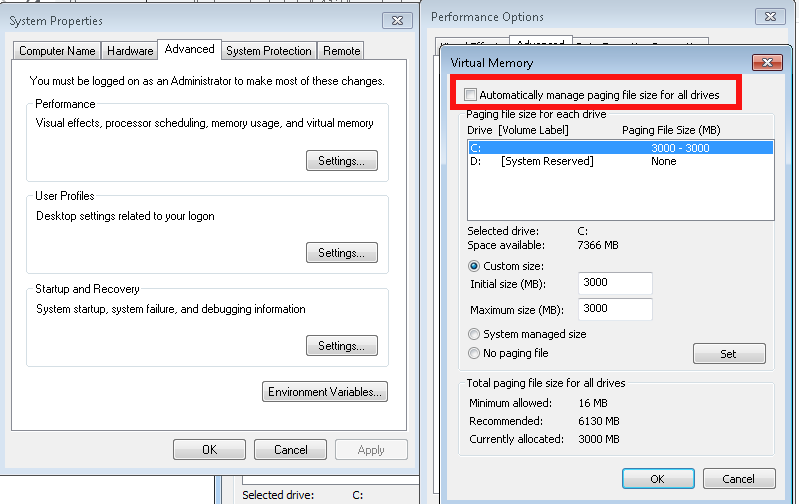
1.2 Disable pagefile on Windows 7
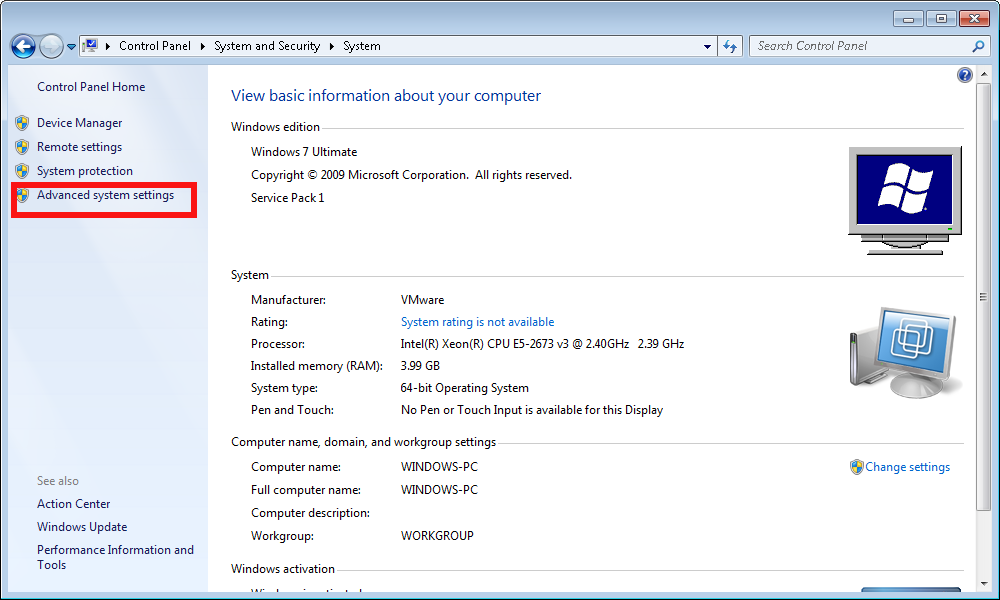
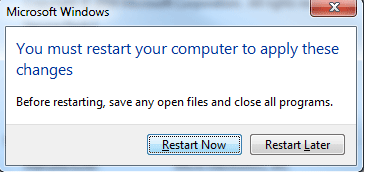
Once applied you'll be required to reboot the PC
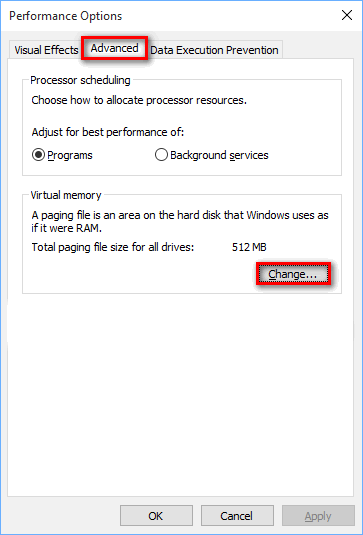
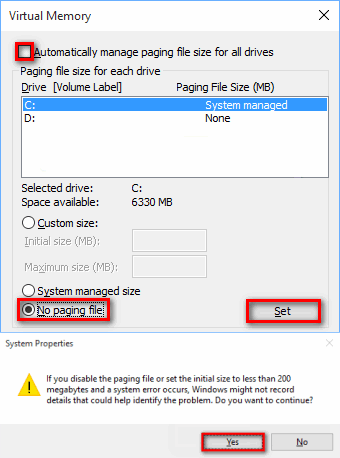
1.3 Disable Increase / Decrease pagefile.sys on Windows 10 / Win 11
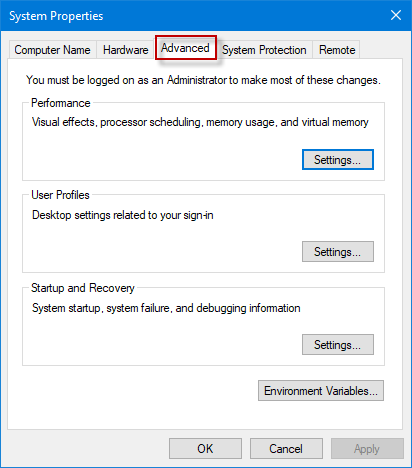
1.4 Make Windows clear pagefile.sys on shutdown
On home PCs it might be useful thing to clear up ( nullify) pagefile.sys on shutdown, that could save you some disk space on every reboot, until file continuously grows to its configured Maximum.
Run
regedit
Modify registry key at location
HKEY_LOCAL_MACHINE\SYSTEM\CurrentControlSet\Control\Session Manager\Memory Management
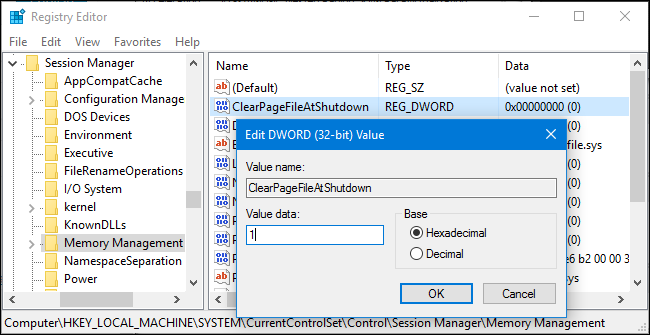
You can apply the value also via a registry file you can get the Enable Clearpagefile at shutdown here .reg.
2. Manipulating pagefile.sys size and file delete from command line with wmic tool
For scripting purposes you might want to use the wmic pagefile which can do increase / decrase or delete the file without GUI, that is very helpful if you have to admin a Windows Domain (Active Directory)
[hipo.WINDOWS-PC] ➤ wmic pagefile /?
PAGEFILE – Virtual memory file swapping management.
HINT: BNF for Alias usage.
(<alias> [WMIObject] | [] | [] ) [].
USAGE:
PAGEFILE ASSOC []
PAGEFILE CREATE <assign list>
PAGEFILE DELETE
PAGEFILE GET [] []
PAGEFILE LIST [] [
]
[hipo.WINDOWS-PC] ➤ wmic pagefile
AllocatedBaseSize Caption CurrentUsage Description InstallDate Name PeakUsage Status TempPageFile
4709 C:\pagefile.sys 499 C:\pagefile.sys 20200912061902.938000+180 C:\pagefile.sys 525 FALSE
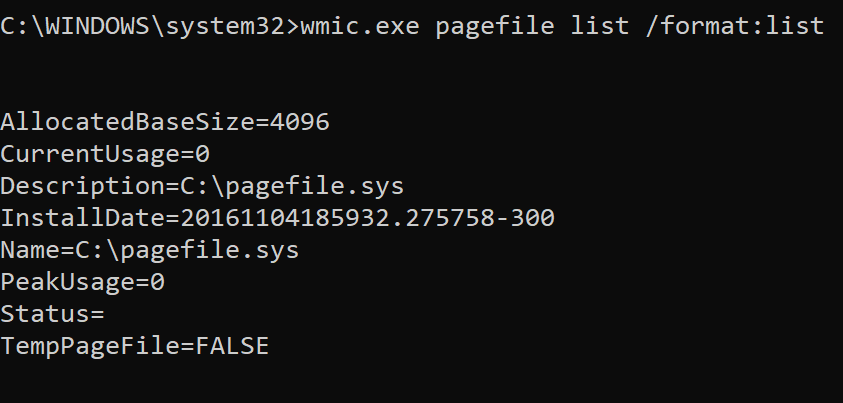
[hipo.WINDOWS-PC] ➤ wmic pagefile list /format:list
AllocatedBaseSize=4709
CurrentUsage=499
Description=C:\pagefile.sys
InstallDate=20200912061902.938000+180
Name=C:\pagefile.sys
PeakUsage=525
Status=
TempPageFile=FALSE
- To change the Initial Size or Maximum Size of Pagefile use:
➤ wmic pagefileset where name="C:\\pagefile.sys" set InitialSize=2048,MaximumSize=2048
- To move the pagefile / change location of pagefile to less occupied disk drive partition (i.e. D:\ drive)
Sometimes you might have multiple drives on the PC and some of them might be having multitudes of gigabytes while main drive C:\ could be fully occupied due to initial install bad drive organization, in that case a good work arount to save you space so you can work normally with the server is just to temporary or permanently move pagefile to another drive.
wmic pagefileset where name="D:\\pagefile.sys" set InitialSize=2048,MaximumSize=2048
!! CONSIDER !!!
That if you have the option to move the pagefile.sys for best performance it is advicable to place the file inside another physical disk, preferrably a Solid State Drive one, SATA disks are too slow and reduced Input / Output disk operations will lead to degraded performance, if there is lack of memory (i.e. pagefile.sys is actively open read and wrote in).
➤ wmic pagefileset where name="C:\\pagefile.sys" delete
If for some reason you prefer to not use wmic but simple del command you can delete pagefile.sys also by:
Removing file default "Hidden" and "system" file attributes – set for security reasons as the file is a system file usually not touched by user. This will save you from "permission denied" errors:
➤ attrib -s -h %systemdrive%\pagefile.sys
Delete the file:
➤ del /a /q %systemdrive%\pagefile.sys
3. Disable hibernation on Windows 7 / 8 and Win 10 / 11
Disabling hibernation file hiberfil.sys can also free up some space, especially if the hibernation has been actively used before and the file is written with data. Of course, that is more common on notebooks.
Windows hibernation has significantly improved over time though i didn't have very pleasant experience in the past and I prefer to disable it just in case.
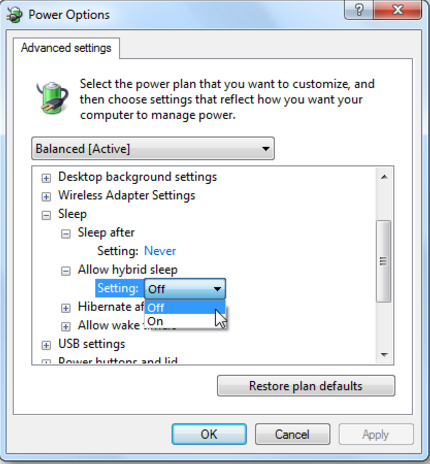
3.1 Disable Windows 7 / 8 / 10 / 11 hibernation from GUI
Disable it through:
Control Panel -> All Control Panel Items -> Power Options -> Edit Plan Settings -> Change advanced power settings
like shown in below screenshot:
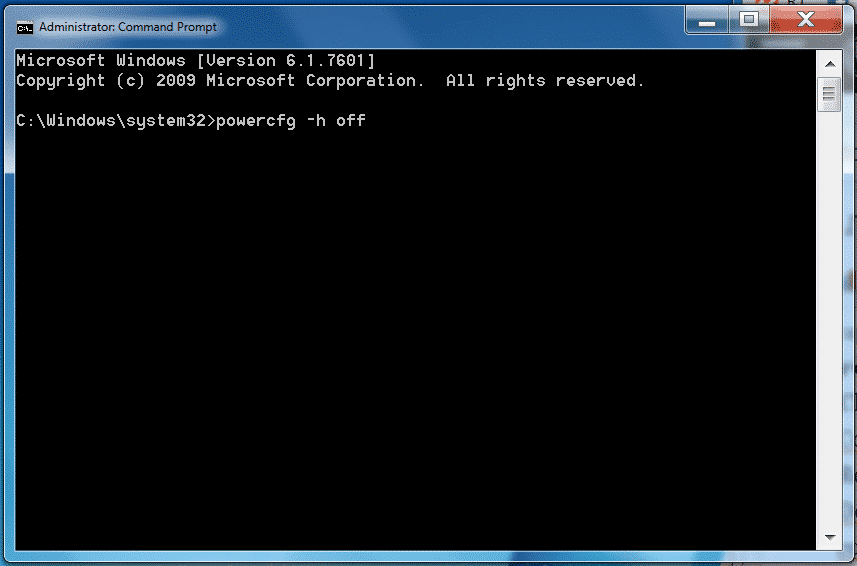
3.2 Disable Windows 7 / 8 / 10 / 11 hibernation from command line
Disable hibernation Is done in the same way through the powercfg.exe command, to disable it
if you're cut of disk space and you want to save space from it:
run as Administrator in Command Line Windows (cmd.exe)
powercfg.exe /hibernate off
If you later need to switch on hibernation
powercfg.exe /hibernate on

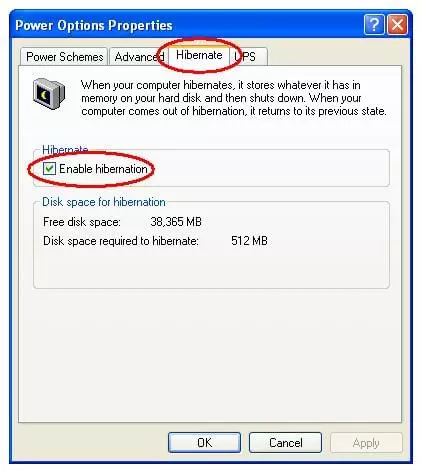
3.3 Disable Windows hibernation on legacy Windows XP
On XP to disable hibernation open
1. Power Options Properties
2. Select Hibernate.
3. Select Enable Hibernation to clear the checkbox and disable Hibernation mode.
4. Select OK to apply the change.
Close the Power Options Properties box.
To sum it up
We have learned some basics on Windows swapping and hibernation and i've tried to give some insight on how thiese files if misconfigured could lead to degraded Win OS performance. In any case using SSD as of 2022 to store both files is a best practice for machines that has plenty of memory always try to completely disable / remove the files. It was shown how to manage pagefile.sys and hiberfil.sys across Windows Operating Systems different versions both from GUI and via command line as well as how you can configure pagefile.sys to be cleared up on pc reboot.
Tags: 8 and win 10, active directory, admin, administrator, BNF, cmd, data, disk space, drive, exe, free space, HINT, How to, partition, Pc, sys, sysadmin, temporary solution, Windows, workaround
Posted in System Administration, Windows | No Comments »
Saturday, November 12th, 2011 
I'm rescuing some files from one unbootable Windows XP using a livecd with Hirens Boot CD 13
In order to rescue the three NTFS Windows partitions files, I mounted them after booting a Mini Linux from Hirens Boot CD.
Mounting NTFS using Hirens BootCD went quite smoothly to mount the 3 partitions I used cmds:
# mount /dev/sda1 /mnt/sda1
# mount /dev/sda2 /mnt/sda2
# mount /dev/sdb1 /mnt/sdb1
After the three NTFS file partitions are mounted I used smbclient to list all the available Network Shares on the remote Network Samba Shares Server which by the way possessed the NETBIOS name of SERVER 😉
# smbclient -L //SERVER/
Enter root's password:
Domain=[SERVER] OS=[Windows 7 Ultimate 7600] Server=[Windows 7 Ultimate 6.1]
Sharename Type Comment
——— —- ——-
!!!MUSIC Disk
ADMIN$ Disk Remote Admin
C$ Disk Default share
Canon Inkjet S9000 (Copy 2) Printer Canon Inkjet S9000 (Copy 2)
D$ Disk Default share
Domain=[SERVER] OS=[Windows 7 Ultimate 7600] Server=[Windows 7 Ultimate 6.1]
Server Comment
——— ——-
Workgroup Master
——— ——-
Further on to mount the //SERVER/D network samba drive – (the location where I wanted to transfer the files from the above 3 mounted partitions):
# mkdir /mnt/D
# mount //192.168.0.100/D /mnt/D
#
Where the IP 192.168.0.100 is actually the local network IP address of the //SERVER win smb machine.
Afterwards I used mc to copy all the files I needed to rescue from all the 3 above mentioned win partitions to the mounted //SERVER/D
Tags: admin, admin c, boot cd, bootcd, Canon, canon inkjet, cd 13, Comment, copy, default, default share, Disk, domain, domain server, drive, hirens boot cd, ip, livecd, local network, location, machine, Master, Mini, mini linux, mnt, mount dev, music disk, nbsp, netbios, netbios name, network ip address, network shares, NTFS, os windows, partitions, password, printer canon, Printer Canon Inkjet S9000 Copy, Remote, remote admin, remote server, rescue, root, samba shares, sda, sdb, Server Comment, server os, server windows, Sharename, unbootable, Windows, windows files, windows pc
Posted in Everyday Life, Linux, System Administration, Windows | 1 Comment »
Saturday, March 1st, 2014 
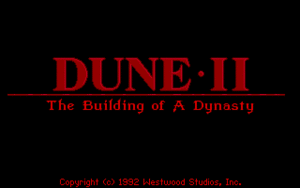
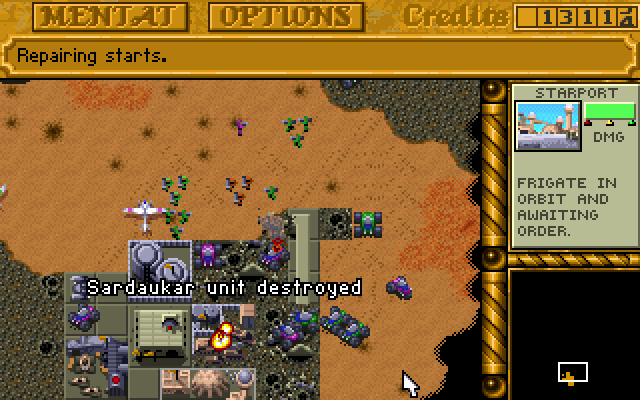
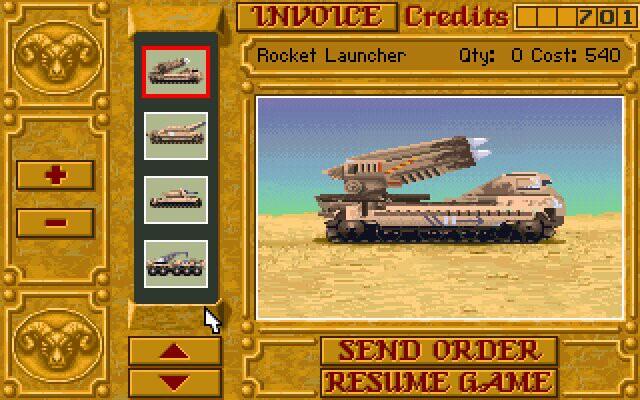
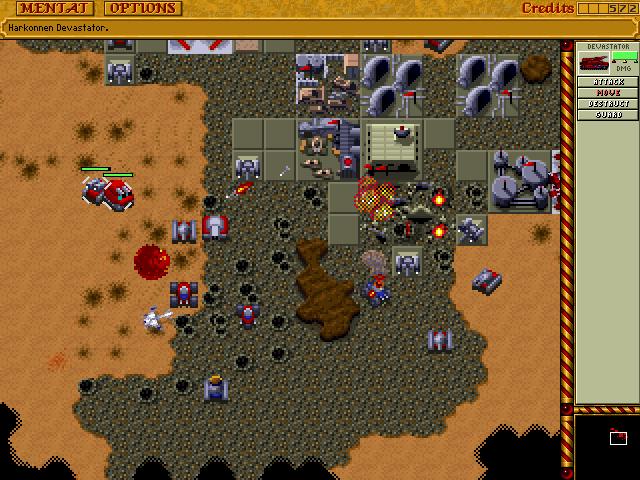
Dune II: The Building of a Dynasty (known also as Dune II: Battle for Arrakis in Europe is a game that my generation will never forget. Dune 2 is the "first" computer Real Time Strategy (RTE) game of the genre of the Warcraft I and Warcraft II / III and later Command and Conquer – Red Aleart, Age of Empires I / II and Starcraft …

I've grown up with Dune2 and the little computer geek community in my school was absolutely crazy about playing it. Though not historically being the first Real Time Strategy game, this Lucas Inc.
game give standards that for the whole RTE genre for years and will stay in history of Computer Games as one of best games of all times.
I've spend big part of my teenager years with my best friends playing Dune2 and the possibility nowadays to resurrect the memories of these young careless years is a blessing. Younger computer enthusiasts and gamers probably never heard of Dune 2 and this is why I decided to place a little post here about this legendary game.

Its worthy out of curiosity or for fun to play Dune 2 on modern OS be it Windows or Linux. Since Dune is DOS game, it is necessary to play it via DOS emulator i.e. – (DosBox).
Here is how I run dune2 on my Debian Linux:
1. Install dosbox DOS emulator
apt-get install --yes dosbox
2. Download Dune2 game executable
You can download my mirror of dune2 here
Note that you will need unzip to uanrchive it, if you don't have it installed do so:
apt-get install --yes unzip
cd ~/Downloads/
wget https://www.pc-freak.net/files/dune-2.zip
3. Unzip archive and create directory to mount it emulating 'C:\' drive
mkdir -p ~/.dos/Dune2
cd ~/.dos/Dune2
unzip ~/Downloads/dune-2.zip
4. Start dosbox and create permanent config for C: drive auto mount
dosbox
To make C:\ virtual drive automatically mounted you have to write a dosbox config from inside dbox console
config -writeconf /home/hipo/.dosbox.conf
My home dir is in /home/hipo, change this with your username /home/username
Then exit dosbox console with 'exit' command
To make dune2 game automatically mapped on Virtual C: drive:
echo "mount c /home/hipo/.dos" >> ~/.dosbox.conf
Further to make dosbox start each time with ~/.dosbox.conf add alias to your ~/.bashrc
vim ~/.bashrc
echo "alias dosbox='dosbox -conf /home/hipo/.dosbox.conf'" >> ~/.bashrc
source ~/.bashrc
Then to run DUNE2 launch dosbox:
dosbox
and inside console type:
c:
cd Dune2
Dune2.exe

For the lazy ones who would like to test dune you can play dune 2 online on this website
Tags: alias, bashrc, best games, Computer Games, computer geek, config, debian linux, directory, DoS, dosbox, Download Dune2, drive, echo, exit, game, games, history, home, Install, Linux, Lucas Inc, OS, Play, Real Time Strategy, RTE, Start, sudo, unzip, Windows, zip
Posted in Entertainment, Everyday Life, Games Linux, Various | No Comments »
Thursday, May 15th, 2014 
If you're working in a middle or big sized IT company or corporation like IBM or HP, you're already sucked into the Outlook "mail whirlwind of corporate world" and daily flooded with tons of corporate spam emails with fuzzy business random terms like taken from Corporate Bullshit Generator
Many corporations, because probably of historic reasons still provide employees with small sized mailboxes half a gigabyte, a gigabyte or even in those with bigger user Mailboxes like in Hewlett Packard, this is usually no more than 2 Gigabytes.
This creates a lot of issues in the long term because usually mail communication in Inbox, Sent Items, Drafts Conversation History, Junk Email and Outbox grows up quickly and for a year or a year and a half, available Mail space fills up and you stop receiving email communication from customers. This is usually not too big problem if your Mailbox gets filled when you're in the Office (in office hours). However it is quite unpleasent and makes very bad impression to customers when you're in a few weeks Summar Holiday with no access to your mailbox and your Mailbox free space depletes, then you don't get any mail from the customer and all the time the customer starts receiving emails disrupting your personal or company image with bouncing messages saying the "INBOX" is full.
To prevent this worst case scenario it is always a good idea to archive old mail communication (Items) to free up space in Outlook 2010 mailbox.
Old Outlook Archived mail is (Saved) exported in .PST outlook data file format. Later exported Mail Content and Contacts could be easily (attached) from those .pst file to Outlook Express, leaving you possibility to still have access to your old archived mail keeping the content on your hard drive instead on the Outlook Exchange Mailserver (freeing up space from your Inbox).
Here is how to archive your Outlook mail Calendar and contacts:
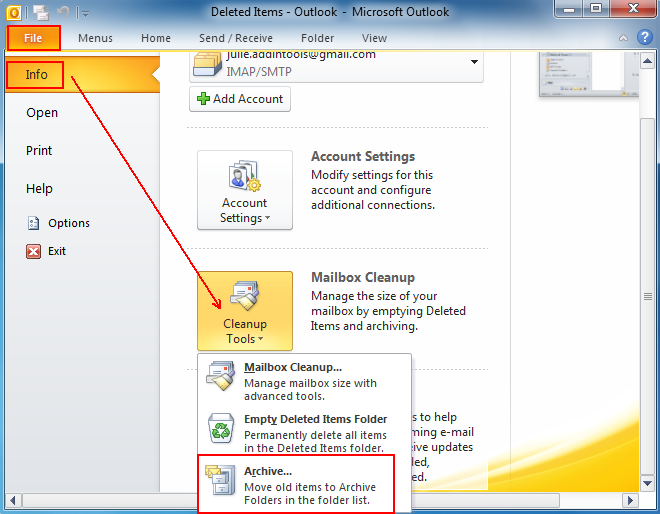
1. Click on the "File" tab on the top horizontal bar.Select "Cleanup Tools" from the options.
2. Click "Cleanup Tools" from the options.
3. Click on the "Archive this folder and all subfolders" option.
4. Select what to archive (e.g. Inbox, Drafts, Sent Items, Calendar whatever …)
5. Choose archive items older than (this is quite self-explanatory)
6. Select the location of your archive file (make sure you palce the .PST file into directory you will not forget later)
That's all now you have old mails freed up from Outlook Exchange server. Now make sure you create regular backups ot old-archived-mail.pst file you just created, it is a very good idea to upload this folder to encrypted file system on USB stick or use something like TrueCrypt to encrypt the file and store it to external hard drive, if you already don't have a complete backup corporate solution backuping up all your Laptop content.
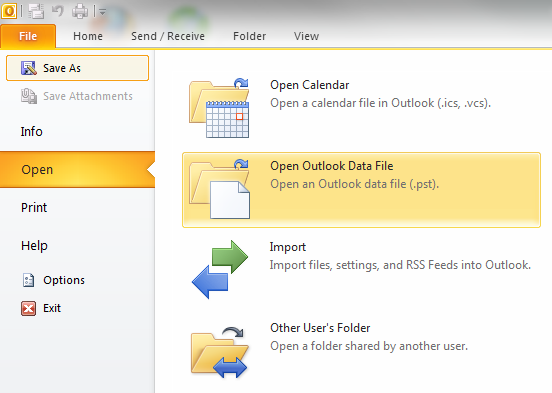
Later Attaching or detaching exported .PST file in Outlook is done from:
File -> Open -> Open Outlook Data File
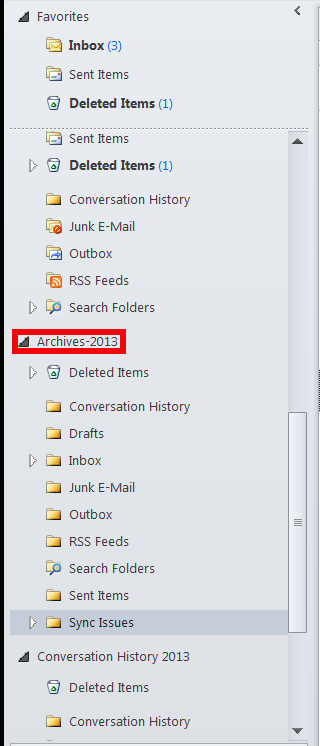
Once .PST file is opened and attached in Left Inbox pane you will have the Archived old mail folder appear.

You can change Archived name (like I did to some meaningful name) like I've change it to Archives-2013 by right clicking on it (Data File properties -> Advanced)
Tags: archive, Archive Outlook, Click Cleanup Tools, data, Drafts Conversation History, drive, external hard drive, file, file format, free space, good, hard drive, hp, ibm, idea, IT, location, mail, mailboxes, middle, possibility, PST, Select Cleanup Tools, Sent Items, system, USB, working, year
Posted in Everyday Life, Outlook, Various, Windows | 1 Comment »
Thursday, November 27th, 2014 
If you are using a Dual-boot PC with installed M$ Windows and GNU .Linux OS storing many of your Documents / Music / Movie data on Linux's ext3 / ext4 filesystem partition but using often also Windows PC for Professional Graphic Design or Photoshop CS5 / Coreldraw Graphics Suite X7 / 3D Studio / Adobe Drewmweaver you will certainly want to be able to mount (Map drive) as a drive Linux partitions ext3 / ext4 or Mac OS's HFS+ read / use it straight from Windows.
Below are few softs that does allow mounting Mac and Linux (Debian, Ubuntu, Fedora, SuSE etc.) partitions on Windows
1. Mapping Linux ext3 and ext4 as a Windows drive
There are number of programs that can map Linux partition as a drive / directly explore Linux FS content. Most famous (free) ones are:
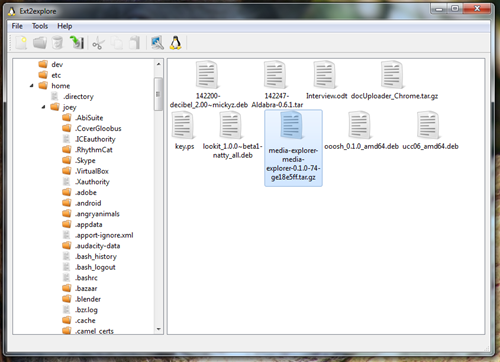
- Ext2Explore (also known as Ext2Read) – Probably best historically known Windows driver that does Linux ext FS reading

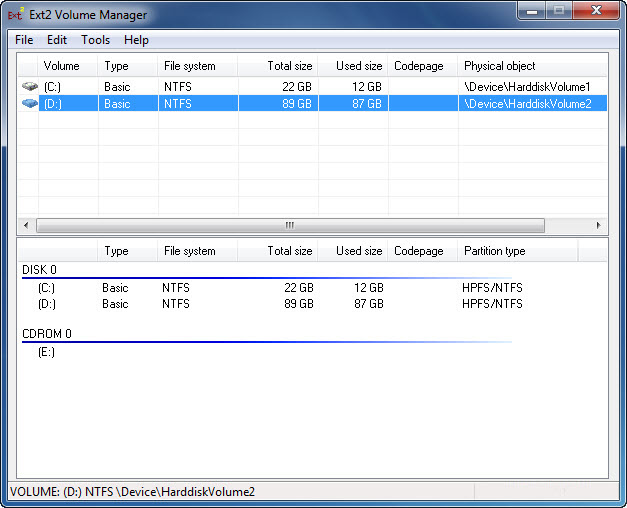
- Ext2FSD – Open source file system driver for Windows (2K / XP / WIN7 / WIN8 – both x86 and 64 bit arch) supports ext2 / ext3 FSs and even CIFS protocol shares over network mounts. Ext4 filesystems are supported in read only mode only. It supports many language codepage utf8, cp936, cp950 etc..- Cyrillic file names shown correctly 🙂

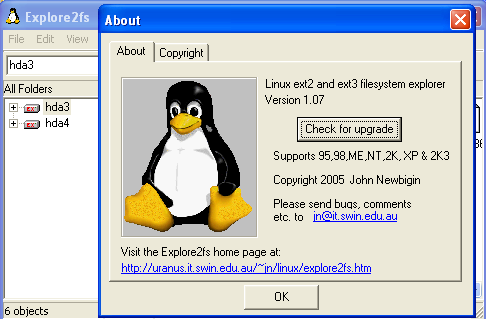
- Explore2FS – GUI explorer tool for accessing ext2 and ext3 filesystems. It runs under all versions of Windows and can read almost any ext2 and ext3 filesystem.

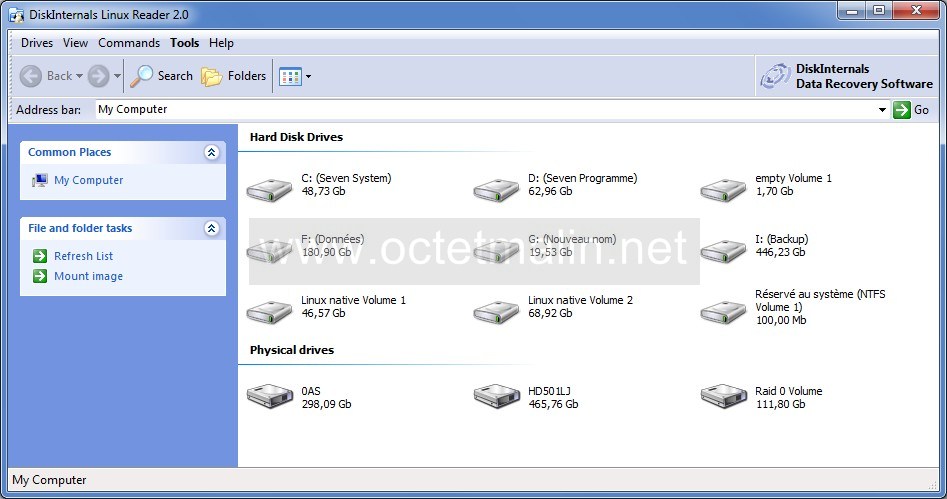
- Disk Internals Linux reader – A freeware tool for reading and extracting files from EXT2/EXT3/EXT4, HFS, UFS2, Reiser4, and ReiserFS partitions in Windows.
Other useful multiplatorm Linux FS reader unfortunately proprietary one is ParagonExtFS – proprietary software having version for both Win OS and Mac (Supports also mounting Linux partitionons Mac).
Note that if you copy some files using some of above tools to Windows permissions held in Linux could screw up, so it is not a good idea to try backup Linux configuration files to Windows's partitions 🙂
2. Read Copy files from Mac OS HFS+ filesystem to Windows
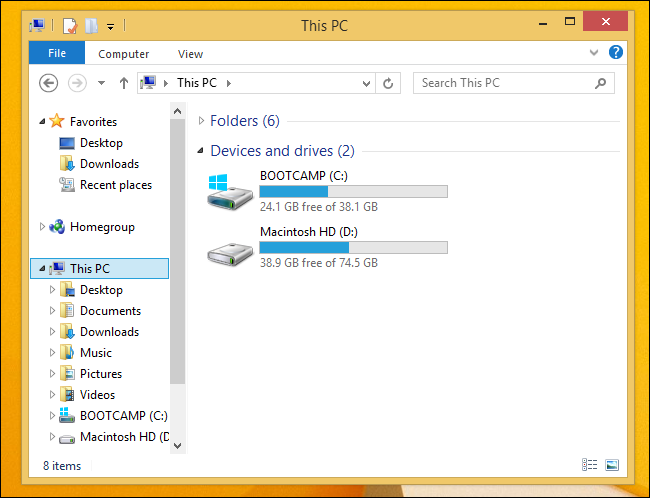
Apple has Boot Camp driver package which allows Mac OS's HFS+ to be viewable from Windows.
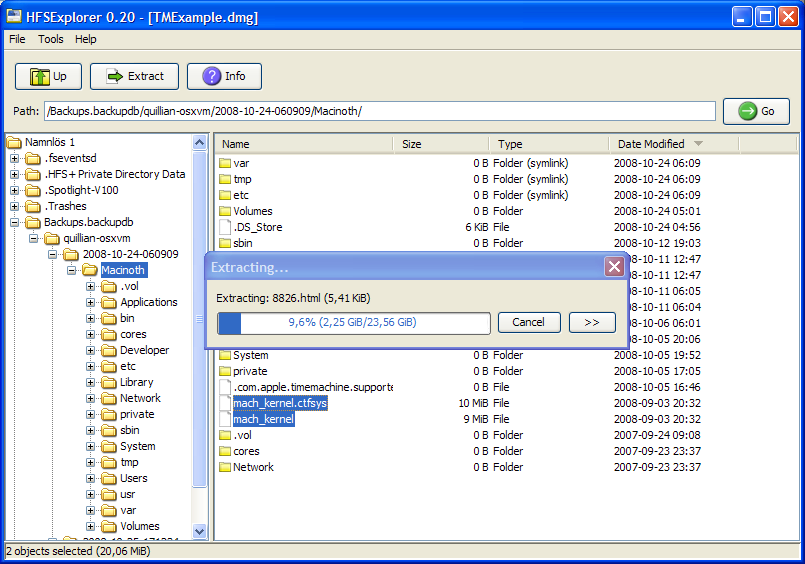
For people who don't intend to continuosly read data HFS+ it might be better to not load Boot Camp but use:
Only problem with Boot Camp and HFSExplorer is it allows you to read data from Mac OS filesystem only read only.If you want to write to HFS+ filesystem from Windows you will need:
- Proprietary Paragon HFS+ (or)
Tags: Below, boot camp, data, disk internals linux reader, drive, explore2fs, ext2exlore, ext2fsd, filesystems, good, HFS, hfsexplorer, How to, idea, partitions, read ext2 ext3 ext4 from windows 7 / 8 / 2012, read hfs plus from windows, read linux from windows, tool, use, Windows
Posted in Everyday Life, Various, Windows | No Comments »
Thursday, November 7th, 2013 
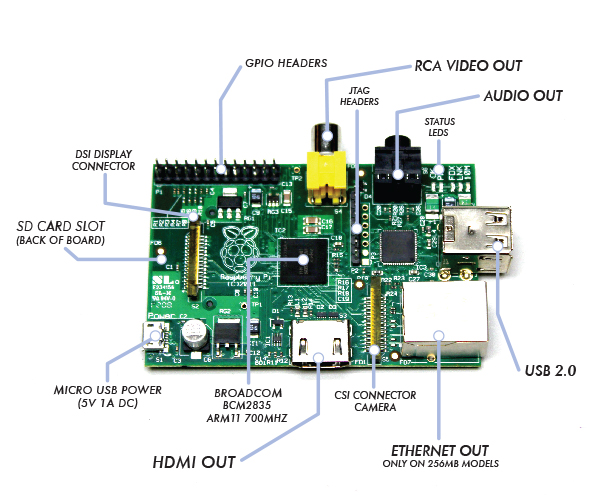
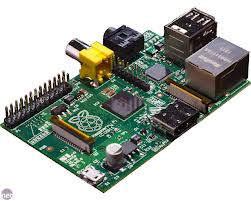
Not of a the latest thing out there but I believe a must know for every geek is existence of Raspberry Pi mini computer Linux board. It is a geek credit-card sized mini PC on extremely cheap price between 25$ and 35$ bucks (e.g. Raspberry Pi model A and Raspberry Pi Model B).
Raspberry Pi hardware you get for this ultra low price is as follows:
- Broadcom BCM2835 system on chip
- ARM Mobile processor model ARM1176JZF running at 700 Mhz (overlocking up to 1Ghz is possible – overclocked RP is called Turbo 🙂 )!
- VideoCore IV GPU with 512 MBytes of ram
- No Build hard disk or solid-state drive but instead designed to use SD-Card as a Storage
- two video outputs
- composite RCA and an HDMI port
- 3.5mm audio output
- 2 or 1SD/MMC/SDIO card slot (depending on device model A or model B)
- Micro USB adapter power charger 500mA (2.5 watts) – Model and 700mA (3.5 watts)

The idea of whole device is to make cheap affordable device for pupils and people from third countries who can't afford to pay big money for a full-featured computer. Achievement is unique all you need to Raspberry Pi credit card sized device is external keyboard a mouse, SD-card and a monitor, this makes a 700Mhz featured almost fully functional computer for less than lets say 80$ whether used with a second hand monitor / mouse and kbd :). A fully functional computer or full functional thin client for as less as 80$ yes that's what RaspberryPi is!
It is recommendable that SD-Card storage on which it is installed is at least 4GB as this is part of its minimum requirement, however it is best if you can get an SD-Card of 32GBytes whether you plan to use its whole graphic functionalities.
Raspberry Pi Hardware is not too powerful to run a version of Windows as well as there is no free version of MS-Windows for ARM Processor, so basicly device is planned to run free software OSes GNU / Linux. 5 operating systems are working fine with the mini-board device as time of writting;
- Raspbian – Debian "Wheezy" Linux port
- Pidora – Fedora mixed version ported to run on Raspberry Pi
- Risk OS port
- Arch Linux port for ARM devices
- Slackware Arm
FreeBSD / NetBSD
- QtonPi
Recommended and probably best distro port is for Debian Squeeze
To boot an OS into raspberry PI dowbnload respective image from raspberrypi.org
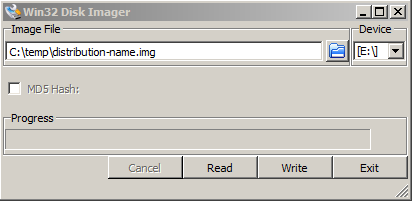
– Use application for copying and extracting image to SD-Card like Win32 Disk Imager – whether on Windows platform

– Or from Linux format SD-Card with gparted (N!B! format disk to be in FAT32 filesystem), extrat files and copy them to SD-CARD.
Once Raspberry Pi loads up it will drop you into Linux console, so further configuration will have to be done manually with invoking plenty of apt-get commands (which I will not talk about here as there are plenty of manuals already) – you will have to manually install your Desktop … Default shipped Web browser in Debian is Midori and due to lack of ported version of flash player for ARM streaming video websites like youtube.com / vimeo.com does not work in browser. There is a Google Chrome for Raspberry Pi port but just like with Midori heavy object loaded websites works very slow and thus not very suitable for multimedia.

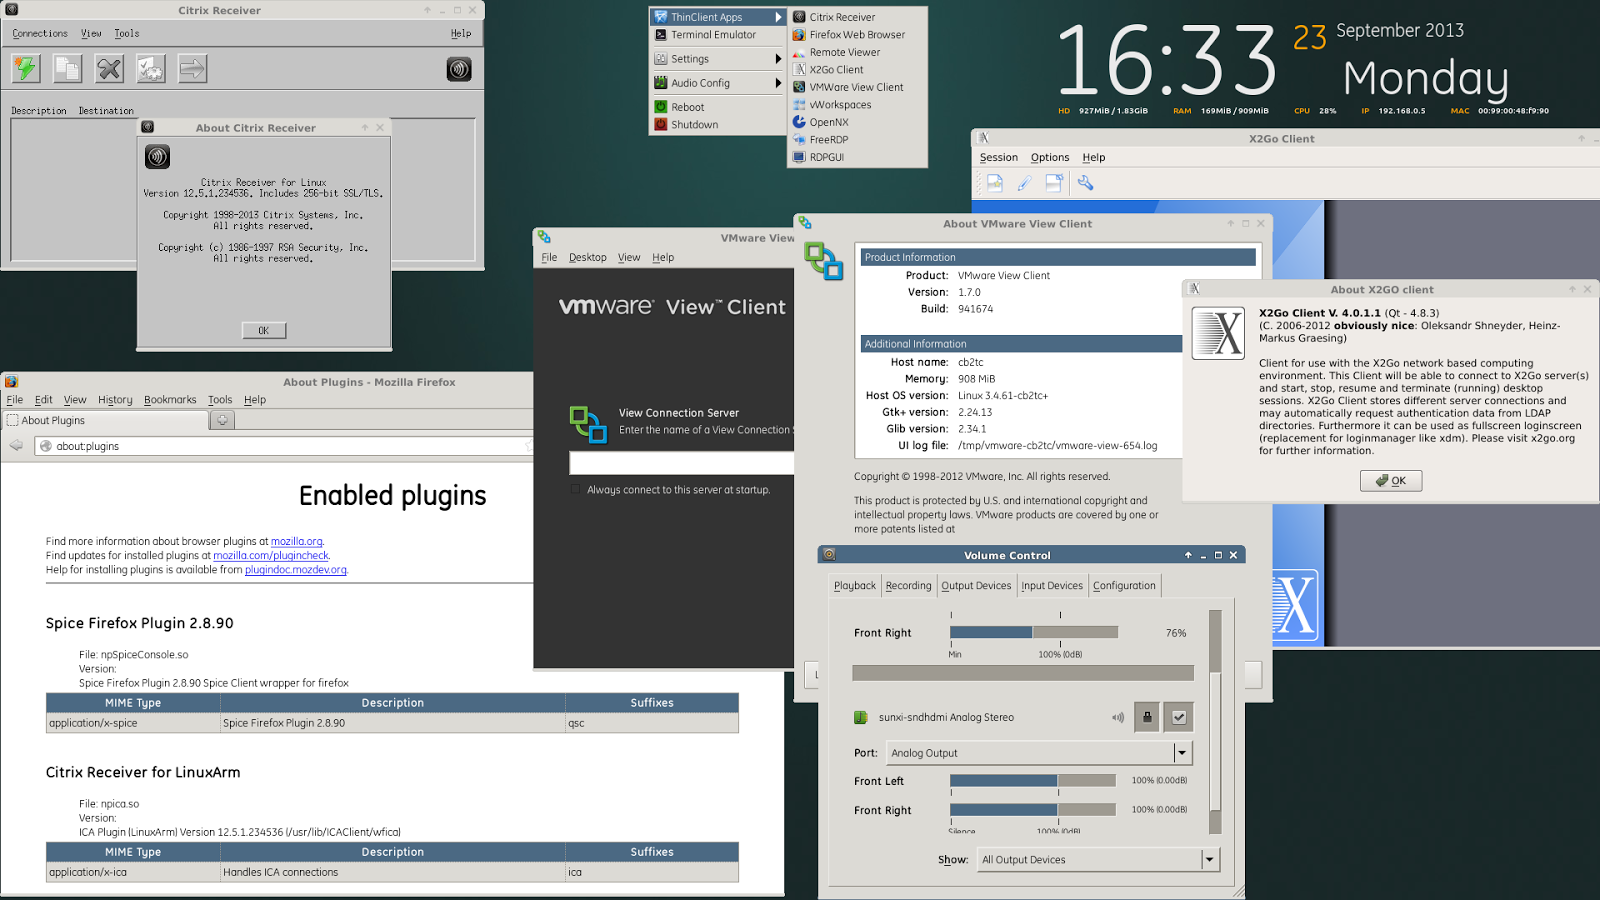
Raspberry Pi device is very suitable for ThinClient use there is a special separate project – Raspberry ThinClient Project – using which a hobbyist can save 400$ for buying proprietary ThinClient.

Tags: Arch Linux, ARM, boot, card, client, com, Debian Squeeze Linux, distro, drive, functionalities, geek, HDMI, hobbyist, Linux, OS, Pc, PI, power, price, Raspberry Pi, run, state, thing, use, version, working, youtube
Posted in Curious Facts, Everyday Life, Linux, Various | 4 Comments »
Wednesday, May 25th, 2011 
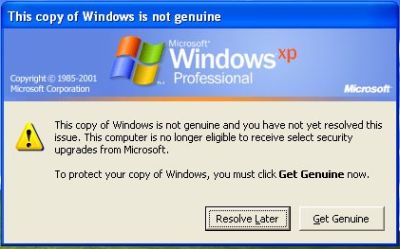
I have a pirate version of Windows XP Pro 2 installer CD which does automatically turn on Windows Genuine Advantage
This is kind of annoying as the computer gets really slow and the hard disk drive activite gets intensive as well as an annoying popup message that the Windows XP copy is not genuine does appear periodically
In order to get rid of the message I had to do the following steps:
1. Get into Windows Safe Mode without Networking
As most of the people knows this is achieved by pressing F8 keyboard key right before the Windows bootup screen appears.
After in Safe mode it’s necessery to,
2. Run Windows Command Line (cmd.exe)
To do so follow, the menus:
Windows (Start Menu) -> Run -> cmd.exe
3. In the command prompt window issue the commands:
C:Documents and SettingsUser> cd WindowsSystem32
C:WindowsSystem32> taskkill -IM wgatray.exe
C:WindowsSystem32> del wgatray.exe
C:WindowsSystem32> move wgalogon.dll wgalogon.dll.old
C:WindowsSystem32> del wgalogon.dll.old
Something to mention is you have to be really quick, with deleting wgalogon.dll, cause wgatray.exe is scheduled to run every 1 / 2 seconds 🙂 It is a bit of situation of type “be quick or be dead” as Maiden used to sing 🙂
A Windows system restart and Hooray the Windows Genuine message is gone 🙂
Tags: activite, Advantage, c documents, command, Computer, Disk, documents and settings, drive, exec, hard disk drive, issue, keyboard, kind, menu, menus, necessery, Networking, oldA, oldC, order, pirate version, popup, popup message, Start, taskkill, User, version, wgalogon, wgatray, windows command, windows safe mode, windows system, windows xp, windows xp copy, windows xp sp2
Posted in Windows | 2 Comments »
Saturday, April 28th, 2012 When a server hard disk scape gets filled its common that Apache returns empty (no content) pages…
This just happened in one server I administer. To restore the normal server operation I freed some space by deleting old obsolete backups.
Actually the whole reasons for this mess was an enormous backup files, which on the last monthly backup overfilled the disk empty space.
Though, I freed about 400GB of space on the the root filesystem and on a first glimpse the system had plenty of free hard drive space, still restarting the MySQL server refused to start up properly and spit error:
Incorrect key file for table '/tmp/#sql_9315.MYI'; try to repair it" mysql start up error
Besides that there have been corrupted (crashed) tables, which reported next to above error.
Checking in /tmp/#sql_9315.MYI, I couldn't see any MYI – (MyISAM) format file. A quick google look up revealed that this error is caused by not enough disk space. This was puzzling as I can see both /var and / partitions had plenty of space so this shouldn't be a problem. Also manally creating the file /tmp/#sql_9315.MYI with:
server:~# touch /tmp/#sql_9315.MYI
Didn't help it, though the file created fine. Anyways a bit of a closer examination I've noticed a /tmp filesystem mounted besides with the other file system mounts ????
You can guess my great amazement to find this 1 Megabyte only /tmp filesystem hanging on the server mounted on the server.
I didn't mounted this 1 Megabyte filesystem, so it was either an intruder or some kind of "weird" bug…
I digged in Googling to see, if I can find more on the error and found actually the whole mess with this 1 mb mounted /tmp partition is caused by, just recently introduced Debian init script /etc/init.d/mountoverflowtmp.
It seems this script was introduced in Debian newer releases. mountoverflowtmp is some kind of emergency script, which is triggered in case if the root filesystem/ space gets filled.
The script has only two options:
# /etc/init.d/mountoverflowtmp
Usage: mountoverflowtmp [start|stop]
Once started what it does it remounts the /tmp to be 1 megabyte in size and stops its execution like it never run. Well maybe, the developers had something in mind with introducing this script I will not argue. What I should complain though is the script design is completely broken. Once the script gets "activated" and does its job. This 1MB mount stays like this, even if hard disk space is freed on the root partition – / ….
Hence to cope with this unhandy situation, once I had freed disk space on the root partition for some reason mountoverflowtmp stop option was not working,
So I had to initiate "hard" unmount:
server:~# mount -l /tmp
Also as I had a bunch of crashed tables and to fix them, also issued on each of the broken tables reported on /etc/init.d/mysql start start-up.
server:~# mysql -u root -p
mysql> use Database_Name;
mysql> repair table Table_Name extended;
....
Then to finally solve the stupid Incorrect key file for table '/tmp/#sql_XXYYZZ33444.MYI'; try to repair it error, I had to restart once again the SQL server:
Stopping MySQL database server: mysqld.
Starting MySQL database server: mysqld.
Checking for corrupt, not cleanly closed and upgrade needing tables..
root@server:/etc/init.d#
Tadadadadam!, SQL now loads and works back as before!
Tags: amazement, apache, Auto, backup files, backups, Disk, disk space, Draft, drive, emergency, empty space, file, file tmp, first glimpse, format, free hard drive, free hard drive space, google, googling, hard disk, help, Incorrect, init, intruder, key file, mess, MYI, MyISAM, mysql server, mysqld, operation, partition, quot, root, root filesystem, script, server operation, shouldn, size, something, TABLE, tmp, weird bug
Posted in MySQL, System Administration, Web and CMS | 2 Comments »
How rescue unbootable Windows PC, Windows files through files Network copy to remote server shared Folder using Hirens Boot CD
Saturday, November 12th, 2011I'm rescuing some files from one unbootable Windows XP using a livecd with Hirens Boot CD 13
In order to rescue the three NTFS Windows partitions files, I mounted them after booting a Mini Linux from Hirens Boot CD.
Mounting NTFS using Hirens BootCD went quite smoothly to mount the 3 partitions I used cmds:
# mount /dev/sda1 /mnt/sda1
# mount /dev/sda2 /mnt/sda2
# mount /dev/sdb1 /mnt/sdb1
After the three NTFS file partitions are mounted I used smbclient to list all the available Network Shares on the remote Network Samba Shares Server which by the way possessed the NETBIOS name of SERVER 😉
# smbclient -L //SERVER/
Enter root's password:
Domain=[SERVER] OS=[Windows 7 Ultimate 7600] Server=[Windows 7 Ultimate 6.1]
Sharename Type Comment
——— —- ——-
!!!MUSIC Disk
ADMIN$ Disk Remote Admin
C$ Disk Default share
Canon Inkjet S9000 (Copy 2) Printer Canon Inkjet S9000 (Copy 2)
D$ Disk Default share
Domain=[SERVER] OS=[Windows 7 Ultimate 7600] Server=[Windows 7 Ultimate 6.1]
Server Comment
——— ——-
Workgroup Master
——— ——-
Further on to mount the //SERVER/D network samba drive – (the location where I wanted to transfer the files from the above 3 mounted partitions):
# mkdir /mnt/D
# mount //192.168.0.100/D /mnt/D
#
Where the IP 192.168.0.100 is actually the local network IP address of the //SERVER win smb machine.
Afterwards I used mc to copy all the files I needed to rescue from all the 3 above mentioned win partitions to the mounted //SERVER/D
Tags: admin, admin c, boot cd, bootcd, Canon, canon inkjet, cd 13, Comment, copy, default, default share, Disk, domain, domain server, drive, hirens boot cd, ip, livecd, local network, location, machine, Master, Mini, mini linux, mnt, mount dev, music disk, nbsp, netbios, netbios name, network ip address, network shares, NTFS, os windows, partitions, password, printer canon, Printer Canon Inkjet S9000 Copy, Remote, remote admin, remote server, rescue, root, samba shares, sda, sdb, Server Comment, server os, server windows, Sharename, unbootable, Windows, windows files, windows pc
Posted in Everyday Life, Linux, System Administration, Windows | 1 Comment »