IS THERE A GRAPHIC ( GUI ) TOOL TO VIEW HARDWARE INFORMATION ON LINUX?
If you are a console maniac like myself, perhaps you never think that you might need anything graphical besides to view hardware information on Linux, but as we're growing older sometimes it becomes much less easier to just use a graphical tool that can show us all the information we need regarding a Notebook / Desktop PC with Linux or even Server machine with enabled Graphical Environment with a brand new installed GNU / Linux whatever version (I hope you don't own server with running Xorg / Gnome / Mate / Xfce etc. as that's pretty much a waste of hardware resource and opens a dozen of other security risks for the server running services ).
There are at least 2 ways to quickly check hardware on both PC WorkStation or Server, the easiest and quickest for PC / Notebook Linux users if you have installed GTK libraries or Gnome Desktop Environment is with;
LSHW-GTK
LSHW-GTK is simply a GTK frontend over the command line tool for hardware information gatheringLSHW
HardiInfo
HardInfo – is a small application that displays information about your hardware and operating system. Currently it knows about PCI, ISA PnP, USB, IDE, SCSI, Serial and parallel port devices.
1. Howto Install LSHW-GTK / HardInfo on Debian / Ubuntu / Mint GNU / Linux to easy view hardware information
To install both of them on Debian / Ubuntu GNU / Linux, run:
apt-get install –yes lshw lshw-gtk hardinfo
2. Howto install LSHW-GTK on Fedora, CentOS and OpenSuSE Linux to view easy hardware information
On RedHat RPM based Linux distributions, the package to install is called lshw-gui
Install with yum RPM package manager:
yum install –yes lshw lshw-gui hardinfo
3. Run lshw-gtk / hardinfo
Again, find them and run from GUI environment menus or run manually like in below example:
$ lshw-gtk
$ hardinfo
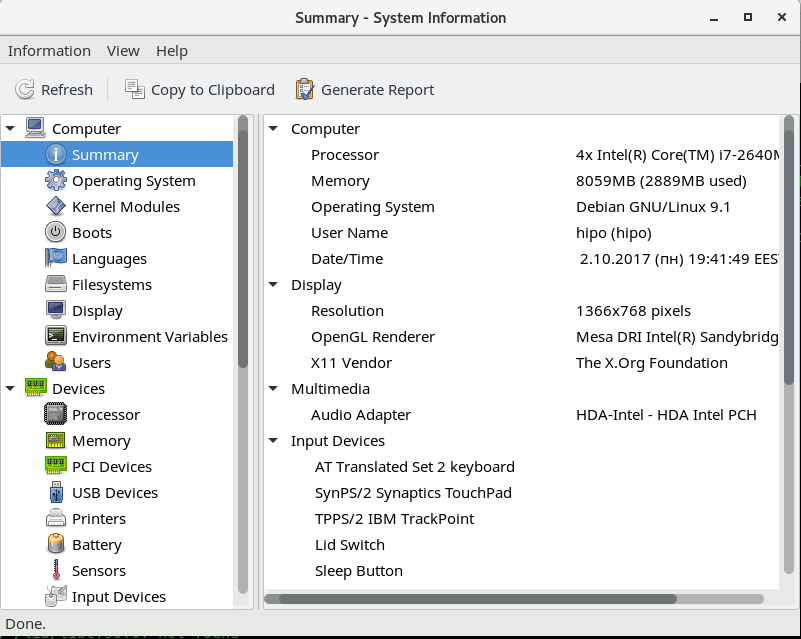
As you see hardinfo is really interactive and it gives you pretty much all the information, you might need, the only information that was missing at my case and I guess, that would happen to others is information about the SSD Hard Disk, which 180GB
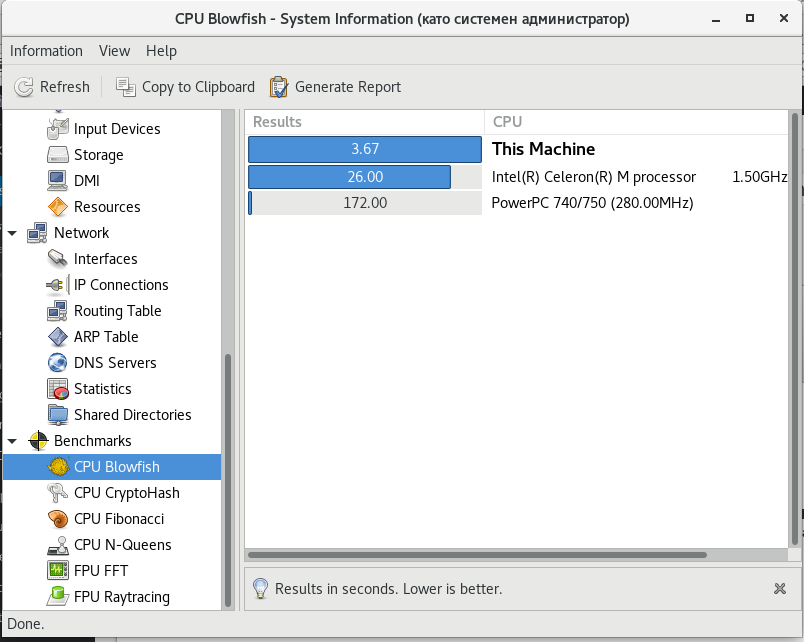
HardInfo is really amazing program as it even includes various common Benchmark Tests and comparison with other Computers:
True that the tests, are pretty simple but still could be useful.
Now run it either from GNOME / Cinnamon (The default graphical environment of Debian Linux) or PLASMA (The new name for the second most popular Linux Graphical Environment – KDE desktop environment)
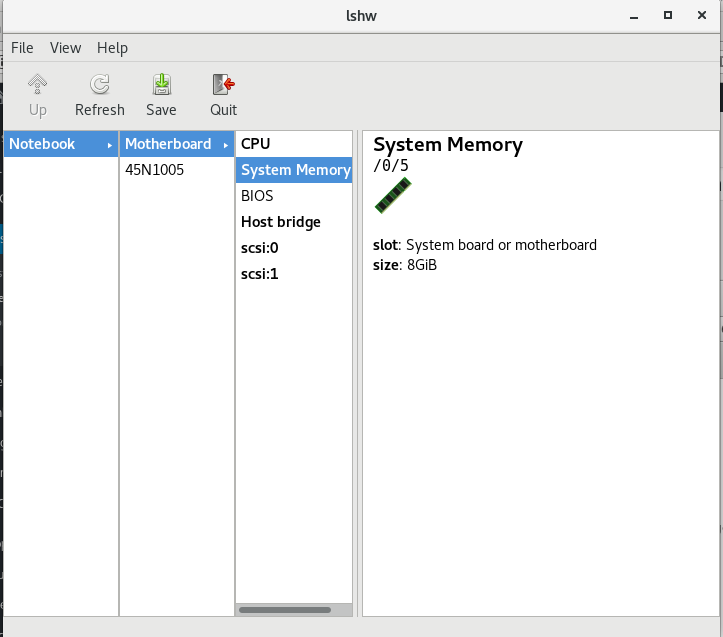
$ lshw
Here is few more screenshots from hardware info reported from my ThinkPad T410 Laptop Running Debian 9 Stretch at the moment.
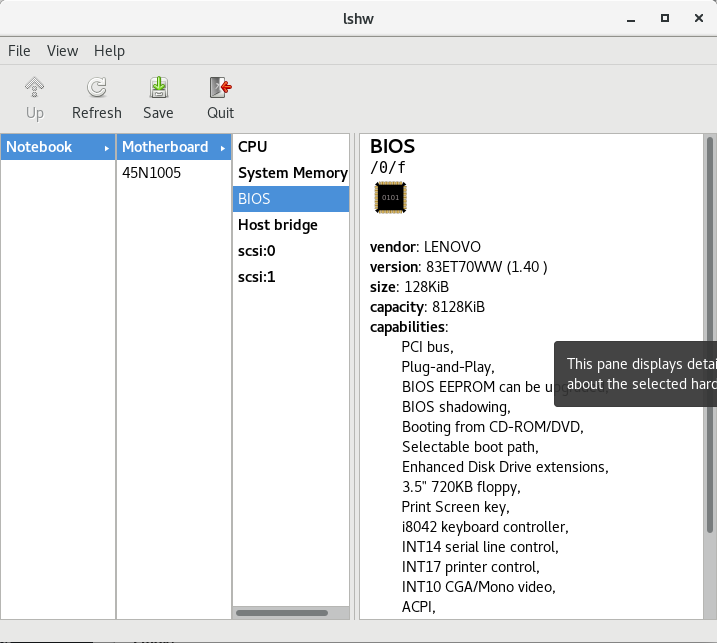
MotherBoard -> BIOS Information
(thatnks God this old but gold Thinkpad T420 business notebook does not run UEFI substitute for BIOS 🙂
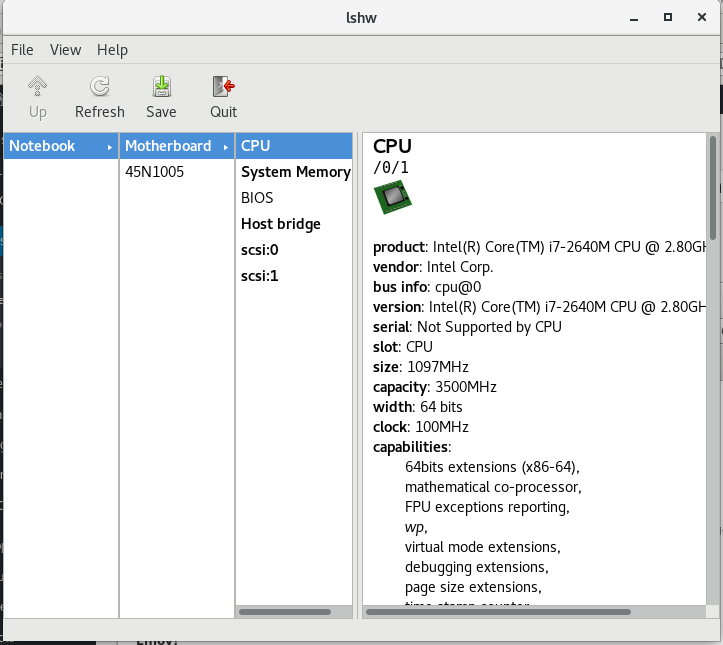
CPU Information (with all the supported CPU capabilities (extensions)
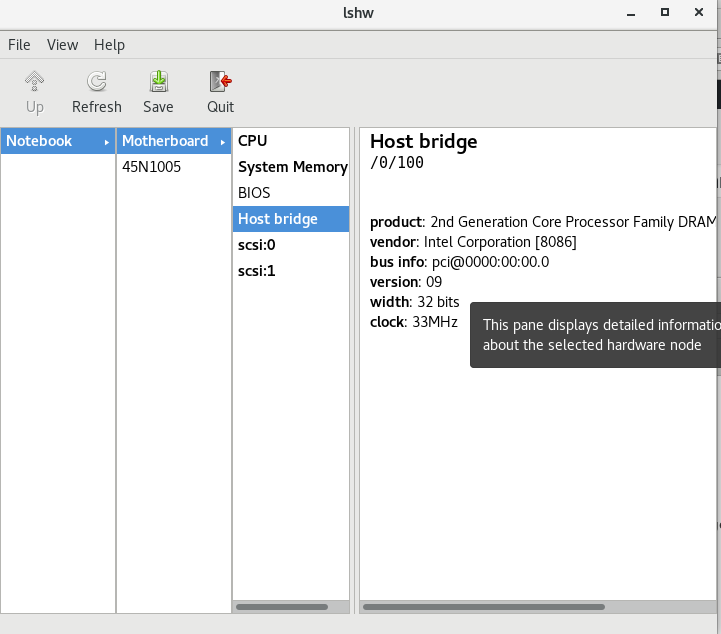
Host Bridge Info
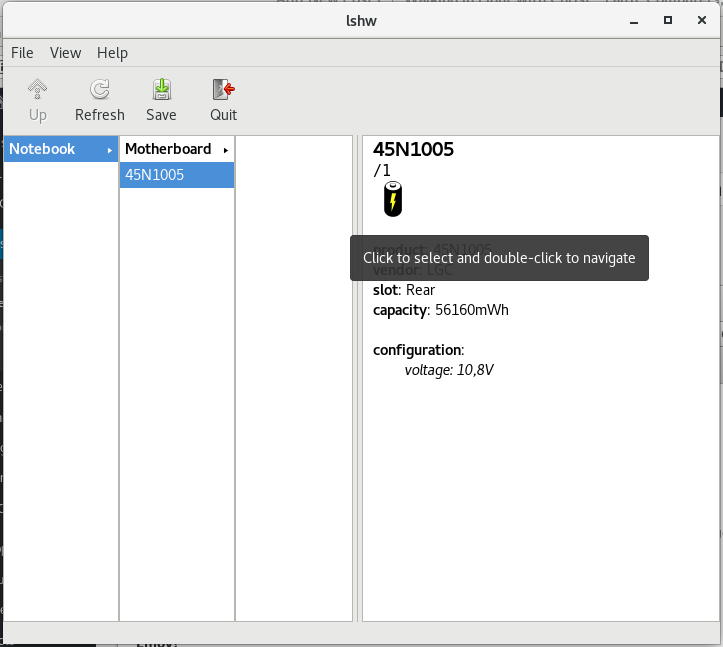
Thinkpad BATTERY (45N1005) Info
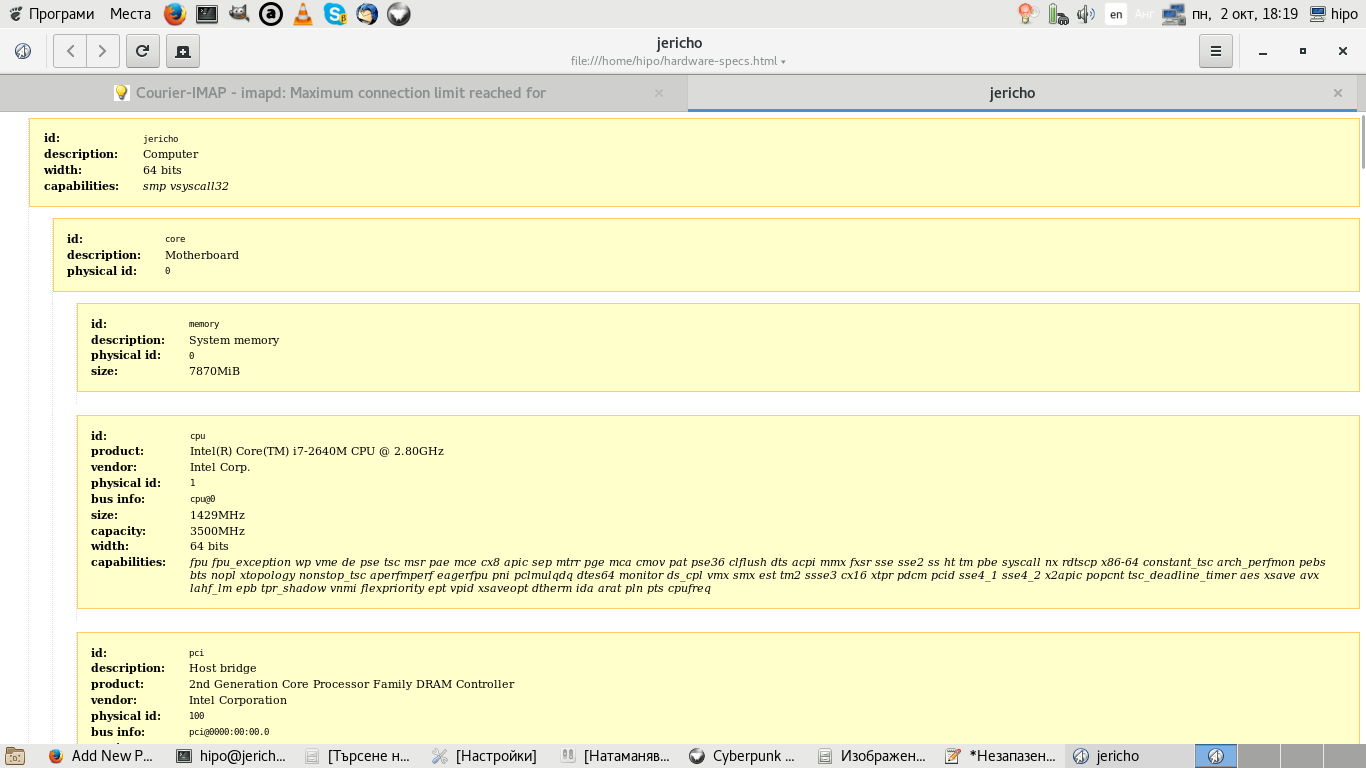
By the way another Way to GUI View your Computer is to just generate HTML from lshw command line tool (as it supports export to HTML), here is how:
$ lshw -html > ~/hardware-specs.html
Then just open it with Browser, for example I like GNOME Epiphany browser, so I'll read HTML with it:
$ epiphany ~/hardware-specs.html
The great thing about generating HTML report for hardware is that on Staging / Production / Development servers which you inherited from some other administrator who for some reason (laziness 🙂 ) didn't left necessery documentation, you can easily map the machine hardware and even if it is a group of machines, you can automate report generation for all of them write a short script that parses the data on each of the HTML reports and finally creates a merged document with main important information about hardware of a cluster of computers etc.
I needed to add to a wordpress based website Google maps location pictures with Google Maps Zoom In / Out controls.
I've seen plenty of plugins available that said to to this but none of them really worked fine for me. Either the plugins I checked in wordperss.org was too complex to set up and required a Google API registration or was marked as Broken (not working).
Finally to add the geographic locations taken from maps.google.com I used the embed code generated directly from maps.google.com.
But that was not the end of my WordPress Google Maps struggles. What followed was rather ridiculous, it seems since some time Google removed the pinning of a location searched for. Moreover the easy old way to simply pin a location on the map is also, gone.
Hence here is what I had to do to pinpoint location on the Google map of my searched country destination:
1. To be able to pinpoint the location, I had to login to my gmail 2. Go to http://maps.google.com in browser 3. Press on My Places button 4. Click on Create map and fill in the Title and Description dialogs 5. The Privacy and Sharing radio button should be selected 6. Click on Done and Save buttons 7. From the left top corner inside the Google map image to select the baloon picture (Add a Placemark) 8. Choose the exact desired placemark type and color from the next appearing dialog 9. Choose the location I want to pin on the map
I've created also a small Video tutorial just for fun for all those who want to see the pin a location with a baloon 😉 on the google map tutorial, here is the video as well:
For all people who can't properly see the .mov video here is link to the video created with recordmydesktop on my Linux showing how the baloon pinning inside a map can be done.
Last Friday together with my best friend Mitko together with an old-school good friend Samuel and another friend Geоrgi travelled to Pomorie Monastery. The reasons to go there was to have a short pilgrimage journey and to baptize Samuil who had the good desire to receive Baptism. As always it is a God's blessing to spend time in monastery and this was time it was not different. We started the trip from Sofia to Pomorie in about 08:15 and with a few little breaks we reached theMonastery about 12:30. Before we start journey I call Pomorie Monastery's abbot father Ierotey to ask if he will bless our pilgrimage (for those who never was in monastery's everything happens wtih a blessing and it is best before a monastic trip to ask a blessing). Once arrived the novice monk Milen met us and accomodated us in two of the monastic rooms.
On next day, there was the standard morning prayer service and the bells rung to wake us up, after the service we had a small talk with father Sergiy, met some of the brothers and with abbots blessing together with father Sergiy, we went for a few hours pilgrimage journey to Nessebar.
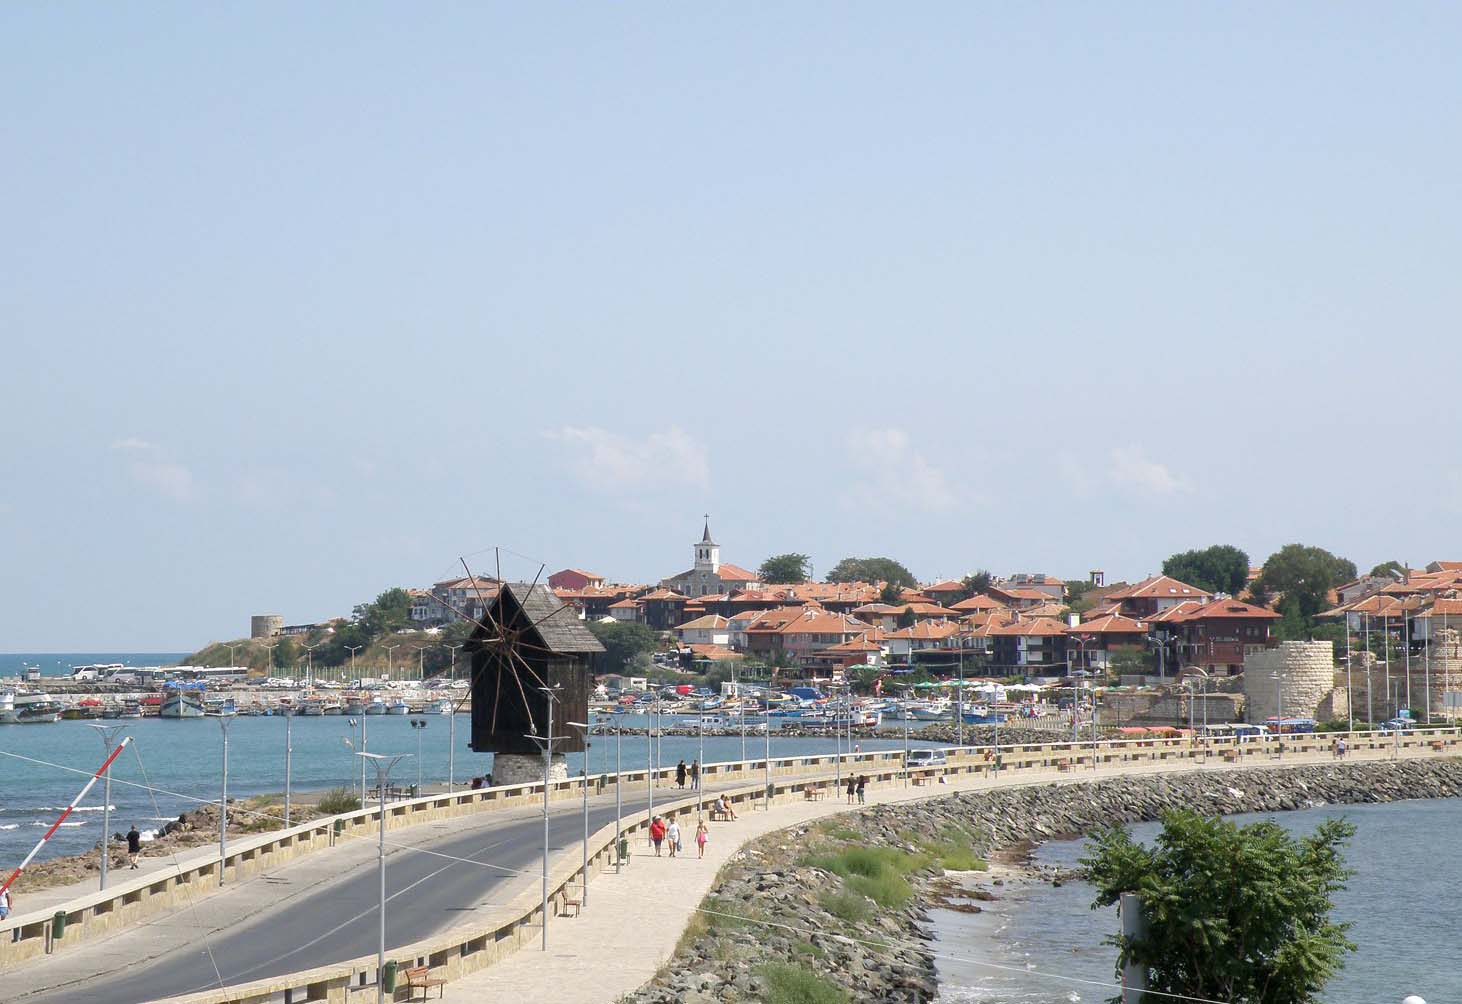
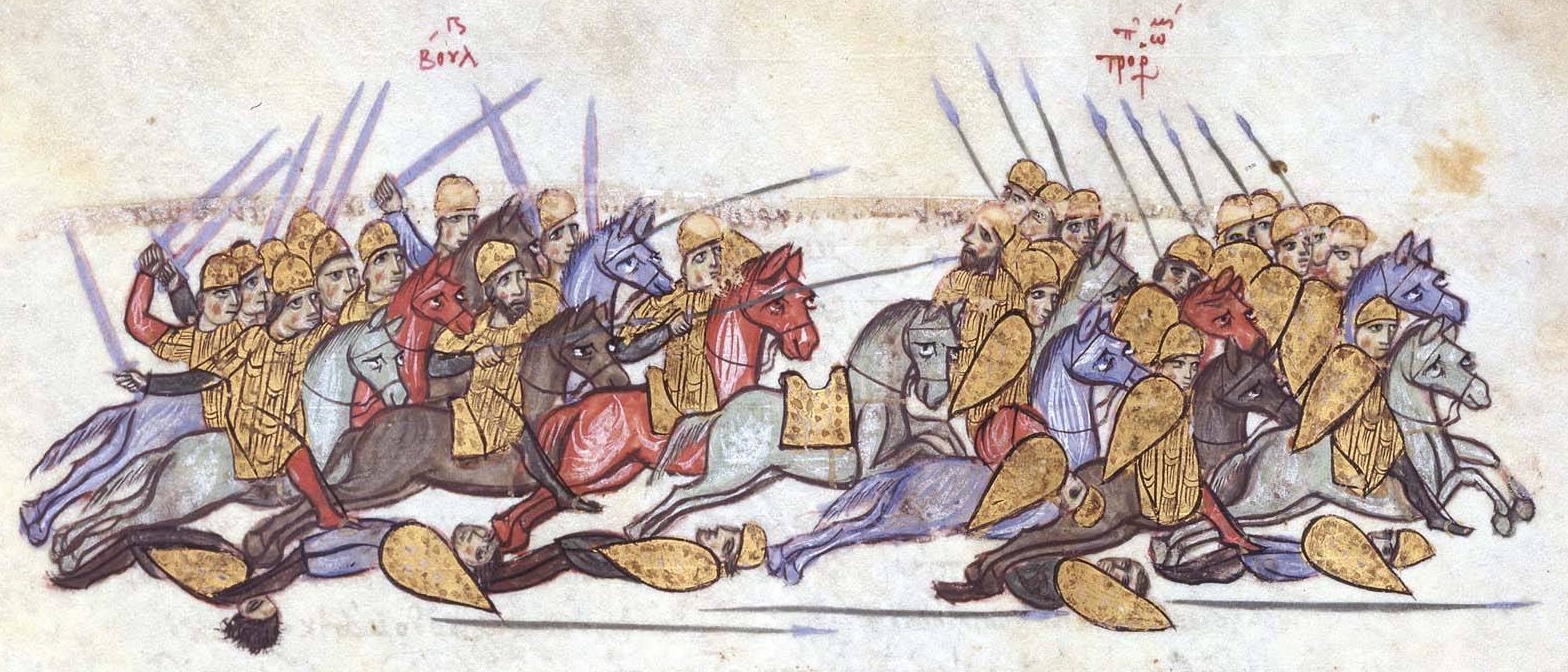
Nessebar (the town ancient name is Mesambria) is an ancient city situated 16 km from Pomorie (known in ancient times as Anchialo / Anchialo). Both Pomorie and Nesebar was a great historical Christian sites from very ancient times, a cities where first civilization started before Christ. Here according to excavation Christianity started somewhere in the early II-nd century and undergoes а bloom until the XI, XIII century. Here in those places according to some historic datas used to even have an archibiship seat. It is less known fact that Nessebar is one of the most ancient cities in all Europe and started its existence about 3200 years B.C.! In ancient times before Christianity Mesambria used to be inhabited with Thracians. On the road to Nesebar we passed through Aheloy (Achelous) – a town where occured the Battle of Achelous (y. 917) which is the biggest battle in medieval European history (120 000 troops participated in battle).
Nesebar is a significant historical city and thus part of UNESCO's world heritage world site. It is divided in new and old city, whether new city's doesn't shiny with architecture, the old town architecture is preserved and absolutely unique. The fact that Nessebar used to be a important Christian center is still evident as even though the town area is situated in peninsula (consisting of only 850 meters width and 350 meters hight), it has 12 Churches !
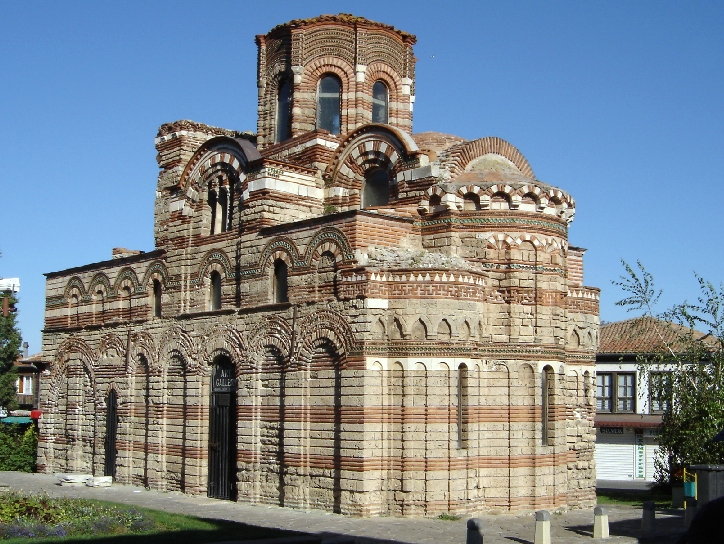
Nessebar Church of Christ Pantokrator
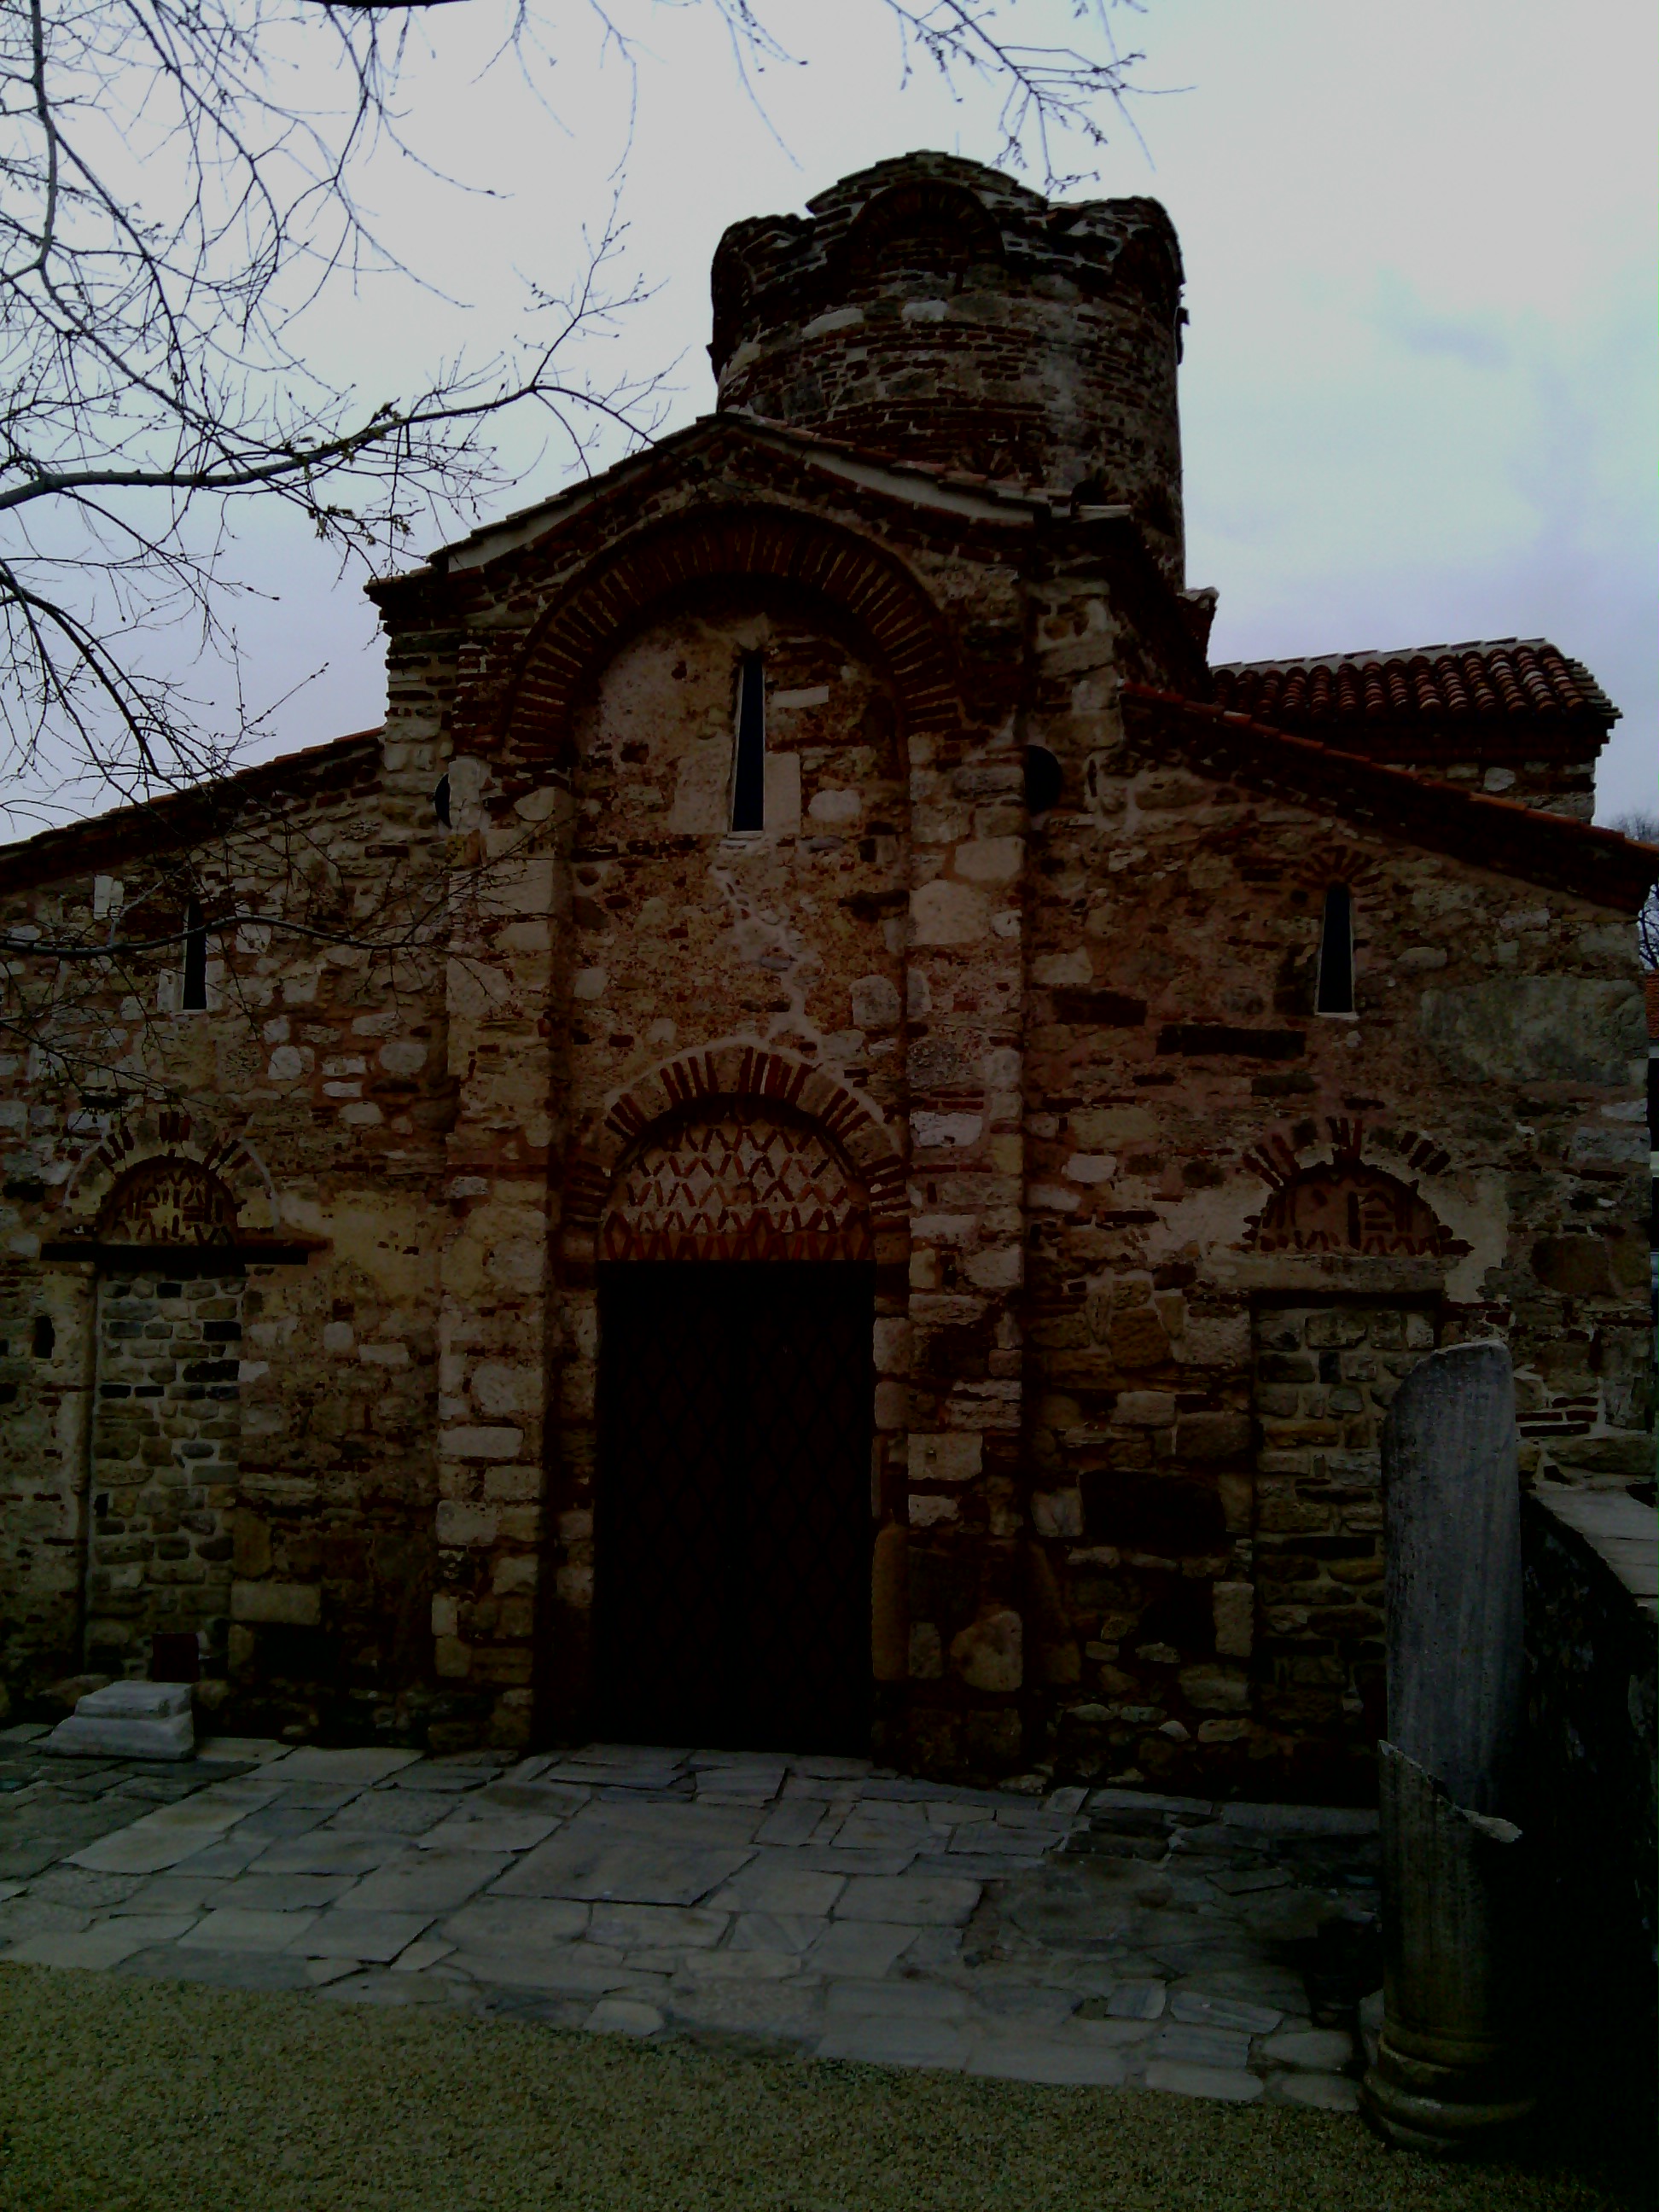
Some of the ancient Churches in nessebar are dated from around VI to VIII century. Many of the Churches are in a style specific for Bulgarian empire build in analogy with the Tarnovo capital of Bulgaria at that time architecture, such architecture is very common for Bulgaria and Byzantine empire in the XIII and XVI centuries. Churches dated from the XIII c. is St. Parascheva, (XIII c.) St. Theodor (XIV c.), St. Archangel Michael and Gabriel (XVI). По това време са построени църквите “Св. Параскева (XIII в), “Св. Теодор” (XIV в), “Св. Архангели Михаил и Гавраил” (XIV в), имащи преки аналогии в столичната търновска архитектура.
Unfortunately though there are many Churches in Nessebar, many of them are just historical monuments nowadays and others are turned into Painting Galleries. In all ancient city only 1 Orthoox Church – The Dormition of Virgin Mary is functional with regular Holy Liturgies served. The Church has a miracle making of the Theotokos. Many people have found relief and cure or fast help from God after praying in front of the miraculous icon.
Nessebar Miracle Making Icon of Holy Theotokos
To give thanks to Mother Mary many people who received cure or whose prayers came true by praying in front of the miraculous icon deliberately left their gold earings, necklaces and even war medals. In the Church there are holy relics of number of Christian saints – saint Cyprian and Justina, saint Tatyiana, st. mrtr. Marina, st. Vlasij, st. Macarious …
Father Sergij walk us through the city telling a bit of history of each of the Churhes one of the Basilicas was much bigger the rest and fr. Sergius explained that this used to be a Church where a Metropolitan or a Bishop was serving.
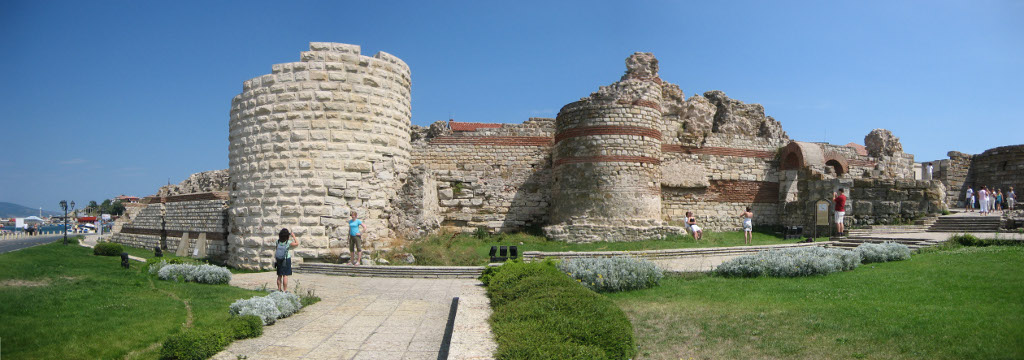
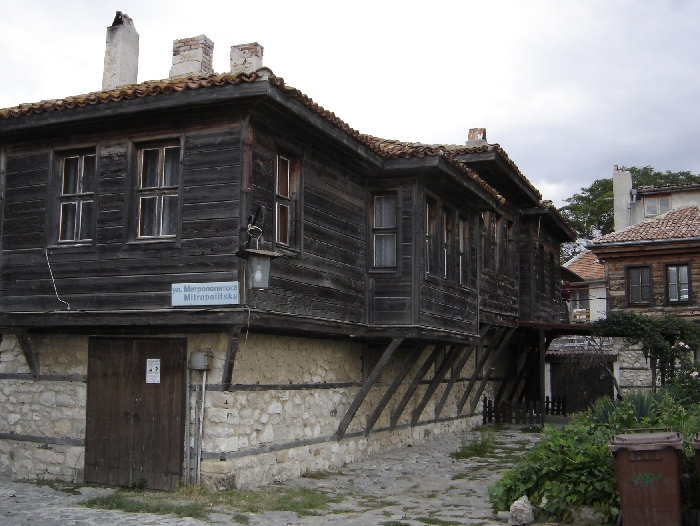
We learned that in Nessebar was a very desired king region a place, a highly spiritual place with an overall of 40 Churches! On the entrance of old nessebar there are remains of the old city fortress walls, the whole city houses and architecture is renessance with a lot of wooden houses. Nessebar city entry fortress remains
Wooden Houses in Nesebar
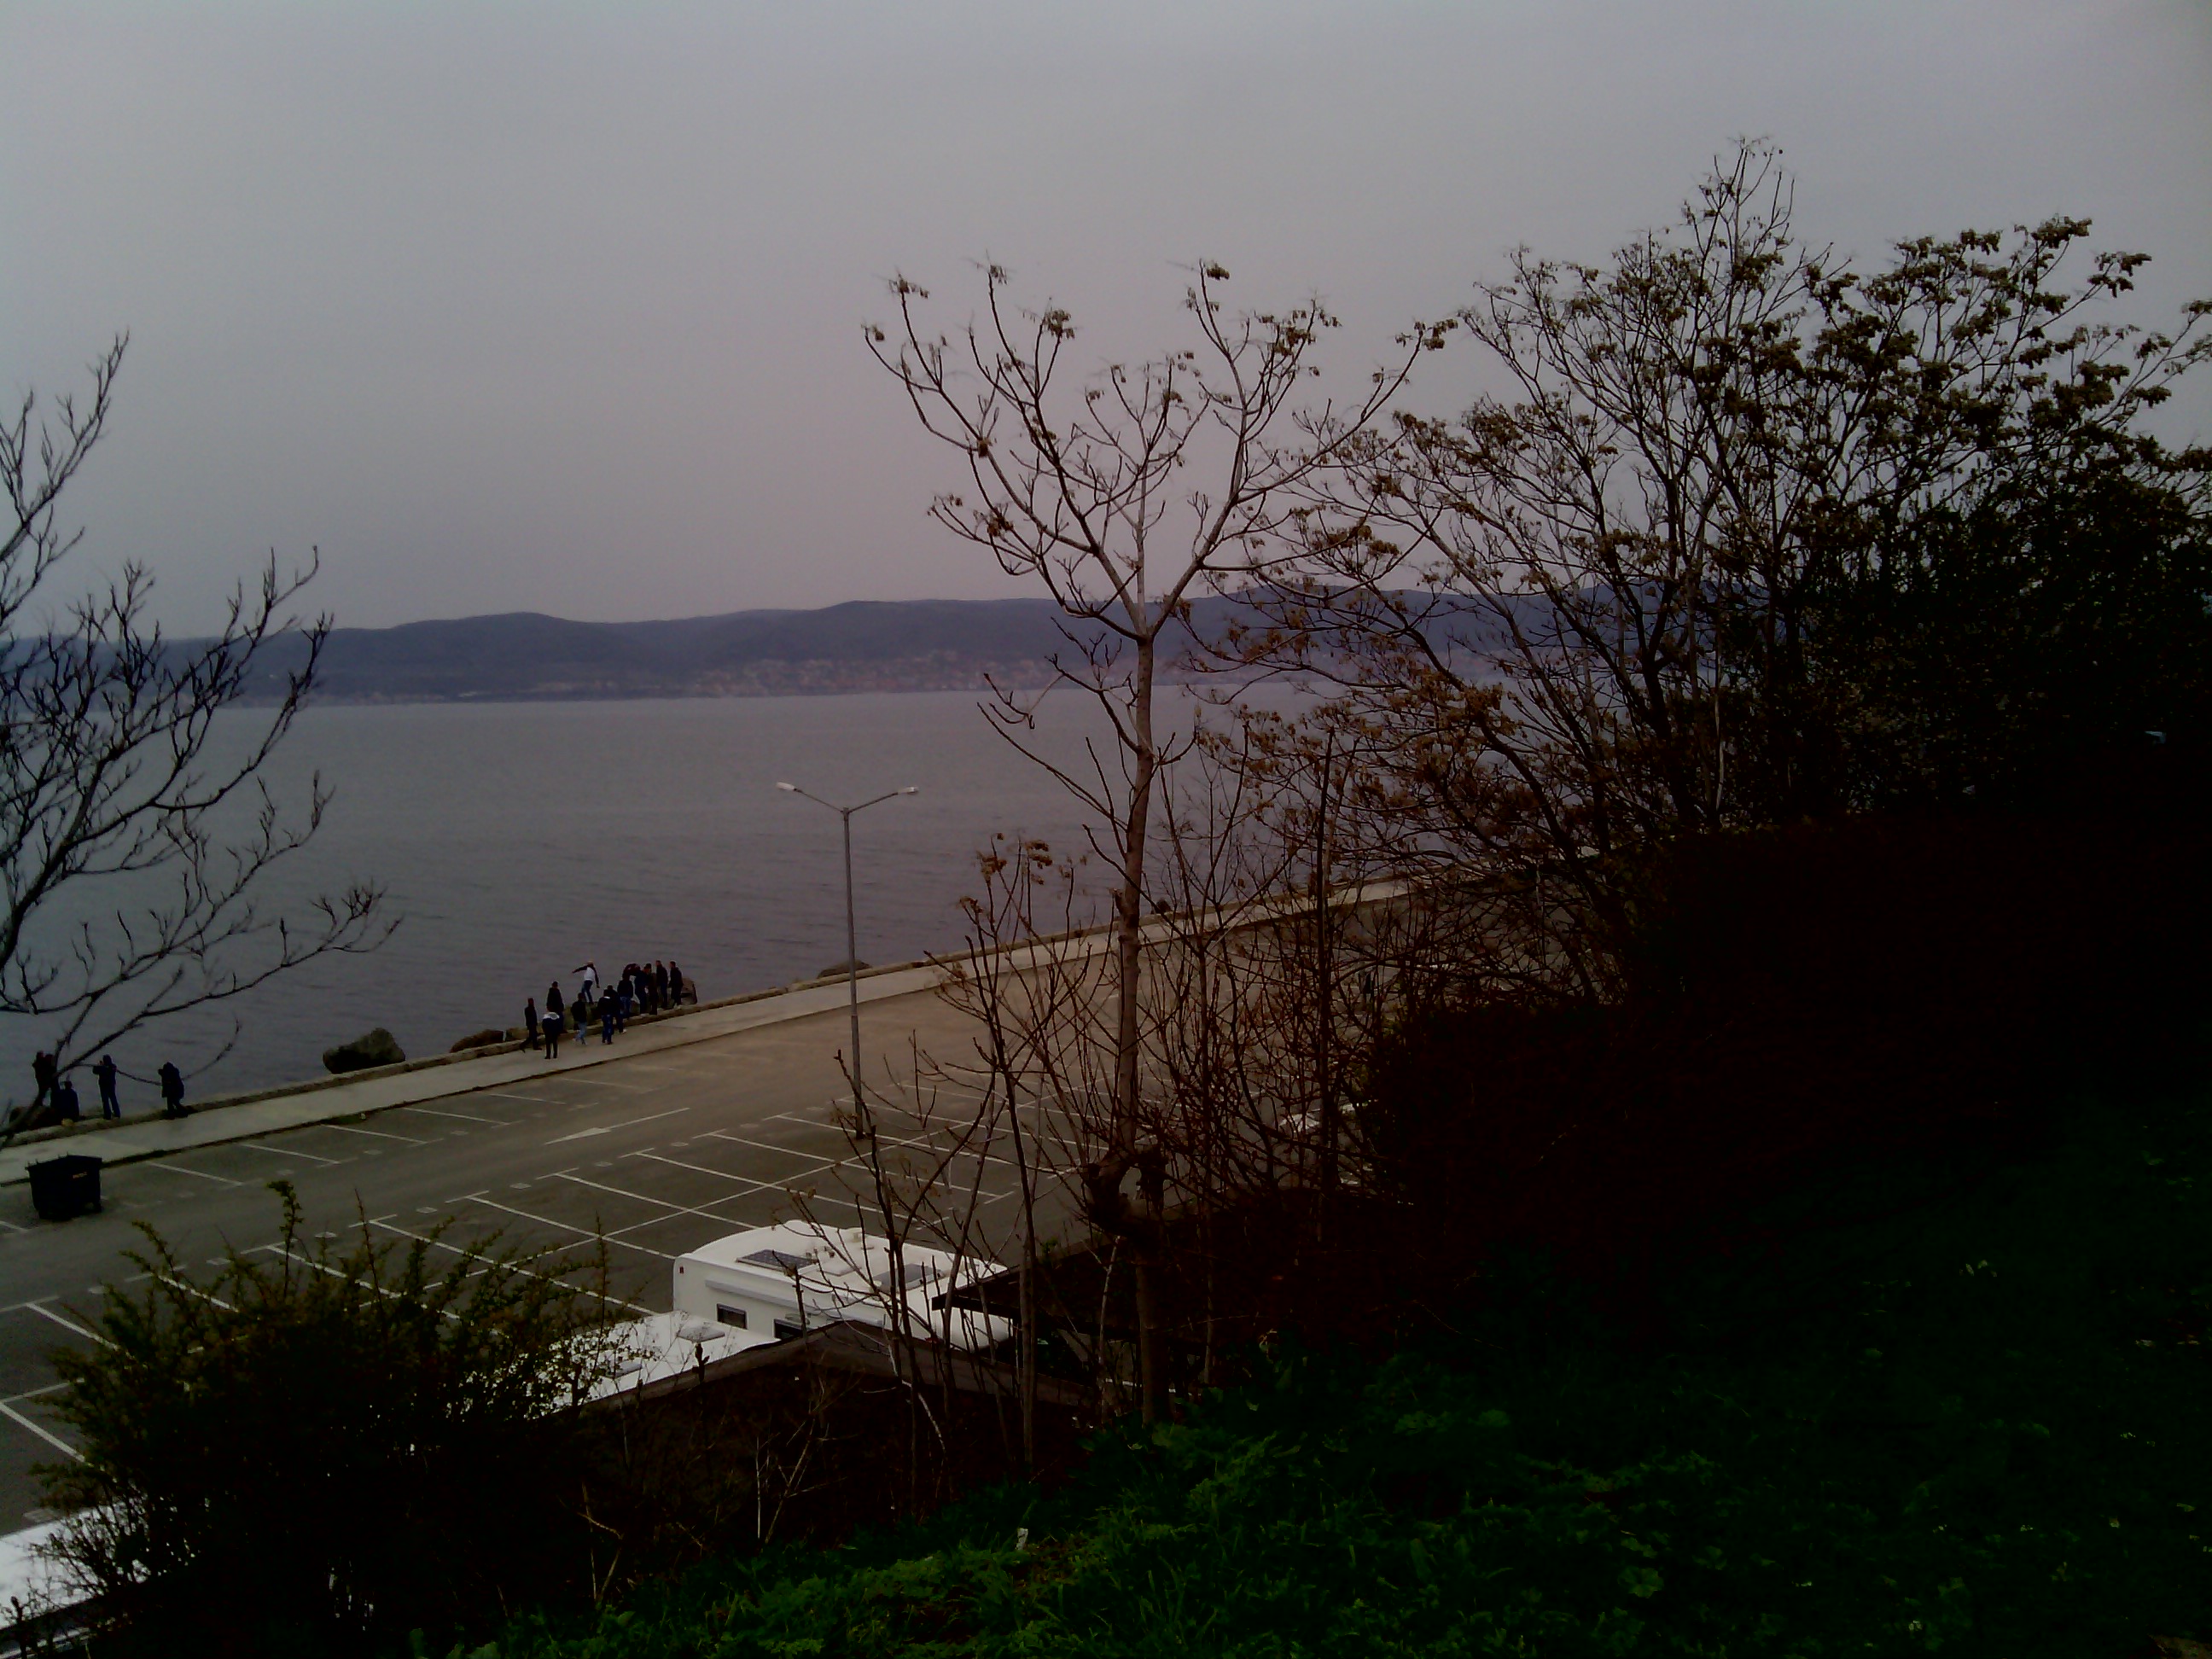
Besides the beautiful Churches the sea side is breath taking and from sea shore you can in the distance another resort city Sunny Beach.
Nessebar winter sea coast view
In Nesebar there are plenty of souvenir shops, caffeterias, small ethnographic styled restaurants assuring a great time for every touries.Very neart to Nessebar is situated also a beautiful rest resort village Ravda. About 13:00 we left Nessebar and headed back to Pomorie with fr. Sergij who told us a what of Christian faith stories rich in wisdom. On next day Sunday after the end of Holy Liturgy the Abbot of Pomorie Monastery (fr. Ierotey) baptized Samuel and we had a lunch together with the brotherhood.In early afternoon we headed back to Sofia. As always father archimandrit Ierotey and fr. Sergius presented us with Christian literature as a gift and a CDs with faith related movies.
I hate facebook, from the deepness of my guts! However, unfortunately in one of the companies I'm employed, occasionally I have to use it as an advertisement media to improve the Search Engine visibility for their websites (gather them some more likes). As a not big lover of facebook, I'm also not a facebook-pro, anyways with this circumstances, I'm starting to learn basic tips on, making a facebook page / profile more user friendly and hence more attracting to facebook users.
From what, i"ve read there are plenty of factors that can affect on how attractive a facebook page / company profile , anyways some of the factors are more important to tamper than others. Such two factors of top importance are:
Let me evaluate a bit on each of the three aforementioned fb marketing weight factors.
1. Using Page likes for popularization.
– Lets say that you would like to make marketing to a company websites which is involved in Financial or Investment market. Enter with the company created page or profile and facebook and think for and search for as many keywords related to the company business as possible. Check each of the results if the Page / Group is liked by hundred thousands of other people, then just give it a like too. By doing so for a couple of seconds all this (hundred thousands or millions) of people who has also liked it will see for a second (or less), what hangs on your Facebook profile 😉 The chance someone gets interested into what is your profile saying here is high especially if this pops up to a some 100 000+ of logged people who previously liked a fb page 🙂
2. Joining groups as a way to drive more visitors to a facebook profile
Joining big groups consisting ot thousands or millions's logic is the same like with the page likes. The only difference is some groups are kept private the so called (Closed Group). Finding a number of similar (Open Groups) to your company activities and joining them will possibly display your company facebook profile to as many profiles as the group has. Most of the groups are not too active therefore joing groups as a way to drive attention of facebook users to a desired profile is not so efficient as with Page Likes Adjusting a profile picture logo dimensions to a wide skyscraper.
It might seem strange but actually the size of profile picture set to pages or profiles in facebook matters, different profiles dimensions could have impact on Page Likes 🙂 The reason for the fb picture profile having influence on the marketing is very simple. If you have a wider picture you can graphically include more data visible for the user that is always stuck to the page and hence seen by the user.
I've realized this after, I've red few articles online on the same topic along with that I've noticed many big brand pages on Facebook like for instance BMW (Cars) with over 8 000 000 of likes, Adidas and Nike – with over 6 000 000 likes, have set up this wide skyscraper dimensions logos.
Here is a crop taken displaying the wide skyscraper profile picture set by BMW cars.The profile picture used by BWM (cars) has an image dimensions of: 180×500 heigh x widthAdidas's profile logo has a size of 180×489.
Nike uses a bit of unstandard 390×720 (but while uploaded facebook website automatically crops the image to a size which is fittable for a wide skyscraper) with dimensions like (200×400)Another franchising company with big likes base, I've seen is McDonald's with 19 900 000+ likes! again with a banner logo consisting of wide scraper with picture dimenions (180×439 – height / width )There are some comparatively big user base facebook pages, like Ubuntu's non-profit organization with 555 000+ thousands of likes, and their logo has dimensions of 180×181 pixels.
Not all of the highly liked (visited) facebook pages however use a wide skyscraper as a profile logo and still has enormous number of likes. One contra-example showing that there is no clear relation between facebook profile picture dimensions and page popularity (number of likes) is Metallica (Musician/Band) fan page – (http://www.facebook.com/Metallica), which as of the time of writting this article has the UNIQUE HIGH NUMBER of 23,725,897 LIKES! 🙂
As far as, I've further red on many blogs, there are two general facebook standard banner profile picture recommendations:
1. One is facebook square like profile picture
– (this is the classics), if you just place a picture that is not too wide automatically facebook upload scripts will tailer the picture to have dimensions like: 180×180 pixels
The other recommended facebook pictures size is the wide wide-scraper and it should possess an image dimensions size similar to: width x height -180×500 pixels
This is pretty much the few basics I so far, know of can help to easily gather a custom fb company Page Likes. As facebook is really HUGE nowdays fb marketing has advanced tremendously.
I'll be glad to hear some cool tips & tricks you know?which can help a facebook page / profile popularity rise up. Looking forward to hear for your good or bad facebook experiences 🙂
Likes of pages, which are liked by thousands of hundreds or millions of people
Belongings to groups / Membering to big groups (consisting of thousands) which hold similar interest or business activity
I had to create a number of Facebook and Twitter accounts for one of the companies where I am employed. As I had to put Avatars to each and every new account. I therefore had to resize the company logos to fit the to the avatar dimensions.. It took me a bit of research until I found the proper picture dimensions. Here are the dimensions:
For facebook page Avatar the good picture width / height dimensions is a square like:
151x151 pixels
If however you prefer to have a sky scraper picture in Facebook, this is possible as thumbnail pictures up to 180×540 w/h pixels are showing up in FB. At most cases FaceBook automatically resizes the uploaded picture and generates a thumbnail which in most pictures looks okay, however in some odd picture dimensions the picture preview might be messy, so its better to ship the profile pic in standard square size like 151×151, 256×256, 313×313 etc.
For Twitter page Avatar the fixed picture width / height dimensions is:
73x73 pixels
In Twitter again the avatar picture should be a square like, to have twitter during upload automatically resize and make a good looking pic thumbnail. If some picture with a non square dimensions is uploaded as an Avatar for twitter account usually, twitter's pic auto resize server side program chops parts of the picture. This is not a bug but expected behaviour. In Twitter another requirement is that the uploaded avatar image does not exceed 700kb, trying to puload a picture over 700k fails.
In both Facebook and Twitter the uploaded Avatar logo should be in format JPEG, GIF or PNG . To resize the company logo pictures for FB and Twitter, I used GIMP 's:
Image -> Scale Image
menus.
I've red some people claiming the size of the Avatar logo in Facebook could have some impact in terms of e-marketing, but I'm not sure if this is a fact or some false rumour. Anyways it is sure that a wide sky scraper like picture allows you to show more even from the profile and maybe through the picture have larger influence over the audience.
I’ve been experimenting since some time in order to understand better what is the current situation with Video Desktop Capturing Software available today for Linux and FreeBSD.
Though xvidcap works pretty well, it is currently uncapable of capturing the audio stream of a Linux Desktop env and hence part of the interactivity of the videos is missing when used.
A bit of further investigation on the topic has pointed me to 3 free software programs which are capable to record Desktop environment on Linux with sound embedded
The interesting screen video capturing Desktop tools I’ve found are:
1. recordMyDesktop 2. Istanbul and 3. vnc2swf
Installing them on a Debian based distribution is pleasable, as there are installable debian packages of each one which I installed easily with apt:
debian:~# apt-get install istanbul recordmydesktop gtk-recordmydesktop vnc2swf
RecordMyDesktop‘s package contains a command line little tool which when started directly starts capturing video and audio of the Linux Desktop. After a Ctrl+C is pressed the program quits, saves and encodes the video in ogg-encapsulated theora-vorbis file format.
Here is the output I got in saving a sample file by launching recordmydesktop without any arguments:
hipo@debian:~/Desktop$ recordmydesktop Initial recording window is set to: X:0 Y:0 Width:1024 Height:768 Adjusted recording window is set to: X:0 Y:0 Width:1024 Height:768 Your window manager appears to be Metacity
Initializing… Buffer size adjusted to 4096 from 4096 frames. Opened PCM device hw:0,0 Recording on device hw:0,0 is set to: 2 channels at 22050Hz Capturing! Broken pipe: Overrun occurred. Broken pipe: Overrun occurred. Broken pipe: Overrun occurred. ^C *********************************************
Cached 5 MB, from 207 MB that were received. Average cache compression ratio: 97.3 %
********************************************* Saved 69 frames in a total of 69 requests Shutting down..Broken pipe: Overrun occurred. … STATE:ENCODING Encoding started! This may take several minutes. Pressing Ctrl-C will cancel the procedure (resuming will not be possible, but any portion of the video, which is already encoded won’t be deleted). Please wait… Output file: out.ogv [100%] Encoding finished! Wait a moment please…
Done. Written 692529 bytes (635547 of which were video data and 56982 audio data)
Cleanning up cache… Done!!! Goodbye!
The captured file as I you see in the above output is saved in file out.ogv
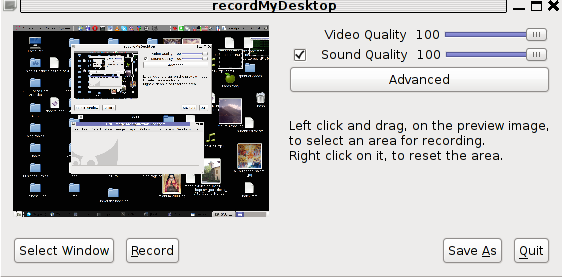
RecordMyDesktop has also a GUI interface (written in Python) called gtk-recordmydesktop
Below you see a screenshot of the GUI gtk-recordmydesktop:
gtk-recordmydesktop is a super-easy to use as you already see in the picture, you can either configure it with Advanced button or use Save As button to select where you want the Desktop captured video and audio to be stored.
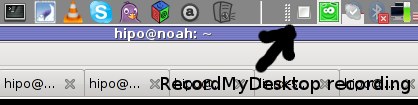
In Debian Squeeze 6.0, the Advanced GUI button interface button is not working but that’s not such an issue, as the rest of the buttons works fine. After the recordmydesktop‘s Record button is pressed it will start capturing from your Desktop and the window seen in the above screenshot will disappear/hide in the system tray:
When you press over the white little square in the system tray the screen capturing will be interrupted and a window will pop-up informing you that the captured video and audio is being encoded, here is another screenshot of recordmydesktop encoding a saved Desktop video stream:
After the final .ogv file is encoded and saved to further transfer it into (.flv) I used ffmpeg;
debian:~# ffmpeg -i test.ogv test.flv

...
Now let’s evaluate a bit on the the final results, the produced test.ogv‘s synchronization between sound and video was not good as the sound was starting earlier than the video and therefore even though recordmydesktop used to be highly praised on the net, the proggie developers still needs to do some bug fixing Further on, I continued and (gave the other Desktop screen capturer) Istanbul a try hoping that at least with it the video and audio of my Linux desktop will be properly captured. But guess what, the results with Istanbul was even more unsatisfactory as the produced videos and sounds, were slow and a lot of frames from the screens were missing completely. Moreover the sound which was supposed to accompany the video was completely 🙁
Thus I will skip on talking about Istanbul as in my view, this piece of software is far away from being production ready.
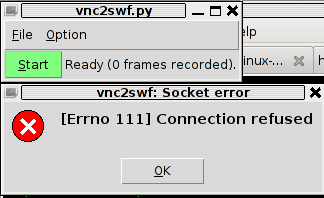
I also tested vnc2swf , launched it by: pressing alt+f2 and typing in vnc2swf in GNOME’s run application prompt, just to be surprised by an error …:
The reason for this error is caused by the xserver (Xorg) port 5900 is being closed by default on Debian
However this error is easily solvable, by making the Xserver to listen to a the port 5900, to make the Xorg server on Debian to listen on this port you need to edit the file:
/etc/X11/xinit/xserverrc
and change inside it:
exec /usr/bin/X -nolisten tcp "$@"
with:
exec /usr/bin/X "$@"
and either reboot your Linux or restart only the Xorg server by pressing Ctrl+Alt+BackSpace
Now let me conclude, the results from my desktop video screen capturing experiments prooved that vnc2swf is superior (as it is capable of properly saving a movie with sound and video from a Linux Desktop). It appears this soft is actually the best one you can use to make a video of your Linux desktop.
Sadly my testing has proven that Linux is still lacking behind Windows and Mac in even doing the most simple tasks … Let’s hope that situation will get better soon and Gnome or KDE developers will soon provide us with better software capable to save properly a video and audio captured from the Linux Desktop.
In my quest to know Linux better and use it capabilities to fulfill a multimedia tasks I came across the question:
How can I extract audio sound and music from Flash Videos .flv file format?
After a bit of investigation online I’ve found out in order to achieve this task the quickest way is via the handy ffmpeg conversion tool .
It’s rather easy actually, all necessery to do the conversion is to have the ffmpeg installed. FFMpeg is part of Debian and Ubuntu repositories, so if you haven’t installed it yet, go straigh and install it with:
debian:~# apt-get install ffmpeg

...
Many modern day Linux distributions already have the ffmpeg pre-installed by default, ffmpeg even have a Windows version so this little tutorial should be directly applied on a Windows host with installed ffmpeg.
Convertion of a .flv file to .mp3 file for example is a real piece of cake to so do issue the command:
When talking about conversions, another very useful application of ffmpeg is in case if you want to:
Extract Audio from online streams
Let’s say you have a favourite radio, you often listen and there are a podcast you want to capture for later listening, or just catch a few nice songs, using ffmpeg it’s a piece of cake by using the command like:
The possible ways of use of ffmpeg is truly versatily, you can use it for instance if you have to convert some kind of audio or video format to another one I have given a very simple example of converting a .flv file to .avi and vice versa in my previous post
And shall not uncircumcision which is by nature, if it fulfil the law, judge thee, who by the letter and circumcision dost transgress the law? -- Romans 2:27