Posts Tagged ‘investigation’
Sunday, March 18th, 2012 
I've noticed in /var/log/apache2/error.log on one of the Debian servers I manage a lot of warnings and errors produced by tidy – HTML syntax checker and reformatter program.
There were actually quite plenty frequently appearing messages in the the log like:
...

To learn more about HTML Tidy see http://tidy.sourceforge.net

Please fill bug reports and queries using the "tracker" on the Tidy web site.

Additionally, questions can be sent to html-tidy@w3.org

HTML and CSS specifications are available from http://www.w3.org/

Lobby your company to join W3C, see http://www.w3.org/Consortium

line 1 column 1 - Warning: missing <!DOCTYPE> declaration

line 1 column 1 - Warning: plain text isn't allowed in <head> elements

line 1 column 1 - Info: <head> previously mentioned

line 1 column 1 - Warning: inserting implicit <body>

line 1 column 1 - Warning: inserting missing 'title' element

Info: Document content looks like HTML 3.2

4 warnings, 0 errors were found!

...
I did a quick investigation on where from this messages are logged in error.log, and discovered few .php scripts in one of the websites containing the tidy string.
I used Linux find + grep cmds find in all php files the "tidy "string, like so:
server:~# find . -iname '*.php'-exec grep -rli 'tidy' '{}' ;

find . -iname '*.php' -exec grep -rli 'tidy' '{}' ; ./new_design/modules/index.mod.php

./modules/index.mod.php

./modules/index_1.mod.php

./modules/index1.mod.php
Opening the files, with vim to check about how tidy is invoked, revealed tidy calls like:
exec('/usr/bin/tidy -e -ashtml -utf8 '.$tmp_name,$rett);
As you see the PHP programmers who wrote this website, made a bigtidy mess. Instead of using php5's tidy module, they hard coded tidy external command to be invoked via php's exec(); external tidy command invocation.
This is extremely bad practice, since it spawns the command via a pseudo limited apache shell.
I've notified about the issue, but I don't know when, the external tidy calls will be rewritten.
Until the external tidy invocations are rewritten to use the php tidy module, I decided to at least remove the tidy warnings and errors output.
To remove the warning and error messages I've changed:
exec('/usr/bin/tidy -e -ashtml -utf8 '.$tmp_name,$rett);
exec('/usr/bin/tidy --show-warnings no --show-errors no -q -e -ashtml -utf8 '.$tmp_name,$rett);
The extra switches meaning is like so:
q – instructs tidy to produce quiet output
-e – show only errors and warnings
–show warnings no && –show errors no, completely disable warnings and error output
Onwards tidy no longer logs junk messages in error.log Not logging all this useless warnings and errors has positive effect on overall server performance especially, when the scripts, running /usr/bin/tidy are called as frequently as 1000 times per sec. or more
Tags: apache, Auto, body, bug reports, command invocation, consortium, content, CSS, css specifications, declaration, design modules, doctype, document content, Draft, element, element info, elementInfo, elements, exec, exec grep, HEAD, How to, HTML, html syntax checker, iname, index, investigation, isn, line 1, Linux, log, logs, lt, mod, php, php exec, php programmers, php scripts, php5, queries, quot, reformatter, rett, rli, servers, Shell, show, sourceforge, text, tmp, usr bin, validator, vim
Posted in System Administration, Web and CMS | No Comments »
Wednesday, June 15th, 2011 
Many joomla CMS installations are for Non-profit organizations or Non Government organizations. These are organizations which are not officially making profit and therefore this instituations are interested into donations to support their activities.
In this occasions adding Joomla paypal capabilities is very essential. There are plenty of modules which enables Joomla to support paypal monetary payments, however many of them are either paid or requires registration and thus it’s quite time consuming to set up a decent PayPal supporting module for Joomla.
After a bit of investigation thanks God, I’ve come across a module that is free of charge, easily downloadable (wihtout registration) and is also relatively easy to configure, these module is called PAYPAL DONATION MODULE
I’ve mirored the module to my server, just in case if the module disappears in the future.
Here are a very brief explanation on how the module can be downloaded installed and configured:
First Download (mod_ojdonation_pp) Paypal Donation Module here
Install it as joomla module via:
Extensions -> Install/Uninstall
menu
Afterwards, go to:
Extensions -> Module Manager
In the list of modules you will notice the Donate module which will be disabled. Use the Enable button to enable it.
Next by clicking on the Donate Module Name, one can configure the module, where the most essential configuration values that needs to be filled in are:
1. Title: – The title of the donation form:
2. Donation Title: – Title of donation picture to show in the webpage
3. Donation Amount: – Default donation amount user will donate with paypal by clicking on Donate button
4. Currency – Default currency the donators will use to donate to configured paypal account
5. Paypal ID: – The email address of paypal account your donators will donate to (This was a bit hard to understand since Paypal ID is not a number ID but the email address configured as an username in PayPal).
6. Donation Description: – Description text to appear before the Donate button
7. Donation Footer: – Text to appear after the Donate button
There are two ways one could add the donation module to show the donation form, on the joomla website:
a. One is to enable the donation button on every joomla webpage (I don’t like this kind of behaviour).
To use this kind of donate button display approach, you will have to select from the Donation module, conf options:
– Show on FrontPage: and Show Title:
Also make sure the Enabled: option is set to Yes
b. Second approach is to set the PayPal Donation form only to appear on a single menu, to do so:
While in Paypal Donation Module configuration in Menu Assignment section, select:
Select Menu Item(s) from the List
instead of the default All value set for Menus.
The last setting to be choosen is the paypal donation form page location (where exactly on the selected pages the form will appear).
The form location is set from the Position: dropdown menu, the option which I found to be the best one for me was the bottom option. However just play with the Position setting and choose the one that will be best for you.
Then scroll on in the Menu Selection: and choose only the menus where you want a paypal donation form to appear.
Finally to save all the recent made settings, click on Apply and refreshing in a new page should show you paypal’s money donation form in joomla
If all is configured fine with Joomla’s – Paypal Donation Module you should get on your webpage:
Tags: amount, Button, buttonThere, capabilities, cms, configuration values, configure, configured, consuming, currency, default, DONATION, Donation Amount, Donation Description, Donation Footer, Donation Title, donations, donators, explanation, footer, form, future, government organizations, How to, Install, investigation, Joomla, location, menu, mod, monetary payments, number id, occasions, ojdonation, option, page, paypal id, profit organizations, show, Show Title, time, username, webpage
Posted in Joomla, Various, Web and CMS | No Comments »
Tuesday, May 3rd, 2011 Every now and then my FreeBSD router dmesg ( /var/log/dmesg.today ) logs, gets filled with error messages like:
pid 86369 (httpd), uid 80, was killed: out of swap space

swap_pager_getswapspace(14): failed

swap_pager_getswapspace(16): failed

swap_pager_getswapspace(11): failed

swap_pager_getswapspace(12): failed

swap_pager_getswapspace(16): failed

swap_pager_getswapspace(16): failed

swap_pager_getswapspace(16): failed

swap_pager_getswapspace(16): failed

swap_pager_getswapspace(14): failed

swap_pager_getswapspace(16): failed

swap_pager_getswapspace(8): failed
Using swapinfo during the swap_pager_getswapspace(16): failed messages were logged in, I figured out that definitely the swap memory over-use is the bottleneck for the troubles, to find this I used the command:
freebsd# swapinfo

Device 1K-blocks Used Avail Capacity Type

/dev/ad0s1b 49712 45920 3792 92% Interleaved
After some investigation, I’ve figured out that the MySQL server is causing the kernel exceeded swap troubles.
My current MySQL server version is installed from the ports tree, whether I’m using the bsd port /usr/ports/databases/mysql51-server/ and it appears to work just fine.
However I have noticed that the mysql-server is missing a my.cnf file!, which means the mysql server is running under a mode with some kind of default configurations.
Strangely in the system process list it appeared it is using a default my.cnf file located in /var/db/mysql/my.cnf
Below you see the paste from the ps command:
ps axuww
freebsd# ps axuww | grep -i my.cnf | grep -v grep

mysql 7557 0.0 0.1 3464 1268 p1 I 12:03PM 0:00.01 /bin/sh /usr/local/bin/mysqld_safe --defaults-extra-file=/var/db/mysql/my.cnf --user=mysql --datadir=/var/db/mysql --pid-file=/var/db/mysql/pcfreak.pidmysql 7589 0.0 5.1 93284 52852 p1 I 12:03PM 0:59.01 /usr/local/libexec/mysqld --defaults-extra-file=/var/db/mysql/my.cnf --basedir=/usr/local --datadir=/var/db/mysql --user=mysql --pid-file=/var/db/mysql/pcfreak.pid --port=3306 --socket=/tmp/mysql.sock
Nevertheless it appeared the sql server is running the file /var/db/mysql/my.cnf conf was not existing! This was really weird for me as I’m used to have the default my.cnf from my previous experience with Linux servers!
Thus the next logical thing I did was to create my.cnf conf file in order to be able to have a proper limiting configuration for the sql server.
The FreeBSD my.cnf skele files are found in /usr/local/share/mysql/, here are the 4 files one can use as a starting basis for further configuration of the mysql-server.
freebsd# ls -al /usr/local/share/mysql/my-*.cnf

-r--r--r-- 1 root wheel 4948 Aug 12 2009 /usr/local/share/mysql/my-huge.cnf

-r--r--r-- 1 root wheel 20949 Aug 12 2009 /usr/local/share/mysql/my-innodb-heavy-4G.cnf

-r--r--r-- 1 root wheel 4924 Aug 12 2009 /usr/local/share/mysql/my-large.cnf

-r--r--r-- 1 root wheel 4931 Aug 12 2009 /usr/local/share/mysql/my-medium.cnf

-r--r--r-- 1 root wheel 2502 Aug 12 2009 /usr/local/share/mysql/my-small.cnf
I have chosen to use the my-medium.cnf as a skele to tune up, as my server is not high iron one e.g. the host I run the mysql is a (simple dual core 1.2Ghz system).
Further on I copied the /usr/local/share/mysql/my-medium.cnf to /var/db/mysql/my.cnf e.g.:
freebsd# cp -rpf /usr/local/share/mysql/my-medium.cnf /var/db/mysql/my.cnf
As a next step to properly tune up the default values of the newly copied my.cnf to my specific server I used the Tuning-Primer MySQL tuning script
Using tuning-primer.sh is really easy as all I did is download, launch it and follow the script suggestions to correct some of the values already in my.cnf
I have finally ended up with the following my.cnf after using tuning-primer.sh to optimize mysql server to work with my bsd host
Now I really hope the shitty swap_pager_getswapspace: failed errors would not haunt me once again by crashing my server and causing mem overheads.
Still I wonder why the port developer Alex Dupre – ale@FreeBSD.org choose not to provide the default mysql51-server conf with some kind of my.cnf file? I hope he had a good reason.
Tags: Aug, Avail, avail capacity, bottleneck, cause and solution, cnf, command ps, databases, default, default configurations, dmesg, error messages, failedswap, file, freebsd router, getswapspace, host, Interleaved, investigation, kernel, log, logs, memory, mysql server, mysqld, pcfreak, ports, ps command, root, script, server version, Strangely, swapinfo, system, tree, uid
Posted in FreeBSD, MySQL, System Administration | 2 Comments »
Monday, December 20th, 2010 A joomla installation I’m managing needed to have created a sitemap.xml
From a SEO perspective sitemap.xml and sitemap.xml.gz are absolutely necessary for a website to bewell indexed in google.
After some investigation I’ve found out a perfect program that makes generation of sitemap.xml in joomla a piece of cake.
All necessary to be done for the sitemap.xml to be created comes to download and install of JCrawler
What makes JCrawler even better is that it’s open source program.
To install Jcrawler go in the joomla administrator panel:
Extensiosn -> Install/Uninstall
You will see the Install from URL on the bottom, there place the link to the com_jcrawler.zip installation archive, for instance you can place the link of the downloaded copy of com_jcrawler.zip I’ve mirrored on www.pc-freak.net ,by placing it on https://www.pc-freak.net/files/com_jcrawler.zip
The installation will be done in a few seconds and you will hopefully be greated with a Installation Success message.
Last thing to do in order to have the sitemap.xml in your joomla based website generated is to navigate to:
Components -> JCrawler
There a screen will appear where you can customize certain things related to the sitemap.xml generation, I myself used the default options and continued straight to the Start button.
Further on a screen will appear asking you to Submit the newly generated sitemap to; Google, MSN, Ask.com, Moreover and Yahoo , so press the Submit button.
That’s all now your joomla website will be equipped with sitemap.xml, enjoy!
Tags: bewell, Button, com, customize, default options, download, downloaded copy, Extensiosn, freak, google, gz, How to build website sitemap (sitemap.xml) in Joomla, Install, installation, installation archive, installation success, investigation, JCrawler, link, MSN, open source program, order, panel, perspective, piece of cake, Press, Start, start button, success message, Uninstall, xml, Yahoo, zip installation
Posted in Joomla, Linux, SEO, Various | 7 Comments »
Tuesday, December 21st, 2010 To change the Main Menu link menu entry in Joomla, from Joomla administ rator I tried to:
Menus -> Main Menu -> Menus
I’ve changed the title but the change didn’t appeared in my Joomla based website .
I tried to change it directly in the source code of the website by looking for ‘Main Menu’ string with:
debian:/home/mysite/www# grep -rli 'Main Menu' *
but it appeared too complicated and after trying few string changes in few files I decided to drop this kind of approach.
A bit of investigation online led me to how to achieve what I was trying to dire ctly from Joomla.
Here is how. In Joomla administrator move to:
Extensions -> Module Manager
In the list you will the Module Manager appear under the list Module Name , therein you have to click over Main Menu text and change it to whatever you like to.
The new text you entered will appear on the joomla website immediately, enjoy.
Tags: administ, change, Click, grep, home, How to change from default main menu to other text in Joomla, investigation, kind, link, link menu, Main, menu, menu entry, menu link, menu text, menus, Module, move, mysite, online, rator, rli, source code, string changes, text, title, website, www
Posted in Joomla, Linux, SEO | 2 Comments »
Wednesday, December 22nd, 2010 My blog’s index has suddenly started redirecting to my last post. That was rather strange, since I haven’t done anything special, all I did before the problem occured was a change in wordpress wp-admin to my latest post.
There in I changed the post Visibility from Public to Private
Right after this my blog’s home started redirecting to the blog post where the changes was made.
This was really strange, so I reverted back the changes in Post’s Publish Visibility to the default setting.
Though the change the redirect to the latest post by accessing my www.pc-freak.net/blog/ was still there.
I tried completely wiping out the post by sending it to Trash and issuing the same post again, but now things became even worser.
Accessing my blog was opening 404 not found error message . Everything seemed fine in wordpress admin and therefore I suspected the redirect is being applied from info read in my wordpress database in MySQL.
A bit of investigation prooved my guess was correct, for some reason a record was made to the MySQL blog database in table wp_redirection_items.
The incorrect redirection wihtin the database looked like so:
| 4 | /blog/ | 0 | 2 | 0 | 0000-00-00 00:00:00 | 2 | enabled | url | 301 | /blog/how-to-change-from-default-main-menu-to-other-text-in-joomla/ | url | NULL |
Removing the incorrect redirect was kind of easy and came to simply issuing:
mysql> delete from wp_redirection_items where id='3';

Query OK, 1 row affected (0.00 sec)
This fixed the redirection issue and opening my blog main page started correctly opening the main page again! 🙂
Tags: blog, change, error message, everything, fine, freak, guess, home, How to fix wordpress blog sudden redirection to present post problem, info, investigation, issue, kind, null, page, private right, Public, Publish, Query, read, reason, redirect, redirection, visibility, wihtin, worser, www
Posted in Joomla, Various | 3 Comments »
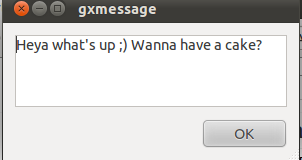
Wednesday, July 27th, 2011 I just had some fun as, my work day is over. I was curious if I can send message directly to a logged in Gnome user on Ubuntu / Debian environment.
After quick investigation I’ve found gxmessage which is available as deb package for both Debian and Ubuntu.
I installed it and use in the following way:
root@linux:~# apt-get install gxmessage
hipo@linux:~$ ssh root@remotehost.com

hipo@remote-desktop:~$ DISPLAY=:0; XAUTHORITY=~owner_of:0/.Xauthority; export DISPLAY XAUTHORITY

hipo@remote-desktop:~$ gxmessage 'Heya what's up ;) Wanna have a cake?"
Below you see what pops up on the screen on the remote-desktop Gnome Desktop 😉
Tags: cake, deb, deb package, Desktop, export, export display, Gnome, gnome desktop, gnome user, gxmessage, gxmessagehipo, investigation, Linux, package, remote desktop, remotehost, root, root linux, screen, ssh, terminal, terminal session, Ubuntu, use, way, work, Xauthority, XAUTHORITYhipo
Posted in Linux, Linux and FreeBSD Desktop, Linux Audio & Video | No Comments »
Friday, July 1st, 2011 My sister’s newly bought laptop is Acer Aspire 5736Z . By the default this notebook comes with some kind of Linux distribution Linpus .
Even though this Linpus (crafted Linux especially for Acer notebooks) looked really nice, it prooved to be a piece of shit linux distro.
Linplus was unable to even establish a simple Wireless WPA2 protected connection with my wireless router, not to mention that the physical Linux consoles (CTRL+ALT+F1) were disabled …
This LinPlus was so bad that I couldn’t even launch any type of terminal on it (I was stuck!) so I decided to kill it and make a decent latest Ubuntu 11.04 Install on it.
I was surprised to find out that trying to boot up the Ubuntu 11.04 installer led me to a black screen (black screen of death).
The v Aspire’s 5736Z monitor kept completely blank, where the hard drive was continuously reading (indicating that the Ubuntu installer has properly booted but it couldn’t light up the notebook screen).
A bit of investigation on any issues with this Acer notebook model has led me to a thread in fedora forums:
http://forums.fedoraforum.org/showthread.php?t=263794
On this forum the same kind of Linux install problem was described to also occur with ASPIREs 5736Z during a Fedora install.
I just tried the suggested fix and it works like a charm.
The fix goes like this:
1. Invoke the Ubuntu settings parameter Install pre install screen
Just press any button while the Ubuntu installer CD is reading and after few secs the Install options screen should appear, like you see it in below’s screenshot:
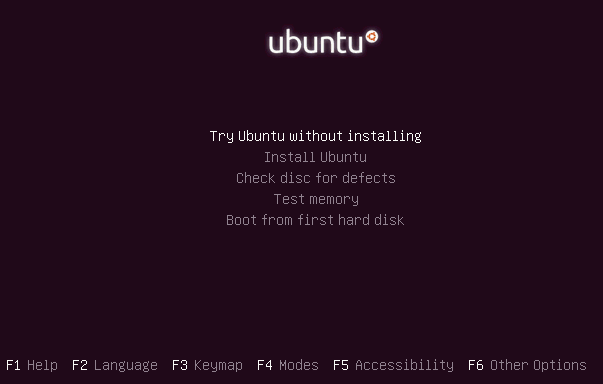
2. Select the nomodetest Boot CD Ubuntu option
You see in the above screenshot the F6 Other Options . I had toto press F6 and choose the nomodetest boot option to make the Ubuntu be able to further boot up.
After selecting the nomodetest option and pressing on the Install Ubuntu menu option the graphic installer launched succesfully 😉
Hope this small tip to be helpful to some Ubuntu or other Linux user who is trying to install Linux on his Acer Aspire 5736Z
Cheers 😉
Tags: acer notebook, acer notebooks, ASPIRE, ASPIREs, boot cd, boot option, Button, drive, f1, fedora, hard drive, Hope, how to install ubuntu linux, Install, installer cd, investigation, laptop, Linplus, linux consoles, menu option, nomodetest, notebook model, option, options screen, piece, piece of shit, reading, screen, secs, showthread, terminal, thread, tip, toto, type, Ubuntu, wireless router, wpa2
Posted in Linux, Various | 20 Comments »
Monday, May 23rd, 2011 One of the Qmail server installations I’m taking care of’s clamd antivirus process started loading the system heavily.
After a bit of log reading and investigation I’ve found the following error in my /var/log/clamd/current
@400000004dda1e1815cf03f4 ERROR: LOCAL: Socket file /tmp/clamd.socket is in use by another process.
I’ve noticed in my process list that actually I do have two processes clamd :
11608 ? Sl 0:05 /usr/local/sbin/clamd

11632 ? S 0:00 /usr/bin/multilog t /var/log/clamd

16013 ? Sl 0:06 /usr/local/sbin/clamd
It appeared that for some weird reason one of the clamd process was failing to connect constantly to the clam server socket /tmp/clamd.socket and each time it tried to connect and failed to connect to the socket the system gets about 5% of extra load …
Resolving the issues was a piece of cake, all I had to do is stop the clamd server delete the /tmp/clamd.socket and relaunch the clamd server.
Here is exactly the commands I issued:
debian:~# cd /service/

debian:/service# svc -a clamd

debian:/service# svc -h clamd

debian:/service# svc -d clamd

debian:/service# rm -f /tmp/clamd.socket

debian:/service# svc -u clamd
Afterwards the clamd extra load went out and in /var/log/clamd/current I can see clamd loads fine without errors, e.g.:
Listening daemon: PID: 16013

MaxQueue set to: 150

No stats for Database check - forcing reload

Reading databases from /usr/local/share/clamav

Database correctly reloaded (966822 signatures)

SelfCheck: Database status OK.

...
Tags: antivirus, care, cd service, clam, clamddebian, Database, database check, database status, databases, dda, debian cd, ERROR, file tmp, investigation, LOCAL, multilog, PID, piece of cake, Qmail, reading, reason, rm, sbin, SelfCheck, server installations, server socket, share, signatures, Socket, socketdebian, time, tmp, use, var, weird reason
Posted in Linux, System Administration | 1 Comment »
Tuesday, April 19th, 2011 I’ve been experimenting since some time in order to understand better what is the current situation with Video Desktop Capturing Software available today for Linux and FreeBSD.
My previous investigations has led me to write an article about xvidcap called How to make Video from your Linux Desktop with xvidcap
Though xvidcap works pretty well, it is currently uncapable of capturing the audio stream of a Linux Desktop env and hence part of the interactivity of the videos is missing when used.
A bit of further investigation on the topic has pointed me to 3 free software programs which are capable to record Desktop environment on Linux with sound embedded
The interesting screen video capturing Desktop tools I’ve found are:
1. recordMyDesktop
2. Istanbul
and
3. vnc2swf
Installing them on a Debian based distribution is pleasable, as there are installable debian packages of each one which I installed easily with apt:
debian:~# apt-get install istanbul recordmydesktop gtk-recordmydesktop vnc2swf
RecordMyDesktop‘s package contains a command line little tool which when started directly starts capturing video and audio of the Linux Desktop. After a Ctrl+C is pressed the program quits, saves and encodes the video in ogg-encapsulated theora-vorbis file format.
Here is the output I got in saving a sample file by launching recordmydesktop without any arguments:
hipo@debian:~/Desktop$ recordmydesktop
Initial recording window is set to:
X:0 Y:0 Width:1024 Height:768
Adjusted recording window is set to:
X:0 Y:0 Width:1024 Height:768
Your window manager appears to be Metacity
Initializing…
Buffer size adjusted to 4096 from 4096 frames.
Opened PCM device hw:0,0
Recording on device hw:0,0 is set to:
2 channels at 22050Hz
Capturing!
Broken pipe: Overrun occurred.
Broken pipe: Overrun occurred.
Broken pipe: Overrun occurred.
^C
*********************************************
Cached 5 MB, from 207 MB that were received.
Average cache compression ratio: 97.3 %
*********************************************
Saved 69 frames in a total of 69 requests
Shutting down..Broken pipe: Overrun occurred.
…
STATE:ENCODING
Encoding started!
This may take several minutes.
Pressing Ctrl-C will cancel the procedure (resuming will not be possible, but
any portion of the video, which is already encoded won’t be deleted).
Please wait…
Output file: out.ogv
[100%]
Encoding finished!
Wait a moment please…
Done.
Written 692529 bytes
(635547 of which were video data and 56982 audio data)
Cleanning up cache…
Done!!!
Goodbye!
The captured file as I you see in the above output is saved in file out.ogv
RecordMyDesktop has also a GUI interface (written in Python) called gtk-recordmydesktop
Below you see a screenshot of the GUI gtk-recordmydesktop:
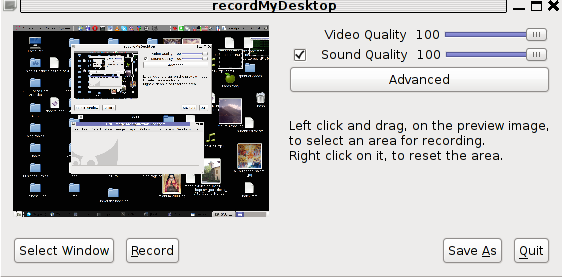
gtk-recordmydesktop is a super-easy to use as you already see in the picture, you can either configure it with Advanced button or use Save As button to select where you want the Desktop captured video and audio to be stored.
In Debian Squeeze 6.0, the Advanced GUI button interface button is not working but that’s not such an issue, as the rest of the buttons works fine.
After the recordmydesktop‘s Record button is pressed it will start capturing from your Desktop and the window seen in the above screenshot will disappear/hide in the system tray:
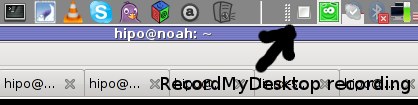
When you press over the white little square in the system tray the screen capturing will be interrupted and a window will pop-up informing you that the captured video and audio is being encoded, here is another screenshot of recordmydesktop encoding a saved Desktop video stream:

After the final .ogv file is encoded and saved to further transfer it into (.flv) I used ffmpeg;
debian:~# ffmpeg -i test.ogv test.flv

...
Now let’s evaluate a bit on the the final results, the produced test.ogv‘s synchronization between sound and video was not good as the sound was starting earlier than the video and therefore even though recordmydesktop used to be highly praised on the net, the proggie developers still needs to do some bug fixing
Further on, I continued and (gave the other Desktop screen capturer) Istanbul a try hoping that at least with it the video and audio of my Linux desktop will be properly captured. But guess what, the results with Istanbul was even more unsatisfactory as the produced videos and sounds, were slow and a lot of frames from the screens were missing completely.
Moreover the sound which was supposed to accompany the video was completely 🙁
Thus I will skip on talking about Istanbul as in my view, this piece of software is far away from being production ready.
I also tested vnc2swf , launched it by: pressing alt+f2 and typing in vnc2swf in GNOME’s run application prompt, just to be surprised by an error …:
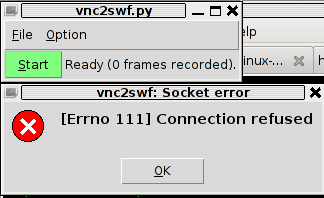
The reason for this error is caused by the xserver (Xorg) port 5900 is being closed by default on Debian
However this error is easily solvable, by making the Xserver to listen to a the port 5900, to make the Xorg server on Debian to listen on this port you need to edit the file:
/etc/X11/xinit/xserverrc
and change inside it:
exec /usr/bin/X -nolisten tcp "$@"
with:
exec /usr/bin/X "$@"
and either reboot your Linux or restart only the Xorg server by pressing Ctrl+Alt+BackSpace
Now let me conclude, the results from my desktop video screen capturing experiments prooved that vnc2swf is superior (as it is capable of properly saving a movie with sound and video from a Linux Desktop). It appears this soft is actually the best one you can use to make a video of your Linux desktop.
Sadly my testing has proven that Linux is still lacking behind Windows and Mac in even doing the most simple tasks …
Let’s hope that situation will get better soon and Gnome or KDE developers will soon provide us with better software capable to save properly a video and audio captured from the Linux Desktop.
Tags: audio stream, broken pipe, buffer size, Button, capturing software, ctrl c, current situation, debian packages, Desktop, desktop environment, desktop tools, encapsulated, file, file format, free software programs, gtk, height, interactivity, investigation, investigations, istanbul, Linux, linux desktop, ogv, Overrun, package, recording, recordMyDesktop, screen, screenshot, software, swf, swfRecordMyDesktop, test, time, tool, topic, video, video desktop, width, xvidcap
Posted in Linux, Linux and FreeBSD Desktop, Linux Audio & Video | 4 Comments »


