Posts Tagged ‘shm’

Install and configure rkhunter for improved security on a PCI DSS Linux / BSD servers with no access to Internet

Wednesday, November 10th, 2021

install-and-configure-rkhunter-with-tightened-security-variables-rkhunter-logo

rkhunter or Rootkit Hunter scans systems for known and unknown rootkits. The tool is not new and most system administrators that has to mantain some good security servers perhaps already use it in their daily sysadmin tasks.

It does this by comparing SHA-1 Hashes of important files with known good ones in online databases, searching for default directories (of rootkits), wrong permissions, hidden files, suspicious strings in kernel modules, commmon backdoors, sniffers and exploits as well as other special tests mostly for Linux and FreeBSD though a ports for other UNIX operating systems like Solaris etc. are perhaps available. rkhunter is notable due to its inclusion in popular mainstream FOSS operating systems (CentOS, Fedora,Debian, Ubuntu etc.).

Even though rkhunter is not rapidly improved over the last 3 years (its last Official version release was on 20th of Febuary 2018), it is a good tool that helps to strengthen even further security and it is often a requirement for Unix servers systems that should follow the PCI DSS Standards (Payment Card Industry Data Security Standards).

Configuring rkhunter is a pretty straight forward if you don't have too much requirements but I decided to write this article for the reason there are fwe interesting options that you might want to adopt in configuration to whitelist any files that are reported as Warnings, as well as how to set a configuration that sets a stricter security checks than the installation defaults. 

1. Install rkhunter .deb / .rpm package depending on the Linux distro or BSD

  • If you have to place it on a Redhat based distro CentOS / Redhat / Fedora

[root@Centos ~]# yum install -y rkhunter


  • On Debian distros the package name is equevallent to install there exec usual:

root@debian:~# apt install –yes rkhunter

  • On FreeBSD / NetBSD or other BSD forks you can install it from the BSD "World" ports system or install it from a precompiled binary.

freebsd# pkg install rkhunter

One important note to make here is to have a fully functional Alarming from rkhunter, you will have to have a fully functional configured postfix / exim / qmail whatever mail server to relay via official SMTP so you the Warning Alarm emails be able to reach your preferred Alarm email address. If you haven't installed postfix for example and configure it you might do.

– On Deb based distros 

[root@Centos ~]#yum install postfix


– On RPM based distros

root@debian:~# apt-get install –yes postfix


and as minimum, further on configure some functional Email Relay server within /etc/postfix/main.cf
 

# vi /etc/postfix/main.cf
relayhost = [relay.smtp-server.com]

2. Prepare rkhunter.conf initial configuration


Depending on what kind of files are present on the filesystem it could be for some reasons some standard package binaries has to be excluded for verification, because they possess unusual permissions because of manual sys admin monification this is done with the rkhunter variable PKGMGR_NO_VRFY.

If remote logging is configured on the system via something like rsyslog you will want to specificly tell it to rkhunter so this check as a possible security issue is skipped via ALLOW_SYSLOG_REMOTE_LOGGING=1. 

In case if remote root login via SSH protocol is disabled via /etc/ssh/sshd_config
PermitRootLogin no variable, the variable to include is ALLOW_SSH_ROOT_USER=no

It is useful to also increase the hashing check algorithm for security default one SHA256 you might want to change to SHA512, this is done via rkhunter.conf var HASH_CMD=SHA512

Triggering new email Warnings has to be configured so you receive, new mails at a preconfigured mailbox of your choice via variable
MAIL-ON-WARNING=SetMailAddress


# vi /etc/rkhunter.conf

PKGMGR_NO_VRFY=/usr/bin/su

PKGMGR_NO_VRFY=/usr/bin/passwd

ALLOW_SYSLOG_REMOTE_LOGGING=1

# Needed for corosync/pacemaker since update 19.11.2020

ALLOWDEVFILE=/dev/shm/qb-*/qb-*

# enabled ssh root access skip

ALLOW_SSH_ROOT_USER=no

HASH_CMD=SHA512

# Email address to sent alert in case of Warnings

MAIL-ON-WARNING=Your-Customer@Your-Email-Server-Destination-Address.com

MAIL-ON-WARNING=Your-Second-Peronsl-Email-Address@SMTP-Server.com

DISABLE_TESTS=os_specific


Optionally if you're using something specific such as corosync / pacemaker High Availability cluster or some specific software that is creating /dev/ files identified as potential Risks you might want to add more rkhunter.conf options like:
 

# Allow PCS/Pacemaker/Corosync
ALLOWDEVFILE=/dev/shm/qb-attrd-*
ALLOWDEVFILE=/dev/shm/qb-cfg-*
ALLOWDEVFILE=/dev/shm/qb-cib_rw-*
ALLOWDEVFILE=/dev/shm/qb-cib_shm-*
ALLOWDEVFILE=/dev/shm/qb-corosync-*
ALLOWDEVFILE=/dev/shm/qb-cpg-*
ALLOWDEVFILE=/dev/shm/qb-lrmd-*
ALLOWDEVFILE=/dev/shm/qb-pengine-*
ALLOWDEVFILE=/dev/shm/qb-quorum-*
ALLOWDEVFILE=/dev/shm/qb-stonith-*
ALLOWDEVFILE=/dev/shm/pulse-shm-*
ALLOWDEVFILE=/dev/md/md-device-map
# Needed for corosync/pacemaker since update 19.11.2020
ALLOWDEVFILE=/dev/shm/qb-*/qb-*

# tomboy creates this one
ALLOWDEVFILE="/dev/shm/mono.*"
# created by libv4l
ALLOWDEVFILE="/dev/shm/libv4l-*"
# created by spice video
ALLOWDEVFILE="/dev/shm/spice.*"
# created by mdadm
ALLOWDEVFILE="/dev/md/autorebuild.pid"
# 389 Directory Server
ALLOWDEVFILE=/dev/shm/sem.slapd-*.stats
# squid proxy
ALLOWDEVFILE=/dev/shm/squid-cf*
# squid ssl cache
ALLOWDEVFILE=/dev/shm/squid-ssl_session_cache.shm
# Allow podman
ALLOWDEVFILE=/dev/shm/libpod*lock*


3. Set the proper mirror database URL location to internal network repository


Usually  file /var/lib/rkhunter/db/mirrors.dat does contain Internet server address where latest version of mirrors.dat could be fetched, below is how it looks by default on Debian 10 Linux.

root@debian:/var/lib/rkhunter/db# cat mirrors.dat 
Version:2007060601
mirror=http://rkhunter.sourceforge.net

As you can guess a machine that doesn't have access to the Internet neither directly, neither via some kind of secure proxy because it is in a Paranoic Demilitarized Zone (DMZ) Network with many firewalls. What you can do then is setup another Mirror server (Apache / Nginx) within the local PCI secured LAN that gets regularly the database from official database on http://rkhunter.sourceforge.net/ (by installing and running rkhunter –update command on the Mirror WebServer and copying data under some directory structure on the remote local LAN accessible server, to keep the DB uptodate you might want to setup a cron to periodically copy latest available rkhunter database towards the http://mirror-url/path-folder/)

# vi /var/lib/rkhunter/db/mirrors.dat

local=http://rkhunter-url-mirror-server-url.com/rkhunter/1.4/


A mirror copy of entire db files from Debian 10.8 ( Buster ) ready for download are here.

Update entire file property db and check for rkhunter db updates


# rkhunter –update && rkhunter –propupdate

[ Rootkit Hunter version 1.4.6 ]

Checking rkhunter data files…
  Checking file mirrors.dat                                  [ Skipped ]
  Checking file programs_bad.dat                             [ No update ]
  Checking file backdoorports.dat                            [ No update ]
  Checking file suspscan.dat                                 [ No update ]
  Checking file i18n/cn                                      [ No update ]
  Checking file i18n/de                                      [ No update ]
  Checking file i18n/en                                      [ No update ]
  Checking file i18n/tr                                      [ No update ]
  Checking file i18n/tr.utf8                                 [ No update ]
  Checking file i18n/zh                                      [ No update ]
  Checking file i18n/zh.utf8                                 [ No update ]
  Checking file i18n/ja                                      [ No update ]


rkhunter-update-propupdate-screenshot-centos-linux


4. Initiate a first time check and see whether something is not triggering Warnings

# rkhunter –check
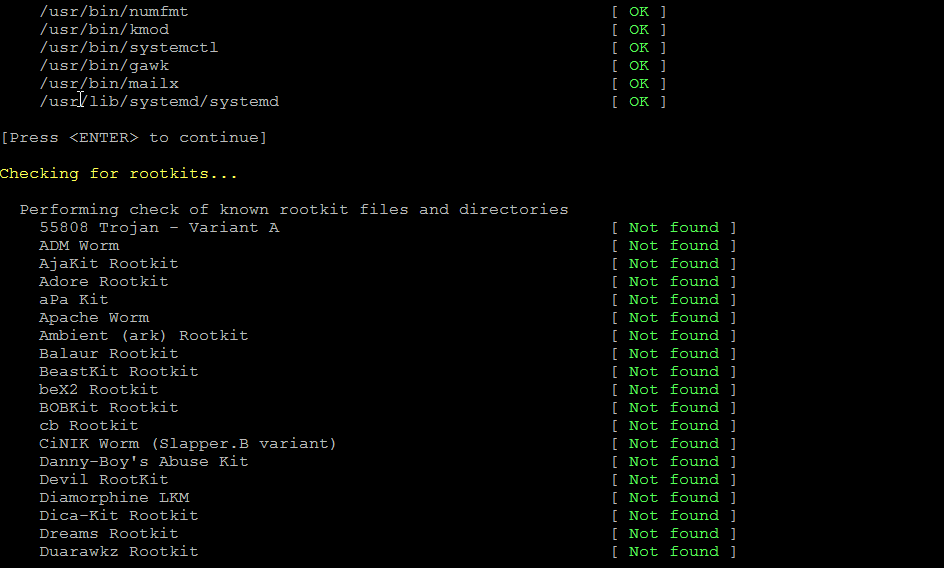
rkhunter-checking-for-rootkits-linux-screenshot

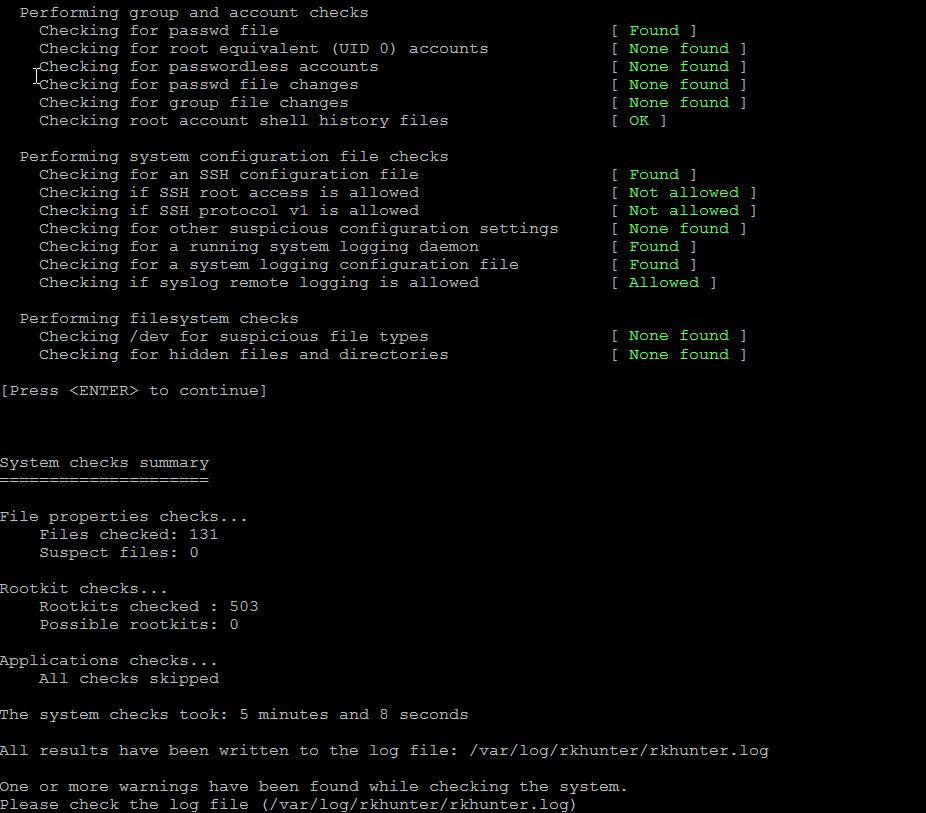
As you might have to run the rkhunter multiple times, there is annoying Press Enter prompt, between checks. The idea of it is that you're able to inspect what went on but since usually, inspecting /var/log/rkhunter/rkhunter.log is much more easier, I prefer to skip this with –skip-keypress option.

# rkhunter –check  –skip-keypress


5. Whitelist additional files and dev triggering false warnings alerts


You have to keep in mind many files which are considered to not be officially PCI compatible and potentially dangerous such as lynx browser curl, telnet etc. might trigger Warning, after checking them thoroughfully with some AntiVirus software such as Clamav and checking the MD5 checksum compared to a clean installed .deb / .rpm package on another RootKit, Virus, Spyware etc. Clean system (be it virtual machine or a Testing / Staging) machine you might want to simply whitelist the files which are incorrectly detected as dangerous for the system security.

Again this can be achieved with

PKGMGR_NO_VRFY=

Some Cluster softwares that are preparing their own /dev/ temporary files such as Pacemaker / Corosync might also trigger alarms, so you might want to suppress this as well with ALLOWDEVFILE

ALLOWDEVFILE=/dev/shm/qb-*/qb-*


If Warnings are found check what is the issue and if necessery white list files due to incorrect permissions in /etc/rkhunter.conf .

rkhunter-warnings-found-screenshot

Re-run the check until all appears clean as in below screenshot.
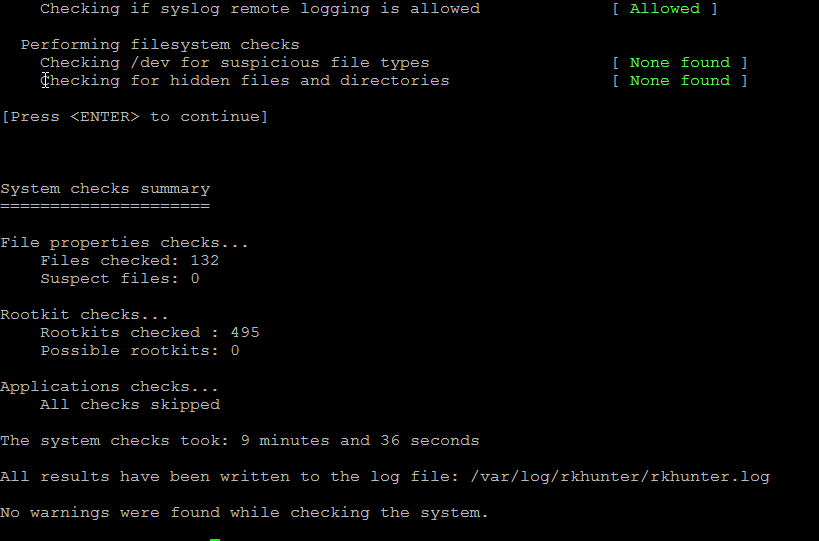
rkhunter-clean-report-linux-screenshot

Fixing Checking for a system logging configuration file [ Warning ]

If you happen to get some message like, message appears when rkhunter -C is done on legacy CentOS release 6.10 (Final) servers:

[13:45:29] Checking for a system logging configuration file [ Warning ]
[13:45:29] Warning: The 'systemd-journald' daemon is running, but no configuration file can be found.
[13:45:29] Checking if syslog remote logging is allowed [ Allowed ]

To fix it, you will have to disable SYSLOG_CONFIG_FILE at all.
 

SYSLOG_CONFIG_FILE=NONE

How to fix rkhunter checking dev for suspisiocus files, solve rkhunter checking if SSH root access is allowed warning

Friday, November 20th, 2020

rkhunter-logo

On a server if you have a rkhunter running and you suddenly you get some weird Warnings for suspicious files under dev, like show in in the screenshot and you're puzzled how comes this happened as so far it was not reported before the regular package patching update conducted …

root@haproxy-server ~]# rkhunter –check

rkhunter-warn-screenshot

To investigate further I've checked rkhunter produced log /var/log/rkhunter.log for a verobose message and found more specifics there on what is the exact files which rkhunter finds suspicious.
To further investigate what exactly are this suspicious files for or where, they're used for something on the system or in reality it is a hacker who hacked our supposibly PCI compliant system,
I've used the good old fuser command which is capable to show which system process is actively using a file. To have fuser report for each file from /var/log/rkhunter.log with below shell loop:

[root@haproxy-server ~]#  for i in $(tail -n 50 /var/log/rkhunter/rkhunter.log|grep -i /dev/shm|awk '{ print $2 }'|sed -e 's#:##g'); do fuser -v $i; done
                     BEN.        PID ZUGR.  BEFEHL
/dev/shm/qb-1783-1851-27-f1sTlC/qb-request-cpg-header:
                     root       1783 ….m corosync
                     hacluster   1851 ….m attrd
                     BEN.        PID ZUGR.  BEFEHL
/dev/shm/qb-1783-1844-26-Znk1UM/qb-event-quorum-data:
                     root       1783 ….m corosync
                     root       1844 ….m pacemakerd
                     BEN.        PID ZUGR.  BEFEHL
/dev/shm/qb-1783-1844-26-Znk1UM/qb-event-quorum-header:
                     root       1783 ….m corosync
                     root       1844 ….m pacemakerd
                     BEN.        PID ZUGR.  BEFEHL
/dev/shm/qb-1783-1844-26-Znk1UM/qb-response-quorum-data:
                     root       1783 ….m corosync
                     root       1844 ….m pacemakerd
                     BEN.        PID ZUGR.  BEFEHL
/dev/shm/qb-1783-1844-26-Znk1UM/qb-response-quorum-header:
                     root       1783 ….m corosync
                     root       1844 ….m pacemakerd
                     BEN.        PID ZUGR.  BEFEHL
/dev/shm/qb-1783-1844-26-Znk1UM/qb-request-quorum-data:
                     root       1783 ….m corosync
                     root       1844 ….m pacemakerd
                     BEN.        PID ZUGR.  BEFEHL
/dev/shm/qb-1783-1844-26-Znk1UM/qb-request-quorum-header:
                     root       1783 ….m corosync
                     root       1844 ….m pacemakerd
                     BEN.        PID ZUGR.  BEFEHL
/dev/shm/qb-1783-1844-25-oCdaKX/qb-event-cpg-data:
                     root       1783 ….m corosync
                     root       1844 ….m pacemakerd
                     BEN.        PID ZUGR.  BEFEHL
/dev/shm/qb-1783-1844-25-oCdaKX/qb-event-cpg-header:
                     root       1783 ….m corosync
                     root       1844 ….m pacemakerd
                     BEN.        PID ZUGR.  BEFEHL
/dev/shm/qb-1783-1844-25-oCdaKX/qb-response-cpg-data:
                     root       1783 ….m corosync
                     root       1844 ….m pacemakerd
                     BEN.        PID ZUGR.  BEFEHL
/dev/shm/qb-1783-1844-25-oCdaKX/qb-response-cpg-header:
                     root       1783 ….m corosync
                     root       1844 ….m pacemakerd
                     BEN.        PID ZUGR.  BEFEHL
/dev/shm/qb-1783-1844-25-oCdaKX/qb-request-cpg-data:
                     root       1783 ….m corosync
                     root       1844 ….m pacemakerd
                     BEN.        PID ZUGR.  BEFEHL
/dev/shm/qb-1783-1844-25-oCdaKX/qb-request-cpg-header:
                     root       1783 ….m corosync
                     root       1844 ….m pacemakerd
                     BEN.        PID ZUGR.  BEFEHL
/dev/shm/qb-1783-1844-24-GKyj3l/qb-event-cfg-data:
                     root       1783 ….m corosync
                     root       1844 ….m pacemakerd
                     BEN.        PID ZUGR.  BEFEHL
/dev/shm/qb-1783-1844-24-GKyj3l/qb-event-cfg-header:
                     root       1783 ….m corosync
                     root       1844 ….m pacemakerd
                     BEN.        PID ZUGR.  BEFEHL
/dev/shm/qb-1783-1844-24-GKyj3l/qb-response-cfg-data:
                     root       1783 ….m corosync
                     root       1844 ….m pacemakerd
                     BEN.        PID ZUGR.  BEFEHL
/dev/shm/qb-1783-1844-24-GKyj3l/qb-response-cfg-header:
                     root       1783 ….m corosync
                     root       1844 ….m pacemakerd
                     BEN.        PID ZUGR.  BEFEHL
/dev/shm/qb-1783-1844-24-GKyj3l/qb-request-cfg-data:
                     root       1783 ….m corosync
                     root       1844 ….m pacemakerd
                     BEN.        PID ZUGR.  BEFEHL
/dev/shm/qb-1783-1844-24-GKyj3l/qb-request-cfg-header:
                     root       1783 ….m corosync
                     root       1844 ….m pacemakerd


As you see from the output all the /dev/shm/qb/ files in question are currently opened by the corosync / pacemaker and necessery for proper work of the haproxy cluster processes running on the machines.
 

How to solve the /dev/ suspcisios files rkhunter warning?

To solve we need to tell rkhunter not check against this files this is done via  /etc/rkhunter.conf first I thought this is done by EXISTWHITELIST= but then it seems there is  a special option for rkhunter whitelisting /dev type of files only ALLOWDEVFILE.

Hence to resolve the warning for the upcoming planned early PCI audit and save us troubles we had to add on running OS which is CentOS Linux release 7.8.2003 (Core) in /etc/rkhunter.conf

ALLOWDEVFILE=/dev/shm/qb-*/qb-*

Re-run

# rkhunter –check

and Voila, the warning should be no more.

rkhunter-check-output

Another thing is on another machine the warnings produced by rkhunter were a bit different as rkhunter has mistakenly detected the root login is enabled where in reality PermitRootLogin was set to no in /etc/ssh/sshd_config

rkhunter-warning

As the problem was experienced on some machines and on others it was not.
I've done the standard boringconfig comparison we sysadmins do to tell
why stuff differs.
The result was on first machine where we had everything working as expected and
PermitRootLogin no was recognized the correct configuration was:

— SNAP —
#ALLOW_SSH_ROOT_USER=no
ALLOW_SSH_ROOT_USER=unset
— END —

On the second server where the problem was experienced the values was:

— SNAP —
#ALLOW_SSH_ROOT_USER=unset
ALLOW_SSH_ROOT_USER=no
— END —

Note that, the warning produced regarding the rsyslog remote logging is allowed is perfectly fine as, we had enabled remote logging to a central log server on the machines, this is done with:

This is done with config options under /etc/rsyslog.conf

# Configure Remote rsyslog logging server
*.* @remote-logging-server.com:514

Speed up WordPress / Joomla CMS and MySQL server on Linux with tmpfs ram file system / Decrease Website pageload times with RAM caching

Wednesday, March 4th, 2015

speed-up-accelerate-wordpress-joomla-drupal-cms-and-mysql-server-with-tmpfs_ramfs_decrease-pageload-times-with-ram-caching
As a WordPress blog owner and an sys admin that has to deal with servers running a lot of WordPress / Joomla / Droopal and other custom CMS installed on servers, performoing slow or big enough to put a significant load on servers
and I love efficiency and hardware cost saving is essential for my daily job, I'm constantly trying to find new ways to optimize Customer Website (WordPress) and rest of sites in order to utilize better our servers and improve our clients sites speed (and hence satisfaction). 

There is plenty of little things to do on servers but probably among the most crucial ones which we use nowadays that save us a lot of money is tmpfs, and earlier (ramfs) – previously known as shmfs).
TMPFS is a (Temporary File Storage Facility) Linux kernel technology based on ramfs (used by Linux kernel initrd / initramfs on boot time in order to load and store the Linux kernel in memory, before system hard disk partition file systems are mounted) which is heavily used by virtually all modern popular Linux distributions. 

Using ramfs (cramfs variation – Compressed ROM filesystem) has been used to store different system environment kernel and Desktop components of many Linux environment / applications and used by a lot of the Linux BootCD such as the most famous (Klaus Knopper's) KNOPPIX LiveCD and Trinity Rescue Kit Linux (TRK uses /dev/shm which btw can be seen on most modern Linux distros and is actually just another mounted tmpfs).
If you haven't tried Live Linux yet try it out as me and a lot of sysadmins out there use some kind of LiveLinux at least few times on yearly basis  to Recover Unbootable Linux servers after some applied remote Updates as well as for Rescuing (Save) Data from Linux server failing to properly boot because of hard disk (bad blocks) failures. As I said earlier TMPFS is also used on almost any distribution for the /dev/ filesystem which is kept in memory.

You can see which tmpfs partitions is used on your Linux server with:


debian-server:~# mount |grep -i tmpfs
tmpfs on /lib/init/rw type tmpfs (rw,nosuid,mode=0755)
udev on /dev type tmpfs (rw,mode=0755)
tmpfs on /dev/shm type tmpfs (rw,nosuid,nodev)


Above is an output from a standard Debian Linux server. On CentOS 7 standard mounted tmpfs are as follows:


[root@centos ~]# mount |grep -i tmpfs
devtmpfs on /dev type devtmpfs (rw,nosuid,seclabel,size=1016332k,nr_inodes=254083,mode=755)
tmpfs on /dev/shm type tmpfs (rw,nosuid,nodev,seclabel)
tmpfs on /run type tmpfs (rw,nosuid,nodev,seclabel,mode=755)
tmpfs on /sys/fs/cgroup type tmpfs (rw,nosuid,nodev,noexec,seclabel,mode=755)


[root@centos ~]# df -h|grep -i tmpfs
devtmpfs                 993M     0  993M   0% /dev
tmpfs                   1002M   92K 1002M   1% /dev/shm
tmpfs                   1002M  8.8M  993M   1% /run
tmpfs                   1002M     0 1002M   0% /sys/fs/cgroup

The /run tmpfs mounted directory is also to be seen also on latest Ubuntus and Fedoras and is actually the good old /var/run ( where applications keep there pids and some small app related files) stored in tmpfs filesystem stored in memory.

If you're wondering what is /dev/shm and why it appears mounted on every single Linux Server / Desktop you've ever used this is a special filesystem shared memory which various running programs (processes) can use to transfer data quick and efficient between each other to preven the slow disk swapping. People using Linux for the rest 15 years should remember /dev/shm has been a target of a lot of kernel exploits as historically it had a lot of security issues.

While writting this article I've just checked about KNOPPIX developed amd just for info as of time of writting this distro has already 1000+ programs on CD version and 2600+ packages / application on DVD version.
Nowadays Knoppix is mostly used mostly as USB Live Flash drive as a lot of people are dropping CD / DVD use (many servers doesn't have a CD / DVD Drive) and for USB Live Flash Linux distros tmpfs is also key technology used as this gives the end user an amazing fast experience (Desktop applications run much fasten on Live USBs when tmpfs is used than when the slow 7200 RPM HDDs are used).

Loading big parts of the distribution within RAM (with tmpfs from Linux Kernel 2.4+ onwards) is also heavily used by a lot of Cluster vendors in most of Clustered (Cloud) Linux based environemnts, cause TMPFS gives often speeds up improvements to x30 times and decreases greatly I/O HDD. FreeBSD users will be happy to know that TMPFS is already ported and could be used on from FreeBSD 7.0+ onward.

In this small article I will give you example use on how I use tmpfs to speed up our WordPress Websites which use WP Caching plugins such as W3 Total Cache and WP Super Cache
and Hyper Cache / WP Super Cache disk caching and MySQL server as a Database backend.
Below example is wordpress specific but since it can be easily applied to JoomlaDrupal or any other CMS out there that uses mySQL server to make a lot of CPU expensive memory hungry (LEFT JOIN) queries which end up using a slow 7200 RPM hard disk.


1. Preparing tmpfs partitions for WordPress File Cache directory
 

If you want to give tmpfs a test drive, I recommend you try to create / mount a 20 Megabyte partition. To create a tmpfs partition you don't need to use a tool like mkfs.ext3 / mkfs.ext4 as TMPFS is in reality a virtual filesystem that is mapped in the server system physical RAM (volatile memory). TMPFS is very nice because if you run out of free RAM system starts a combination of RAM use + some Hard disk SWAP 
The great thing about TMPFS is it never uses all of the available RAM and SWAP, which would not halt your server if TMPFS partition gets filled, but instead you will start getting the usual "Insufficient Disk Space", just like with a physical HDD parititon. RAMFS cares much less about server compared to TMPFS, because if RAMFS is historically older.

ramfs file systems cannot be limited in size like a disk base file system which is limited by it’s capacity, thus ramfs will continue using memory storage until the system runs out of RAM and likely crashes or becomes unresponsive. This is a problem if the application writing to the file system cannot be limited in total size, so in my opinion you better stay away from RAMFS except you have a good idea what you're doing. Another disadvantage of RAMFS compared to TMPFS is you cannot see the size of the file system in df and it can only be estimated by looking at the cached entry in free.

Note that before proceeding to use TMPFS or RAMFS you should know besides having advantages, there are certain serious disadvantage that if the server using tmpfs (in RAM) to store files crashes the customer might loose his data, therefore using RAM filesystems on Production servers is best to be used just for caching folders which are regularly synchronized with (rsync) to some folder to assure no data will be lost on server reboot or crash.

Memory of fast storage areas are ideally suited for applications which need repetitively small data areas for caching or using as temporary space such as Jira (Issue and Proejct Tracking Software) Indexing  As the data is lost when the machine reboots the tmpfs stored data must not be data of high importance as even scheduling backups cannot guarantee that all the data will be replicated in the even of a system crash.

To test mounting a tmpfs virtual (memory stored) filesystem issue:
 

mount -t tmpfs tmpfs -o size=256m /mnt/tmpfs


If you want to test mount a ramfs instead:


 mount -t ramfs -o size=256m ramfs /mnt/ramfs


debian-server:~#  mount |grep -i -E "ramfs|tmpfs"
tmpfs on /lib/init/rw type tmpfs (rw,nosuid,mode=0755)
udev on /dev type tmpfs (rw,mode=0755)
tmpfs on /dev/shm type tmpfs (rw,nosuid,nodev)
tmpfs on /mnt/tmpfs type tmpfs (rw,size=256m)
ramfs on /mnt/ramfs type tmpfs (rw,size=256m)


Once mounted tmpfs can be used in the same way as any ext4 / reiserfs filesystem. In the same way to make mounts permanent, its necessery to add a line to /etc/fstab

To illustrate better a tmpfs use case on my blog running WordPress with W3TotalCache (W3TC) plugin cache folder in /var/www/blog/wp-content/w3tc to get advantage of tmpfs to store w3tc files.

a) Stop Apache

On Debian
 

debian-server:~# /etc/init.d/apache stop


On CentOS 
 

[root@centos ~]# /etc/init.d/httpd stop


b) Move w3tc dir to w3tc-bak


debian-server:~# cd /var/www/blog/wp-content/
debian-server:~# mv w3tc w3tc-bak


c) Create w3tc directory
 

debian-server:/var/www/blog/wp-content# mkdir w3tc
debian-server:/var/www/blog/wp-content# chown -R www-data:www-data w3tc


d) Add tmpfs record to /etc/fstab

My W3TC Cache didn't grow bigger than 2Gigabytes so I create a 2Giga directory for it by adding following in /etc/fstab 
 

debian-server:~# vim /etc/fstab


tmpfs /var/www/blog/wp-content/w3tc tmpfs defaults,size=2g,noexec,nosuid,uid=33,gid=33,mode=1755 0 0


You might also want to add the nr_inodes (option) to tmpfs while mounting. nr_inodes is the maximum inode for instance. Default is half the number of your physical RAM pages, (on a machine with highmem) the number of lowmem RAM page, some common option that should work is nr_inodes=5k, if you're unsure what this option does you can safely skip it 🙂

e) Mount new added tmpfs folder

Then to mount the newly added filesystem issue:
 

mount -a


Or if you're on a CentOS / RHEL server use httpd Apache user instead and whenever you have docroot and wordpress installed.


[root@centos ~]# chown -R apache:apache: w3tc


If you're using Apache SuPHP use whatever the UID / GID is proper.

On CentOS you will need to set proper UID and GID (UserID / GroupID), to find out which ones to to use check in /etc/passwd:
 

[root@centos ~]# grep -i apache /etc/passwd
apache:x:48:48:Apache:/var/www:/sbin/nologin


f) Move old w3tc cache from w3tc-bak to w3tc


debian-server:/var/www/blog/wp-content# mv w3tc-bak/* w3tc/


g) Start again Apache

On Debian:


debian-server:~# /etc/init.d/apache2 start


On CentOS:
 

[root@centos~]# /etc/init.d/httpd start

h) Keeping w3tc cache site folder synced

As I said earlier the biggest problem with caching (the reason why many hosting providers) and site admins refuse to use it is they might loose some data, to prevent data loss or at least mitigate the data loss to few minutes intervals it is a good idea to synchronize tmpfs kept folders somewhere to disk with rsync.

To achieve that use a cronjob like this:
 

debian-server:~# crontab -u root -e
*/5 * * * * /usr/bin/ionice -c3 -n7 /usr/bin/nice -n 19 /usr/bin/rsync -ah –stats –delete /var/www/blog/wp-content/w3tc/ /backups/tmpfs/cache/ 1>/dev/null


Note that you will need to have the /backups/tmpfs/cache folder existing, create it with:


debian-server:~# mkdir -p /backups/tmpfs/cache


You will also need to add a rsync synchronization from backupped folder to tmpfs (in case if the server gets accidently rebooted because it hanged or power outage), place in

/etc/rc.local


ionice -c3 -n7 nice -n 19 rsync -ahv –stats –delete /backups/tmpfs/cache/ /var/www/blog/wp-content/w3tc/ 1>/dev/null


(somewhere before exit 0) line
 

0 05 * * * /usr/bin/ionice -c3 -n7 /bin/nice -n 19 /usr/bin/rsync -ah –stats –delete /var/www/blog/wp-content/w3tc/ /backups/tmpfs/cache/ 1>/dev/null


2. Preparing tmpfs partitions for MySQL server temp File Cache directory


Its common that MySQL servers had to serve a lot of long and heavy SQL JOIN Queries mostly by related posts WP plugins such as (Zemanta Related Posts) and Contextual Related posts though MySQLs are well optimized  to work as much as efficient using mysql tuner (tuning primer) still often SQL servers get a lot of temp tables created to disk (about 25% to 30%) of all SQL queries use somehow HDD to serve queries and as this is very slow and there is file lock created the overall MySQL performance becomes sluggish at times to fix (resolve) that without playing with SQL code to optimize the slow queries the best way I found is by using TMPFS as MySQL temp folder.

To do so I create a TMPFS usually the size of 256 MB because this is usually enough for us, but other hosting companies might want to add bigger virtual temp disk:

a) Add tmpfs new dir to /etc/fstab

In /etc/fstab add below record with vim editor:
 

debian-server:~# vim /etc/fstab


tmpfs /var/mysqltmp tmpfs rw,gid=111,uid=108,size=256M,nr_inodes=10k,mode=0700 0 0


Note that the uid / and gid 105 and 114 are taken again from /etc/passwd

On Debian

debian-server:~# grep -i mysql /etc/passwd
mysql:x:108:111:MySQL Server,,,:/var/lib/mysql:/bin/false


On CentOS
 

[root@centos ~]# grep -i mysql /etc/passwd
mysql:x:27:27:MySQL Server:/var/lib/mysql:/bin/bash


b) Create folder /var/mysqltmp or whenever you want to place the tmpfs memory kept SQL folder


debian-server:~# mkdir /var/mysqltmp
debian-server:~# chown mysql:mysql /var/mysqltmp


debian-server:~# mount|grep -i tmpfs
tmpfs on /lib/init/rw type tmpfs (rw,nosuid,mode=0755)
udev on /dev type tmpfs (rw,mode=0755)
tmpfs on /dev/shm type tmpfs (rw,nosuid,nodev)
tmpfs on /var/www/blog/wp-content/w3tc type tmpfs (rw,noexec,nosuid,size=2g,uid=33,gid=33,mode=1755)
tmpfs on /var/mysqltmp type tmpfs (rw,gid=108,uid=111,size=256M,nr_inodes=10k,mode=0700)


c) Add new path to tmpfs created folder in my.cnf 

Then  edit /etc/mysql/my.cnf


debian-server:~# vim /etc/mysql/my.cnf

[mysqld]
#
# * Basic Settings
#
user        = mysql
pid-file    = /var/run/mysqld/mysqld.pid
socket      = /var/run/mysqld/mysqld.sock
port        = 3306
basedir     = /usr
datadir     = /var/lib/mysql
tmpdir      = /var/mysqltmp


On CentOS edit and change tmpdir in same way within /etc/my.cnf


d) Finally Restart Apache and MySQL to make mysql start using new set tmpfs memory kept folder

On Debian:
 

debian-server:~# /etc/init.d/apache2 stop; /etc/init.d/mysql restart; /etc/init.d/apache2 start

On CentOS:
 

[root@centos ~]# /etc/init.d/httpd stop; /etc/init.d/mysqld restart; /etc/initd/httpd start


Now monitor your server and check your pagespeed increase for me such an optimization usually improves site performance so site becomes +50% faster, to see the difference you can test your website before applying tmpfs caching for site and after that by using Google PageInsight (PageSpeed) Online Test. Though this example is for MySQL and WordPress you can easily adopt the same for Joomla if you have Joomla Caching enabled to some folder, same goes for any other CMS such as Drupal that can take use of Disk Caching. Actually its a small secret of many Hosting providers that allow clients to create sites via CPanel and Kloxo this tmpfs optimizations are already used for sites and by this the provider is able to offer better website service on lower prices. VPS hosting providers also use heavy caching. A lot of people are using TMPFS also to accelerate Sites that have enabled Google Pagespeed as Cacher and accelerator, as PageSpeed module puts a heavy HDD I/O load that can easily stone the server. Many admins also choose to use TMPFS for  /tmp, /var/run, and /var/lock directories as this leads often to significant overall server services operations improvement.
Once you have tmpfs enabled, It is a good idea to periodically monitor your SWAP used space with (df -h), because if you allocate bigger tmpfs partitions than your physical memory and tmpfs's full size starts to be used your machine will start swapping heavily and this could have a very negative performance affect.
 

debian-server:~# df -h|grep -i tmpfs
tmpfs            3,9G     0   3,9G   0% /lib/init/rw
tmpfs            3,9G     0   3,9G   0% /dev/shm
tmpfs            2,0G  1,4G   712M  66% /var/www/blog/wp-content/w3tc
tmpfs            256M     0   256M   0% /mnt/tmpfs
tmpfs            256M  236K   256M   1% /var/mysqltmp

The applications of tmpfs to accelerate services is up to your imagination, so I will be glad to hear from other admins on any interesting other application or problems faced while using TMPFS.

 Enjoy! 🙂

How to enable AUTO fsck (ext3, ext4, reiserfs, LVM filesystems) checking on Linux boot through /etc/fstab

Tuesday, July 12th, 2011

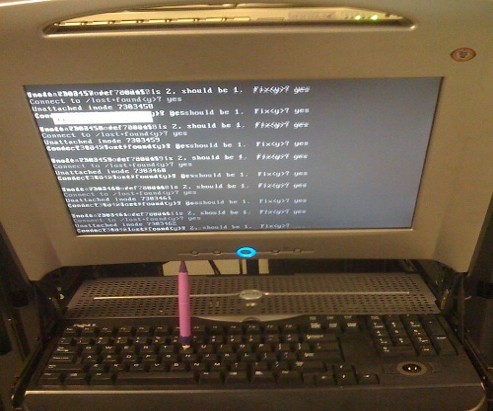
How to auto FSCK manual fsck screenshot

Are you an administrator of servers and it happens a server is DOWN.
You request the Data Center to reboot, however suddenly the server fails to boot properly and you have to request for IPKVM or some web java interface to directly access the server physical terminal …

This is a very normal admin scenario and many people who have worked in the field of remote system administrators (like me), should have experienced that bad times multiple times.

Sadly enough only a insignifant number of administrators try to do their best to reduce this down times to resolve client stuff downtime but prefer spending time playing the ztype! game or watching some porn website 😉

Anyways there are plenty of things like Server Auto Reboot on Crash with software Watchdog etc., that we as sysadmins can do to reduce server downtimes and most of the manual human interactions on server boot time.

In that manner of thougts a very common thing when setting up a new Linux server that many server admins forget or don’t know is to enable all the server partition filesystems to be auto fscked during server boot time.

By not enabling the auto filesystem check options in Linux the server filesystems did not automatically scan and fix hard drive partitions for fs innode inconsistencies.
Even though the filesystems are tuned to automatically get checked on every 38 system reboots, still if some kind of filesystem errors are found that require a manual confirmation the boot process is interrupted and the admin ends up with a server which is not reachable remotely via ssh !

For the remote system administrator, this times are a terrible times of waitings, prayers and hopes that the server hardware is fine 😉 as well as being on hold to get a KVM to get into the server manually and enter the necessery input to fsck prompt.

Many of this bad times can be completely avoided with a very simple fix through /etc/fstab by enabling all server partitions containing any filesystem to be automatically checked and fixed in case if inconsistencies or errors are found by fsck.ext3, fsck.ext4, fsck.reiserfs etc. commands.

A very typical default /etc/fstab file you will find on many servers should look something like:

/dev/sda8 / ext3 errors=remount-ro 0 1
tmpfs /dev/shm tmpfs defaults 0 0
devpts /dev/pts devpts gid=5,mode=620 0 0
sysfs /sys sysfs defaults 0 0
proc /proc proc defaults 0 0
/dev/sda1 /home ext3 defaults 0 0

Notice the line:
/dev/sda1 /home ext3 defaults 0 0

The first column in the example contains the device name, the second one its mount point, third its filesystem type, fourth the mount options, fifth (a number) dump options, and sixth (another number) filesystem check options. Let’s take a closer look at this stuff.

The ones which are interesting to enable auto fsck checking and error resolving is provided usually by the last sixth variable (filesystem check option) which in the above example equals 0 .

When the filesystem check option equals 0 this means the auto fsck and repair for the respective filesystem is disabled.
Some time in the past the dump backup option (5th option in the example) was also used but as far as I can understand today it’s not that important in modern GNU/Linux distributions.

Now having the above sample crontab in order to enable the fsck file checking on Linux boot for /dev/sda1 , we will need to modify the above line’s filesystem check option be 2, e.g. the line would afterwards look like:

/dev/sda1 /home ext3 defaults 0 2

Setting the 2 as an option for filesystem check is necessery for every filesystem which is not mounted as a root filesystem /

In above example /etc/fstab you already see that auto filesystem fsck is enabled for root partition:

/dev/sda8 / ext3 errors=remount-ro 0 1
(notice the 1 in the end of the line)

Finally a modified version of the default sample /etc/fstab which will check the extra /dev/sda1 /home partition would look like so:

/dev/sda8 / ext3 errors=remount-ro 0 1
tmpfs /dev/shm tmpfs defaults 0 0
devpts /dev/pts devpts gid=5,mode=620 0 0
sysfs /sys sysfs defaults 0 0
proc /proc proc defaults 0 0
/dev/sda1 /home ext3 defaults 0 2

Making sure all Linux server partitions has the auto filesystem check option enabled is something absoultely necessery!
Enabling the auto fsck on servers always makes me sleep calmer 😉
Hope it helps your too. 🙂