
Earlier I've written a an article MobaXTerm: A good gnome-terminal like tabbed SSH client for Windows / Windows Putty Tabs Alternative in which I've introduced the best in my opinion SSH / Telnet / VNC / RDP / Xserver in one Terminal client emulator for Windows operating systems.
The client has been around for quite some time and it has been improving rapidly over the last 10 years, where it now more looks like a separate Operating System than a single terminal client. It's size is quite compact as well and my opinion and every self respectiving developer, system administrator, IT geek or a hacker would definitely
use the mobaxterm at home or at work place on a daily. I guess some of my readers, who have already migrated SuperPutty / SecureCRT or Putty / XMing or whatever kind of exotic Remote SSH Console terminal is used could validate this 🙂
Therefore as I've set up Mobaxterm on a multiple computers all around, I've found it useful to write a small article with some post-install hints (tune ups) one can do immediately once he has installed the Desktop or Portable Apps version of mobaxterm on desktop PC / notebook.
1. Set up your bashrc server / command aliases
Lets say you need to setup some rules for connectivity via a socks proxy to dig holes over a harsh company firewalls or add
custom options to every ssh client attempt to remote server, or simply alias some of your servers with custom connectivity options and so on simply open vi / vim text editor from mobaxterm local terminal and place inside your rules, for example that could be anything like:
alias ssh='ssh -o stricthostkeychecking=no -o passwordauthentication=yes -o PreferredAuthentications=password -v'
alias sftp='sftp -o stricthostkeychecking=no -o passwordauthentication=yes -o PreferredAuthentications=password'
alias work-server='ssh UserName@work-server -v -o passwordauthentication=yes -o PreferredAuthentications=password'alias proxy='ssh -D 3128 UserName@proxyIP-host1 -o ConnectTimeout=80'
alias proxy1='ssh -D 3128 UserName@proxy-host2 -p 443 -o ConnectTimeout=60'
alias proxy3='ssh -D 3128 Username@proxy-host3 -p 443 -o ConnectTimeout=60'Simply open the terminal and setup whatever you require
export ftp_proxy="http://proxy-host:8080"
export https_proxy="https://proxy-host:8080"
export http_proxy="http://proxy-host:8080"
export HTTP_PROXY="http://proxy-host:8080"
export HTTPS_PROXY="http://proxy-host:8080"
2. Set mobaxterm presistent directory / persistent root directory and default text editor
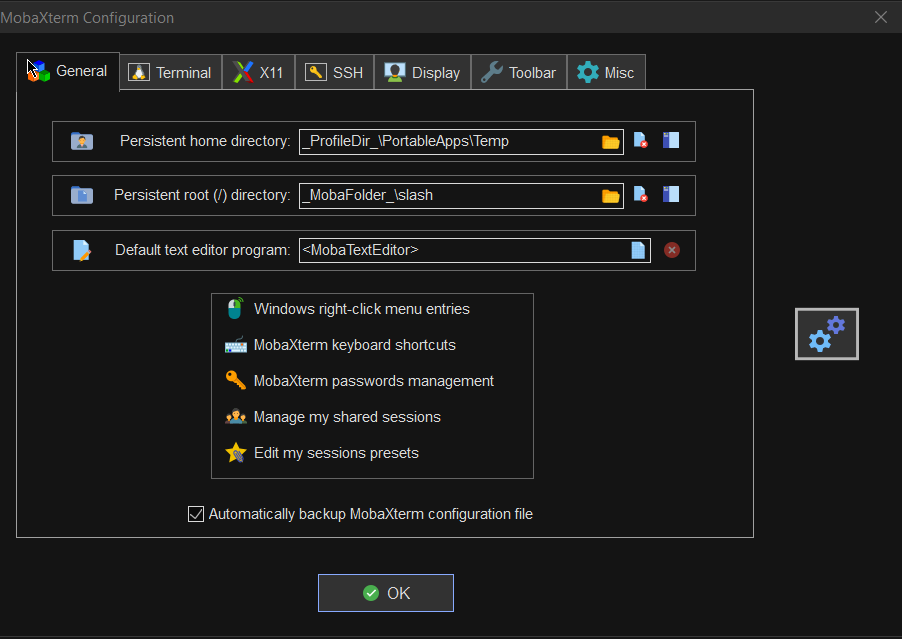
Make sure you have properly defined at least Persistent directory / Persistent directory if you want to keep the files under your /home/mobaxterm and root directory be able to save your data from local mobaxterm terminal work you have done.
To do so o to Configuration -> General
3. Change default settings for Opening / Closing Terminal tabs just like in gnome-terminal
MobaXterm is really awesome as the developer, followed pretty much the logic of some common GNU / Linux Terminal clients like Gnome-Terminal and KDE's default Konsole terminal.
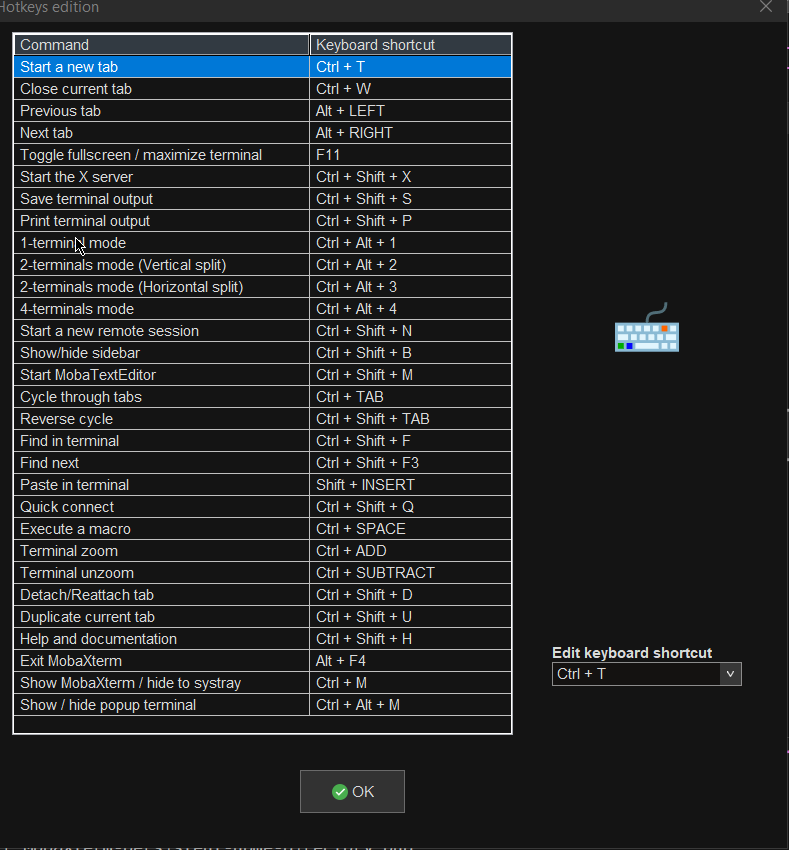
One of the first things to do once Mobaxterm is installed on the PC is to set up nice key binds as default onces might be heard to learn at the beginning or you might have already the habit to use the certain set of key combinations on your Linux desktop:
Common once are:
1. Open tab / Close tab common once I bind to are (CTRL + T / CTRL + W)
2. Previous tab move / Next tab move keys common one I use are (ALT + LEFT / ALT + RIGHT)
3. Find in terminal (CTRL + F)
4. Make MobaXterm to automatically open a terminal to not Start local terminal every time
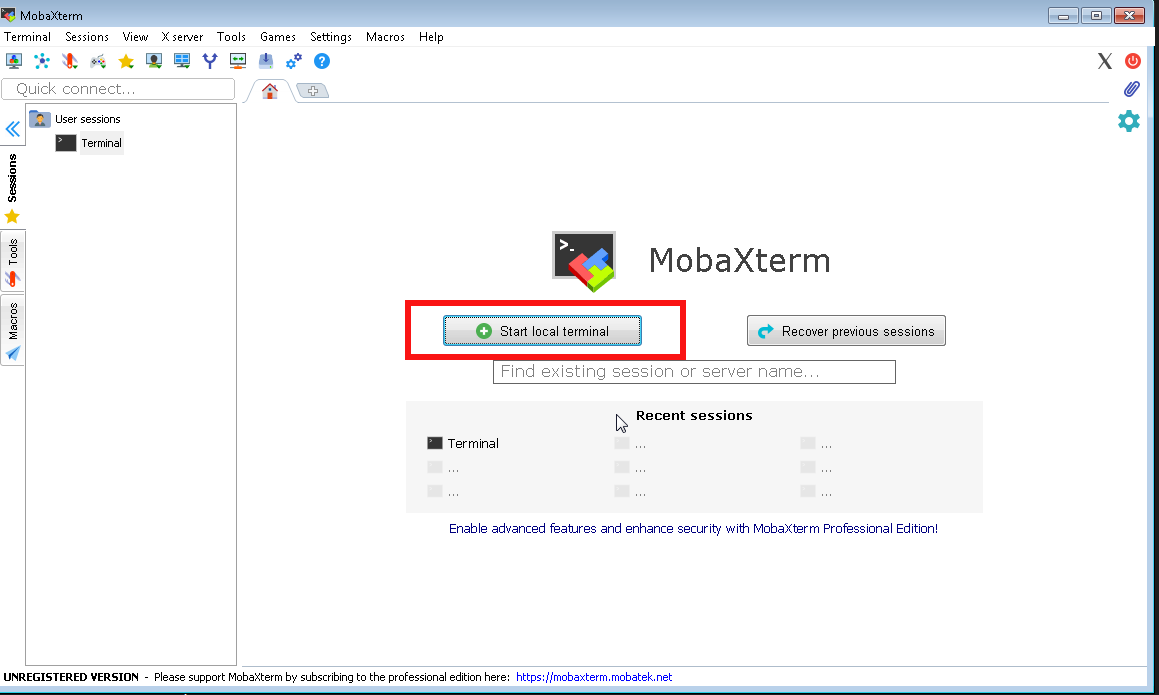
By default mobaxterm it is really annoying cause every time you run it after system reboot you have to select
Start local terminal
Once you run the terminal you get this prompt and you have to press on Start local terminal
How to make Mobaxterm automatically open local Terminal Tab on every boot?
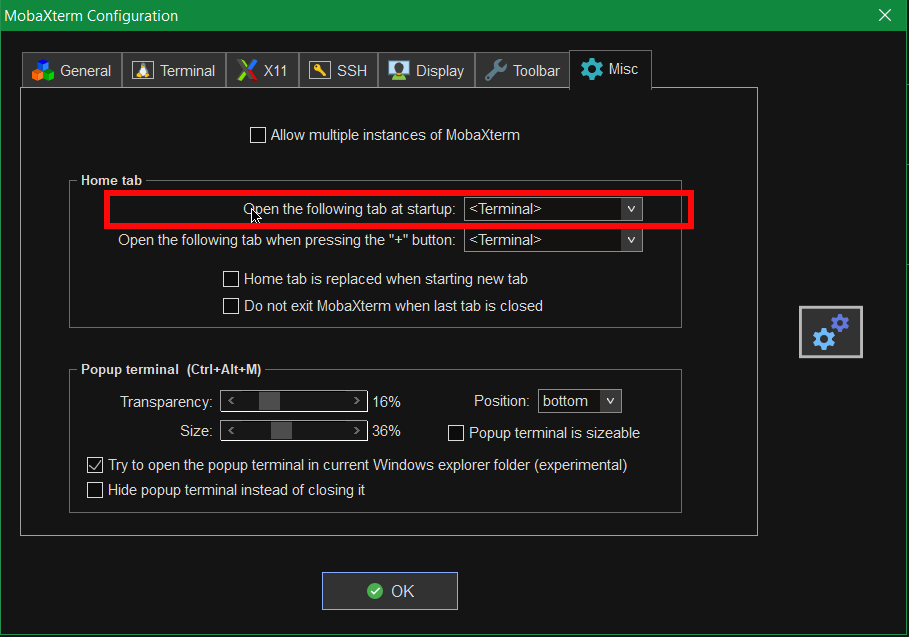
To fix this so every time a local terminal is spawn on MobaXterm you have get to:
Settings -> Configuration -> Misc
Open the Following tab at startup by default it will be
<Home (Pinned)>
Change it to:
<Terminal>
That's it on next login your Local Terminal with /bin/bash.exe will auto load !
[hipo.WINDOWS-PC] ➤ env|grep -i SHELL
SHELL=/bin/bash.exe
PATH=/bin:/drives/c/Users/hipo/DOCUME~1
/MobaXterm/slash/bin:/drives/c/Windows:/drives/c/Windows/system32:/drives/c/Windows/system32:/drives/c/Windows:/drives/c/Windows/System32/Wbem:
/drives/c/Windows/System32/WindowsPowerShell/v1.0:/drives/c/Windows/sysnative
PSModulePath=C:\Windows\system32\WindowsPowerShell\v1.0\Modules\
CMDPATH=C:\Windows\system32;C:\Windows;C:\Windows\System32\Wbem;
C:\Windows\System32\WindowsPowerShell\v1.0\;C:\Windows\sysnative\;
C:\Users\hipo\DOCUME~1\MobaXterm\slash\bin
WINPATH=C:\Windows\system32;C:\Windows;C:\Windows\System32\Wbem;C:\Windows\System32\WindowsPowerShell\v1.0\;C:\Windows\sysnative\
5. Make menu buttons to appear smaller
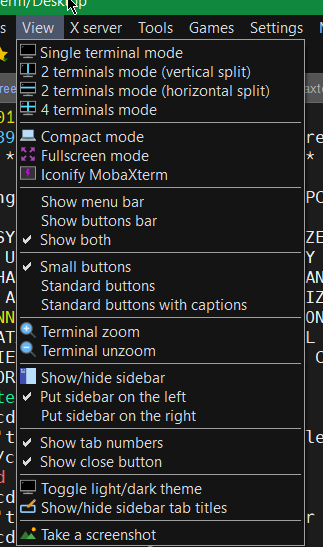
Go to menu and select
View -> (Small Buttons)
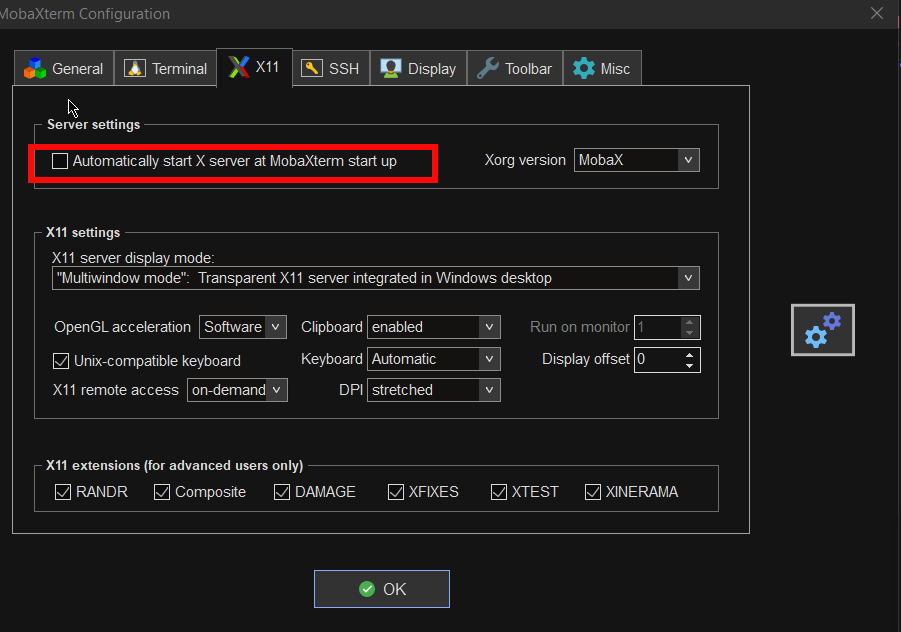
6. Disable auto start of XServer to prevent a port listener on the machine on TCP port
By default mobaxterm opens XServer listener, so you can immediately connect from a remote SSH servers missing Xserver and install software requiring an XServer, for example software such as Oracle Database or some MiddleWare WebLogig or IBM's Web Sphere. This is useful but if you want to have a good security only allow this server on a purpose. Otherwise the XServer will run in parallel with rest of your Moba and just load up your PC and eat up some RAM memory. To disable it go to:
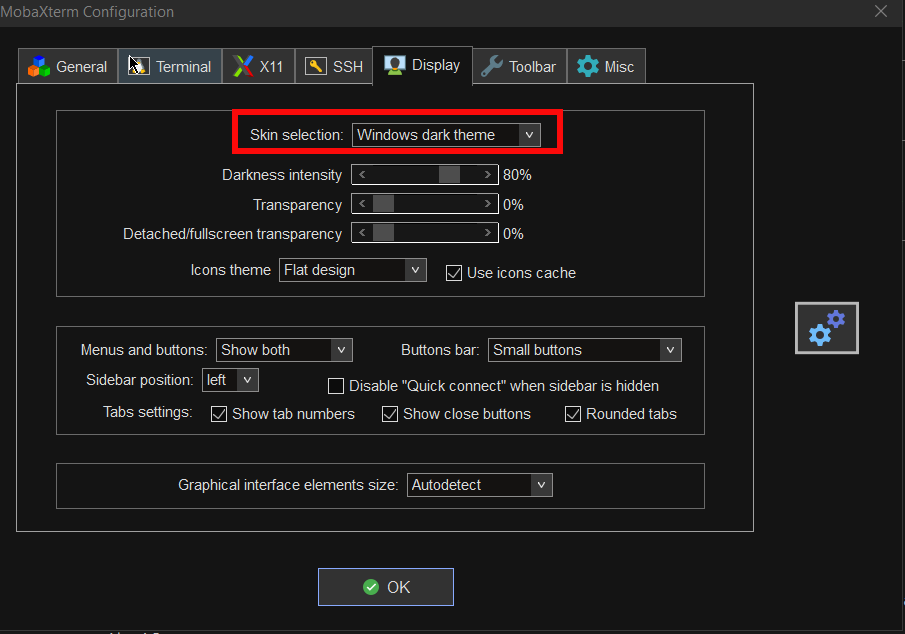
7. Change the mobaxterm Default theme to Dark
This is optional I like to set the Theme to Dark, also as a Theme for Windows as well as for MobaxTerm, the aim of that is simply to not put extra stress on my eye sight. Being on the PC around 8 to 10 hours and spending some 6 to 8 hours on console work is enough. If you want to do as well.
8. Install additional set of common Linux tools to mobaxterm to use on Windows
Tools such as:
1. Midnight Commander (mc)
2. Wget
3. Curl
4. Vim
5. Screen
6. Rsync
7. Perl
8. W3m
9. dosunix
10. unix2dos
11. gnupg
12. diffutils
13. mysql
14. mpg123
15. whois
If you want to have a set of packages pre-installed that are including above as well as the rest of mine, here is a dump of my installed mobapt manager packages:
For more simply use the experimental Mobaxterm Graphical Package installer
[hipo.WINDOWS-PC] ➤ for i in $(cat Downloads/installed-packages-mobaxterm.txt ); do apt-cyg install $i; done
Found package GeoIP-database
Installing GeoIP-database
Downloading GeoIP-database-20180505-1.tar.xz…
Unpacking GeoIP-database-20180505-1.tar.xz…
Running postinstall scripts
Package GeoIP-database installed.Rebasing new libraries
Found package adwaita-icon-theme
Installing adwaita-icon-theme
Downloading adwaita-icon-theme-3.26.1-1.tar.xz……
You will be prompted for a single Yes for the respository
MobApt Packages Manager
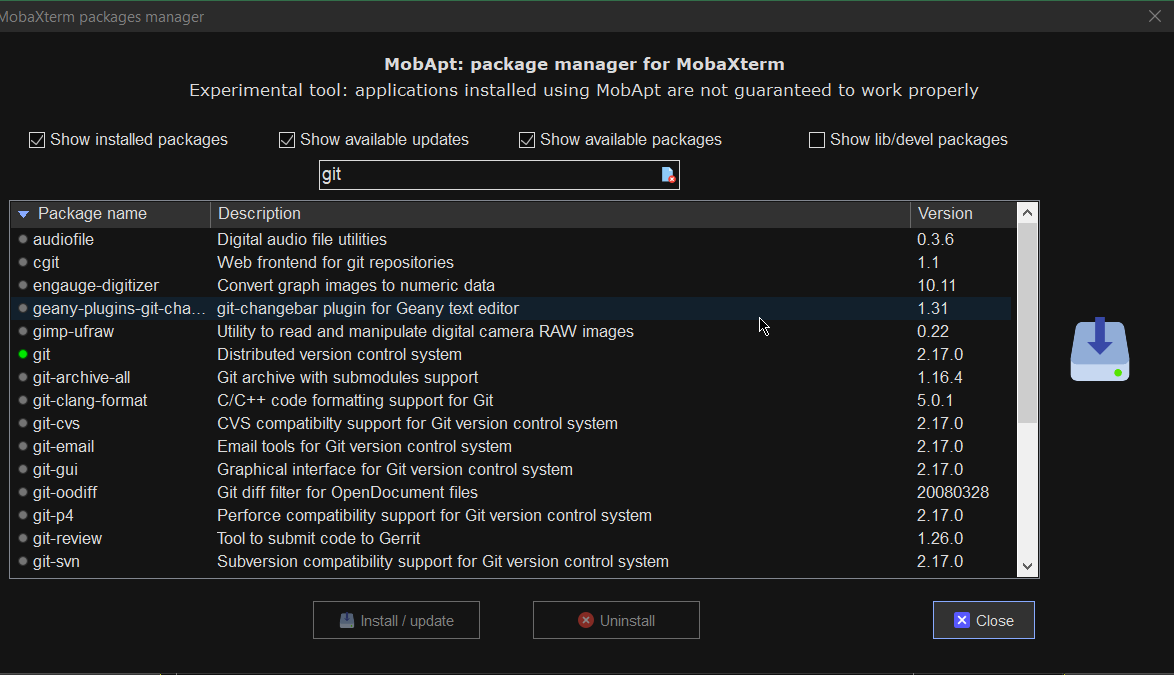
Though it is said it is experimental, I have to say the MobApt Apt Manager works quite good, I never had any issues with it so far.
9. Mobaxterm.ini the settings storage file that can help you move your configurations
If you have to prepeare new MobaXterm on multiple PCs frequently perhaps it is best to just copy the Mobaxterm.ini file.
Here is an example of my mobaxterm.ini for download.
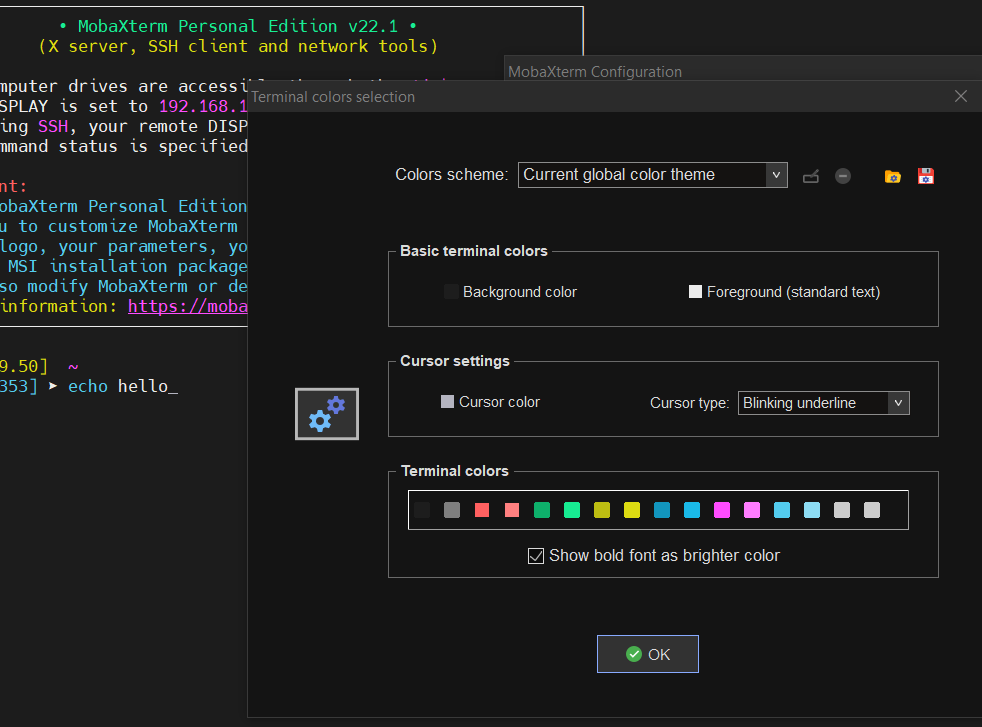
10. Change terminal colors and curor type and enable blinking (customizations)
Settings -> Configuration -> Terminal -> (Default Terminal Color Settings)
11. Use very useful moba Tools
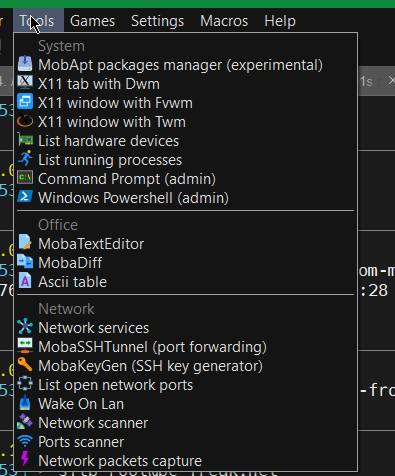
For sysadmins Moba has plenty of other jems such as:
-
Network Port scanner such as Nmap with GUI
-
list open network ports (GUI interface to netmap)
-
SSH tunnel tool
-
Moba Diff
-
Wake on Lan
-
Network Packet capturer (such as tcpdump)
-
List running processes (such as taskmgr in simple form)
-
List machine hardware devices (such as Windows Device manager)
12. Remote monitoring of opened ssh session
To enable remote monitoring for a Saved session simply use the "Remote monitoring" button on the down left corner of the terminal.
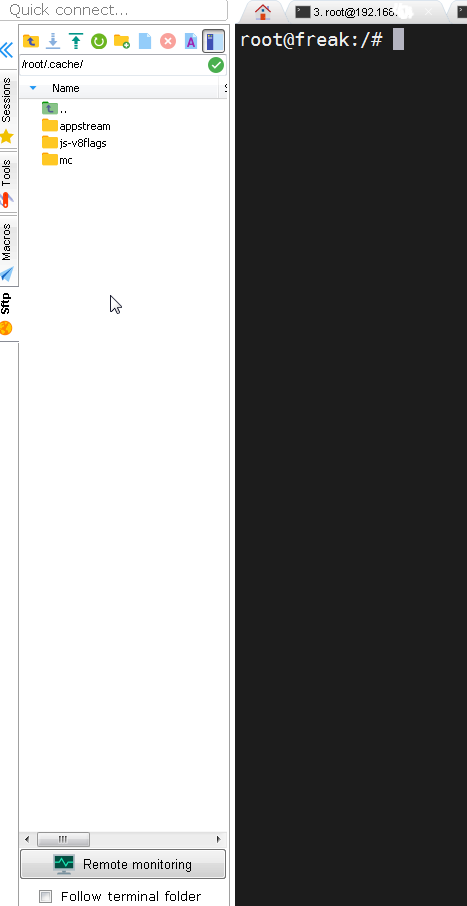
Or to enable it for a new host, open:
1. "Saved sessions"
2. Click over "User sessions"
3. New Session -> (SSH)
4. Basic SSH Settings (Remote host) -> OK
5. Click over the new created session
6. Click on Remote monitoring for the opened session

13. Play some mobaxterm console games
As you might have pissed off of configuring go on and enjoy some of the great console games, some of which are also present on a normal Linux new distribution installation. 🙂
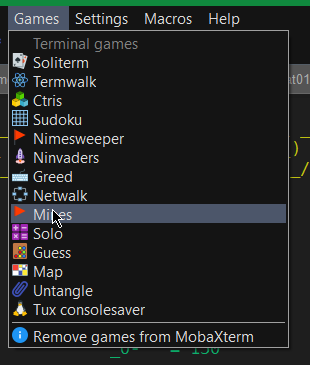
List of Moba Games
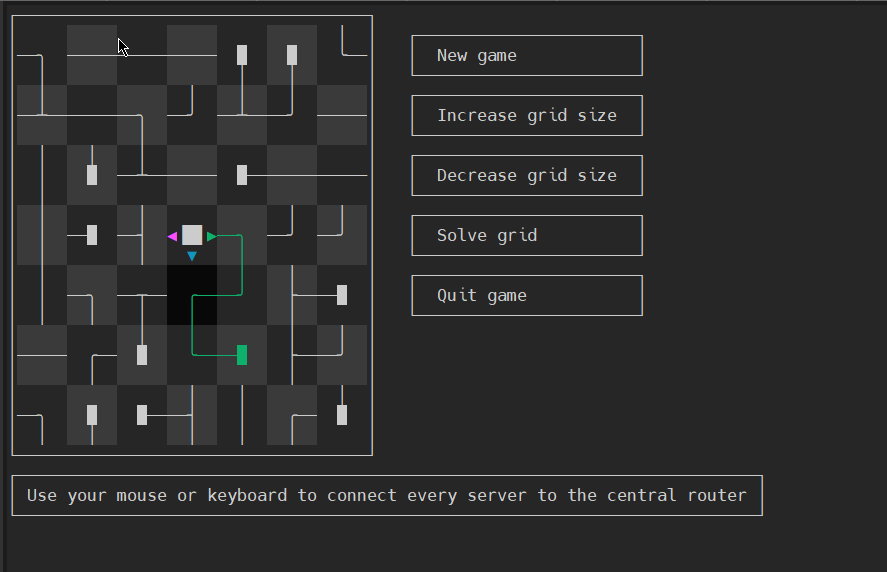
TeamWalk (Use your mouse or keyboard to connect every server to the central router)
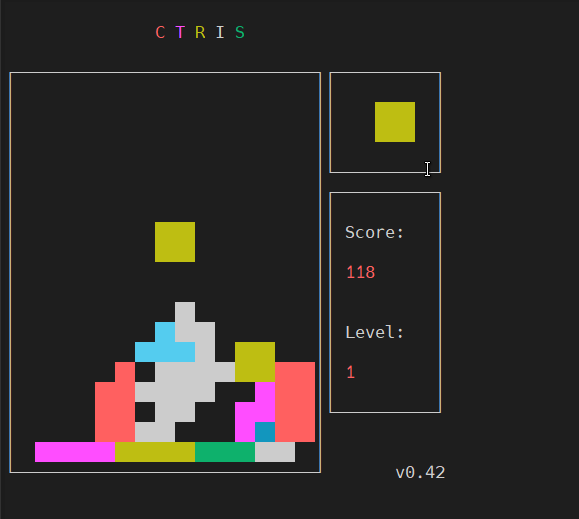
Ctris Console tetris from Mobaxterm
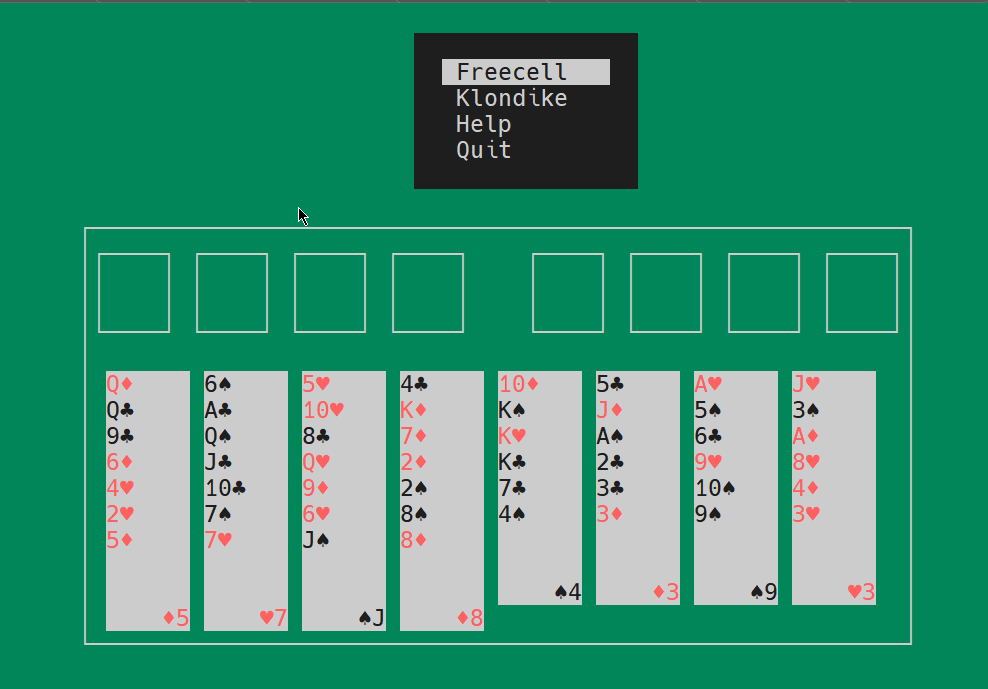
Text console Solitaire from Moba
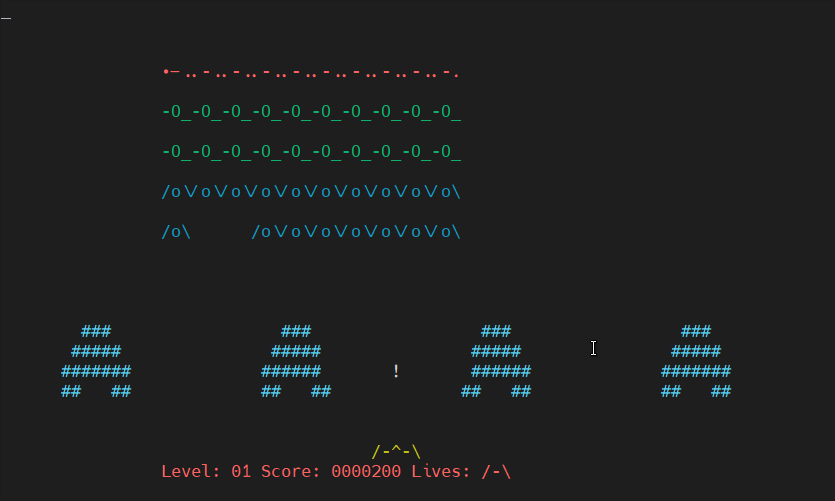
Here is NinVaders (Text Version of Space Invaders Arcade Classic)
Enjoy ! 🙂




How to install and configure Jabber Server (Ejabberd) on Debian Lenny GNU / Linux
Wednesday, December 28th, 2011I've recently installed a jabber server on one Debian Lenny server and hence decided to describe my installations steps hoping this would help ppl who would like to run their own jabber server on Debian . After some research of the jabber server softwares available, I decided to install Ejabberd
The reasons I choose Ejabberd is has rich documentation, good community around the project and the project in general looks like one of the best free software jabber servers available presently. Besides that ejabberd doesn't need Apache or MySQL and only depends on erlang programming language.
Here is the exact steps I followed to have installed and configured a running XMPP jabber server.
1. Install Ejabberd with apt
The installation of Ejabberd is standard, e.g.:
debian:~# apt-get --yes install ejabberd
Now as ejabberd is installed, some minor configuration is necessery before the server can be launched:
2. Edit /etc/ejabberd/ejabberd.cfg
Inside I changed the default settings for:
a) Uncomment%%override_acls.. Changed:
%%%% Remove the Access Control Lists before new ones are added.%%%%override_acls.to
%%

%% Remove the Access Control Lists before new ones are added.

%%

override_acls.
b) Admin User from:
%% Admin user

{acl, admin, {user, "", "example.com"}}.
to
%% Admin user

{acl, admin, {user, "admin", "jabber.myserver-host.com"}}.
c) default %% Hostname of example.com to my real hostname:
%% Hostname

{hosts, ["jabber.myserver-host.com"]}.
The rest of the configurations in /etc/ejabberd/ejabberd.cfg can stay like it is, though it is interesting to read it carefully before continuing as, there are some config timings which might prevent the XMPP server from user brute force attacks as well as few other goodies like for example (ICQ, MSN , Yahoo etc.) protocol transports.
3. Add iptables ACCEPT traffic (allow) rules for ports which are used by Ejabberd
The minimum ACCEPT rules to add are:
/sbin/iptables -A INPUT -p tcp -m tcp --dport 22 -j ACCEPT

/sbin/iptables -A INPUT -p tcp -m tcp --dport 5222 -j ACCEPT

/sbin/iptables -A INPUT -p udp -m udp --dport 5222 -j ACCEPT

/sbin/iptables -A INPUT -p tcp -m tcp --dport 5223 -j ACCEPT

/sbin/iptables -A INPUT -p udp -m udp --dport 5223 -j ACCEPT

/sbin/iptables -A INPUT -p tcp -m tcp --dport 5269 -j ACCEPT

/sbin/iptables -A INPUT -p udp -m udp --dport 5269 -j ACCEPT

/sbin/iptables -A INPUT -p tcp -m tcp --dport 5280 -j ACCEPT

/sbin/iptables -A INPUT -p udp -m udp --dport 5280 -j ACCEPT

/sbin/iptables -A INPUT -p tcp -m tcp --dport 4369 -j ACCEPT

/sbin/iptables -A INPUT -p udp -m udp --dport 4369 -j ACCEPT

/sbin/iptables -A INPUT -p tcp -m tcp --dport 53873 -j ACCEPT
Of course if there is some specific file which stores iptables rules or some custom firewall these rules has to be added / modified to fit appropriate place or chain.
4. Restart ejabberd via init.d script
debian:~# /etc/init.d/ejabberd restart

Restarting jabber server: ejabberd is not running. Starting ejabberd.
5. Create ejabberd necessery new user accounts
debian:~# /usr/sbin/ejabberdctl register admin jabber.myserver-host.com mypasswd1
etc.debian:~# /usr/sbin/ejabberdctl register hipo jabber.myserver-host.com mypasswd2
debian:~# /usr/sbin/ejabberdctl register newuser jabber.myserver-host.com mypasswd3
debian:~# /usr/sbin/ejabberdctl register newuser1 jabber.myserver-host.com mypasswd4
...
ejabberdctl ejabberd server client (frontend) has multiple other options and the manual is a good reading.
One helpful use of ejabberdctl is:
debian:~# /usr/sbin/ejabberdctl status

Node ejabberd@debian is started. Status: started

ejabberd is running
ejabberctl can be used also to delete some existent users, for example to delete the newuser1 just added above:
debian:~# /usr/sbin/ejabberdctl unregister newuser jabber.myserver-host.com
6. Post install web configurations
ejabberd server offers a web interface listening on port 5280, to access the web interface right after it is installed I used URL: http://jabber.myserver-host.com:5280/admin/
To login to http://jabber.myserver-host.com:5280/admin/ you will need to use the admin username previously added in this case:
admin@jabber.myserver-host.com mypasswd1
Anyways in the web interface there is not much of configuration options available for change.
7. Set dns SRV records
I'm using Godaddy 's DNS for my domain so here is a screenshot on the SRV records that needs to be configured on Godaddy:
In the screenshto Target is the Fually qualified domain hostname for the jabber server.
Setting the SRV records for the domain using Godaddy's DNS could take from 24 to 48 hours to propagate the changes among all the global DNS records so be patient.
If instead you use own custom BIND DNS server the records that needs to be added to the respective domain zone file are:
_xmpp-client._tcp 900 IN SRV 5 0 5222 jabber.myserver-host.com.

_xmpp-server._tcp 900 IN SRV 5 0 5269 jabber.myserver-host.com.

_jabber._tcp 900 IN SRV 5 0 5269 jabber.myserver-host.com.
8. Testing if the SRV dns records for domain are correct
debian:~$ nslookup
> set type=SRV

> jabber.myserver-host.com

 ...
> myserver-host.com
If all is fine above nslookup request should return the requested domain SRV records.
You might be wondering what is the purpose of setting DNS SRV records at all, well if your jabber server has to communicate with the other jabber servers on the internet using the DNS SRV record is the way your server will found the other ones and vice versa.
DNS records can also be checked with dig for example
$ dig SRV _xmpp-server._tcp.mydomain.net
[…]
;; QUESTION SECTION:
;_xmpp-server._tcp.mydomain.net. IN SRV
;; ANSWER SECTION:
_xmpp-server._tcp.mydomain.net. 259200 IN SRV 5 0 5269 jabber.mydomain.net.
;; ADDITIONAL SECTION:
jabber.mydomain.net. 259200 IN A 11.22.33.44
;; Query time: 109 msec
;; SERVER: 212.27.40.241#53(212.27.40.241)
;; WHEN: Sat Aug 14 14:14:22 2010
;; MSG SIZE rcvd: 111
9. Debugging issues with ejabberd
Ejabberd log files are located in /var/log/ejabberd , you will have to check the logs in case of any issues with the jabber XMPP server. Here is the three files which log messages from ejabberd:
debian:~$ ls -1 /var/log/ejabberd/

ejabberd.log

erl_crash.dump

sasl.log
I will not get into details on the logs as the best way to find out about them is to read them 😉
10. Testing ejabberd server with Pidgin
To test if my Jabber server works properly I used Pidgin universal chat client . However there are plenty of other multiplatform jabber clients out there e.g.: Psi , Spark , Gajim etc.
Here is a screenshot of my (Accounts -> Manage Accounts -> Add) XMPP protocol configuration
Tags: admin, apache, best free software, brute force, cfg, com, configure, custom, default hostname, default settings, DNS, doesn, dport, ejabberd, ejabberdctl, exact steps, file, GNU, goodies, hostname, hosts, init, INPUT, Install, installation, Jabber, Linux, Lists, mypasswd, necessery, override, ports, ppl, programming language, Protocol, quot, quot quot, rich documentation, server, servers, software, tcp, transports, uncomment, User, xmpp
Posted in Linux, System Administration, Various | 8 Comments »