Posts Tagged ‘squid’

Windows 10 install local Proxy server to Save bandwidth on a slow and limited Mobile Phone HotSpot network Shared connections

Wednesday, August 20th, 2025

https://pc-freak.net/images/how-to-use-local-proxy-to-speed-up-internet-speed-connectivity-on-windows-os-with-squid-and-privoxy

If you're running on Internet ISP that is providing via a Internet / Wifi Router device with a 3G / 4G / 5G etc. but your receiving point location is situated somewhere very far in a places like High mountains lets say Rila Mountain or  Alps on a very distant places where Internet coverate of Inetner Service Provider is low or very low but you need still to Work / Play / Entertain on the Net frequently.
Hence you will cenrtainly be looking for a ways to Speed Up / Optimize the Internet connectivity somehow.
You cannot do miracles but certainly the daily operations and a pack up of repeating traffic can be achieved by using installing and using simple local proxy server.

The advantages of using a proxy are even more besides the speed up of Internet connection lines, here is the Pros you get by using the proxy:
 

  • Using Caches frequently accessed content (e.g., images, scripts, web pages).
  • Blocks ads and trackers (reduces bandwidth).
  • Compresses data (if needed)
  • Can serve multiple local devices if needed.
     

To save bandwidth on a slow and limited connectivity Internet router or mobile phone hotspot using Windows 10, you can install a local proxy server that:

Here’s a step-by-step guide to set this up:
 

Install a local caching proxy server on Windows 10 to reduce bandwidth usage over a mobile hotspot.


1. Install Squid (Caching Proxy Server)

Squid is a powerful and widely used open-source caching proxy.

Download Squid for Windows

Download Squid for Windows from:

https://squid.acmeconsulting.it/download (Unofficial, stable build)

or compile it manually (if you're having an own Linux or BSD router that is passing on the traffic)

2. Install Squid Proxy sever on Windows


2.1. Extract or install the downloaded Squid package.


2.2. Install it as a Windows Service

Open Command Prompt (Admin) and run:

C:\\Users\\hipo\\Downloads> squid -i

Initialize cache directories:
 

C:\\Users\\hipo\\Downloads> squid -z


3. Configure Squid Proxy via squid.conf


3.1. Open squid.conf

usually in

C:\\Squid\\etc\\squid\\squid.conf
 

3.2. Edit key lines:  

http_port 3128
cache_dir ufs c:/squid/var/cache 100 16 256
access_log c:/squid/var/logs/access.log
cache_log c:/squid/var/logs/cache.log
maximum_object_size 4096 KB
cache_mem 64 MB


3.3. Allow local access:


acl localnet src 192.168.0.0/16
http_access allow localnet

(Adjust IP ranges according to your network.)


Here's a ready-to-use Squid configuration file optimized for Running on Windows 10:

  • Caching web content to save bandwidth
  • Blocking ads and trackers
  • Allowing local device connections


Location for the squid Config File
 

The Windows squid installer should have setup the Squid proxy by default inside C:\Squid so the full path to squid.conf should be:
Place this as

squid.conf

in:

C:\\Squid\\etc\\squid\\squid.conf


# BASIC CONFIGURATION
http_port 3128
visible_hostname localhost

# CACHE SETTINGS
cache_mem 128 MB
maximum_object_size 4096 KB
maximum_object_size_in_memory 512 KB
cache_dir ufs c:/squid/var/cache 100 16 256
cache_log c:/squid/var/logs/cache.log
access_log c:/squid/var/logs/access.log

# DNS
dns_nameservers 8.8.8.8 1.1.1.1

# ACLs (Access Control Lists)
acl localhost src 127.0.0.1/32
acl localnet src 192.168.0.0/16
acl Safe_ports port 80      # HTTP
acl Safe_ports port 443     # HTTPS
acl Safe_ports port 21      # FTP
acl CONNECT method CONNECT

# BLOCKED DOMAINS (Ad/Tracking)
acl ads dstdomain .doubleclick.net .googlesyndication.com .googleadservices.com
acl ads dstdomain .ads.yahoo.com .adnxs.com .track.adform.net
http_access deny ads

# SECURITY & ACCESS CONTROL
http_access allow localhost
http_access allow localnet
http_access deny !Safe_ports
http_access deny CONNECT !SSL_ports
http_access deny all

# REFRESH PATTERNS (Cache aggressively)
refresh_pattern ^ftp:           1440    20%     10080
refresh_pattern ^gopher:        1440    0%      1440
refresh_pattern -i \.jpg$       10080   90%     43200
refresh_pattern -i \.png$       10080   90%     43200
refresh_pattern -i \.gif$       10080   90%     43200
refresh_pattern -i \.css$       10080   90%     43200
refresh_pattern -i \.js$        10080   90%     43200
refresh_pattern -i \.html$      1440    90%     10080
refresh_pattern .               0       20%     4320

# LOGGING
logfile_rotate 10


4. Start the Squid Win Service from Admin command prompt

C:\Users\hipo> net start squid


5. Test the Proxy


Set the proxy server in your Windows proxy settings:
 

  • Go to Settings > Network & Internet > Proxy
     
  • Enable Manual proxy setup:

Address: 127.0.0.1

Port: 3128

Browse the web — Squid will now cache content locally.

Make sure

C:\Squid\var\cache

and

C:\Squid\var\logs

exist.

You can expand the ad block list by importing public blocklists. Let me know if you want help with that.

To share this proxy with other local devices, ensure they’re on the same network and allowed via ACL.
 

6. Block Ads and Save More Bandwidth with the Proxy

You can modify Squid to:

Block ad domains (using

acl

rules or a blacklist)

Limit download sizes

Restrict background updates or telemetry

Example rule to block a domain:

acl ads dstdomain .doubleclick.net .ads.google.com http_access deny ads


7. Use Aternative lightweight Proxy Privoxy (Lightweight filtering proxy) 

What is Privoxy?

Privoxy is a lightweight, highly customizable proxy server focused on privacy protection, content filtering, and web page optimization.

Unlike caching proxies (like Squid), Privoxy doesn’t store data locally—but it filters and blocks unnecessary traffic before it even reaches your browser.

7.1. Why Use Privoxy to Speed Up Internet?

Here's how Privoxy helps:

Feature Benefit
 Blocks Ads & Banners Reduces page load size and clutter
 Stops Trackers Prevents background data requests
Filters Pop-ups Improves usability and safety
Speeds Up Web Browsing By stripping unwanted content
Low Resource Usage Works on older or low-spec systems


Privoxy is easier to set up than Squid and usually much more simple and fits well if you want something simpler and more light weight and is also great for ad/tracker blocking.
To install and use it it comes to 4 simple steps

  1. Download from: https://www.privoxy.org/

  2. Install and run it.

  3. Configure browser/system to use proxy lets say on:

    127.0.0.1:8118

  4. Customize

    config.txt

    to add block rules.

7.2. Configure Your Web Browser or System Proxy

Set your browser/system to use the local Privoxy proxy:

Proxy address:

127.0.0.1

Port:

8118

On Windows:

Go to Settings > Network & Internet > Proxy

Enable Manual Proxy Setup

Enter:

Address:

127.0.0.1

Port:

8118

Save

7.3: Enable Privoxy Filtering and Blocking Rules

Privoxy comes with built-in rules for:

  • Ad blocking
  • Tracker blocking
  • Cookie management
  • Script filtering

You can customize filters in the configuration files via following configs:

Main config:

C:\\Program Files (x86)\\Privoxy\\config


Action files:

C:\\Program Files (x86)\\Privoxy\\default.action


Filter files:

C:\\Program Files (x86)\\Privoxy\\default.filter


7.4. Example to Block All Ads with Privoxy

Look in

default.action

and ensure these are uncommented:


{ +block }


Or add specific ad server domains:

{ +block{Ad Servers} }
.com.doubleclick.net
.ads.google.com
.adnxs.com


You can further use community-maintained blocklists for stronger Ads filtering.


Privoxy does not compress traffic, so to speed up even further with privoxy you might Compress traffic to do so use ziproxy (the http traffic compressor).

Now all your HTTP traffic is routed through Privoxy and you will notice search engines and repeatingly accessed websites pictures and Internet resources such as css / javscript / htmls etc. will give a boost !

Squid Proxy log timestamp human readable / Convert and beautify Proxy unixtime logs in human-readable form howto

Thursday, February 21st, 2019

ccze-squid-access-log-colorized-with-log-analizer-linux-tool

If you have installed Squid Cache Proxy recently and you need to watch who is accessing the proxy and what Internet (website is viewed) under /var/log/squid/access.log /var/log/store.log /var/log/access.log etc., you will be unpleasently surprised the log's records are logged in a weird human unreadable format called UTC as Squid Proxy server does not store the date / year / hour time information in a human readable format.

Squid uses the format:
<UNIX timestamp>.<Centiseconds> and you have to be a robot of a kind or a math genious to read it 🙂

To display Squid Proxy log in a human readable, luckily you can use below one-liner  regular expression.
 

cat access.log | perl -p -e 's/^([0-9]*)/”[“.localtime($1).”]"/e'


If you have to review squid logs multiple times and on a regular basis you can either set some kind of cmd alias in $HOME/.bashrc such as:

alias readproxylog='cat access.log | perl -p -e 's/^([0-9]*)/”[“.localtime($1).”]"/e'

Or for those who prefer beauty install and use a log beatifier / colorizer such as ccze
 

root@pcfreak:/home/hipo# apt-cache show ccze|grep -i desc -A 3
Description-en: robust, modular log coloriser
 CCZE is a robust and modular log coloriser, with plugins for apm,
 exim, fetchmail, httpd, postfix, procmail, squid, syslog, ulogd,
 vsftpd, xferlog and more.

Description-md5: 55cd93dbcf614712a4d89cb3489414f6
Homepage: https://github.com/madhouse/ccze
Tag: devel::prettyprint, implemented-in::c, interface::commandline,
 role::program, scope::utility, use::checking, use::filtering,

root@pcfreak:/home/hipo# apt-get install –yes ccze


tail -f /var/log/squid/access.loc | ccze -CA


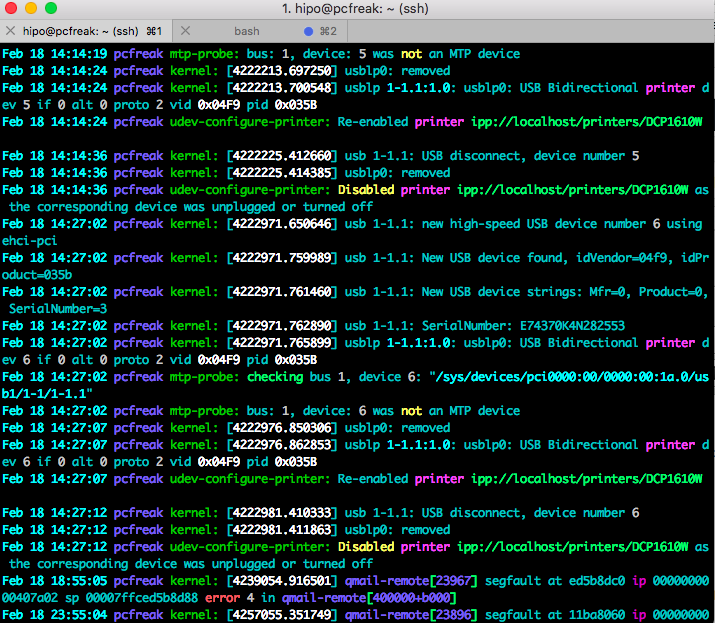
ccze is really nice to view /var/log/syslog errors and make your daily sysadmin life a bit more colorful


tail -f -n 200 /var/log/messages | ccze


tail-ccze-syslog-screenshot viewing in Colors your Linux logs

For a frequent tail + ccze usage with ccze you can add to ~/.bashrc following shell small function
 

tailc () { tail $@ | ccze -A }


Below is a list of supported syntax highlighting colorizer:

$ ccze -l
Available plugins:

Name      | Type    | Description
————————————————————
apm       | Partial | Coloriser for APM sub-logs.
distcc    | Full    | Coloriser for distcc(1) logs.
dpkg      | Full    | Coloriser for dpkg logs.
exim      | Full    | Coloriser for exim logs.
fetchmail | Partial | Coloriser for fetchmail(1) sub-logs.
ftpstats  | Full    | Coloriser for ftpstats (pure-ftpd) logs.
httpd     | Full    | Coloriser for generic HTTPD access and error logs.
icecast   | Full    | Coloriser for Icecast(8) logs.
oops      | Full    | Coloriser for oops proxy logs.
php       | Full    | Coloriser for PHP logs.
postfix   | Partial | Coloriser for postfix(1) sub-logs.
procmail  | Full    | Coloriser for procmail(1) logs.
proftpd   | Full    | Coloriser for proftpd access and auth logs.
squid     | Full    | Coloriser for squid access, store and cache logs.
sulog     | Full    | Coloriser for su(1) logs.
super     | Full    | Coloriser for super(1) logs.
syslog    | Full    | Generic syslog(8) log coloriser.
ulogd     | Partial | Coloriser for ulogd sub-logs.
vsftpd    | Full    | Coloriser for vsftpd(8) logs.
xferlog   | Full    | Generic xferlog coloriser.

At many cases for sysadmins like me that prefer clarity over obscurity, even a better solution is to just change in /etc/squid/squid.conf
the logging to turn it in human-readable form
, to do so add to config somewhere:


Logformat squid %tl.%03tu %6tr %>a %Ss/%03Hs %


You will get log output in format like:


18/Feb/2019:18:38:47 +0200.538 4787 y.y.y.y TCP_MISS/200 41841 GET https://google.com – DIRECT/x.x.x.x text/html


SQUID's format recognized parameters in above example are as follows:


%    a literal % character
>a    Client source IP address
>A    Client FQDN
>p    Client source port
la    Local IP address (http_port)
lp    Local port number (http_port)
sn    Unique sequence number per log line entry
ts    Seconds since epoch
tu    subsecond time (milliseconds)
tl    Local time. Optional strftime format argument
default %d/%b/%Y:%H:%M:%S %z
tg    GMT time. Optional strftime format argument
default %d/%b/%Y:%H:%M:%S %z
tr    Response time (milliseconds)
dt    Total time spent making DNS lookups (milliseconds)


How to disable / block sites with Squid Proxy ACL rules on Debian GNU / Linux – Setup Transparent Proxy

Wednesday, October 16th, 2013

Squid transparant proxy disabling blocking websites with Squid proxy

Often when configuring new Firewall router for a network its necessary to keep log on HTTP (Web) traffic passing by the router. The best way to do this in Linux is by using Proxy server. There are plenty of different Proxy (Caching) servers for GNU / Linux. However the most popular one is Squid (WWW Proxy Cache). Besides this its often a requirement in local office networks that Proxy server is transparent (invisible for users) but checking each and every request originating from the network. This scenario is so common in middle sized and small sized organizations that its a must that every Linux admin is ready to easily configure it. In most of my experience so far I used Debian Linux, so in this post I will explain how to configure Transparent Squid Proxy with configured ACL block rules for employee's time wasting services like facebook / youtube / vimeo etc.

Here is diagram I found on a skullbox.net showing graphically below Squid setup:

Squid as transparent proxy behind nat firewall diagram

1. Install Squid Proxy Server

Squid is available as Debian package since a long time, so on Deb Linux installing Squid is a piece of cake.

debian-server:~# apt-get install --yes squid
...


2. Create /var/cache/proxy directory and set proper permissions necessary for custom config

debian-server:~# mkdir /var/cache/proxy
debian-server:~# chown -R proxy:proxy /var/cache/proxy

3. Configure Squid Caching Server

By default debian package extract script does include default squid.conf which should be substituted with my custom squid.conf. A Minor user changes has to be done in config, download my squid.conf from here and overwrite default squid.conf in /etc/squid/squid.conf. Quickest way to do it is through:

debian-server:~# cd /etc/squid
debian-server:/etc/squid# mv /etc/squid/squid.conf /etc/squid/squid.conf.orig
debian-server:/etc/squid# wget -q https://www.pc-freak.net/files/squid.conf
debian-server:/etc/squid# chown -R root:root squid.conf

Now open squid.conf and edit lines:

http_port 192.168.0.1:3128

Change 192.168.0.1 which is IP assigned to eth1 (internal NAT-ted interface) with whatever IP of local (internal network) is. Some admins prefer to use 10.10.10.1 local net addressing.
Below in configuration, there are some IPs from 192.168.0.1-255 network configured through Squid ACLs to have access to all websites on the Internet. To tune such IPs you will have to edit lines after (1395) after comment

# allow access to filtered sites to specific ips


4. Disabling sites that pass through the proxy server

Create file /etc/disabled-sites i.e.:

debian-server:~# touch /etc/disabled-sites

and place inside all siles that would like to be inaccessible for local office network either through text editor (vim / pico etc.) or by issuing:

debian-server:~# echo 'facebook.com' >> /etc/disabled-sites
debian-server:~# echo ''youtube.com' >> /etc/disabled-sites
debian-server:~# echo 'ask.com' >> /etc/disabled-sites

5. Restart Squid to load configs

debian-server:~# /etc/init.d/squid restart
[ ok ] Restarting Squid HTTP proxy: squid.

6. Making Squid Proxy to serve as Transparent proxy through iptables firewall Rules

Copy paste below shell script to lets say /etc/init.d/squid-transparent-fw.sh
 

#!/bin/bash
IPT=/sbin/iptables;

IN=INPUT;
OUT=OUTPUT;
FORW=FORWARD;

AC=ACCEPT;
REJ=REJECT;
DRP=DROP;
RED=REDIRECT;
MASQ=MASQUERADE;
POSTR=POSTROUTING;
PRER=PREROUTING;
OUT_IFACE=eth2;
OUT_B_IFACE=eth0;
IN_IFACE=eth1;
MNG=mangle;

ALL_NWORKS='0/0';
LOCALHOST='127.0.0.1';

# forward to squid.
$IPT -t nat -I $PRER -p tcp -s 192.168.0.0/24 -d ! 192.168.0.1 –dport www -j $RED –to 3128
$IPT -t nat -I $PRER -p tcp -s 192.168.0.0/24 -d ! 192.168.0.1 –dport 3128 -j $RED –to 3128

# Reject connections to squid from the untrusted world.
# rules for order.
$IPT -A $IN -p tcp -s 83.228.93.76 -d $ALL_NWORKS –dport 65221 -j $AC

$IPT -A $IN -p tcp -s $ALL_NWORKS –dport 65221 -j $REJ
$IPT -A $IN -i $OUT_B_IFACE -p tcp -s $ALL_NWORKS –dport 3128 -j $REJ

Easiest way to set up squid-transparent-fw.sh firewall rules is with:

debian-server:~# cd /etc/init.d/
debian-server:/etc/init.d# wget -q https://www.pc-freak.net/files/squid-transparent-fw.sh
debian-server:/etc/init.d# chmod +x squid-transparent-fw.sh
debian-server:/etc/init.d/# bash squid-transparent-fw.sh
Then place line /etc/init.d/squid-transparent-fw.sh into /etc/rc.local before exit 0
 

That's all now Squid Transparent Proxy will be up and running and the number of sites listed in disabled-sites will be filtered for Office employees returning a status of Access Denied.

Access Denied msg

Gets logged in /var/log/squid/access.log example of Denied access for Employee with IP 192.168.0.155 is below:

192.168.0.155 - - [16/Oct/2013:16:50:48 +0300] "GET http://youtube.com/ HTTP/1.1" 403 1528 TCP_DENIED:NONE

Various other useful information on what is cached is also available via /var/log/squid/cache.log and /var/log/squid/store.log

Another useful thing of using Transparent Squid Proxy is that you can always keep track on exact websites opened by Employees in Office so you can easily catch people trying to surf p0rn websites or some obscenity.

Hope this post helps some admin out there 🙂 Enjoy

How to clear Squid Proxy Cache on Debian and Ubuntu

Saturday, July 16th, 2011

Squid proxy cache clear logo

It was necessery to clean up some squid cache for some proxy users on a Debian host. Until now I’ve used to run only custom build Squid server on Slackware Linux.

Thus I was curious if Debian guys were smart enough to implement a proxy cache cleaning option as an option to be passed on to squid’s init script.

Honestly I was quite suprised squid clear cache option is not there;

squid-cache:~# /etc/init.d/squid3
Usage: /etc/init.d/squid3 {start|stop|reload|force-reload|restart}
squid-cache:/#

As it was not embedded into init script I still hoped, there might be some Debian way to do the proxy cache clearing, so I spend some 10 minutes checking online as well as checked in squid3‘s manual just to find there is no specific command or Debian accepted way to clean squid’s cache.

Since I couldn’t find any Debian specific, way I did it the old fashioned way 😉 (deleted directory/file structures in /var/spool/squid3/* and used squid’s -z option, to recreate the swap directories.

Here is how:

squid-cache:~# /etc/init.d/squid3 stop;
squid-cache:~# rm -Rf /var/spool/squid3/*;
squid-cache:~# squid3 -z; /etc/init.d/squid3 start

Finally I was quite amazed to realize, there was not even a crontab script to periodically clear and re-create proxy cache.

My previous experience with maintaning an office Squid proxy cache has prooved, that periodic cache clean ups are very helpful, especially to resolve issues with cached unreslovable DNS entries in the server.
Clearing up squid cache every week or something, guarantees that failure to resolve certain hosts at certain times would not stay unresolvable like forever 😉

In that manner of thougths, I decided to put the following crontab which will twice a month clear up proxy’s cache, to possibly solve some failed squid DNS issues.

squid-cache:~# crontab -u root -l > file;
echo '00 04 12,26 * * /etc/init.d/squid3 stop; rm -Rf /var/spool/squid3/*; squid3 -z; /etc/init.d/squid3 start >/dev/null 2>&1'
>> file; crontab file

By the way, implementing the squid clear cache in Debian and Ubuntu ‘s init scripts and putting a periodic proxy clear up cron, seems like a feature worthy to be proposed to the distro developers and hopefully be embbed in some of the upcoming distro releases 😉

How to generate user password for digest_pw_auth SQUID digest authentication

Wednesday, July 6th, 2011

Squid Proxy pass prompt / real squid fun picture

I needed to generate new password for proxy user configured on SQUID proxy server configured with digest user authentication.
My dear colleague was kind to provide me with the below script, which generates the one line string which needs to go to the squid user password file:

#!/bin/sh
user="$1";
realm="$2";
pass="$3";
if [ -z "$1" -o -z "$2" -o -z "$3" ] ; then
echo "Usage: $0 user password 'realm'";
exit 1
fi
ha1=$(echo -n "$user:$realm:$pass"|md5sum |cut -f1 -d' ')
echo "$user:$realm:$ha1"

You can alternatively download the squid_generate_pass.sh script here

The script accepts three arguments;
proxy-server:~# ./squid_generate_pass.sh
Usage: ./squid_generate_pass.sh user password 'realm'

Thus to generate a new user and password and insert it immediately into let’s say a squid configured user/pass file in /etc/squid3/users execute command:

proxy-server:~# ./squid_generate_pass.sh admin_user MySecretPassword 'Squid_Configured_Realm'
>> /etc/squid3/users

Where Squid_Configured_Realm depends on the realm name configured in squid.conf, for example if squid.conf includes some auth configuration similar to:

auth_param digest program /usr/lib/squid3/digest_pw_auth -c /etc/squid3/users
auth_param digest children 2
auth_param digest realm My_Proxy_Realm
acl localusers proxy_auth REQUIRED

The realm script argument should be My_Proxy_realm . If squid_generate_pass does completes without errors, it should add a line to /etc/squid3/users file similar to:

proxy-server:~# cat /etc/squid3/users
admin_user:My_Proxy_realm:3bbcb35e505c52a0024ef2e3ab1910b0

Cheers 😉

Cloud Computing a possible threat to users privacy and system administrator employment

Monday, March 28th, 2011

Cloud Computing screenshot

If you’re employed into an IT branch an IT hobbyist or a tech, geek you should have certainly heard about the latest trend in Internet and Networking technologies the so called Cloud Computing

Most of the articles available in newspapers and online have seriously praised and put the hopes for a better future through cloud computing.
But is really the cloud computing as good as promised? I seriously doubt that.
Let’s think about it what is a cloud? It’s a cluster of computers which are connected to work as one.
No person can precisely say where exactly on the cluster cloud a stored information is located (even the administrator!)

The data stored on the cluster is a property of a few single organizations let’s say microsoft, amazon etc., so we as users no longer have a physical possession of our data (in case if we use the cloud).

On the other hand the number of system administrators that are needed for an administration of a huge cluster is dramatically decreased, the every day system administrator, who needs to check a few webservers and a mail server on daily basis, cache web data with a squid proxy cache or just restart a server will be no longer necessary.

Therefore about few million of peoples would have to loose their jobs, the people necessary to administrate a cluster will be probably no more than few thousands as the clouds are so high that no more than few clouds will exist on the net.

The idea behind the cluster is that we the users store retrieve our desktops and boot our operating system from the cluster.
Even loading a simple webpage will have to retrieve it’s data from the cluster.

Therefore it looks like in the future the cloud computing and the internet are about to become one and the same thing. The internet might become a single super cluster where all users would connect with their user ids and do have full access to the information inside.

Technologies like OpenID are trying to make the user identification uniform, I assume a similar uniform user identication will be used in the future in a super cloud where everybody, where entering inside will have access to his/her data and will have the option to access any other data online.

The desire of humans and business for transperancy would probably end up in one day, where people will want to share every single bit of information.
Even though it looks very cool for a sci-fi movie, it’s seriously scary!

Cloud computing expenses as they’re really high would be affordable only for a multi-national corporations like Google and Microsoft

Therefore small and middle IT business (network building, expanding, network and server system integration etc.) would gradually collapse and die.

This are only a few small tiny bit of concerns but in reality the problems that cloud computing might create are a way more severe.
We the people should think seriously and try to oppose cloud computing, while we still can! It might be even a good idea if a special legislation that is aming at limiting cloud computing can be integrated and used only inside the boundary of a prescribed limitations.

Institutions like the European Parliament should be more concerned about the issues which the use of cloud computing will bring, EU legislation should very soon be voted and bounding contracts stop clouds from expanding and taking over the middle size IT business.