Posts Tagged ‘failure’
Friday, October 21st, 2011 
I needed to migrate vpopmail/domains multiple directories stored on 2 servers to a single vpopmail install.
Merging the two vpopmails user Maildir/ stored accounts actually actually was quite simple, though it needed a bit of tweaks.
Here is how I migrated the two vpopmail installations to reside on the one vpopmail mail storage.
1. I used tar to archive the two vpopmail installations on the two different
First I logged in with root over ssh on the first node, e.g.:
qmail-server1:~# cd /home/vpopmail/

qmail-server1:/home/vpopmail# ionice -c 3 tar -czvf vpopmail1_$(date +%Y%m%d).tar.gz domains/

...
Then logged in on the second machine:
qmail-server2:~# cd /home/vpopmail

qmail-server2:/home/vpopmail# ionice -c 3 tar -czvf vpopmail2_$(date +%Y%m%d).tar.gz domains/
I used ionice -c 3 which instructs the tar archive of vpopmail directory to be created using idle (sparing the hard disk) from I/O overheads.
Sometimes not using ionice especially the case where hundreds of mail domains exist in domains/ could overload the server and stop the qmail and even sometimes ssh from properly responding for a very long periods as well as delaying the work of the mail server and failure to accept some user connections to pop3 or smtp protocols.I found out about the exisnte of ionice command just recently, reading some blog online. The command is absolute "must use", always when have to archive directories with tens of thousands of files and subdirectories. It's also nice in general, also on some copy or move operations on GNU / Linux, ionice is truly great.
Anyways after a while I had my both archives on both servers existing, so I used sftp (one can use scp as well) to transfer the archives to the newly configured qmail + vpopmail installation.
2. Use sftp or scp to copy the archives to the new configured vpopmail server
Again on both servers I had to execute, sftp I prefer sftp as I love being interactive on the shell 😉
qmail-server1:/home/vpopmail# sftp root@my-vpopmail-server-host.com

Password:

Connected to my-vpopmail-server-host.com.

sftp> cd /home/vpopmail

sftp> put vpopmail1_$(date +%Y%m%d).tar.gz

...

sftp> exit
Once again the same commands has to be issued on the second vpomail server, where the second domains/ mail accounts archive was just made:
qmail-server2:/home/vpopmail# sftp root@my-vpopmail-server-host.com

Password:

Connected to my-vpopmail-server-host.com.

sftp> cd /home/vpopmail

sftp> put vpopmail2_$(date +%Y%m%d).tar.gz

...

sftp> exit
Now as both of the archives are uploaded, next step is to login to the root@my-vpopmail-server-host.com server, where the two archives were just uploaded:
qmail-server1:/var/domains# ssh root@my-vpopmail-server-host.com

my-vpopmal-server-host:~# cd /home/vpopmailmy-vpopmail-server-host:/home/vpopmail# tar -zxvf vpopmail1_$(date +%Y%m%d).tar.gz domains/

...
Next on, the second vpopmail2_$(date +%Y%m%d).tar.gz is untarred:
3. Unarchive the uploaded vpopmail*.tar.gz archives
my-vpopmail-server-host:/home/vpopmail# tar -zxvf vpopmail2_$(date +%Y%m%d).tar.gz domains/

...
Now, if the two archives are properly tarred and no errors are returned (that was my case thx God).
4. Use a shell script to generate a script, to later change all user emails passwords on the my-vpopmail-server-host.com
The next thing which has to be done is that all email accounts with passwords are recreated with vpopmail's /home/vpopmail/bin/vpasswd command. Even though the domains are existing with the respective vpasswd and vpasswd.cdb in each mailbox on the new server my-vpopmail-server-host still the mailboxes were not visible by vpopmail. To make all the mailboxes with the correct passwords be responding on the new vpopmail connections via IMAP and POP3 mail fetch protocols, I wrote a small script which does change the passwords of all mailboxes just transferred from the two servers to my-vpopmail-server-host
The script is very simple and actually is not too automated, but at least it works. I've called my script to dump all the user passwords for all the vpopmail filesystem existing mail domains dump_vpopmail_mail_passwords.sh
To use the script its necessery that the script is downloaded on both the vpopmail mail servers from which domains/ directory is migrated, e.g.:
qmail-server1:/home/vpopmail# wget https://www.pc-freak.net/bshscr/dump_vpopmail_mail_passwords.sh

...

qmail-server1:/home/vpopmail# sh dump_vpopmail_mail_passwords.sh >> change_mail_account_pwds.sh
Same procedure goes on the second vpopmail server qmail-server2:
qmail-server2:/home/vpopmail# wget https://www.pc-freak.net/bshscr/dump_vpopmail_mail_passwords.sh

...

qmail-server2:/home/vpopmail# sh dump_vpopmail_mail_passwords.sh >> change_mail_account_pwds.sh
5. Upload the change_mail_accounts_pwds.sh shell script created on the two qmail mail servers to dump_vpopmail_mail_passwords.sh
Again I used sftp to upload the two change_mail_account_pwds.sh bash scripts:
qmail-server1:/home/vpopmail# sftp root@my-vpopmail-server-host.com

Password:

Connected to my-vpopmail-server-host.com.

sftp> put change_mail_account_pwds.sh change_mail_account_pwds1.sh

...

sftp> exit
sftp>
qmail-serve2:/home/vpopmail# sftp root@my-vpopmail-server-host.com

Password:

Connected to my-vpopmail-server-host.com.

sftp> put change_mail_account_pwds.sh change_mail_account_pwds2.sh

...

sftp> exit
6. Execute change_mail_account_pwds1.sh and change_mail_account_pwds2.sh on my-vpopmail-server-host.com
On the 3rd server where the two vpopmail domains are migrated my-vpopmail-server-host.com , from /home/vpopmail invoke the above two scripts:
root@my-vpopmail-server-host.com:/home/vpopmail# sh change_mail_account_pwds1.sh

root@my-vpopmail-server-host.com:/home/vpopmail# sh change_mail_account_pwds2.sh
The two scripts will contain list with all the two migrated vpopmail user mail addresses in a format similar to:
vpasswd mail_account@mail-domain.com password1

vpasswd mail_account1@mail-domain.com some_password

vpasswd mail_accountX@mail-domain.com other_password

etc..
After following this steps, all the mail accounts (or most of them ;)) should be merged from the two servers on the new configured vpopmail on my-vpopmail-server-host.com host.
The up-described procedure could be literally followed with migratingm any number of vpopmail /home/vpopmail/domains user email accounts.
If it has to be mass deployed based, its coparatively easy even to write an automated script to do the various aforementioned steps without any user interaction.
I've seen also some other explanations on how to migrate qmail.jsm1.net , but honestly was too lazy to read them, so I just came up with the ways described here.
One important note to make here is always to make backups, this steps worked for me but I can't guarantee this migration tutorial will work at all. I hope this helps somebody out there. Cheers 😉
Tags: archive directories, cd home, change, com, command, comPassword, configured, copy, czvf, Disk, email accounts, failure, gnu linux, gz, hard disk, How to, installation, login, long periods, mail accounts, mail domains, mail server, mail storage, move, node, pop, protocols, quot, root, scp, script, servers, sftp, Shell, smtp, ssh, tar archive, tar gz, tens of thousands, thx, tweaks, vpomail, vpopmail, wget, work
Posted in Linux, Qmail, System Administration, Various | 1 Comment »
Thursday, January 10th, 2013 
I had to fix one Notebook Compaq CQ71-330ED which was failing connecting to a home Wireless Router. The notebook was running 64 Bit Windows 7 installed from scratch just few weeks ago. The PC could connect normally via a LAN cable to the Internet, but can't connect to the Wireless Router. I thought the issue might be due to the Wireless Router, thus checked with my laptop if I can connect to the WPA2 network with the pass key. Being able to connect from my own PC make it clear the problem is somewhere in Windows 7 (most likely the drivers). I checked in
Control Panel -> Device Manager
to make sure the Wireless drivers were appearing as properly installed, there all seemed fine, Wireless was detected as:
Intel (R) Centrino Wireless-N 1000
I tried playing with Wireless settings from
Control Panel -> Network and Internet
stopped Wireless Power Saving, as I know with some wireless devices it creates problems. Also tried settings the default wireless network support from A B G N to A B G. I tried playing with changing the Workgroup name to WORKGROUP., Disabling / Enabling the Wireless Network, checking if settings for IP obtain for IPv4 are not messed up etc., but all seemed okay and still the PC weirdly was unable to connect to Wi-fi network.
I suspected, the drivers though reporting as properly installed and working with the Wi-Fi card are the point of failure. So removed driver for Wireless card and tried re-installing.
As the model of laptop was COMPAQ Presario CQ71-330ED, I looked for this model driver, but again strangely CQ71-330ED was not among the Presario models on www.hp.com drivers section.
I improvised and dfecided to download 64 bit Wi-Fi drivers for the model which seemed to be closest to CQ71-330ED – Compaq Presario CQ71-120ED.
Install the Intel 64-bit Wireless Driver for notebook CQ71-120ED solved the Wi-Fi Router connection issues. Re-connecting once again to the WPA network just worked 🙂
A mirror of Wireless driver that worked for me . After installing the driver the Wireless was detected as:
Intel (R) Wifi Link BGN
Tags: compaq presario, device manager, failure, lan cable, laptop, model driver, notebook compaq, pass key, presario models, scratch, wi fi card, wireless router, workgroup name
Posted in Everyday Life, Various, Windows | No Comments »
Tuesday, May 8th, 2012 I'm starting to learn some video editing, as I need it sometimes for building client websites.
As a Linux user I needed to have some kind of software for amateur video editing.
For Microsoft Windows OS, there are tons of video editor programs both free and proprietary (paid).
Windows users can for instance use the free software program VirtualDub (licensed under GPL license) to easily cut movie scenes from a video.
Unfortunately VirtualDub didn't have a Linux or BSD version so in my case I had to look for another soft.

I consulted a friend of mine who recommended a video editor program called LiVES.
If you haven't done any video editing previously on Linux (like my case was), you will certainly be happy to try LiVES

LiVES can extract only sound from videos, cut selected parts (frames) from videos and do plenty of other nice stuff. It is just great piece of software for anyone, who needs to do simply (newbie) video editting.
With LiVES even an amateur video editor like me could, immediately learn how to chop a movie scenes …

To master the basics and edit one video in FLV format it took me about 1 hour of time, as in the beginning it was confusing to get confortable with the program scenes selector.
One downside of LiVES it failure to open a FLV file I wanted to edit.
In order to be able to edit the flv movie hence I first had to convert the FLV to AVI or MPEG, as this two (video multimedia formats) are supported by LiVES video editor.
After completing my video scenes chopping to the AVI file I had to convert back to FLV.
In order to complete the convertion between FLV to AVI format on my Debian Linux, I used a program called avidemux
Avidemux has a nice GUI interface and also like Lives has support for video editting, though I have never succesfully done any video edits with it.
Avidemux IMHO is user (completely intuitive). To convert the FLV to AVI, all I had to do was simply open the file FLV file, press (CTRL+S) select my FLV video file format and select the output file extension format to be AVI.
Further on, used LiVES to cut my desired parts from my video of choice. Once the cuts were complete I saved the new cutted version of video to AVI.
Then I needed the video again in FLV to upload it in Joomla, so used ffmpeg – command line tool to do the AVI to FLV file converstion, like so:
hipo@noah:~$ /usr/bin/ffmpeg -i my_media_file.avi my_video_file.flv
Hope this article helps someone aiming to do basic video editting on Linux with LiVES and just like needed FLV to AVI and AVI to FLV convertions.
Tags: Auto, avi, avi file, avi format, avidemux, BSD, client, client websites, convertion, debian linux, downside, Draft, editing, editor, failure, file, flv file, format, free software program, gui interface, how to convert flv to avi, IMHO, instance, Linux, linux user, Microsoft, microsoft windows os, multimedia formats, nice stuff, piece, selector, simple, software, support, time, video, video editing, video editor, video editting, video multimedia, video scenes, Videos, windows users
Posted in Entertainment, Everyday Life, Linux and FreeBSD Desktop | No Comments »
Wednesday, January 17th, 2007 Aloha. Still here. Two days ago I ran Heroes 3 under my FreeBSD box successfully, there was a terrible bug in fullscreen mode which needed fix I’ve used the loki’s site patch to patch the heroes 3 start binary with xdelta. The loki installer was a terrible pain in the ass I used my l337test sk!llZ :} to be able to patch the binary by hand. About the last post yes I was desperate still not good still living. Today I was on exam again a failure probably, nothing new.
As I often used to say in the fast if something starts bad then it overs bad too. See my life show this very well. I’m suffering terrible and still waiting for something to set me free to happen. What would be the turning point? Will there be turning point at all? No idea. If God is such good and powerful as he said in the bible and his promises are true then he will deliver me and set me free on a good ground. Still hoping … Prodigy — Speedway, else the earth is probably his favourite experiment.
Tags: bible, earth, experiment, failure, favourite, freebsd, fullscreen, god, ground, hand, heroes, idea, life, llZ, loki, Mode, pain, pain in the ass, post, Prodigy, promises, show, site, something, speedway, test, turning, turning point, xdelta
Posted in Everyday Life | No Comments »
Wednesday, August 17th, 2011 One server recently installed with Qmail + Vpopmail and Squirrelmail had just been reported to me that the webmail is failing to properly login existent users on the server via the IMAP protocol.
I’ve checked on port 143 to see if couriertpcd process is properly listening with netstat -tlnp as well as used telnet to check if I can normally connect with telnet to the imap port and it seemed there is no issue with IMAP
Further on I checked /var/log/mail.log and there I found the following error message popping up:
Aug 17 08:56:27 mail-serv imapd: LOGIN FAILED, user=hipo@mail-serv.com, ip=[::ffff:127.0.0.1]

Aug 17 08:56:27 mail-serv imapd: authentication error: Connection refused

Aug 17 08:56:29 mail-serv imapd: Connection, ip=[::ffff:127.0.0.1]

Aug 17 08:56:29 mail-serv imapd: authdaemon: s_connect() failed: Connection refused

Aug 17 08:56:29 mail-serv imapd: [Hint: perhaps authdaemond is not running?]
The error was shown each time I do get a failure in Squirrelmail in my browser to connect to IMAP with the error:
ERROR: Connection dropped by IMAP server.
As the log revealed the courier-authdaemond was not up and running on the system. I thus launched it :
qmail:~# /usr/local/sbin/authdaemond stop

qmail:~# /usr/local/sbin/authdaemond start

qmail:~# /etc/init.d/imap start
I’ve later on figured out the strange, was caused because of a server reboot, during boot process authdaemond did not properly load up, therefore to prevent future problems like this one, I’ve put authdaemond and /etc/init.d/imap scripts to load up via /etc/rc.local :
qmail:~# echo '/usr/local/sbin/authdaemond stop' >> /etc/rc.local

qmail:~# echo '/usr/local/sbin/authdaemond start' >> /etc/rc.local

qmail:~# echo '/etc/init.d/imap start' >> /etc/rc.local
Tags: authdaemon, authentication error, boot, boot process, browser, com, connection, connection ip, ERROR, error error, error message, failure, ffff, imap port, imap protocol, IMAPFurther, issue, localqmail, login, mail, mail log, nbsp, port, port 143, Protocol, Qmail, Reboot, sbin, scripts, squirrelmail, startI, startqmail, Stop, time, usr, var, vpopmail
Posted in Linux, Qmail, System Administration | No Comments »
Thursday, August 11th, 2011 I’ve completed a qmail installation few days ago on a fresh installed Debian Squeeze 64 bit server. All is configured and works fine, except qmailadmin and vqadmin.
As the mail server was missing any kind of web mail administration panel, I needed to make at least one of the two above to make with qmail.
I decided to concentrate on qmailadmin and took the time to make it work. I used the following command lines and got the compile failure during make compilation:
debian:/usr/local/src/qmailadmin-1.2.15# ./configure --enable-cgibindir=/usr/lib/cgi-bin --enable-htmldir=/var/www/qmailadmin/ --enable-modify-quota

...

debian:/usr/local/src/qmailadmin-1.2.15# make

...
The source make failed with the following error:
In file included from template.c:45:

qmailadmin.h:37:1: warning: "MAX_FILE_NAME" redefined

In file included from template.c:28:

/home/vpopmail/include/vpopmail.h:146:1: warning: this is the location of the previous definition

template.c: In function "send_template_now":

template.c:505: error: "VERSION" undeclared (first use in this function)

template.c:505: error: (Each undeclared identifier is reported only once

template.c:505: error: for each function it appears in.)

make[1]: *** [template.o] Error 1

make[1]: Leaving directory `/usr/local/src/qmailadmin-1.2.15'

make: *** [all] Error 2
To workaround these compile issues, I’ve had to modify the C source file belonging to qmailadmin ( template.c ), e.g.:
debian:/usr/local/src/qmailadmin-1.2.15# vim template.c
In the file I had to add besides the line:
#include "util.h"
The code:
#define VERSION ""
Aterwards qmailadmin’s compile and install via make && make install-strip succeeded and now works perfectly fine 😉
Tags: Administration, administration panel, amp, bit, c source, code, compilation, configure, configured, failure, few days, file, function, identifier, installation, lib, Linux, location, mail administration, mail server, make, name, oncetemplate, panel, qmail installation, qmailadmin, quot, Quota, source file, squeeze, template, template c, time, undeclared identifier, util, version, vim, vqadmin
Posted in Linux, Qmail, System Administration, Web and CMS | 13 Comments »
Tuesday, November 8th, 2011 
Did you ever think, the tons of money your business has spend paying for buggy and unreliable non-free software?
Having problems with your Windows Network, being tortured by Viruses, a failure after windows upgrade, unexpected system crashes? Don’t worry MR. GNU will help you to change your business go free ;))
Tags: buggy, Business, failure, free software, GNU, money, network, software, system, system crashes, tons of money, Viruses, Windows, windows network, worry
Posted in Entertainment, Everyday Life, Linux, Linux and FreeBSD Desktop, Various | 1 Comment »
Saturday, July 16th, 2011 
It was necessery to clean up some squid cache for some proxy users on a Debian host. Until now I’ve used to run only custom build Squid server on Slackware Linux.
Thus I was curious if Debian guys were smart enough to implement a proxy cache cleaning option as an option to be passed on to squid’s init script.
Honestly I was quite suprised squid clear cache option is not there;
squid-cache:~# /etc/init.d/squid3

Usage: /etc/init.d/squid3 {start|stop|reload|force-reload|restart}

squid-cache:/#
As it was not embedded into init script I still hoped, there might be some Debian way to do the proxy cache clearing, so I spend some 10 minutes checking online as well as checked in squid3‘s manual just to find there is no specific command or Debian accepted way to clean squid’s cache.
Since I couldn’t find any Debian specific, way I did it the old fashioned way 😉 (deleted directory/file structures in /var/spool/squid3/* and used squid’s -z option, to recreate the swap directories.
Here is how:
squid-cache:~# /etc/init.d/squid3 stop;

squid-cache:~# rm -Rf /var/spool/squid3/*;

squid-cache:~# squid3 -z; /etc/init.d/squid3 start
Finally I was quite amazed to realize, there was not even a crontab script to periodically clear and re-create proxy cache.
My previous experience with maintaning an office Squid proxy cache has prooved, that periodic cache clean ups are very helpful, especially to resolve issues with cached unreslovable DNS entries in the server.
Clearing up squid cache every week or something, guarantees that failure to resolve certain hosts at certain times would not stay unresolvable like forever 😉
In that manner of thougths, I decided to put the following crontab which will twice a month clear up proxy’s cache, to possibly solve some failed squid DNS issues.
squid-cache:~# crontab -u root -l > file;

echo '00 04 12,26 * * /etc/init.d/squid3 stop; rm -Rf /var/spool/squid3/*; squid3 -z; /etc/init.d/squid3 start >/dev/null 2>&1'

>> file; crontab file
By the way, implementing the squid clear cache in Debian and Ubuntu ‘s init scripts and putting a periodic proxy clear up cron, seems like a feature worthy to be proposed to the distro developers and hopefully be embbed in some of the upcoming distro releases 😉
Tags: amp, cache option, clear cache, clearing, command, cron, crontab script, dev, DNS, dns entries, experience, failure, feature, fi, fil, file, file structures, guarantees, Honestly, hosts, init script, Linux, necessery, online, option, proxy, proxy cache, proxy users, rf, root, something, specific, spool, squid, squid cache, Stop, thougths, Ubuntu, ups, Usage, var, way
Posted in Linux, System Administration | No Comments »
Tuesday, June 28th, 2011 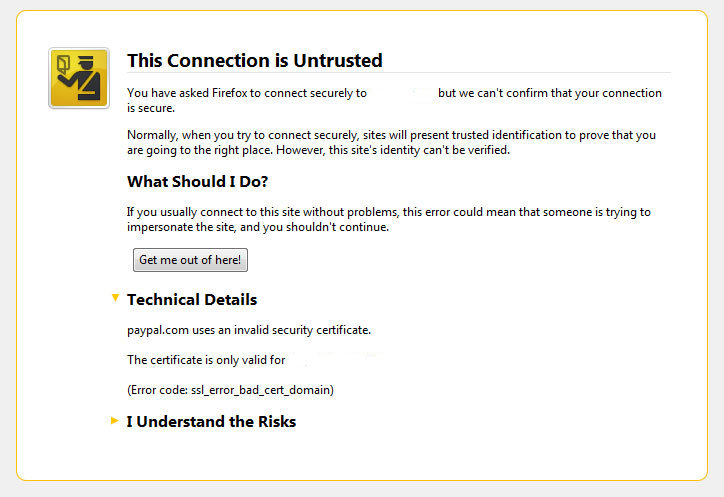
I’ve been issuing new wildcard multiple SSL certificate to renew an expiring ones. After I completed the new certificate setup manually on the server (a CentOS 5.5 Final running SoluSVM Pro – Virtual Private Manager), I launched Firefox to give a try if the certificate is properly configured.
Instead of my expectations that the browser would just accept the certificate without spitting any error messages and all will be fine, insetad I got error with the just installed certificate and thus the browser failed to report the SSL cert is properly authenticated.
The company used to issue the SSL certificate is GlobeSSL – http://globessl.com , it was quite “hassle”, with the tech support as the first certficate generated by globessl was generation based on SSL key file with 4096 key encryption.
As the first issued Authenticated certificate generated by GlobeSSL was not good further on about a week time was necessery to completethe required certificate reissuing ….
It wasn’t just GlobeSSL’s failure, as there were some spam filters on my side that was preventing some of GlobeSSL emails to enter normally, however what was partially their fault as they haven’t made their notification and confirmation emails to pass by a mid-level strong anti-spam filter…
Anyways my overall experience with GlobeSSL certificate reissue and especially their technical support is terrible.
To make a parallel, issuing certificates with GoDaddy is a way more easier and straight forward.
Now let me come back to the main certificate error I got in Firefox …
A bit of further investigation with the cert failure, has led me to the error message which tracked back to the newly installed SSL certificate issues.
In order to find the exact cause of the SSL certificate failure in Firefox I followed to the menus:
Tools -> Page Info -> Security -> View Certificate
Doing so in the General browser tab, there was the following error:
Could not verify this certificate for unknown reasons
The information on Could not verify this certificate for unknown reasons on the internet was very mixed and many people online suggested many possible causes of the issue, so I was about to loose myself.
Everything with the certificate seemed to be configured just fine in lighttpd, all the GlobeSSL issued .cer and .key file as well as the ca bundle were configured to be read used in lighttpd in it’s configuration file:
/etc/lighttpd/lighttpd.conf
Here is a section taken from lighttpd.conf file which did the SSL certificate cert and key file configuration:
$SERVER["socket"] == "0.0.0.0:443" {

ssl.engine = "enable"

ssl.pemfile = "/etc/lighttpd/ssl/wildcard.mydomain.bundle"

}
The file /etc/lighttpd/ssl/wildcard.mydomain.bundle was containing the content of both the .key (generated on my server with openssl) and the .cer file (issued by GlobeSSL) as well as the CA bundle (by GlobeSSL).
Even though all seemed to be configured well the SSL error Could not verify this certificate for unknown reasons was still present in the browser.
GlobeSSL tech support suggested that I try their Web key matcher interface – https://confirm.globessl.com/key-matcher.html to verify that everything is fine with my certificate and the cert key. Thanks to this interface I figured out all seemed to be fine with the issued certificate itself and something else should be causing the SSL oddities.
I was further referred by GlobeSSL tech support for another web interface to debug errors with newly installed SSL certificates.
These interface is called Verify and Validate Installed SSL Certificate and is found here
Even though this SSL domain installation error report and debug tool did some helpful suggestions, it wasn’t it that helped me solve the issues.
What helped was First the suggestion made by one of the many tech support guy in GlobeSSL who suggested something is wrong with the CA Bundle and on a first place the documentation on SolusVM’s wiki – http://wiki.solusvm.com/index.php/Installing_an_SSL_Certificate .
Cccording to SolusVM’s documentation lighttpd.conf‘s file had to have one extra line pointing to a seperate file containing the issued CA bundle (which is a combined version of the issued SSL authority company SSL key and certificate).
The line I was missing in lighttpd.conf (described in dox), looked like so:
ssl.ca-file = “/usr/local/solusvm/ssl/gd_bundle.crt”
Thus to include the directive I changed my previous lighttpd.conf to look like so:
$SERVER["socket"] == "0.0.0.0:443" {

ssl.engine = "enable"

ssl.pemfile = "/etc/lighttpd/ssl/wildcard.mydomain.bundle"

ssl.ca-file = "/etc/lighttpd/ssl/server.bundle.crt"

}
Where server.bundle.crt contains an exact paste from the certificate (CA Bundle) mailed by GlobeSSL.
There was a couple of other ports on which an SSL was configured so I had to include these configuration directive everywhere in my conf I had anything related to SSL.
Finally to make the new settings take place I did a lighttpd server restart.
[root@centos ssl]# /etc/init.d/lighttpd restart

Stopping lighttpd: [ OK ]

Starting lighttpd: [ OK ]
After lighttpd reinitiated the error was gone! Cheers ! 😉
Tags: anti spam filter, bundle, CentOS, cert, certficate, certificate, certificate error, Certificates, completethe, confirmation, confirmation emails, directive, encryption, Engine, error message, error messages, everything, exact cause, failure, file, Firefox, generation, godaddy, hassle, key file, menus, mid level, necessery, pemfile, place, private manager, Socket, something, spam filters, ssl certificate, support, tech support, time, Virtual
Posted in System Administration, Web and CMS | No Comments »
Friday, May 20th, 2011 After a failed attempt to enable some wrapper scripts to enable domain keys support in a qmail powered mail server my qmail server suddenly stopped being able to normally send mail.
The exact error message which was logged in /var/log/qmail/current was:
@400000004dd66fcc16a088ac delivery 1: deferral: Sorry,_message_has_wrong_owner._(#4.3.5)/
This qmail messed happened after I substituted /var/qmail/bin/qmail-queue and /var/qmail/bin/qmail-remote with two respective wrapper shell scripts which were calling for the original qmail-queue and qmail-remote binaries under the names qmail-queue.orig and qmail-queue.orig
Restoring back qmail-queue.orig to /var/qmail/bin/qmail-queue and qmail-remote.orig to /var/qmain/bin/qmail-remote and restarting the mail server broke my qmail install.
After a bunch of nerves trying to isolate what is causing the error I found out that by mistake I forgot to copy the qmail-queue and qmail-remote permissions and ownership.
Thus I had to check another qmail working installation’s permissions for both binaries and fix the permissions to be equivalent to the permissions:
debian:~# ls -al /var/qmail/bin/qmail-remote
-rwx–x–x 1 root qmail 50464 2011-05-20 12:56 /var/qmail/bin/qmail-remote*
debian:~# ls -al /var/qmail/bin/qmail-queue
-rws–x–x 1 qmailq qmail 20392 2011-05-20 12:56 /var/qmail/bin/qmail-queue*
The exact chmod and chmod commands I issued to solve the shitty issues were as follows:
First I fixed the qmail-queue and qmail-remote ownership:
debian:~# chown qmailq:qmail /var/qmail/bin/qmail-queue

debian:~# chown root:qmail /var/qmail/bin/qmail-remote
Second I set the proper file permissions:
# make the qmail-queue binary suid

debian:~# chmod u+s /var/qmail/bin/qmail-queue

debian:~# chmod 611 /var/qmail/bin/qmail-queue

debian:~# chmod 611 /var/qmail/bin/qmail-remote
Third and last I did a restart of the qmail server and tested it sends properly
debian:~# /usr/bin/qmailctl stop

Stopping qmail...

qmail-send

qmail-smtpd

debian:~# /usr/bin/qmailctl start

Starting qmail
Finally to test that the qmail server qmail-queue was queing and sending with qmail-remote I used the system mail command like so:
debian:~# mail -s "test email" testuser@www.pc-freak.net

asdfafdsdf

.

Cc:
Afterwards the mail was properly received on my mail account testuser@www.pc-freak.net immediately.
In my /var/log/qmail/current log file all seemed fine:
@400000004dd6702a2eb2b064 starting delivery 1: msg 85281596 to remote testuser@www.pc-freak.net

@400000004dd6702a2eb2b834 status: local 0/20 remote 1/20

@400000004dd6702b34cc809c delivery 1: success: 83.228.93.76_accepted_message./Remote_host_said:_250_ok_

1305899099_qp_65293/

@400000004dd6702b34cc886c status: local 0/20 remote 0/20

@400000004dd6702b34cc8c54 end msg 85281596
The test mail was properly received on my mail account testuser@www.pc-freak.net immediately.
It took me like half an hour to figure out what exactly is wrong with the permissions in situations like this I really wanted to change all my qmail installs with postfix and forget forever I ever used qmail …
Tags: binaries, chmod commands, chown root, email, exact error message, failure, failure message, file, host, installation, log, mail delivery failure, mail server, mistake, msg, nerves, orig, ownership, properlydebian, qmailctl, queue, Remote, root, rws, rwx, Shell, shell scripts, sorry message, status, system, test, testuser, Third, wrapper, wrapper scripts
Posted in Linux, System Administration | No Comments »


