Posts Tagged ‘working’

Fix qmail-scanner-queue.pl: X-Qmail-Scanner-2.08st:[] cannot create /var/spool/qscan/tmp – Permission denied – Finally a working solution and what causes the error

Wednesday, July 22nd, 2015


qmail-fixing-clamdscan-errors-and-qq-errors-qmail-binary-migration-few-things-to-check-out
I've lost a whole day and was angry and irritated after moving (migrating) a Working Qmail installation in a binary form from a Debian Lenny 5.0 to a Debian 7.0 Wheezy Linux. The whole migration exercise was quite of a crazy move and I can tell you it didn't worth the effort as I lost much more time than even if I went on installing the server following Thibs Great Qmail Tutorial.

Yes I know many would say why do you still bother with an old and unsupported Qmail Mail server and not go with Postfix, the logic is correct however the whole issue is the previous installation has a number of domains already running VirtualMail hosting using VPopMail, so migrating all the old mailboxes from Qmail to Postfix are not worthy IMHO. Plus I honestly love qmail for being so stable even today (even without support). After all most of Qmail is secure enough already 🙂
And to be honest I don't so much care about security as in the old days as I know NSA, does already have access to any server on planet 🙂

Almost always when a Qmail migration happens I end up swearing and sweating and generally getting crazy, but anyways …

The overall migration of binaries went quite OK I just copied every binary and all the related libraries from the old Debian 5.0 to Debian 7.0 and installed the following long list of perl deb binaries using apt-get:
 

dh-make-perl
libalgorithm-c3-perl
libalgorithm-diff-perl
libalgorithm-diff-xs-perl
libalgorithm-merge-perl
libapparmor-perl
libapt-pkg-perl
libarray-unique-perl
libclass-accessor-chained-perl
libclass-accessor-perl
libclass-c3-perl
libclass-c3-xs-perl
libclass-factory-util-perl
libclass-inspector-perl
libclass-isa-perl
libclass-load-perl
libclass-singleton-perl
libconfig-file-perl
libconvert-binhex-perl
libcrypt-openssl-bignum-perl
libcrypt-openssl-random-perl
libcrypt-openssl-rsa-perl
libcrypt-passwdmd5-perl
libcrypt-ssleay-perl
libdata-optlist-perl
libdata-section-perl
libdate-manip-perl
libdatetime-format-builder-perl
libdatetime-format-iso8601-perl
libdatetime-format-strptime-perl
libdatetime-locale-perl
libdatetime-perl
libdatetime-timezone-perl
libdbd-mysql-perl
libdbi-perl
libdevel-symdump-perl
libdigest-hmac-perl
libdigest-sha-perl
libdpkg-perl
libemail-address-perl
libemail-date-format-perl
libencode-detect-perl
libencode-locale-perl
libenv-sanctify-perl
liberror-perl
libexporter-lite-perl
libfcgi-perl
libfile-chdir-perl
libfile-fcntllock-perl
libfile-find-rule-perl
libfile-listing-perl
libfile-which-perl
libfont-afm-perl
libhtml-form-perl
libhtml-format-perl
libhtml-parser-perl
libhtml-tagset-perl
libhtml-template-perl
libhtml-tree-perl
libhttp-cookies-perl
libhttp-daemon-perl
libhttp-date-perl
libhttp-message-perl
libhttp-negotiate-perl
libhttp-server-simple-perl
libio-multiplex-perl
libio-socket-inet6-perl
libio-socket-ip-perl
libio-socket-ssl-perl
libio-string-perl
libio-stringy-perl
libip-country-perl
liblist-moreutils-perl
liblocale-gettext-perl
liblwp-mediatypes-perl
liblwp-protocol-https-perl
libmail-dkim-perl
libmail-sendmail-perl
libmail-spf-perl
libmailtools-perl
libmath-round-perl
libmime-tools-perl
libmodule-depends-perl
libmodule-implementation-perl
libmodule-runtime-perl
libmro-compat-perl
libnet-cidr-lite-perl
libnet-cidr-perl
libnet-daemon-perl
libnet-dns-perl
libnet-http-perl
libnet-ident-perl
libnet-ip-perl
libnet-server-perl
libnet-snmp-perl
libnet-ssleay-perl
libnetaddr-ip-perl
libnumber-compare-perl
libossp-uuid-perl
libpackage-deprecationmanager-perl
libpackage-stash-perl
libpackage-stash-xs-perl
libparams-classify-perl
libparams-util-perl
libparams-validate-perl
libparse-debcontrol-perl
libparse-debianchangelog-perl
libparse-syslog-perl
libpcre-ocaml-dev
libpcre3:amd64
libpcre3-dev
libpcrecpp0:amd64
libperl-dev
libperl5.14
libpod-coverage-perl
libregexp-assemble-perl
librpc-xml-perl
librrds-perl
libsoap-lite-perl
libsocket-perl
libsocket6-perl
libsoftware-license-perl
libsub-exporter-perl
libsub-install-perl
libsub-name-perl
libswitch-perl
libsys-hostname-long-perl
libsys-syslog-perl
libtask-weaken-perl
libterm-readkey-perl
libtest-distribution-perl
libtest-pod-coverage-perl
libtest-pod-perl
libtext-charwidth-perl
libtext-glob-perl
libtext-iconv-perl
libtext-template-perl
libtext-wrapi18n-perl
libtie-ixhash-perl
libtimedate-perl
libtry-tiny-perl
liburi-perl
libwww-mechanize-perl
libwww-perl
libwww-robotrules-perl
libxml-namespacesupport-perl
libxml-parser-perl
libxml-sax-base-perl
libxml-sax-expat-perl
libxml-sax-perl
libxml-simple-perl
libyaml-perl
libyaml-syck-perl
perl
perl-base
perl-doc
perl-modules
spamassassin
spf-tools-perl


I've also installed with apt-get daemontools and daemontools-run ucspi and some others to get all the necessery binaries qmail needs the whole list of apt installed packages is here

I've also copied all the old binaries from /usr/local/lib from server1 to server2, some others from /usr/local/share and /usr/share as well as /usr/lib/courier /usr/lib/courier-authlib /usr/local/libexec /usr/local/sbin also had to link a couple of libraries such as /usr/lib/libcrypto* , link  /usr/lib/libperl.so.5.10 to /usr/lib/libperl.so.5.14 and copy /usr/lib/libltdl.so.3 and few others which i don't exactly remember.

Well anyways once I've copied everything Qmail looked fined except I had a couple of permission issues and had to clean up and fix the queue with qfixq, I've also used qmail-scanner*/contrib/test_installation.sh script to test whether qmail-scanner was running fine, e.g.:
 

./test_installation.sh -doit


As well as


qmr_inst_check


script, thanks to which I've captured and resolved few of permission problems 

Finally I've stuck upon this shitty errors (appearing) in /var/log/syslog and /var/log/messages


Jul 21 22:04:19 vps186637 qmail-scanner-queue.pl: X-Qmail-Scanner-2.08st:[] cannot create /var/spool/qscan/tmp – Permission denied
Jul 21 22:08:27 vps186637 qmail-scanner-queue.pl: X-Qmail-Scanner-2.08st:[] cannot create /var/spool/qscan/tmp – Permission denied
Jul 21 22:08:38 vps186637 qmail-scanner-queue.pl: X-Qmail-Scanner-2.08st:[] cannot create /var/spool/qscan/tmp – Permission denied
Jul 21 22:11:17 vps186637 qmail-scanner-queue.pl: X-Qmail-Scanner-2.08st:[] cannot create /var/spool/qscan/tmp – Permission denied
Jul 21 22:16:09 vps186637 qmail-scanner-queue.pl: X-Qmail-Scanner-2.08st:[] cannot create /var/spool/qscan/tmp – Permission denied
Jul 21 22:19:15 vps186637 qmail-scanner-queue.pl: X-Qmail-Scanner-2.08st:[] cannot create /var/spool/qscan/tmp – Permission denied
Jul 21 22:38:59 ns2 qmail-scanner-queue.pl: X-Qmail-Scanner-2.08st:[] cannot create /var/spool/qscan/tmp – Permission denied
Jul 21 22:42:33 ns2 qmail-scanner-queue.pl: X-Qmail-Scanner-2.08st:[] cannot create /var/spool/qscan/tmp – Permission denied
Jul 21 22:43:49 ns2 qmail-scanner-queue.pl: X-Qmail-Scanner-2.08st:[] cannot create /var/spool/qscan/tmp – Permission denied
Jul 21 22:46:05 ns2 qmail-scanner-queue.pl: X-Qmail-Scanner-2.08st:[] cannot create /var/spool/qscan/tmp – Permission denied
Jul 21 22:50:40 ns2 qmail-scanner-queue.pl: X-Qmail-Scanner-2.08st:[] cannot create /var/spool/qscan/tmp – Permission denied
Jul 21 22:53:08 ns2 qmail-scanner-queue.pl: X-Qmail-Scanner-2.08st:[] cannot create /var/spool/qscan/tmp – Permission denied


There is plenty of things written about this:
 

qmail-scanner-queue.pl: X-Qmail-Scanner-2.08st:[] cannot create /var/spool/qscan/tmp – Permission denied


But all written is too obscure and too old already somewhere between 2004 and 2010, I've been digging through Gentoo Forums, Fedora Debian and other Linux installs and everyone used to be pointing a permission issue with /var/spool/qscan/ said theoretically to be causing the error, however all looked perfectly fine with my /var/spool/qscan , e.g.:


roo@ns2:/usr/local/src# ls -ld /var/spool/qscan/
drwxr-s— 6 qscand qscand 4096 Jul 21 23:07 /var/spool/qscan/


ls -al /var/spool/qscan/
total 244904
drwxr-s— 6 qscand qscand      4096 Jul 21 23:07 .
drwxr-xr-x 4 root   root        4096 Jul 20 21:17 ..
drwxrwx— 5 qscand qscand      4096 Oct 12  2011 archives
-rwxr-x— 1 qscand qscand      1434 Oct 12  2011 log-report.sh
-rw——- 1 qscand qscand 249731919 Jul 21 23:11 qmail-queue.log
-rw——- 1 qscand qscand    398225 Oct 28  2011 qmail-queue.log.1
-rw-rw—- 1 root   qscand        74 Jul 21 23:07 qmail-scanner-queue-version.txt
lrwxrwxrwx 1 root   qscand        16 Jul 21 23:07 qscan -> /var/spool/qscan
drwxrwx— 5 qscand qscand      4096 Oct 12  2011 quarantine
-rw-r—– 1 root   qscand     12288 Jul 21 23:07 quarantine-events.db
-rw-r—– 1 qscand qscand     10443 Oct 12  2011 quarantine-events.txt
-rw-rw—- 1 qscand qscand    580033 Jul 21 23:07 quarantine.log
-rw-r—– 1 qscand qscand      2739 Oct 12  2011 settings_per_domain.txt
drwxr-x— 3 qscand qscand      4096 Jul 21 23:11 tmp
drwxrwx— 5 qscand qscand      4096 Oct 12  2011 working


Some suggested that /var/spool/qscan should be owned by qscand:clamav instead so I tried this but it didn't help,
others recommended adding clamav groupid into qscand's but this didn't help either:
 

root@ns2:/usr/local/src# grep -i clamav /etc/group
qscand:x:163:clamav,vpopmail
clamav:x:105:


Besides that I was getting also this shitty error:


Jul 21 20:05:42 vps186637 qmail-scanner-queue.pl: X-Qmail-Scanner-2.08st:[ns2143750194279012466] clamdscan: corrupt or unknown clamd scanner error or memory/resource/perms problem – exit status -1/72057594037927935
Jul 21 20:06:51 vps186637 qmail-scanner-queue.pl: X-Qmail-Scanner-2.08st:[ns2143750201179013125] clamdscan: corrupt or unknown clamd scanner error or memory/resource/perms problem – exit status -1/72057594037927935
Jul 21 20:15:42 vps186637 qmail-scanner-queue.pl: X-Qmail-Scanner-2.08st:[ns214375025407906015] clamdscan: corrupt or unknown clamd scanner error or memory/resource/perms problem – exit status -1/72057594037927935
Jul 21 20:16:06 vps186637 qmail-scanner-queue.pl: X-Qmail-Scanner-2.08st:[ns2143750256579011980] clamdscan: corrupt or unknown clamd scanner error or memory/resource/perms problem – exit status -1/72057594037927935
Jul 21 20:18:54 vps186637 qmail-scanner-queue.pl: X-Qmail-Scanner-2.08st:[ns2143750273479014847] clamdscan: corrupt or unknown clamd scanner error or memory/resource/perms problem – exit status -1/72057594037927935
Jul 21 20:21:03 vps186637 qmail-scanner-queue.pl: X-Qmail-Scanner-2.08st:[ns2143750286379028491] clamdscan: corrupt or unknown clamd scanner error or memory/resource/perms problem – exit status -1/72057594037927935
Jul 21 22:07:47 vps186637 qmail-scanner-queue.pl: X-Qmail-Scanner-2.08st:[ns2143750926779010097] clamdscan: corrupt or unknown clamd scanner error or memory/resource/perms problem – exit status 512/2


All the time in logs, so I thought something might be wrong with clamdscan and followed and tried some suggestions from qms1.net as described here, however none of the fixes described there worked for me …

I also tried to reinstall clamav from source using a bit of modified version of this tutorial

This didn't help either … I saw some suggestions online that the permission issues are caused by some wrong clamd.conf and freshclamd.conf configuration options – failing clamdscan, but this didn't work either. I also tried to remove clamdscan and substitute it with clamscan  as a suggested workaround but this didn't work either …

I spend about 6 hours trying to catch what is causing this issues so finally I went on and re-installed bigger part of Qmail using Thibs tutorial over the old installation.

I've also tried in mean time multiple time to rebuild qmail scanner database with:
 

setuidgid qscand /var/qmail/bin/qmail-scanner-queue.pl -g


Played around with permissions in /etc/clamav e.g.


chown -R qscand:clamav /var/log/clamav /var/lib/clamav /var/run/clamav
chown qscand:qscand /etc/clamav/freshclam.conf


Created:

/etc/cron.daily/qmail-scanner with following content


cat /etc/cron.daily/qmail-scanner
setuidgid qscand /var/qmail/bin/qmail-scanner-queue.pl -z


However in /var/log/qmail/qmail-smtpd/current and /var/log/qmail-send/current I continously got:

Qmail 451 qq temporary problem (#4.3.0) error

Interestingly during looking for a solution to the 451 qq temporary problem and:

status: qmail-todo stop processing asap / status: exiting – I've stumbled to my own blog post here 🙂


Finally, I tried to reinstall qmail-scanner and in mean time update it to  Version: 2.11 – st – patch – 20130319
Just to realized something was wrong with suidperl, e.g. in Debian 7.0.* Wheezy perl-suid binary is no longer in repositories so only way to have suidperl there is either to re-compile perl from source manually which is too much work and I think in most cases not worthy the effort or to use a small suid-wrapper:
 

#include <unistd.h>
#include <errno.h>
 

main( int argc, char ** argv, char ** envp )
{
              if( setgid(getegid()) ) perror( "setgid" );
              if( setuid(geteuid()) ) perror( "setuid" );
              envp = 0; /* blocks IFS attack on non-bash shells */
              system( "/usr/bin/perl", argv, envp );
              perror( argv[0] );
              return errno;
}


Create it into a file lets say suid-wrapperc and compile the file with GNU C Compiler:
 

$ gcc -o suid-wrapper suid-wrapper.c


Then move the suid-wrapper produced binary into /usr/bin/suidperl e.g.


$ mv suid-wrapper /usr/bin/suidperl


Last you will need to edit /var/qmail/bin/qmail-scanner-queue.pl


# vim /var/qmail/bin/qmail-scaner-queue.pl


And substitute


#!/usr/bin/perl -T


with:


#!/usr/bin/suidperl


Note!!! that qmail-scanner-queue.pl permissions should be suid and owned by qscand:qscand as follows:


ls -al /var/qmail/bin/qmail-scanner-queue.pl
-rwsr-sr-x 1 qscand qscand 159727 Jul 21 23:11 /var/qmail/bin/qmail-scanner-queue.pl


Finally to resolve the error I had to restart qmail via qmailctl start / stop script:


root@ns2:/var/qmail/bin# qmailctl restart
Restarting qmail:
* Stopping qmail-smtpdssl.
* Stopping qmail-smtpd.
* Sending qmail-send SIGTERM and restarting.
* Restarting qmail-smtpd.
* Restarting qmail-smtpdssl.


Finally to test emails are sent and receiver properly I used good old mail command part of bsd-mailx deb package


# mail -s "testing 12345678" testemail1234@gmail.com
asdfadf
.
Cc:


I've also tested with plain telnet to verify no errors because often the mail command doesn't return (show) errors on email sent and errors are written only in /var/log/mail.log or /var/log/qmail/* logs


# telnet localhost 25
Trying 127.0.0.1…
Connected to localhost.
Escape character is '^]'.
220 servername.localdomain.tld ESMTP
mail from: <testmail@test.com>
250 ok
rcpt to: <nospam@test.com>
250 ok
data
354 go ahead
From: Test_sender <testmail@test.com>
To: Test_receiver <nospam@test.com>
Subject: Just a stupid SMTP test


Just a test !
.
250 ok 1279384489 qp 3711
quit
221 servername.localdomain.tld
Connection closed by foreign host.

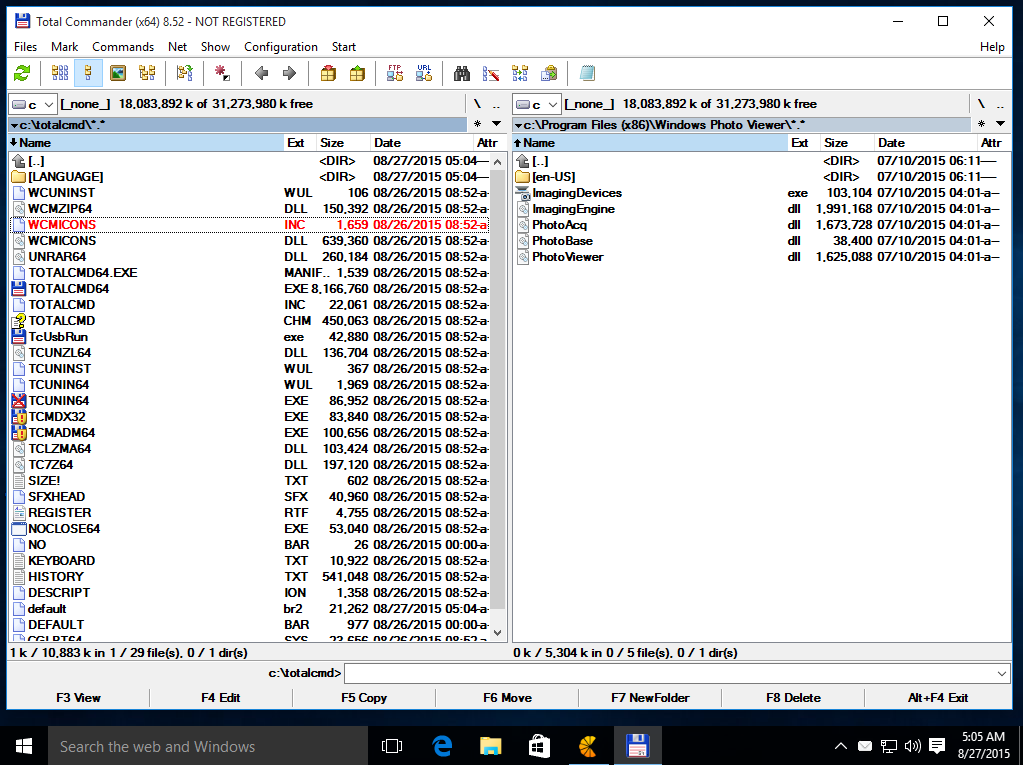
One other thing which probably helped I did was:

# qmailctl doqueue


Thanks God this time, it worked out without any QQ errors 🙂 !


Fixing Disappeared intel net link 5100 wifi on Toshiba Satellite L300 1YA

Friday, October 29th, 2010

I've recently had to fix a Toshiba Satellite L300 1YA notebook , running the shitty Windows Vista operating system.
For some reason suddenly the Net Link 5100 Wi-FI Network Adapter of the laptop mysteriously disappeared.
The led indicating the device is enabled was blinking the driver showed properly installed in Windows -> System and everything.
Even though that the wireless network scanning in the notebook was not working.

In networking in System there were two lines showing up with excalammation mark "!".

To fix the mess it took me 3.5 hours. I tried many things first logical thing I tried was reinstalling the driver with the latest available from Intel's website. Anyways this doesn't helped so I was about to think about other solutions.
What made thinks even worse was that the Vista installed was in Chineese!, yes you red this correctly chineese. You cannot imagine what a hell it is to deal with Windows whose language pack was Chineese …

The Vista had installed also the Chineese antivirus program Rising which also provided the system with some weird firewall and this made the dealing with the problem even more complicated.

After many tries I finally completely removed the wireless driver on the system and reinstalled it with the latest version from Intel's website.
Thanksfully after a couple of reboots and going into save mode the Intel Net Link 5100 started working again by itself?!

Well you know how things goes with Windows, you never know what will happen next.

Maybe a lot of notebooks suffer the same weird issue with Wireless Wi-Fi adapter suddenly stopping to work.

So now you know the solution, remove the driver install it again, restart and it should be working again.
Hope this quick and dirty article will save somebody an hours of time to figure it out …

Ubuntu 9.04 Jaunty on Toshiba L300 PLSBGE Laptop

Sunday, September 20th, 2009

toshiba-l300-plsbge-laptop-ubuntu-9.04-install

Today I had the task to Install Ubuntu GNU / Linux on Toshiba L300 PLSBGE Laptop.

I had already installed Windows Vista Enterprise on the notebook. Thus I used Acronis Disk Directory Suite to partition the harddrive for Ubuntu even though I could have used the gparted included on Ubuntu’s installation CD. I’ve asked specificly if
I could use the Ubuntu CD to repartition my hard drive in #ubuntu in irc.freenode.net.
The answer was positive it’s absolutely safe to resize an NTFS partition using Ubuntu’s installation LiveCD and gparted.That seems like a good news for all of us the free software users / enthusiasts / hobbyists etc.
I hated the default Ubuntu behaviour it automatically decided to install itself on a automatically created 2.5 GB partition.
I thought it won’t be so dumb to install itself on such a tiny partition. Well guess what I was wrong IT WAS SO DUMB!
Even though I had already 80 GB ext3 partition. Ubuntu’s default behaviour was to install on an automatically created 2.5GB partition.
Right after the installation I was stunned just to realize there was no free space on the drive where the dumbass installed itself.
After that I had some issues deleting the already cretead partitions, which for some reason messed up. Luckily the good old fdisk fixed the situation so I could easily delete all the partitions except the vista and recreate them again using gparted with Ubuntu’s install LiveCD. The install was completely flawless. Everything worked out of the box, no external efforts to fix broken stuff like usually happens in Linux fantastic! The only broken thing was that switching to plain console with ctrl+alt+f1 would visualize a non working display output and I couldn’t see the ttys at all. That wasn’t such a hassle since the system is planned to work only in GUI mode. I guess Ubuntu is going through a real development with a positive end results. Even external USB printer Canon PIXMA IP3300 worked by simply plugging it in. For some weird reason to make the printer work correctly I had to use driver for Canon PIXMA IP3000. Anyways it worked with it and the printer started printing correctly even though officially on some of the linux printers databases it’s reported the printer won’t work correctly never ever.END—–

Fix dosbox – setting: cycles=auto. If the game runs too fast try a fixed cycles amount in DOSBox’s options. Exit to error: DRC64:Unhandled memory reference

Thursday, October 12th, 2017

fix-dosbox-error-setting-cycles-auto-game-runs-too-fast-exit-err-drc64-unhandled-memory-reference

I've recently installed Debian GNU / Linux 9.1 Stretch and on Ubuntu 16.10 Yakkety Yak and as an old school true gamer addict decided to play some games to recall the good old memories from the past of the glorious DOS games times, when all was simple people was real and there was no terrible people dividers such as Facebook  / GooglePlus, no skype fuzzy craziness and no people watching all time at their mobile smart phones like zoombies .

Well anyways, so I wanted to play my favourite DOS games Terminal Velocity, StarGunner, Raptor, Heroes of Might and Magic 2, Doom II, Duke 3d etc. etc. the list goes on and on – BTW What's your favourite old school DOS Game??

So I issues in Terminal:

$ dosbox TV.EXE

DOSBox version 0.74
Copyright 2002-2010 DOSBox Team, published under GNU GPL.

CONFIG:Loading primary settings from config file /home/zetathon/.dosbox/dosbox-0.74.conf
MIXER:Got different values from SDL: freq 44100, blocksize 512
ALSA:Can't subscribe to MIDI port (65:0) nor (17:0)
MIDI:Opened device:none
DOSBox switched to max cycles, because of the setting: cycles=auto. If    the game runs too fast try a fixed cycles amount in DOSBox's options.
Exit to error: DRC64:Unhandled memory reference


So what is the solution to  Exit to error: DRC64:Unhandled memory reference
error and why it happens?

Well, as the error clearly states the whole problem
comes from a default dosbox dos emulator configuration, that's the
setting:
 

cycles=auto


Perhaps the CPU beat of a Core I7 CPUs is too strong for some of the old games which are expecting a slower PC with less memory that's why the exception

Exit to Error: DRC64:Unhandled memory reference
is spit out by Dosemu.

So how to solve DRC64:Unhandled memory reference dosemu error?

By default DOSBOX places its configuration at  Linux / BSD / *nix-es at home folder /dosbox – e.g. ~/.dosbox/ the naming of dosbox.conf might differ according to dosbox version and the respective Linux / BSD distro, on Debian and Ubuntu Linux usually the naming includes a version number.

On Debian 9 Strecth Linux dosbox config is at ~/.dosbox/dosbox-0.74.conf

Edit the file
 

$ vim ~/.dosbox/dosbox-0.74.conf


and change inside the value for:


core=auto

to

core=normal

Then give dosbox with the erroring game another try, it worked for me
for me and everything seemed to run fine.

I've only run a handful of games but so far it seems to be working well.

If it does work but performance is degraded and tooks a huch hit on Gameplay you better try to substitute
 

core=normal

to
 

core=simple


AND HOORAY IT WORKS AGAIN! THE GAME RUN SUCCESSFULLY JOY TO THE WORLD! 🙂

How to enable Control Alt Backspace to Kill X server on Debian / Ubuntu Linux

Thursday, September 28th, 2017

kill-X-server-switch-revert-back-to-ctrl-alt-backspace-howto
Being a long time GNU / Linux user, I've been quite dissatisfied for the fact that in latest Debian and Ubuntu Linux, the default Key combination to Kill X (CTRL + ALT + BACKSPACE) is no longer working.

Though nowdays Xorg (XServer) is pretty stable it still happens from time to time for some application to overload the PC badly and make Gnome or KDE environment little or no responsive at all and here comes the goody CTRL + ALT + BACKSPACE it is pretty much  like  (CTRL + ALT + DEL) did restarted the computer in DOS and earlier Windows OS-es once the environment became unusable with the only difference that just Xorg server is restarted and the other using programs that are in background work just like they used to. 

CTRL + ALT + Backspace is a great thing to use especially if you're running some homebrew server and you use it both as a Server with some few little websites and as a Desktop environment to browse the net and do basic stuff.

So here comes the question how to make the CTRL + ALT + BACKSPACE keyboard combination be killing Xserver like in the good old days?

The easiest way to do it interactively in ncurses interface is by  running:


root@noah:~# dpkg-reconfigure keyboard-configuration


If somehow on the machine you don't have dpkg-reconfigure or you prefer to do set CTRL + ALT + BACKSPACE Kill Switch manually edit /etc/default/keyboard 

inside change value of


XKBOPTIONS="terminate:ctrl_alt_bksp" 


like shown below file:

root@noah:/home/hipo# cat  /etc/default/keyboard

# KEYBOARD CONFIGURATION FILE

# Consult the keyboard(5) manual page.

XKBMODEL="pc105"
XKBLAYOUT="us"
XKBVARIANT=""
XKBOPTIONS="terminate:ctrl_alt_bksp"

BACKSPACE="guess"

The configuration should be working across Debian 7, 8, 9 as well as Ubuntu 12 ..14 .. 16 and hopefully in future releases too, just as many other Linux distributions like Mint etc. the Xserver Kill Switch setting should be located in same file.

Finally if even after that change the Control Alt BackSpace Kill Switch sequence refuses to work in GNOME Desktop environment, it might be due to a local setting typical for GNOME and this should be fixed via the good known gnome-tweak-tool

So GNOME users should run it from command line and check the setting there, e.g.:


$ gnome-tweak-tool


You should check:


Typing -> Kill Sequence to Kill the X Server


it should look like shown in below screenshot:

how-to-set-X-server-kill-switch-in-GNOME-gnak-tool-screenshot-debian-stretch


Block Web server over loading Bad Crawler Bots and Search Engine Spiders with .htaccess rules

Monday, September 18th, 2017

howto-block-webserver-overloading-bad-crawler-bots-spiders-with-htaccess-modrewrite-rules-file

In last post, I've talked about the problem of Search Index Crawler Robots aggressively crawling websites and how to stop them (the article is here) explaning how to raise delays between Bot URL requests to website and how to completely probhit some bots from crawling with robots.txt.

As explained in article the consequence of too many badly written or agressive behaviour Spider is the "server stoning" and therefore degraded Web Server performance as a cause or even a short time Denial of Service Attack, depending on how well was the initial Server Scaling done.

The bots we want to filter are not to be confused with the legitimate bots, that drives real traffic to your website, just for information

 The 10 Most Popular WebCrawlers Bots as of time of writting are:
 

1. GoogleBot (The Google Crawler bots, funnily bots become less active on Saturday and Sundays :))

2. BingBot (Bing.com Crawler bots)

3. SlurpBot (also famous as Yahoo! Slurp)

4. DuckDuckBot (The dutch search engine duckduckgo.com crawler bots)

5. Baiduspider (The Chineese most famous search engine used as a substitute of Google in China)

6. YandexBot (Russian Yandex Search engine crawler bots used in Russia as a substitute for Google )

7. Sogou Spider (leading Chineese Search Engine launched in 2004)

8. Exabot (A French Search Engine, launched in 2000, crawler for ExaLead Search Engine)

9. FaceBot (Facebook External hit, this crawler is crawling a certain webpage only once the user shares or paste link with video, music, blog whatever  in chat to another user)

10. Alexa Crawler (la_archiver is a web crawler for Amazon's Alexa Internet Rankings, Alexa is a great site to evaluate the approximate page popularity on the internet, Alexa SiteInfo page has historically been the Swift Army knife for anyone wanting to quickly evaluate a webpage approx. ranking while compared to other pages)

Above legitimate bots are known to follow most if not all of W3C – World Wide Web Consorium (W3.Org) standards and therefore, they respect the content commands for allowance or restrictions on a single site as given from robots.txt but unfortunately many of the so called Bad-Bots or Mirroring scripts that are burning your Web Server CPU and Memory mentioned in previous article are either not following /robots.txt prescriptions completely or partially.

Hence with the robots.txt unrespective bots, the case the only way to get rid of most of the webspiders that are just loading your bandwidth and server hardware is to filter / block them is by using Apache's mod_rewrite through


.htaccess


file

Create if not existing in the DocumentRoot of your website .htaccess file with whatever text editor, or create it your windows / mac os desktop and transfer via FTP / SecureFTP to server.

I prefer to do it directly on server with vim (text editor)


vim /var/www/sites/your-domain.com/.htaccess


RewriteEngine On

IndexIgnore .htaccess */.??* *~ *# */HEADER* */README* */_vti*

SetEnvIfNoCase User-Agent "^Black Hole” bad_bot
SetEnvIfNoCase User-Agent "^Titan bad_bot
SetEnvIfNoCase User-Agent "^WebStripper" bad_bot
SetEnvIfNoCase User-Agent "^NetMechanic" bad_bot
SetEnvIfNoCase User-Agent "^CherryPicker" bad_bot
SetEnvIfNoCase User-Agent "^EmailCollector" bad_bot
SetEnvIfNoCase User-Agent "^EmailSiphon" bad_bot
SetEnvIfNoCase User-Agent "^WebBandit" bad_bot
SetEnvIfNoCase User-Agent "^EmailWolf" bad_bot
SetEnvIfNoCase User-Agent "^ExtractorPro" bad_bot
SetEnvIfNoCase User-Agent "^CopyRightCheck" bad_bot
SetEnvIfNoCase User-Agent "^Crescent" bad_bot
SetEnvIfNoCase User-Agent "^Wget" bad_bot
SetEnvIfNoCase User-Agent "^SiteSnagger" bad_bot
SetEnvIfNoCase User-Agent "^ProWebWalker" bad_bot
SetEnvIfNoCase User-Agent "^CheeseBot" bad_bot
SetEnvIfNoCase User-Agent "^Teleport" bad_bot
SetEnvIfNoCase User-Agent "^TeleportPro" bad_bot
SetEnvIfNoCase User-Agent "^MIIxpc" bad_bot
SetEnvIfNoCase User-Agent "^Telesoft" bad_bot
SetEnvIfNoCase User-Agent "^Website Quester" bad_bot
SetEnvIfNoCase User-Agent "^WebZip" bad_bot
SetEnvIfNoCase User-Agent "^moget/2.1" bad_bot
SetEnvIfNoCase User-Agent "^WebZip/4.0" bad_bot
SetEnvIfNoCase User-Agent "^WebSauger" bad_bot
SetEnvIfNoCase User-Agent "^WebCopier" bad_bot
SetEnvIfNoCase User-Agent "^NetAnts" bad_bot
SetEnvIfNoCase User-Agent "^Mister PiX" bad_bot
SetEnvIfNoCase User-Agent "^WebAuto" bad_bot
SetEnvIfNoCase User-Agent "^TheNomad" bad_bot
SetEnvIfNoCase User-Agent "^WWW-Collector-E" bad_bot
SetEnvIfNoCase User-Agent "^RMA" bad_bot
SetEnvIfNoCase User-Agent "^libWeb/clsHTTP" bad_bot
SetEnvIfNoCase User-Agent "^asterias" bad_bot
SetEnvIfNoCase User-Agent "^httplib" bad_bot
SetEnvIfNoCase User-Agent "^turingos" bad_bot
SetEnvIfNoCase User-Agent "^spanner" bad_bot
SetEnvIfNoCase User-Agent "^InfoNaviRobot" bad_bot
SetEnvIfNoCase User-Agent "^Harvest/1.5" bad_bot
SetEnvIfNoCase User-Agent "Bullseye/1.0" bad_bot
SetEnvIfNoCase User-Agent "^Mozilla/4.0 (compatible; BullsEye; Windows 95)" bad_bot
SetEnvIfNoCase User-Agent "^Crescent Internet ToolPak HTTP OLE Control v.1.0" bad_bot
SetEnvIfNoCase User-Agent "^CherryPickerSE/1.0" bad_bot
SetEnvIfNoCase User-Agent "^CherryPicker /1.0" bad_bot
SetEnvIfNoCase User-Agent "^WebBandit/3.50" bad_bot
SetEnvIfNoCase User-Agent "^NICErsPRO" bad_bot
SetEnvIfNoCase User-Agent "^Microsoft URL Control – 5.01.4511" bad_bot
SetEnvIfNoCase User-Agent "^DittoSpyder" bad_bot
SetEnvIfNoCase User-Agent "^Foobot" bad_bot
SetEnvIfNoCase User-Agent "^WebmasterWorldForumBot" bad_bot
SetEnvIfNoCase User-Agent "^SpankBot" bad_bot
SetEnvIfNoCase User-Agent "^BotALot" bad_bot
SetEnvIfNoCase User-Agent "^lwp-trivial/1.34" bad_bot
SetEnvIfNoCase User-Agent "^lwp-trivial" bad_bot
SetEnvIfNoCase User-Agent "^Wget/1.6" bad_bot
SetEnvIfNoCase User-Agent "^BunnySlippers" bad_bot
SetEnvIfNoCase User-Agent "^Microsoft URL Control – 6.00.8169" bad_bot
SetEnvIfNoCase User-Agent "^URLy Warning" bad_bot
SetEnvIfNoCase User-Agent "^Wget/1.5.3" bad_bot
SetEnvIfNoCase User-Agent "^LinkWalker" bad_bot
SetEnvIfNoCase User-Agent "^cosmos" bad_bot
SetEnvIfNoCase User-Agent "^moget" bad_bot
SetEnvIfNoCase User-Agent "^hloader" bad_bot
SetEnvIfNoCase User-Agent "^humanlinks" bad_bot
SetEnvIfNoCase User-Agent "^LinkextractorPro" bad_bot
SetEnvIfNoCase User-Agent "^Offline Explorer" bad_bot
SetEnvIfNoCase User-Agent "^Mata Hari" bad_bot
SetEnvIfNoCase User-Agent "^LexiBot" bad_bot
SetEnvIfNoCase User-Agent "^Web Image Collector" bad_bot
SetEnvIfNoCase User-Agent "^The Intraformant" bad_bot
SetEnvIfNoCase User-Agent "^True_Robot/1.0" bad_bot
SetEnvIfNoCase User-Agent "^True_Robot" bad_bot
SetEnvIfNoCase User-Agent "^BlowFish/1.0" bad_bot
SetEnvIfNoCase User-Agent "^JennyBot" bad_bot
SetEnvIfNoCase User-Agent "^MIIxpc/4.2" bad_bot
SetEnvIfNoCase User-Agent "^BuiltBotTough" bad_bot
SetEnvIfNoCase User-Agent "^ProPowerBot/2.14" bad_bot
SetEnvIfNoCase User-Agent "^BackDoorBot/1.0" bad_bot
SetEnvIfNoCase User-Agent "^toCrawl/UrlDispatcher" bad_bot
SetEnvIfNoCase User-Agent "^WebEnhancer" bad_bot
SetEnvIfNoCase User-Agent "^TightTwatBot" bad_bot
SetEnvIfNoCase User-Agent "^suzuran" bad_bot
SetEnvIfNoCase User-Agent "^VCI WebViewer VCI WebViewer Win32" bad_bot
SetEnvIfNoCase User-Agent "^VCI" bad_bot
SetEnvIfNoCase User-Agent "^Szukacz/1.4" bad_bot
SetEnvIfNoCase User-Agent "^QueryN Metasearch" bad_bot
SetEnvIfNoCase User-Agent "^Openfind data gathere" bad_bot
SetEnvIfNoCase User-Agent "^Openfind" bad_bot
SetEnvIfNoCase User-Agent "^Xenu’s Link Sleuth 1.1c" bad_bot
SetEnvIfNoCase User-Agent "^Xenu’s" bad_bot
SetEnvIfNoCase User-Agent "^Zeus" bad_bot
SetEnvIfNoCase User-Agent "^RepoMonkey Bait & Tackle/v1.01" bad_bot
SetEnvIfNoCase User-Agent "^RepoMonkey" bad_bot
SetEnvIfNoCase User-Agent "^Zeus 32297 Webster Pro V2.9 Win32" bad_bot
SetEnvIfNoCase User-Agent "^Webster Pro" bad_bot
SetEnvIfNoCase User-Agent "^EroCrawler" bad_bot
SetEnvIfNoCase User-Agent "^LinkScan/8.1a Unix" bad_bot
SetEnvIfNoCase User-Agent "^Keyword Density/0.9" bad_bot
SetEnvIfNoCase User-Agent "^Kenjin Spider" bad_bot
SetEnvIfNoCase User-Agent "^Cegbfeieh" bad_bot


<Limit GET POST>
order allow,deny
allow from all
Deny from env=bad_bot
</Limit>


Above rules are Bad bots prohibition rules have RewriteEngine On directive included however for many websites this directive is enabled directly into VirtualHost section for domain/s, if that is your case you might also remove RewriteEngine on from .htaccess and still the prohibition rules of bad bots should continue to work
Above rules are also perfectly suitable wordpress based websites / blogs in case you need to filter out obstructive spiders even though the rules would work on any website domain with mod_rewrite enabled.

Once you have implemented above rules, you will not need to restart Apache, as .htaccess will be read dynamically by each client request to Webserver

2. Testing .htaccess Bad Bots Filtering Works as Expected


In order to test the new Bad Bot filtering configuration is working properly, you have a manual and more complicated way with lynx (text browser), assuming you have shell access to a Linux / BSD / *Nix computer, or you have your own *NIX server / desktop computer running
 

Here is how:


lynx -useragent="Mozilla/5.0 (compatible; MegaIndex.ru/2.0; +http://megaindex.com/crawler)" -head -dump http://www.your-website-filtering-bad-bots.com/


Note that lynx will provide a warning such as:

Warning: User-Agent string does not contain "Lynx" or "L_y_n_x"!

Just ignore it and press enter to continue.

Two other use cases with lynx, that I historically used heavily is to pretent with Lynx, you're GoogleBot in order to see how does Google actually see your website?
 

  • Pretend with Lynx You're GoogleBot


lynx -useragent="Mozilla/5.0 (compatible; Googlebot/2.1; +http://www.google.com/bot.html)" -head -dump http://www.your-domain.com/


  • How to Pretend with Lynx Browser You are GoogleBot-Mobile


lynx -useragent="Mozilla/5.0 (iPhone; U; CPU iPhone OS 4_1 like Mac OS X; en-us) AppleWebKit/532.9 (KHTML, like Gecko) Version/4.0.5 Mobile/8B117 Safari/6531.22.7 (compatible; Googlebot-Mobile/2.1; +http://www.google.com/bot.html)" -head -dump http://www.your-domain.com/


Or for the lazy ones that doesn't have Linux / *Nix at disposal you can use WannaBrowser website

Wannabrowseris a web based browser emulator which gives you the ability to change the User-Agent on each website req1uest, so just set your UserAgent to any bot browser that we just filtered for example set User-Agent to CheeseBot

The .htaccess rule earier added once detecting your browser client is coming in with the prohibit browser agent will immediately filter out and you'll be unable to access the website with a message like:
 

HTTP/1.1 403 Forbidden


Just as I've talked a lot about Index Bots, I think it is worthy to also mention three great websites that can give you a lot of Up to Date information on exact Spiders returned user-agent, common known Bot traits as well as a a current updated list with the Bad Bots etc.

Bot and Browser Resources information user-agents, bad-bots and odd Crawlers and Bots specifics

1. botreports.com
2. user-agents.org
3. useragentapi.com


An updated list with robots user-agents (crawler-user-agents) is also available in github here regularly updated by Caia Almeido

There are also a third party plugin (modules) available for Website Platforms like WordPress / Joomla / Typo3 etc.

Besides the listed on these websites as well as the known Bad and Good Bots, there are perhaps a hundred of others that might end up crawling your webdsite that might or might not need  to be filtered, therefore before proceeding with any filtering steps, it is generally a good idea to monitor your  HTTPD access.log / error.log, as if you happen to somehow mistakenly filter the wrong bot this might be a reason for Website Indexing Problems.

Hope this article give you some valueable information. Enjoy ! 🙂


Upgrade old crappy Windows 7 32 bit to Windows 10 32 bit, post install fixes and impressions / How to enter Safe Mode in Windows 10

Wednesday, June 28th, 2017

Upgrade-Windows-7-Vista-XP-to-Windows-10-upgrade-howto-observations-post-fixes

However as I've been upgrading my sister's computer previously running Windows 7 to Windows 10 (the process of upgrading is really simple you just download Windows-Media-Creation-tool from Microsoft website and the rest comes to few clicks (Accept Windows 10 User Agreement, Create current install  restore point (backup) 
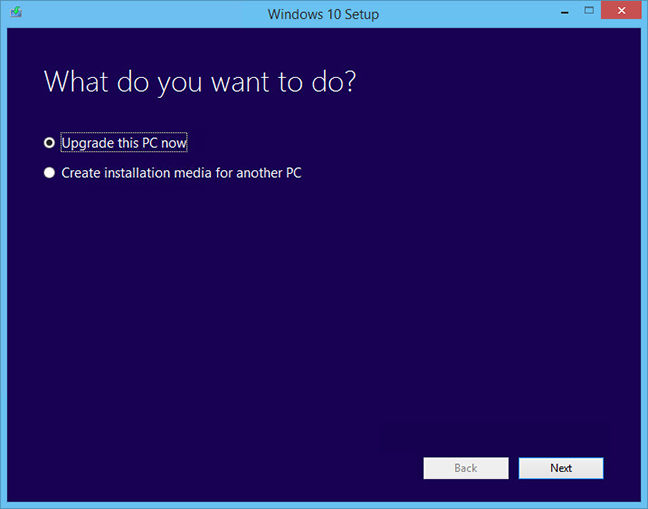
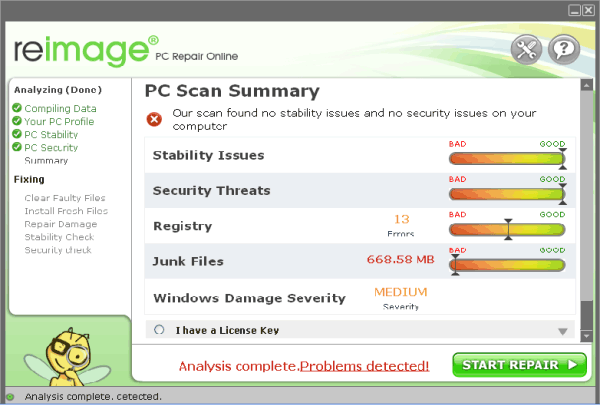
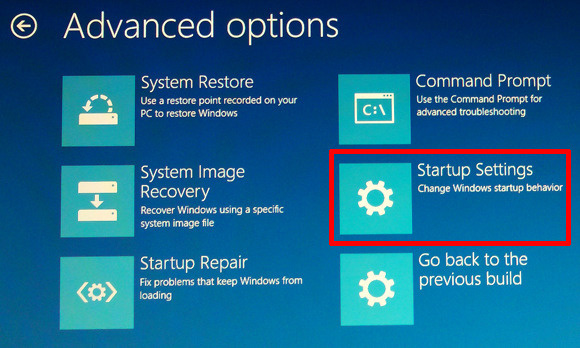
etc.) and waiting some 30 minutes or so for the upgrade to complete.

windows-7-to-10-windows-setup-upgrade-this-pc-prompt

Then it was up to downloading some other updates on a few times and restarting the computer, each time the upgrades were made and all the computer was ready. I've installed Avira (AntiVirus) as I usually do on new PCs and downloaded a bunch of anti-malware (MalwareBytes / Rfkill  / Zemanta)  to make sure that the old upgraded  WIndows was not already infected before the upgrade and I've found a bunch of malware, that got quickly cleared up.

Anyways I've tried also another tool called ReimagePlus – Online Computer Repair in order to check whether there are no some broken WIndows system files after the upgrade

Reimage_Repair-Windows-fix-windows-failing-services-and-broken-windows-installations-clear-up-malware
(here I have to say I've done that besides running in an Administrator command prompt (cmd.exe) and running
 

sfc /scannow


command to check base system files integrity, which luckily showed no problems with the Win base system files.

ReimagePlus however showed some failed services and some failed programs that were previously installed from Windows 7 before the upgrade and even it showed indication for Trojan present on computer but since ReImagePlus is a payed software and I didn't have the money to spend on it, I just proceeded to clean up what was found manually.

After that the computer ran fine, with the only strange thing that some data was from hard drive was red a bit too frequently, after a short call with a close friend (Nomen) – thx man, he suggested that the frequenty hdd usage might be related to Windows Search Indexing service database rebuilt and he adviced me to disable it which I did following this article How to speed up Windows by disabling Search Index Service.

One issue worthy to mention  stumbled upon after the upgrade was problems with Windows Explorer which was frequently crashing and "restarting the Desktop", but once, I've enabled all upgrades from Microsoft and Applied them after some update failures and restarts, once all was up2date to all latest from Microsoft, Explorer started working normally.

In the mean time while Windows Explorer was crashing in order to browse my file system I used the good old Win Total Command or Norton Commander for Windows – WinNC (with its most cool bizzarre own File Explorer tool).

Windows-Total-commander-tool-running-on-MS-Windows-10

As I wanted to run a MalwareBytes scan and Antivirus under Windows Safe-Mode, I tried entering it by restarting the Computer and pressing F8 a number of times before the Windows boot screen but this didn't work as Safe-Mode boot was changed in Windows 10 to be callable in another way because of some extra Windows Boot speed up optimizations, in short the easiest way I found to enter Windows 10 Safe Mode was to Hit Start Button -> Choose Restart PC and keep pressed SHIFT button simultaneously
that calls a menu that gives you some restore options, along with safe mode options for those who want to read more on How to Enter Safe mode (Command Prompt) on Windows 10 – please read this article.

Windows-10-enable-Safe-Mode-options-screen

Once the upgrade was over and all below done unfortunately I've realized her previously installed WIndows 7 is x86 (32 bit) version and the Acer notebook 5736Z where it is being installed is actually X64 (64 bit), hence I've decided to upgrade my dear sis computer to a 64 Bit Windows 10 and researched online whether, there is some tool that is capable to upgrade WIndows 10 from 32 bit to Windows 10 64 bit just to find out the only option is to either use some program to creaty a backup of files on the PC or to manually copy files to external hard drive and reinstall with a Windows 10 64 bit bootable USB Flash or CD / DVD image, so I took my USB flash and used again Windows Media Creation Tool to burn Windows and re-install with the 64 bit iso.

If you're wonder about why I choose to re-install finally Win 10 32 bit with Win 64 bit, because you might think performance difference might be not really so dramatic, then I have to say the Acer notebook is equipped with 4 Gigabytes of RAM Memory and Windows 10 32bit  (Pro) could recognize a maximum of 3 Gigabytes (2.9 GB if I have to be precise) and 1 Gigabyte of memory stays totally unusued all the time with  Winblows 10 32 bit.

Windows-10-4gb-memory-present-only-3gb-usable-why-reason-and-solution

I've tried my best actually to not loose time to fully upgrade Windows 7 (32 bit) -> Windows 10 (64 bit) but to make Windows 7 32 bit Windows to use more than the default Limitation of 3GB of memory by using this thirt party PAE Externsion Kernel Patch
which is patching the Windows Kernel to extend the Windows support for PCs with up to 128 GB of memory however it turned out that this Patch file is not compatible with my Windows Kernel version once I followed readme instructions.

It seems the PAE (Physical Address Extension) is supported by default  by Microsoft only on 32 bit Windows Server 10 to read more on the PAE if interested give a look here.

Well that's all folks, the rest I did was to just boot from the USB drive just burned and re-install WIndows and copy my files from User profile / Downloads / Pictures / Music etc. to the same locations on the new installed Windows 10 professional 64 bit and enjoy the better performance.

Sermon on how the Christian can live without Fear – Repent ! Pope Shenouda II Coptic Patriarch

Tuesday, April 9th, 2013

I'm a Christian and even though I'm trying to live as a Christian it is not always working. I'm a human and as all of us I have my fears. Thus by God's grace today by looking on Youtube on what the Coptic Christian say on Fear. I've ended in Sermon from his Holiness Pope Shenoda II. He explains very well the connection of Fear and the lack of Christian repentance. Below is the video I hope some Christian out there can earn by watching this video.
 

HH pope Shenouda Sermon Old ''A Life Without Fear''

chmod all directories permissions only and omit files (recursively) on Linux howto

Friday, March 11th, 2016

execute-write-read-of-user-group-and-others-on-linux-unix-bsd-explanationary-picture

If you mistakenly chmod-ed all files within directory full of multiple other subdirectories and files and you want to revert back and set a certain file permissions (read, wite execute) privileges only to all directories:
 

find /path/to/base/dir -type d -exec chmod 755 {} +


If there are too many files or directories you need to change mod use
 

chmod 755 $(find /path/to/base/dir -type d) chmod 644 $(find /path/to/base/dir -type f)

Above willl run evaluate $() all files searched and print them and pass them to chmod so if you have too many files / directories to change it will drastically reduce execution time.

An alternative and perhaps a better way to do it for those who don't remember by heart the chmod permission (numbers), use something like:
 

chmod -R u+rwX,go+rX,go-w /path

Below is arguments meaning:

    -R = recursively;
    u+rwX = Users can read, write and execute;
    go+rX = group and others can read and execute;
    go-w = group and others can't write

If like piping, a less efficient but still working way to change all directory permissions only is with:
 

find /path/to/base/dir -type d -print0 | xargs -0 chmod 755
find /path/to/base/dir -type f -print0 | xargs -0 chmod 644


For those who wish to automate and often do change permissions of only files or only directories it might be also nice to look at (chmod_dir_files-recursive.sh) shell script

Tadadam 🙂


GNU / Linux Widgets (gdesklets, screenlets) – Apple MacoSX / Microsoft Vista like Widgets

Tuesday, September 15th, 2009

Screenlet Widget
I’m staying in a friend’s place for few days. Nasko a friend of mine has apple pc and showed me some nice features of the apple MacBook’s Mac OS X. One of the features I liked was the Apple Widgets which are helpful in facilitating the work with your pc. The same widgets are also included in Windows Vista (I always disabled that when used Vista).
Anyways I wondered if there is a way to have the same shiny widgets running on my Debian GNU/Linux.
I first found Gdesklets which basicly is a collection of Widgets for the Linux Gnome desktop written in Python. To run the gdesklet after installation
I had to issue the command:
$ gdesklets .Then in the tray a small tray puzzle icon appears. I sort of wondered a bit until I figured out how to add some gdesklet widgets.
To do that I had to select
“Manage Desklets” and through the gdesklets shell
to click twice the widget I would like to add to the desktop and thendrag it to the exact desktop place I would like it to have it positioned.
I have to emphasize gdesklets widgets are very, very buggy. Many of the widgets I tried crashed the whole application.
After which I had to manually kill the gdesklets app
and delete all it’s temporary files located in
~/.gdesklets directory. Many of the apps that didn’t crashed the gdesklets that required extra data from lmsensors never worked even though I have working version of lmsensors.
I suspect some of the widgets which failed to gather data from lmsensors cause
My notebook is Lenovo Thinkpad R61 and uses some custom features from the thinkpad_acpi kernel module
. Another possible reason for the crashes and misworkings of some components of gdesklets could be because I’m currently running Debian Unstable.

After being a bit disappointment from gdesklets experience.
I went looking further for some Linux widgets alternative.
Next widget related gnome prog I stucked on was jackfield . This one is said to have worked with Apple’s Widgets I don’t believe it does any more since it’s not actively developed anymore.
I tried the jackfield python program with no luck. The untarred archive of it was really messy and what was even worse was it lacked any documentation.
Hence I continued my quest for widgets just to came across a real working Gnome widget application.
Just to find Screenlets! .
I’ve red somewhere that Screenlets is based on jacfield.
The current release of Gnome Screenlets which by the way is officially part of gnome-look.org is 0.1.2. I was pleased to find the application worked pretty decent.
Screenlets includes many, many widgets:
Here is a link containg a list of all the screenlets widgets
.If you like to have a general idea of how screenlets looks like please check out the screenlet in action screenshots
END—–