Posts Tagged ‘boots’

Upgrade Debian Linux 9 to 10 Stretch to Buster and Disable graphical service load boot on Debian 10 Linux / Debian Buster is out

Tuesday, July 9th, 2019

howto-upgrade-debian-linux-debian-stretch-to-buster-debian-10-buster

I've just took a time to upgrade my Debian 9 Stretch Linux to Debian Buster on my old school Laptop (that turned 11 years old) Lenovo Thinkpad R61 . The upgrade went more or less without severe issues except few things.

The overall procedure followed is described n a few websites out there already and comes up to;


0. Set the proper repository location in /etc/apt/sources.list


Before update the sources.list used are:
 

deb [arch=amd64,i386] http://ftp.bg.debian.org/debian/ buster main contrib non-free
deb-src [arch=amd64,i386] http://ftp.bg.debian.org/debian/ buster main contrib non-free


deb [arch=amd64,i386] http://security.debian.org/ buster/updates main contrib non-free
deb-src [arch=amd64,i386] http://security.debian.org/ buster/updates main contrib non-free

deb [arch=amd64,i386] http://ftp.bg.debian.org/debian/ buster-updates main contrib non-free
deb-src [arch=amd64,i386] http://ftp.bg.debian.org/debian/ buster-updates main contrib non-free

deb http://ftp.debian.org/debian buster-backports main


For people that had stretch defined in /etc/apt/sources.list you should change them to buster or stable, easiest and quickest way to omit editting with vim / nano etc. is run as root or via sudo:
 

sed -i 's/stretch/buster/g' /etc/apt/sources.list
sed -i 's/stretch/buster/g' /etc/apt/sources.list.d/*.list

The minimum of config in sources.list after the modification should be
 

deb http://deb.debian.org/debian buster main
deb http://deb.debian.org/debian buster-updates main
deb http://security.debian.org/debian-security buster/updates main

Or if you want to always be with latest stable packages (which is my practice for notebooks):

deb http://deb.debian.org/debian stable main
deb http://deb.debian.org/debian stable-updates main
deb http://security.debian.org/debian-security stable/updates main


1. Getting list of hold packages if such exist and unholding them, e.g.


apt-mark showhold


Same could also be done via dpkg

dpkg –get-selections | grep hold


To unhold a package if such is found:

echo "package_name install"|sudo dpkg –set-selections

For those who don't know what hold package is this is usually package you want to keep at certain version all the time even though after running apt-get upgrade to get the latest package versions.
 

2. Use df -h and assure you have at least 5 – 10 GB free space on root directory / before proceed

df -h /

3. Update packages list to set new set repos as default

apt update


4. apt upgrade
 

apt upgrade

Here some 10 – 15 times you have to confirm what you want to do with configuration that has changed if you're unsure about the config (and it is not critical service) you're aware as such as Apache / MySQL / SMTP etc. it is best to install the latest maintainer version.

Hopefully here you will not get fatal errors that will interrupt it.

P.S. It is best to run apt-update either in VTTY (Virtual console session) with screen or tmux or via a physical tty (if this is not a remote server) as during the updates your GUI access to the gnome-terminal or konsole / xterm whatever console used might get cut. Thus it is best to do it with command:
 

screen apt upgrade


5. Run dist-upgrade to finalize the upgrade from Stertch to Buster


Once all is completed of the new installed packages, you will need to finally do, once again it is best to run via screen, if you don't have installed screen install it:


if [ $(which screen) ]; then echo 'Installed'; else apt-get install –yes screen ; fi

screen apt dist-upgrade


Here once again you should set whether old configuration to some e services has to stay or the new Debian maintainer package shipped one will overwrite the old and locally modified (due to some reason), here do wisely whatever you will otherwise some configured services might not boot as expected on next boot.


6. What if you get packages failed on update


If you get a certain package failed to configure after installed due to some reason, if it is a systemd service use:


journalctl -xe |head -n 50


or fully observer output of journalctl -xe and decide on yourself.

In most cases

dpkg-reconfigure failed-package-name


should do the trick or at least give you more hints on how to solve it.


Also if a package seems to be in inconsistent or broken state after upgrade  and simple dpkg-reconfigure doesn't help, a good command
that can help you is


dpkg-reconfigure -f package_name


or you can try to workaround a failed package setup with:
 

dpkg –configure -a

 
If dpkg-reconfigure doesn't help either as I experienced in prior of Debian from Debian 6 -> 7 an Debian 7 ->8 updates on some Computers, then a very useful thing to try is:
 

apt-get update –fix-missing 

apt-get install -f


At certain cases the only work around to be able to complete the package upgrade is to to remove the package with apt remove but due to config errors even that is not possible to work around this as final resort run:
 

dpkg –remove –force-remove-reinstreq


7. Clean up ununeeded packages


Some packages are left over due to package dependencies from Stretch and not needed in buster anymore to remove them.
 

apt autoremove


8. Reboot system once all upgrade is over


/sbin/reboot


9. Verify your just upgraded Debian is in a good state


root@noah:~# uname -a;
Linux noah 4.19.0-5-rt-amd64 #1 SMP PREEMPT RT Debian 4.19.37-5 (2019-06-19) x86_64 GNU/Linux


root@noah:~# cat /etc/issue.net
Debian GNU/Linux 10


root@noah:~# lsb_release -a
No LSB modules are available.
Distributor ID:    Debian
Description:    Debian GNU/Linux 10 (buster)
Release:    10
Codename:    buster


root@noah:~# hostnamectl
   Static hostname: noah
         Icon name: computer-laptop
           Chassis: laptop
        Machine ID: 4759d9c2f20265938692146351a07929
           Boot ID: 256eb64ffa5e413b8f959f7ef43d919f
  Operating System: Debian GNU/Linux 10 (buster)
            Kernel: Linux 4.19.0-5-rt-amd64
      Architecture: x86-64


10. Remove annoying picture short animation with debian logo looping
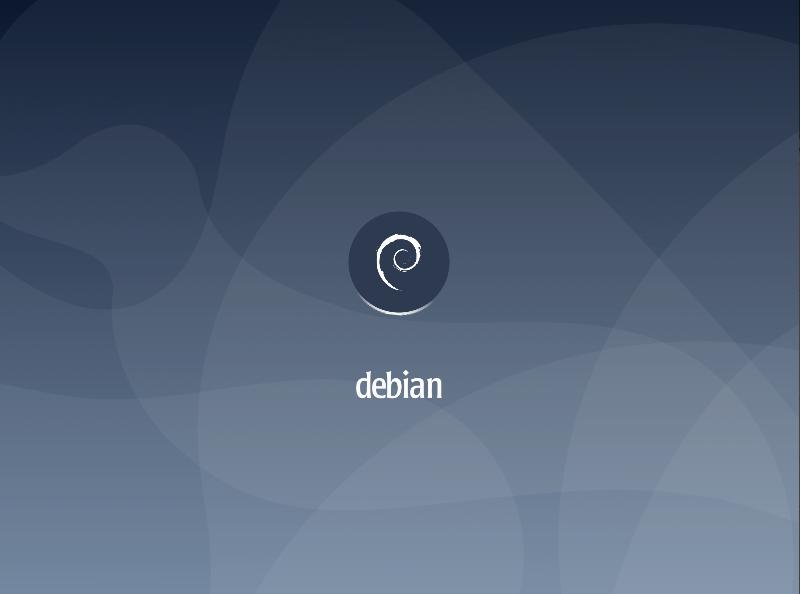
 

plymouth-debian-graphical-boot-services

By default Debian 10 boots up with annoying screen hiding all the status of loaded services state .e.g. you cannot see the services that shows in [ FAILED ] state and  which do show as [ OK ] to revert back the old behavior I'm used to for historical reasons and as it shows a lot of good Boot time debugging info, in previous Debian distributions this was possible  by setting the right configuration options in /etc/default/grub

which so far in my config was like so

GRUB_CMDLINE_LINUX_DEFAULT="quiet splash scsi_mod.use_blk_mq=y dm_mod.use_blk_mq=y zswap.enabled=1 text"


Note that zswap.enabled=1 passed option is because my notebook is pretty old machine from 2008 with 4GB of memory and zswap does accelerate performance when working with swap – especially helpful on Older PCs for more you can read more about zswap on ArchLinux wiki
After modifying this configuration to load the new config into grub the cmd is:
 

/usr/sbin/update-grub

 
As this was not working and tried number of reboots finally I found that annoying animated gif like picture shown up is caused by plymouth below is excerpts from Plymouth's manual page:


       "The plymouth sends commands to a running plymouthd. This is used during the boot process to control the display of the graphical boot splash."

Plymouth has a set of themes one can set:


# plymouth-set-default-theme -l
futureprototype
details
futureprototype
joy
lines
moonlight
softwaves
spacefun
text
tribar


I tried to change that theme to make the boot process as text boot as I'm used to historically with cmd:
 

update-alternatives –config text.plymouth

 
As after reboot I hoped the PC will start booting in text but this does not happened so the final fix to turn back to textmode service boot was to completely remove plymouth
 

apt-get remove –yes plymouth

How to stop / start services in boot time and install / remove / update SuSE SLES (Suse Enterprise Linux Server)?

Friday, February 6th, 2015

Suse-Logo-stop-start-services-on-linux-boot-time-howto-chkconfig
If you're long time Linux sysadmin but you haven't need to adminster SuSE Linux still and your company buys other business / company which already owns some SuSE servers and you need to deal with them, even though you're just starting up with SuSE Linux but you had already plenty of experience with other Linux distributions Fedora / RHEL / CentOS, don't worry set up / stop / start a service (daemon) to boot on Linux boot time is just the same as any other Redhat (RPM) Linux based distributions. it is done by multiple shell scripts located in /etc/init.d directory which can be manually stopped start by issuing the script with an argument e.g
 

suse:/etc/init.d# cd /etc/init.d/
suse:/etc/init.d# ./snmpd 
Usage: ./snmpd {start|stop|try-restart|restart|force-reload|reload|status}


To configure how each of the /etc/init.d/ existent service boots you can the use good old /sbin/chkconfig (a script written in perl) – which you already know from Fedora / CentOS and other RPM distros.

1. Get a list of all enabled on boot SuSE Linux services

To get a list of all set up to run on boot SuSE server services with chkconfig:


suse:/etc/init.d# /sbin/chkfong –list 

Makefile                  0:off  1:off  2:off  3:off  4:off  5:off  6:off
OVCtrl                    0:off  1:off  2:off  3:on   4:on   5:on   6:off
SuSEfirewall2_init        0:off  1:off  2:off  3:off  4:off  5:off  6:off
SuSEfirewall2_setup       0:off  1:off  2:off  3:off  4:off  5:off  6:off
Tivoli_lcfd1              0:off  1:off  2:on   3:on   4:off  5:on   6:off
Tivoli_lcfd1.bkp          0:off  1:off  2:off  3:off  4:off  5:off  6:off
aaeventd                  0:off  1:off  2:off  3:off  4:off  5:off  6:off
acpid                     0:off  1:off  2:on   3:on   4:off  5:on   6:off
alsasound                 0:off  1:off  2:on   3:on   4:off  5:on   6:off
apache2-eis               0:off  1:off  2:off  3:off  4:off  5:off  6:off
atd                       0:off  1:off  2:off  3:off  4:off  5:off  6:off
auditd                    0:off  1:off  2:off  3:on   4:off  5:on   6:off
autofs                    0:off  1:off  2:off  3:off  4:off  5:off  6:off
autoyast                  0:off  1:off  2:off  3:off  4:off  5:off  6:off
boot.apparmor             0:off  1:off  2:on   3:on   4:off  5:on   6:off  B:on
cron                      0:off  1:off  2:on   3:on   4:off  5:on   6:off
dbus                      0:off  1:off  2:off  3:on   4:off  5:on   6:off
earlykbd                  0:off  1:off  2:off  3:off  4:off  5:on   6:off
earlysyslog               0:off  1:off  2:off  3:off  4:off  5:on   6:off
esound                    0:off  1:off  2:off  3:off  4:off  5:off  6:off
evms                      0:off  1:off  2:off  3:off  4:off  5:off  6:off
fbset                     0:off  1:on   2:on   3:on   4:off  5:on   6:off
firstboot                 0:off  1:off  2:off  3:off  4:off  5:off  6:off
fixperms                  0:off  1:off  2:off  3:off  4:off  5:off  6:off
gpm                       0:off  1:off  2:off  3:off  4:off  5:off  6:off
gssd                      0:off  1:off  2:off  3:off  4:off  5:off  6:off
gwproxy                   0:off  1:off  2:on   3:on   4:off  5:on   6:off
haldaemon                 0:off  1:off  2:off  3:on   4:off  5:on   6:off
hp-health                 0:off  1:off  2:on   3:on   4:on   5:on   6:off
hp-ilo                    0:off  1:off  2:off  3:on   4:off  5:on   6:off
hp-snmp-agents            0:off  1:off  2:on   3:on   4:on   5:on   6:off
hpsmhd                    0:off  1:off  2:off  3:on   4:on   5:on   6:off
idmapd                    0:off  1:off  2:off  3:off  4:off  5:off  6:off
ipmi                      0:off  1:off  2:off  3:off  4:off  5:off  6:off
ipmi.hp                   0:off  1:off  2:off  3:off  4:off  5:off  6:off
irq_balancer              0:off  1:on   2:on   3:on   4:off  5:on   6:off
itcaIBMTivoliCommonAgent0  0:off  1:off  2:on   3:on   4:off  5:on   6:off
jboss                     0:off  1:off  2:off  3:off  4:off  5:off  6:off
joystick                  0:off  1:off  2:off  3:off  4:off  5:off  6:off
kadmind                   0:off  1:off  2:off  3:off  4:off  5:off  6:off
kbd                       0:off  1:on   2:on   3:on   4:off  5:on   6:off  S:on
kdump                     0:off  1:off  2:off  3:off  4:off  5:off  6:off
kpropd                    0:off  1:off  2:off  3:off  4:off  5:off  6:off
krb524d                   0:off  1:off  2:off  3:off  4:off  5:off  6:off
krb5kdc                   0:off  1:off  2:off  3:off  4:off  5:off  6:off
ldap                      0:off  1:off  2:off  3:on   4:off  5:on   6:off
lm_sensors                0:off  1:off  2:off  3:off  4:off  5:off  6:off
lw_agt                    0:off  1:off  2:off  3:off  4:off  5:off  6:off
mdadmd                    0:off  1:off  2:off  3:off  4:off  5:off  6:off
microcode                 0:off  1:on   2:on   3:on   4:off  5:on   6:off  S:on
multipathd                0:off  1:off  2:off  3:off  4:off  5:off  6:off
mysql                     0:off  1:off  2:off  3:off  4:off  5:off  6:off
network                   0:off  1:off  2:on   3:on   4:off  5:on   6:off
nfs                       0:off  1:off  2:off  3:on   4:off  5:on   6:off
nfsboot                   0:off  1:off  2:off  3:on   4:off  5:on   6:off
nfsserver                 0:off  1:off  2:off  3:off  4:off  5:off  6:off
nohup.out                 0:off  1:off  2:off  3:off  4:off  5:off  6:off
novell-zmd                0:off  1:off  2:off  3:off  4:off  5:off  6:off
nscd                      0:off  1:off  2:off  3:on   4:off  5:on   6:off
ntp                       0:off  1:off  2:on   3:on   4:off  5:on   6:off
openct                    0:off  1:off  2:off  3:off  4:off  5:off  6:off
opsware-agent             0:off  1:off  2:off  3:on   4:on   5:on   6:off
osddownt                  0:off  1:off  2:off  3:on   4:on   5:on   6:off
ovpa                      0:on   1:off  2:on   3:on   4:off  5:on   6:off
pcscd                     0:off  1:off  2:off  3:off  4:off  5:off  6:off
pctl                      0:off  1:off  2:on   3:on   4:off  5:on   6:off
portmap                   0:off  1:off  2:off  3:on   4:off  5:on   6:off
postfix                   0:off  1:off  2:off  3:on   4:off  5:on   6:off
powerd                    0:off  1:off  2:off  3:off  4:off  5:off  6:off
powersaved                0:off  1:off  2:off  3:off  4:off  5:off  6:off
random                    0:off  1:off  2:on   3:on   4:off  5:on   6:off
raw                       0:off  1:off  2:off  3:off  4:off  5:off  6:off
resmgr                    0:off  1:off  2:on   3:on   4:off  5:on   6:off
rpasswdd                  0:off  1:off  2:off  3:off  4:off  5:off  6:off
rpmconfigcheck            0:off  1:off  2:off  3:off  4:off  5:off  6:off
rrdtools                  0:off  1:off  2:off  3:on   4:off  5:on   6:off
rsyncd                    0:off  1:off  2:off  3:off  4:off  5:off  6:off
saslauthd                 0:off  1:off  2:off  3:off  4:off  5:off  6:off
skeleton.compat           0:off  1:off  2:off  3:off  4:off  5:off  6:off
slurpd                    0:off  1:off  2:off  3:off  4:off  5:off  6:off
smartd                    0:off  1:off  2:off  3:off  4:off  5:off  6:off
smpppd                    0:off  1:off  2:off  3:off  4:off  5:off  6:off
snmpd                     0:off  1:off  2:on   3:on   4:off  5:on   6:off
splash                    0:off  1:on   2:on   3:on   4:off  5:on   6:off  S:on
splash_early              0:off  1:off  2:on   3:on   4:off  5:on   6:off
sshd                      0:off  1:off  2:off  3:on   4:off  5:on   6:off
suseRegister              0:off  1:off  2:off  3:off  4:off  5:off  6:off
svcgssd                   0:off  1:off  2:off  3:off  4:off  5:off  6:off
syslog                    0:off  1:off  2:on   3:on   4:off  5:on   6:off
sysstat                   0:off  1:off  2:off  3:off  4:off  5:off  6:off
tecad_logfile             0:off  1:off  2:off  3:on   4:off  5:on   6:off
tomcat55                  0:off  1:off  2:off  3:off  4:off  5:off  6:off
tomcat_eis                0:off  1:off  2:off  3:off  4:off  5:off  6:off
tpmgwproxy.sh             0:off  1:off  2:on   3:on   4:off  5:on   6:off
uc4_smgrp                 0:off  1:off  2:off  3:on   4:off  5:on   6:off
uc4_smgrq1                0:off  1:off  2:off  3:on   4:off  5:on   6:off
xbis-ldap-tool            0:off  1:off  2:off  3:off  4:off  5:off  6:off
xdm                       0:off  1:off  2:off  3:off  4:off  5:on   6:off
xfs                       0:off  1:off  2:off  3:off  4:off  5:off  6:off
xinetd                    0:off  1:off  2:off  3:off  4:off  5:off  6:off
ypbind                    0:off  1:off  2:off  3:off  4:off  5:off  6:off
xinetd based services:
        chargen:            off
        chargen-udp:        off
        daytime:            off
        daytime-udp:        off
        echo:               off
        echo-udp:           off
        netstat:            off
        rsync:              off
        servers:            off
        services:           off
        systat:             off
        time:               off
        time-udp:           off


2. Stop / Disable a service in all Linux boot runlevels or in a concrete one

As you should know already in Linux there are multiple runlevels in which server can boot, under normal circumstances SuSE servers (as of time of writting) this article boots into runlevel 3, if you'r'e  unsure about the runlevel you can check it with runlevel command:
 

 suse:/etc/init.d# /sbin/runlevel
N 3

To stop a service on all possible boot runlevels – 1,2,3,4,5
 

suse:/etc/init.d# /sbin/chkconfig xinetd off


If you want to stop xinetd or any other service just for certain runlevels (lets say run-level 3,4,5):
 

suse:/etc/init.d# chkconfig –level 345 xinetd off


3. Start / Enable a service for a runlevel or all boot levels 1,2,3,4,5

To disable boot.apparmor on all boot runlevels –  kernel enhancement that enabled to set a limited set of resources for services (good for tightened security, but often creating issues with some external server configured services).
 

suse:/etc/init.d# chkconfig boot.apparmor off


Or for single boot modes again with –level option:
 

suse:/etc/init.d# chkconfig –level 345 boot.apparmor off


suse:/etc/init.d# chkconfig xfs off 


4. SuSE Linux Package management zypper console tool

If you need / wonder how to install /remove / update a service on a SuSE Linux server, take a look at zypper tool.
zypper is  a  command-line  interface to ZYPP system management library.

To install a package / service with zypper the syntax is very much like yum, for example:
 

suse: ~# zypper install vim -emacs


will remove emacs editor and install Vi Improved

The equivalent of yum -y  Fedora command in SuSE Enterprise Linux is –non-interactive option


suse:~# zypper –non-interactive install


In SuSE it is pretty annoying when you're asked for accepting licensing on some proprietary (external vendor) non-free software packages to get around this:
 

suse:~# zypper patch –auto-agree-with-licenses


To keep the SuSE server up2date – i.e. SLES equivalent of CentOS's yum update && yum upgrade


suse:~# zypper list-patches
Loading repository data…
Reading installed packages…
 
Repository                          | Name      | Version | Category | Status
————————————+———–+———+———-+——-
Updates for openSUSE 11.3 11.3-1.82 | lxsession | 2776    | security | needed


suse:~# zypper patch-check
Loading repository data…
Reading installed packages…
5 patches needed (1 security patch)


To look for a certain package with Zypper (equivalent of yum search packagename)

suse: ~# zypper search apache


To verify whether an RPM installed package dependecies are OK:
 

suse:~# zypper verify


The equivalent of Fedora yum update command in SuSE (SLES) are:

suse:~# zypper refresh


To force a complete refresh and rebuild of the database, including a forced download of raw metadata.
 

suse:~# zypper refresh -fdb


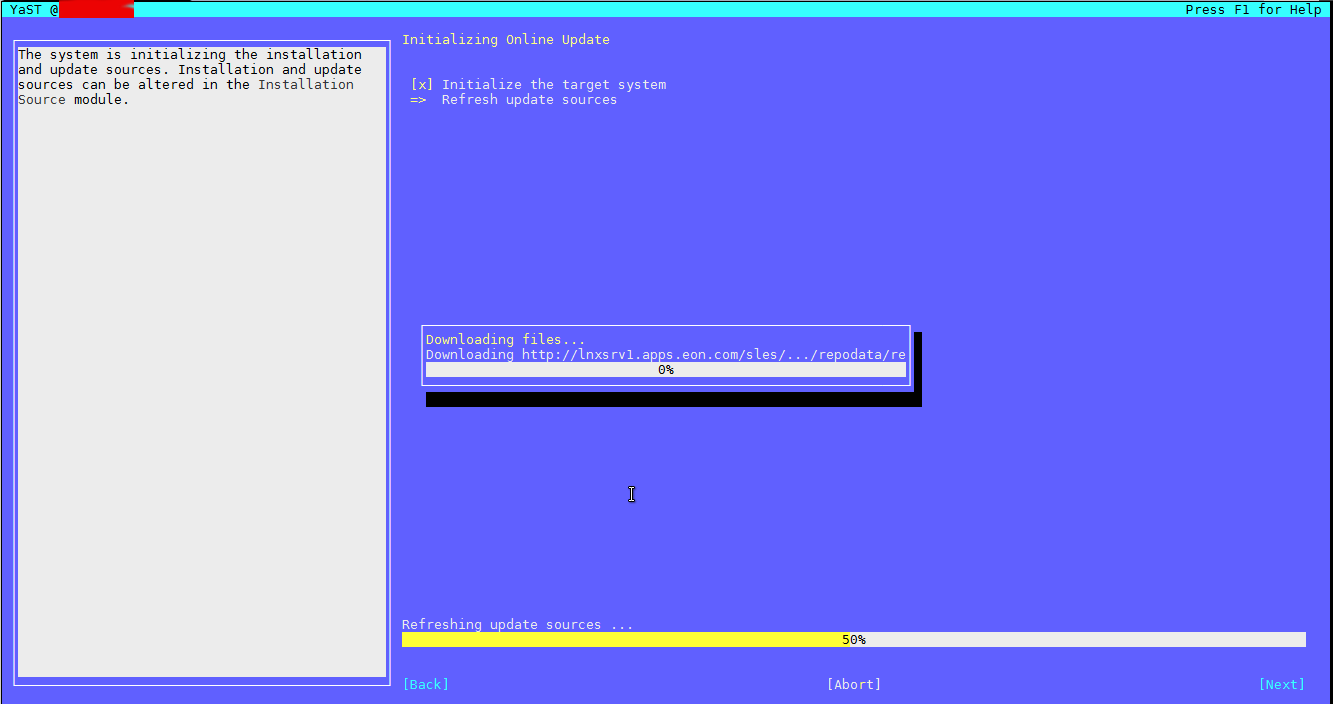
For people that are used to ncurses (midnight commander) like text interface you can also use yoast2 (text GUI) package manager:
 

suse:~# yoast2


update-linux-suse-server-with-yoast2-ncurses-package-text-gui-management-tool

If a package is messed you can always go back and use good old RPM (Redhat Package Manager) to solve it.


Windows 7: Change default language for logon screen howto

Tuesday, September 3rd, 2013

WINDOWS 7 LOGO HOW TO CHANGE DEFAULT INPUT LANGUAGE TO ENGLISH

I just installed Windows 7 on my notebook. I had a licensed version of Windows Vista, which kept on notebook unused for about 4 years. Vista was too slow and even though I didn't launch it for about 2 years after launching I figured out it is broken, it boots about 10 minutes and all the time tries read from notebook Hard Disk. After re-installing with Windows 7, and setting default environment Language setting to Bulgarian I figured, my default input language set it Bulgarian. As I use more latin than Cyrillic this made me crazy as in each Windows I had to press Alt + Shift to change language to EN.

Bulgarian language was set as default even on Windows logon (Welcome Screen).

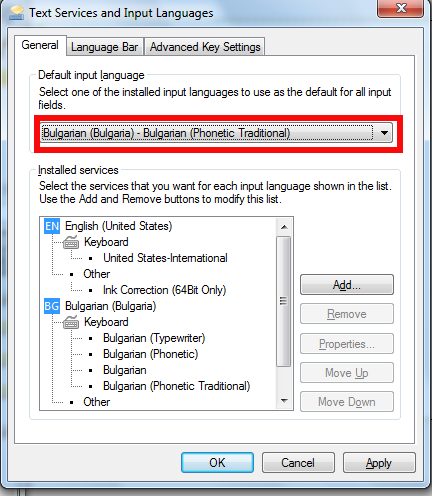
 Here is how I managed to change Windows irritating behavior so my default input language is English:

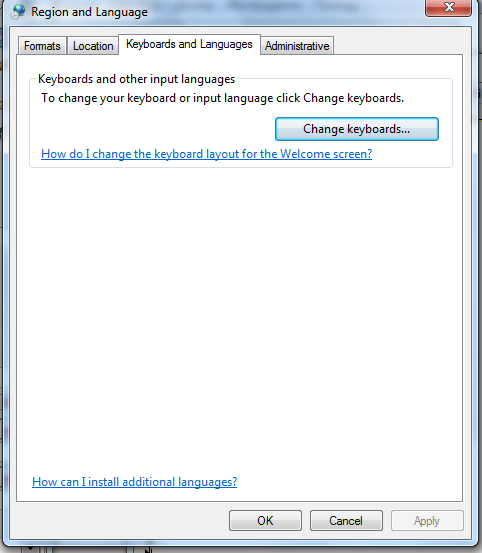
Start -> Control Panel -> Region and Language -> Keyboards and Languages

Region and language keyboards and languages windows 7 screenshot

Windows 7 text services and input languages dialog screen

From there I changed language to English (UK) then retart and Hooray, default input language is English 🙂

How to configure NTP server (ntpd) to synchronize server clock over the Internet on FreeBSD

Friday, February 10th, 2012


FreeBSD ntpd logo / How to configure ntpd to synchronize with internet time servers on FreeBSD

On FreeBSD ntpd , ntpdc , ntpdate , ntpq doesn't need to be installed via a specific package like on GNU/Linux as they're part of the FreeBSD world (binary standardly shipped with FreeBSD basis system).

The FreeBSD handbook has a chapter explaining thoroughfully on ntp on FreeBSD ,however for the lazy ones here is a short few steps tutorial on how to install and configure ntpd on bsd :

1. Copy sample ntp.conf file to /etc/

freebsd# cp -rpf /usr/src/etc/ntp.conf /etc/ntp/

No need for any modifications if you don't want to apply some specific restrictions on whom can access the ntpd server. If you update regularly the FreeBSD system with freebsd-update or directly by rebuilding the FreeBSD kernel / world adding restrictions might be not necessery..

If you check /usr/src/etc/ntp.conf you will notice freebsd project people are running their own ntp servers , by default ntpd will use this servers to fetch timing information. The exact server hosts which as of time of writting are used can be seen in ntp.conf and are:

server 0.freebsd.pool.ntp.org iburst maxpoll 9
server 1.freebsd.pool.ntp.org iburst maxpoll 9
server 2.freebsd.pool.ntp.org iburst maxpoll 9

2. Add ntpd daemon to load on system boot via /etc/rc.conf

By default ntpd is disabled on FreeBSD, you can see if it is disabled or enabled by invoking:

freebsd# /etc/rc.d/ntpd rcvar
# ntpd
ntpd_enable=NO

To Enable ntpd to get loaded each time it boots , following 3 lines has to be added in /etc/rc.conf .

ntpdate_enable="YES"
ntpdate_flags="europe.pool.ntp.org"
ntpd_enable="YES"

Quick way to add them is to use echo :

echo 'ntpdate_enable="YES" >> /etc/rc.conf
echo 'ntpdate_flags="europe.pool.ntp.org" >> /etc/rc.conf
echo 'ntpd_enable="YES" >> /etc/rc.conf

Now as the 3 rc.conf vars are set to "YES", the ntpd can be started. Without having this variables in /etc/rc.conf , "/etc/rc.d/ntpd start" will refuse to start ntpd.

3. Start the ntpd service

freebsd# /etc/rc.d/ntpd start
...

One interesting note to make is ntpd can also operate without specifying any config file (/etc/ntp.conf), the only requirement for the server to start is to have a properly set ntpdate server, like lets say (ntpdate_flags="europe.pool.ntp.org")

4. Permit only certain host or localhost to "talk" to the ntpd server

If you want to imply some ntp server restrictions, the configuration directives are same like on Linux:

To allow only a a host inside a local network with IP 192.168.0.2 as well as localhost, to be able to fetch time information via ntpd server put inside /etc/ntp.conf:

restrict 127.0.0.1
restrict 192.168.0.1 mask 255.255.255.0 nomodify notrap

If you want to prohibit ntpd to serve as a Network Time Server, to any other host except localhost, add in /etc/ntp.conf :

restrict default ignore

Allowing and denying certain hosts can be also done on pf (packet filter) or ipfw firewall level, and in my view is easier (and less confusing), than adding restrictions through ntp.conf. Besides that using directly the server firewall to apply restrictions is more secure. If for instance a remote exploit vulnerability is discovered affecting your ntpd server. this will not affect you externally as access to the UDP port 123 will be disabled on a firewall level.
Something good to mention is NTP servers communicate between each other using the UDP source/destination (port 123). Hence if the NTPD server has to be publicly accessible and there is a firewall already implemented, access to source/dest port 123 should be included in the configured firewall …

5. Check if the ntp server is running properly / ntp server query operations

[root@pcfreak /home/hipo]# ps axuww|grep -i ntp
root 15647 0.0 0.2 4672 1848 ?? Ss 2:49PM 0:00.04 /usr/sbin/ntpd -c /etc/ntp.conf -p /var/run/ntpd.pid -f /var/db/ntpd.drift

To query the now running ntpd server as well as set various configuration options "on the fly" (e.g. without need for ntp.conf edits and init script restart), a tool called ntpdc exists. ntpdc tool could be used to connect to localhost running ntpd as well as to connect and manage remotely a ntpd server.
The most basic use of ntpdc is to check (server peers).:
freebsd# ntpdc localhost
ntpdc> peers
remote local st poll reach delay offset disp
===================================================

kgb.comnet.bg 83.228.93.76 2 64 377 0.00282 -0.050575 0.06059
*billing.easy-la 83.228.93.76 2 64 377 0.01068 -0.057400 0.06770
=ns2.novatelbg.n 83.228.93.76 2 64 377 0.01001 -0.055290 0.06058

ntpdc has also a non-interactive interface, handy if there is a need for requests to a ntpd to be scripted. To check ntpd server peers non-interactively:

freebsd# ntpdc -p localhost
===================================================
kgb.comnet.bg 83.228.93.76 2 64 377 0.00284 -0.043157 0.06184
=billing.easy-la 83.228.93.76 2 64 377 0.01059 -0.042648 0.05811
*ns2.novatelbg.n 83.228.93.76 2 64 377 0.00996 -0.041097 0.06094

ntpdc has plenty of other ntpd query options, e.g. :

ntpdc> help
ntpdc commands:
addpeer controlkey fudge keytype quit timeout
addrefclock ctlstats help listpeers readkeys timerstats
addserver debug host loopinfo requestkey traps
addtrap delay hostnames memstats reset trustedkey
authinfo delrestrict ifreload monlist reslist unconfig
broadcast disable ifstats passwd restrict unrestrict
clkbug dmpeers iostats peers showpeer untrustedkey
clockstat enable kerninfo preset sysinfo version
clrtrap exit keyid pstats sysstats

ntpdc is an advanced query tool for ntpd , servers. Another tool exists called ntpq which syntax is almost identical to ntpdc . The main difference between the two is ntpq is a monitoring tool mostly used just for monitoring purposes, where ntpdc can also change plenty of things in the server configuration.

For people who want to learn more on ntpd the man page is a great reading , containing chapters describing thoroughfully exactly how NTPD time servers operate, etc.

How to solve “IPv6 addrconf: prefix with wrong length 48”

Friday, December 9th, 2011

While reading some log files on one of the co-located servers at UK2.net , I’ve noticed dmesg log was filling in with tons of junk messages like:

[4288245.609762] IPv6 addrconf: prefix with wrong length 48
[4288445.984153] IPv6 addrconf: prefix with wrong length 48
[4288646.296110] IPv6 addrconf: prefix with wrong length 48
[4288846.609119] IPv6 addrconf: prefix with wrong length 48
[4289046.922604] IPv6 addrconf: prefix with wrong length 48
[4289247.267273] IPv6 addrconf: prefix with wrong length 48
[4289447.545800] IPv6 addrconf: prefix with wrong length 48
[4289647.857789] IPv6 addrconf: prefix with wrong length 48
[4289848.169308] IPv6 addrconf: prefix with wrong length 48
[4290048.595104] IPv6 addrconf: prefix with wrong length 48
[4290248.808497] IPv6 addrconf: prefix with wrong length 48
[4290449.103503] IPv6 addrconf: prefix with wrong length 48
[4290649.418747] IPv6 addrconf: prefix with wrong length 48
[4290849.742731] IPv6 addrconf: prefix with wrong length 48

After checking the message to make sure it would not suddeny lead to server hang ups I figured out the message is not dangerous but just an annoying warning that some other (routing) host on the same network as mine is advertising something using IPv6, that doesn’t fit with my IPv6 server config.
Actually the server doesn’t use the IPv6 configuration at all, and the assigned configuration is just some kind of auto set IPv6 IP address.
The server, where this message appeared is powered by 64 bit Debian GNU / Linux Squeeze

To resolve the annoying message, 5 of the kernel sysctl settings needs to be modified with cmds:

debian:~# sysctl net.ipv6.conf.all.accept_ra=0
debian:~# sysctl net.ipv6.conf.all.autoconf=0
debian:~# sysctl net.ipv6.conf.lo.autoconf=0
debian:~# sysctl net.ipv6.conf.eth0.autoconf=0
debian:~# sysctl net.ipv6.conf.eth1.autoconf=0

Furthermore to prevent the IPv6 addrconf: prefix with wrong length 48 to re-appear after future server reboots / boots the two sysctl values of course needs to be included in /etc/sysctl.conf e.g.:

debian:~# echo 'net.ipv6.conf.all.accept_ra = 0' >> /etc/sysctl.conf
debian:~# echo 'net.ipv6.conf.all.autoconf = 0' >> /etc/sysctl.conf
echo 'net.ipv6.conf.lo.autoconf = 0' >> /etc/sysctl.conf
echo 'net.ipv6.conf.eth0.autoconf = 0' >> /etc/sysctl.conf
echo 'net.ipv6.conf.eth1.autoconf = 0' >> /etc/sysctl.conf

My server has 2 etherhet interfaces, eth0 and eth1 that’s the reason I had to set up autoconf kernel the two vars net.ipv6.conf.eth0.autoconf and net.ipv6.conf.eth1.autoconf , for more interfaces more kernel vars (eth2, eth3) etc. needs to be set to “0”

I’ve seen posts online of people complaining about a similar errors to IPv6 addrconf: prefix with wrong length 48, like:

IPv6 addrconf: prefix with wrong length 96
IPv6 addrconf: prefix with wrong length 128

The solution to this messages is also done by setting the above described sysctl kernel vars. Setting the vars will suppress the messages which by the way with time could take up A LOT of disk space and fills /var/log/dmesg with this useless message, hence applying the “fix” is a must 😉

Another thing, I’ve noticed while I was researching about the error and the respective fix is that people on other deb based distributions like Ubuntu as well as on Fedora GNU / Linux had also experienced the issue.

How to fix “vbAccelerator SGrid II Control Runtime Error” popup window in Windows XP

Tuesday, May 24th, 2011

Windows XPI’m in a friend and he asked me to take a look at his Win PC.
When the Windows boots up a weird and annoying error message appears that reads:

vBAccelerator SGrid II Control Runtime Error

I figured out the SGrid II Control Runtime Error was a cause of a mis-working old Malware Bytes portable installation.

I’ve found online the following tool which fixes the stupid VBAccelerator SGrid II error

By simply downloading and starting the mbam-clean.exe binary after a computer restart the error gets fixed.