Posts Tagged ‘writting’

PortQRY Native Windows command line Nmap like port scanner – Check status of remote host ports on Windows

Monday, June 30th, 2014

Windows_command_line_and_gui_port-scanner-portqry-like-nmap-check-status-of-remote-host-service-windows-xp-7-2000-2003-2008-server
Linux users know pretty well Nmap (network mapper) tool which is precious in making a quick server host security evaluation.
Nmap binary port is available for Windows too, however as nmap is port for its normal operation you have to install WinPcap (Packet Capture Library).
And more importantly it is good to mention if you need to do some remote port scanning from Windows host, there is Microsoft produced native tool called PortQry (Port Query).

PortQRY is a must have tool for the Windows Admin as it can help you troubleshoot multiple network issues.

windows-nmap-native-alternative-portqry-gui-ui-web-service-port-scan-screenshot
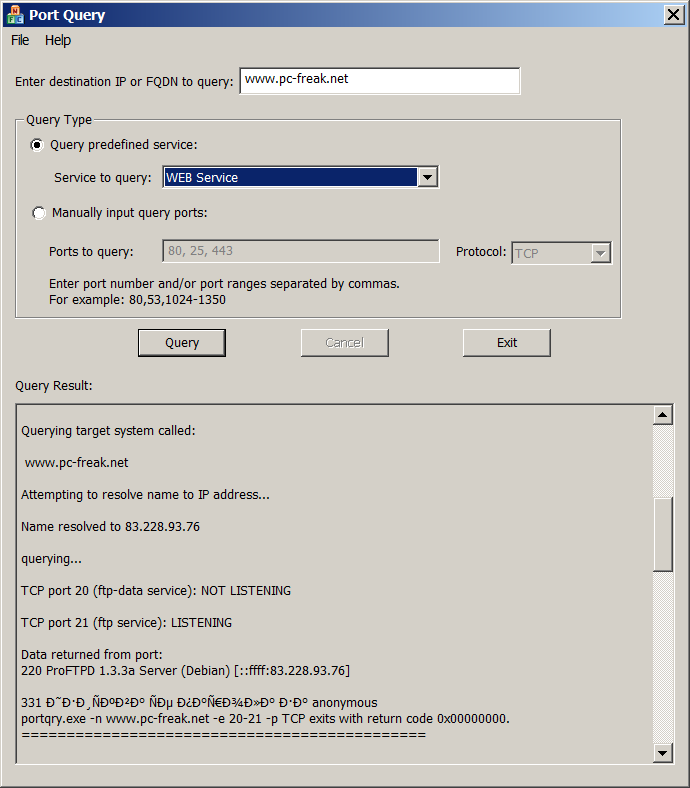
As of time of writting this post PortQRY is at version 2, PortQRY tool has also a GUI (UI) Version for those lazy to type in command line.

Port Query UI tool (portqueryui.exe) is a tool to query open ports on a machine. This tool makes use of command line version port query tool (portqry.exe). The UI provides the following functionalities:

   1. Following "Enter destination IP or FQDN to query:”, an edit box needs the user to specify the IP address or FDQN name of the destination to query port status.

   2. The end user is able to choose Query type:

        – Predefined services type. It groups ports into service, so that you can query multiple ports for a service by a single click. Service includes "Domains and Trusts", "DNS Queries", "NetBIOS     communication", "IPSEC", "Networking", "SQL Service", "WEB Service", "Exchange Server",          "Netmeeting", and other services.

You can check detail port and protocol info for each service category by opening Help -> Predefined Services…

PORTQRY is part of Windows Server 2003 Support Tools and can be added to any NT based Windows (XP, 2003, Vista, 7, 8)
 You can download portqry command line tool here or my mirrored portqry version command line port scanner here and PortQRY UI here.

PortQRY comes in PortQryV2.exe package which when run extracts 3 files: PortQry.exe program, EULA and readme file. Quickest way to make portqry globally accessible from win command prompt is to copy it to %SystemRoot% (The environment variable holding default location for Windows Installation directory).
It is good idea to add PortQRY to default PATH folder to make it accessible from command line globally.

PorQry has 3 modes of operation:

Command Line Mode, Interactive Mode and Local Mode

portqry-windows-native-security-port-network-scanner-nmap-equivalent-help-screenshot
 

Command Line Mode – is when it is invoked with parameters.

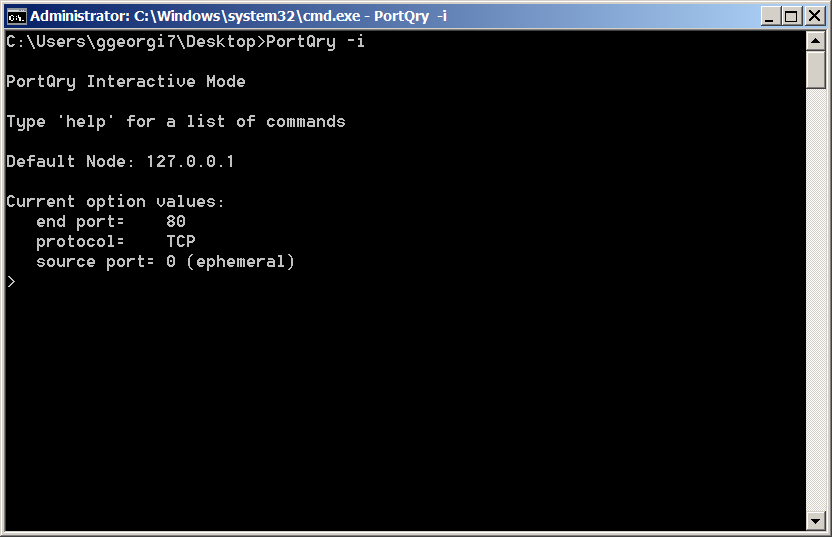
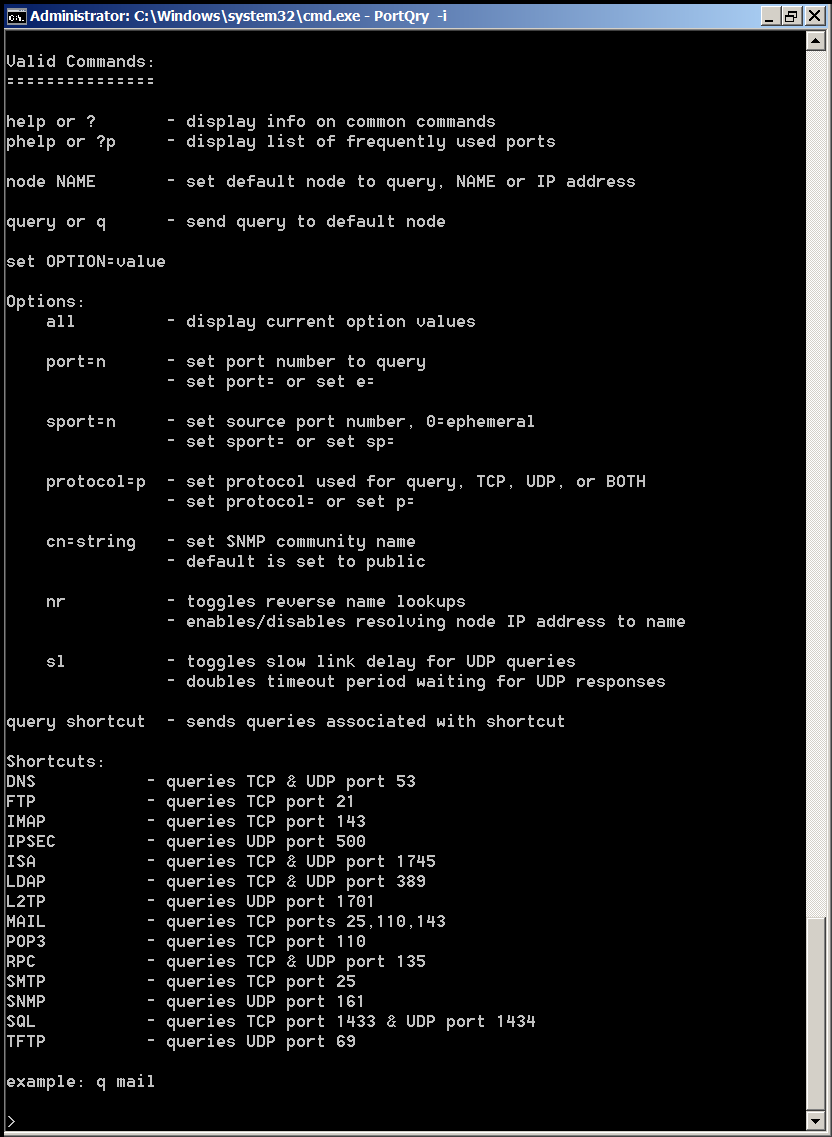
Interactive Mode is when it runs in interactive CLI console

portqry-windows-native-security-port-network-scanner-nmap-equivalent-interactive-mode-screenshot

portqry-windows-native-security-port-network-scanner-nmap-equivalent-interactive-mode-help-screenshot
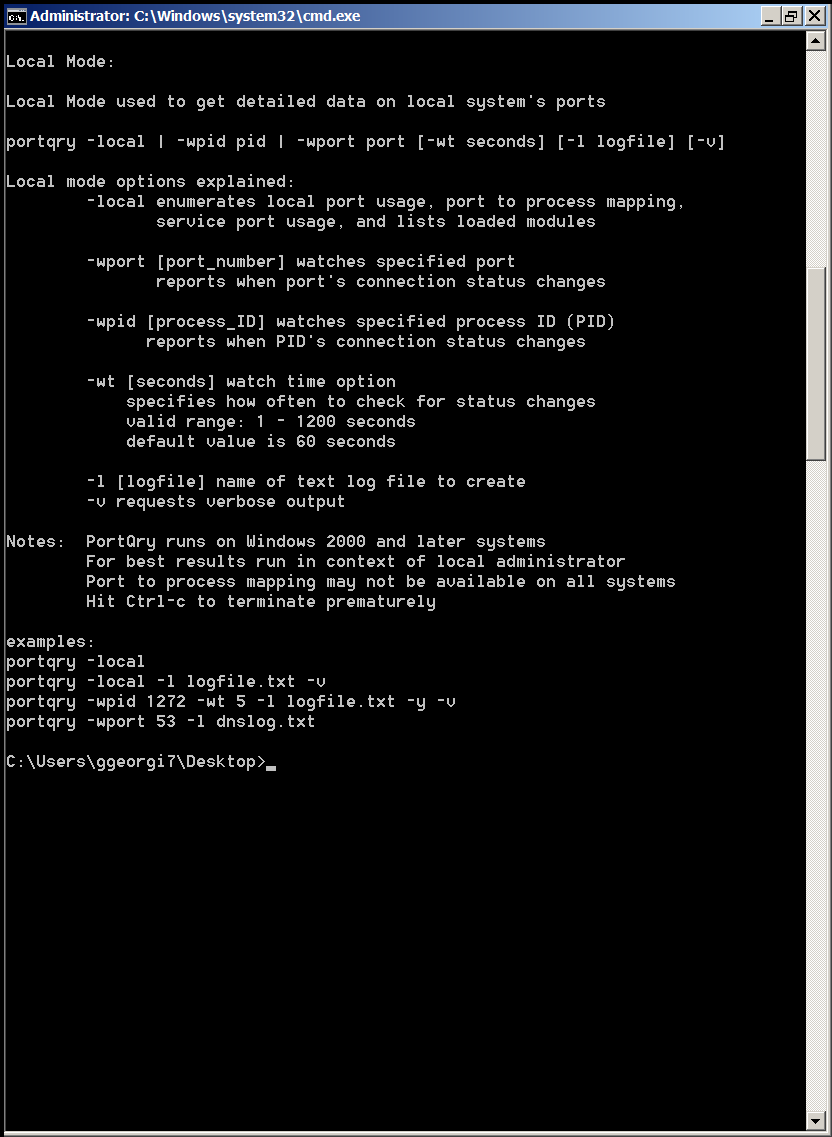
and Local Mode is used whether information on local system ports is required.

portqry-windows-native-security-port-network-scanner-nmap-equivalent-local-mode-screenshot


Here are some examples on basic usage of portqry:
 

1. Check if remote server is running webserver is listening on (HTTPS protocol) TCP port 80

portqry -n servername -e 80
 

Querying target system called:

 www.pc-freak.net

Attempting to resolve name to IP address…


Name resolved to 83.228.93.76

querying…

TCP port 80 (http service): FILTERED

2. Check whether some common Samba sharing and DNS UDP ports are listening

portqry -n servername -p UDP -o 37,53,88,135
 

Querying target system called:

servername

Attempting to resolve name to IP address…


Name resolved to 74.125.21.100

querying…

UDP port 37 (time service): NOT LISTENING

UDP port 53 (domain service): NOT LISTENING

UDP port 88 (kerberos service): NOT LISTENING

UDP port 135 (epmap service): NOT LISTENING

3. Scan open ports in a port range – Check common services port range (port 1-1024)

portqry -n 192.168.1.20 -r 1:1024 | find ": LISTENING"

4. Logging network scan output to file

Portqry –n localhost –e 135 -l port135.txt
 

Querying target system called:

 localhost

Attempting to resolve name to IP address…


Name resolved to 127.0.0.1

querying…

TCP port 135 (epmap service): LISTENING

Using ephemeral source port
Querying Endpoint Mapper Database…
Server's response:

UUID: d95afe70-a6d5-4259-822e-2c84da1ddb0d
ncacn_ip_tcp:localhost[49152]

UUID: 2f5f6521-cb55-1059-b446-00df0bce31db Unimodem LRPC Endpoint
ncacn_np:localhost[PIPEwkssvc]

Total endpoints found: 38


5. Scanning UDP and TCP protocols port

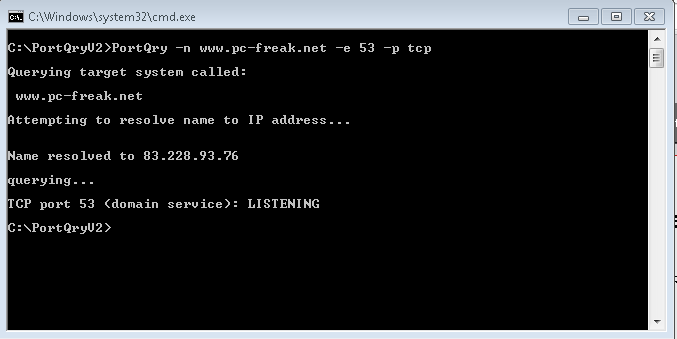
PortQry -n www.pc-freak.net -e 25 -p both


Querying target system called:

 www.pc-freak.net

Attempting to resolve name to IP address…


Name resolved to 83.228.93.76

querying…

TCP port 53 (domain service): LISTENING

UDP port 53 (domain service): LISTENING or FILTERED

Sending DNS query to UDP port 53…


6. Checking remote server whether LDAP ports are listening

Portqry -remotehost.com -p tcp -e 389
Portqry -n remotehost.com -p tcp -e 636
Portqry -n remotehost.com -p both -e 3268
Portqry -n remotehost.com -p tcp -e 3269


7. Making SNMP community name requests

portqry -n host2 -cn !my community name! -e 161 -p udp


8. Initiating scan from pre-selected source port

A network socket request initiation is useful from certain port because, some remote services expect connection from certain ports, lets say you're connecting to mail server, you might want to set as a source port – port 25, to make remote server another SMTP is connecting.

portqry -n www.pc-freak.net -e 25 -sp 25


9. Scanning whether server ports required by Active Directories are opened

Common ports used in Windows hosts to communicate between each other to sustain Active Directory are:

88 (Kerberos)
135 (RPC)
389 (LDAP)
445 (CIFS)
3268 (Global Catalog)

portqry -n remote-host.com -o 88,135,389,445,3268 -p both

portqry has also a silent mode with the "-q" switch if you want to get only whether a port is LISTENING (opened).

On port scan it returns three major return codes (very useful for scripting purposes);

  • returncode 0 – if port / service is listening
  • returncode 1 – if service is not listening
  • returncode 2 – if service is listening or filtered

PortQry is very simple port scanner for win sysadms and is precious tool for basic network debugging (services)  on Windows farms, however it doesn't have the powerful cracker functionality, application / OS versioning etc. like Nmap.


How to fix problem with Skype No Video on MacBook Air with Mac OS X 10.8.6 / Mac OS X Repair OS file permissions with Disk Utility

Monday, December 9th, 2013

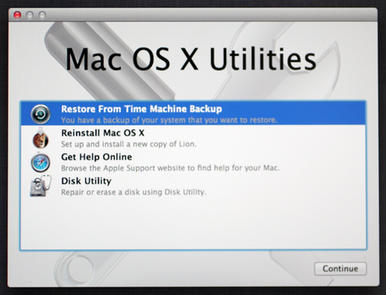
mac os x utilities disk utility reset Mac OSX file permissions to default
My girlfriend Svetlana has MacBook Air and just recently her skype Video calls stopped working once again after Mac OS X offered her to apply some update. Her notebook as of time of writting this post is running Mac OS X version 10.8.6. About 1 month and a halfago she was facing same Skype No VIdeo on Mac BookAri issues for how I fixed her No Video Skype issues back then check here. Initially I thought again the problem will be identical and to test if Web Camera hardware is detected on a hardware level by OS, I tried to check if it is displaying videoi FaceTime application. Last time there was no Video in Skype on her Mac Book Air  I remember clearly camera was detected on OS level and displaying well in Facetime, however this time even in facetime I couldn't see a capture of myself … As obviously problem was not in Skype Mac OS previous time fix of substituting AppleCamera.plugin with older version would not fix it. After some evaluation on problem and reading large number of posts on Apple support forums, I've came to the conclusion that it is possible the whole issues are faced by improper permissions applied by latest applied Mac OS update. In such cases people were recommending to Repair Mac OS Standard OS Files Permissions using an OS embedded tool called Disk Utility.
Disk Utility is an application that's built into OS X that can perform lots of useful and even scary actions.Sysadmins and advanced users seem to find frequent need of this handy tool but those newer to the Mac OS it is better to only use it after reading the docs and well realizing what exactly doing.

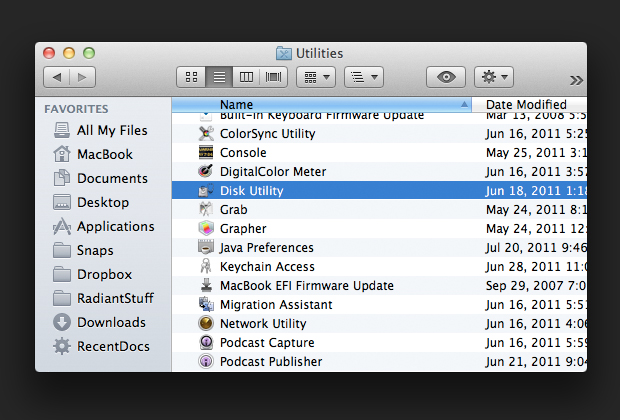
To Find / Open Disk Utility on Mac OS;

Launch Applications folder -> Utilities (folder), click the name of your startup disk, and select Repair Disk Permissions.

mac-oSX-applications-utilitilities-diskutility


Mac OS X 10.8.6 Disk Utility Repair Disk Permissions screenshot
As I can understand from other ports reverting Mac OS File permissions to their default can solve a number of strange issues with Mac OS.
After repairing Mac OS X basis OS file permissions and testing in FaceTime and Skype, Camera god detected and Video was working fine 🙂
Hope this little article helps someone to fix same issues, if so please drop a thank you comment 😉

Happy Birthday Debian! – Rejoice, Debian GNU / Linux turns 20 :)

Wednesday, August 28th, 2013

Debian Happy birthday cake with debian logo spiral - Debian Linux becomes 20 years old

 A bit outdated news but still worthy to mention as Debian GNU / Linux is important part of my life. On 16 of August this year Debian turned 20 years! I'm actively using Debian Linux for servers and Desktops over the past 13 years and for this time I've seen right before my eyes how debian grow and from buggy hobbyinst Linux distribution became a robust and rock-solid OS. Moreover Debian is now practically the most important Linux distribution around. Thanks to it currently a thousands of other world changing distributions like Ubuntu, Arch Linux, Knoppix Linux LiveCD, Linux Mint etc. Debian is truly multi platform as of time of writting supports 10 hardware architecture (platforms) – in this number Embedded devices like ARM processors, has translation of most shipped software to 73 languages and comes with about 20 000 installable software packages. Contribution of Debian GNU Linux for Free software community is immerse, hundreds of millions or even billion Debian servers or some kind of Debian based OSes are running all around the net. Besides that Debian is one of the largest if not the biggest and most influential Open Source Project. By its essence existing of Debian is just a miracle. 
Though out of date again,  lets great each other with Happy Debian Anniversary and Wish Debian a many and healthy years of successful development!

Converting jpeg / png pictures to mp4 format videos on Linux with avconv

Wednesday, June 12th, 2013

making mp4 videos from jpeg and png pictures gnu linux
Here in my job, there is one internet (TV) around which can only read video formats in Mp4. Henceforth I needed a way to convert a number of JPEG / PNG format Picture files to Mp4. In my situation I needed to make video out of pictures and script it as this was required to be later pushed via FTP protocol to the Internet TV. Ater doing some research I figured out this is possible to build video out of pictures by using together ImageMagick and avconv.

First thing is to send pictures in certain resolution. There is a tool from imagemagick package called mogrify (which can do that). To convert a number of different dimension pictures to lets say 1024×768, used:

noah:~# mogrify -resize 1024×768 *.png

In earlier Linux distributions to create a movie from pictures ffmpeg was used like so:

# ffmpeg -qscale 5 -r 20 -b 9600 -i SDC%04d.png movie.mp4

However in newer version of ffmpeg support for this is removed, and to make video from images, there is other tool avconv. On most Linux distributions avconv is part of libav-tools package.

To install on avconv Debian and Ubuntu;
noah:~# apt-get install –yes libav-tools

Once installed to create single mp4 video from JPEG or PNG pictures:

noah:~# avconv -i SDC106001.JPG SDC10595.JPG SDC13611.JPG SDC13612.JPG SDC13614.JPG  movie-from-pictures.mp4

I found there is also a nice GUI,software Open Movie Editor, which can create video out of number of pictuers stored in a directory. 
Open Movie Editor is available in most Linux distributions (unfortunately as of time of writting on Debian Wheeze there is no install candidate of openmovieeditor), there is however substitute package doing the same job called openshot);
On latest Debian stable to install Openshot:

noah:~# apt-get install –yes openshot

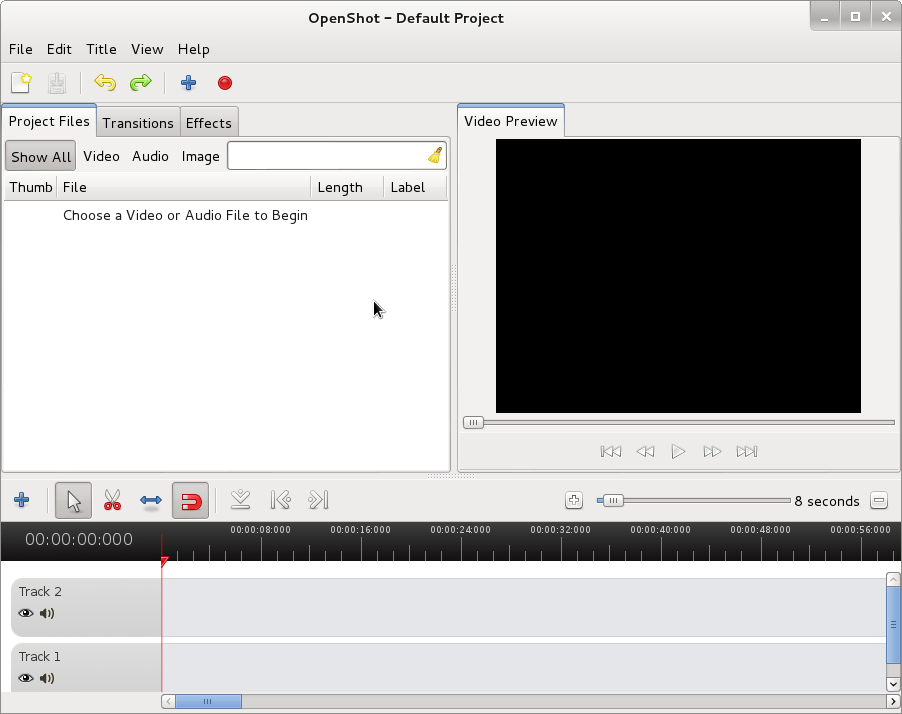
openshot running on Debian Wheezy Linux create video from pictures

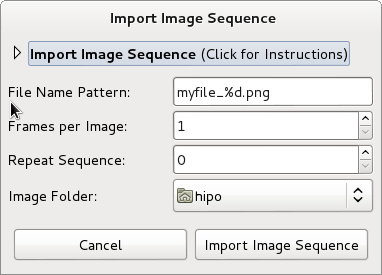
Openshot has an option (Import Image Sequence) from File -> Import Image Sequence. Using this option you can select a directory with fles with common prefix name lets say IMG*.png and create Video based on the photos inside.

Linux create video from images import image sequence Debian / Fedora and Ubuntu

On Ubuntu Linux or other distro where openmovieeditor is avialable install it with:

ubuntu:~# apt-get install –yes openmovieeditor

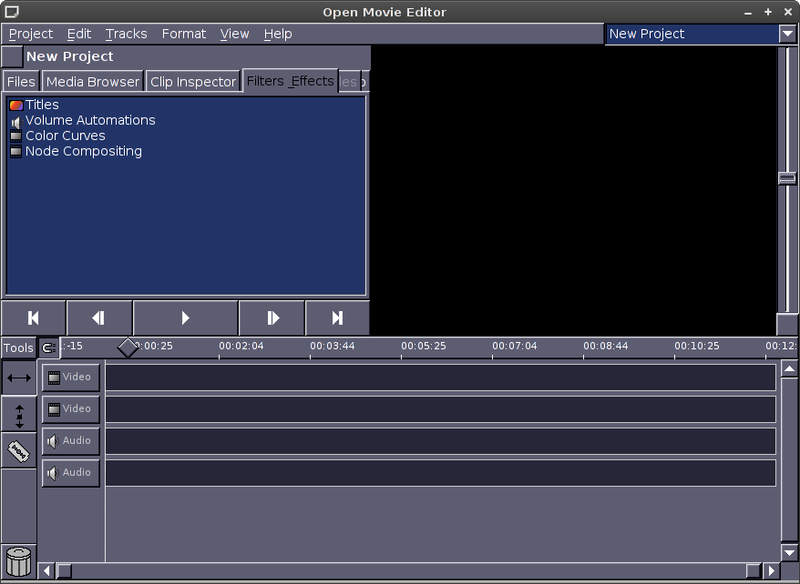
Openmovieeditor Linux create movies from images screenshot
To create a video out of pictures click on Media Browser tab. Choose the Folder with pictures from which video will be generated and drag them to the Video bar
(window).

To save produced video navigate to menus:

Project -> Render

and select format to save it as. One good codec to save output is Quicktime's. To convert later Quicktime MOV Video to MP4 video,
there is the  Pytube Media Converter script.

Well that's all enjoy your new videos from pictures 🙂

Linux: Delete empty lines from text file with sed, awk, grep and vim

Saturday, March 23rd, 2013

As a system administrator, sometimes is necessary to do basic plain text processing for various sysadmin tasks. One very common task I do to remove empty lines in file. There are plenty of ways to do it i.e. – with grep, sed, awk, bash, perl etc.

1. Deleting empty file lines with sed

The most standard way to do it is with sed, as sed was written to do in shell quick regexp. Here is how;

sed '/^\s*$/d' file_with_empty_lines.txt > output_no_empty_lines.txt

2. Deleting empty file lines with awk

It is less of writting with awk, but I always forget the syntax and thus I like more sed, anyways here is how with awk;

cat file_with_empty_lines.txt | awk 'NF' >
output_no_empty_lines.txt

3. Deleting empty lines with grep

Grep  regular expression can be used. Here is grep cmd to cut off empty lines from file;

grep -v '^\s*$' file_with_empty_lines.txt >
output_no_empty_lines.txt

4. Delete empty files with vi / vim text editor

Open vi / vim text editor

$ vim

Press Esc+: and if empty lines doesn't have empty space characters use command

g/^$/d

Whether, empty lines contain " " – space characters (which are not visible in most text editors), use vi cmd:
g/^ $/d

How to speed up Linux Flash Player videos in Firefox on old Computers

Wednesday, January 30th, 2013

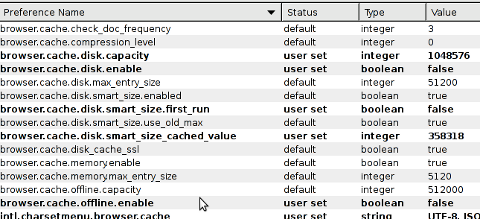
Firefox browser cache variables to tune for better Flash player performance Linux screenshot
 

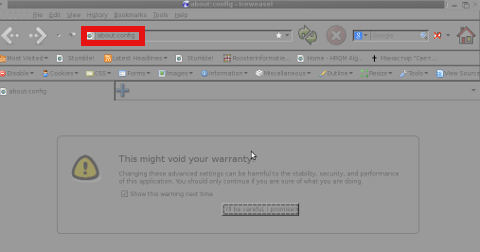
If you happen to run old Computer hardware with lets say 256 or 512 MB of memory, a CPU of 600-800Mhz and a small hard disk like 5 / 10 GB and you need to have Flash Player on Firefox play Videos in Youtube and Vimeo with as less obstructions as possible, it is useful to take a look and try tuning up browser caching values, to do so type in URL Address Bar


about:config

iceweasel about:config Iceweasel Firefox about:config screenshot in URL address bar

Then search for;

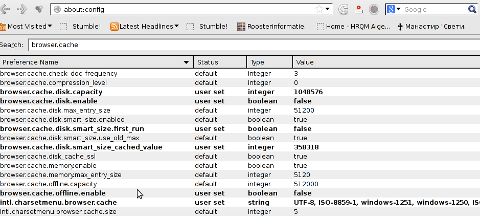
browser.cache

Iceweasel Firefox browser cache screenshot Debian Gnu Linux screenshot tiny

Raise (tune up) the values for:

browser.cache.disk.capacity 1048576

Try to raise this value with 50% (524288), (1048576 + 524288) = 1572864.

By default, as you see

browser.cache.disk.enable is set to false

Try to change it to true, as this might have positive effect on flash video buffering and thus improve a bit experience.

browser.cache.disk.smart_size_cached_value 358318

Again it is good practice to try raise it with 50% and test if Flash Player performs better. I.e. (358318/2) = 179159, (358318+179159) = 537477. Hence raise it too lets say 358318. I give the 50%, example because the cache size on Firefox (IceWeasel) will differ depending on the browser version Linux distro and architecture.

There are few other caching, variables to tune, though I doubt if they will have impact on Flash Player performance it is good to know they're there. To see all Mozilla caching variables in Search filed, type "cache". One other non Flash Player performance related variable to check and tune is:

image.cache.size

In time of writting on my Firefox ver. 18.0.1 it is set to 5242880.
I'm looking forward to hear if this little tuning tips helped improve Flash Player. If you happen to have some positive impact on Video flow, please drop a comment with Linux distribution type and version, Flash Player version and changed caching variables.
Hope this little post helps. Happy tuning 🙂
 

how to set Youtube default to use Adobe Flash player – fixing weird problem with youtube displaying videos using HTML5

Tuesday, January 29th, 2013


Youtube change html trial to Adobe Flash Player - how to change Youtube videos be played with Adobe Flash Player

I'm just coming from being a guest to dear friends. They're having a bit old hardware PC running Windows XP and some old ATI Radeon model video card. A video was played in youtube so I noticed the video is displaying very slow. The PC hardware was good enough to play videos with no delays and image chops, so I give it a check.
My guess was something is wrong with Video driver and to make driver is installed okay I take a look in:
Control Panel -> System -> Hardware -> Device Manager

For my surprise there all was fine, so my next guess-es were:

  • Mozilla Firefox Browser is out of date
  • Computer resolution is set to too high for the old video adapter hardware
  • Something is wrong with Adobe Flash Player
  • Computer has Viruses or Spyware loading CPU creating the video lags
     

I check Mozilla Firefox and it was latest version; Help -> About Firefox As of time of writting Firefox 18.0.1 The computer Monitor was a huge 21 inch LCD HP display and Windows was configured to display on a very high resolution ;

1280×1024 (32 bit Colors)

I've earlier, seen old Computer hardware creating similar video delays and chop issues with Played videos thus to see if this will solve the issue lowered down video resolution 1024×768 with 16 bit color depth.  Video continued to be showing slowly in every few seconds and display "choppy", so I excluded it as cause.

To make sure something is not wrong with Flash Player, I check in browser about installed plugins by typing in URL Address bar;

about:plugins

Very surprisingly the Flash Player was not installed! I hurried and install – googling, "install flash player" and following the trivial install procedure.

Then I give Firefox a restart and tested video with Alexander Nevsky Russian Movie (which btw is an interesting one to see for people who value art and history). The movie chops continued, I checked Flash version clicking on the video again just to determine, weirdly still Youtube was displaying videos usiong HTML5 (WebM) format!

I check once again if flash player is properly installed in about:plugins and weirdly all seemed fine I had on the PC properly working installed Adobe Flash 11.x.x. Now this was weird ?

For a first time I had a situation, where even though I installed Flash Player, Youtube continued to show videos using HTML5 WebM (open source video format). Now I should say I'm a big fan of HTML5 and open technologies, so HTML5 is great, the only problem is it still not production ready so for ordinary user Flash Player is still better – Flash's video buffering is much better, its compression is better, it is less buggy etc. etc.

It took me a bit of pondering Why Youtube was showing videos in HTML5 instead of using the Installed and working Flash Player?? After about 5 minutes of googling, I came to conclusion the person who fixed their Software, some months before had on purpose choose Youtube to be displayed with Experimetnal HTML5. I was not sure how to check if HTML5 is set as a default player in Youtube, so looked on the net, The page to change it is found by googling for "youtube html trial".

The URL to tune this as of time of writting is on;

https://www.youtube.com/html5


youtube change html trial set youtube to use adobe flash player screenshot pciture Windows


I had to click on;

Leave the HTML5 Trial  – to stop using experimental Youtube HTML5 support

After a FF restart and lowered resolution to 1024×768 in 32 bit color depth, video started playing nice & smoothly 😉