Posts Tagged ‘variables’

How to filter dhcp traffic between two networks running separate DHCP servers to prevent IP assignment issues and MAC duplicate addresses

Tuesday, February 8th, 2022

how-to-filter-dhcp-traffic-2-networks-running-2-separate-dhcpd-servers-to-prevent-ip-assignment-conflicts-linux
Tracking the Problem of MAC duplicates on Linux routers
 

If you have two networks that see each other and they're not separated in VLANs but see each other sharing a common netmask lets say 255.255.254.0 or 255.255.252.0, it might happend that there are 2 dhcp servers for example (isc-dhcp-server running on 192.168.1.1 and dhcpd running on 192.168.0.1 can broadcast their services to both LANs 192.168.1.0.1/24 (netmask 255.255.255.0) and Local Net LAN 192.168.1.1/24. The result out of this is that some devices might pick up their IP address via DHCP from the wrong dhcp server.

Normally if you have a fully controlled little or middle class home or office network (10 – 15 electronic devices nodes) connecting to the LAN in a mixed moth some are connected via one of the Networks via connected Wifi to 192.168.1.0/22 others are LANned and using static IP adddresses and traffic is routed among two ISPs and each network can see the other network, there is always a possibility of things to go wrong. This is what happened to me so this is how this post was born.

The best practice from my experience so far is to define each and every computer / phone / laptop host joining the network and hence later easily monitor what is going on the network with something like iptraf-ng / nethogs  / iperf – described in prior  how to check internet spepeed from console and in check server internet connectivity speed with speedtest-cliiftop / nload or for more complex stuff wireshark or even a simple tcpdump. No matter the tools network monitoring is only part on solving network issues. A very must have thing in a controlled network infrastructure is defining every machine part of it to easily monitor later with the monitoring tools. Defining each and every host on the Hybrid computer networks makes administering the network much easier task and  tracking irregularities on time is much more likely. 

Since I have such a hybrid network here hosting a couple of XEN virtual machines with Linux, Windows 7 and Windows 10, together with Mac OS X laptops as well as MacBook Air notebooks, I have followed this route and tried to define each and every host based on its MAC address to pick it up from the correct DHCP1 server  192.168.1.1 (that is distributing IPs for Internet Provider 1 (ISP 1), that is mostly few computers attached UTP LAN cables via LiteWave LS105G Gigabit Switch as well from DHCP2 – used only to assigns IPs to servers and a a single Wi-Fi Access point configured to route incoming clients via 192.168.0.1 Linux NAT gateway server.

To filter out the unwanted IPs from the DHCPD not to propagate I've so far used a little trick to  Deny DHCP MAC Address for unwanted clients and not send IP offer for them.

To give you more understanding,  I have to clear it up I don't want to have automatic IP assignments from DHCP2 / LAN2 to DHCP1 / LAN1 because (i don't want machines on DHCP1 to end up with IP like 192.168.0.50 or DHCP2 (to have 192.168.1.80), as such a wrong IP delegation could potentially lead to MAC duplicates IP conflicts. MAC Duplicate IP wrong assignments for those older or who have been part of administrating large ISP network infrastructures  makes the network communication unstable for no apparent reason and nodes partially unreachable at times or full time …

However it seems in the 21-st century which is the century of strangeness / computer madness in the 2022, technology advanced so much that it has massively started to break up some good old well known sysadmin standards well documented in the RFCs I know of my youth, such as that every electronic equipment manufactured Vendor should have a Vendor Assigned Hardware MAC Address binded to it that will never change (after all that was the idea of MAC addresses wasn't it !). 
Many mobile devices nowadays however, in the developers attempts to make more sophisticated software and Increase Anonimity on the Net and Security, use a technique called  MAC Address randomization (mostly used by hackers / script kiddies of the early days of computers) for their Wi-Fi Net Adapter OS / driver controlled interfaces for the sake of increased security (the so called Private WiFi Addresses). If a sysadmin 10-15 years ago has seen that he might probably resign his profession and turn to farming or agriculture plant growing, but in the age of digitalization and "cloud computing", this break up of common developed network standards starts to become the 'new normal' standard.

I did not suspected there might be a MAC address oddities, since I spare very little time on administering the the network. This was so till recently when I accidently checked the arp table with:

Hypervisor:~# arp -an
192.168.1.99     5c:89:b5:f2:e8:d8      (Unknown)
192.168.1.99    00:15:3e:d3:8f:76       (Unknown)

..


and consequently did a network MAC Address ARP Scan with arp-scan (if you never used this little nifty hacker tool I warmly recommend it !!!)
If you don't have it installed it is available in debian based linuces from default repos to install

Hypervisor:~# apt-get install –yes arp-scan


It is also available on CentOS / Fedora / Redhat and other RPM distros via:

Hypervisor:~# yum install -y arp-scan


Hypervisor:~# arp-scan –interface=eth1 192.168.1.0/24

192.168.1.19    00:16:3e:0f:48:05       Xensource, Inc.
192.168.1.22    00:16:3e:04:11:1c       Xensource, Inc.
192.168.1.31    00:15:3e:bb:45:45       Xensource, Inc.
192.168.1.38    00:15:3e:59:96:8e       Xensource, Inc.
192.168.1.34    00:15:3e:d3:8f:77       Xensource, Inc.
192.168.1.60    8c:89:b5:f2:e8:d8       Micro-Star INT'L CO., LTD
192.168.1.99     5c:89:b5:f2:e8:d8      (Unknown)
192.168.1.99    00:15:3e:d3:8f:76       (Unknown)

192.168.x.91     02:a0:xx:xx:d6:64        (Unknown)
192.168.x.91     02:a0:xx:xx:d6:64        (Unknown)  (DUP: 2)

N.B. !. I found it helpful to check all available interfaces on my Linux NAT router host.

As you see the scan revealed, a whole bunch of MAC address mess duplicated MAC hanging around, destroying my network topology every now and then 
So far so good, the MAC duplicates and strangely hanging around MAC addresses issue, was solved relatively easily with enabling below set of systctl kernel variables.
 

1. Fixing Linux ARP common well known Problems through disabling arp_announce / arp_ignore / send_redirects kernel variables disablement


Linux answers ARP requests on wrong and unassociated interfaces per default. This leads to the following two problems:

ARP requests for the loopback alias address are answered on the HW interfaces (even if NOARP on lo0:1 is set). Since loopback aliases are required for DSR (Direct Server Return) setups this problem is very common (but easy to fix fortunately).

If the machine is connected twice to the same switch (e.g. with eth0 and eth1) eth2 may answer ARP requests for the address on eth1 and vice versa in a race condition manner (confusing almost everything).

This can be prevented by specific arp kernel settings. Take a look here for additional information about the nature of the problem (and other solutions): ARP flux.

To fix that generally (and reboot safe) we  include the following lines into


Hypervisor:~# cp -rpf /etc/sysctl.conf /etc/sysctl.conf_bak_07-feb-2022
Hypervisor:~# cat >> /etc/sysctl.conf

# LVS tuning
net.ipv4.conf.lo.arp_ignore=1
net.ipv4.conf.lo.arp_announce=2
net.ipv4.conf.all.arp_ignore=1
net.ipv4.conf.all.arp_announce=2

net.ipv4.conf.all.send_redirects=0
net.ipv4.conf.eth0.send_redirects=0
net.ipv4.conf.eth1.send_redirects=0
net.ipv4.conf.default.send_redirects=0

Press CTRL + D simultaneusly to Write out up-pasted vars.


To read more on Load Balancer using direct routing and on LVS and the arp problem here


2. Digging further the IP conflict / dulicate MAC Problems

Even after this arp tunings (because I do have my Hypervisor 2 LAN interfaces connected to 1 switch) did not resolved the issues and still my Wireless Connected devices via network 192.168.1.1/24 (ISP2) were randomly assigned the wrong range IPs 192.168.0.XXX/24 as well as the wrong gateway 192.168.0.1 (ISP1).
After thinking thoroughfully for hours and checking the network status with various tools and thanks to the fact that my wife has a MacBook Air that was always complaining that the IP it tried to assign from the DHCP was already taken, i"ve realized, something is wrong with DHCP assignment.
Since she owns a IPhone 10 with iOS and this two devices are from the same vendor e.g. Apple Inc. And Apple's products have been having strange DHCP assignment issues from my experience for quite some time, I've thought initially problems are caused by software on Apple's devices.
I turned to be partially right after expecting the logs of DHCP server on the Linux host (ISP1) finding that the phone of my wife takes IP in 192.168.0.XXX, insetad of IP from 192.168.1.1 (which has is a combined Nokia Router with 2.4Ghz and 5Ghz Wi-Fi and LAN router provided by ISP2 in that case Vivacom). That was really puzzling since for me it was completely logical thta the iDevices must check for DHCP address directly on the Network of the router to whom, they're connecting. Guess my suprise when I realized that instead of that the iDevices does listen to the network on a wide network range scan for any DHCPs reachable baesd on the advertised (i assume via broadcast) address traffic and try to connect and take the IP to the IP of the DHCP which responds faster !!!! Of course the Vivacom Chineese produced Nokia router responded DHCP requests and advertised much slower, than my Linux NAT gateway on ISP1 and because of that the Iphone and iOS and even freshest versions of Android devices do take the IP from the DHCP that responds faster, even if that router is not on a C class network (that's invasive isn't it??). What was even more puzzling was the automatic MAC Randomization of Wifi devices trying to connect to my ISP1 configured DHCPD and this of course trespassed any static MAC addresses filtering, I already had established there.

Anyways there was also a good think out of tthat intermixed exercise 🙂 While playing around with the Gigabit network router of vivacom I found a cozy feature SCHEDULEDING TURNING OFF and ON the WIFI ACCESS POINT  – a very useful feature to adopt, to stop wasting extra energy and lower a bit of radiation is to set a swtich off WIFI AP from 12:30 – 06:30 which are the common sleeping hours or something like that.
 

3. What is MAC Randomization and where and how it is configured across different main operating systems as of year 2022?

Depending on the operating system of your device, MAC randomization will be available either by default on most modern mobile OSes or with possibility to have it switched on:

  • Android Q: Enabled by default 
  • Android P: Available as a developer option, disabled by default
  • iOS 14: Available as a user option, disabled by default
  • Windows 10: Available as an option in two ways – random for all networks or random for a specific network

Lately I don't have much time to play around with mobile devices, and I do not my own a luxury mobile phone so, the fact this ne Androids have this MAC randomization was unknown to me just until I ended a small mess, based on my poor configured networks due to my tight time constrains nowadays.

Finding out about the new security feature of MAC Randomization, on all Android based phones (my mother's Nokia smartphone and my dad's phone, disabled the feature ASAP:


4. Disable MAC Wi-Fi Ethernet device Randomization on Android

MAC Randomization creates a random MAC address when joining a Wi-Fi network for the first time or after “forgetting” and rejoining a Wi-Fi network. It Generates a new random MAC address after 24 hours of last connection.

Disabling MAC Randomization on your devices. It is done on a per SSID basis so you can turn off the randomization, but allow it to function for hotspots outside of your home.

  1. Open the Settings app
  2. Select Network and Internet
  3. Select WiFi
  4. Connect to your home wireless network
  5. Tap the gear icon next to the current WiFi connection
  6. Select Advanced
  7. Select Privacy
  8. Select "Use device MAC"
     

5. Disabling MAC Randomization on MAC iOS, iPhone, iPad, iPod

To Disable MAC Randomization on iOS Devices:

Open the Settings on your iPhone, iPad, or iPod, then tap Wi-Fi or WLAN


  1. Tap the information button next to your network
  2. Turn off Private Address
  3. Re-join the network


Of course next I've collected their phone Wi-Fi adapters and made sure the included dhcp MAC deny rules in /etc/dhcp/dhcpd.conf are at place.

The effect of the MAC Randomization for my Network was terrible constant and strange issues with my routings and networks, which I always thought are caused by the openxen hypervisor Virtualization VM bugs etc.

That continued for some months now, and the weird thing was the issues always started when I tried to update my Operating system to the latest packetset, do a reboot to load up the new piece of software / libraries etc. and plus it happened very occasionally and their was no obvious reason for it.


6. How to completely filter dhcp traffic between two network router hosts
IP 192.168.0.1 / 192.168.1.1 to stop 2 or more configured DHCP servers
on separate networks see each other

To prevent IP mess at DHCP2 server side (which btw is ISC DHCP server, taking care for IP assignment only for the Servers on the network running on Debian 11 Linux), further on I had to filter out any DHCP UDP traffic with iptables completely.
To prevent incorrect route assignments assuming that you have 2 networks and 2 routers that are configurred to do Network Address Translation (NAT)-ing Router 1: 192.168.0.1, Router 2: 192.168.1.1.

You have to filter out UDP Protocol data on Port 67 and 68 from the respective source and destination addresses.

In firewall rules configuration files on your Linux you need to have some rules as:

# filter outgoing dhcp traffic from 192.168.1.1 to 192.168.0.1
-A INPUT -p udp -m udp –dport 67:68 -s 192.168.1.1 -d 192.168.0.1 -j DROP
-A OUTPUT -p udp -m udp –dport 67:68 -s 192.168.1.1 -d 192.168.0.1 -j DROP
-A FORWARD -p udp -m udp –dport 67:68 -s 192.168.1.1 -d 192.168.0.1 -j DROP

-A INPUT -p udp -m udp –dport 67:68 -s 192.168.0.1 -d 192.168.1.1 -j DROP
-A OUTPUT -p udp -m udp –dport 67:68 -s 192.168.0.1 -d 192.168.1.1 -j DROP
-A FORWARD -p udp -m udp –dport 67:68 -s 192.168.0.1 -d 192.168.1.1 -j DROP

-A INPUT -p udp -m udp –sport 67:68 -s 192.168.1.1 -d 192.168.0.1 -j DROP
-A OUTPUT -p udp -m udp –sport 67:68 -s 192.168.1.1 -d 192.168.0.1 -j DROP
-A FORWARD -p udp -m udp –sport 67:68 -s 192.168.1.1 -d 192.168.0.1 -j DROP


You can download also filter_dhcp_traffic.sh with above rules from here


Applying this rules, any traffic of DHCP between 2 routers is prohibited and devices from Net: 192.168.1.1-255 will no longer wrongly get assinged IP addresses from Network range: 192.168.0.1-255 as it happened to me.


7. Filter out DHCP traffic based on MAC completely on Linux with arptables

If even after disabling MAC randomization on all devices on the network, and you know physically all the connecting devices on the Network, if you still see some weird MAC addresses, originating from a wrongly configured ISP traffic router host or whatever, then it is time to just filter them out with arptables.

## drop traffic prevent mac duplicates due to vivacom and bergon placed in same network – 255.255.255.252
dchp1-server:~# arptables -A INPUT –source-mac 70:e2:83:12:44:11 -j DROP


To list arptables configured on Linux host

dchp1-server:~# arptables –list -n


If you want to be paranoid sysadmin you can implement a MAC address protection with arptables by only allowing a single set of MAC Addr / IPs and dropping the rest.

dchp1-server:~# arptables -A INPUT –source-mac 70:e2:84:13:45:11 -j ACCEPT
dchp1-server:~# arptables -A INPUT  –source-mac 70:e2:84:13:45:12 -j ACCEPT


dchp1-server:~# arptables -L –line-numbers
Chain INPUT (policy ACCEPT)
1 -j DROP –src-mac 70:e2:84:13:45:11
2 -j DROP –src-mac 70:e2:84:13:45:12

Once MACs you like are accepted you can set the INPUT chain policy to DROP as so:

dchp1-server:~# arptables -P INPUT DROP


If you later need to temporary, clean up the rules inside arptables on any filtered hosts flush all rules inside INPUT chain, like that
 

dchp1-server:~#  arptables -t INPUT -F

Log rsyslog script incoming tagged string message to separate external file to prevent /var/log/message from string flood

Wednesday, December 22nd, 2021

rsyslog_logo-log-external-tag-scripped-messages-to-external-file-linux-howto

If you're using some external bash script to log messages via rsyslogd to some of the multiple rsyslog understood data tubes (called in rsyslog language facility levels) and you want Rsyslog to move message string to external log file, then you had the same task as me few days ago.

For example you have a bash shell script that is writting a message to rsyslog daemon to some of the predefined facility levels be it:
 

kern,user,cron, auth etc. or some local

and your logged script data ends under the wrong file location /var/log/messages , /var/log/secure , var/log/cron etc. However  you need to log everything coming from that service to a separate file based on the localX (fac. level) the usual way to do it is via some config like, as you would usually do it with rsyslog variables as:
 

local1.info                                            /var/log/custom-log.log

# Don't log private authentication messages!
*.info;mail.none;authpriv.none;cron.none;local0.none;local1.none        /var/log/messages


Note the local1.none is instructing the rsyslog not to log anything from local1 facility towards /var/log/message. 
But what if this due to some weirdness in configuration of rsyslog on the server or even due to some weird misconfiguration in

/etc/systemd/journald.conf such as:

[Journal]
Storage=persistent
RateLimitInterval=0s
RateLimitBurst=0
SystemMaxUse=128M
SystemMaxFileSize=32M
MaxRetentionSec=1month
MaxFileSec=1week
ForwardToSyslog=yes
SplitFiles=none

Due to that config and especially the FowardToSyslog=yes, the messages sent via the logger tool to local1 still end up inside /var/log/messages, not nice huh ..

The result out of that is anything being sent with a predefined TAGGED string via the whatever.sh script which uses the logger command  (if you never use it check man logger) to enter message into rsyslog with cmd like:
 

# logger -p local1.info -t TAG_STRING

# logger -p local2.warn test
# tail -2 /var/log/messages
Dec 22 18:58:23 pcfreak rsyslogd: — MARK —
Dec 22 19:07:12 pcfreak hipo: test


was nevertheless logged to /var/log/message.
Of course /var/log/message becomes so overfilled with "junk" shell script data not related to real basic Operating system adminsitration, so this prevented any critical or important messages that usually should come under /var/log/message / /var/log/syslog to be lost among the big quantities of other tagged tata reaching the log.

After many attempts to resolve the issue by modifying /etc/rsyslog.conf as well as the messed /etc/systemd/journald.conf (which by the way was generated with this strange values with an OS install time automation ansible stuff). It took me a while until I found the solution on how to tell rsyslog to log the tagged message strings into an external separate file. From my 20 minutes of research online I have seen multitudes of people in different Linux OS versions to experience the same or similar issues due to whatever, thus this triggered me to write this small article on the solution to rsyslog.

The solution turned to be pretty easy but requires some further digging into rsyslog, Redhat's basic configuration on rsyslog documentation is a very nice reading for starters, in my case I've used one of the Propery-based compare-operations variable contains used to select my tagged message string.
 

1. Add msg contains compare-operations to output log file and discard the messages

[root@centos bin]# vi /etc/rsyslog.conf

# config to log everything logged to rsyslog to a separate file
:msg, contains, "tag_string:/"         /var/log/custom-script-log.log
:msg, contains, "tag_string:/"    ~

Substitute quoted tag_string:/ to whatever your tag is and mind that it is better this config is better to be placed somewhere near the beginning of /etc/rsyslog.conf and touch the file /var/log/custom-script-log.log and give it some decent permissions such as 755, i.e.
 

1.1 Discarding a message


The tilda sign –  

as placed to the end of the msg, contains is the actual one to tell the string to be discarded so it did not end in /var/log/messages.

Alternative rsyslog config to do discard the unwanted message once you have it logged is with the
rawmsg variable, like so:


# config to log everything logged to rsyslog to a separate file
:msg, contains, "tag_string:/"         /var/log/custom-script-log.log
:rawmsg, isequal, "tag_string:/" stop

Other way to stop logging immediately after log is written to custom file across some older versions of rsyslog is via the &stop

:msg, contains, "tag_string:/"         /var/log/custom-script-log.log
& stop

I don't know about other versions but Unfortunately the &stop does not work on RHEL 7.9 with installed rpm package rsyslog-8.24.0-57.el7_9.1.x86_64.

1.2 More with property based filters basic exclusion of string 

Property based filters can do much more, you can for example, do regular expression based matches of strings coming to rsyslog and forward to somewhere.

To select syslog messages which do not contain any mention of the words fatal and error with any or no text between them (for example, fatal lib error), type:

:msg, !regex, "fatal .* error"


2. Create file where tagged data should be logged and set proper permissions
 

[root@centos bin]# touch /var/log/custom-script-log.log
[root@centos bin]# chmod 755 /var/log/custom-script-log.log


3. Test rsyslogd configuration for errors and reload rsyslog

[root@centos ]# rsyslogd -N1
rsyslogd: version 8.24.0-57.el7_9.1, config validation run (level 1), master config /etc/rsyslog.conf
rsyslogd: End of config validation run. Bye.

[root@centos ]# systemctl restart rsyslog
[root@centos ]#  systemctl status rsyslog 
● rsyslog.service – System Logging Service
   Loaded: loaded (/usr/lib/systemd/system/rsyslog.service; enabled; vendor preset: enabled)
   Active: active (running) since Wed 2021-12-22 13:40:11 CET; 3h 5min ago
     Docs: man:rsyslogd(8)
           http://www.rsyslog.com/doc/
 Main PID: 108600 (rsyslogd)
   CGroup: /system.slice/rsyslog.service
           └─108600 /usr/sbin/rsyslogd -n


4. Property-based compare-operations supported by rsyslog table
 

Compare-operation Description
contains Checks whether the provided string matches any part of the text provided by the property. To perform case-insensitive comparisons, use  contains_i .
isequal Compares the provided string against all of the text provided by the property. These two values must be exactly equal to match.
startswith Checks whether the provided string is found exactly at the beginning of the text provided by the property. To perform case-insensitive comparisons, use  startswith_i .
regex Compares the provided POSIX BRE (Basic Regular Expression) against the text provided by the property.
ereregex Compares the provided POSIX ERE (Extended Regular Expression) regular expression against the text provided by the property.
isempty Checks if the property is empty. The value is discarded. This is especially useful when working with normalized data, where some fields may be populated based on normalization result.


5. Rsyslog understanding Facility levels

Here is a list of facility levels that can be used.

Note: The mapping between Facility Number and Keyword is not uniform over different operating systems and different syslog implementations, so among separate Linuxes there might be diference in the naming and numbering.

Facility Number Keyword Facility Description
0 kern kernel messages
1 user user-level messages
2 mail mail system
3 daemon system daemons
4 auth security/authorization messages
5 syslog messages generated internally by syslogd
6 lpr line printer subsystem
7 news network news subsystem
8 uucp UUCP subsystem
9   clock daemon
10 authpriv security/authorization messages
11 ftp FTP daemon
12 NTP subsystem
13 log audit
14 log alert
15 cron clock daemon
16 local0 local use 0 (local0)
17 local1 local use 1 (local1)
18 local2 local use 2 (local2)
19 local3 local use 3 (local3)
20 local4 local use 4 (local4)
21 local5 local use 5 (local5)
22 local6 local use 6 (local6)
23 local7 local use 7 (local7)


6. rsyslog Severity levels (sublevels) accepted by facility level

As defined in RFC 5424, there are eight severity levels as of year 2021:

Code Severity Keyword Description General Description
0 Emergency emerg (panic) System is unusable. A "panic" condition usually affecting multiple apps/servers/sites. At this level it would usually notify all tech staff on call.
1 Alert alert Action must be taken immediately. Should be corrected immediately, therefore notify staff who can fix the problem. An example would be the loss of a primary ISP connection.
2 Critical crit Critical conditions. Should be corrected immediately, but indicates failure in a primary system, an example is a loss of a backup ISP connection.
3 Error err (error) Error conditions. Non-urgent failures, these should be relayed to developers or admins; each item must be resolved within a given time.
4 Warning warning (warn) Warning conditions. Warning messages, not an error, but indication that an error will occur if action is not taken, e.g. file system 85% full – each item must be resolved within a given time.
5 Notice notice Normal but significant condition. Events that are unusual but not error conditions – might be summarized in an email to developers or admins to spot potential problems – no immediate action required.
6 Informational info Informational messages. Normal operational messages – may be harvested for reporting, measuring throughput, etc. – no action required.
7 Debug debug Debug-level messages. Info useful to developers for debugging the application, not useful during operations.


7. Sample well tuned configuration using severity and facility levels and immark, imuxsock, impstats
 

Below is sample config using severity and facility levels
 

# Don't log private authentication messages!
*.info;mail.none;authpriv.none;cron.none;local0.none;local1.none        /var/log/messages


Note the local0.none; local1.none tells rsyslog to not log from that facility level to /var/log/messages.

If you need a complete set of rsyslog configuration fine tuned to have a proper logging with increased queues and included configuration for loggint to remote log aggegator service as well as other measures to prevent the system disk from being filled in case if something goes wild with a logging service leading to a repeatedly messages you might always contact me and I can help 🙂
 Other from that sysadmins might benefit from a sample set of configuration prepared with the Automated rsyslog config builder  or use some fine tuned config  for rsyslog-8.24.0-57.el7_9.1.x86_64 on Redhat 7.9 (Maipo)   rsyslog_config_redhat-2021.tar.gz.

To sum it up rsyslog though looks simple and not an important thing to pre

Apache disable requests to not log to access.log Logfile through SetEnvIf and dontlog httpd variables

Monday, October 11th, 2021

apache-disable-certain-strings-from-logging-to-access-log-logo

Logging to Apache access.log is mostly useful as this is a great way to keep log on who visited your website and generate periodic statistics with tools such as Webalizer or Astats to keep track on your visitors and generate various statistics as well as see the number of new visitors as well most visited web pages (the pages which mostly are attracting your web visitors), once the log analysis tool generates its statistics, it can help you understand better which Web spiders visit your website the most (as spiders has a predefined) IP addresses, which can give you insight on various web spider site indexation statistics on Google, Yahoo, Bing etc. . Sometimes however either due to bugs in web spiders algorithms or inconsistencies in your website structure, some of the web pages gets double visited records inside the logs, this could happen for example if your website uses to include iframes.

Having web pages accessed once but logged to be accessed twice hence is erroneous and unwanted, and though that usually have to be fixed by the website programmers, if such approach is not easily doable in the moment and the website is running on critical production system, the double logging of request can be omitted thanks to a small Apache log hack with SetEnvIf Apache config directive. Even if there is no double logging inside Apache log happening it could be that some cron job or automated monitoring scripts or tool such as monit is making periodic requests to Apache and this is garbling your Log Statistics results.

In this short article hence I'll explain how to do remove certain strings to not get logged inside /var/log/httpd/access.log.

1. Check SetEnvIf is Loaded on the Webserver
 

On CentOS / RHEL Linux:

# /sbin/apachectl -M |grep -i setenvif
AH00558: httpd: Could not reliably determine the server's fully qualified domain name, using localhost.localdomain. Set the 'ServerName' directive globally to suppress this message
 setenvif_module (shared)


On Debian / Ubuntu Linux:

/usr/sbin/apache2ctl -M |grep -i setenvif
AH00548: NameVirtualHost has no effect and will be removed in the next release /etc/apache2/sites-enabled/000-default.conf:1
 setenvif_module (shared)


2. Using SetEnvIf to omit certain string to get logged inside apache access.log


SetEnvIf could be used either in some certain domain VirtualHost configuration (if website is configured so), or it can be set as a global Apache rule from the /etc/httpd/conf/httpd.conf 

To use SetEnvIf  you have to place it inside a <Directory …></Directory> configuration block, if it has to be enabled only for a Certain Apache configured directory, otherwise you have to place it in the global apache config section.

To be able to use SetEnvIf, only in a certain directories and subdirectories via .htaccess, you will have defined in <Directory>

AllowOverride FileInfo


The general syntax to omit a certain Apache repeating string from keep logging with SetEnvIf is as follows:
 

SetEnvIf Request_URI "^/WebSiteStructureDirectory/ACCESS_LOG_STRING_TO_REMOVE$" dontlog


General syntax for SetEnvIf is as follows:

SetEnvIf attribute regex env-variable

SetEnvIf attribute regex [!]env-variable[=value] [[!]env-variable[=value]] …

Below is the overall possible attributes to pass as described in mod_setenvif official documentation.
 

  • Host
  • User-Agent
  • Referer
  • Accept-Language
  • Remote_Host: the hostname (if available) of the client making the request.
  • Remote_Addr: the IP address of the client making the request.
  • Server_Addr: the IP address of the server on which the request was received (only with versions later than 2.0.43).
  • Request_Method: the name of the method being used (GET, POST, etc.).
  • Request_Protocol: the name and version of the protocol with which the request was made (e.g., "HTTP/0.9", "HTTP/1.1", etc.).
  • Request_URI: the resource requested on the HTTP request line – generally the portion of the URL following the scheme and host portion without the query string.

Next locate inside the configuration the line:

CustomLog /var/log/apache2/access.log combined


To enable filtering of included strings, you'll have to append env=!dontlog to the end of line.


CustomLog /var/log/apache2/access.log combined env=!dontlog


You might be using something as cronolog for log rotation to prevent your WebServer logs to become too big in size and hard to manage, you can append env=!dontlog to it in same way.

If you haven't used cronolog is it is perhaps best to show you the package description.

server:~# apt-cache show cronolog|grep -i description -A10 -B5
Version: 1.6.2+rpk-2
Installed-Size: 63
Maintainer: Debian QA Group <packages@qa.debian.org>
Architecture: amd64
Depends: perl:any, libc6 (>= 2.4)
Description-en: Logfile rotator for web servers
 A simple program that reads log messages from its input and writes
 them to a set of output files, the names of which are constructed
 using template and the current date and time.  The template uses the
 same format specifiers as the Unix date command (which are the same
 as the standard C strftime library function).
 .
 It intended to be used in conjunction with a Web server, such as
 Apache, to split the access log into daily or monthly logs:
 .
   TransferLog "|/usr/bin/cronolog /var/log/apache/%Y/access.%Y.%m.%d.log"
 .
 A cronosplit script is also included, to convert existing
 traditionally-rotated logs into this rotation format.

Description-md5: 4d5734e5e38bc768dcbffccd2547922f
Homepage: http://www.cronolog.org/
Tag: admin::logging, devel::lang:perl, devel::library, implemented-in::c,
 implemented-in::perl, interface::commandline, role::devel-lib,
 role::program, scope::utility, suite::apache, use::organizing,
 works-with::logfile
Section: web
Priority: optional
Filename: pool/main/c/cronolog/cronolog_1.6.2+rpk-2_amd64.deb
Size: 27912
MD5sum: 215a86766cc8d4434cd52432fd4f8fe7

If you're using cronolog to daily rotate the access.log and you need to filter out the strings out of the logs, you might use something like in httpd.conf:


CustomLog "|/usr/bin/cronolog –symlink=/var/log/httpd/access.log /var/log/httpd/access.log_%Y_%m_%d" combined env=!dontlog


3. Disable Apache logging access.log from certain USERAGENT browser
 

You can do much more with SetEnvIf for example you might want to omit logging requests from a UserAgent (browser) to end up in /dev/null (nowhere), e.g. prevent any Website requests originating from Internet Explorer (MSIE) to not be logged.

SetEnvIf User_Agent "(MSIE)" dontlog

CustomLog /var/log/apache2/access.log combined env=!dontlog


4. Disable Apache logging from requests coming from certain FQDN (Fully Qualified Domain Name) localhost 127.0.0.1 or concrete IP / IPv6 address

SetEnvIf Remote_Host "dns.server.com$" dontlog

CustomLog /var/log/apache2/access.log combined env=!dontlog


Of course for this to work, your website should have a functioning DNS servers and Apache should be configured to be able to resolve remote IPs to back resolve to their respective DNS defined Hostnames.

SetEnvIf recognized also perl PCRE Regular Expressions, if you want to filter out of Apache access log requests incoming from multiple subdomains starting with a certain domain hostname.


SetEnvIf Remote_Host "^example" dontlog

– To not log anything coming from localhost.localdomain address ( 127.0.0.1 ) as well as from some concrete IP address :

SetEnvIf Remote_Addr "127\.0\.0\.1" dontlog

SetEnvIf Remote_Addr "192\.168\.1\.180" dontlog

– To disable IPv6 requests that be coming at the log even though you don't happen to use IPv6 at all

SetEnvIf Request_Addr "::1" dontlog

CustomLog /var/log/apache2/access.log combined env=!dontlog


– Note here it is obligatory to escape the dots '.'


5. Disable robots.txt Web Crawlers requests from being logged in access.log

SetEnvIf Request_URI "^/robots\.txt$" dontlog

CustomLog /var/log/apache2/access.log combined env=!dontlog

Using SetEnvIfNoCase to read incoming useragent / Host / file requests case insensitve

The SetEnvIfNoCase is to be used if you want to threat incoming originators strings as case insensitive, this is useful to omit extraordinary regular expression SetEnvIf rules for lower upper case symbols.

SetEnvIFNoCase User-Agent "Slurp/cat" dontlog
SetEnvIFNoCase User-Agent "Ask Jeeves/Teoma" dontlog
SetEnvIFNoCase User-Agent "Googlebot" dontlog
SetEnvIFNoCase User-Agent "bingbot" dontlog
SetEnvIFNoCase Remote_Host "fastsearch.net$" dontlog

Omit from access.log logging some standard web files .css , .js .ico, .gif , .png and Referrals from own domain

Sometimes your own site scripts do refer to stuff on your own domain that just generates junks in the access.log to keep it off.

SetEnvIfNoCase Request_URI "\.(gif)|(jpg)|(png)|(css)|(js)|(ico)|(eot)$" dontlog


SetEnvIfNoCase Referer "www\.myowndomain\.com" dontlog

CustomLog /var/log/apache2/access.log combined env=!dontlog


6. Disable Apache requests in access.log and error.log completely


Sometimes at rare cases the produced Apache logs and error log is really big and you already have the requests logged in another F5 Load Balancer or Haproxy in front of Apache WebServer or alternatively the logging is not interesting at all as the Web Application served written in ( Perl / Python / Ruby ) does handle the logging itself. 
I've earlier described how this is done in a good amount of details in previous article Disable Apache access.log and error.log logging on Debian Linux and FreeBSD

To disable it you will have to comment out CustomLog or set it to together with ErrorLog to /dev/null in apache2.conf / httpd.conf (depending on the distro)
 

CustomLog /dev/null
ErrorLog /dev/null


7. Restart Apache WebServer to load settings
 

An important to mention is in case you have Webserver with multiple complex configurations and there is a specific log patterns to omit from logs it might be a very good idea to:

a. Create /etc/httpd/conf/dontlog.conf / etc/apache2/dontlog.conf
add inside all your custom dontlog configurations
b. Include dontlog.conf from /etc/httpd/conf/httpd.conf / /etc/apache2/apache2.conf

Finally to make the changes take affect, of course you will need to restart Apache webserver depending on the distro and if it is with systemd or System V:

For systemd RPM based distro:

systemctl restart httpd

or for Deb based Debian etc.

systemctl apache2 restart

On old System V scripts systems:

On RedHat / CentOS etc. restart Apache with:
 

/etc/init.d/httpd restart


On Deb based SystemV:
 

/etc/init.d/apache2 restart


What we learned ?
 

We have learned about SetEnvIf how it can be used to prevent certain requests strings getting logged into access.log through dontlog, how to completely stop certain browser based on a useragent from logging to the access.log as well as how to omit from logging certain requests incoming from certain IP addresses / IPv6 or FQDNs and how to stop robots.txt from being logged to httpd log.


Finally we have learned how to completely disable Apache logging if logging is handled by other external application.
 

Adding proxy to yum repository on Redhat / Fedora / CentOS and other RPM based Linux distributions, Listing and enabling new RPM repositories

Tuesday, September 7th, 2021

yum-add-proxy-host-for-redhat-linux-centos-list-rpm-repositories-enable-disable-repositories

Sometimes if you work in a company that is following PCI standards with very tight security you might need to use a custom company prepared RPM repositories that are accessible only via a specific custom maintained repositories or alternatively you might need the proxy node  to access an external internet repository from the DMZ-ed firewalled zone where the servers lays .
Hence to still be able to maintain the RPM based servers up2date to the latest security patches and install software with yumone very useful feature of yum package manager is to use a proxy host through which you will reach your Redhat Package Manager files  files.

1. The http_proxy and https_proxy shell variables 

To set  a proxy host you need to define there the IP / Hostname or the Fully Qualified Domain Name (FQDN).

By default "http_proxy and https_proxy are empty. As you can guess https_proxy is used if you have a Secure Socket Layer (SSL) certificate for encrypting the communication channel (e.g. you have https:// URL).

[root@rhel: ~]# echo $http_proxy
[root@rhel: ~]#

2. Setting passwordless or password protected proxy host via http_proxy, https_proxy variables

There is a one time very straight forward to configure proxying of traffic via a specific remote configured server with server bourne again  shell (BASH)'s understood variables:
 

a.) Set password free open proxy to shell environment.

[root@centos: ~]# export https_proxy="https://remote-proxy-server:8080"


Now use yum as usual to update the available installabe package list or simply upgrade to the latest packages with lets say:

[root@rhel: ~]# yum check-update && yum update

b.) Configuring password protected proxy for yum

If your proxy is password protected for even tigher security you can provide the password on the command line as well.

[root@centos: ~]# export http_proxy="http://username:pAssW0rd@server:port/"

Note that if you have some special characters you will have to pass the string inside single quotes or escape them to make sure the password will properly handled to server, before trying out the proxy with yum, echo the variable.

[root@centos: ~]# export http_proxy='http://username:p@s#w:E@192.168.0.1:3128/'
  [root@centos: ~]# echo $http_proxy
http://username:p@s#w:E@server:port/

Then do whatever with yum:

[root@centos: ~]# yum check-update && yum search sharutils


If something is wrong and proxy is not properly connected try to reach for the repository manually with curl or wget

[root@centos: ~]# curl -ilk http://download.fedoraproject.org/pub/epel/7/SRPMS/ /epel/7/SRPMS/
HTTP/1.1 302 Found
Date: Tue, 07 Sep 2021 16:49:59 GMT
Server: Apache
X-Frame-Options: SAMEORIGIN
X-Xss-Protection: 1; mode=block
X-Content-Type-Options: nosniff
Referrer-Policy: same-origin
Location: http://mirror.telepoint.bg/epel/7/SRPMS/
Content-Type: text/plain
Content-Length: 0
AppTime: D=2264
X-Fedora-ProxyServer: proxy01.iad2.fedoraproject.org
X-Fedora-RequestID: YTeYOE3mQPHH_rxD0sdlGAAAA80
X-Cache: MISS from pcfreak
X-Cache-Lookup: MISS from pcfreak:3128
Via: 1.1 pcfreak (squid/4.6)
Connection: keep-alive


Or if you need, you can test the user, password protected proxy with wget as so:

[root@centos: ~]# wget –proxy-user=USERNAME –proxy-password=PASSWORD http://your-proxy-domain.com/optional-rpms/


If you have lynx installed on the machine you can do the remote proxy successful authentication check with it with less typing:

[root@centos: ~]# lynx -pauth=USER:PASSWORD http://proxy-domain.com/optional-rpm/


3. Making yum proxy connection permanent via /etc/yum.conf


Perhaps the easiest and quickest way to add the http_proxy / https_proxy configured is to store it to automatically load on each server ssh login in your admin user (root) in /root/.bashrc or /root/.bash_profile or in the global /etc/profile or /etc/profile.d/custom.sh etc.

However if you don't want to have hacks and have more cleanness on the systems, the recommended "Redhat way" so to say is to store the configuration inside /etc/yum.conf

To do it via /etc/yum.conf you have to have some records there like:

# The proxy server – proxy server:port number 
proxy=http://mycache.mydomain.com:3128 
# The account details for yum connections 
proxy_username=yum-user 
proxy_password=qwerty-secret-pass

4. Listing RPM repositories and their state

As I had to install sharutils RPM package to the server which contains the file /bin/uuencode (that is provided on CentOS 7.9 Linux from Repo: base/7/x86_64 I had to check whether the repository was installed on the server.

To get a list of all yum repositories avaiable 

[root@centos:/etc/yum.repos.d]# yum repolist all
Loaded plugins: fastestmirror
Loading mirror speeds from cached hostfile
 * base: centos.telecoms.bg
 * epel: mirrors.netix.net
 * extras: centos.telecoms.bg
 * remi: mirrors.netix.net
 * remi-php74: mirrors.netix.net
 * remi-safe: mirrors.netix.net
 * updates: centos.telecoms.bg
repo id                                repo name                                                                         status
base/7/x86_64                          CentOS-7 – Base                                                                   enabled: 10,072
base-debuginfo/x86_64                  CentOS-7 – Debuginfo                                                              disabled
base-source/7                          CentOS-7 – Base Sources                                                           disabled
c7-media                               CentOS-7 – Media                                                                  disabled
centos-kernel/7/x86_64                 CentOS LTS Kernels for x86_64                                                     disabled
centos-kernel-experimental/7/x86_64    CentOS Experimental Kernels for x86_64                                            disabled
centosplus/7/x86_64                    CentOS-7 – Plus                                                                   disabled
centosplus-source/7                    CentOS-7 – Plus Sources                                                           disabled
cr/7/x86_64                            CentOS-7 – cr                                                                     disabled
epel/x86_64                            Extra Packages for Enterprise Linux 7 – x86_64                                    enabled: 13,667
epel-debuginfo/x86_64                  Extra Packages for Enterprise Linux 7 – x86_64 – Debug                            disabled
epel-source/x86_64                     Extra Packages for Enterprise Linux 7 – x86_64 – Source                           disabled
epel-testing/x86_64                    Extra Packages for Enterprise Linux 7 – Testing – x86_64                          disabled
epel-testing-debuginfo/x86_64          Extra Packages for Enterprise Linux 7 – Testing – x86_64 – Debug                  disabled
epel-testing-source/x86_64             Extra Packages for Enterprise Linux 7 – Testing – x86_64 – Source                 disabled
extras/7/x86_64                        CentOS-7 – Extras                                                                 enabled:    500
extras-source/7                        CentOS-7 – Extras Sources                                                         disabled
fasttrack/7/x86_64                     CentOS-7 – fasttrack                                                              disabled
remi                                   Remi's RPM repository for Enterprise Linux 7 – x86_64                             enabled:  7,229
remi-debuginfo/x86_64                  Remi's RPM repository for Enterprise Linux 7 – x86_64 – debuginfo                 disabled
remi-glpi91                            Remi's GLPI 9.1 RPM repository for Enterprise Linux 7 – x86_64                    disabled
remi-glpi92                            Remi's GLPI 9.2 RPM repository for Enterprise Linux 7 – x86_64                    disabled
remi-glpi93                            Remi's GLPI 9.3 RPM repository for Enterprise Linux 7 – x86_64                    disabled
remi-glpi94                            Remi's GLPI 9.4 RPM repository for Enterprise Linux 7 – x86_64                    disabled
remi-modular                           Remi's Modular repository for Enterprise Linux 7 – x86_64                         disabled
remi-modular-test                      Remi's Modular testing repository for Enterprise Linux 7 – x86_64                 disabled
remi-php54                             Remi's PHP 5.4 RPM repository for Enterprise Linux 7 – x86_64                     disabled
remi-php55                             Remi's PHP 5.5 RPM repository for Enterprise Linux 7 – x86_64                     disabled
remi-php55-debuginfo/x86_64            Remi's PHP 5.5 RPM repository for Enterprise Linux 7 – x86_64 – debuginfo         disabled
!remi-php56                            Remi's PHP 5.6 RPM repository for Enterprise Linux 7 – x86_64                     disabled
remi-php56-debuginfo/x86_64            Remi's PHP 5.6 RPM repository for Enterprise Linux 7 – x86_64 – debuginfo         disabled
remi-php70                             Remi's PHP 7.0 RPM repository for Enterprise Linux 7 – x86_64                     disabled
remi-php70-debuginfo/x86_64            Remi's PHP 7.0 RPM repository for Enterprise Linux 7 – x86_64 – debuginfo         disabled
remi-php70-test                        Remi's PHP 7.0 test RPM repository for Enterprise Linux 7 – x86_64                disabled
remi-php70-test-debuginfo/x86_64       Remi's PHP 7.0 test RPM repository for Enterprise Linux 7 – x86_64 – debuginfo    disabled
remi-php71                             Remi's PHP 7.1 RPM repository for Enterprise Linux 7 – x86_64                     disabled
remi-php71-debuginfo/x86_64            Remi's PHP 7.1 RPM repository for Enterprise Linux 7 – x86_64 – debuginfo         disabled
remi-php71-test                        Remi's PHP 7.1 test RPM repository for Enterprise Linux 7 – x86_64                disabled
remi-php71-test-debuginfo/x86_64       Remi's PHP 7.1 test RPM repository for Enterprise Linux 7 – x86_64 – debuginfo    disabled
!remi-php72                            Remi's PHP 7.2 RPM repository for Enterprise Linux 7 – x86_64                     disabled
remi-php72-debuginfo/x86_64            Remi's PHP 7.2 RPM repository for Enterprise Linux 7 – x86_64 – debuginfo         disabled
remi-php72-test                        Remi's PHP 7.2 test RPM repository for Enterprise Linux 7 – x86_64                disabled
remi-php72-test-debuginfo/x86_64       Remi's PHP 7.2 test RPM repository for Enterprise Linux 7 – x86_64 – debuginfo    disabled
remi-php73                             Remi's PHP 7.3 RPM repository for Enterprise Linux 7 – x86_64                     disabled
remi-php73-debuginfo/x86_64            Remi's PHP 7.3 RPM repository for Enterprise Linux 7 – x86_64 – debuginfo         disabled
remi-php73-test                        Remi's PHP 7.3 test RPM repository for Enterprise Linux 7 – x86_64                disabled
remi-php73-test-debuginfo/x86_64       Remi's PHP 7.3 test RPM repository for Enterprise Linux 7 – x86_64 – debuginfo    disabled
remi-php74                             Remi's PHP 7.4 RPM repository for Enterprise Linux 7 – x86_64                     enabled:    423
remi-php74-debuginfo/x86_64            Remi's PHP 7.4 RPM repository for Enterprise Linux 7 – x86_64 – debuginfo         disabled
remi-php74-test                        Remi's PHP 7.4 test RPM repository for Enterprise Linux 7 – x86_64                disabled
remi-php74-test-debuginfo/x86_64       Remi's PHP 7.4 test RPM repository for Enterprise Linux 7 – x86_64 – debuginfo    disabled
remi-php80                             Remi's PHP 8.0 RPM repository for Enterprise Linux 7 – x86_64                     disabled
remi-php80-debuginfo/x86_64            Remi's PHP 8.0 RPM repository for Enterprise Linux 7 – x86_64 – debuginfo         disabled
remi-php80-test                        Remi's PHP 8.0 test RPM repository for Enterprise Linux 7 – x86_64                disabled
remi-php80-test-debuginfo/x86_64       Remi's PHP 8.0 test RPM repository for Enterprise Linux 7 – x86_64 – debuginfo    disabled
remi-safe                              Safe Remi's RPM repository for Enterprise Linux 7 – x86_64                        enabled:  4,549
remi-safe-debuginfo/x86_64             Remi's RPM repository for Enterprise Linux 7 – x86_64 – debuginfo                 disabled
remi-test                              Remi's test RPM repository for Enterprise Linux 7 – x86_64                        disabled
remi-test-debuginfo/x86_64             Remi's test RPM repository for Enterprise Linux 7 – x86_64 – debuginfo            disabled
updates/7/x86_64                       CentOS-7 – Updates                                                                enabled:  2,741
updates-source/7                       CentOS-7 – Updates Sources                                                        disabled
zabbix/x86_64                          Zabbix Official Repository – x86_64                                               enabled:    178
zabbix-debuginfo/x86_64                Zabbix Official Repository debuginfo – x86_64                                     disabled
zabbix-frontend/x86_64                 Zabbix Official Repository frontend – x86_64                                      disabled
zabbix-non-supported/x86_64            Zabbix Official Repository non-supported – x86_64                                 enabled:      5
repolist: 39,364

[root@centos:/etc/yum.repos.d]# yum repolist all|grep -i 'base/7/x86_64'
base/7/x86_64                       CentOS-7 – Base              enabled: 10,072


As you can see in CentOS 7 sharutils is enabled from default repositories, however this is not the case on Redhat 7.9, hence to install sharutils there you can one time enable RPM repository to install sharutils 

[root@centos:/etc/yum.repos.d]# yum –enablerepo=rhel-7-server-optional-rpms install sharutils

To install zabbix-agent on the same Redhat server, without caring that I need precisely  know the RPM repository that is providing zabbix agent that in that was (Repo: 3party/7Server/x86_64)  I had to:

[root@centos:/etc/yum.repos.d]# yum –enablerepo \* install zabbix-agent zabbix-sender


Permanently enabling repositories of course is possible via editting or creating fresh new file configuration manually on CentOS / Fedora under directory /etc/yum.repos.d/
On Redhat Enterprise Linux  servers it is easier to use the subscription-manager command instead, like this:
 

[root@rhel:/root]# subscription-manager repos –disable=epel/7Server/x86_64

[root@rhel:/root]# subscription-manager repos –enable=rhel-6-server-optional-rpms

How to Avoid the 7 Most Frequent Mistakes in Python Programming

Monday, September 9th, 2019

python-programming-language-logo

Python is very appealing for Rapid Application Development for many reasons, including high-level built in data structures, dynamic typing and binding, or to use as glue to connect different components. It’s simple and easy to learn but new Python developers can fall in the trap of missing certain subtleties.

Here are 7 common mistakes that are harder to catch but that even more experienced Python developers have fallen for.


1. The misuse of expressions as function argument defaults

Python allows developers to indicate optional function arguments by giving them default values. In most cases, this is a great feature of Python, but it can create some confusion when the default value is mutable. In fact, the common mistake is thinking that the optional argument is set to whatever default value you’ve set every time the function argument is presented without a value. It can seem a bit complicated, but the answer is that the default value for this function argument is only evaluated at the time you’ve defined the function, one time only.  

how-to-avoid-the-7-most-frequent-mistakes-in-python-programming-3


2. Incorrect use of class variables

Python handles class variables internally as dictionaries and they will follow the Method Resolution Order (MRO). If an attribute is not found in one class it will be looked up in base classes so references to one part of the code are actually references to another part, and that can be quite difficult to handle well in Python. For class attributes, I recommend reading up on this aspect of Python independently to be able to handle them.

how-to-avoid-the-7-most-frequent-mistakes-in-python-programming-2


3. Incorrect specifications of parameters for exception blocks

There is a common problem in Python when except statements are provided but they don’t take a list of the exceptions specified. The syntax except Exception is used to bind these exception blocks to optional parameters so that there can be further inspections. What happens, however, is that certain exceptions are then not being caught by the except statement, but the exception becomes bound to parameters. The way to get block exceptions in one except statement has to be done by specifying the first parameter as a tuple to contain all the exceptions that you want to catch.

how-to-avoid-the-7-most-frequent-mistakes-in-python-programming-1
 

4. Failure to understand the scope rules

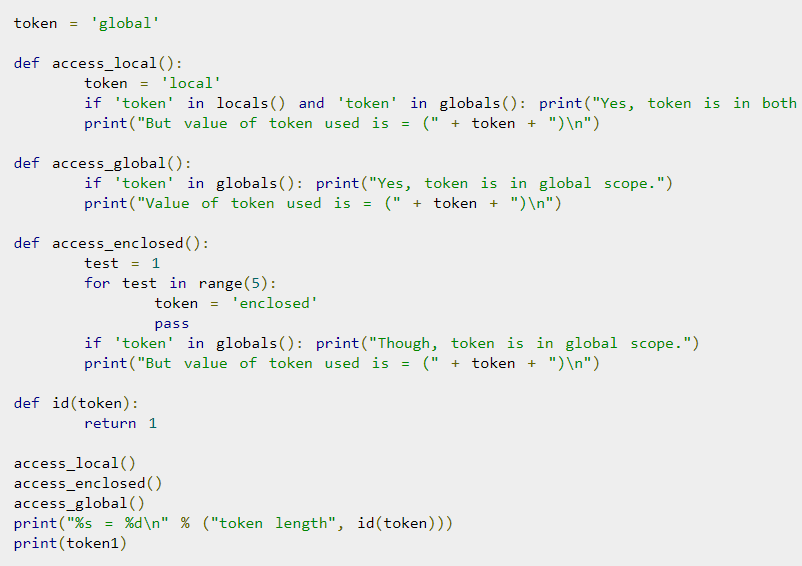
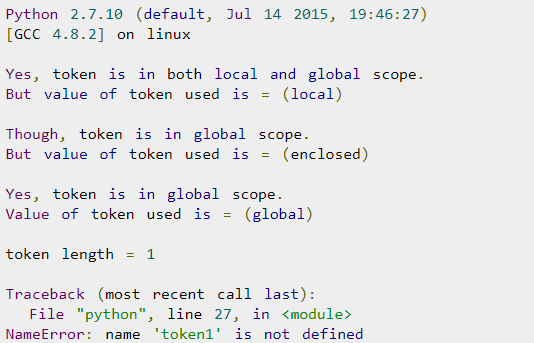
The scope resolution on Python is built on the LEGB rule as it’s commonly known, which means Local, Enclosing, Global, Built-in. Although at first glance this seems simple, there are some subtleties about the way it actually works in Python, which creates a more complex Python problem. If you make an assignment to a variable in a scope, Python will assume that variable is local to the scope and will shadow a variable that’s similarly named in other scopes. This is a particular problem especially when using lists.


5. Modifying lists during iterations over it


When a developer deletes an item from a list or array while iterating, they stumble upon a well known Python problem that’s easy to fall into. To address this, Python has incorporated many programming paradigms which can really simplify and streamline code when they’re used properly. Simple code is less likely to fall into the trap of deleting a list item while iterating over it. You can also use list comprehensions to avoid this problem.

how-to-avoid-the-7-most-frequent-mistakes-in-python-programming-8


6. Name clash with Python standard library


Python has so many library modules which is a bonus of the language, but the problem is that you can inadvertently have a name clash between your module and a module in the standard library. The problem here is that you can accidentally import another library which will import the wrong version. To avoid this, it’s important to be aware of the names in the standard library modules and stay away from using them.

how-to-avoid-the-7-most-frequent-mistakes-in-python-programming-5


7. Problems with binding variables in closures


Python has a late binding behavior which looks up the values of variables in closure only when the inner function is called. To address this, you may have to take advantage of default arguments to create anonymous functions that will give you the desired behavior – it’s either elegant or a hack depending on how you look at it, but it’s important to know.


how-to-avoid-the-7-most-frequent-mistakes-in-python-programming-6

Python is very powerful and flexible and it’s a great language for developers, but it’s important to be familiar with the nuances of it to optimize it and avoid these errors.

Ellie Coverdale, a technical writer at Essay roo and UK Writings, is involved in tech research and projects to find new advances and share her insights. She shares what she has learned with her readers on the Boom Essays blog.

Optimizing Linux TCP/IP Networking to increase Linux Servers Performance

Tuesday, April 8th, 2008

optimize-linux-servers-for-network-performance-to-increase-speed-and-decrease-hardware-costs-_tyan-exhibits-hpc-optimized-server-platforms-featuring-intel-xeon-processor-e7-4800-v3-e5-2600-supercomputing-15_full

Some time ago I thought of ways to optimize my Linux Servers network performance.

Even though there are plenty of nice articles on the topic on how to better optimize Linux server performance by tunning up the kernel sysctl (variables).

Many of the articles I found was not structed in enough understandable way so I decided togoogle around and  found few interesting websites which gives a good overview on how one can speed up a bit and decrease overall server loads by simply tuning few basic kernel sysctl variables.

Below article is a product of my research on the topic on how to increase my GNU / Linux servers performance which are mostly running LAMP (Linux / Apache / MySQL / PHP) together with Qmail mail servers.

The article is focusing on Networking as networking is usual bottleneck for performance.
Below are the variables I found useful for optimizing the Linux kernel Network stack.

Implementing the variables might reduce your server load or if not decrease server load times and CPU utilization, they would at lease increase thoroughput so more users will be able to access your servers with (hopefully) less interruptions.
That of course would save you some Hardware costs and raise up your Servers efficiency.

Here are the variables themselves and some good example:
 

# values.net.ipv4.ip_forward = 0 ( Turn off IP Forwarding )

net.ipv4.conf.default.rp_filter = 1

# ( Control Source route verification )
net.ipv4.conf.default.accept_redirects = 0

# ( Disable ICMP redirects )
net.ipv4.conf.all.accept_redirects = 0 ( same as above )
net.ipv4.conf.default.accept_source_route = 0

# ( Disable IP source routing )
net.ipv4.conf.all.accept_source_route = 0
( - || - )net.ipv4.tcp_fin_timeout = 40

# ( Decrease FIN timeout ) - Useful on busy/high load
serversnet.ipv4.tcp_keepalive_time = 4000 ( keepalive tcp timeout )
net.core.rmem_default = 786426 - Receive memory stack size ( a good idea to increase it if your server receives big files )
net.ipv4.tcp_rmem = "4096 87380 4194304"
net.core.wmem_default = 8388608 ( Reserved Memory per connection )
net.core.wmem_max = 8388608
net.core.optmem_max = 40960
( maximum amount of option memory buffers )

# like a homework investigate by yourself what the variables below stand for :)
net.ipv4.tcp_max_tw_buckets = 360000
net.ipv4.tcp_reordering = 5
net.core.hot_list_length = 256
net.core.netdev_max_backlog = 1024


# Below are newly added experimental
#net.core.rmem_max = 16777216
#net.core.wmem_max = 16777216
##kernel.msgmni = 1024
##kernel.sem = 250 256000 32 1024
##vm.swappiness=0
kernel.sched_migration_cost=5000000


Also a good sysctl.conf file which one might want to substitite or use as a skele for some productive server is ready for download here


Even if you can't reap out great CPU reduction benefits from integrating above values or similar ones, your overall LAMP performance to end customers should increase – at some occasions dramatically, at others little bit but still noticable.

If you're unsure on exact kernel variable values to use check yourself what should be the best values that fits you according to your server Hardware – usually this is done by experimenting and reading the kernel documentation as provided for each one of uplisted variables.

Above sysctl.conf is natively created to run on Debian and on other distributions like CentOS, Fedora Slackware some values might either require slight modifications.

Hope this helps and gives you some idea of how network optimization in Linux is usually done. Happy (hacking) tweakening !

Weblogic – How to change / remove IP/hostname quick and dirty howto

Wednesday, March 11th, 2015

Oracle-Weblogic-Server-logo-how-to-change-ip-hostname-weblogic-quick-and-dirty-howto

This is just quick & dirty doc on how to change/remove IP/host on Oracle WebLogic Application server

– In logs the Error message will be message like:


<Oct 21, 2013 1:06:51 AM SGT> <Warning> <Security> <BEA-090504> <Certificate chain received from cluster2.yourdomain.com – 192.168.1.41 failed hostname verification check. Certificate contained cluster1.yourdomain.com but check expected cluster2.yourdomain.com>


Solution:

On web console – change/remove IP/hostname


As root / admin supersuser:


– Stop Weblogic Webserver 

As this is RHEL Linux, to stop WLS use standard init script start / stop service command


service wls stop


– As Application user create directory where new key will be created


mkdir /home/uwls11pp/tmp_key
cd /home/uwls11pp/tmp_key


– Make backup of current JKS (Keystore File)


cp /WLS/app/oracle/wls1036/wlserver_10.3/server/lib/DemoIdentity.jks /WLS/app/oracle/wls1036/wlserver_10.3/server/lib/DemoIdentity.jks_11032015


– Execute set env . script


/WLS/app/oracle/wls1036/wlserver_10.3/server/bin/setWLSEnv.sh


– Copy & paste output from script above and export variables


export CLASSPATH;
export PATH;


– Check old certificate in keystore


/WLS/app/oracle/jdk1.7.0_25/bin/keytool -list -v -keystore /WLS/app/oracle/wls1036/wlserver_10.3/server/lib/DemoIdentity.jks  -storepass DemoIdentityKeyStorePassPhrase


– Delete old Weblogic keystore JKS file


/WLS/app/oracle/jdk1.7.0_25/bin/keytool -delete -alias demoidentity -keystore /WLS/app/oracle/wls1036/wlserver_10.3/server/lib/DemoIdentity.jks -storepass DemoIdentityKeyStorePassPhrase


– Check wether proper Java version is used


java -version


– Get hostname from hosts file


cat /etc/hosts


#Replace weblogic1 with your FQDN (Fully Qualified Domain Name) – this step will create new certificate with new hostname


java utils.CertGen -cn weblogic1 -keyfilepass DemoIdentityPassPhrase -certfile newcert -keyfile newkey


#Import certificate to “official” keystore


java utils.ImportPrivateKey -keystore /WLS/app/oracle/wls1036/wlserver_10.3/server/lib/DemoIdentity.jks -storepass DemoIdentityKeyStorePassPhrase -keyfile newkey.pem -keyfilepass DemoIdentityPassPhrase -certfile newcert.pem -alias demoidentity


#Recheck once again if correct certificate is in use


/WLS/app/oracle/jdk1.7.0_25/bin/keytool -list -v -keystore /WLS/app/oracle/wls1036/wlserver_10.3/server/lib/DemoIdentity.jks  -storepass DemoIdentityKeyStorePassPhrase


– Finally issue as root user restart Weblogic server again


service wls start

find text strings recursively in Linux and UNIX – find grep in sub-directories command examples

Tuesday, May 13th, 2014

unix_Linux_recursive_file_search_string_grep
GNU Grep
is equipped with a special option "-r" to grep recursively. Looking for string in a file in a sub-directories tree with the -r option is a piece of cake. You just do:

grep -r 'string' /directory/

or if you want to search recursively non-case sensitive for text

grep -ri 'string' .
 

Another classic GNU grep use (I use almost daily) is whether you want to match all files containing (case insensitive) string  among all files:

grep -rli 'string' directory-name
 

Now if you want to grep whether a string is contained in a file or group of files in directory recursively on some other UNIX like HP-UX or Sun OS / Solaris where there is no GNU grep installed by default here is how to it:

find /directory -exec grep 'searched string' {} dev/null ;

Note that this approach to look for files containing string on UNIX is very slowThus on not too archaic UNIX systems for some better search performance it is better to use xargs;

find . | xargs grep searched-string


A small note to open here is by using xargs there might be weird results when run on filesystems with filenames starting with "-".

Thus comes the classical (ultimate) way to grep for files containing string with find + grep, e.g.

find / -exec grep grepped-string {} dev/null ;

Another way to search a string recursively in files is by using UNIX OS '*' (star) expression:

grep pattern * */* */*/* 2>/dev/null

Talking about recursive directory text search in UNIX, should mention  another good GNU GREP alternative ACK – check it on betterthangrep.com 🙂 . Ack is perfect for programmers who have to dig through large directory trees of code for certain variables, functions, objects etc.


Use apt-get with Proxy howto – Set Proxy system-wide in Linux shell and Gnome

Friday, May 16th, 2014

linux-apt-get-configure-proxy-howto-set-proxy-systemwide-in-linux

I juset setup a VMWare Virtual Machine on my HP notebook and installed Debian 7.0 stable Wheezy. Though VMWare identified my Office Internet and configured automatically NAT, I couldn't access the internet from a browser until I remembered all HP traffic is going through a default set browser proxy.
After setting a proxy to Iceweasel, Internet pages started opening normally, however as every kind of traffic was also accessible via HP's proxy, package management with apt-get (apt-get update, apt-get install etc. were failing with errors):


# apt-get update

Ign cdrom://[Debian GNU/Linux 7.2.0 _Wheezy_ – Official i386 CD Binary-1 20131012-12:56] wheezy Release.gpg
Ign cdrom://[Debian GNU/Linux 7.2.0 _Wheezy_ – Official i386 CD Binary-1 20131012-12:56] wheezy Release
Ign cdrom://[Debian GNU/Linux 7.2.0 _Wheezy_ – Official i386 CD Binary-1 20131012-12:56] wheezy/main i386 Packages/DiffIndex
Ign cdrom://[Debian GNU/Linux 7.2.0 _Wheezy_ – Official i386 CD Binary-1 20131012-12:56] wheezy/main Translation-en_US
Err http://ftp.by.debian.org wheezy Release.gpg
  Could not connect to ftp.by.debian.org:80 (86.57.151.3). – connect (111: Connection refused)
Err http://ftp.by.debian.org wheezy-updates Release.gpg
  Unable to connect to ftp.by.debian.org:http:
Err http://security.debian.org wheezy/updates Release.gpg
  Cannot initiate the connection to security.debian.org:80 (2607:ea00:101:3c0b:207:e9ff:fe00:e595). – connect (101: Network is unreachable) [IP: 2607:ea00:101:3c0b:207:e9ff:fe00:e595 80]
Reading package lists…


This error is caused because apt-get is trying to directly access above http URLs and because port 80 is filtered out from HP Office, it fails in order to make it working I had to configure apt-get to use Proxy host – here is how:

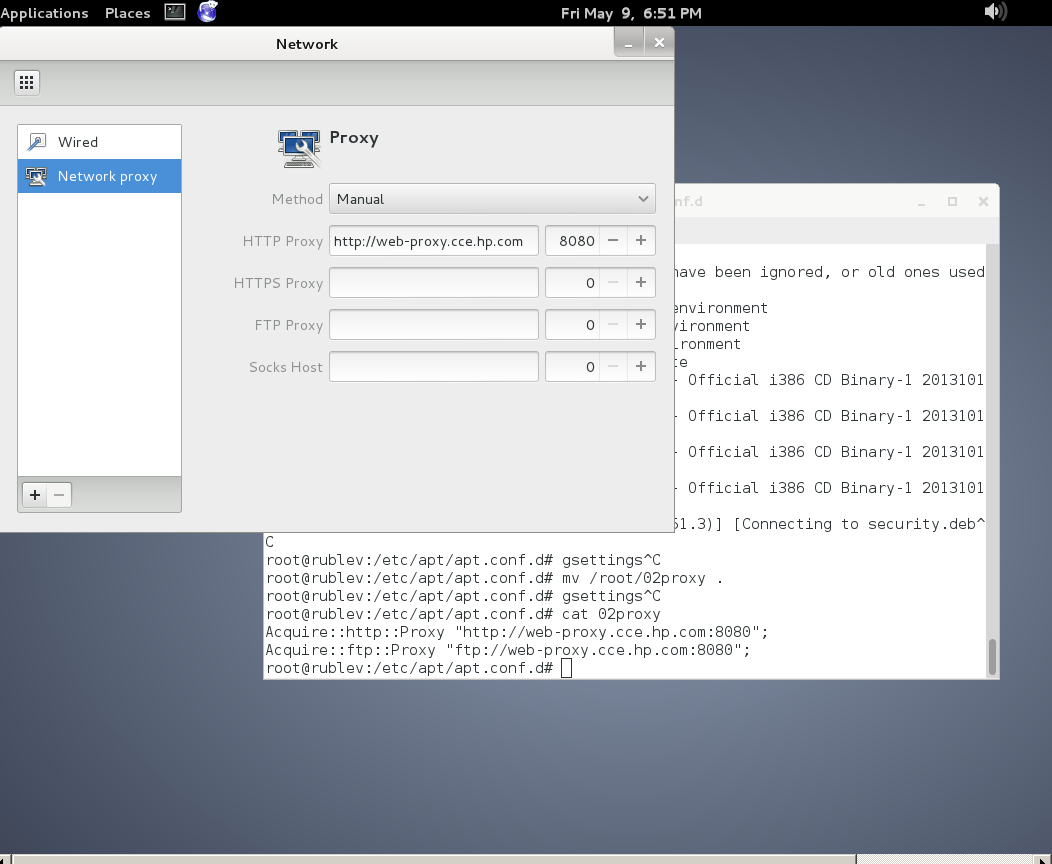
a) Create /etc/apt/apt.conf.d/02proxy file (if not already existing)
and place inside:
 

Acquire::http::proxy::Proxy "https://web-proxy.cce.hp.com";
Acquire::ftp::proxy::Proxy "ftp://web-proxy.cce.hp.com";


To do it from console / gnome-terminal issue:
echo ''Acquire::http::Proxy "https://web-proxy.cce.hp.com:8088";' >> /etc/apt/apt.conf.d/02proxy
echo ''Acquire::ftp::Proxy "https://web-proxy.cce.hp.com:8088";' >> /etc/apt/apt.conf.d/02proxy

That's all now apt-get will tunnel all traffic via HTTP and FTP proxy host web-proxy.cce.hp.com and apt-get works again.

Talking about Proxyfing Linux's apt-get, its possible to also set proxy shell variables, which are red and understood by many console programs like Console browsers lynx, links, elinks  as well as wget and curl commands, e.g.:


export http_proxy=http://192.168.1.5:5187/
export https_proxy=$http_proxy
export ftp_proxy=$http_proxy
export rsync_proxy=$http_proxy
export no_proxy="localhost,127.0.0.1,localaddress,.localdomain.com"

For proxies protected with username and password export variables should look like so: echo -n "username:"
read -e username
echo -n "password:"
read -es password
export http_proxy="http://$username:$password@proxyserver:8080/"
export https_proxy=$http_proxy
export ftp_proxy=$http_proxy
export rsync_proxy=$http_proxy
export no_proxy="localhost,127.0.0.1,localaddress,.localdomain.com"

To make this Linux proxy settings system wide on Debian / Ubuntu there is the /etc/environment file add to it:
 

http_proxy=http://proxy.server.com:8080/
https_proxy=http://proxy.server.com:8080/
ftp_proxy=http://proxy.server.com:8080/
no_proxy="localhost,127.0.0.1,localaddress,.localdomain.com"
HTTP_PROXY=http://proxy.server.com:8080/
HTTPS_PROXY=http://proxy.server.com:8080/
FTP_PROXY=http://proxy.server.com:8080/
NO_PROXY="localhost,127.0.0.1,localaddress,.localdomain.com"


To make proxy global (systemwide) for most (non-Debian specific) Linux distributions shell environments create new file /etc/profile.d/proxy.sh and place something like:

function proxy(){
echo -n "username:"
read -e username
echo -n "password:"
read -es password
export http_proxy="http://$username:$password@proxyserver:8080/"
export https_proxy=$http_proxy
export ftp_proxy=$http_proxy
export rsync_proxy=$http_proxy
export no_proxy="localhost,127.0.0.1,localaddress,.localdomain.com"
echo -e "nProxy environment variable set."
}
function proxyoff(){
unset HTTP_PROXY
unset http_proxy
unset HTTPS_PROXY
unset https_proxy
unset FTP_PROXY
unset ftp_proxy
unset RSYNC_PROXY
unset rsync_proxy
echo -e "nProxy environment variable removed."
}

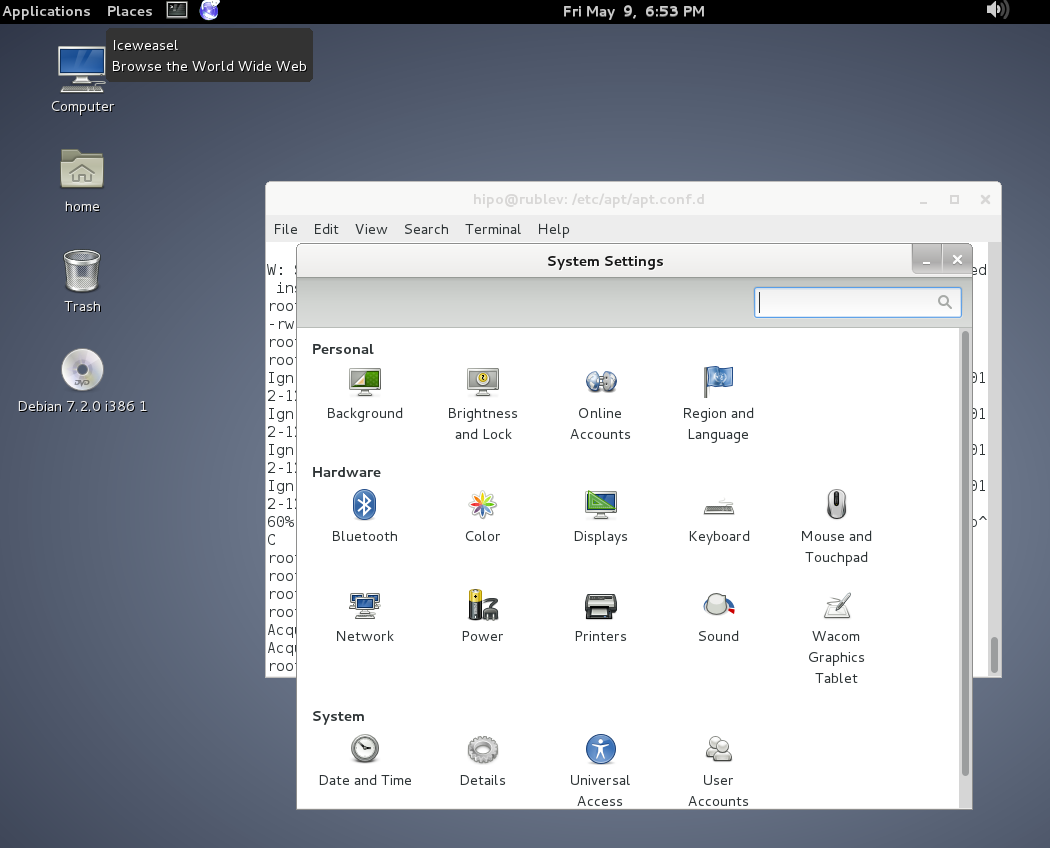
To set Global Proxy (make Proxy Systemwide) for a user in GNOME Desktop environment launch gnome-control-center

And go to Network -> Network Proxy

/images/gnome-configure-systemwide-proxy-howto-picture1

/images/gnome-configure-systemwide-proxy-howto-picture2

To make proxy settings also system wide for some GUI Gnome GTK3 applications

gsettings set org.gnome.system.proxy mode 'manual'
gsettings set org.gnome.system.proxy.http host 'your-proxy.server.com'
gsettings set org.gnome.system.proxy.http port 8080

StatusNet – Start your own hosted microblogging twitter like social network on Debian GNU / Linux

Monday, July 14th, 2014

build-your-own-microblogging-service-like-twitter-on-debian-linux-Status.net-logo
I like experimenting with free and open source projects providing social networking capabilities like twitter and facebook. Historically I have run my own social network with Elgg – Open Source Social Network Engine. I had a very positive impression from Elgg as a social engine as, there are plenty of plugins and one can use Elgg to run free alternative to very basic equivalent of facebook, problem with Elgg I had however is if is not all the time monitored it quickly fills up with spam and besides that I found it to be still buggy and not easy to update.
The other social network free software I heard of isBuddyPress which I recently installed with Multisite (MuSite) enabled.

Since BuddyPress is WordPress based and it supports all the nice wordpress plugins, my impression is social networking based on wordpress behaves much more stable and since there is Akismet for WordPress, the amount of spammer registrations is much lower than with Elgg.

Recently I started blogging much more actively and I realized everyday I learn and read too much interesting articles and I don't log them anywhere and thought I need a way besides twitter to keep flashy notes of what I'm doing reading, learning in a short notes. I don't want to use Twitter on purpose, because I don't want to improve twitter's site SEO with adding my own stuff on their website but I want to keep my notes on my own local hosted server.

As I didn't wanted to loose time with Complexity of Elgg anymore and wanted to try to something new and I know the open source microblogging social network (Twitter Equivalent) – identi.ca runs StatusNet – Free and Open Source Social software. StatusNet is well known under the motto of "Decentralized Twitter"

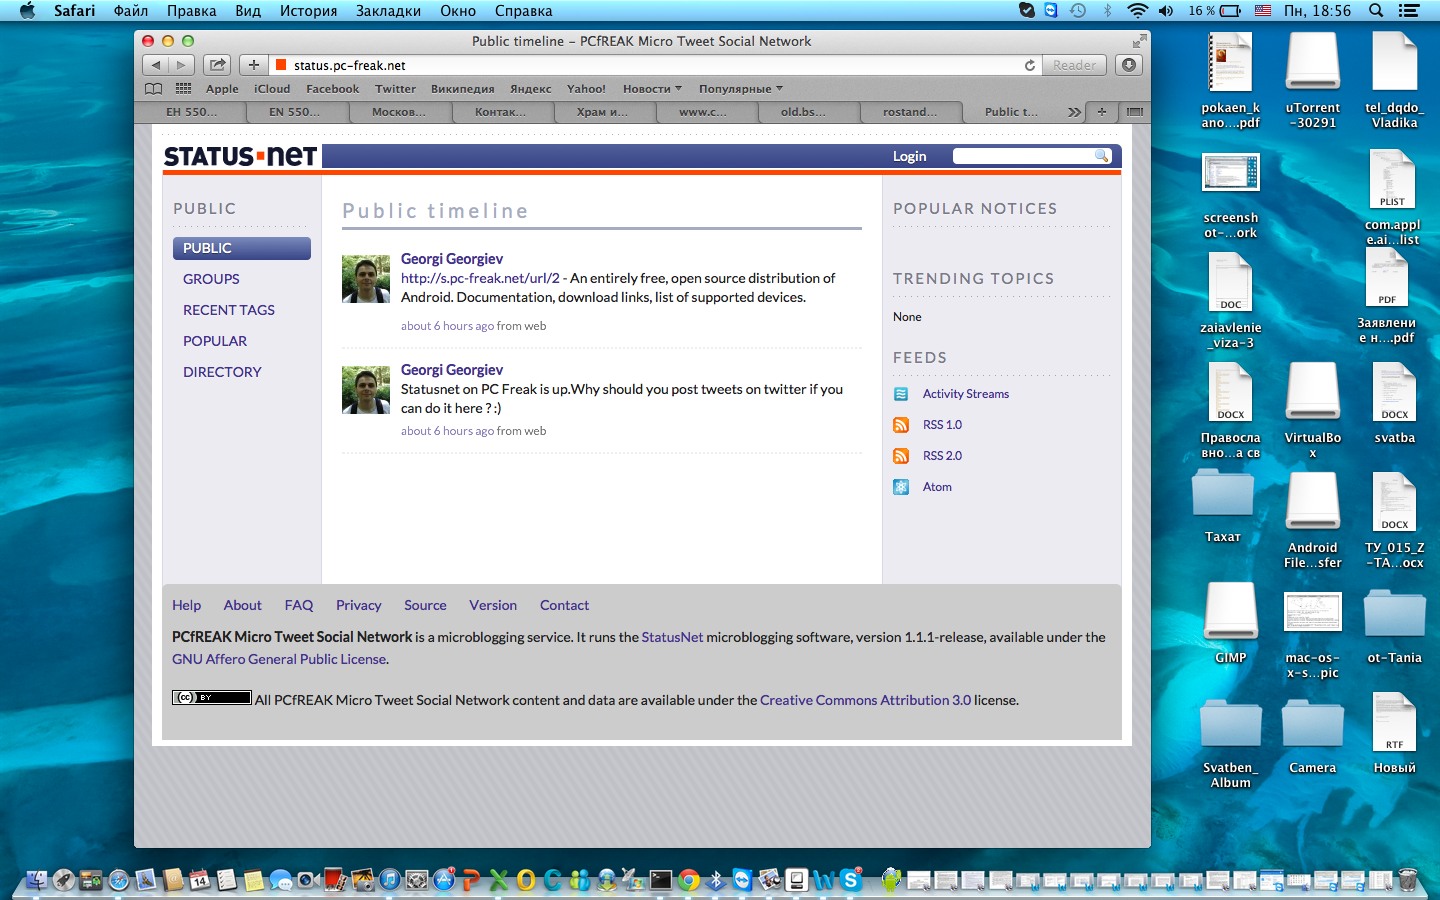
screenshot-status-net-microblogging-twitter-like-free-software-network

I took the time to grab it and install it to my home brew machine www.pc-freak.net. If you haven't seen StatusNet so far – you can check out demo of my installation here – registration is not freely opened because, i don't want spammers to break in, however if you want to give a try drop me a mail or comment below and I will open access for you ..

There is no native statusnet package for Debian Linux (as I'm running Debian) so to install it, I've grabbed statusnet.

To install StatusNet, everything was pretty straight forward and literally following instructionsf rom INSTALL file, i.e.:

# status.example.com maps to /var/www/status/
cd /var/www/status/
wget http://status.net/statusnet-0.9.6.tar.gz
tar -xzf statusnet-0.9.6.tar.gz --strip-components=1
rm statusnet-0.9.6.tar.gz
cd ..
chgrp www-data status/
chmod g+w status/
cd status/
chmod a+w avatar/ background/ file/

mysqladmin -u "root" -p "sql-root-password" create statusnet
mysql -u root -p
GRANT ALL on statusnet.* TO 'statusnetuser'@'localhost' IDENTIFIED BY 'statusnet-secret-password';

To Change default behaviour of URls to be more SEO friendly and not to show .php in URL (e.g. add so called fancy URLs – described in INSTALL):

cp htaccess.sample .htaccess


Then had to configure a VirtualHost under a subdomain http://statusnet.yourdomain.com/install.php or you can alternatively install and access it in browser via http://your-domain.com/status/install.php

An important note to open here is you have to set the URLs via which status.net will be accessed further before proceeding with the install, if you will be using HTTPS here is time to configure it and test it before proceeding with install …  Just be warned that if you don't set the URLs properly now and try to modify them further you will get a lot of issues hard to solve which will cost you a lot of time and nervee ..

If you want to enable twitter bridging in Statusnet you will need to get Twitter consumer and secret keys, to get that you have to create new application on https://dev.twitter.com/apps afterwards you will be taken to a page containing Consumer Key & Consumer Secret string.
StatusNet installation will auto generate config.php, you can further edit it manually with text editor. Content of my current statusnet config.php is here.

Most important options to change are:

$config['daemon']['user'] = 'www-data';
$config['daemon']['group'] = 'www-data';

www-data is user with which Apache is running by default on Debian Linux.

$config['site']['profile'] = 'private';

By default Status.Net will be set to run as private – e.g. it will be fitted for priv. use – messages posted will not publicly be visible. Here the possible options to choose between are:

$config['site']['profile'] = 'private';
$config['site']['profile'] = 'community';
$config['site']['profile'] = 'singleuser';
$config['site']['profile'] = 'public';

singleuser is pretty self explanatory, setting public option will open registration for any user on the internet – probably your network will quickly be filled with spam – so beware with this option. community will make statusnet publicly visible but, registration will only possible via use creation / invitation to join the network from admin.

vi /var/www/status/config.php
$config['site']['fancy'] = true;

Then to enable twitter to statusnet bridge add to config.php

vi /var/www/status/config.php

addPlugin('TwitterBridge');
$config['twitter']['enabled'] = true;
$config['twitterimport']['enabled'] = true;
$config['avatar']['path'] = '/avatar';
$config['twitter']['consumer_key'] = 'XXXXXXXX';
$config['twitter']['consumer_secret'] = 'XXXXXXXX';
# disable sharing location by default
$config['location']['sharedefault'] = 'false';

Notice, I decided to disable statusnet sharedefault folder, because i don't have a lot of free space to provide to users. If you want to let users be allowed to share files (you the space for that), you might want to set a maximum quote of uploaded files (to prevent your webserver from being DoSed – for example by too many huge uploads), here is some reasonable settings:
 

$config['attachments']['file_quota'] = 7000000;
$config['attachments']['thumb_width'] = 400;
$config['attachments']['thumb_height'] = 300;


If you want to get the best out of performance of your new statusnet microblogging service, after each modification of config.php be sure to run:


php scripts/checkschema.php

Running checkschema.php is also useful, to check whether adding new plugins to check whether plugin will not throw an error.

Here is some extra useful config.php plugins to enable:
 

addPlugin('Gravatar', array());
#addPlugin('Textile');
addPlugin('InfiniteScroll');
addPlugin('Realtime');
addPlugin('Blog');
addPlugin('SiteNoticeInSidebar');
addPlugin('WikiHashtags');
addPlugin('SubMirror');
addPlugin('LinkPreview');
addPlugin('Blacklist');


If you expect to have quickly growing base of users it is recommended to also check out whether your MySQL is tuned with mysqltuner and optimize it for performance

Another useful think you would like to do is to increased the number of Statusnet avatars in the 'following' – 'followers' – 'groups' sections on my profile page by editing

lib/groupminilist.php

and

lib/profileminilist.php

line 36 in both files.
To get the full list of possible variables that can be set in config.php run in terminal:

 php scripts/setconfig.php -a

If you happen to encounter some oddities and issues with StatusNet after installation, this is most likely to some PHP hardering on compile time or some PHP.ini functions disabled for security or some missing component to install which is described as a prerequirement in statusnet INSTALL file

to debug the issues enable statusnet logging by adding in config.php

$config['site']['logdebug'] = true;
$config['site']['logfile'] = '/var/log/statusnet.log';

By default logs produced will be quite verbose and there will be plenty of information you will probably not need and will lead to a lot of "noise", to get around this, there is the LogFilter Plugin for some reasonable logging use in config.php:

addPlugin('LogFilter', array( 'priority' => array(LOG_ERR => true,
LOG_INFO => true,
LOG_DEBUG => false),
'regex' => array('/About to push/i' => false,
'/twitter/i' => false,
'/Successfully handled item/i' => false)
));

If you want tokeep log of statusnet it is a good idea to rorate logs periodically to keep them from growing too big, to do this create in /etc/logrotate.d new files /etc/logrotate.d/statusnet with following content:

/var/log/statusnet/*.log {
daily
missingok
rotate 7
compress
delaycompress
notifempty
create 770 www-data www-data
sharedscripts
postrotate
/path/to/statusnet/scripts/stopdaemons.sh > /dev/null
/path/to/statusnet/scripts/startdaemons.sh > /dev/null
endscript
}

You will probably want to to add new Links, next to StatusNet main navigation links for logged in users, this is possible by adding new line to

lib/primarynav.php

and

lib/secondarynav.php

You will have to add a PHP context like:

 $this->action->menuItem('https://www.pc-freak.net/blog/',
                              _m('MENU','Pc-Freak.Net Blog'),
                              _('A pC Freak Blog'),
                              false,
                              'nav_pcfreak');

Once you're done with installation, make sure you change permissions or move install.php from /var/www/status, otherwise someone might overwrite your config.php and mess your installation …

chmod 000 /var/www/status/install.php There is plenty of other things to do with StatusNet (Support for communication with Jabber XMPP protocol, notification via SMS etc. There are also some plugins to add more statusnet functionality.


Enjoy micro blogging ! 🙂