Posts Tagged ‘reading’

How to convert Postscript files to PDF on Debian GNU / Linux with ps2pdf

Saturday, December 3rd, 2011

convert ps to pdf linux,Free as in Freedom book cover - Richard Stallman GNU and Free Software Father

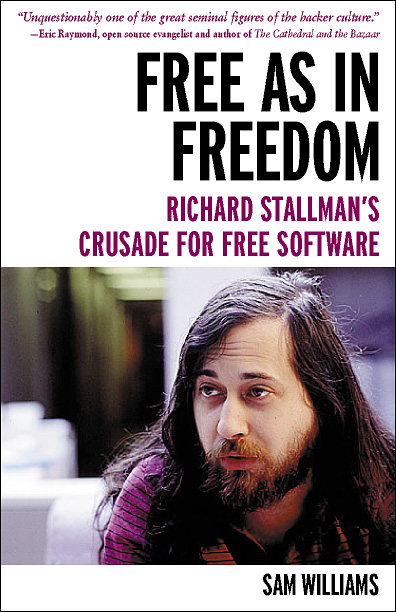
I’m currently reading Free as in Freedom (2.0) R. Stallman and the Free Software Revolution
The book includes a reference to Eric S. Raymond ‘s famous The Cathedral and the Bazaar which does makes a point about the important of Open Source . I’ve read the The Cathedral and the Bazaar paper some very long time ago (in my young days so to say) and hence I couldn’t resemble much of the document so I jumped in after the footnote in the FAIF book and decided to take a quick look on The Cathedral and the Bazaar once again to bring up some memories. I was stunned to find the paper is available in many formats but officially not included in PDF . Since i’m a GNU / Linux user I’ve never managed to get into the habit to read postscript documents which from modern day stand point are also already a bit of obsolete and therefore I found it as a wise idea to convert and mirror the POSTSCRIPT (PS) version of the document to PDF on www.pc-freak.net

Happily the ps2pdf command to convert the ps to pdf on my debian gnu / linux is really easy:

ps2pdf cathedral-and-the-bazaar-Eric_Raymond.ps Cathedral-and-the-bazaar-Eric_Raymond.pdf

ps2pdf is part of the ghostscript deb package, so if you can’t find the program you will need to have it installed with apt-get first.

By the way the Postscript file is easily readable using my default gnome PDF reader evince , but anyways I converted and mirrored the paper for all those windows users who might like to take a look at the document in PDF.
I’ve also made a mirror of the original Cathedral and the Bazaaar postscript document here , for all those who want to check out The PDF version of the Cathedral and the Bazaaar is for download here

Even though the “open source” movement is an interesting idea and it had some major impact on the development of some free software the idiology of open source which was very much influenced by this document is very weak compared to the philosophy Richard Stallman indcuded as of the great need of the software to be free.

To be honest looking back in time for a long time being a Linux user I did not make any distinguishment between “Free Software” concept and “Open Source”, even worser I considered to evangelize on Open Source not realizing that initially what attracted me to free software was the idiology of open source and not the real values on which ground free software is built.
This kind of miss understanding between perception of “open source” and “free software” I got and spread for years now I fully realize and I seem like when I red back then The Cathedral and the Bazaar document I didn’t looked any critical at the document but it had a major, I would say “bad” impact on my idiology on software for a long time. So for all those who had not checked it it’s worthy checking but only in case if one fully understands Richard Stallman’s concept of Free Software, without this understanding one can easily slip into the wrong believe (just like me back in thme) that open source is the same as free software. Even though open source can be free software it is not presumably that an open source is free software and that it guarantees that the published source will be free. But I’ll stop now as I slept away from my goal of the article to just log here how a convertion of postscript to pdf on gnu / linux is done.
Just to close up this article I warmly recommend on all people interested into hacking and the history of Free operating systems and Free software as FreeBSD and GNU / Linux the Free as in Freedom (2.0) book ! Its truly a remarkable and great inspirational reading for all people like me involved into free software realm of ICT.

Easy way to look for irregularities and problems in log files / Facilitate reading log files on GNU / Linux and FreeBSD

Thursday, November 24th, 2011

LogWatch logo picture check Logcheck Linux BSD look for irregularities in log files

As a System Administrator I need to check daily the log files produced on various GNU / Linux distributions or FreeBSD. This can sometimes take too much time if the old fashioned way using the normal system tools cat, less and tail etc. is used.

Reading logs one by one eats too much of my time and often as logs are reviewed in a hurry some crucial system irregularities, failed ssh or POP3 / Imap logins, filling disk spaces etc. are missed.

Therefore I decided to implement automated log parsing programs which will summary and give me an overview (helicopter view) on what were the system activities from the previous day (24h) until the moment I logged the system and issued the log analyzer program.
There are plenty of programs available out there that does “wide scale” log analysis, however there are two applications which on most GNU / Linux and BSD systems had become a de-facto standard programs to scan system log files for interesting lines.

These are:
 

  • 1. logwatchsystem log analyzer and reporter
  • 2. logcheckprogram to scan system log files for interesting lines

1. logwatch is by default installed on most of the Redhat based Linux systems (Fedora, RHEL, CentOS etc.). On Debian distributions and as far as I know (Ubuntu) and the other deb based distros logwatch is not installed by default. Most of the servers I manage these days are running Debian GNU / Linux so, to use logwatch I needed to install it from the available repository package, e.g.:

debian:~# apt-get install logwatch
...

logwatch is written in perl and with some big files to analyze, parsing them might take hell a lot of time. It does use a bunch of configuration scripts which defines how logwatch should read and parse the various services logwatch support by default. These conf scripts are also easily extensible, so if one has to analyze some undefined service in the conf files he can easily come up with a new conf script that will support the service/daemon of choice.Using logwatch is very easy, to get an overview about server system activity invoke the logwatch command:

debian:~# logwatch
################### Logwatch 7.3.6+cvs20080702-debian (07/02/08) ####################
Processing Initiated: Thu Nov 24 05:22:07 2011
Date Range Processed: yesterday
( 2011-Nov-23 )
Period is day.
Detail Level of Output: 0
Type of Output/Format: stdout / text
Logfiles for Host: debian
 ################################################# 

——————— dpkg status changes Begin ————- 

Upgraded:
libfreetype6 2.3.7-2+lenny7 => 2.3.7-2+lenny8
libfreetype6-dev 2.3.7-2+lenny7 => 2.3.7-2+lenny8

———————- dpkg status changes End ————————-

——————— httpd Begin ————————

Requests with error response codes
400 Bad Request
HTTP/1.1: 2 Time(s)
admin/scripts/setup.php: 2 Time(s)
401 Unauthorized


———————- vpopmail End ————————-

——————— Disk Space Begin ————————

Filesystem Size Used Avail Use% Mounted on
/dev/md0 222G 58G 154G 28% /

———————- Disk Space End ————————-

###################### Logwatch End #########################

The execution might take up from 10 to 20 seconds up to 10 or 20 minutes depending on the log files size and the CPU / RAM hardware on the machine where /var/log/… logs will be analyzed.

logwatch output can be easily mailed to a custom mail address using a crontab if the server runs a properly configured SMTP server. Using a cron like:

00 5 * * * /usr/sbin/logwatch | mail -s "$(hostname) log files for $(date)"

Here is time to make a note that logwatch is ported also to FreeBSD and is available from BSD’s port tree, from a port with path:

/usr/ports/security/logcheck

2. logcheck is another handy program, which does very similar job to logwatch . The “interesting” information it returns is a bit less than compared to logwatch

The good thing about logcheck is that by default it is made to mail every 1 hour a brief data summary which might be of an interest to the sys admin.
Logcheck is available for install on RedHat distros via yum and has existing package for Debian as well as a port for FreeBSD under the port location /usr/ports/security/logcheck

To install on logcheck on Debian:

debian:~# apt-get install logcheck
...

After installation I found it wise to change the default mailing time from each and every hour to just once per day to prevent my email from overfilling with “useless” mails.

This is done by editting the default cron tab installed by the package located in /etc/cron.d/logcheck

The default file looks like so:

# /etc/cron.d/logcheck: crontab entries for the logcheck package
PATH=/usr/local/sbin:/usr/local/bin:/sbin:/bin:/usr/sbin:/usr/bin
MAILTO=root
@reboot logcheck if [ -x /usr/sbin/logcheck ]; then nice -n10 /usr/sbin/logcheck -R; fi
2 * * * * logcheck if [ -x /usr/sbin/logcheck ]; then nice -n10 /usr/sbin/logcheck; fi
# EOF

To change it run only once per day its content should looks something like:

# /etc/cron.d/logcheck: crontab entries for the logcheck package
PATH=/usr/local/sbin:/usr/local/bin:/sbin:/bin:/usr/sbin:/usr/bin
MAILTO=root
@reboot logcheck if [ -x /usr/sbin/logcheck ]; then nice -n10 /usr/sbin/logcheck -R; fi
2 5 * * * logcheck if [ -x /usr/sbin/logcheck ]; then nice -n10 /usr/sbin/logcheck; fi
# EOF

Altering it that way the log summary interesting info analysis will be sent on mail every day in 05:02 a.m.
Changing the default email logcheck will ship its log analyzer report emails on deb based distros is done via editting the file:

/etc/logcheck/logcheck.conf

And changing the SENDMAILTO=”” variable to point to the appropriate admin email email addr.
 

Develop your children intellect with Gcompris high quality educational software on GNU / Linux, Windows and Mac OS X

Monday, October 3rd, 2011

Gcompris Main entry Screen

Gcompris is a great piece of software to educate children in the age interval of 2 to 10 years old.
Gcompris is a tool of educative and funny interactive computer applications many of which has a form of games.

Gcompris strategy games

Gcompris is teaching the children on the following fields of knowledge:
 

  • understand the computer – keyboard, mouse etc.
  • Algebra – Summing up numbers, enumarations, table memory, mirror image etc.
  • Science – The Canal lock, the water cycle, how a submarine works, elementary electric simulation
  • Geography – Find out about country locations, Place the country on the map
  • Games – Learn how to play chess, improve memory and memorization, sudoku etc.
  • Reading – Learning to read fluent, reading practice
  • Learn to proerply tell time, solve puzzle games and learn famous paintings, basic cartoon making, vector drawing

Gcompris reading activities

All the funny activities Gcompris educative kid tool offers 100+. Gcompris is in active development so with time more and more activities gets added.
Gcompris is a Free Software and among with its native GNU / Linux support it has ports for Windows and Mac OS X

The Free Software nature of Gcompris gives possibility to be easily adapted and further developed! Its really funny not only for kids, but even for adults. If you had a stressy day and you want to relax in a childish way and feel like a kid again, give it a try and you will be amazed how much light and happiness this computer program can bless you with 😉

Many of Gcompris activities has a little cute penguins and in general its capable of introducing the kids to the nice concept of the free software.

As a free software Gcompris is really great as among the rest of the so popular free software freedoms: to distribute and modify the software it comes absolutely free of charge (in money terms). This is great news for parents who are growing their kids in the “developing world”, the so called 2nd and 3rd world as well is a good alternative to the many available paid costly application and games aiming at kids brain development.
Gcompris puzzle games

The name Gcompris is also known in free software realm under the name I GOT IT .Gcompris has currently Sound and text support for 33 Country Languages, here is a completele list of languages currently supported:

Arabic, Asturian, Bulgarian, Breton, Czech, Danish, German, Greek, English, Esperanto, Spanish, Basque, Finnish, French, Hebrew, Indian, Hungarian, Indonesian, Italian, Indian, Norwegian, Dutch, Norwegian, Punjabi, Portuguese, Portuguese, Russian, Somali, Serbian, Swedish, Turkish, Urdu, Chinese

Some of the languages supported still does not have a 100% translation but partially translated as its a question of time that enough translators are found to make the translations for all available major languages. The only 100% completed trasnlation as of time of writting is in French, Slovenian and Spanish

Gcompris is already included in almost all available moderm GNU / Linux distributions. A packaged version of it is part of Fedora, Debian and Ubuntu.

Gcompris Mathematics

For all those parents who wish to educate their children on Fedora Linux install it with the GUI installer or yum with cmd:

[root@fedora ~]# yum install gcompris
...

On Debian and Ubuntu Gcompris is installable via apt from repos:

debian:~# apt-get install gcompris
...

To add a text and sound translation to Gcompris its also necessery to install the relevant gcompris-sound distribution package, for example to add the sound translations for my native Bulgarian language I had to install the package gcompris-sound-bg, e.g.:

debian:~# apt-get install gcompris-sound-bg
...

Gcompris is developed to use the Gnome’s GTK and is a perfect match for Linux users who already run a Gnome Desktop on their PCs.

Most of Gcompris versions should run without much hassle on Mac OS X and Windows so all mommies and daddies on Windows or Mac can install it and use it to educate their kids 😉

Here are few more screenshots of Gcompris

Gcompris children intellect develop Experimental activities

Gcompris educational kids develop intellect Discovery activities
Gcompris various games for develop your kid intellect
Gcompris also fits well with  Tux for Kids Linux / Windows ready games also suitable for kids development. Gcompris and Tux for Kids makes Linux and  free software more “children mature” and is a perfect to be used on kids educational computers in kindergartens or any educational institutions aiming at children development. 

To sum it up, if you want to make your children smarter or you’re bored to death and you need to have some rest by going back to your childhood years give gcompris a try 😉

How to install Ubuntu Linux on Acer ASPIRE 5736Z Notebook / Get around the black screen install CD issue

Friday, July 1st, 2011

My sister’s newly bought laptop is Acer Aspire 5736Z . By the default this notebook comes with some kind of Linux distribution Linpus .
Even though this Linpus (crafted Linux especially for Acer notebooks) looked really nice, it prooved to be a piece of shit linux distro.
Linplus was unable to even establish a simple Wireless WPA2 protected connection with my wireless router, not to mention that the physical Linux consoles (CTRL+ALT+F1) were disabled …

This LinPlus was so bad that I couldn’t even launch any type of terminal on it (I was stuck!) so I decided to kill it and make a decent latest Ubuntu 11.04 Install on it.

I was surprised to find out that trying to boot up the Ubuntu 11.04 installer led me to a black screen (black screen of death).

The v Aspire’s 5736Z monitor kept completely blank, where the hard drive was continuously reading (indicating that the Ubuntu installer has properly booted but it couldn’t light up the notebook screen).

A bit of investigation on any issues with this Acer notebook model has led me to a thread in fedora forums:
http://forums.fedoraforum.org/showthread.php?t=263794
On this forum the same kind of Linux install problem was described to also occur with ASPIREs 5736Z during a Fedora install.

I just tried the suggested fix and it works like a charm.

The fix goes like this:

1. Invoke the Ubuntu settings parameter Install pre install screen

Just press any button while the Ubuntu installer CD is reading and after few secs the Install options screen should appear, like you see it in below’s screenshot:

Ubuntu Install boot options parameters screen

2. Select the nomodetest Boot CD Ubuntu option

You see in the above screenshot the F6 Other Options . I had toto press F6 and choose the nomodetest boot option to make the Ubuntu be able to further boot up.

After selecting the nomodetest option and pressing on the Install Ubuntu menu option the graphic installer launched succesfully 😉
Hope this small tip to be helpful to some Ubuntu or other Linux user who is trying to install Linux on his Acer Aspire 5736Z
Cheers 😉

How to fix clamd “ERROR: LOCAL: Socket file /tmp/clamd.socket is in use by another process.”

Monday, May 23rd, 2011

One of the Qmail server installations I’m taking care of’s clamd antivirus process started loading the system heavily.
After a bit of log reading and investigation I’ve found the following error in my /var/log/clamd/current

@400000004dda1e1815cf03f4 ERROR: LOCAL: Socket file /tmp/clamd.socket is in use by another process.

I’ve noticed in my process list that actually I do have two processes clamd :

11608 ? Sl 0:05 /usr/local/sbin/clamd
11632 ? S 0:00 /usr/bin/multilog t /var/log/clamd
16013 ? Sl 0:06 /usr/local/sbin/clamd

It appeared that for some weird reason one of the clamd process was failing to connect constantly to the clam server socket /tmp/clamd.socket and each time it tried to connect and failed to connect to the socket the system gets about 5% of extra load …

Resolving the issues was a piece of cake, all I had to do is stop the clamd server delete the /tmp/clamd.socket and relaunch the clamd server.

Here is exactly the commands I issued:

debian:~# cd /service/
debian:/service# svc -a clamd
debian:/service# svc -h clamd
debian:/service# svc -d clamd
debian:/service# rm -f /tmp/clamd.socket
debian:/service# svc -u clamd

Afterwards the clamd extra load went out and in /var/log/clamd/current I can see clamd loads fine without errors, e.g.:

Listening daemon: PID: 16013
MaxQueue set to: 150
No stats for Database check - forcing reload
Reading databases from /usr/local/share/clamav
Database correctly reloaded (966822 signatures)
SelfCheck: Database status OK.
...

Upgrade Ubuntu from 9.04 to latest Ubuntu

Friday, April 1st, 2011

Updating a version of Ubuntu version 9.04 to the latest stable release is actually very simple and BORING.

It takes some long time and a lot of clicking, however eventually, the upgrade to the latest Ubuntu will be at hand.
The whole upgrade philosophy to Upgrade an outdated Ubuntu distribution to the newest supported stable Ubuntu release is in a consequentual number of release to release upgrades.

Let’s say you’re running Ubuntu 9.04 (Jaunty Jackalope and) you want to upgrade to Ubuntu 11.10 TLS
then you will have to to the following step by step upgrades;

Upgrade Ubuntu from;

  • Ubuntu 9.04 to Ubuntu 9.10
  • Ubuntu 9.10 to Ubuntu 10.04
  • Ubuntu 10.04 to Ubuntu 10.10
  • Ubuntu 10.10 to Ubuntu 11.04
  • Ubuntu 11.04 to Ubuntu 11.11

Now let’s start upgrading …
1. Upgrade Ubuntu 9.04 to Ubuntu 9.10

Press Alt+F2 and type:

update-manager -d

Update Manager Ubuntu

Press the Run Button afterwards to launch the command.
You will be prompted for your Linux administrator password, so type it in.

Next the command will launch the Update Manager . The update manager will show you all the available updates.

The Update Manager will show you the update options, it should say something like:

New distribution release ‘9.10’ is available

update manager ubuntu 9.10

Click Over the Update button and wait.

The Ubuntu update will went by by few steps:

1. Preparing Updates
2. Setting new software channels
3. Getting new packages
4. Installing the updates
5. Cleaning up
6. Restarting the computer

You will see further on a screen reading “Support for some applications ended”, on that screen simply press the Close button.

Further on you will be prompted with a windows reading:

Do you want to start the upgrade? You have to click over Start Upgrade button to finally begin with the upgrade process.
Getting new packages screen Ubuntu Update procedure

Now a prompt window will appearing asking you to reboot the system, when the prompt appears click over:

Restart Now

After the upgrade the new release of Ubuntu 9.10 will start booting up, and you will see a screen similar to the picture below:

Ubuntu 9.10 boot screen

Now as you have updated from Ubuntu 9.04 next step is to upgrade to Ubuntu 10.04

Now guess what you will have to upgrade the trivial quick update procedures once again.

Once again launch the Ubuntu Update Manager

System -> Administration -> Update Manager Now as you have updated from Ubuntu 9.04 next step is to upgrade to Ubuntu 10.04 (LTS – Lucid Lynx)

Now guess what you will have to upgrade the trivial quick update procedures once again.

Once again launch the Ubuntu Update Manager

System -> Administration -> Update Manager

Now follow the above described procedure with update-manager -d

After repeating the few trivial steps you will have Ubuntu 10.04 LTS on your Desktop

Further on complete the trivial update steps with the update-manager to update to Ubuntu release 10.10 (Maverick Meerkat).

After having succesfully upgraded to version 10.10, now repeat the boring update procedures described in the beginning of the article to update to Ubuntu 11.04

Now as you should be with Ubuntu 11.04, upgrade once again with update-manager to Ubuntu 11.04 (Natty Narwhal).

And ast a last, once again with the update-manager -d update following the instructions to Ubuntu 11.10.

I’m pretty sure this is one of my most boring articles ever …
It’s interesting fact that I learn once from a friend of mine about the Ubuntu distribution. The Ubuntu distribution has it’s versioning based on months and year whether a version is out for instance Ubuntu 9.04 means this Ubuntu release is released on (Month 04 (April), year 2009)), Ubuntu 11.10 Means this distribution is released in (year 2011, month 10 (October)).