Posts Tagged ‘Lynx’

Check server Internet connectivity Speedtest from Linux terminal CLI

Friday, August 7th, 2020

check-server-console-speedtest

If you are a system administrator of a dedicated server and you have no access to Xserver Graphical GNOME / KDE etc. environment and you wonder how you can track the bandwidth connectivity speed of remote system to the internet and you happen to have a modern Linux distribution, here is few ways to do a speedtest.
 

1. Use speedtest-cli command line tool to test connectivity


speedtest-cli is a tiny tool written in python, to use it hence you need to have python installed on the server.
It is available both for Redhat Linux distros and Debians / Ubuntus etc. in the list of standard installable packages.

a) Install speedtest-cli on Fedora / CentOS / RHEL
 

On CentOS / RHEL / Scientific Linux lower than ver 8:


$ sudo yum install python

On CentOS 8 / RHEL 8 user type the following command to install Python 3 or 2:


$sudo yum install python3
$ sudo yum install python2


On Fedora Linux version 22+


$ sudo dnf install python
$ sudo dnf install pytho3


Once python is at place download speedtest.py or in case if link is not reachable download mirrored version of speedtest.py on www.pc-freak.net here


$ wget -O speedtest-cli https://raw.githubusercontent.com/sivel/speedtest-cli/master/speedtest.py
$ chmod +x speedtest-cli


Then it is time to run script speedtest-screenshot-linux-terminal-console-cli-cmd
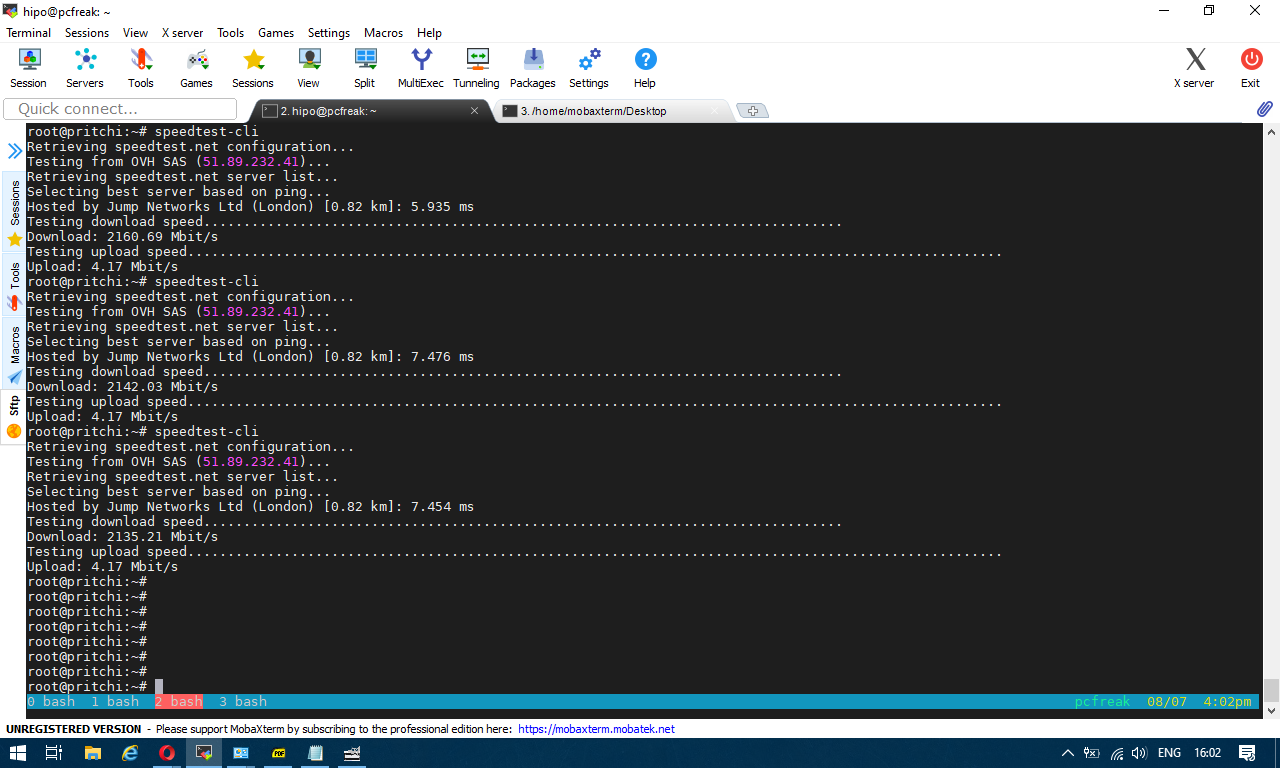
To test enabled Bandwidth on the server


$ python speedtest-cli


b) Install speedtest-cli on Debian

On Latest Debian 10 Buster speedtest is available out of the box in regular .deb repositories, so fetch it with apt


# apt install –yes speedtest-cli


You can give now speedtest-cli a try with –bytes arguments to get speed values in bytes instead of bits or if you want to generate an image with test results in picture just like it will appear if you use speedtest.net inside a gui browser, use the –share option
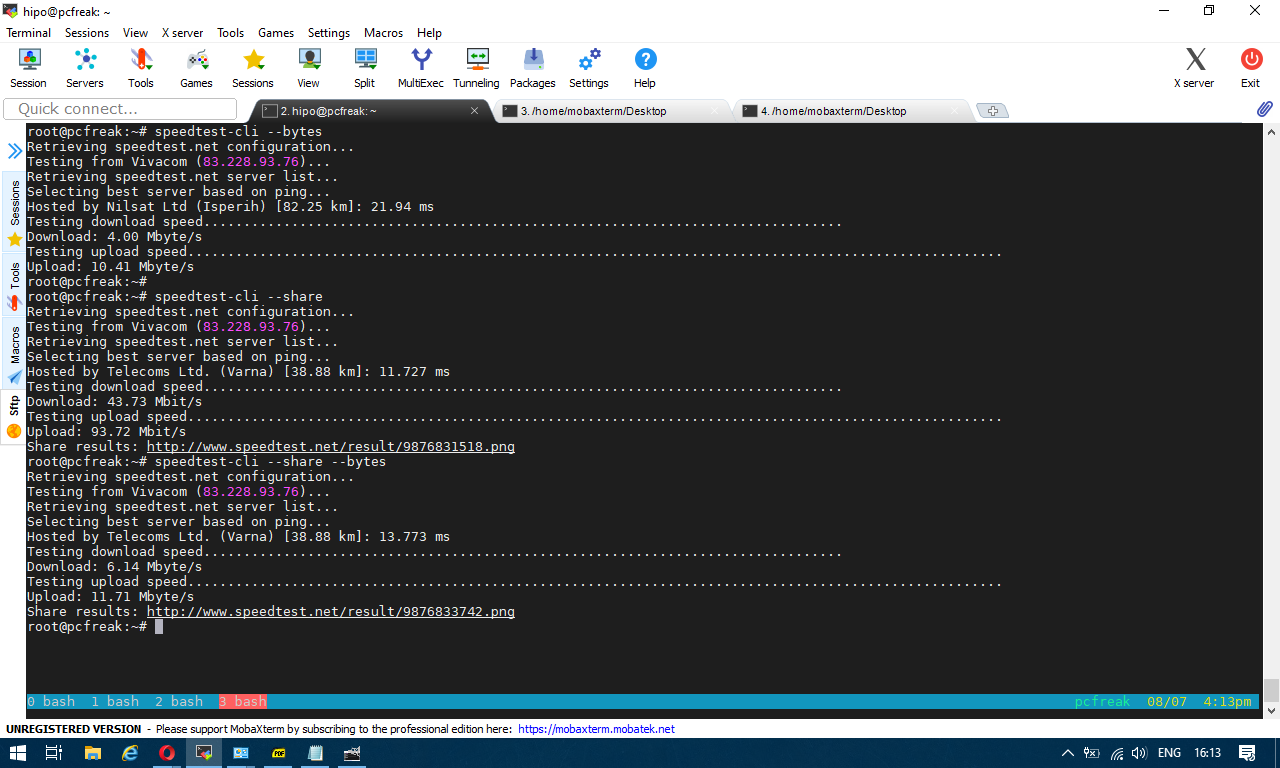
speedtest-screenshot-linux-terminal-console-cli-cmd-options


2. Getting connectivity results of all defined speedtest test City Locations


Speedtest has a list of servers through which a Upload and Download speed is tested, to run speedtest-cli to test with each and every server and get a better picture on what kind of connectivity to expect from your server towards the closest region capital cities, fetch speedtest-servers.php list and use a small shell loop below is how:


root@pcfreak:~#  wget http://www.speedtest.net/speedtest-servers.php
–2020-08-07 16:31:34–  http://www.speedtest.net/speedtest-servers.php
Преобразувам www.speedtest.net (www.speedtest.net)… 151.101.2.219, 151.101.66.219, 151.101.130.219, …
Connecting to www.speedtest.net (www.speedtest.net)|151.101.2.219|:80… успешно свързване.
HTTP изпратено искане, чакам отговор… 301 Moved Permanently
Адрес: https://www.speedtest.net/speedtest-servers.php [следва]
–2020-08-07 16:31:34–  https://www.speedtest.net/speedtest-servers.php
Connecting to www.speedtest.net (www.speedtest.net)|151.101.2.219|:443… успешно свързване.
HTTP изпратено искане, чакам отговор… 307 Temporary Redirect
Адрес: https://c.speedtest.net/speedtest-servers-static.php [следва]
–2020-08-07 16:31:35–  https://c.speedtest.net/speedtest-servers-static.php
Преобразувам c.speedtest.net (c.speedtest.net)… 151.101.242.219
Connecting to c.speedtest.net (c.speedtest.net)|151.101.242.219|:443… успешно свързване.
HTTP изпратено искане, чакам отговор… 200 OK
Дължина: 211695 (207K) [text/xml]
Saving to: ‘speedtest-servers.php’
speedtest-servers.php                  100%[==========================================================================>] 206,73K  –.-KB/s    in 0,1s
2020-08-07 16:31:35 (1,75 MB/s) – ‘speedtest-servers.php’ saved [211695/211695]

Once file is there with below loop we extract all file defined servers id="" 's 
 

root@pcfreak:~# for i in $(cat speedtest-servers.php | egrep -Eo 'id="[0-9]{4}"' |sed -e 's#id="##' -e 's#"##g'); do speedtest-cli  –server $i; done
Retrieving speedtest.net configuration…
Testing from Vivacom (83.228.93.76)…
Retrieving speedtest.net server list…
Retrieving information for the selected server…
Hosted by Telecoms Ltd. (Varna) [38.88 km]: 25.947 ms
Testing download speed……………………………………………………………………..
Download: 57.71 Mbit/s
Testing upload speed…………………………………………………………………………………………
Upload: 93.85 Mbit/s
Retrieving speedtest.net configuration…
Testing from Vivacom (83.228.93.76)…
Retrieving speedtest.net server list…
Retrieving information for the selected server…
Hosted by GMB Computers (Constanta) [94.03 km]: 80.247 ms
Testing download speed……………………………………………………………………..
Download: 35.86 Mbit/s
Testing upload speed…………………………………………………………………………………………
Upload: 80.15 Mbit/s
Retrieving speedtest.net configuration…
Testing from Vivacom (83.228.93.76)…

…..


etc.

For better readability you might want to add the ouput to a file or even put it to run periodically on a cron if you have some suspcion that your server Internet dedicated lines dies out to some general locations sometimes.
 

3. Testing UPlink speed with Download some big file from source location


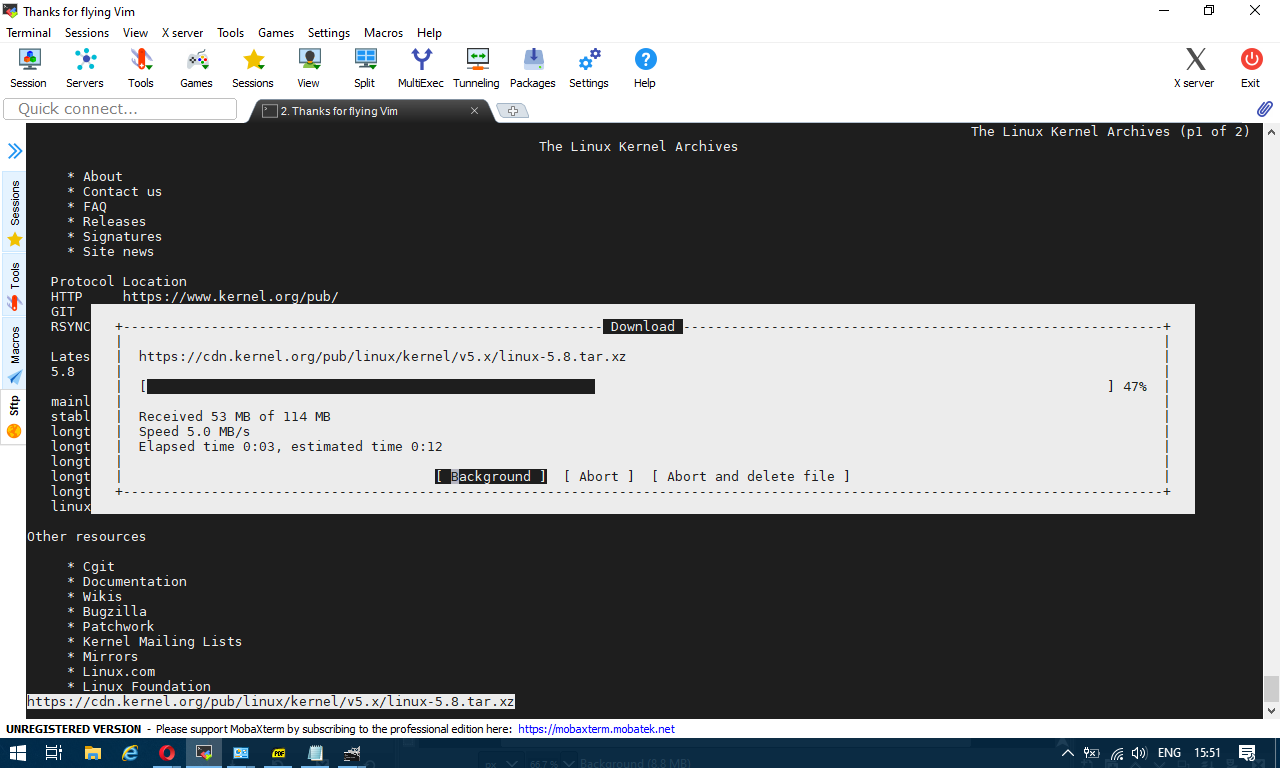
In the past a classical way to test the bandwidth connectivity of your Internet Service Provider was to fetch some big file, Linux guys should remember it was almost a standard to roll a download of Linux kernel source .tar file with some test browser as elinks / lynx / w3c.
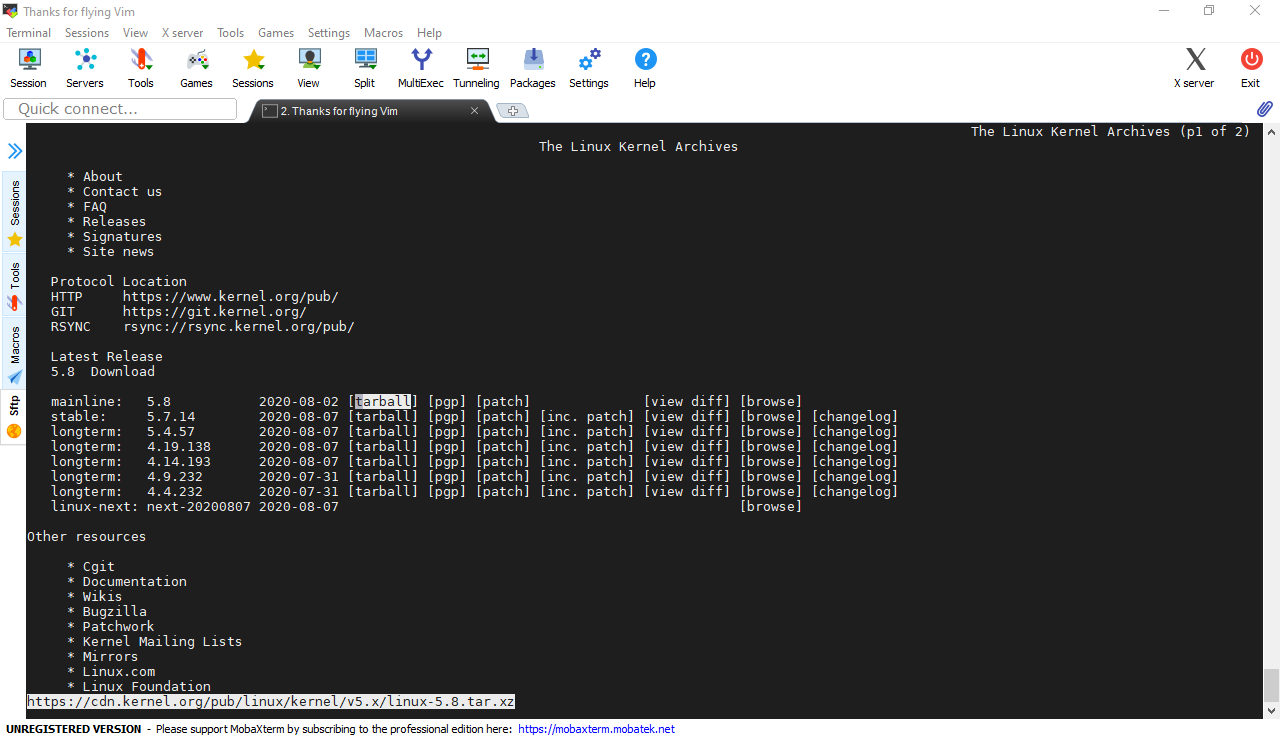
speedtest-screenshot-kernel-org-shot1 speedtest-screenshot-kernel-org-shot2
or if those are not at hand test connectivity on remote free shell servers whatever file downloader as wget or curl was used.
Analogical method is still possible, for example to use wget to get an idea about bandwidtch connectivity, let it roll below 500 mb from speedtest.wdc01.softlayer.com to /dev/null few times:


$ wget –output-document=/dev/null http://speedtest.wdc01.softlayer.com/downloads/test500.zip

$ wget –output-document=/dev/null http://speedtest.wdc01.softlayer.com/downloads/test500.zip

$ wget –output-document=/dev/null http://speedtest.wdc01.softlayer.com/downloads/test500.zip


# wget -O /dev/null –progress=dot:mega http://cachefly.cachefly.net/10mb.test ; date
–2020-08-07 13:56:49–  http://cachefly.cachefly.net/10mb.test
Resolving cachefly.cachefly.net (cachefly.cachefly.net)… 205.234.175.175
Connecting to cachefly.cachefly.net (cachefly.cachefly.net)|205.234.175.175|:80… connected.
HTTP request sent, awaiting response… 200 OK
Length: 10485760 (10M) [application/octet-stream]
Saving to: ‘/dev/null’

     0K …….. …….. …….. …….. …….. …….. 30%  142M 0s
  3072K …….. …….. …….. …….. …….. …….. 60%  179M 0s
  6144K …….. …….. …….. …….. …….. …….. 90%  204M 0s
  9216K …….. ……..                                    100%  197M=0.06s

2020-08-07 13:56:50 (173 MB/s) – ‘/dev/null’ saved [10485760/10485760]

Fri 07 Aug 2020 01:56:50 PM UTC


To be sure you have a real picture on remote machine Internet speed it is always a good idea to run download of random big files on a certain locations that are well known to have a very stable Internet bandwidth to the Internet backbone routers.

4. Using Simple shell script to test Internet speed


Fetch and use speedtest.sh


wget https://raw.github.com/blackdotsh/curl-speedtest/master/speedtest.sh && chmod u+x speedtest.sh && bash speedtest.sh


5. Using iperf to test connectivity between two servers 


iperf is another good tool worthy to mention that can be used to test the speed between client and server.

To use iperf install it with apt and do on the server machine to which bandwidth will be tested:


# iperf -s 


On the client machine do:


# iperf -c 192.168.1.1 


where 192.168.1.1 is the IP of the server where iperf was spawned to listen.

6. Using Netflix fast to determine Internet connection speed on host


Fast

fast is a service provided by Netflix. Its web interface is located at Fast.com and it has a command-line interface available through npm (npm is a package manager for nodejs) so if you don't have it you will have to install it first with:

# apt install –yes npm


Note that if you run on Debian this will install you some 249 new nodejs packages which you might not want to have on the system, so this is useful only for machines that has already use of nodejs.


$ fast


     82 Mbps ↓


The command returns your Internet download speed. To get your upload speed, use the -u flag:


$ fast -u


   ⠧ 80 Mbps ↓ / 8.2 Mbps ↑


7. Use speedometer / iftop to measure incoming and outgoing traffic on interface


If you're measuring connectivity on a live production server system, then you might consider that the measurement output might not be exactly correct especially if you're measuring the Uplink / Downlink on a Heavy loaded webserver / Mail Server / Samba or DNS server.
If this is the case a very useful tools to consider to extract the already taken traffic used on your Incoming and Outgoing ( TX / RX ) Network interfaces
are speedometer and iftop, they're present and installable depending on the OS via yum / apt or the respective package manager.


To install on Debian server:


# apt install –yes iftop speedometer


The most basic use to check the live received traffic in a nice Ncurses like text graphic is with: 


# speedometer -r 
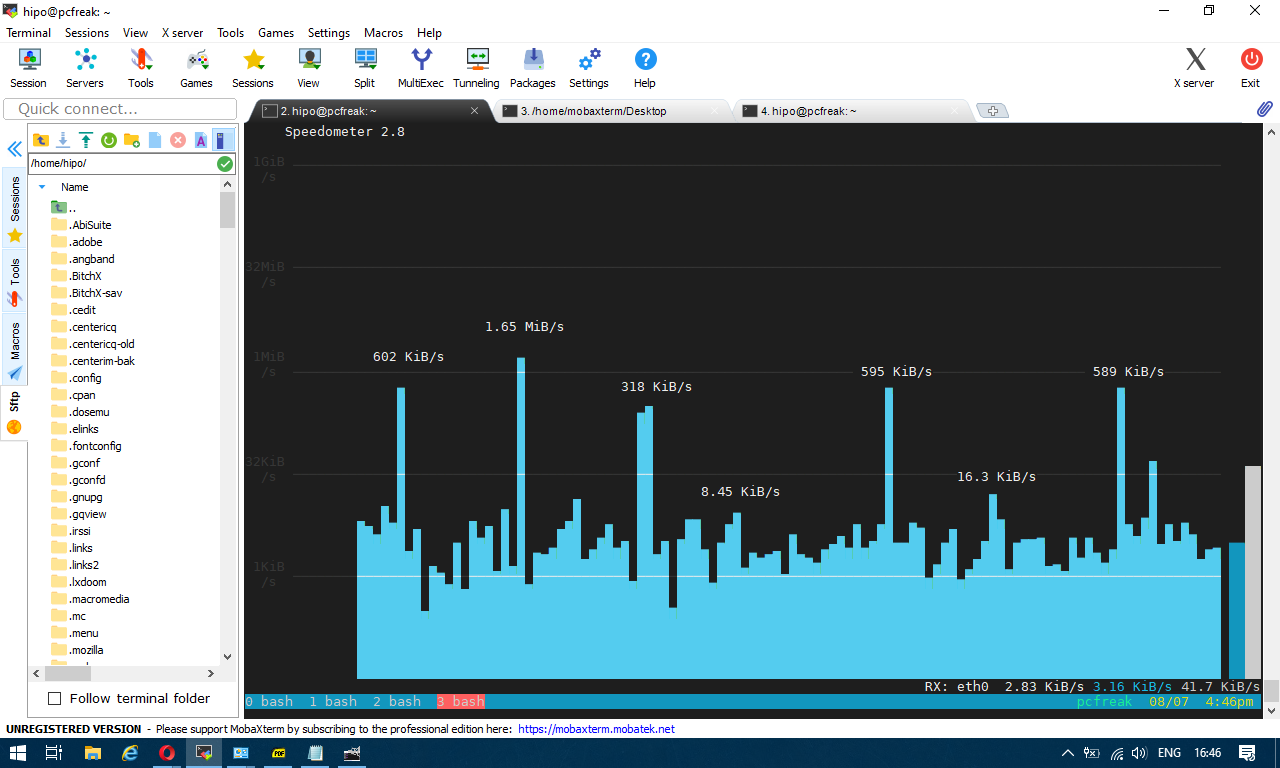

speedometer-check-received-transmitted-network-traffic-on-linux1

To generate real time ASCII art graph on RX / TX traffic do:


# speedometer -r eth0 -t eth0
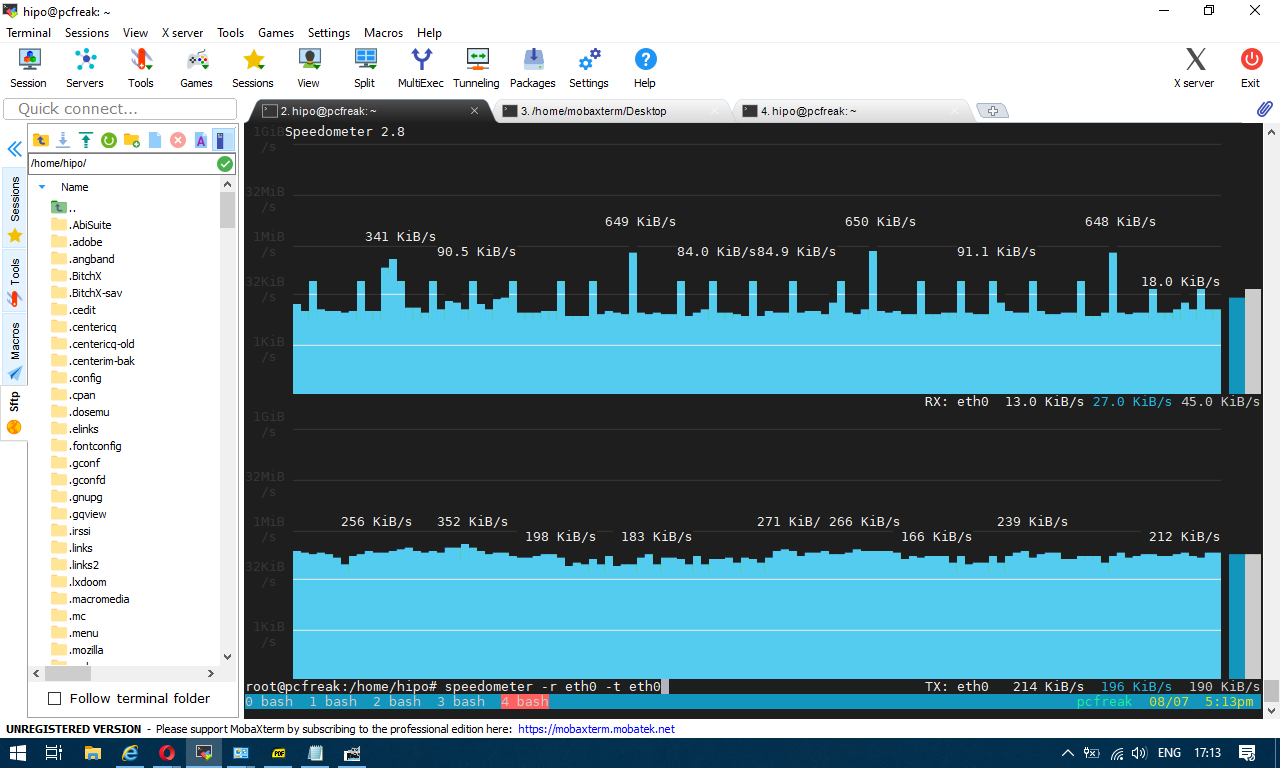

speedometer-check-received-transmitted-network-traffic-on-linux


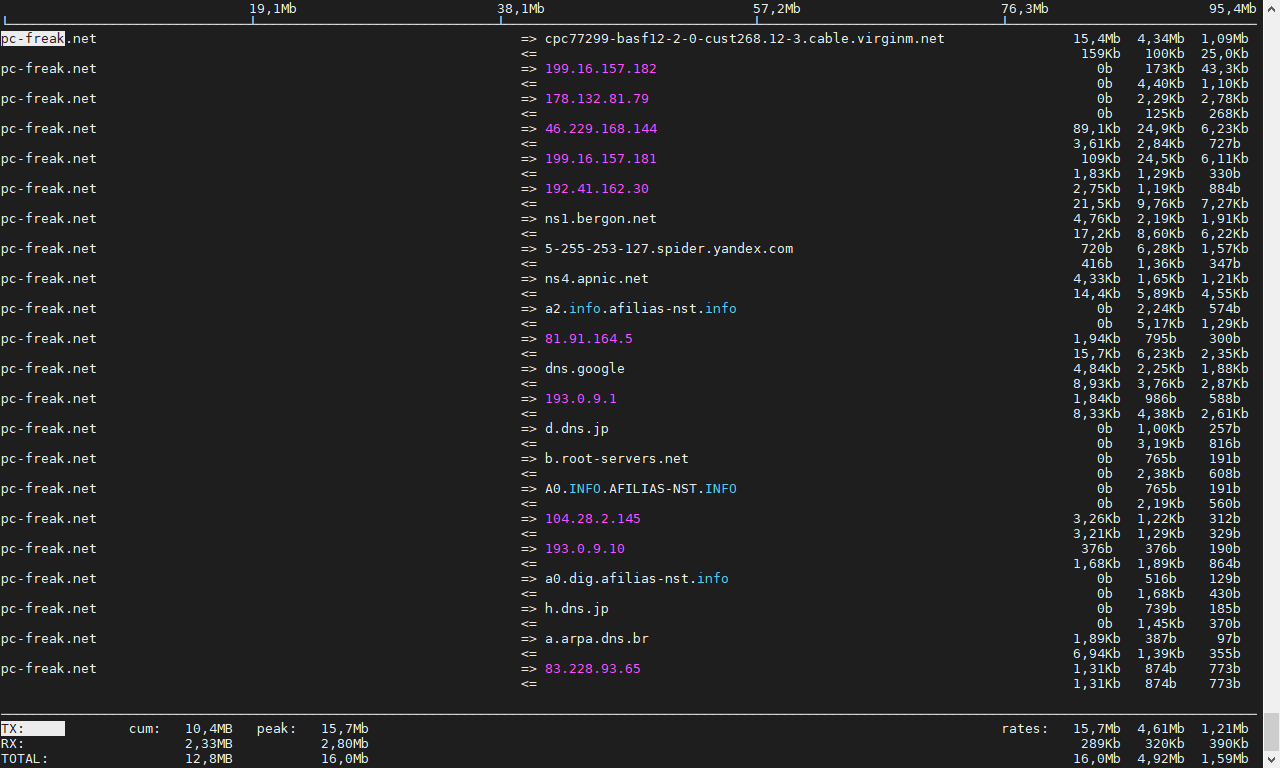
# iftop -P -i eth0



iftop-show-statistics-on-connections-screenshot-pcfreak


A quick and easy way to install Social Network on Linux/BSD System with Elgg

Monday, March 14th, 2011

elgg-blue-logo
I'm experimenting this days with Elgg – An Open Source Free Software GPLed Social Network which enables users to quickly create Communities.

Elgg is really easy to install and all it requires is a Linux/BSD or Windows system with PHP, MySQL and Apache installed.

Elgg is provided with dozens of nice plugins which for a short time enables individual to create fully operational Social Network like facebook.

Many people nowdays use facebook without realizing how bad facebook is how it breaks their privacy.
Facebook is actually a spy network, it stores data and pictures, likings and user behaviour of million of users around the world.
This needs to be stopped somehow, maybe if people start using the free software networks like elgg to build a mini-community which has profound interests in a certain spheres of work, life and amusement.
The evil empire of facebook will slowly start to loose it's position and the small projects networks based on Elgg and the other Free Software Social Networks which are currently available will start to rise up.
I'm currently really a novice into Elgg but I'm more convinced that the guys who develop it and contribute to it in terms of handy plugins have done really a great job.

It's ultra easy even for non professional middle level user to setup himself an Elgg install.
The installation procedure is not much harder than a simple wordpress blog or joomla based website install.
The installation of elgg takes no more than 10 to 20 minutes, the plugin installation and setup time further could take few days but in the end you have a full featured Social Network! This is really amazing.
The installation of new plugins in elgg is also fool proof / easy all you have to do to equip a newly installed elgg with plugins is to go to it's root directory and look for the mod directory. The new plugins which needs to be installed, could be directly downloaded and saved via links, elinks, lynx or even wget to the elgg installation directory.

Most of the elgg plugins comes in a form of zip files so after being installed simply executing:

server:/home/elgg/mysocialnetwork/mod# unzip walltowall.zip
....

The above cmd will for example unzip the WallToWall elgg plugin and the plugin will be further ready to be enabled via the administrator user set upped during your elgg installation.

The configurations of elgg are being accomplished via:

Administration -> Tool Administration

I should I'm still experimenting with Elgg social, until this very moment I've installed the following elgg plugins:

aaudio
akismet
artfolio
blog
bookmarks
buddytalk
captcha
categories
chat
crontrigger
custom_index
custom_profile_fields
default_widgets
diagnostics
elgg-ebuddy
embed
embedvideo
emoticons
externalpages
family
fbconnect
file
file_tree
flyers
forum
friend_request
friends
garbagecollector
groups
htmlawed
invitations
invitefriends
izap_videos
kaltura_video
lastfm
likes
logbrowser
logrotate
lucygames
members
messageboard
messages
milockergames_frameme
noscript_message
notifications
pages
polls
profile
reportedcontent
resume
river_comments
riverdashboard
riverfaces
search
siteaccess
tagcloud
theme_simpleneutral
thewire
tidypics
tidypicsExt
tinymce
twitter
twitterservice
user_contact_list
uservalidationbyemail
walltowall
weather
wp1
zaudio

One very handy feature I truly enjoy about Elgg is that it gives every user an own blog which or in other words when somebody registers in Elgg, he automatically gets a personal blog! How cool this is Yeash 😉
The Elgg photo upload plugin is also another interesting story. The photo plugin is a way better from my first impressions than facebook's buggy upload client.
Elgg also uses heavily jquery for it's various operations and the user experience feels very interactive.

Of course as with all free software things are not perfect some of the elgg plugins or (mods) as they are called are not working.
For example I couldn't make by so far the weather plugin which is supposed to report the weather.

Maybe some tweakening of the not working plugins will easily make them working. What is really important is that the Elgg basis system looks and seems to work really good and enpowers the user with a social network alternatives to the ugly facebook.

In order to experiment with Elgg and I've established a small social network targetting at University College and School Students called MockATeacher – mockateacher.com>/i>. The idea behind is to help students in their report writting by providing them with a place where they can meet other students and share files.

Some other aspects I've planned for MockATeacher is to build a small community of people who would like to share about idiot teachers, teacher stupid sayings as well as to mock the idiotic type of education that we and our children are up to in this age.
Just to close up, if you're looking for some time to spend in experimenting in an enjoyable way you definitely need to install elgg and play with it 😉

How to permanently enable Cookies in Lynx text browser – Disable accept cookies prompt in lynx console browser

Wednesday, April 18th, 2012

lynx-text-browser-logo
The default behaviour of lynx console text browser on Linuces, BSD and other free OSes is to always ask, for the accept cookies prompt once an internet web page is opened that requires browser cookies to be enabled.

I should admin, having this "secure by default" (always ask for new cookies) behaviour in lynx was a good practice from a security point of view.

Another reason, why this cookies prompt is enabled by default is back in the days, when lynx was actively developed by programmers the websites with cookies support was not that many and even cookies was mostly required for user/pass authentication (all those who still remember this days the websites that requires authentication was a way less than today) …
With this said the current continuing security cautious behaviour in the browser, left from its old days is understandable.

Screenshot Google Accept cookies Lynx dialog FreeBSD

However I personally sometimes, need to use lynx more frequently and this behaviour of always opening a new website in text mode in console to prompts me for a cookie suddenly becomes a big waste of time if you use lynx to browser more than few sites. Hence I decided to change the default way lynx handles cookies and make them enabled by default instead.
Actually even in the past, when I was mainly using internet in console on every new server or home Linux install, I was again making the cookies to be permanently accepted.
Everyone who used lynx a few times already knows its "annoying" to all time accept cookie prompts … This provoked me to write this short article to explain how enabling of constant cookie accepting in lynx is done

To enable the persistent cookies in lynx, one needs to edit lynx.cfg on different GNU / Linux and BSD* distributions lynx.cfg is located in different directory.

Most of the lynx.cfg usual locations are /etc/lynx/lynx.cfg or /etc/lynx.cfg as of time of writting this post in Debian Squeeze GNU / Linux the lynx.cfg is located in /etc/lynx-cur/lynx.cfg, whether for FreeBSD / NetBSD / OpenBSD users the file is located in /usr/local/etc/lynx.cfg

What I did to allow all cookies is open lynx.cfg in vim edit and change the following lines:

a)

#FORCE_SSL_COOKIES_SECURE:FALSE

with

FORCE_SSL_COOKIES_SECURE:TRUE

b)

#SET_COOKIES:TRUE

uncomment it to:

SET_COOKIES:TRUE

c) next, change

ACCEPT_ALL_COOKIES:FALSE

ACCEPT_ALL_COOKIES:TRUE

Onwards opening any website with lynx auto-accepts the cookies.

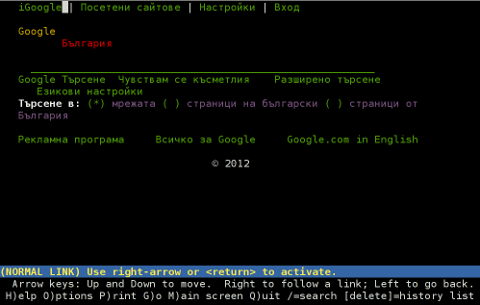
lynx Always allowing from domain cookies Linux screenshot

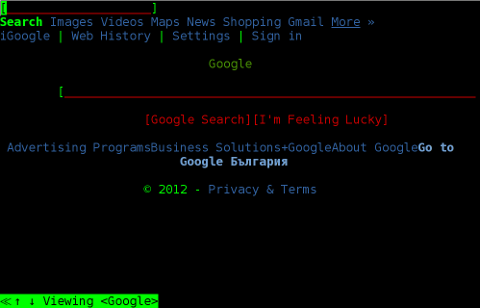
Google in Bulgarian Lynx browser screenshot

For people who care about there security (who still browse in console (surely not many anymore)), permanently allowing the cookies is not a good idea. But for those who are ready to drop off little security for convenience its ok.
 

How to test if imap and pop mail server service is working with Telnet cmd

Monday, August 8th, 2011

test-if-imap-pop3-is-working-with-telnet-command-logo-imap
I’ve recently built new mail qmail server with vpopmail to serve pop3 connectins and courierimap and courierimaps to take care for IMAP IMAPS.

I further used telnet to test if the Linux server pop3 service on (110) and imap on (143) worked fine, straight after the completed qmail install.
Here is how to test mail server with vpopmail listening for connections on pop3 port :

debian:~# telnet mail.mymailserver.com 110
Trying 111.222.333.444...
Connected to mail.mymailserver.com.
Escape character is '^]'.
+OK <2813.1312745988@mymailserver.com>
USER hipo@mymailserver.com
+OK
PASS here_goes_my_secret_pass
+OK
LIST
1 309783
2 64053
3 2119
4 64357
5 317893
RETR 1
My first mail content retrieved with RETR commandgoes here ....
quit
+OK
Connection closed by foreign host.

You see I have 5 messages in my mailbox, as you can see I used RETR command to check the content of my mail, this is handy as I can read my mails straight with telnet (if the mail is in plain text), of course it’s a bit more complicated if I have to read encrypted or html mail, though still its easy to write a tiny parser and pipe the content produced by telnet command to lynx or some other text based browser.

Now another sys admin handy tip is the use of telnet to check my mail servers IMAP servers is correctly operating.
Here is how:

debian:~# telnet mail.mymailserver.com 143
Trying 111.222.333.444...
Connected to localhost.
Escape character is '^]'.
* OK [CAPABILITY IMAP4rev1 UIDPLUS CHILDREN NAMESPACE THREAD=ORDEREDSUBJECT THREAD=REFERENCES SORT QUOTA IDLE ACL ACL2=UNION STARTTLS] Courier-IMAP ready. Copyright 1998-2010 Double Precision, Inc. See COPYING for distribution information.
01 LOGIN hipo@mymailserver.com here_goes_my_secret_pass
A OK LOGIN Ok.
02 LIST "" *
* LIST (Unmarked HasNoChildren) "." "INBOX"
02 OK LIST completed
03 SELECT INBOX
* FLAGS (Draft Answered Flagged Deleted Seen Recent)
* OK [PERMANENTFLAGS (* Draft Answered Flagged Deleted Seen)] Limited
* 5 EXISTS
* 5 RECENT
* OK [UIDVALIDITY 1312746907] Ok
* OK [MYRIGHTS "acdilrsw"] ACL
03 OK [READ-WRITE] Ok
04 STATUS INBOX (MESSAGES)
* STATUS "INBOX" (MESSAGES 5)
04 OK STATUS Completed.
05 FETCH 1 ALL
...
06 FETCH 1 BODY
...
07 FETCH 1 ENVELOPE
...
As you can see according to standard to send commands to IMAP server from console after a telnet connection you will have to always include a command line number like 01, 02, 03 .. etc.

Using such a line numbering is not obligitory and also letters like A, B, C could be use still line numbering with numbers is generally a good idea since it’s easier for reading on the screen.

Now line 02 shows you available mailboxes, line 03 SELECT INBOX selects the imap Inbox to be further operated with, 04 STATUS INBOX cmd displays status about current mailboxes in folder.
FETCH 1 ALL instructs the imap server to get list of all IMAP message headers. Next command in line 05 FETCH 1 BODY will display the message body of the first message in list.
The 07 FETCH 1 ENVELOPE will display the mail headers for the 1 message.

Few other IMAP commands which might be helpfun on connection are:

08 FETCH 1 FULL
09 FETCH * FULL

First one would fetch complete content of a message numbered one from the imap server and the second one 09 FETCH * FULL will get all the mail content for all messages located on the remote IMAP server.

The STATUS command aforementioned earlier could take the following list of arguments:

MESSAGES, UNSEEN, RECENT UIDNEXT UIDVALIDITY

These commands are a gold mine for me as a sysadmin as it helps quickly solve problems, hope they would help to somebody out there as well 😉
This way is a way shorter than bothering each time to check, if some customer e-mail account is improperly configured by creating setting up a new account in Thunderbird.
 

Browse the web graphically in text console TTYs with w3m-img and links2 on Debian, Ubuntu, Fedora and CentOS Linux

Sunday, May 6th, 2012

links2 (links console graphics) www browser logo picture

Lately, I'm starting to use my tty consoles more and more. Most of the people should be probably aware of the existence of lynx, elinks and w3m text browsers enabling the console geeks to browse or debug web pages in plain text mode.

Anyhow, for people who did not used one of the aforementioned browsers to text brose the net I warmly suggest you give them a try. A good review on 'em is in one of my  previous post – Text mode console browsing with lynx, elinks, w3m and links text browsers

For people dedicated to only use console and text mode console on their Personal Computer, simply installing and using this text browsers will not allow you to view any images tags in the html.

Nowdays one of the reasons many people would decide not to use console for web is because they want to see pictures. Hence I believe by having the opportunity to have almost fully functional text browsing in Linux cosnole /  terminal many might choose not to bother with heavy resource consuming desktop browsers like Firefox, Google Chrome, Opera etc..

Another good reason why you might want to use a console browser instead of its Desktop resource monsters, would be improved efficiency of work. It is a well evident fact keyboard access to commands is always faster than mouse and GUI!

Besides that, I'm convinced there should be many hard core geeks out there, who still can happily live without Macromedia Flash ads and Videos in Web. For this group of users having support for graphical browsing in console is also a must.
Following my previous thoughts there should be many people who doesn't have a specific requirement for GUI programs but still use (mutt, ssh, vim, mpg321, zgv etc.).

I'm sure there are plenty of this people who do most of their work in text console and use the X windows server in conjunction with mimalistic graphical environment like (DropBox, XFCE …) for the one and only reason to view  pictures embedded in web pages.

I'm one of all this guys prior mentioned, keen on console tty browsing. Therefore while checking the available console browsers few days ago, I've stumbled on a text console w3m browser capable of displaying website with images in console called w3m-img.

w3m-img is displays pictures in web over a plain console tty or in X terminals (mlterm, xterm etc.).

Here is the description returned by apt-cache show w3m-img

debian:~# apt-cache show w3m-img|grep -i description -A 3
Description: inline image extension support utilities for w3m
w3m-img provides some utilities to support inline images for w3m
on terminal emulator in X Window System environments and Linux
framebuffer.

w3m-img doesn't rely on svgalib for displaying the pictures, but comes with its own written console image display & rendering library called w3mimgdisplay. – /usr/lib/w3m/w3mimgdisplay.

One w3m-img pre-requirement in order to be able to display pictures in plain text console ttys is to have the Linux kernel framebuffer enabled..

Actually, framebuffer is enabled by default on latest stable Debian and derivatives as well as on most other Linux releases as of time of writing.
Framebuffer is also active on other RPM based distros (Fedora, CentOS, SuSE) etc.

The Frambebuffer on or off is controlled via some directives added in grub or lilo configuration files – (depending on the installed boot loader).

Some people can only boot their PCs with the framebuffer kernel support switched off at boot time or the system will not boot Linux at all.
Unfortunately this unlucky ones, would not be able to use the picture rendering w3m-img capabilities but don't be desperate, there is hope 🙂

For people who can't run their Linux distro with a framebuffer kernel support enabled there is a custom hacked version of linksconsole text browser called links-graphic. links-graphic supports both console graphical text browsing using the framebuffer or alternatively svgalib as a console graphics render machine.

I used to be actively using links-graphics WWW browser quite often about 8 years ago and just remembering it brings me good memories of the good old console "hacking" years 🙂

Anyways, w3m-img packaged version is currently available for both rpm and deb based Linux distributions. Here is how to install on both.

1.Install and use w3m-img on Debian, Ubuntu, Mint Linux-es

debian:~# apt-get --yes install w3m-img
....

This should install w3m-img, if of course there is already no previous install of w3m package on the system.

In case you have the w3m deb installed, you will have to first remove the existing w3m installed version before installing the w3m-img package, otherwise you will probably end up with an installation conflict (at least I got such a dependency conflict while apt-getting). Probably the conflict would never occur if aptitude install w3m-img is used instead of apt ….

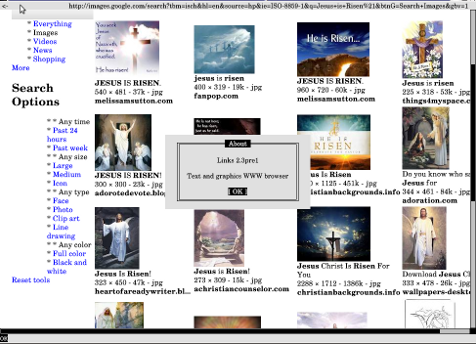
Usage of w3m-img is exactly the same as using the w3m text only browser version. Below is a screenshot example of w3m-img in action:

debian:~# w3m http://images.google.com

w3m-img text (console) browsing images.google.com screenshot

Jesus Christ Pantocrator Orthodox icon google image search screenshot Debian Squeeze Linux

As you can see in the upper screenshots w3m-img displays pictures pretty nice, whether even images.google.com search functionality works fine.

Generally IMHO a lot of pages looks cool with w3m-img.
Some elements placement during rendering, comes at odd positions but this is normal, since original w3m text browser doesn't have any support for Javascript 1 / 2.

For those people who would like to have both javascript basic support and images in a plain text console browsing you, again you will have to compile links2 WWW browser from source manually with svgalib support enabled.

2. Installing w3m-img to text-browse with images on Fedora, CentoS, RHEL, Redhat etc.

[root@centos ~]# yum -y install w3m-img
....

A very cool thing of w3m graphical console browser is it support  most major image formats including animated GIF files 🙂

The way animated GIFs are viewed is very old school, here is a notice extracted from README.img contained in the pack.
 

Notice
If you want to see GIF animation, please hit a suitable key, such
as 'h', 'l', etc., repeatedly, because a frame is rewritten
according to the re-drawing demand from w3m.
Some code in w3mimg/fb/fb.c was originally written by Mr. Yamasaki.
http://www.sainet.or.jp/~yamasaki/download/fb-sample.tar.gz

As one can read in order to see an animated GIF file with w3m you will have to keep pumping the h or l key or Enter key 😀 😀 😀 (like a nintendo game ain't it?)

Here is the also the complete list of Supported browser features mentioned in README.img
 

Support

* Display inline image (GIF,PNG,JPEG, etc.) on terminals
(xterm,rxvt, etc.) of X11 or Linux framebuffer device.
* Support inline image of img tag.
Support of attributes "width", "height", and "align".
* Direct display of image file which header is "Content-type: image/*"
* Support of

tag.
Support of attributes "shape" and "coords" of

tag.
* Support of an attribute "ismap" of img tag.
"w3m" adds coordinate of the cursor as ?, to url, and sends url.
* Support of an attribute "type=image" of img tag.
"w3m" sends coordinate of the cursor as .x=&.y=.
* Asynchronous loading of image files.
* Using cache of image file as pixmap.
* Support of GIF animation when use GdkPixbuf.

Something else which I find worthy to mention is the browser behaviour, whether a webpage has Adobe Flash .swf or .flv files embedded. If such files are contained in website source code, they will be simply ignored and the w3m keeps running stable (no strange flash crashes! hooray!).

While website with flash is opened in w3m, Adobe Flash's field on the screen shows either a blank rectangle or an empty square (depending on the site embedded flash banner dimensions and form).

W3m-Img text web browser with picture viewing support adobe flash enabled youtube.com opened screenshot

Stability of w3m in opening flash website is something really nice. I say this because I still remember how terrible the situation with links with svgalib support compiled in used to be. I remember back in the day with links2 most "flash enabled" websites lead the browser to a ugly core dump.

3. Install and use links2 on Debian and derivatives Linux to browse in console graphically with javascript support

As aforementioned, there is a hacked version of links browser called links-graphics
This hacked version is available as a package within Debian, Ubuntu and presumably most if not all of the rest deb based Linux repos.

On Fedora and the other RPM family Linuces links-graphics, should be downloaded separately as rpm and installed and is inavailable through default rpm repositories.

On Debian distros links-graphics is available by installing links2.
debian:~# apt-get install --yes links2
....

Later to start links2 in graphics mode in lets say tty1 on a machine booted its kernel with framebuffer support, type:

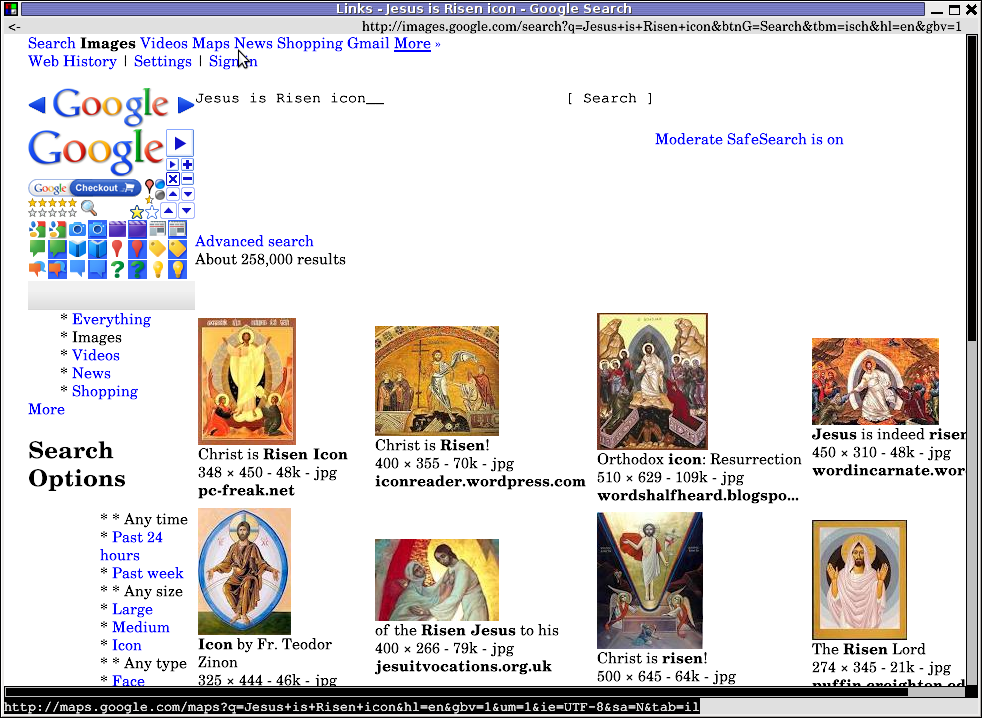
debian:~# links2 -driver fb http://images.google.com

Actually links2 looks, way better in console than w3m but this is quite normal, as links is way more "user friendly GUI text browser".

For those, using their console ttys without framebuffer enabled you can alternatively run links2 with its svgalib graphics support like so:

debian:~# links2 -driver svgalib -mode 320x200x16 http://images.google.com

links graphics / xlinks images in X window on Debian GNU / Linux screenshot

Note that the svgalib driver is not working on my machine, as my Linux kernel framebuffer is already enabled. Probably if I want to use links2 through  svgalib I will have to reboot and boot machine with framebuffer kernel support switched off…

links2 also supports X window graphics and is a great for Graphical environment WWW browser substitute to CPU intensive Iceweasel / Firefox or Google Chrome.

Links2 can be also used as a default browser in X windows (GUI) with any graphic manager. In my view it is   perfect web browser  for scientists and people who does not need support for Adobe Flash Player or HTML5 standards.

To use links in XFCE or GNOME Desktop env, the quickest way is to prepare new Application Launcher to run command:

debian:~# links2 -g

Google Images links2 graphics in GNOME desktop env screenshot

It is useful to use a quick alias to links -g in my ~/.bashrc in order to allow easier browsing from console by typing xlinks someurladdress.com

If you want to add this xlinks shell alias  exec:

debian:~# echo 'alias xlinks='links2 -g $1' >> ~/.bashrc

4. Install links with graphics console support on Fedora, CentOS and RHEL

[root@fedora ~]# cd /usr/local/src
[root@fedora src]# wget -q http://jakub.horky.net/rpm/links/links-2.1pre15-2/links-2.1pre15-2.i386.rpm
[root@fedora src]# rpm -ivh --nodeps links-2.1pre15-2/links-2.1pre15-2.i386.rpm
Preparing... ########################################### [100%]
Installing... ########################################### [100%]

If you get some errors with missing libraries after installing and launching links2, try to resolve them by manually linking them with ln cmd or look for the library package rpm versions and install them via yum. Another way is to fetch the links2 source from Links2 official website links.twibright.com and build from source.

Since the last time in 8 years ago I used links2,  it evolved a lot. The version now did not crash as before with flash websites are viewed.  Generally Links2 now is way more  stable.
To sum it up most people, will probably want to use Links2 for console graphical browsing as the speed and support for HTML and Javascript and web site formatting is way advanced than w3m-img

I haven't compared the speed of opening pages, but since w3m-img is html and graphics render is more simple than xlinks I suppose at some occasions w3m-img will be faster in site rendering.
However still links2 performs really light fast and its web page opening time is swift and more than good.. If xlinks opening performance is compared to most (if not all) traditional desktop browsers used nowdays Links2 will definitely beat them.

A good links2 application instead of a traditional desktop browser is also for people who aim at  improving website browsing time.

I haven't thoroughfully enough, researched on other text console grahic browser alternatives programs. If I miss something and you know amy other better ones please let me know.

Wish you a Happy Browsing 😉

Text mode (console) browsing with tabs with Elinks / Text browsers – (lynx, elinks, links and w3m) useful HTTP debugging tools for Linux and FreeBSD servers

Friday, April 27th, 2012

The last days, I'm starting to think the GUI use is making me brainless so I'm getting back to my old habits of using console.
I still remember with a grain of nostalgy how much more efficient I used to be when the way to interact with my computer was primary in text mode console.
Actually, I'm starting to get this idea the more new a software is the more inefficient it makes your use of computer, not to mention the hardware resources required by newer software is constantly increasing.

With this said, I started occasionally browsing again like in the old days by using links text browser.
In the old days I mostly used lynx and its more advanced "brother" text browser links.
The main difference between lynx and links is that lynx does not have any support for the terrible "javascript", whether links supports most of the Javascript ver 2.
Also links and has a midnight commander like pull down menus on the screen top, – handy for people who prefer some more interactivity.

In the past I remember I used also to browse graphically in normal consoles (ttys) with a hacked version of links calledTThere is also a variation of linksxlinks suitable for people who would like to have graphical browser in console (ttys).

I used xlinks quite heavily in the past, when I have slower computer P166Mhz with 64MB of memory 2.5 GB HDD (What a times boy what a times) .
Maybe when I have time I will install it on my PC and start using it again like in the old days to boost my computer use efficiency…
I remember the only major xlinks downside was it doesn't included support for Adobe flash (though this is due to the bad non-free software nature of Adobe lack of proper support for free software and not a failure of xlinks developers. Anyways for me this wasn't a big trouble since, ex Macromedia (Adobe) Flash support is not something essential for most of my work…

links2 is actually the naming of links version 2. elinks emerged later (if I remember correctly, as fork project of links).
elinks difference with links constitutes in this it supports tabbed browsing as well as colors (links browser displays results monochrome).

Having a tabbed browsing support in tty console is a great thing…
I personally belive text browsing if properly used can in many ways outbeat, graphic browsing in terms of performance and time spend to obtain data. I'm convinced text browsing is superior for two reasons:
1. with text there is way less elements to obstruct your attention.
– No graphical annoying flash banners, no annoying taking the attention pictures

2. Navigating in web pages using the keyboard is more efficient than mouse
– Using keyboard shorcuts is always quicker than mouse, generally keboard has always been a quicker way to access computer commands.

Another reason to use text browsing is, it is mostly the text part of a page that matters, most of the pages that provide images to better explain a topic are bloated (this is my personal view though, i'm sure designer guys will argue me :D).
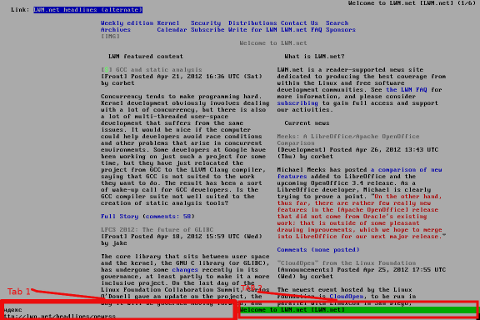
Here is a screenshot of a my links text browser in action, I'm sorry the image is a bit unreadable, but after taking a screenshot of the console and resizing it with GIMP this is what I got …

Links text console browser screenshot with 2 tabs opened Debian GNU / Linux

For all those new to Linux who didn't tried text browsing yet and for those interested in computer history, I suggest you install and give a try to following text browsers:
 

  • lynx
  • (Supports colorful text console text browsing)
    lynx text console browser Debian Squeeze GNU / Linux Screenshot

  • links
  • Links www text console browser screenshot on Debian Linux

  • elinks
  • (Supports colors filled text browsing and tabs)
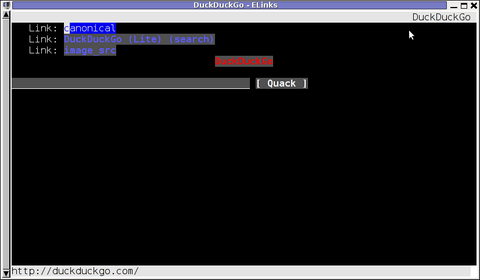
    elinks opened duckduckgo.com google alternative search engine in mlterm terminal Debian Linux

  • w3m
  • w3m one of the oldest text console browsers screenshot Debian Linux Squeeze 6.2

By the way having the 4 text browsers is very useful for debugging purposes for system administrators too, so in any case I think this 4 web browsers are absoutely required software for newly installed GNU / Linux or BSD* based servers.

For Debian and the derivatives Linux distributions, the 4 browsers are available as deb packages, so install them with following apt 1 liner:
 

debian:~# apt-get –yes install w3m elinks links lynx
….

FreeBSD users can install the browsers using, cmd:
 

freebsd# cd /usr/ports/www/w3mfreebsd# make install clean
….
freebsd# cd /usr/ports/www/elinksfreebsd# make install clean
….
freebsd# cd /usr/ports/www/linksfreebsd# make install clean
….
freebsd# cd /usr/ports/www/lynxfreebsd# make install clean
….

In links using the tabs functionality appeared, somewhere near the 2001 or 2000 (at least that was the first time I saw links with tabbed browsing enabled). My first time to saw links support opening multiple pages within the same screen under tabs was on Redhat Linux 9

Opening multiple pages in tabs in the text browser is done by pressing the t key and typing in the desired URL to open isnide.
For more than 2 tabs, again t has to be pressed and same procedure goes on and on.
It was pretty hard for me to figure out how I can do a text browsing with tabs, though I found a way to open new tabs it took me some 10 minutes in pondering how to switch between the new opened links browser tabs.

Hence, I thought it would be helpful to mention here how tabs can be switched in links text browser. Actually it turned it is pretty easy to Switch tabs tabs back and foward.

1 tab to move backwards is done with < (key), wheter switching one tab forward is done with the > key.

On UK and US qwerty keyboards alignment the movement a tab backward and forward is done with holding shift and pressing < onwards holding both keys simultaneously and analogously with pressing shift + >
 

Check and Restart Apache if it is malfunctioning (not returning HTML content) shell script

Monday, March 19th, 2012

Check and Restart Apache Webserver on Malfunction, Apache feather logo

One of the company Debian Lenny 5.0 Webservers, where I'm working as sys admin sometimes stops to properly server HTTP requests.
Whenever this oddity happens, the Apache server seems to be running okay but it is not failing to return requested content

I can see the webserver listens on port 80 and establishing connections to remote hosts – the apache processes show normally as I can see in netstat …:

apache:~# netstat -enp 80
Active Internet connections (w/o servers)
Proto Recv-Q Send-Q Local Address Foreign Address State User Inode PID/Program name
tcp 0 0 xxx.xxx.xxx.xx:80 46.253.9.36:5665 SYN_RECV 0 0 -
tcp 0 0 xxx.xxx.xxx.xx:80 78.157.26.24:5933 SYN_RECV 0 0 -
...

Also the apache forked child processes show normally in process list:

apache:~# ps axuwwf|grep -i apache
root 46748 0.0 0.0 112300 872 pts/1 S+ 18:07 0:00 \_ grep -i apache
root 42530 0.0 0.1 217392 6636 ? Ss Mar14 0:39 /usr/sbin/apache2 -k start
www-data 42535 0.0 0.0 147876 1488 ? S Mar14 0:01 \_ /usr/sbin/apache2 -k start
root 28747 0.0 0.1 218180 4792 ? Sl Mar14 0:00 \_ /usr/sbin/apache2 -k start
www-data 31787 0.0 0.1 219156 5832 ? S Mar14 0:00 | \_ /usr/sbin/apache2 -k start

In spite of that, in any client browser to any of the Apache (Virtual hosts) websites, there is no HTML content returned…
This weird problem continues until the Apache webserver is retarted.
Once webserver is restarted everything is back to normal.
I use Apache Check Apache shell script set on few remote hosts to regularly check with nmap if port 80 (www) of my server is open and responding, anyways this script just checks if the open and reachable and thus using it was unable to detect Apache wasn't able to return back HTML content.
To work around the malfunctions I wrote tiny script – retart_apache_if_empty_content_is_returned.sh

The scripts idea is very simple;
A request is made a remote defined host with lynx text browser, then the output of lines is counted, if the output returned by lynx -dump http://someurl.com is less than the number returned whether normally invoked, then the script triggers an apache init script restart.

I've set the script to periodically run in a cron job, every 5 minutes each hour.
# check if apache returns empty content with lynx and if yes restart and log it
*/5 * * * * /usr/sbin/restart_apache_if_empty_content.sh >/dev/null 2>&1

This is not perfect as sometimes still, there will be few minutes downtime, but at least the downside will not be few hours until I am informed ssh to the server and restart Apache manually

A quick way to download and set from cron execution my script every 5 minutes use:

apache:~# cd /usr/sbin
apache:/usr/sbin# wget -q https://www.pc-freak.net/bscscr/restart_apache_if_empty_content.sh
apache:/usr/sbin# chmod +x restart_apache_if_empty_content.sh
apache:/usr/sbin# crontab -l > /tmp/file; echo '*/5 * * * *' /usr/sbin/restart_apache_if_empty_content.sh 2>&1 >/dev/null


How to convert html pages to text in console / terminal on GNU / Linux and FreeBSD

Thursday, December 8th, 2011

HTML to Plain Text Convertion on GNU / Linux and FreeBSD

I’m realizing the more I’m converting to a fully functional GUI user, the less I’m doing coding or any interesting stuff…
I remembered of the old glorious times, when I was full time console user and got a memory on a nifty trick I was so used to back in the day.
Back then I was quite often writing shell scripts which were fetching (html) webpages and converting the html content into a plain TEXT (TXT) files

In order to fetch a page back in the days I used lynx(a very simple UNIX text browser, which by the way lacks support for any CSS or Javascipt) in combination with html2text – (an advanced HTML-to-text converter).

Let’s say I wanted to fetch a my personal home page https://www.pc-freak.net/, I did that via the command:

$ lynx -source https://www.pc-freak.net/ | html2text > pcfreak_page.txt

The content from www.pc-freak.net got spit by lynx as an html source and passed html2pdf wchich saves it in plain text file pcfreak_page.txt
The bit more advanced elinks – (lynx-like alternative character mode WWW browser) provides better support for HTML and even some CSS and Javascript so to properly save the content of many pages in plain html file its better to use it instead of lynx, the way to produce .txt using elinks files is identical, e.g.:

$ elinks -source https://www.pc-freak.net/blog/ | html2text > pcfreak_blog_page.txt

By the way back in the days I was used more to links , than the superior elinks , nowdays I have both of the text browsers installed and testing to fetch an html like in the upper example and pipe to html2text produced garbaged output.

Here is the time to tell its not even necessery to have a text browser installed in order to fetch a webpage and convert it to a plain text TXT!. wget file downloading tools supports source dump as well, for all those who did not (yet) tried it and want to test it:

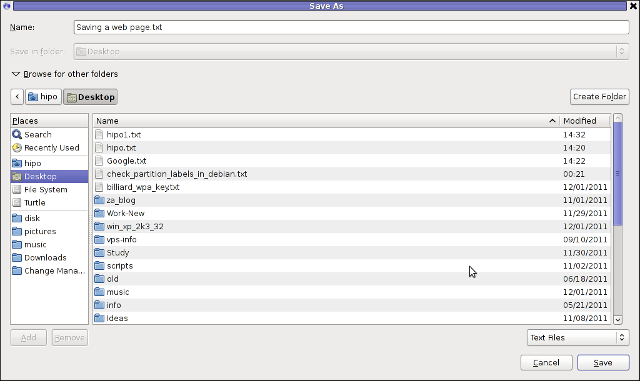
$ wget -qO- https://www.pc-freak.net | html2text Anyways of course, some pages convertion of text inside HTML tags would not properly get saved with neither lynx or elinks cause some texts might be embedded in some elinks or lynx unsupported CSS or JavaScript. In those cases the GUI browser is useful. You can use any browser like Firefox, Epiphany or Opera ‘s File -> Save As (Text Files) embedded functionality, below is a screenshot showing an html page which I’m about to save as a plain Text File in Mozilla Firefox:

Firefox iceWeasel Opera etc. save html webpage as plain text on GNU / Linux, FreeBSD

Besides being handy in conjunction with text browsers, html2text is also handy for converting .html pages already existing on the computer’s hard drive to a plain (.TXT) text format.
One might wonder, why would ever one would like to do that?? Well I personally prefer reading plain text documents instead of htmls 😉
Converting an html files already existing on hard drive with html2text is done with cmd:

$ html2text index.html >index.txt

To convert a whole directory full of .html (documentation) or whatever files to plain text .TXT , cd the directory with HTMLs and issue the one liner bash loop command:

$ cd html/
html$ for i in $(echo *.html); do html2text $i > $(echo $i | sed -e 's#.html#.txt#g'); done

Now lay off your back and enjoy reading the dox like in the good old hacker days when .TXT files were fashionable 😉

Upgrade Ubuntu from 9.04 to latest Ubuntu

Friday, April 1st, 2011

Updating a version of Ubuntu version 9.04 to the latest stable release is actually very simple and BORING.

It takes some long time and a lot of clicking, however eventually, the upgrade to the latest Ubuntu will be at hand.
The whole upgrade philosophy to Upgrade an outdated Ubuntu distribution to the newest supported stable Ubuntu release is in a consequentual number of release to release upgrades.

Let’s say you’re running Ubuntu 9.04 (Jaunty Jackalope and) you want to upgrade to Ubuntu 11.10 TLS
then you will have to to the following step by step upgrades;

Upgrade Ubuntu from;

  • Ubuntu 9.04 to Ubuntu 9.10
  • Ubuntu 9.10 to Ubuntu 10.04
  • Ubuntu 10.04 to Ubuntu 10.10
  • Ubuntu 10.10 to Ubuntu 11.04
  • Ubuntu 11.04 to Ubuntu 11.11

Now let’s start upgrading …
1. Upgrade Ubuntu 9.04 to Ubuntu 9.10

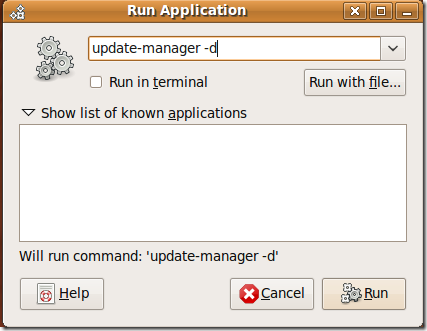
Press Alt+F2 and type:

update-manager -d

Update Manager Ubuntu

Press the Run Button afterwards to launch the command.
You will be prompted for your Linux administrator password, so type it in.

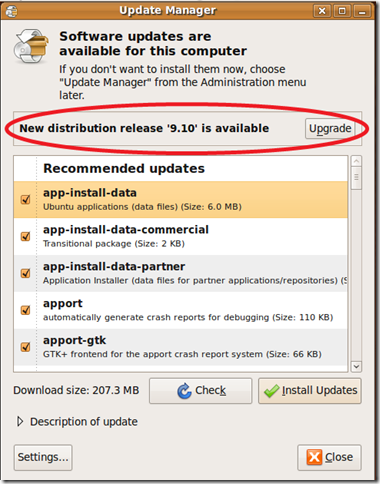
Next the command will launch the Update Manager . The update manager will show you all the available updates.

The Update Manager will show you the update options, it should say something like:

New distribution release ‘9.10’ is available

update manager ubuntu 9.10

Click Over the Update button and wait.

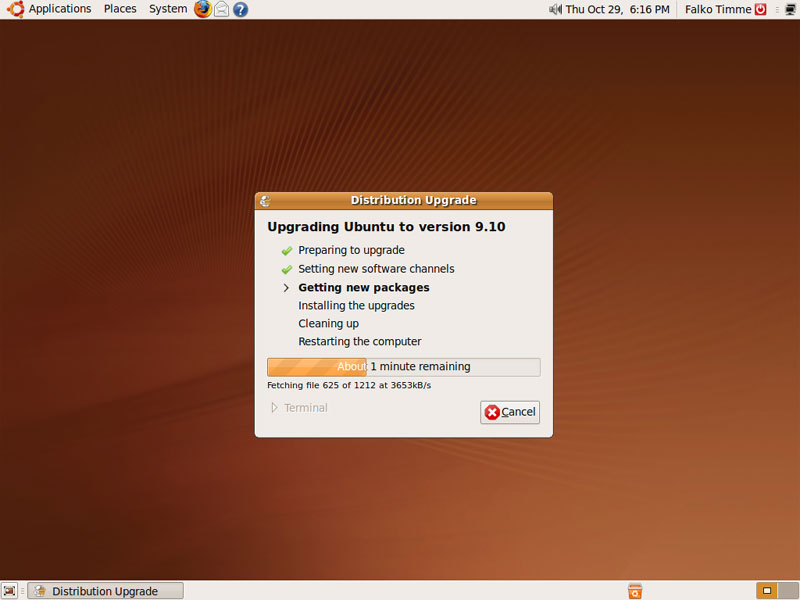
The Ubuntu update will went by by few steps:

1. Preparing Updates
2. Setting new software channels
3. Getting new packages
4. Installing the updates
5. Cleaning up
6. Restarting the computer

You will see further on a screen reading “Support for some applications ended”, on that screen simply press the Close button.

Further on you will be prompted with a windows reading:

Do you want to start the upgrade? You have to click over Start Upgrade button to finally begin with the upgrade process.
Getting new packages screen Ubuntu Update procedure

Now a prompt window will appearing asking you to reboot the system, when the prompt appears click over:

Restart Now

After the upgrade the new release of Ubuntu 9.10 will start booting up, and you will see a screen similar to the picture below:

Ubuntu 9.10 boot screen

Now as you have updated from Ubuntu 9.04 next step is to upgrade to Ubuntu 10.04

Now guess what you will have to upgrade the trivial quick update procedures once again.

Once again launch the Ubuntu Update Manager

System -> Administration -> Update Manager Now as you have updated from Ubuntu 9.04 next step is to upgrade to Ubuntu 10.04 (LTS – Lucid Lynx)

Now guess what you will have to upgrade the trivial quick update procedures once again.

Once again launch the Ubuntu Update Manager

System -> Administration -> Update Manager

Now follow the above described procedure with update-manager -d

After repeating the few trivial steps you will have Ubuntu 10.04 LTS on your Desktop

Further on complete the trivial update steps with the update-manager to update to Ubuntu release 10.10 (Maverick Meerkat).

After having succesfully upgraded to version 10.10, now repeat the boring update procedures described in the beginning of the article to update to Ubuntu 11.04

Now as you should be with Ubuntu 11.04, upgrade once again with update-manager to Ubuntu 11.04 (Natty Narwhal).

And ast a last, once again with the update-manager -d update following the instructions to Ubuntu 11.10.

I’m pretty sure this is one of my most boring articles ever …
It’s interesting fact that I learn once from a friend of mine about the Ubuntu distribution. The Ubuntu distribution has it’s versioning based on months and year whether a version is out for instance Ubuntu 9.04 means this Ubuntu release is released on (Month 04 (April), year 2009)), Ubuntu 11.10 Means this distribution is released in (year 2011, month 10 (October)).