Posts Tagged ‘debian cd’

VIM Project (VI Improvied IDE Editor extension to facilitate web development with vi enhanced editor

Wednesday, August 25th, 2010

I use VIM as an editor of choice for many years already.
Yet it's until recently I use it for a PHP ZF (Zend Framework) web development.

Few days ago I've blogged How to configure vimrc for a php syntax highlightning (A Nicely pre-configured vimrc to imrpove the daily text editing experience

This enhancements significantly improves the overall PHP code editing with VIM. However I felt something is yet missing because I didn't have the power and functunality of a complete IDE like for instance The Eclipse IDE

I was pretty sure that VIM has to have a way to be used in a similar fashion to a fully functional IDE and looked around the net to find for any VIM plugins that will add vim an IDE like coding interface.

I then come accross a vim plugin called VIM Prokject : Organize/Navigate projects of files (like IDE/buffer explorer)

The latest VIM Project as of time of writting is 1.4.1 and I've mirrored it here

The installation of the VIM Project VIM extension is pretty straight forward to install it and start using it on your PC issue commands:

1. Install the project VIM add-on

debian:~$ wget https://www.pc-freak.net/files/project-1.4.1.tar.gz
debian:~$ mv project-1.4.1.tar.gz ~/.vim/
debian:~$ cd ~/.vim/
debian:~$ tar -zxvvf project-1.4.1.tar.gz

2. Load the plugin

Launch your vim editor and type : Project(without the space between : and P)
You will further see a screen like:
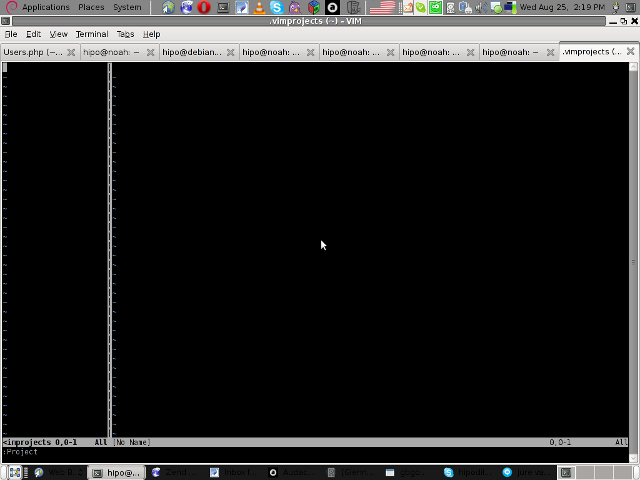
vim project entry screen

3. You will have to press C within the Project window to load a new project

Then you will have to type a directory to use to load a project sources files from:
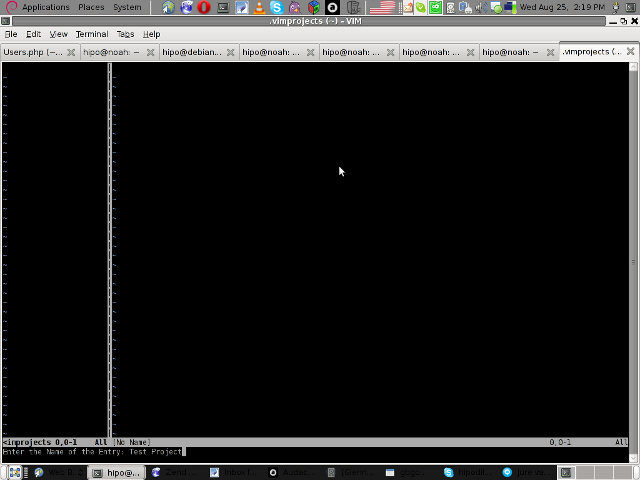
vim project enter file source directory screen

You will be prompted with to type a project name like in the screenshot below:
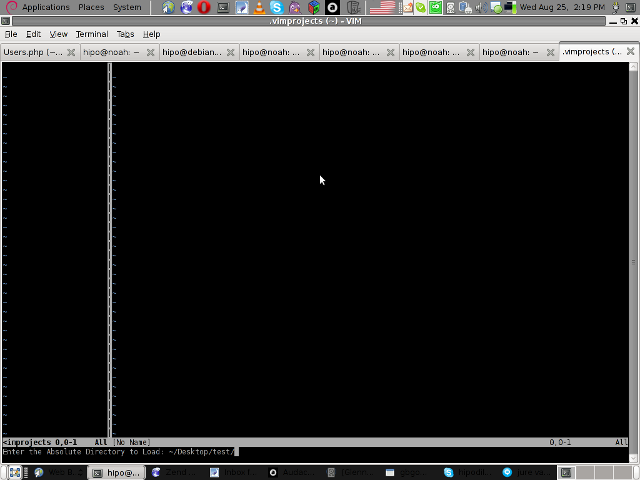
vim project load test project

4. Next you will have to type a CD (Current Dir) parameter
To see more about the CD parameter consult vim project documentation by typing in main vim pane :help project

The appearing screen will be something like:
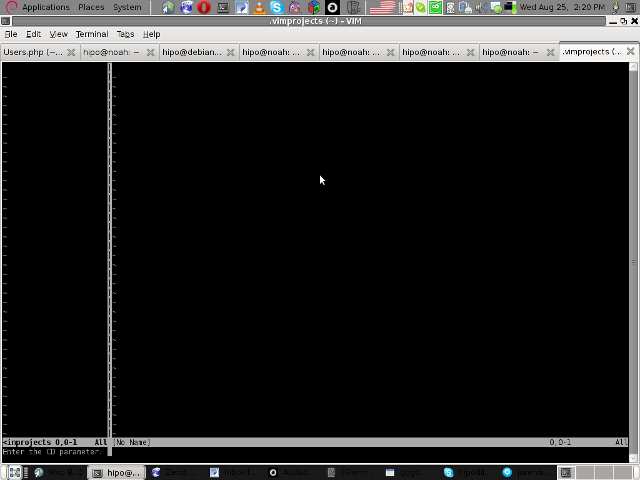
vim project extension cd parameter screen

5. Thereafter you will have to type a file filter

File filter is necessary and will instruct the vim project plugin to load all files with the specified extension within vim project pane window

You will experience a screen like:
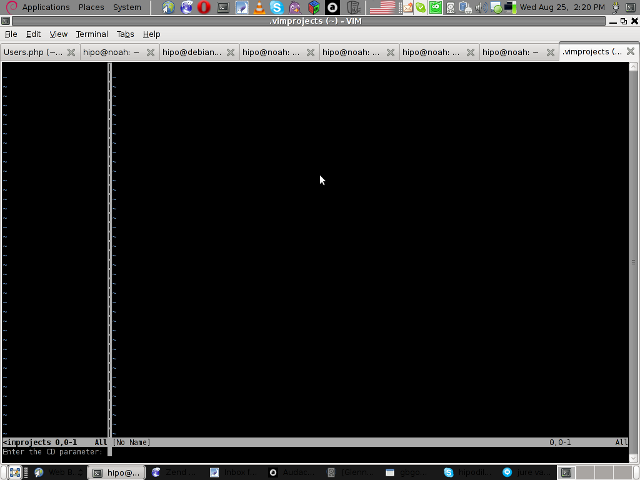

vim project plugin file filter screen

Following will be a short interval in which all specified files by the filter type will get loaded in VIM project pane and your Zend Framework, PHP or any other source files will be listed in a directory tree structure like in the picture shown below:
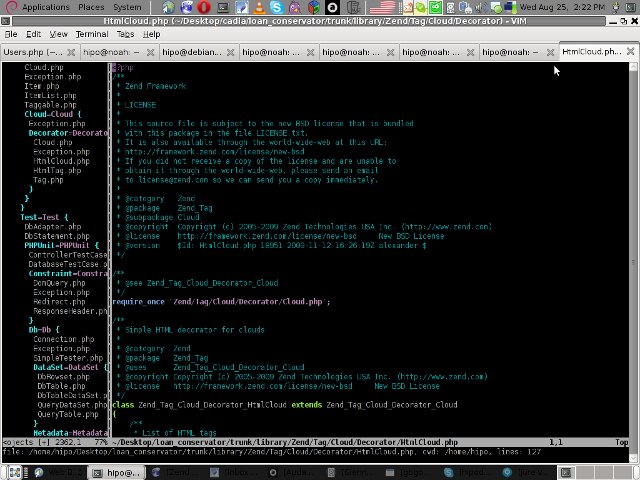
vim project successful loaded project screen

6. Saving loaded project hierarchy state

In order to save a state of a loaded project within the VIM project window pane you will have to type in vim, let's say:

:saveas .projects/someproject

Later on to load back the saved project state you will have to type in vim :r .projects/someproject

You will now have almost fully functional development IDE on top of your simple vim text editor.

You can navigate within the Project files loaded with the Project extension pane easily and select a file you would like to open up, whenever a source file is opened and you work on it to switch in between the Project file listing pane and the opened source code file you will have to type twice CTRL+w or in vim language C-w

To even further sophisticate your web development in PHP with vim you can add within your ~/.vimrc file the following two lines:

" run file with PHP CLI (CTRL-M)
:autocmd FileType php noremap <C-M> :w!<CR>:!/usr/bin/php %<CR>
" PHP parser check (CTRL-L)
:autocmd FileType php noremap <C-L> :!/usr/bin/php -l %>CR>

In the above vim configuration directovies the " character is a comment line and the autocmd is actually vim declarations.
The first :autocmd … declaration will instruct vim to execute your current opened php source file with the php cli interpreter whenever a key press of CTRL+M (C-m) occurs.

The second :autocmd … will add to your vim a shortcut, so whenever a CTRL+L (C-l) key combination is pressed VIM editor will check your current edited source file for syntax errors.
Therefore this will enable you to very easily periodically check if your file syntax is correct.

Well this things were really helpful to me, so I hope they will be profitable for you as well.
Cheers 🙂
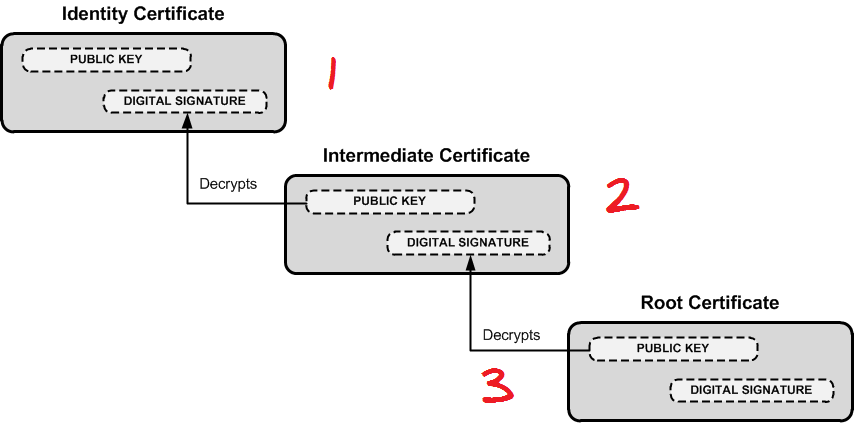
How to install / add new root certificates on Debian, Ubuntu, Mint Linux

Saturday, October 21st, 2017

add-install-new-root-ca-certificates-to-debian-ubuntu-linux-howto

How to add / Installing a root/CA Certificate on Debian, Ubuntu, Mint Linux


 Because of various auditing failures and other security issues, the CAcert root certificate set is slowly disappearing from the Ubuntu and Debian ‘ca-certificates’ package.

That's really tricky because if you're a system administrator or have a bunch of programmers whose needs is to install a new set of root certificates for their freshly develped Application or you have to make a corporate certificates added to debian rootca, then the good news is it is quite easy to install new certificates to deb based distributions.


Given a CA certificate file foo.crt, follow these steps to install it on Debian / Ubuntu:

    Create a directory for extra CA certificates in /usr/share/ca-certificates:


    debian:~# mkdir /usr/share/ca-certificates/extra-certificates


    Copy the CA .crt file to this directory:


    debian:~# cp foo.crt /usr/share/ca-certificates/extra-certificates/foo.crt


    Let Debian / Ubuntu add the .crt file's path relative to /usr/share/ca-certificates to /etc/ca-certificates.conf (the file lists certificates that you wish to use or to ignore to be installed in /etc/ssl/certs)


    debian:~# dpkg-reconfigure ca-certificates


In case you want to include a .pem file to the list of trustable certificates on Debian / Ubuntu, it must first be converted to a .crt file first, you can do that with:


    debian:~# openssl x509 -in foo.pem -inform PEM -out foo.crt


Lets say you want to add some custom Root certificate for exapmle cacert.org


   debian:~# mkdir /usr/local/share/ca-certificates/cacert.org
   debian:~# cd /usr/local/share/ca-certificates/cacert.org
   debian:~# mkdir /usr/local/share/ca-certificates/cacert.org
   debian:~# wget -P /usr/local/share/ca-certificates/cacert.org http://www.cacert.org/certs/root.crt http://www.cacert.org/certs/class3.crt


Then once again update the ca certificates bundle

   debian:~# update-ca-certificates


How to install and configure djbdns from source as a Cachening Localhost Proxy resolver to increase resolving efficiency on Debian 6 Squeeze

Monday, August 1st, 2011

djbdns-logo-install-configure-djbdns-from-source-on-gnu-linux-to-accelerate-server-dns-resolving
It seems DjbDNS on Debian Squeeze has been not included as a Debian package. There is still possibility to install djbdns from an older deb package or install it from source. I however decided to install it from source as finding the old Debian package for Lenny and Etch takes time, plus I'm running an amd64 version of Debian and this might even more complicate the situation.
Installing it from source is not really a Debian way but at least it works.

In this article I assume that daemontools and ucspi-tcp are preliminary installed, if not one needs to install them with:

debian:~# apt-get install ucspi-tcp daemontools daemontools-run
...

The above two ones are required as DJBDNS is originally made to run through djb's daemontools.

Here is the exact step I took to have it installed as local caching DNS server on a Debian Squeeze server:

1. Download and untar DjbDNS

debian:~# wget -q http://cr.yp.to/djbdns/djbdns-1.05.tar.gz debian:~# tar -zxvvf djbdns-1.05.tar.gz
...

2. Add DjbDNS users to /etc/passwd

Creating the below two users is not arbitrary but it's recommendable.

echo 'dnscache:*:54321:54321:dnscache:/dev/null:/dev/null' >> /etc/passwd
echo 'dnslog:*:54322:54322:dnslog:/dev/null:/dev/null' >> /etc/passwd

3. Compile DJBDNS nameserver

First it's necessery to use the below echo command to work around a common Linux bug:

debian:~# cd djbdns-1.05
debian:/root/djbdns-1.05# echo gcc -O2 -include /usr/include/errno.h > conf-cc

Next let's make it:

debian:/root/djbdns-1.05# make

4. Install the compiled djbdns binaries

debian:/root/djbdns-1.05# make setup check
# here comes some long install related output

If no errors are produced by make setup check this means that the djbdns should have installed itself fine.

As installation is compileted it's a good idea to report about the newly installed DjbDNS server if running a mail server. This info is used by Dan Bernstein to gather statistical data about the number of installations of djbdns servers throughout the world.

5. Do some general configurations to the newly installed DJBDNS

Now let's copy the list of the IP addresses of the global DNS root servers in /etc/.

debian:/root/djbdns-1.05# cp -rpf dnsroots.global /etc/ debian:/root/djbdns-1.05# ./dnscache-conf dnscache dnslog /etc/dnscache 0.0.0.0

dnscache-conf will generate some default configuration files for djbdns in /etc/dnscache

Next allow the networks which should be able to use the just installed djbdns server as a caching server:

debian:/root/djbdns-1.05# cd /etc/dnscache/root/ip
debian:/etc/dnscache/root# touch 192.168.1
debian:/root/djbdns-1.05# touch 123.123

First command will allow all ips in range 192.168.1.* to be able to access the DNS server and the second command will allow all ips from 123.123.1-255.1-255 to be able to query the server.

Some further fine tunning can be done from the files:

/etc/dnscache/env/CACHESIZE and /etc/dnscache/env/DATALIMIT

As a last step, before it's running, we have to link the /etc/dnscache to daemontools like so:

debian:/root/djbdns-1.05# ln -sf /etc/dnscache /etc/service/dnscache

If the daemontools is not linked to be accessible via /etc/service it's also a good to link it there:

debian:~# ln -sf /etc/service /

Now the DJBDNS should be running fine, to test if it's running without errors through daemontools I used:

debian:~# ps ax|grep -i readproc
5358 pts/18 R+ 0:00 grep -i readproc
11824 ? S 0:00 readproctitle service errors: ...........

If no errors are displayed it's configured and running to also test if it's capable of resolving I used the host command:

debian:~# host www.pc-freak.net localhost
Using domain server:
Name: localhost
Address: 127.0.0.1#53
Aliases:

www.pc-freak.net has address 83.228.93.76
www.pc-freak.net mail is handled by 0 mail.www.pc-freak.net.

Now the DJBDNS is properly installed and if you test it for a while with time host somehost.com localhost , you will see how quick it is in resolving.

The advantage of running DJBDNS is it does not require almost no maintance, its rock solid and great just like all other Dan Bernstein's written software.
Enjoy 😉

Convert png files to ico on Linux – Create “icon” files from pictures

Tuesday, November 2nd, 2010

You will need png2ico

First you will have to download the png2ico source

Now you will have to download compile and install the program by issuing:

debian:~# wget http://www.winterdrache.de/freeware/png2ico/data/png2ico-src-2002-12-08.tar.gz
debian:~# tar -zxvf png2ico-src-2002-12-08.tar.gz...
debian:~# cd png2ico/
debian:/root/png2ico# make
debian:/root/png2ico# cp -rpf png2ico /usr/local/bin/

Convertion is pretty easy and it comes to executing simply:

debian:/home/hipo$ png2ico favicon.ico png_picture_to_convert.png

Note that your png_picture_to_convert.png has to be in a graphic dimensions of 16×16
That’s all now you should have your favicon.ico on your Linux created.

Download and Play Apogee’s Raptor (Call of the Shadows) DOS arcade game on GNU / Linux and BSD* with dosbox / Few words on Apogee and Shareware

Thursday, January 19th, 2012

Since its early days dosbox has elolved a lot. For all those who haven't heard of dosbox, it is x86 Free Software Linux / FreeBSD DOS emulator

DosBox supports, almost all the game classics we used top lay in oldschool times when DOS (Disk Operating System ) version was running on top of most personal computer.

The most spread versions of DOS people used to use on their PCs were Novell (DR-DOS) more rarely used, and MS-DOS (The Microsoft DOS ver.).

I'm sometimes being sentimental about the past so I remembered for Raptor Call of the Shadows !

Having a bit of experience with DOSBox to run few DOS games I've decided to give a try with dosbox.

First I have to dig for this shareware, since this game is part of the sharewares, nowdays a binary version of it is freely distributed on the net.
Finding the game however took me about 10 minutes, as most of the download links for Raptor, were either dead or required some kind of registration. After a bit of look I found it on an old torrent with few seeders and succeded downloading.

For the convenience of people who would like to download run the Raptor arcade classic game check here

Nicely Raptor works out of the box directly launched with dosbox emulator.
Dosbox has packages for most Linux distributions.
I personally used it on my Debian Linux so installed via apt:

debian:~# apt-get install dosbox
...

The game works without any dosbox hacks, just download, unarchive and launch with dosbox:

hipo@debian:~$ wget https://www.pc-freak.net/files/Raptor_Call_of_The_Shadows_Apogee_arcade.tar.gz
...
hipo@debian:~$ tar -zxvf Raptor_Call_of_The_Shadows_Apogee_arcade.tar.gz
...
hipo@debian:~$ cd Raptor/
hipo@debian:/home/hipo/Raptor$ dosbox rap.exe

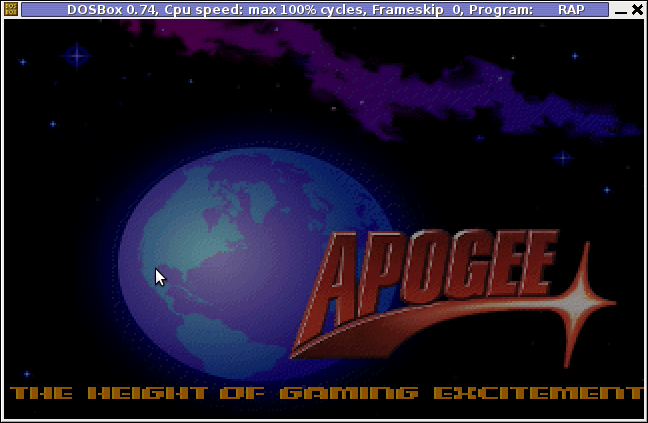
Apogee Raptor Screenshot Dosbox Debian linux

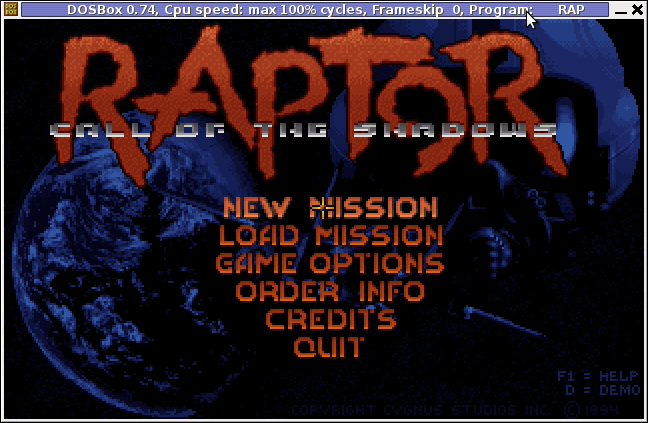
Raptor Call of the Shadows main screen linux debian

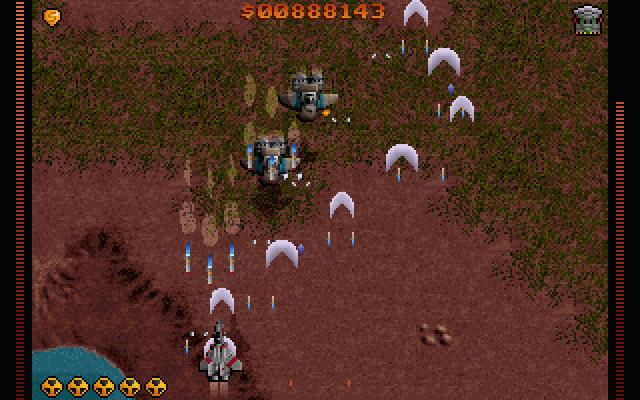
Dosbox raptor level

People like me 😉 who lived in that glorious times when DOS was a standard for a desktop operating system pretty much like MS Windows is today, certainly remember the awesome games produced by Apogee Software a company later known as 3D Realms

Apogee until this very day remain one of the greatest game creation companies in history of games. 3D Realms played a crucial role in development of PC game industry as well as has a great santimental value to probably million of old school arcade game addicts.

They can be ben undoubtedly can be praised for having created some of the most awesome arcade games for all times.

Some of the early hit games they created you probably know, few of the titles are:

  • Duke Nukem I, II
  • Arctic Adventure
  • Monster Bash
  • Stargunner
  • Commander Keen series
  • Wolfenstein 3D
  • Blake Stone
  • Terminal Velocity (Terminal Reality)
  • Shadow Warrior
  • Death Rally
  • Blood

Apogee was also notable for being a company to had established the so spread mostly during the late 80s up to the early years of the second millenium.

ShareWare model of distribution is an interesting phenomenon, that co-relates more or less with the ideas of Free Software.
The idea of ShareWare games was games are distributed for Free and the end customer (gamer) is asked to pay for a game only if he likes it.

Some of the shareware published games was available for free download and play, however the game was only bundled with only a number of game levels to unlock the rest of the game levels you had to play some money.

The shareware games produced were then freely published and shared via dial up access BBS nodes (A text based Bulletin Board System similar to nowdays Forums).
BBS has historically been the major way of sharing knowledge and exchanging ideas and opinions preceding the massive rise of the WEB.
Today most computer users would probably even haven't heard about BBS, if you like to have a general idea on how BBSes seemed to look dahmer.vistech.net .

ShareWare started to loose speed with the decline of BBS and the emergence of Free Software.

Some of the conceptual ideas of ShareWare found its way in "Open Source & Free Software", and commercial companies like RedHat and SuSE.

If you have tried some other Apogee games with Dosbox on Linux and FreeBSD and you can positively confirm they work it will be great. In theory all of the DOS games of apogee should work fine with dosbox. Any feedback or game recommendations of your favourite games of the DOS years are mostly welcome in comments. I'm curious to hear what was your favourite DOS game. Maybe when I have time I'll prepare a list of my favourite games put them here 😉

How to play VCD videos in Debian Linux

Monday, September 26th, 2011

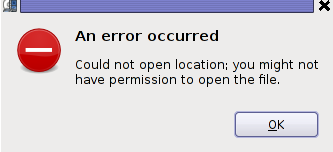
Totem VCD error occured, could not open location you might not have permissions to open the file

A friend of mine gave me a VCD with some coptic Orthodox Christian exorcism, where there pope was chasing some evil spirits from possessed muslims who came to the Coptic Orthodox Church in egypt. The video was made to be in VCD and as you can expect this did not worked out of the box with Totem and VLC out of the box.
Putting in the VCD video inside my cdrom poped up an error like the one in the header of the post.
In order to make the video play I had to use the old school and now a bit obsolete mplayer.
Hence in order to play the VCD on Debian Linux I had to install mplayer and w32codecs packages first e.g.:

debian:~# apt-get update && apt-get install mplayer w32codecs

Second to play the video from gnome-terminal, I had to switch to the mounted cdrom location /media/cdrom0 and launch the video with mplayer cmd like so:

debian:~$ cd /media/cdrom0/vcd
debian:/media/cdrom0/vcd$ mplayer vcd://2
...

In some cases it might be necessery to play the video with mplayer command like:

debian:/media/cdrom0/vdd$ mplayer vcd://2 vcd://3

Watching it with mplayer from console has some downsides as I couldn’t make the fast rewind work, but still it’s way better than nothing.
Too bad in Debian Squeeze 6 gmplayer is no longer installable. The gmplayer can probably be installed if mplayer is compiled from source, but I’m too lazy to try it out.
I’ve red also in some forums online that gxine is capable of playing the VCD play nice, but I couldn’t install it from my existing Debian repositories so I did not give it a go.

How to fix clamd “ERROR: LOCAL: Socket file /tmp/clamd.socket is in use by another process.”

Monday, May 23rd, 2011

One of the Qmail server installations I’m taking care of’s clamd antivirus process started loading the system heavily.
After a bit of log reading and investigation I’ve found the following error in my /var/log/clamd/current

@400000004dda1e1815cf03f4 ERROR: LOCAL: Socket file /tmp/clamd.socket is in use by another process.

I’ve noticed in my process list that actually I do have two processes clamd :

11608 ? Sl 0:05 /usr/local/sbin/clamd
11632 ? S 0:00 /usr/bin/multilog t /var/log/clamd
16013 ? Sl 0:06 /usr/local/sbin/clamd

It appeared that for some weird reason one of the clamd process was failing to connect constantly to the clam server socket /tmp/clamd.socket and each time it tried to connect and failed to connect to the socket the system gets about 5% of extra load …

Resolving the issues was a piece of cake, all I had to do is stop the clamd server delete the /tmp/clamd.socket and relaunch the clamd server.

Here is exactly the commands I issued:

debian:~# cd /service/
debian:/service# svc -a clamd
debian:/service# svc -h clamd
debian:/service# svc -d clamd
debian:/service# rm -f /tmp/clamd.socket
debian:/service# svc -u clamd

Afterwards the clamd extra load went out and in /var/log/clamd/current I can see clamd loads fine without errors, e.g.:

Listening daemon: PID: 16013
MaxQueue set to: 150
No stats for Database check - forcing reload
Reading databases from /usr/local/share/clamav
Database correctly reloaded (966822 signatures)
SelfCheck: Database status OK.
...