Archive for the ‘Educational’ Category

Saint protector of the Family and The receipt of Saint Petka Tarnovska by King Asen II story

Thursday, October 14th, 2021

Chapel-Trun-Sveta-Petka-Ikona-ot-16-17-vek-na-Sveta-Petka-v-skalniq-paraklis-na-Trun-231x300

In these hazy and confused times where the family as institution is failing and it is becoming more and more modern for people to live together without official Civil marriages count are steadily declining not to mention that the Church marriages no matter whether it is a Protestant, Roman Catholic is very rare thing. The attack against families is multi-vector one, it is descredited and being pranked on the TV in movies and serials, in the press. Many of the bad sides of marriage are exposed as well as the incapabilities of any traditional marriage to respond to the modern challenges of the world and hence many choose to not marry. But originally God created man to live in a family Adam and Eve were the first marital couple (even though they did not officially binded it on paper) in the municipality or the Church. Of course there situation was slightly different than today as they were the only couple in the beginning when God created man one would say. But even after that through the Ages Marriage and fidelity that stems out of it has been considered normal. However today normality is being pranked and abnormality is being enforced from all sides. 
As the topic of family does directly concern me as I have a family I thought therefore it is useful to mention again today about the feast of Saint Petka Epivatska (Epivates) famous as Saint Petka of Tarnovo who is considered in our Eastern Orthodox Christian countries as a protectress of family.

The reason why we venerate saint Petka here in Bulgaria is because here holy relics has stayed in Tarnovo for almost 2 Centuries and being in Bulgaria, they have worked many miracles, many of which were done over a family husbands and wifes who had their usual trials, like infertility, problems in family, quarrels etc.
For being famous for that miracles she has been invoked for centuries worldwide by believing Christians for help on their family trials.

Below is shortly the history of how St. Petka Epivatska, holy relics were transferred to Tarnovo and the multiple transfers of her relics until she finally choose to reside in Iash Romania.
 

+++

Posreshhane_na_moshhite_na_sv-petka_v_Trnovo-Bylgariq
The reception of Holy Relics of Saint Petka Paraskeva in medieval Capital of Bulgaia Tarnovo

In 1230 King Ivan Asen II the most powerful South-eastern European ruler demanded from the the Knights of the Crusaders to submit him her holy relics who are found still in Tracian city Kaliakratea ruled at that time by the Holy Latin Empire. King Ivan Asen II together with the patriach Joachim the first receives her holy relics with honor and settles her incorruptabilities into the newly creates Church in honour of herself St. Petka behind Tsarevets FortressSaint Petka became from that point considered as a protectress of the city, the throne and the country.
Her holy relics arrived from Kallikrateia in Tarnovo, the Capital of Second Bulgarian Empire in year 1230 AD, she has been thus called Paraskeva of Tarnovo and has been venerated as a protectress of the Tarnovo city the Bulgarian nation and the country. The attitude towards Saint Petka Tarnovska as a protectress of Bulgarian nation and contry is been clearly seen by the mention in the Bulgarian and International acts (documents) and manuscripts of that XII – XII century.

To learn more about Saint Petka  Parskeva Epivates of Thrakia feast day today 14 of October check my previous article here.

Let by the Holy Prayers of Saint Petka the Families be granted grace to endure the hardships of life! Saint Petka pray Christ for us!

How to create SD Card DATA dump image to .ISO with dd and mount it with imdisk from command line on Windows CygWin with MobaXterm

Saturday, September 18th, 2021

dd-command-logo
I'm forced to use Windows every now and then and do some ordinary things which I do usually on Linux such as dumping the content of my Android phone SD Card SanDisk, Kingston etc. to .ISO image etc.

On Linux creating and mounting a data copy of a whole SD Card is a relatively simple thing and there are plenty of ways to do it such as using the dd ( command-line utility for Unix and Unix-like operating systems whose primary purpose is to convert and copy files as said in the command manual .- e.g. ''man dd'. ). On Microsoft Windows environment perhaps one of easiest ways is to use WinCDEmu (which is relatively free under LGPL License).
WinCDEmu is capable of doing plenty of things such as:
 

  • One-click mounting of ISO, CUE, NRG, MDS/MDF, CCD, IMG images.

  • Supports unlimited amount of virtual drives.

  • Runs on 32-bit and 64-bit Windows versions from XP to Windows 10.

  • Allows creating ISO images through a context menu in Explorer.

  • Small installer size – less than 2MB!

  • Have a portable version

WinCDEmu is a nice piece of software that perhaps every Win poweruser can enjoy, plus it has a nice Graphical frontend:

wincdemu-graphical-create-iso-and-mount-so-ms-windows-software

But what if you're a console geek, like me and you end up forced to be using Windows on your Work PC and you still need to create .iso dump of your Mobile SD Card or external attached Hard Drive, without the graphical mambo jumbo in the old fashioned way with dd?

Luckily Windows advanced command lined users could massively benefit from Cygwin + Mobaxterm (if you don't know or used MobaXterm and you still use things like Putty / SuperPutty or SecureCRT – perhaps you can reconsider and make your sysadmin life easier with MobaXerm gnome-terminal like SSH tabbed Windows alternative.

Once having mobaxterm + cygwin you have dd installed on the Windows host as it is part of the busybox minimal environment and you can use it in the same manner as your used in Linux environment.

sdcard-sandisk-drive-my-computer-windows-screenshot
 

1. Using dd to copy files on Linux / UNIX OS with a dialog status bar

To use dd the usual syntax on Linux / BSD / Unix is:
 

dd if=/dev/dev-name_ID of=/path/to/directory/dump/location.iso bs=2048


As 2048 BS (Bytes) per second is quite a low value usually on Modern operating systems, this bytesize is usually increased to some MBs  ( Megabytes).

For example if the reading from carrier  is Solid State Drive Disk (SSD) supporting 100 MBs per second and the output SD Card is a 32 Bit Kingston Plus+ drive with whose write speed is up to 50 ~ 100 MBs, you can use cmd as:

dd if=/dev/dev-name_ID of=/path/to/directory/dump/location.iso bs=100M


If you need to have a progress on the dd copy (in case if you copy some large SD Card 128 GB or 256GB or a full copy of a hard drive partition that is really big lets say 8 Terabytes of data, dialog and pv comes quite handy.

To use them install them first:

# apt-get install –yes pv dialog


Next to have a beautiful ncurses dialog box with the status (very useful if you're shell scripting), use:
 

(pv -n /dev/sda | dd of=/dev/sdb bs=128M conv=notrunc,noerror) 2>&1 | dialog –gauge "Running dd command (cloning), please wait…" 10 70 0

pv-dialog-dd-command-ncurses-status-screenshot-gnu-linux
 

2. Listing the avaialble copy drives /dev/sda /dev/sdb1 … etc. disk locations on Windows 7 / 10 / 11 OS

[User.T420-89] ➤ for F in /dev/s* ; do echo "$F    $(cygpath -w $F)" ; done

check-drives-loop-on-cygwin-to-be-used-later-with-dd-copy-iso-creating-imageCheck drives device naming on WIndows PC – Screenshot extract from Mobaxterm

As you can see the drive location we've seen in Windows Explorer is located at drive E: above bash for loop reveals us this is located and readable from CygWin / MobaxTerm at /dev/sdb1


3. Create .iso image file on WIndows OS with dd command
 

To create a full data copy dump of to .iso (image file) with dd on Windows , I had to run:

[User.T420-89] ➤ dd if=/dev/sdb1 of=sdcard-blu-r1-hd-sdcard-backup_10092021a.img bs=100M

75+1 records in
75+1 records out
7944011776 bytes (7.4GB) copied, 391.794316 seconds, 19.3MB/s


dd-copy-drive-data-screenshot-100mb-bitesize-windows-mobaxterm


4. Mount the newly create dd Image with imdisk

In order to test the image is properly created, you can attempt to mount it from command line on Linux, mounting it is quite easy and is up to mounting the just created .img file as a loopback (loop) device, like so: 

# mount -o loop file.iso /mnt/dir

Unfortunately cygwin and mobaxterm's embedded mount command on Win OS does not support the loopback device so to have it you have to install and use some additional program  such as the upmentioned WinCDEmu or if you prefer to do it fully from command line and further on automate the process of creating a dump of images of attached drives out of a multiple computers (lets say belonging to a Windows Active Directory domain). You might install and use something like:


imdisk 

imdisk-gui-interface-ms-windows-screenshot

imdisk handy tool is  created by Olof Lagerkvist. It is free and open-source software, which  will let you mount image files of hard drive, cd-rom or floppy, and create one or several ramdisks with various parameters either from a command line or via its Graphical interface.

To use imdisk download it from its home page on sourceforge extract and install it, pretty much as any other software it has both 32 bit version as a legacy for old computers as well as 64 bit exe installer.
The general command line use of it follows a cmd syntax like:

  • Mounting .iso image files from command line on WIndows host with imdisk


[User.T420-89] ➤ ImDisk.exe -a -f "sdcard-blu-r1-hd-sdcard-backup_10092021.img" -m #:

Where:
 

  • #: – is the actual drive you would like to mount to.
     
  • -a option stands for attach to, it will configure and attach a virtual disk with the parameters specified and attach it to the system.
     
  • -f – is self explanatory, provides the iso image file naming 

If you want to attach the newly created image to lets say  L:\ windows new mapped drive

ImDisk.exe -a -f "sdcard-blu-r1-hd-sdcard-backup_10092021.img" -m l:

  • Unmount mounted .img image with imdisk from cmd line

[User.T420-89] ➤ imdisk.exe -l
\Device\ImDisk0
                                                                                                                              ✘

[User.T420-89] ➤ imdisk.exe -D -m l:
Notifying applications…
Flushing file buffers…
Locking volume…
Failed, forcing dismount…
Removing device…
Removing mountpoint…
Done.

imdisk-detach-attached-drive-mobaxterm-windows-screenshot


What we learned ?

What we have learned in this article is how to use Mobaxterm embedded dd Data Convert and Copy command to prepare full image backups of SD card or external drives on Windows OS. Also few alternative ways were entions such as using WinCDEmu free  open source alternative to DaemonTools program to create / mount or convert the image for the GUI lovers. Also for hard core sysadmins as me was shown how to list drives devices attached to the Win PC {/dev/sda,/dev/sdb} etc. and how to copy partition data with dd just like one would do on Linux OS. Finally to test the created image, I've shown you how to use the imdisk free software tool to attach and detach image to a mapped local Windows drive.

Hope this article learned you something new.

7th of July The Feast of Saint Nedelya Kyriakia one of the most honored woman saints in Bulgarian Orthodox Church and few words of the history of Sofia Second biggest Cathedral Church St. Nedelya

Thursday, July 8th, 2021

Saint_nedelja_(kyriaki)_bulgarian_icon_19th-century

Saint Nedelya is a major Cathedral in Sofia Bulgaria dedicated to an early Christian saint Kyriaki (martyred year 289 AD). It is is a second biggest Cathedral Church in Bulgaria and a place where they serve the Holy Liturgy daily. The Patriarch and most notable spiritual leaders of the Bulgarian orthodox church do hold services there regularly.

Coffin_with_holy-relics_of-saint-Stefan_Uros_II_Milutin

Coffin with Holy Relics of Saint Stephan Urosh II Milutin in the St Nedelya Sofia Church right corner near alter wall

Saint Nedelya Church  is a beautiful peace of Christian art the Church is also known in XX-th century as Holy King (because the incorruptable Holy Relics of Sebian King Saint Stephan Urosh II ( Milutin ) are found in the Church).

Sveta_Nedelia_ikona-arapovski-manastir.
Saint Nedelya Icon Arapovski Monastery Bulgaria

The fact that Saint Nedelya is the second Church by spiritual importance for Bulgaria is not a coincidence and this is related to the high veneration of saint martyr Nedelya (Kyriakia) Bulgarians had for the saint through the years especially in the Second Bulgarian kingdom during the reigh of King Asen's Dynasty (12-th 13-th century). The incorruptable Holy relics of the saint Kyriakia has been transferred to Trnovo (Tarnovo) the capital of Bulgaria at that time by saint Patriarch Euthymius (Evtimij) of Tarnovo (who was the last patriarch head of Bulgarian Orthodox Church during the Second Bulgarian Kingdom, right  before the fall of Bulgaria under the Turkish slavery (Yoke).
 

Saint Martyr Nedelya ( Kyriakia) died in July 7th 289 A.D.

Saint_Nedela_Kyriaki_Icon_by_Dicho_Zograf_in_Saint_Kyriaki_Church_in_Debrene_1844

Saint Nedelya Debrene Church iconographer Dicho Zograph from year 1844

Inspired by the great deed and the great grace received by receiving the incorruptable relics of the saint, saint Euthymius wrote a glorofication called "Praise to the Holy Great Martyr (Nedelya)". The Nedelya word meaning in Bulgarian Language is Sunday and is a literal translation from Greek's Kyriaky.

St_Kyriaki_Church_-Constantinople-crop

Saint Kyriaky dedicated Church, Istanbul Turkey

The veneration for saint Kyriaky has been quite common in medieval times one of the major Churches in Constantinople (today Istanbul) is dedicated also to saint Kyriaki.

According to Church tradition described by patriarch Evtimij, we know saint Nedelya has been born in Asia Minor and has been a child who has been long awaited kid that was gifted by God. Saint Kyriaki's was born in responce to her parents Dorotheus and Eusebia many fervent beseach prayers begging for a kid that will help Christ's salvation plan for the mankind.

 She was brought up in the truths of Christ from an early age.

At a very young age, she decided to dedicate her life to God. She happened to live at the time before Saint Constantine The Great when still the ligth of Christianity did not yet overcome the false believes of paganism in the time of the peresuction by emperor Diocletian. This was the time of persecution against Christian confessors and brutal violence against Christians – they were persecuted, imprisoned, exiled or forced to renounce their faith. Nedelya was thrown into prison and tortured, and her parents were exiled to the town of Miletin. The miraculous healing of her wounds, as well as her refusal to worship pagan idols, led the authorities to sentence her to death as they believed she is doing her wonderful healing by some strange whichcraft.

Kyriaki was tortured again by Apollonius, the successor of Hilarion. She was thrown into a fire, but the flames were extinguished, and then to wild beasts, but they became tame and gentle. Apollonius then sentenced her to death by the sword. As she was given a little time to pray, she asked God to receive her soul and to remember those who honoured her martyrdom. Upon completing her prayer, she rendered her soul to God before the sword was lowered on her head. Pious Christians took her relics and buried them. At the time of her death, she was 21 years old.[

At her place of death, after prayer, Sunday surrendered her spirit to God before the sentence is carried out exactly on her feast date (July 7, 289). For early Christians the day of death or martyrdom was considered the date of the real birthday for eternal life in heve. Nedelya died at the age of 22, as saint Patriarch Euthymius of Trnovo writes, "Dying in a short time, she fulfilled long years, because her Lord's soul was satisfied, purity – great enough, feats enough …"

The Second Biggest Bulgarian Cathedral is dedicated to saint Nedelya

Sveta-Nedelia-Monolithic-second-biggest-Cathedral-in-Bulgaria

Saint Nedelya Church, Sofia – Capital of Bulgaria

As many of the Churches in Bulgaria the history of Saint Nedelya's Church in Capital of Bulgaria, Sofia  goes back to distant X-th century and as many of the Churches of the time was most lilely laying on a stones and built of wood as Churches used to be built of that time. Today's architecture of the Church is of the XIX century.

St_Nedela_Cathedral_Old_Church_in_Sofia_Bulgaria_September_2005-pic

The church became famous during the assassination attempt by Bulgarian Communist Party (BCP / BKP) on April 16, 1925 during the funeral of General Konstantin Georgiev, when it was destroyed. Then on this sad date for the Bulgarian history, 193 people mainly from the country's political and military elite were killed and about 500  bystander believers, who attended the liturgy were injured. The assault was perhaps the worst terrorist act in the history of Bulgaria, and at that time in the world. The aim of the temple blowing assault was to kill King Boris III, who was not in the Church at the time because he was slightly late for the service by the providence.

After this bloody terrorist act of the Bulgarian Communist Party, the church board of trustees assigned the architectural bureau "Vasilyov – Tsolov" (architect Ivan Vasilyov and architect Dimitar Tsolov) the restoration of the church. Renovation began in June 1927. By the spring of 1933, an almost new, huge central-domed temple was built with a length of 30 meters, a width of 15.50 meters and a height of the dome of 31 meters. The surviving two-row gilded iconostasis has been returned to the temple.

The church was solemnly consecrated again on April 7, 1933. The fresco decoration was made from 1971 to 1973 by an artistic team led by Nikolai Rostovtsev. Around 2015, the Church iconography has been fully restored and is amazingly beautiful worthy to see, if you happen to visit Bulgaria.

17th of May Saint Martyr Nikolay Sofiiski (Nikolas of Sofia) – Bulgarian Martyr Confessor saint from the XV century

Friday, May 21st, 2021

Saint Confessor Nikolay Sofijski (Nikolay of Sofia) Short Biography


saint_Nikolay-of-Sofia-icon-on-the-entrance-of-his-Church-in-capital-of-Bulgaria-Sofia

St. Nikolay (Nicolas) of Sofia has been born in Ioannina (city now in territory of Greece). He was a pious and with his honorable craft of shoemaking going through the stormy sea of life. When he arrived in Sofia (Serdica / Sredetz), one of the main cities of the Ottoman Empire of that time, a long remain of the glorious past when even the righteous emperor Constantine The great was considering to set as a capital of the Eastern empire either Constantinople today's Istanbul in Turkey or Sofia (Fortress of Serdika).

When Nikolay came to Sofia, he was immediately recognized by the Turkish authorities and rich people of the city  and to have him part of their "nobel" turkish society and enrich the city ruleship, the Turkish tried to push Nikolay to accept Islam. 
Once a time Turkish invited Nikolay, put a somniferous herb in his offered drink and once he fall asleep without his knowledge they have circumcised him according to Islamic tradition observance. 
Once awaken Nikolay realised what has been done to him and fall in a deep regret and mourned over the abuse of his body which according the Christian faith is a temple of the Holy Spirit. Once he started appearing on the streets of Sofia, Turkish immediately invited him to attend the mosque considering him already a muslim due to the circumcision ritual commited on him. 
He firmly rejected the offer publicly, considering himself a Christian as he never publicly resigned his Christian faith and never ever wanted to be muslim and never ever has attended another temple apart from the Eastern Orthodox Christian Church he belonged to.
Facing the rejection, the powerful of the day turks cannot believe their eyes as they already thought Nikolay accepted the fact he is already a muslim, not understanding that for a Christian the temporary flesh is nothing but a temporary hut and the Spiritual and Eternal Soul and The Spirit of God which enlightens it as well as the Eternal Kingdom of Heaven is everything. The turks thouhgt over it fleshly, thinking that having a sign of circumcision already puts a person belonging to his faith, not knowing that the the first desciples of Christ, the most holy apostles as belonging to the Jewish faith had their circumcision themselves, and this circumcision never ever hindered their faith in the Resurrected Messiah Jesus Christ.

Immediately facing the rejecting the Turks, arrested him as a traitor of their faith and put him into a harsh torments.

Saint_Nikolay_Sofijski-living-and-martyrdom-scenes-icon-painting

Saint_Nikolay_Sofijski-martyrdom-scenes-icon-painting

Combined icon with the living of saint Nikolay of Sofia

Putting him on trial In the local court, the judge announced his opinion that Nikolay doesn't hold a fault, neither against Islam neither against the claimants.
Nevertheless the crowd put Nikolay outside of Sofia (in a similar way the Jews resurrected Christ outside of the city of Jerusalem) in Sofia's near region called "Yuch Bunar", translated from Turkish as the  ("The Tree Wells"), there they stoned to death on 17th of May year 1555 A.D., (the stoning a transgressor of the Islamic law, tradition is still followed by some countries even today, for example I heard similar cases do happen still in Saudi Arabia for sinners against islamic law).

Saint_Bulgarian_Christian_martyr_Nikolay-Sofiiski-year-1555AD-commemorated-17-th-of-May

Saint Nikolay icon in his traditional Bulgarian clothes wear (Nosia)
holding his shoemaking instrument

His holy body has been moved to the graveyear called (Търница) Térnitza and has been burned – and the dust has been scattered through the four directions of the world North, East, South, West following islamic tradition and in attempt to completely irradicate the memory of the saint in the relatives and the living Christians of that time.  Even though due to the request of Matey Gramatik (Mathew the Gramatik – translated as Chronicler / Annalist), a boy managed to collect little burned part remains of the relics and a pious christian, secretly made a burial prayer for his Soul (Опело – called Opelo in the Slavonic Eastern Orthodox Church) according to the Christian tradition and buried him with honor.

saint_Nikolay-new-of-Sofia-sv_nikolay_novi
 

Soon after the martyrdom of saint Nikolay the New, the Metropolitan of Sredetz Iakov (Jacob), announced the canonization of st. Nikolay on a specially summoned for the consideration of saintship of St. Nikolay, a Local Church Metropolitan Council. Jacob received parts from holy relics (parts of the skull and the bones) of st. Nikolay, that has been secretly kept by a faithful Christians till then and placed the new received saint relics and placed them together in the ark (coffin) with the incorruptable holy relics of Saint King Stephan Milutin at that time located in Church of St. Archangel Michaelsee my previous article pilgrimage to the incorruptable Holy relics of Saint Stephan Milutin in Cathedral Saint Nedelya, Sofia Bulgaria. Later parts of the holy relics has been housed in in a Wood maden Church.


The grave of saint Nikolay of Sofia is one of the few known graves of Bulgarian saints. Today, it is situated in the city center of Sofia capital city of Bulgaria in the district "Три кладенци" / "The Three Wells". Three hundred meters from there (in the tiny park like garden between the streets of "Pirotska" and "Opalchenska") lays a Beatiful Majestic Church, dedicated to the Holy Martyr st. Nikolay Sofijski. The Church of Saint Nicolas of Sofia is one of the biggest Cathedral Churches in Bulgaria (it is second by size in city of Sofia). The Temple has been rised following a project of architecture created by Anton Tornyov after the Liberation of Bulgarian following the Russian/Bulgarian-Turkish war on 3-rd of December 1900. Church saint Nikolay Sofijski has been consecrated by Metropolitan Partenij (Parthenius of Sofia was a senior Bulgarian clergyman and church figure, Metropolitan of Sofia from 1892 to 1918. Metropolitan Parthenius is an exceptional clergyman who has left a lasting mark in the history of the Bulgarian Orthodox Church.).

Church-of-Saint_Nikolay-Sofijski-Cyrkva_Sv_Nikolaj_Sofijski

Church of Saint Nikolay of Sofia in Sofia Bulgaria (corner of street "Opalchenska" and "Pirotska").


Church-of-saint-Nikolay-of-Sofia-internal-view-Church-icons-and-architecture-decoration

Church Nikolay Sofijski view to Iconostasis Church interior

Saint-Nikolay-of-Sofia-Church-dome-Christ

Church dome paintings of St. Nikolay Sofijski

Saint-Nikolay-of-Sofia-Church-Iconostasis-icons

Iconostasis of the Church (notice the beatiful flower forms curved wood)

In the beginning of XXth century in 1870s on the exact place of the grave of the saint has been built a small chapel in his memoriam. It is situated in a small yard on today's Street of "Tzar Simeon / King Simeon" it is opened for pilgrim visitors everyday in the early afternoon every working day. 
Chapel-with-grave-of-Saint-Nikolay-of-Sofia-1
The Chapel entrance door 

Chapel-with-grave-of-Saint-Nikolay-of-Sofia-2

A Heavenly beauty roman like chapel

Chapel_paraklis_sv_Nikolaj_Sofijski_novi

The Chapel on the grave of Saint Nikolas of Sofia, built on the place called "Terniza" (Tzar Simeon Street), where on 17-th of May, year 1555 A.D. where remains of the saint has been burned by turks – photo by Martin Mitov (C) 

Chapel-with-grave-of-Saint-Nikolay-of-Sofia-3

The Grave of Saint Nikolay of Sofia (View to Alter dedicated to the matryr saint)


The holy relics of Saint Nikolay the new are now preserved in his Church  and are brought for veneration by believers and pilgrims on each 16 and 17 of May and sometimes in a Church feasts of a higher importance.

Each 17-th of May in Sofia it is a tradition for clirics (clergy) to gather together with pilgrims and layman for a Lithia with the holy relics of saint Nikolay from the Church to the chapel, and for the following two days 18, 19th of May his holy relics are publicly displayed for veneration.

Sofia's mediaval historian and clergyman deacon Matey Gramatik (upmentioned), was a comtemporary of the saint and eyewitness of his martyrdom and death, soon after wrote his Church service and Biography (Saint Living). Today the original manuscript is preserved in the the Library of the church "St. Martyr Nikolai Novi Sofiyski" in Sofia.

Let by the holy prayers of Saint Nikolay Sofijski our homeland Bulgaria is given peace prosperity in The Hope, Faith and Love and every Good and firmness in the True faith given by Christ the Holy Eastern Orthodox faith. Let by his Holy prayers God gives peace and love to everyone in the world and grant, repentance for us the lost and spiritually poor and "fatherless" children of the 21st century.

Adding custom user based host IP aliases load custom prepared /etc/hosts from non root user on Linux – Script to allow define IPs that doesn’t have DNS records to user preferred hostname

Wednesday, April 14th, 2021

adding-custom-user-based-host-aliases-etc-hosts-logo-linux

Say you have access to a remote Linux / UNIX / BSD server, i.e. a jump host and you have to remotely access via ssh a bunch of other servers
who have existing IP addresses but the DNS resolver recognized hostnames from /etc/resolv.conf are long and hard to remember by the jump host in /etc/resolv.conf and you do not have a way to include a new alias to /etc/hosts because you don't have superuser admin previleges on the hop station.
To make your life easier you would hence want to add a simplistic host alias to be able to easily do telnet, ssh, curl to some aliased name like s1, s2, s3 … etc.


The question comes then, how can you define the IPs to be resolvable by easily rememberable by using a custom User specific /etc/hosts like definition file? 

Expanding /etc/hosts predefined host resolvable records is pretty simple as most as most UNIX / Linux has the HOSTALIASES environment variable
Hostaliases uses the common technique for translating host names into IP addresses using either getaddrinfo(3) or the obsolete gethostbyname(3). As mentioned in hostname(7), you can set the HOSTALIASES environment variable to point to an alias file, and you've got per-user aliases

create ~/.hosts file

linux:~# vim ~/.hosts

with some content like:
 

g google.com
localhostg 127.0.0.1
s1 server-with-long-host1.fqdn-whatever.com 
s2 server5-with-long-host1.fqdn-whatever.com
s3 server18-with-long-host5.fqdn-whatever.com

linux:~# export HOSTALIASES=$PWD/.hosts

The caveat of hostaliases you should know is this will only works for resolvable IP hostnames.
So if you want to be able to access unresolvable hostnames.
You can use a normal alias for the hostname you want in ~/.bashrc with records like:

alias server-hostname="ssh username@10.10.10.18 -v -o stricthostkeychecking=no -o passwordauthentication=yes -o UserKnownHostsFile=/dev/null"
alias server-hostname1="ssh username@10.10.10.19 -v -o stricthostkeychecking=no -o passwordauthentication=yes -o UserKnownHostsFile=/dev/null"
alias server-hostname2="ssh username@10.10.10.20 -v -o stricthostkeychecking=no -o passwordauthentication=yes -o UserKnownHostsFile=/dev/null"

then to access server-hostname1 simply type it in terminal.

The more elegant solution is to use a bash script like below:

# include below code to your ~/.bashrc
function resolve {
        hostfile=~/.hosts
        if [[ -f “$hostfile” ]]; then
                for arg in $(seq 1 $#); do
                        if [[ “${!arg:0:1}” != “-” ]]; then
                                ip=$(sed -n -e "/^\s*\(\#.*\|\)$/d" -e "/\<${!arg}\>/{s;^\s*\(\S*\)\s*.*$;\1;p;q}" "$hostfile")
                                if [[ -n “$ip” ]]; then
                                        command "${FUNCNAME[1]}" "${@:1:$(($arg-1))}" "$ip" "${@:$(($arg+1)):$#}"
                                        return
                                fi
                        fi
                done
        fi
        command "${FUNCNAME[1]}" "$@"
}

function ping {
        resolve "$@"
}

function traceroute {
        resolve "$@"
}

function ssh {
        resolve "$@"
}

function telnet {
        resolve "$@"
}

function curl {
        resolve "$@"
}

function wget {
        resolve "$@"
}


Now after reloading bash login session $HOME/.bashrc with:

linux:~# source ~/.bashrc

ssh / curl / wget / telnet / traceroute and ping will be possible to the defined ~/.hosts IP addresses just like if it have been defined global wide on System in /etc/hosts.

Enjoy
 

8 October year 927 the feast of Bulgarian Orthodox Church become autocephalous independent from Constantinople

Monday, October 12th, 2020

On 8 of October 927 the Bulgarian Orthodox Church has become autocephalous, this historical event is quite memorable for me as it happens to be almo  my birthday.
Thus I found it worthy to write few raw lines on the feast. This post will probably will not be of interest to any serious historian but still might be interesting for people keen on history.

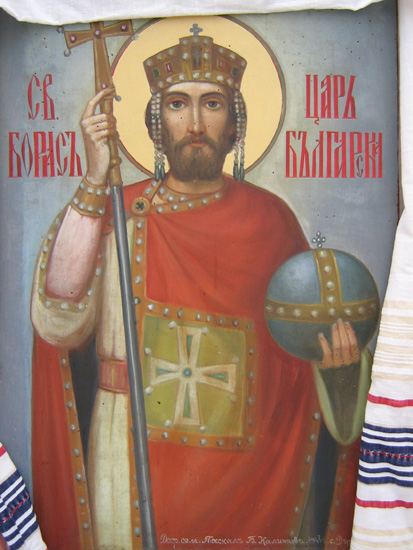
The requirement of Church organization on the Bulgarian lands that is indepedent from the center of Christianity as of then Constantinople has existed with the Glorious and World changing event of receiving Holy Baptism of the Ruler of Bulgaria Saint King Boris-Mikhail in year 864 from Constaniple's Emperor Mikhail III who ruled Byzantine Empire from year (842 – 867).
 

saint-Apostle-equal-King-Boris-Mihail-The-Baptizer-of-Bulgaria
The event for the history of the Civilillized world and the Christian history wordwide is only comparable to the act of saint emperor Constantine's Milano Edict  The Edict of Milan (LatinEdictum Mediolanense, Greek: Διάταγμα των ΜεδιολάνωνDiatagma tōn Mediolanōn) was the February AD 313 agreement to treat Christians benevolently within the Roman Empire. Which opened the doors for Christianity to not only be equal religion within the empire but even to become official religion for the Eastern Roman (Byzantine empire).

Milanos-Edict-year-313-313ad-milanedicta

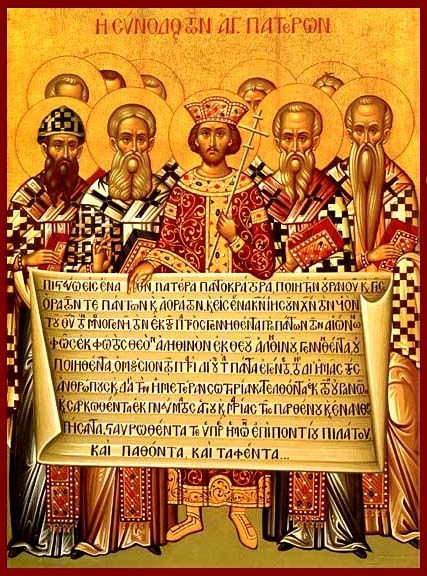
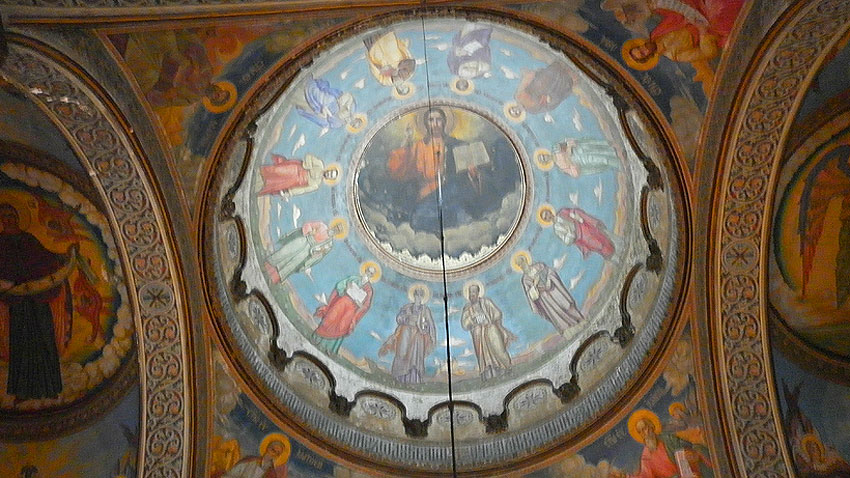
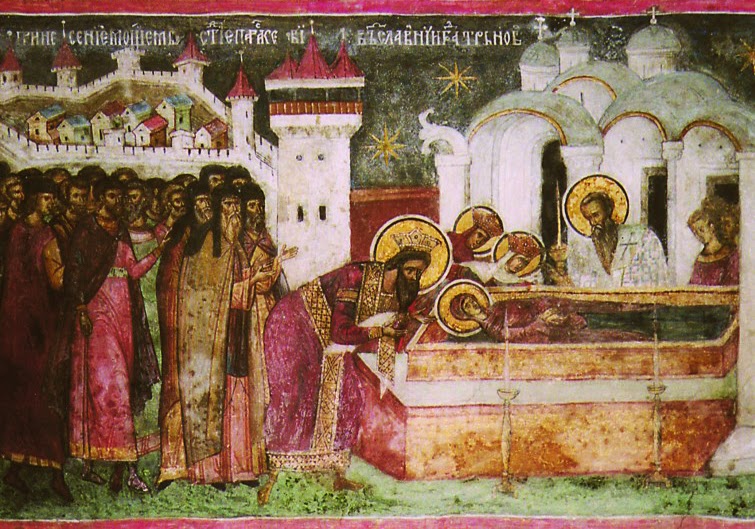
Assembly of Synod of Holy Fathers

The Milano's edict is today little known both in Eastern and Western world as people have more interest for money and business than to truth, virtues and history, so I find it useful to share with readers this forgotten history …

saint-emperor-Constantine

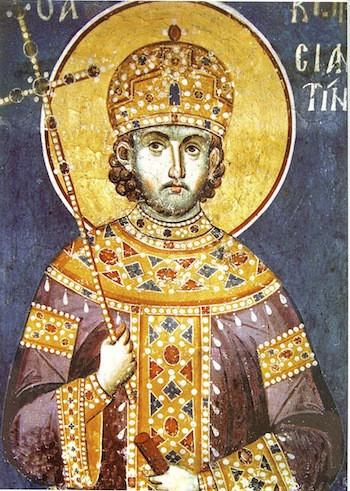
Saint Emperor Constantine

Western Roman Emperor (and later canonized for Saint) Constantine I and Emperor Licinius, who controlled the Balkans, met in Mediolanum (modern-day Milan) and, among other things, agreed to change policies towards Christians following the Edict of Toleration issued by Emperor Galerius two years earlier in Serdica (today the city of Sofia Bulgaria).
The document is found in Lactantius' De Mortibus Persecutorum and in Eusebius of Caesarea's History of the Church.

It was already a set path for Europe to become Christian and the majority of people and missionaries all through europe has spread the Good words of the Lord Jesus Christ throgh the European lands. Many missionaries both in Greece and the Balkans as well as the far lands of Kiev and North has been preaching for the coming centuries. Christianity has become already official religion for big part of the civillized (non-barbarian) world such as the Hellenes, France, Germany, Hungary,Romania, Ukraine, Belarus, Russia etc.. Monastic life has been also well established all through europe and many missionaries has come from the far deserts of Egypt to baptize and teach Christianity in the West in Ireland, England and even the Netherlands in the 7th century. Rome as a Christian center of the Western Empire even though the hardships has established and in the rule of Charlemagne has seriously expanded Christianity in the west.

The largest unbaptized lands with a paganism at that time seems to be few tribes such as the Vikings, the Gotts, The Traks and perhaps the Slavs. The biggest part of which seems to be the Slavs who has been settled in a large parts of Balkans Bulgaria, Serbia, Macedonia as well as Croatia, Chech, Poland and even in far Moscow.

This people has been following a peaceful paganism and has been still unenlightened. Thanks to Saint Cyril and Methodius and 7 pupils Saint Gorazd, saint Naum, saint Sava, saint Angelarius and Saint Clement of Ohrid (known as Ohridski) tireless work for Christ to translate the Holy Bible in the so called Church-Slavonic which in practice is a form of Ancient Bulgarian (in Glagolitic Script – Glagolica) which was mainly used before saint Clement Ohridski and other pupils of Saint Methodius such as the medieval famous author of many early Christian books Constantine of Preslav who worked in the Preslav Scriptorium and Christian school.
Constantine-of-Preslav-a-Holy-Church-books-and-bible-translator-and-copier-Konstantin_Preslavski

Constantine of Preslav

Saint King Boris-Mikhail  in that time took the right decision to baptize his large for that time lands populated by Bulgarians and Slavs under his rule and enlighten them with the Gospel and faith in the Jesus Christ and the true God the Holy Trinity (the Father the Son and the Holy Spirit).

It took him quite a long to decide whether to baptize his country citizens with the faith from the Western Empire (The Latins) or the Eastern Empire (the Byzantines) who at that time has been in process of creating and establishing the Great Church Schism from year 1054, and due to that he led a corresponce to both Byzantine empire as well as pope Nicolas I. 

One of the questions asked to both the The Pope and the Byzantine emperor has been about his desire of the Bulgarian Church to be an independent Church with independent head and ruleship that is able to take an independent decisions for its destiny. He wanted that as he was understanding the importance for the Cultarial freedom of Bulgaria from Helinism or the Latins. As he found that the Pope can't offer him too much and considering the closeness of the Byzantine empire to his lands as well seeing the Eastern Christianity to be more indepth and filled with beauty he has baptized from Byzantia and has received a Byzantian archibishop.
In the beginning the church services and the preach in Bulgaria has been in Greek and due to the common Bulgarian and Slavs couldn't understand Christianity. Thanks to the Holy Brothers Cyril and Methodius and the acceptance of their pupils by saint King Boris slowly in Preslav and Pliska in 9th 10th century and Ohrid in middle of 10th – 11th century a Spiritual Schools and Scriptoriums has been established which allowed a few years later gradually to have for Bulgaria the Holy Gospel and Church services to be served in the Bulgarian language (in the better understood by both Bulgariand and Slavs cyrllic).

saint-Boris-I-Michael-Baptism-of-Bulgarians-Ioan-Skilica

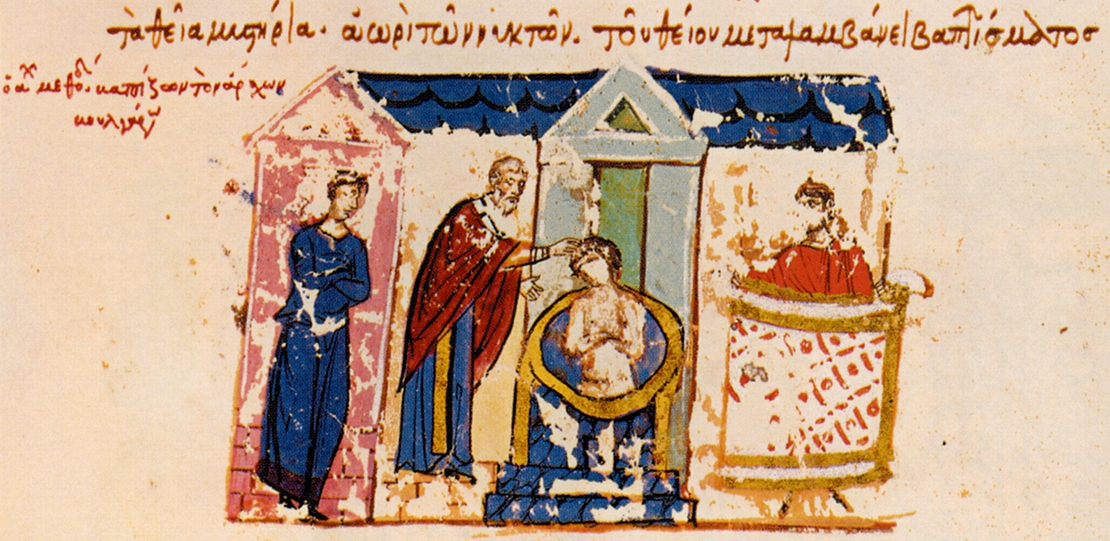
The baptism of Bulgarians Ioan Skilica (John Skilica)

Saint King Boris-Mikhail completed his earthly life as a humble Monk in the last years of his life, he has put on the throne Vladimir Rasate who tried to bring back paganism and faith in Tangra after his death. When heard about the evilness of his first born son and the hostility to Christianity and his plans to overrule the work of his father Saint King Boris is famous for getting out of the Monastery fighting again his son and with a Miracle about which is written even to the Pope to have win with his weaker supporter army against Vladimir-Rasate. He has blinded his son and put on the throne his second Son, King Simeon who has been officially later recognized by Romans and Byzantines the title usually only given to Byzantine Emperors  – Basileus of Bulgarians (Emperor of Bulgarians).

On the summoned in year 893 Council of Preslav together with the enthronization of King Simeon as a Bulgarian Ruler it was taken as a decision to change the Greek language in the Church with the Old Bulgarian (liked to be called in Russian sources as Church Slavonic). During his governship King Simeon (893 – 927) has gradually changed the Greek higher clergy with a Bulgarian and Created the Bulgarian Exarchate.

Veliki-Preslav_fortress_main-ancient-Christian-center-in-the-10th-century-on-the-Balkans

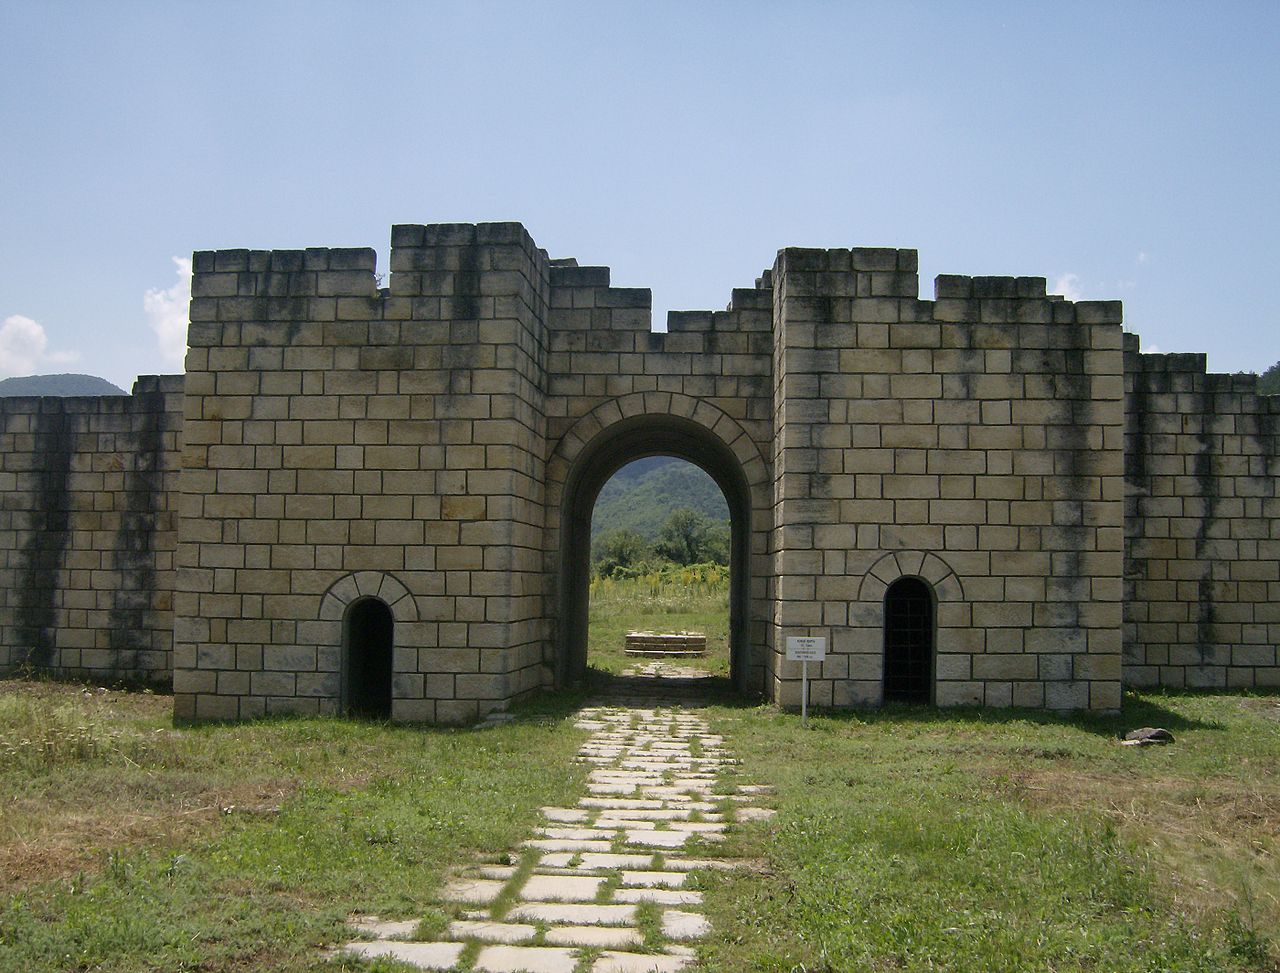
Veliki Preslav Fortress 

The-medieval-world-famous-Golden_Church_in_Veliki_Preslav-the-round-Church-ruins.

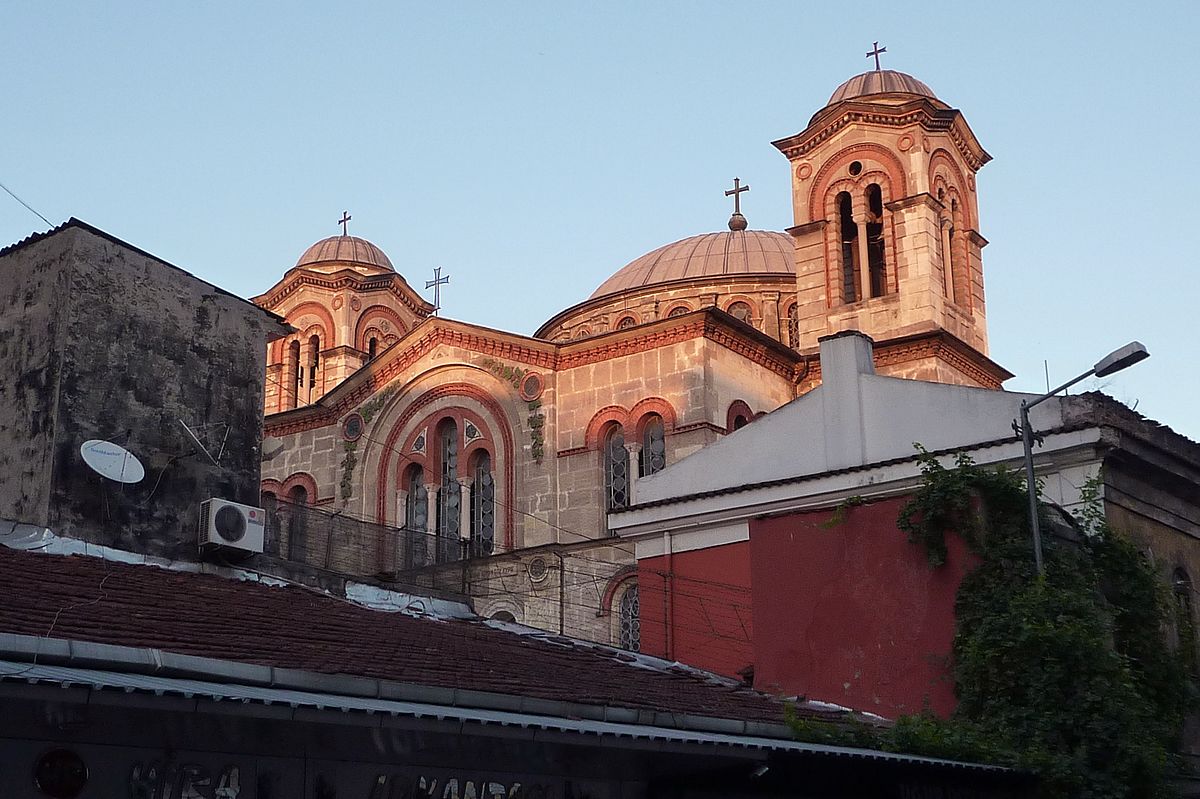
The Golden Church Saint John also known as the Round Church built by Simeon I the Great in Preslav built in 907, aiming to show the
high importance of the new established Bulgarian Church – Known to have been one of most beautiful Churches in Europe

During the rulership of Simeon's (second son) successor saint King Peter I (927 – 970 ) rise on throne, thanks to his wise politics and a lot of efforts to increase the prestige and spirituality in the Church following the path of his father. The Bulgarian Church has been recognized officially by the byzantine Emperor as an independent Church with a Mother Church the Church of Constantinople (today governed by the Ecumenical patriarch of Constantinople Bartholomew).

During the diplomatic negotiations between the King and the ruler of Byzantines Roman Lakapin  in year 927, the emperor has re-ratified the earlier disputed
as well the Church canonical uplifting ordination  of the head of Bulgarian Church the exarch to be a Patriarch of Bulgaria.

8-october-927-the-bulgarian-church-becomes-autocephalous-independent-1

Byzantines has always questioned the title of "Basileus of Bulgarians" with which King Simeon I the Great used to sign his documents, as Basileus was believed to be only supremacy title of the Byzantine emperor. The proud Byzantines did not wanted to accept another new-born Nation with less than 3 centuries of history could be their rivalry neither political nor spiritual and morever to be on the same importance in the known World with authority of the Eastern Emperor.

The archives of Vatican keeps a copies of the decision of the emperor's synclitis (meeting) for the recognition of the Bulgarian Patriarchy officially on 8th of October.
For a First Bulgarian Patriach was selected Patriach Damian (Drystyr) nowadays the city of Silistra with a patriachal seat in medieval city of Veliki Preslav (Great Preslav). Soon after the Patrairchal seat was moved to Silistra.

https://upload.wikimedia.org/wikipedia/commons/thumb/d/d7/Sv.Ahil_church.jpg/1280px-Sv.Ahil_church

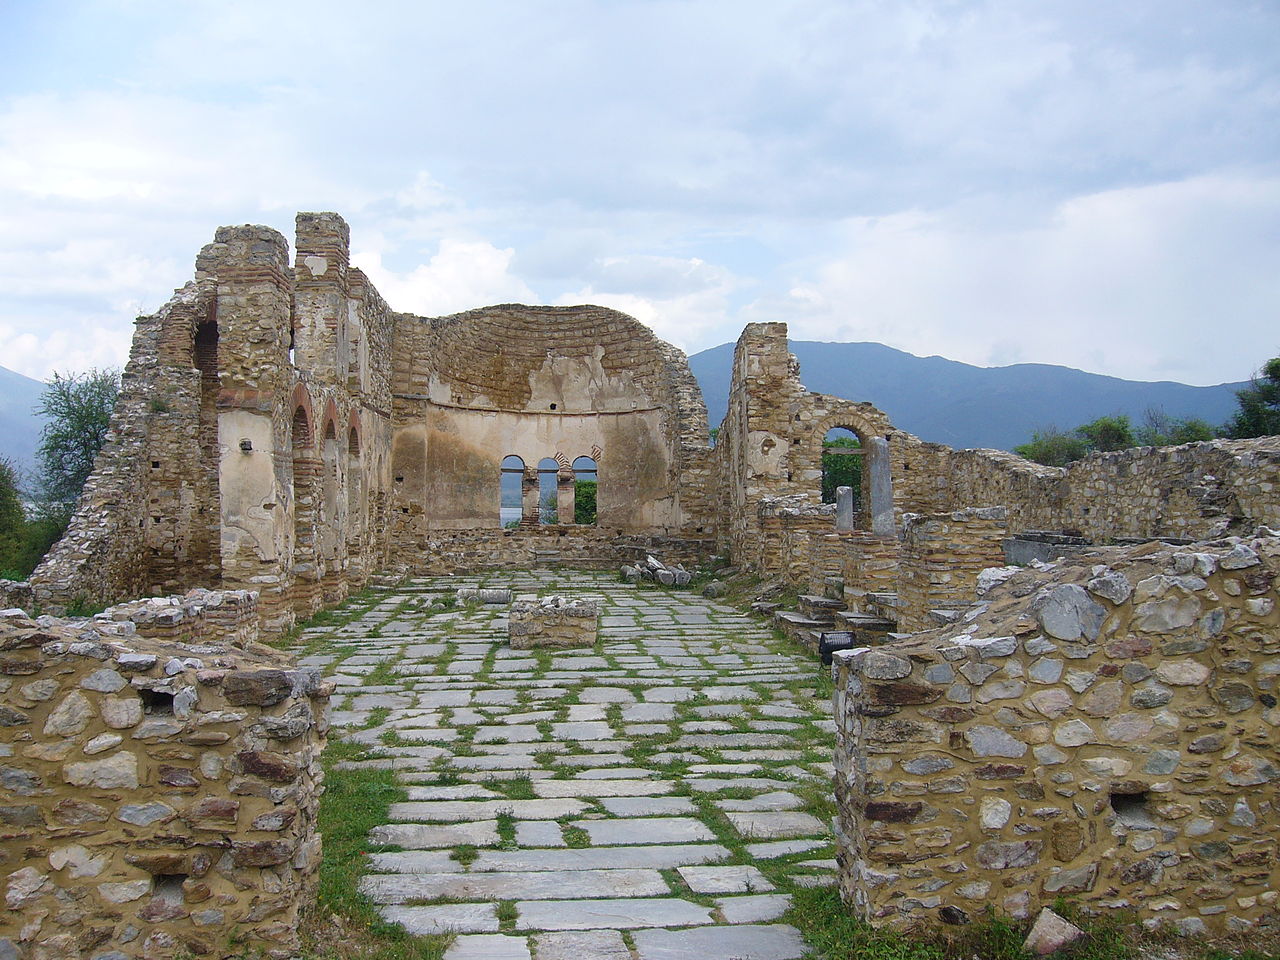
Saint Ahil Church (Bulgarian Patriarchy) main seat in Prespa

The Eparchy of Dorostol has been existing even to this day, even though the exarchs and patriachal seat and patriachs through the centuries has been concentrated in the mother patriarchal city for our Church Preslav and in Ohrid as well as later for II centuries in city of Turnovo until 1393 when in city of Tarnovo (Trnovo) Fall raided by the Ottoman Turkish invaders. 
During the Ottoman's slavery of Bulgaria it has ceased to exist and has been reduced by the Turkish mostly under the influence of Patriarch of Constantinople to Archibishopship center in Ohrid.

History-of-Bulgarian-Patriarchy-Patriarshia-of-Tarnovo

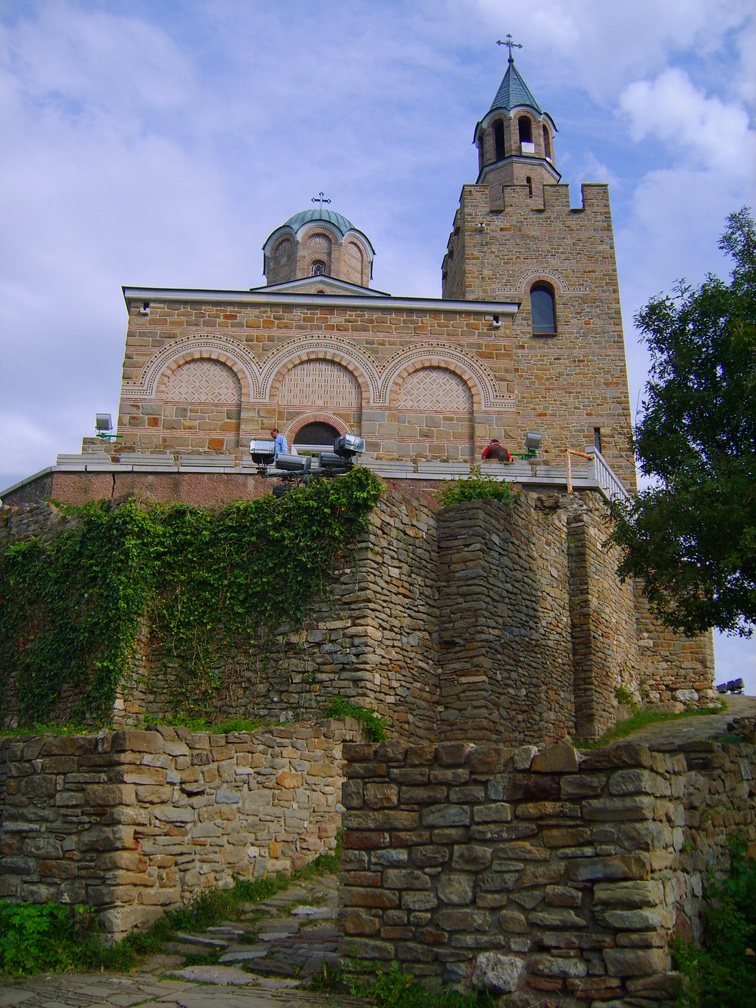
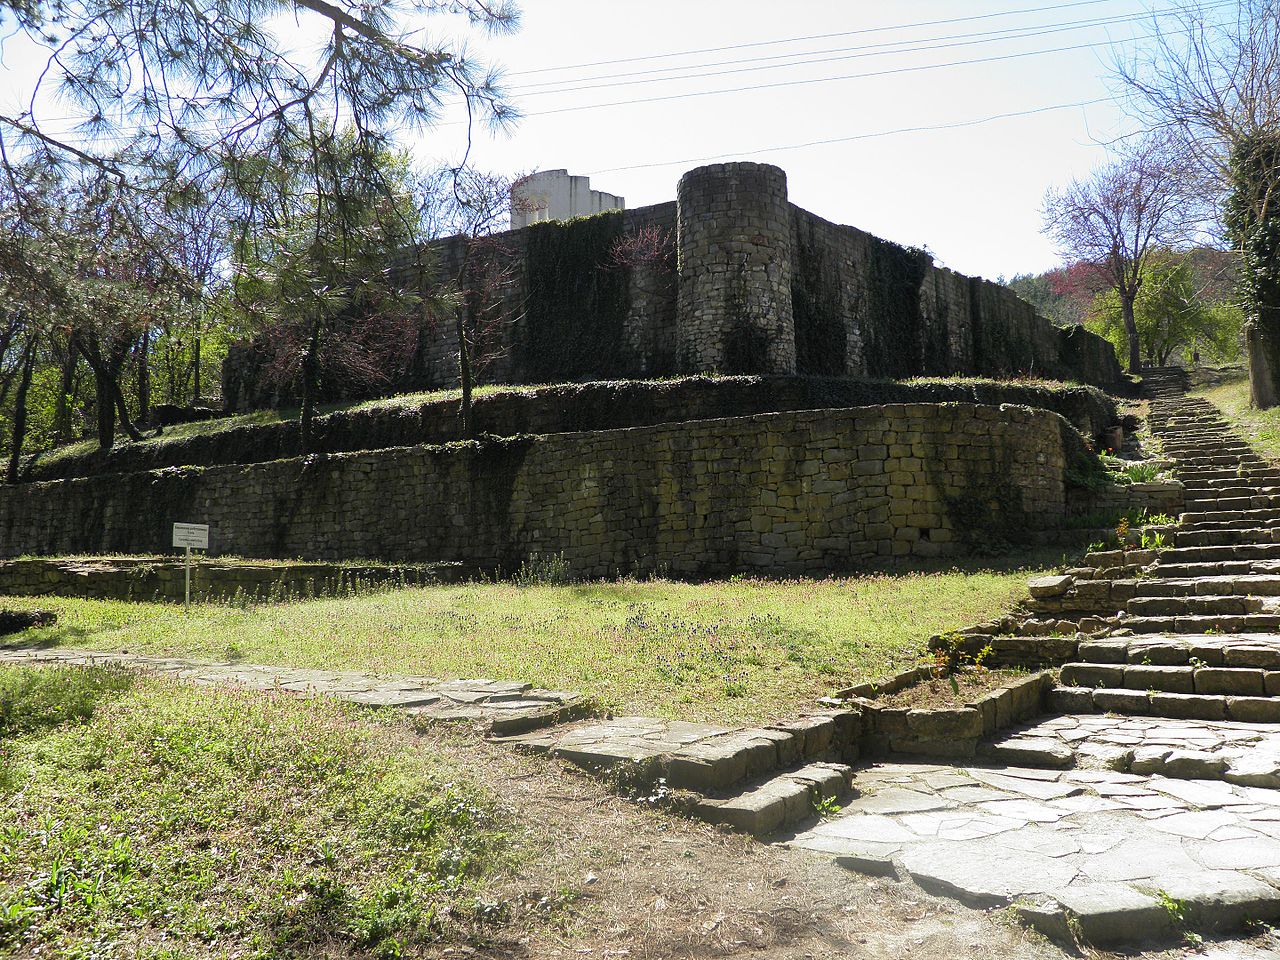
The Patriarchal Church Ascension of Christ in Carevetz (The city of Kings) Hill Turnovo

After the Liberation of Bulgarian in the Russian-Turkish Bulgarian liberation war (1877 – 1878) in which Bulgaria has been liberated. The Bulgarian Church has been an Exarchy for a while in a dark period when the Bulgarian Church was recognized by the Phanariots (The Greeks). The Schism put over the Bulgarian Church was removed in 22 February 1945 y., few weeks after the enthronement of Patriarch Stephan I of Bulgaria. Unfortunately the next years coincided with the dark years of the imposed totalitarian regime of the Bulgarian Communist Party (BCP), which led to active persecution of the Church, the humilation and torture of priest and Church leaders and martyrdom of many clergymen and people who were against the unhuman kind of the new power that take over.

Boris_Nevrokopski-Metropolitan-a-saint-killed-by-the-Communistic-atheist-regime-in-Bulgaria

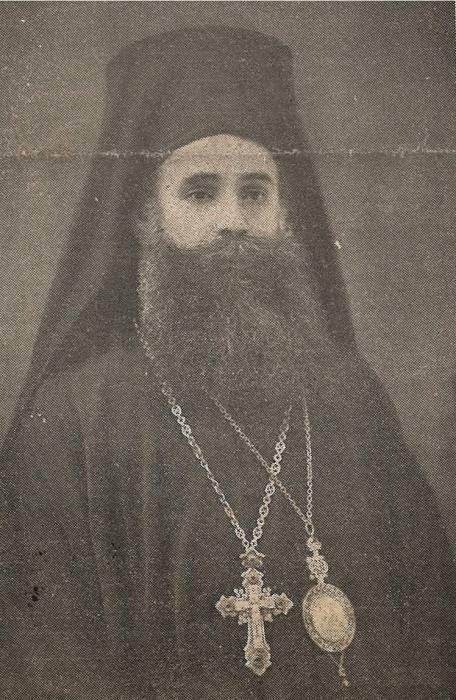
One of those many martyrs for Christ is a supposedly a saint Boris Razumov of Nevrokop who was killed by a order of communists by an orthodox priest to his own eparchy who has joined the party by the order of the BCP.
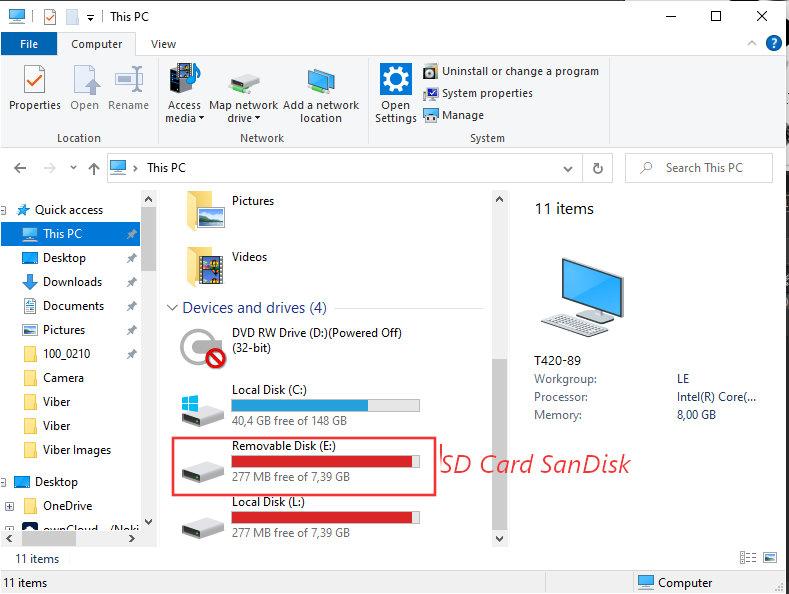
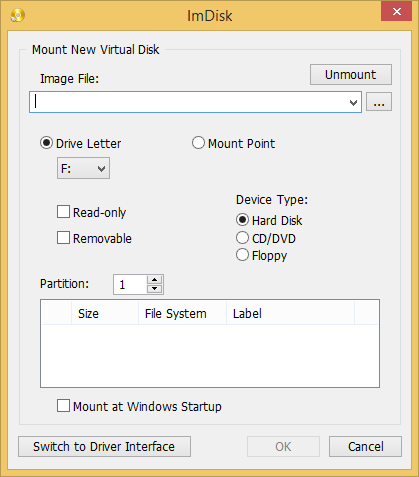
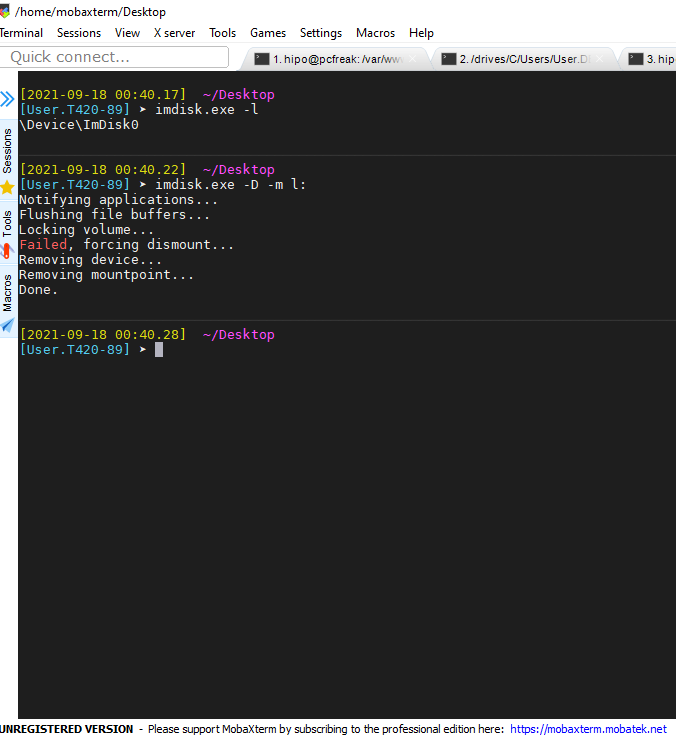
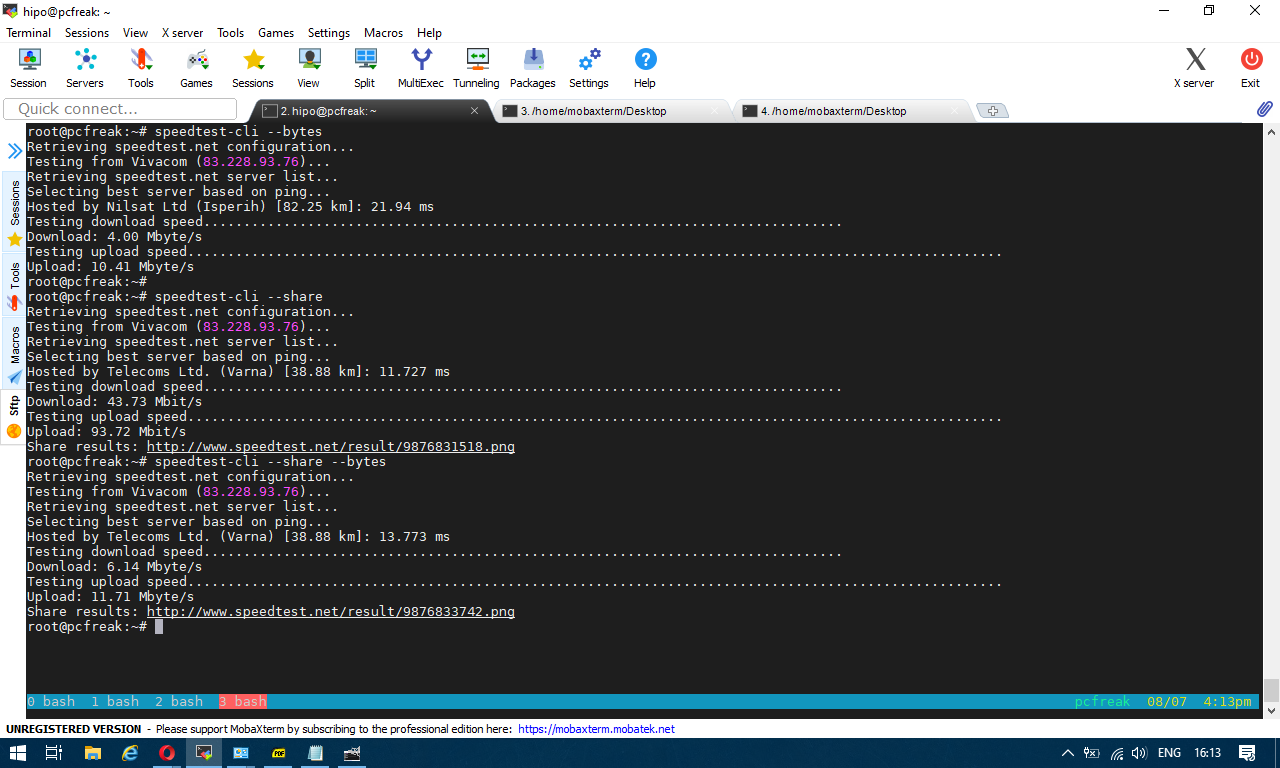
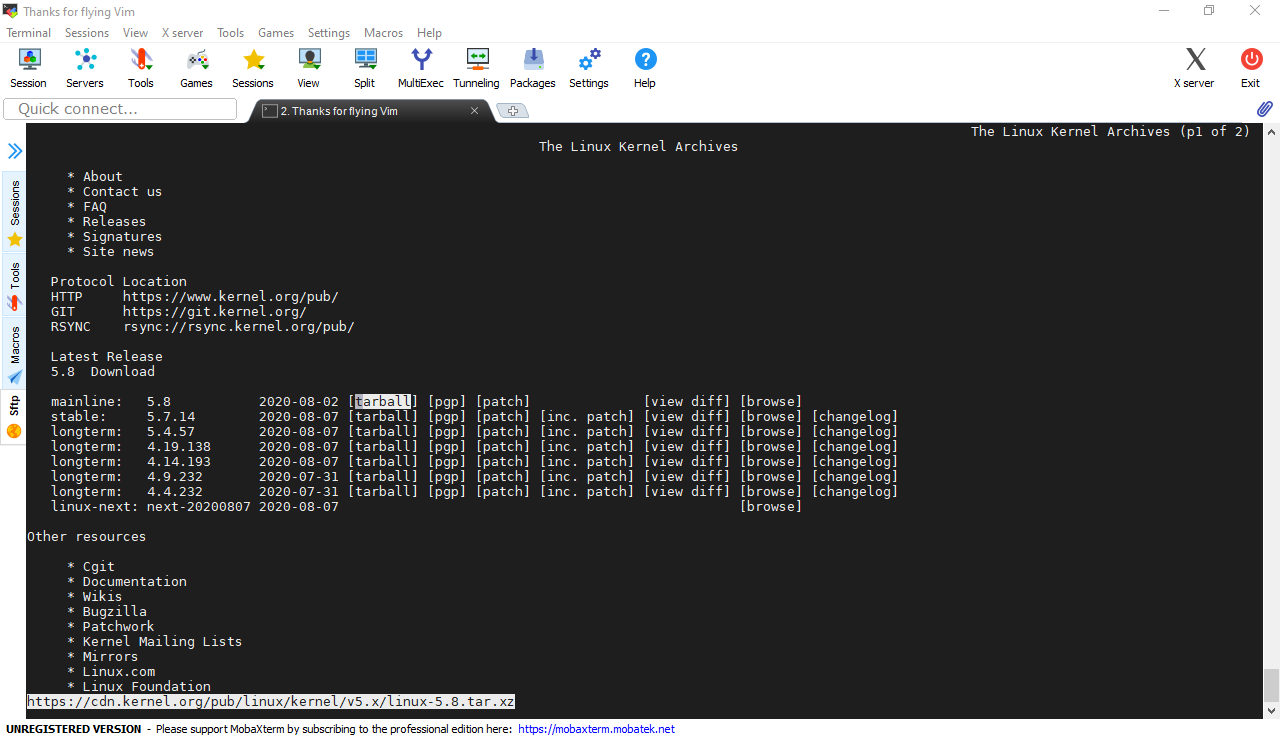
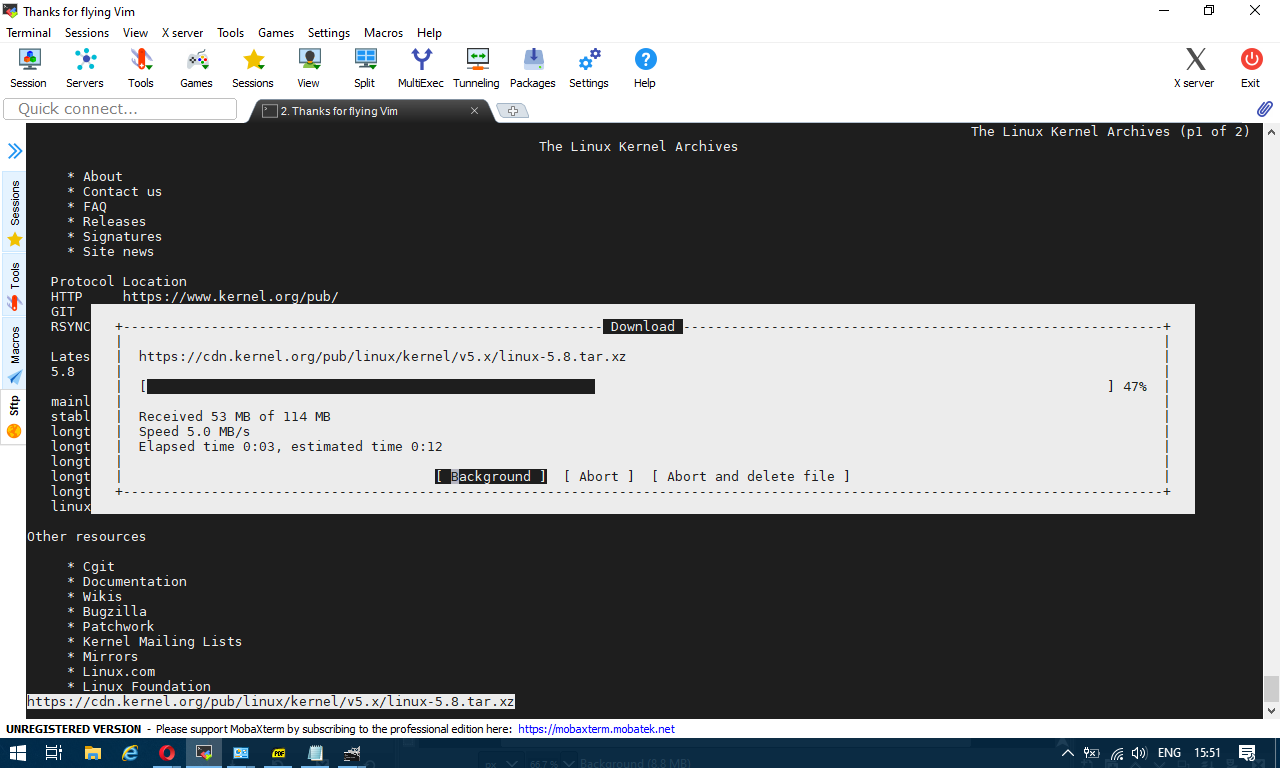
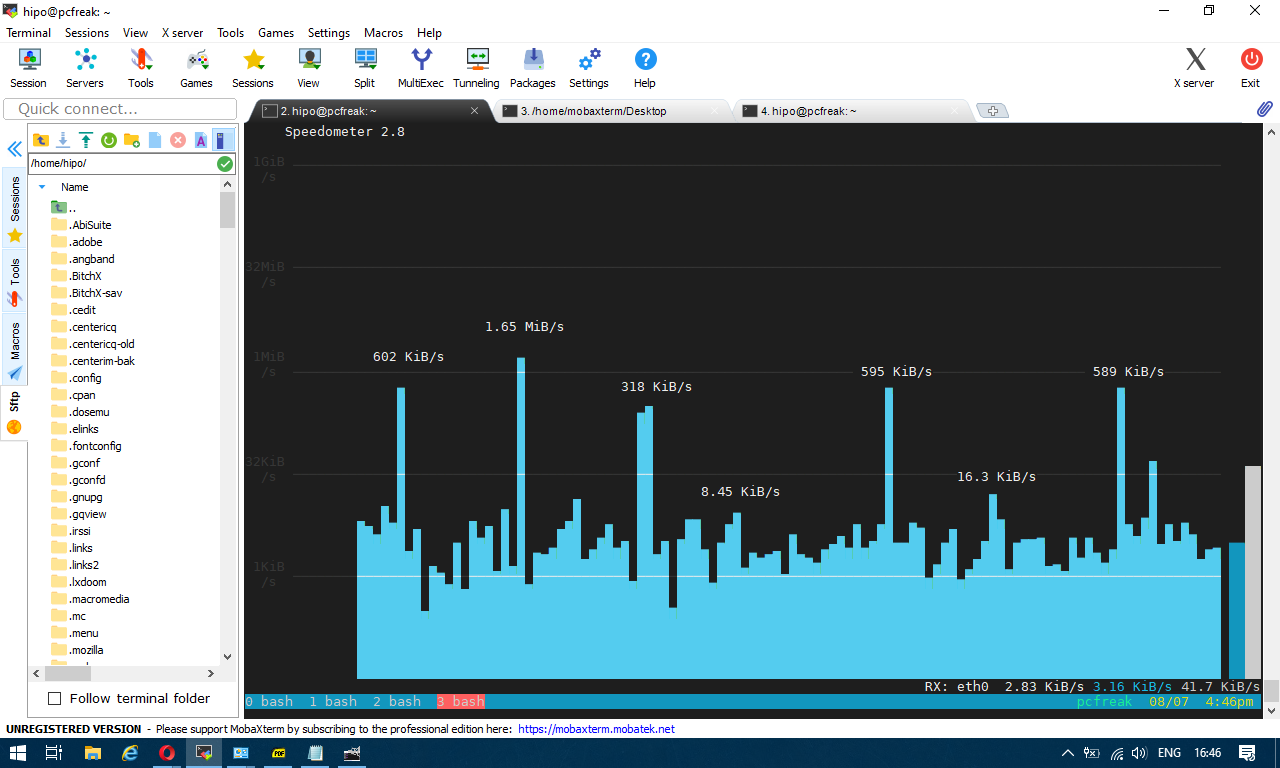
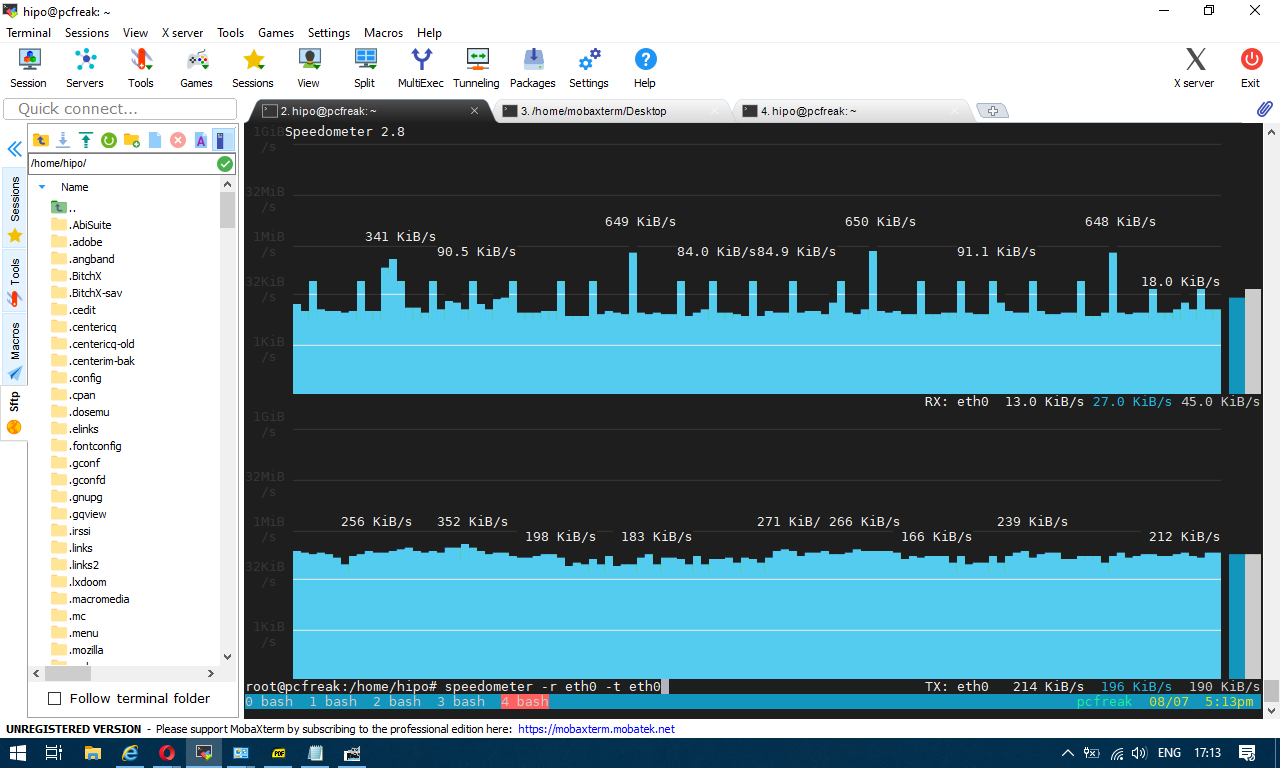
 

Check server Internet connectivity Speedtest from Linux terminal CLI

Friday, August 7th, 2020

check-server-console-speedtest

If you are a system administrator of a dedicated server and you have no access to Xserver Graphical GNOME / KDE etc. environment and you wonder how you can track the bandwidth connectivity speed of remote system to the internet and you happen to have a modern Linux distribution, here is few ways to do a speedtest.
 

1. Use speedtest-cli command line tool to test connectivity


speedtest-cli is a tiny tool written in python, to use it hence you need to have python installed on the server.
It is available both for Redhat Linux distros and Debians / Ubuntus etc. in the list of standard installable packages.

a) Install speedtest-cli on Fedora / CentOS / RHEL
 

On CentOS / RHEL / Scientific Linux lower than ver 8:


$ sudo yum install python

On CentOS 8 / RHEL 8 user type the following command to install Python 3 or 2:


$sudo yum install python3
$ sudo yum install python2


On Fedora Linux version 22+


$ sudo dnf install python
$ sudo dnf install pytho3


Once python is at place download speedtest.py or in case if link is not reachable download mirrored version of speedtest.py on www.pc-freak.net here


$ wget -O speedtest-cli https://raw.githubusercontent.com/sivel/speedtest-cli/master/speedtest.py
$ chmod +x speedtest-cli


Then it is time to run script speedtest-screenshot-linux-terminal-console-cli-cmd
To test enabled Bandwidth on the server


$ python speedtest-cli


b) Install speedtest-cli on Debian

On Latest Debian 10 Buster speedtest is available out of the box in regular .deb repositories, so fetch it with apt


# apt install –yes speedtest-cli


You can give now speedtest-cli a try with –bytes arguments to get speed values in bytes instead of bits or if you want to generate an image with test results in picture just like it will appear if you use speedtest.net inside a gui browser, use the –share option

speedtest-screenshot-linux-terminal-console-cli-cmd-options


2. Getting connectivity results of all defined speedtest test City Locations


Speedtest has a list of servers through which a Upload and Download speed is tested, to run speedtest-cli to test with each and every server and get a better picture on what kind of connectivity to expect from your server towards the closest region capital cities, fetch speedtest-servers.php list and use a small shell loop below is how:


root@pcfreak:~#  wget http://www.speedtest.net/speedtest-servers.php
–2020-08-07 16:31:34–  http://www.speedtest.net/speedtest-servers.php
Преобразувам www.speedtest.net (www.speedtest.net)… 151.101.2.219, 151.101.66.219, 151.101.130.219, …
Connecting to www.speedtest.net (www.speedtest.net)|151.101.2.219|:80… успешно свързване.
HTTP изпратено искане, чакам отговор… 301 Moved Permanently
Адрес: https://www.speedtest.net/speedtest-servers.php [следва]
–2020-08-07 16:31:34–  https://www.speedtest.net/speedtest-servers.php
Connecting to www.speedtest.net (www.speedtest.net)|151.101.2.219|:443… успешно свързване.
HTTP изпратено искане, чакам отговор… 307 Temporary Redirect
Адрес: https://c.speedtest.net/speedtest-servers-static.php [следва]
–2020-08-07 16:31:35–  https://c.speedtest.net/speedtest-servers-static.php
Преобразувам c.speedtest.net (c.speedtest.net)… 151.101.242.219
Connecting to c.speedtest.net (c.speedtest.net)|151.101.242.219|:443… успешно свързване.
HTTP изпратено искане, чакам отговор… 200 OK
Дължина: 211695 (207K) [text/xml]
Saving to: ‘speedtest-servers.php’
speedtest-servers.php                  100%[==========================================================================>] 206,73K  –.-KB/s    in 0,1s
2020-08-07 16:31:35 (1,75 MB/s) – ‘speedtest-servers.php’ saved [211695/211695]

Once file is there with below loop we extract all file defined servers id="" 's 
 

root@pcfreak:~# for i in $(cat speedtest-servers.php | egrep -Eo 'id="[0-9]{4}"' |sed -e 's#id="##' -e 's#"##g'); do speedtest-cli  –server $i; done
Retrieving speedtest.net configuration…
Testing from Vivacom (83.228.93.76)…
Retrieving speedtest.net server list…
Retrieving information for the selected server…
Hosted by Telecoms Ltd. (Varna) [38.88 km]: 25.947 ms
Testing download speed……………………………………………………………………..
Download: 57.71 Mbit/s
Testing upload speed…………………………………………………………………………………………
Upload: 93.85 Mbit/s
Retrieving speedtest.net configuration…
Testing from Vivacom (83.228.93.76)…
Retrieving speedtest.net server list…
Retrieving information for the selected server…
Hosted by GMB Computers (Constanta) [94.03 km]: 80.247 ms
Testing download speed……………………………………………………………………..
Download: 35.86 Mbit/s
Testing upload speed…………………………………………………………………………………………
Upload: 80.15 Mbit/s
Retrieving speedtest.net configuration…
Testing from Vivacom (83.228.93.76)…

…..


etc.

For better readability you might want to add the ouput to a file or even put it to run periodically on a cron if you have some suspcion that your server Internet dedicated lines dies out to some general locations sometimes.
 

3. Testing UPlink speed with Download some big file from source location


In the past a classical way to test the bandwidth connectivity of your Internet Service Provider was to fetch some big file, Linux guys should remember it was almost a standard to roll a download of Linux kernel source .tar file with some test browser as elinks / lynx / w3c.
speedtest-screenshot-kernel-org-shot1 speedtest-screenshot-kernel-org-shot2
or if those are not at hand test connectivity on remote free shell servers whatever file downloader as wget or curl was used.
Analogical method is still possible, for example to use wget to get an idea about bandwidtch connectivity, let it roll below 500 mb from speedtest.wdc01.softlayer.com to /dev/null few times:


$ wget –output-document=/dev/null http://speedtest.wdc01.softlayer.com/downloads/test500.zip

$ wget –output-document=/dev/null http://speedtest.wdc01.softlayer.com/downloads/test500.zip

$ wget –output-document=/dev/null http://speedtest.wdc01.softlayer.com/downloads/test500.zip


# wget -O /dev/null –progress=dot:mega http://cachefly.cachefly.net/10mb.test ; date
–2020-08-07 13:56:49–  http://cachefly.cachefly.net/10mb.test
Resolving cachefly.cachefly.net (cachefly.cachefly.net)… 205.234.175.175
Connecting to cachefly.cachefly.net (cachefly.cachefly.net)|205.234.175.175|:80… connected.
HTTP request sent, awaiting response… 200 OK
Length: 10485760 (10M) [application/octet-stream]
Saving to: ‘/dev/null’

     0K …….. …….. …….. …….. …….. …….. 30%  142M 0s
  3072K …….. …….. …….. …….. …….. …….. 60%  179M 0s
  6144K …….. …….. …….. …….. …….. …….. 90%  204M 0s
  9216K …….. ……..                                    100%  197M=0.06s

2020-08-07 13:56:50 (173 MB/s) – ‘/dev/null’ saved [10485760/10485760]

Fri 07 Aug 2020 01:56:50 PM UTC


To be sure you have a real picture on remote machine Internet speed it is always a good idea to run download of random big files on a certain locations that are well known to have a very stable Internet bandwidth to the Internet backbone routers.

4. Using Simple shell script to test Internet speed


Fetch and use speedtest.sh


wget https://raw.github.com/blackdotsh/curl-speedtest/master/speedtest.sh && chmod u+x speedtest.sh && bash speedtest.sh


5. Using iperf to test connectivity between two servers 


iperf is another good tool worthy to mention that can be used to test the speed between client and server.

To use iperf install it with apt and do on the server machine to which bandwidth will be tested:


# iperf -s 


On the client machine do:


# iperf -c 192.168.1.1 


where 192.168.1.1 is the IP of the server where iperf was spawned to listen.

6. Using Netflix fast to determine Internet connection speed on host


Fast

fast is a service provided by Netflix. Its web interface is located at Fast.com and it has a command-line interface available through npm (npm is a package manager for nodejs) so if you don't have it you will have to install it first with:

# apt install –yes npm


Note that if you run on Debian this will install you some 249 new nodejs packages which you might not want to have on the system, so this is useful only for machines that has already use of nodejs.


$ fast


     82 Mbps ↓


The command returns your Internet download speed. To get your upload speed, use the -u flag:


$ fast -u


   ⠧ 80 Mbps ↓ / 8.2 Mbps ↑


7. Use speedometer / iftop to measure incoming and outgoing traffic on interface


If you're measuring connectivity on a live production server system, then you might consider that the measurement output might not be exactly correct especially if you're measuring the Uplink / Downlink on a Heavy loaded webserver / Mail Server / Samba or DNS server.
If this is the case a very useful tools to consider to extract the already taken traffic used on your Incoming and Outgoing ( TX / RX ) Network interfaces
are speedometer and iftop, they're present and installable depending on the OS via yum / apt or the respective package manager.


To install on Debian server:


# apt install –yes iftop speedometer


The most basic use to check the live received traffic in a nice Ncurses like text graphic is with: 


# speedometer -r 


speedometer-check-received-transmitted-network-traffic-on-linux1

To generate real time ASCII art graph on RX / TX traffic do:


# speedometer -r eth0 -t eth0


speedometer-check-received-transmitted-network-traffic-on-linux


# iftop -P -i eth0


iftop-show-statistics-on-connections-screenshot-pcfreak


Send TCP / UDP strings and commands to Local and Remote Applications without netcat with Bash

Friday, July 24th, 2020

bash-open-network-tcp-udp-connections-from-shell-gnu-bash-shell-shell-logo

Did you ever needed to send TCP / UDP packets manually to send commands to local or remote applications, having a fully functional BASH Shell but not having the luxury to have NC (Netcat Swiss Army Knife of Networking) tool?
This happens if you have some Linux based embeded device as Arduino or a Linux server with a high security PCI requirement which can't affort to have Netcat in place or another portable hardware with a Linux kernel, that needs to communicate in UDP for any reason but you don't want to waste additional 28KB or physically you have access to a Linux device that doesn't have netcat but you want to be able to send UDP externally …

SInce some time in newer GNU Bash's releases support for TCP / UDP data sending is described in Bash's Manual and should be working it is not as good as you might expect but for a small things it could save you the day.

The syntax to use it is:
 

 /dev/protocol/IP/PORT


To open new socket connection to a UDP / TCP protocol with bash you have to simply open a new Shell handler (lets say 3) to:


/dev/tcp/your-url.com/80


or

/dev/udp/83.228.93.76/53


1. Get GOOGLE HTML Source with simple BASH / Getting URL Index with bash sockets


If you happen to have access to a machine where no network downloader tool or a text browser such as curl, wget, lynx, links is available but you want to dump the content of a index.html or any other URL with simply bash you can do it like so:
 

exec 3<>/dev/tcp/www.google.com/80
echo -e "GET / HTTP/1.1\r\n\r\n" >&3 

cat <&3

If you need to open a connection to a Internet Domain with bash and store the output into a separate .html file:

exec 3<>/dev/tcp/www.google.com/80
echo -e "GET / HTTP/1.1\r\n\r\n" >&3 

cat <&3 | tee -a output.html


Note that this will work only if you're logged into into an interactive shell.
If you want instead do it from a shell script (and omit usage) of wget etc. use something like bash_sockets_google_connect.sh basic script :

#!/bin/bash
exec 3<>/dev/tcp/www.google.com/80
printf "GET /\r\n\r\n" >&3
while IFS= read -r -u3 -t2 line || [[ -n “$line” ]]; do echo "$line"; done
exec 3>&-
exec 3<&-


2. Sending UDP protocol data via bash socket


To send test  variables or commands data to localhost (127.0.0.1) UDP listening service:
 

echo 'TEST COMMAND' > /dev/udp/127.0.0.1/538


echo "Any UDP data" > /dev/udp/127.0.0.1/3000


If you happent to have netcat or running on a bash shell that doesn't properly support TCP / UDP sending you can always do it netcat way:

echo "Command" | nc -u -w0 127.0.0.1 3000


Of course this little hack is useful just for simple things and eventually for more comlex stuff and scripting you would like to use a fully functional HTML reader ( W3C compliant Web Browser )
still  for a quick dirty stuff Bash socketing from the console rocks pretty much ! 🙂


Tips & Tricks for Passing CompTIA Security+ Certification Exams with PrepAway Dumps

Monday, September 30th, 2019

comptia-security-certifications

Introduction

Many candidates aiming to land a career in IT choose to be certified by CompTIA. This reputable organization is rightly considered to be a leader on the IT market that offers various credentials. And its position is justified. The thing is that CompTIA has been in service for more than 20 years, and in its turn, certified more than 2,000,000 IT specialists all over the world. It offers various vendor-neutral certifications for all tastes Security+, Project+ among many. Their goal is to develop and advance the IT industry.


So, since CompTIA aims to serve as a voice of the Information technology industry, it keeps the pace with the rapidly changing IT field and makes its best to equip candidates with the most updated skills.

In this article, we’ll cover one of the exams that leads you to get SECURITY+ certification which allows you to build a successful career in IT and more .


Overview of CompTIA SECURITY+ Certification

The CompTIA SECURITY+ certification is one of the core credentials, offered by this vendor. The rest include ITF+, Network+, and Security+. To obtain SECURITY+ credential, you need to pass two exams. They are either 900-series (220-901 and 220-902) or the new ones Core 1 (220-1001) and Core 2 (220-1002).

220-901 exam tests your skills to complete the tasks that deal with hardware and its troubleshooting, peripherals, as well as network connectivity problems. 220-902 test is all about working with operating systems (Windows, Linux, iOS, etc.). As for the new exams, the topics included refer to cloud computing, virtualization and expanded security.

After succeeding and getting the CompTIA SECURITY+ certification, you are eligible to work as a support specialist, field service technician or desktop support analyst and earn annually from $46K to $60K.


Details of 220-902 Exam

To gain the SECURITY+ certification, you have to undertake two exams separately. These are 220-901 and 220-902 tests. The CompTIA 220-902 exam verifies your fundamental skills required to install and configure operating systems such as Windows, Apple OS X, Linus, iOS, and Android. The exam also covers security as well as the essentials of cloud computing and operational procedures.


Exam 220-902 consists of 90 questions which require 90 minutes to complete. The types of questions included are multiple-choice, drag and drop, and performance-based. To gain the CompTIA SECURITY+ certification you must attain a score of 700. The exam fee comprises $219.


Exam objectives

The CompTIA SECURITY+ 220-902 exam objectives are based on a thorough review made by experts and professionals in the IT field. This is done to make the exam relevant and useful for entry-level IT specialists. The objectives are divided into five domains which are listed below:

  • Windows operating system-29%
  • Other operating systems and technologies-12%
  • Security-22%
  • Software troubleshooting-24%
  • Operation procedures-13%


Importance of CompTIA 220-902 Exam

Passing the CompTIA 220-902 exam will equip you with the expertise to do the following;

  • Assemble components as per the customer requirements
  • Effective customer support
  • PCs installation, configuring and maintenance services
  • Basic understanding of networking and securitySkills in troubleshooting
  • Diagnose, resolve, and document normal hardware and software problems
  • Understanding the basics of Virtualization, desktop imaging, and deploying


CompTIA Training material

Since preparation is key to your success, start from checking the CompTIA official website. The vendor offers prep materials that you need to be adequately ready for your exam. The options include virtual labs, e-learning, video training, exam preps, study guides, and instructor-led training. All the options offered contain the study material to hone your skills in taking 220-902 exam and bring your certification goals to fruition. You simply need to choose the method/s that suit/s you best.

PrepAway – the best platform for your Exam preparation


In addition to the official study materials offered by CompTIA, you should hunt for the best resources searching the internet to sharpen your skills in order to pass 220-902 exam. For that, you can visit the PrepAway website. It’s a popular provider of the most updated exam dumps to your certification exam/s among test takers.

PrepAway offers you to download free practice questions with answers shared by the recent exam takers. It means that you’ll get the latest exam questions that you can practice. Thus, for exam 220-902 you’ll find a great variety of such dumps.

If you would like to get the practice questions and answers checked by IT experts, 220-902 premium bundle has been designed for such purpose. At an affordable price you can get a bundle that contains an updated premium file, a study guide, and a training course. The files offered at PrepAway are in vce format and can be opened with the help of the VCE Software. This modern exam simulator has been created by Avanset team and helps you practice exam questions in the interesting and interactive manner. Moreover, the VCE testing engine resembles the real exam environment and equips you with skills to tackle any type of question, as well as ability to manage your time wisely. Besides, you can track your results, define the weak areas and focus on them before taking the real 220-902 exam. You can download the files in VCE Player anytime you wish and practice on the go as well. Note that the download is limited to a maximum of 15 files to prevent commercial selling which is prohibited.

So, the benefit of using 220-902 premium bundle is because it contains the updated file verified by IT experts, who have worked in this field for long and feel themselves like a duck to water. And extremely informative video course along with a study guide will complete your thorough preparation to the CompTIA 220-902 exam.


Conclusion

This article has taken you through the necessity of passing 220-902 exam and earning the SECURITY+ certification. You get a detailed picture of the benefits waiting for you afterwards. Since the proper preparation is key to your success, utilize the materials offered on the CompTIA website and PrepAway online platform, choose the study options that suit you best, and you won’t have a reason to fail. Wish you luck!