Archive for the ‘FreeBSD’ Category

How to check what process is listening on network port with: lsof & fuser commands in Linux / BSD

Saturday, March 16th, 2013

It is a common thing for me as a Linux and FreeBSD sysadmin to know what process assignes to which port number? I'm sure many novice system administrators will end up sooner or later with same question. Knowing what kind of processes has listening to TCP and UDP protocol / ports is a must to have a proper configured Linux / BSD system. In Linux there are two commands ( lsof and fuser) with which you can get various extra PID information on running processes (i.e. get information which cannot otherwise be obtained via the usual ps and netstat  To use them on most Linux distributions, you will have to have them installed.

1. Install fuser / lsof on Linux / BSD

a) On RPM based Linux distros – Fedora, CentOS, RHEL, SuSE /sbin/fuser is usually part of base install psmisc rpm package, however /usr/sbin/lsof is not among standard installed rpms, so you have to manually install via yum:

[root@centos ~]# yum install -y lsof
….

b) On Deb based Linuxes (Debian, Ubuntu, Mint, ArchLinux etc.). both lsof and fuser has to be installed via a separate packages non-part of Debian base install packs.

server:~# apt-get --yes install lsof fuser
....

On Debian full path location of both is in /bin/fuser and /usr/bin/lsof.

Two tools are precious swiss army knife outfit to use, whether you doubt someone cracked into a server or in doubt you might have "hidden" cracker processes on server.

c) Install fuser on Free/Net/Open/ BSD

bsd# cd /usr/ports/sysutils/fuser
bsd# make install clean
....
bsd# cd /usr/ports/sysutils/lsof
bsd# make install clean
....

2. Using fuser and lsof to look up process PIDs assigned to port numbers

lsof name is derived from List Open Files, as we know in UNIX, GNU / Linux,  *BSD everything on the system is a file, thus to get all kind of information concerning all active files (i.e. ports, PIDs, procotols and process names;

server:~# lsof +M -i4 | less

COMMAND     PID     USER   FD   TYPE   DEVICE SIZE/OFF NODE NAME
portmap    1317   daemon    4u  IPv4     3930      0t0  UDP *:sunrpc[portmapper]
portmap    1317   daemon    5u  IPv4     3939      0t0  TCP *:sunrpc[portmapper] (LISTEN)
rpc.statd  1329    statd    4u  IPv4     3974      0t0  UDP *:657
rpc.statd  1329    statd    6u  IPv4     3983      0t0  UDP *:28530[status]
rpc.statd  1329    statd    7u  IPv4     3986      0t0  TCP *:58515[status] (LISTEN)
apache2    1625 www-data    3u  IPv4     5456      0t0  TCP *:www (LISTEN)
apache2    1625 www-data    4u  IPv4     5458      0t0  TCP *:https (LISTEN)
sshd       1918     root    3u  IPv4     4945      0t0  TCP *:ssh (LISTEN)
miniserv.  2155     root    5u  IPv4     5299      0t0  TCP *:20000 (LISTEN)
miniserv.  2155     root    6u  IPv4     5300      0t0  UDP *:20000
miniserv.  2161     root    6u  IPv4     5367      0t0  TCP *:webmin (LISTEN)
miniserv.  2161     root    7u  IPv4     5368      0t0  UDP *:10000
ntpd       2172      ntp   16u  IPv4     5395      0t0  UDP *:ntp
ntpd       2172      ntp   18u  IPv4     5402      0t0  UDP localhost:ntp
ntpd       2172      ntp   19u  IPv4     5403      0t0  UDP iqtest.soccerfame.com:ntp
ntpd       2172      ntp   20u  IPv4    16028      0t0  UDP secure.broomlake.com:ntp
apache2    4505 www-data    3u  IPv4     5456      0t0  TCP *:www (LISTEN)
apache2    4505 www-data    4u  IPv4     5458      0t0  TCP *:https (LISTEN)
apache2    4539 www-data    3u  IPv4     5456      0t0  TCP *:www (LISTEN)
apache2    4539 www-data    4u  IPv4     5458      0t0  TCP *:https (LISTEN)
apache2    4780 www-data    3u  IPv4     5456      0t0  TCP *:www (LISTEN)
apache2    4780 www-data    4u  IPv4     5458      0t0  TCP *:https (LISTEN)
apache2    4900 www-data    3u  IPv4     5456      0t0  TCP *:www (LISTEN)
apache2    4900 www-data    4u  IPv4     5458      0t0  TCP *:https (LISTEN)
apache2    4907 www-data    3u  IPv4     5456      0t0  TCP *:www (LISTEN)
apache2    4907 www-data    4u  IPv4     5458      0t0  TCP *:https (LISTEN)
apache2    4915 www-data    3u  IPv4     5456      0t0  TCP *:www (LISTEN)
apache2    4915 www-data    4u  IPv4     5458      0t0  TCP *:https (LISTEN)
apache2    5067 www-data    3u  IPv4     5456      0t0  TCP *:www (LISTEN)
apache2    5067 www-data    4u  IPv4     5458      0t0  TCP *:https (LISTEN)
apache2    5133 www-data    3u  IPv4     5456      0t0  TCP *:www (LISTEN)
apache2    5133 www-data    4u  IPv4     5458      0t0  TCP *:https (LISTEN)
apache2    5134 www-data    3u  IPv4     5456      0t0  TCP *:www (LISTEN)
apache2    5134 www-data    4u  IPv4     5458      0t0  TCP *:https (LISTEN)
apache2    5148 www-data    3u  IPv4     5456      0t0  TCP *:www (LISTEN)
apache2    5148 www-data    4u  IPv4     5458      0t0  TCP *:https (LISTEN)
apache2    5152 www-data    3u  IPv4     5456      0t0  TCP *:www (LISTEN)
apache2    5152 www-data    4u  IPv4     5458      0t0  TCP *:https (LISTEN)
apache2    5259 www-data    3u  IPv4     5456      0t0  TCP *:www (LISTEN)
apache2    5259 www-data    4u  IPv4     5458      0t0  TCP *:https (LISTEN)
apache2    5265 www-data    3u  IPv4     5456      0t0  TCP *:www (LISTEN)
apache2    5265 www-data    4u  IPv4     5458      0t0  TCP *:https (LISTEN)
apache2    5266 www-data    3u  IPv4     5456      0t0  TCP *:www (LISTEN)
apache2    5266 www-data    4u  IPv4     5458      0t0  TCP *:https (LISTEN)
apache2    5346 www-data    3u  IPv4     5456      0t0  TCP *:www (LISTEN)
apache2    5346 www-data    4u  IPv4     5458      0t0  TCP *:https (LISTEN)
apache2    5356 www-data    3u  IPv4     5456      0t0  TCP *:www (LISTEN)
apache2    5356 www-data    4u  IPv4     5458      0t0  TCP *:https (LISTEN)
apache2    5467 www-data    3u  IPv4     5456      0t0  TCP *:www (LISTEN)
apache2    5467 www-data    4u  IPv4     5458      0t0  TCP *:https (LISTEN)
apache2    5523 www-data    3u  IPv4     5456      0t0  TCP *:www (LISTEN)
apache2    5523 www-data    4u  IPv4     5458      0t0  TCP *:https (LISTEN)
apache2    5568 www-data    3u  IPv4     5456      0t0  TCP *:www (LISTEN)
apache2    5568 www-data    4u  IPv4     5458      0t0  TCP *:https (LISTEN)
apache2    5715 www-data    3u  IPv4     5456      0t0  TCP *:www (LISTEN)
apache2    5715 www-data    4u  IPv4     5458      0t0  TCP *:https (LISTEN)
apache2    5716 www-data    3u  IPv4     5456      0t0  TCP *:www (LISTEN)
apache2    5716 www-data    4u  IPv4     5458      0t0  TCP *:https (LISTEN)
apache2    5758 www-data    3u  IPv4     5456      0t0  TCP *:www (LISTEN)
apache2    5758 www-data    4u  IPv4     5458      0t0  TCP *:https (LISTEN)
apache2    5789 www-data    3u  IPv4     5456      0t0  TCP *:www (LISTEN)
apache2    5789 www-data    4u  IPv4     5458      0t0  TCP *:https (LISTEN)
apache2    6106 www-data    3u  IPv4     5456      0t0  TCP *:www (LISTEN)
apache2    6106 www-data    4u  IPv4     5458      0t0  TCP *:https (LISTEN)
apache2   16608 www-data    3u  IPv4     5456      0t0  TCP *:www (LISTEN)
apache2   16608 www-data    4u  IPv4     5458      0t0  TCP *:https (LISTEN)
apache2   16904 www-data    3u  IPv4     5456      0t0  TCP *:www (LISTEN)
apache2   16904 www-data    4u  IPv4     5458      0t0  TCP *:https (LISTEN)
apache2   17124 www-data    3u  IPv4     5456      0t0  TCP *:www (LISTEN)
apache2   17124 www-data    4u  IPv4     5458      0t0  TCP *:https (LISTEN)
apache2   17280 www-data    3u  IPv4     5456      0t0  TCP *:www (LISTEN)
apache2   17280 www-data    4u  IPv4     5458      0t0  TCP *:https (LISTEN)
apache2   20855 www-data    3u  IPv4     5456      0t0  TCP *:www (LISTEN)
apache2   20855 www-data    4u  IPv4     5458      0t0  TCP *:https (LISTEN)
apache2   20920 www-data    3u  IPv4     5456      0t0  TCP *:www (LISTEN)
apache2   20920 www-data    4u  IPv4     5458      0t0  TCP *:https (LISTEN)
apache2   21023 www-data    3u  IPv4     5456      0t0  TCP *:www (LISTEN)
apache2   21023 www-data    4u  IPv4     5458      0t0  TCP *:https (LISTEN)
apache2   22182 www-data    3u  IPv4     5456      0t0  TCP *:www (LISTEN)
apache2   22182 www-data    4u  IPv4     5458      0t0  TCP *:https (LISTEN)
apache2   23307 www-data    3u  IPv4     5456      0t0  TCP *:www (LISTEN)
apache2   23307 www-data    4u  IPv4     5458      0t0  TCP *:https (LISTEN)
apache2   23366 www-data    3u  IPv4     5456      0t0  TCP *:www (LISTEN)
apache2   23366 www-data    4u  IPv4     5458      0t0  TCP *:https (LISTEN)
apache2   23408 www-data    3u  IPv4     5456      0t0  TCP *:www (LISTEN)
apache2   23408 www-data    4u  IPv4     5458      0t0  TCP *:https (LISTEN)
apache2   23419 www-data    3u  IPv4     5456      0t0  TCP *:www (LISTEN)
apache2   23419 www-data    4u  IPv4     5458      0t0  TCP *:https (LISTEN)
apache2   23428 www-data    3u  IPv4     5456      0t0  TCP *:www (LISTEN)
apache2   23428 www-data    4u  IPv4     5458      0t0  TCP *:https (LISTEN)
apache2   23452 www-data    3u  IPv4     5456      0t0  TCP *:www (LISTEN)
apache2   23452 www-data    4u  IPv4     5458      0t0  TCP *:https (LISTEN)
apache2   23561 www-data    3u  IPv4     5456      0t0  TCP *:www (LISTEN)
apache2   23561 www-data    4u  IPv4     5458      0t0  TCP *:https (LISTEN)
apache2   23579 www-data    3u  IPv4     5456      0t0  TCP *:www (LISTEN)
apache2   23579 www-data    4u  IPv4     5458      0t0  TCP *:https (LISTEN)
apache2   23851 www-data    3u  IPv4     5456      0t0  TCP *:www (LISTEN)
apache2   23851 www-data    4u  IPv4     5458      0t0  TCP *:https (LISTEN)
apache2   24103 www-data    3u  IPv4     5456      0t0  TCP *:www (LISTEN)
apache2   24103 www-data    4u  IPv4     5458      0t0  TCP *:https (LISTEN)
apache2   24659 www-data    3u  IPv4     5456      0t0  TCP *:www (LISTEN)
apache2   24659 www-data    4u  IPv4     5458      0t0  TCP *:https (LISTEN)
sshd      25073     root    3u  IPv4 29855891      0t0  TCP iqtest.soccerfame.com:ssh->www.pc-freak.net:50176 (ESTABLISHED)
sshd      25084     hipo    3u  IPv4 29855891      0t0  TCP iqtest.soccerfame.com:ssh->www.pc-freak.net:50176 (ESTABLISHED)
apache2   25089 www-data    3u  IPv4     5456      0t0  TCP *:www (LISTEN)
apache2   25089 www-data    4u  IPv4     5458      0t0  TCP *:https (LISTEN)
apache2   26737 www-data    3u  IPv4     5456      0t0  TCP *:www (LISTEN)
apache2   26737 www-data    4u  IPv4     5458      0t0  TCP *:https (LISTEN)
apache2   27243 www-data    3u  IPv4     5456      0t0  TCP *:www (LISTEN)
apache2   27243 www-data    4u  IPv4     5458      0t0  TCP *:https (LISTEN)
apache2   27282 www-data    3u  IPv4     5456      0t0  TCP *:www (LISTEN)
apache2   27282 www-data    4u  IPv4     5458      0t0  TCP *:https (LISTEN)
apache2   27633 www-data    3u  IPv4     5456      0t0  TCP *:www (LISTEN)
apache2   27633 www-data    4u  IPv4     5458      0t0  TCP *:https (LISTEN)
apache2   28205 www-data    3u  IPv4     5456      0t0  TCP *:www (LISTEN)
apache2   28205 www-data    4u  IPv4     5458      0t0  TCP *:https (LISTEN)
apache2   29244 www-data    3u  IPv4     5456      0t0  TCP *:www (LISTEN)
apache2   29244 www-data    4u  IPv4     5458      0t0  TCP *:https (LISTEN)
apache2   29372 www-data    3u  IPv4     5456      0t0  TCP *:www (LISTEN)
apache2   29372 www-data    4u  IPv4     5458      0t0  TCP *:https (LISTEN)
apache2   29411 www-data    3u  IPv4     5456      0t0  TCP *:www (LISTEN)
apache2   29411 www-data    4u  IPv4     5458      0t0  TCP *:https (LISTEN)
apache2   29462 www-data    3u  IPv4     5456      0t0  TCP *:www (LISTEN)
apache2   29462 www-data    4u  IPv4     5458      0t0  TCP *:https (LISTEN)
apache2   29548 www-data    3u  IPv4     5456      0t0  TCP *:www (LISTEN)
apache2   29548 www-data    4u  IPv4     5458      0t0  TCP *:https (LISTEN)
apache2   30161 www-data    3u  IPv4     5456      0t0  TCP *:www (LISTEN)
apache2   30161 www-data    4u  IPv4     5458      0t0  TCP *:https (LISTEN)
apache2   31876 www-data    3u  IPv4     5456      0t0  TCP *:www (LISTEN)
apache2   31876 www-data    4u  IPv4     5458      0t0  TCP *:https (LISTEN)
apache2   31958 www-data    3u  IPv4     5456      0t0  TCP *:www (LISTEN)
apache2   31958 www-data    4u  IPv4     5458      0t0  TCP *:https (LISTEN)
apache2   32052 www-data    3u  IPv4     5456      0t0  TCP *:www (LISTEN)
apache2   32052 www-data    4u  IPv4     5458      0t0  TCP *:https (LISTEN)
apache2   32061 www-data    3u  IPv4     5456      0t0  TCP *:www (LISTEN)
apache2   32061 www-data    4u  IPv4     5458      0t0  TCP *:https (LISTEN)
apache2   32143 www-data    3u  IPv4     5456      0t0  TCP *:www (LISTEN)
apache2   32143 www-data    4u  IPv4     5458      0t0  TCP *:https (LISTEN)
apache2   32149 www-data    3u  IPv4     5456      0t0  TCP *:www (LISTEN)
apache2   32149 www-data    4u  IPv4     5458      0t0  TCP *:https (LISTEN)
apache2   32440 www-data    3u  IPv4     5456      0t0  TCP *:www (LISTEN)
apache2   32440 www-data    4u  IPv4     5458      0t0  TCP *:https (LISTEN)
apache2   32635 www-data    3u  IPv4     5456      0t0  TCP *:www (LISTEN)
apache2   32635 www-data    4u  IPv4     5458      0t0  TCP *:https (LISTEN)
apache2   32790 www-data    3u  IPv4     5456      0t0  TCP *:www (LISTEN)
apache2   32790 www-data    4u  IPv4     5458      0t0  TCP *:https (LISTEN)
apache2   40211 www-data    3u  IPv4     5456      0t0  TCP *:www (LISTEN)
apache2   40211 www-data    4u  IPv4     5458      0t0  TCP *:https (LISTEN)
apache2   40309 www-data    3u  IPv4     5456      0t0  TCP *:www (LISTEN)
apache2   40309 www-data    4u  IPv4     5458      0t0  TCP *:https (LISTEN)
apache2   40432 www-data    3u  IPv4     5456      0t0  TCP *:www (LISTEN)
apache2   40432 www-data    4u  IPv4     5458      0t0  TCP *:https (LISTEN)
apache2   40476 www-data    3u  IPv4     5456      0t0  TCP *:www (LISTEN)
apache2   40476 www-data    4u  IPv4     5458      0t0  TCP *:https (LISTEN)
apache2   46319     root    3u  IPv4     5456      0t0  TCP *:www (LISTEN)
apache2   46319     root    4u  IPv4     5458      0t0  TCP *:https (LISTEN)
apache2   46438 www-data    3u  IPv4     5456      0t0  TCP *:www (LISTEN)
apache2   46438 www-data    4u  IPv4     5458      0t0  TCP *:https (LISTEN)
apache2   46439 www-data    3u  IPv4     5456      0t0  TCP *:www (LISTEN)
apache2   46439 www-data    4u  IPv4     5458      0t0  TCP *:https (LISTEN)
apache2   46440 www-data    3u  IPv4     5456      0t0  TCP *:www (LISTEN)
apache2   46440 www-data    4u  IPv4     5458      0t0  TCP *:https (LISTEN)
apache2   46441 www-data    3u  IPv4     5456      0t0  TCP *:www (LISTEN)
apache2   46441 www-data    4u  IPv4     5458      0t0  TCP *:https (LISTEN)
apache2   46442 www-data    3u  IPv4     5456      0t0  TCP *:www (LISTEN)
apache2   46442 www-data    4u  IPv4     5458      0t0  TCP *:https (LISTEN)
apache2   46443 www-data    3u  IPv4     5456      0t0  TCP *:www (LISTEN)
apache2   46443 www-data    4u  IPv4     5458      0t0  TCP *:https (LISTEN)
apache2   46509     root    3u  IPv4     5456      0t0  TCP *:www (LISTEN)
apache2   46509     root    4u  IPv4     5458      0t0  TCP *:https (LISTEN)
apache2   46510     root    3u  IPv4     5456      0t0  TCP *:www (LISTEN)
apache2   46510     root    4u  IPv4     5458      0t0  TCP *:https (LISTEN)
apache2   46515     root    3u  IPv4     5456      0t0  TCP *:www (LISTEN)
apache2   46515     root    4u  IPv4     5458      0t0  TCP *:https (LISTEN)
apache2   51287 www-data    3u  IPv4     5456      0t0  TCP *:www (LISTEN)
apache2   51287 www-data    4u  IPv4     5458      0t0  TCP *:https (LISTEN)
apache2   51485 www-data    3u  IPv4     5456      0t0  TCP *:www (LISTEN)
apache2   51485 www-data    4u  IPv4     5458      0t0  TCP *:https (LISTEN)
apache2   51804 www-data    3u  IPv4     5456      0t0  TCP *:www (LISTEN)
apache2   51804 www-data    4u  IPv4     5458      0t0  TCP *:https (LISTEN)
named     54418     bind   20u  IPv4 31298857      0t0  TCP localhost:domain (LISTEN)
named     54418     bind   21u  IPv4 31298859      0t0  TCP iqtest.soccerfame.com:domain (LISTEN)
named     54418     bind   22u  IPv4 31298861      0t0  TCP secure.broomlake.com:domain (LISTEN)
named     54418     bind   23u  IPv4 31298865      0t0  TCP localhost:953 (LISTEN)
named     54418     bind  512u  IPv4 31298856      0t0  UDP localhost:domain
named     54418     bind  513u  IPv4 31298858      0t0  UDP iqtest.soccerfame.com:domain
named     54418     bind  514u  IPv4 31298860      0t0  UDP secure.broomlake.com:domain
named     54418     bind  515u  IPv4 31298864      0t0  UDP *:domain
proftpd   62010  proftpd    1u  IPv4 31306260      0t0  TCP *:ftp (LISTEN)
mysqld    62420    mysql   11u  IPv4 31306903      0t0  TCP *:mysql (LISTEN)
apache2   62582 www-data    3u  IPv4     5456      0t0  TCP *:www (LISTEN)
apache2   62582 www-data    4u  IPv4     5458      0t0  TCP *:https (LISTEN)
apache2   62845 www-data    3u  IPv4     5456      0t0  TCP *:www (LISTEN)
apache2   62845 www-data    4u  IPv4     5458      0t0  TCP *:https (LISTEN)
apache2   64748 www-data    3u  IPv4     5456      0t0  TCP *:www (LISTEN)
apache2   64748 www-data    4u  IPv4     5458      0t0  TCP *:https (LISTEN)

Above lsof command lists all active listening processes port number on UDP and TCP/IP 4 proto with the assigned process PID number (in second column). This is very useful if you find out to have listening service on port number and you cannot figure out what process name exactly is listening.

A classic example, where this is very helpful is if you have a listening process on SMTP port 25 and you cannot identify what kind of mail server is taking up the port? This has happened me many times on Debian Linux based hosts, which by default had priorly installed sendmail and I later removed sendmail to install Postfix or Exim SMTP.
To find out what is assigning port 25, you had to grep the protocol name from all binded host processes, like so:


server:~# lsof +M -i4 | grep -i smtp

exim4     17550     root    3u  IPv4 31577966      0t0  TCP localhost:smtp (LISTEN)

Whether you want to get information on Process ID, binding other random port lets say port 10000, following same logic you can grep it:

server:~# lsof +M -i4 |grep -i 10000
miniserv.  2161     root    7u  IPv4     5368      0t0  UDP *:10000

To get rid of a process for which you're unsure what kind of (/etc/init.d/service-name) init script is starting it, you can then use kill cmd to stop it;

server:~# kill -9 2161

Second approach to find out what kind of process is listening on a random port or socket, lets say port num 58515 is by using fuser.


server:~# netstat -ltn4
Active Internet connections (only servers)
Proto Recv-Q Send-Q Local Address           Foreign Address         State     
tcp        0      0 0.0.0.0:3306            0.0.0.0:*               LISTEN    
tcp        0      0 0.0.0.0:111             0.0.0.0:*               LISTEN    
tcp        0      0 0.0.0.0:80              0.0.0.0:*               LISTEN    
tcp        0      0 0.0.0.0:10000           0.0.0.0:*               LISTEN    
tcp        0      0 0.0.0.0:58515           0.0.0.0:*               LISTEN    
tcp        0      0 0.0.0.0:21              0.0.0.0:*               LISTEN    
tcp        0      0 77.92.85.71:53          0.0.0.0:*               LISTEN    
tcp        0      0 109.123.106.44:53       0.0.0.0:*               LISTEN    
tcp        0      0 127.0.0.1:53            0.0.0.0:*               LISTEN    
tcp        0      0 0.0.0.0:22              0.0.0.0:*               LISTEN    
tcp        0      0 127.0.0.1:953           0.0.0.0:*               LISTEN    
tcp        0      0 0.0.0.0:443             0.0.0.0:*               LISTEN    
tcp        0      0 0.0.0.0:20000           0.0.0.0:*               LISTEN    

Below netstat cmmand, lists all active listening processes on respective IP address and port for protocol TCPIP v.4.

Hence on to get more information on what process is listening on port 58515?

server:~#  fuser -v 58515/tcp

                     USER        PID ACCESS COMMAND
58515/tcp:           statd      1329 F…. rpc.statd

Once you know what is listening, whether you want to kill it this is also possible directly through fuser;


server:~# fuser -vk 58515/tcp

As a close-up, I will say fuser and lsof are two must have software tools on any productive server. It is among the critical applications admin has to install during initial server set-up. fuser and lsof helps me often in my sysadmin work, it was more than once I've used them to identify script-kiddies exploit scanners running as a standard process names, as well secretly listening on weird port number  cracker back-doors.

Hopefully this little article, helps someone learn something new. Plenty is written and will be written and if one takes the time to research he can learn much, much more. I'm sure my tiny article is nothing new under the sun for old-school admins, I still hope it will be of use to novice. I'm looking forward to hear if I'm missing some neat use or some interesting case, when lsof or fuser "saved your ass" 🙂
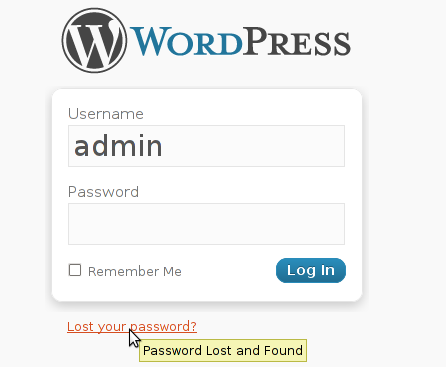
 

swap_pager_getswapspace: failed, MySQL troubles on FreeBSD 7.2 cause and solution

Tuesday, May 3rd, 2011

Every now and then my FreeBSD router dmesg ( /var/log/dmesg.today ) logs, gets filled with error messages like:

pid 86369 (httpd), uid 80, was killed: out of swap space
swap_pager_getswapspace(14): failed
swap_pager_getswapspace(16): failed
swap_pager_getswapspace(11): failed
swap_pager_getswapspace(12): failed
swap_pager_getswapspace(16): failed
swap_pager_getswapspace(14): failed
swap_pager_getswapspace(16): failed
swap_pager_getswapspace(8): failed

Using swapinfo during the swap_pager_getswapspace(16): failed messages were logged in, I figured out that definitely the swap memory over-use is the bottleneck for the troubles, to find this I used the command:

freebsd# swapinfo
Device 1K-blocks Used Avail Capacity Type
/dev/ad0s1b 49712 45920 3792 92% Interleaved

After some investigation, I’ve figured out that the MySQL server is causing the kernel exceeded swap troubles.

My current MySQL server version is installed from the ports tree, whether I’m using the bsd port /usr/ports/databases/mysql51-server/ and it appears to work just fine.

However I have noticed that the mysql-server is missing a my.cnf file!, which means the mysql server is running under a mode with some kind of default configurations.

Strangely in the system process list it appeared it is using a default my.cnf file located in /var/db/mysql/my.cnf

Below you see the paste from the ps command:

ps axuww freebsd# ps axuww | grep -i my.cnf | grep -v grep
mysql 7557 0.0 0.1 3464 1268 p1 I 12:03PM 0:00.01 /bin/sh /usr/local/bin/mysqld_safe --defaults-extra-file=/var/db/mysql/my.cnf --user=mysql --datadir=/var/db/mysql --pid-file=/var/db/mysql/pcfreak.pidmysql 7589 0.0 5.1 93284 52852 p1 I 12:03PM 0:59.01 /usr/local/libexec/mysqld --defaults-extra-file=/var/db/mysql/my.cnf --basedir=/usr/local --datadir=/var/db/mysql --user=mysql --pid-file=/var/db/mysql/pcfreak.pid --port=3306 --socket=/tmp/mysql.sock

Nevertheless it appeared the sql server is running the file /var/db/mysql/my.cnf conf was not existing! This was really weird for me as I’m used to have the default my.cnf from my previous experience with Linux servers!

Thus the next logical thing I did was to create my.cnf conf file in order to be able to have a proper limiting configuration for the sql server.

The FreeBSD my.cnf skele files are found in /usr/local/share/mysql/, here are the 4 files one can use as a starting basis for further configuration of the mysql-server.

freebsd# ls -al /usr/local/share/mysql/my-*.cnf
-r--r--r-- 1 root wheel 4948 Aug 12 2009 /usr/local/share/mysql/my-huge.cnf
-r--r--r-- 1 root wheel 20949 Aug 12 2009 /usr/local/share/mysql/my-innodb-heavy-4G.cnf
-r--r--r-- 1 root wheel 4924 Aug 12 2009 /usr/local/share/mysql/my-large.cnf
-r--r--r-- 1 root wheel 4931 Aug 12 2009 /usr/local/share/mysql/my-medium.cnf
-r--r--r-- 1 root wheel 2502 Aug 12 2009 /usr/local/share/mysql/my-small.cnf

I have chosen to use the my-medium.cnf as a skele to tune up, as my server is not high iron one e.g. the host I run the mysql is a (simple dual core 1.2Ghz system).

Further on I copied the /usr/local/share/mysql/my-medium.cnf to /var/db/mysql/my.cnf e.g.:

freebsd# cp -rpf /usr/local/share/mysql/my-medium.cnf /var/db/mysql/my.cnf

As a next step to properly tune up the default values of the newly copied my.cnf to my specific server I used the Tuning-Primer MySQL tuning script

Using tuning-primer.sh is really easy as all I did is download, launch it and follow the script suggestions to correct some of the values already in my.cnf

I have finally ended up with the following my.cnf after using tuning-primer.sh to optimize mysql server to work with my bsd host

Now I really hope the shitty swap_pager_getswapspace: failed errors would not haunt me once again by crashing my server and causing mem overheads.

Still I wonder why the port developer Alex Dupre – ale@FreeBSD.org choose not to provide the default mysql51-server conf with some kind of my.cnf file? I hope he had a good reason.

How to make a mysql root user to login interactive with mysql cli passwordless

Wednesday, June 29th, 2011

MySQL Logo Passwordless root login .my.cnf

I’m using access to the mysql servers via localhost with mysql cli on daily basis.
With time I’ve figured out that it’s pretty unahandy to always login with my root mysql password, I mean each time to enter it, e.g.:

root@mysql-server:~# mysql -u root
Enter password:
...

Thus to make my life a way easier I decided to store my mysql root password in order to allow my root admin user to be able to login to my mysql server without asking for password. This saves time and nerves, as I’m not supposed to look up for the password file I store my server mysql root pass.

To allow my mysql cli interface, to login passwordless to the SQL server I had to create the file /root/.my.cnf readable only for my root user and store my MySQL username and password there.

Here is a sample /root/.my.cnf file:

root@mysql-server:~# cat /root/.my.cnf
[client]
user="root"
pass="mysecretMySQLPasswordgoeshere"

Now next time I use the mysql console interface to access my mysql server I don’t have to supply the password, here is how easier is the mysql login afterwards:

root@mysql-server:~# mysql -u root
Welcome to the MySQL monitor. Commands end with ; or g.
Your MySQL connection id is 3520
Server version: 5.0.77 Source distribution

Type ‘help;’ or ‘h’ for help. Type ‘c’ to clear the buffer.

mysql>

The only downside of using .my.cnf to store permanently the mysql server root and password is from security standpoint.
If for instance somebody roots my servers, where I have stored my root user/pwds in .my.cnf , he will be able immediately to get access to the MySQL server.

Another possible security flaw with using the mysql passwordless login “trick” is if somebody forgets to set proper file permissions to, .my.cnf

Once again the file should possess the permissons of:

root@mysql-server:~# ls -al /root/.my.cnf
-rw------- 1 root root 90 Apr 2 00:05 /root/.my.cnf

Any other permissons might allow non-privileged users to read the file and gain unathorized admin access to the SQL server.
 

How to tune MySQL Server to increase MySQL performance using mysqltuner.pl and Tuning-primer.sh

Tuesday, August 9th, 2011

MySQL Easy performance tuning with mysqltuner.pl and Tuning-primer.sh scripts

Improving MySQL performance is crucial for improving a website responce times, reduce server load and improve overall work efficiency of a mysql database server.

I’ve seen however many Linux System administrators who does belittle or completely miss the significance of tuning a newly installed MySQL server installation.
The reason behind that is probably caused by fact that many people think MySQL config variables, would not significantly improve performance and does not pay back for optimization efforts. Moreover there are a bunch of system admins who has to take care for numerous services so they don’t have time to get good knowledge to optimize MySQL servers.
Thus many admins and webmasters nowdays, think optimizations depend mostly on the side of the website programmers.
It’s also sometimes falsely believed that optimizing a MySQL server could reduce the overall server stability.

With the boom of Internet website building and internet marketing, many webmasters emerged and almost anybody with almost no knowledge on GNU/Linux or minimal or no knowledge on PHP can start his Online store, open a blog or create a website powered by some CMS like joomla.
Thus nowdays many servers even doesn’t have a hired system administrators but are managed by people whose knowledge on *Nix is almost next to zero, this is another reason why dozens of MySQL installations online are a default ones and are not taking a good advantage of the server hardware.

The incrase of website visitors leads people servers expectations for hardware also to grow, thus many companies simply buy a new hardware instead of taking the few time to investigate on how current server hardware can be utilized better.
In that manner of thought I though it will be a good idea to write this small article on Tuning mysql servers with two scripts Tuning-primer.sh and mysqltuner.pl.
The scripts are ultra easy to use and does not require only a minimal knowledge on MySQL, Linux or (*BSD *nix if sql is running on BSD).
Tuning-primer.sh and mysqltuner.pl are therefore suitable for a quick MySQL server optimizations to even people who are no computer experts.

I use this two scripts for MySQL server optimizations on almost every new configured GNU/Linux with a MySQL backend.
Use of the script comes to simply download with wget, lynx, curl or some other web client and execute it on the server host which is already running the MySQL server.

Here is an example of how simple it is to run the scripts to Optimize MySQL:

debian:~# perl mysqltuner.pl
>> MySQLTuner 1.2.0 - Major Hayden >major@mhtx.net<
>> Bug reports, feature requests, and downloads at http://mysqltuner.com/
>> Run with '--help' for additional options and output filtering

——– General Statistics ————————————————–
[–] Skipped version check for MySQLTuner script
[OK] Currently running supported MySQL version 5.1.49-3
[OK] Operating on 64-bit architecture

——– Storage Engine Statistics ——————————————-
[–] Status: +Archive -BDB -Federated +InnoDB -ISAM -NDBCluster
[–] Data in MyISAM tables: 6G (Tables: 952)
[!!] InnoDB is enabled but isn’t being used
[!!] Total fragmented tables: 12

——– Security Recommendations ——————————————-
[OK] All database users have passwords assigned

——– Performance Metrics ————————————————-
[–] Up for: 1d 2h 3m 35s (68M q [732.193 qps], 610K conn, TX: 49B, RX: 11B)
[–] Reads / Writes: 76% / 24%
[–] Total buffers: 512.0M global + 2.8M per thread (2000 max threads)
[OK] Maximum possible memory usage: 6.0G (25% of installed RAM)
[OK] Slow queries: 0% (3K/68M)
[OK] Highest usage of available connections: 7% (159/2000)
[OK] Key buffer size / total MyISAM indexes: 230.0M/1.7G
[OK] Key buffer hit rate: 97.8% (11B cached / 257M reads)
[OK] Query cache efficiency: 76.6% (46M cached / 61M selects)
[!!] Query cache prunes per day: 1822075
[OK] Sorts requiring temporary tables: 0% (1K temp sorts / 2M sorts)
[!!] Joins performed without indexes: 63635
[OK] Temporary tables created on disk: 1% (26K on disk / 2M total)
[OK] Thread cache hit rate: 99% (159 created / 610K connections)
[!!] Table cache hit rate: 4% (1K open / 43K opened)
[OK] Open file limit used: 17% (2K/16K)
[OK] Table locks acquired immediately: 99% (36M immediate / 36M locks)

——– Recommendations —————————————————–
General recommendations:
Add skip-innodb to MySQL configuration to disable InnoDB
Run OPTIMIZE TABLE to defragment tables for better performance
Enable the slow query log to troubleshoot bad queries
Increasing the query_cache size over 128M may reduce performance
Adjust your join queries to always utilize indexes
Increase table_cache gradually to avoid file descriptor limits
Variables to adjust:
query_cache_size (> 256M) [see warning above] join_buffer_size (> 256.0K, or always use indexes with joins) table_cache (> 7200)

You see there are plenty of things, the script reports, for the unexperienced most of the information can be happily skipped without need to know the cryptic output, the section of importance here is Recommendations for some clarity, I’ve made this section to show up bold.

The most imporant things from the Recommendations script output is actually the lines who give suggestions for incrase of certain variables for MySQL.In this example case this are the last three variables:
query_cache_size,
join_buffer_size and
table_cache

All of these variables are tuned from /etc/mysql/my.cnf (on Debian) and derivatives distros and from /etc/my.cnf on RHEL, CentOS, Fedora and the other RPM based Linux distributions.

On some custom server installs my.cnf is also located in /usr/local/mysql/etc/ or some other a bit more unstandard location 😉

Anyways now having the Recommendation from the script, it’s necessery to edit my.cnf and try to double the values for the suggested variables.

First, I check if all the suggested variables are existent in my config with grep , if they’re not then I’ll simply add the variable with doubled size of the suggested values.
P.S: One note here is sometimes some values which are configured, are the default value for the MySQL server and does not have a record in my.cnf

debian:~# grep -E 'query_cache_size|join_buffer_size|table_cache' /etc/mysql/my.cnf table_cache = 7200
query_cache_size = 256M
join_buffer_size = 262144

All of my variables are in the config so, now edit my.cnf and set values to:
table_cache = 14400
query_cache_size = 512M
join_buffer_size = 524288

I always, however preserve the old variable’s value, because sometimes raising the value might create problem and the MySql server might be unable to restart properly.
Thus before going with adding the new values make sure the old ones are commented with # , e.g.:
#table_cache = 7200
#query_cache_size = 256M
#join_buffer_size = 262144

I would recommend vim as editor of choice while editing my.cnf as vim completely rox 😉 If you’re not acquainted to vim use nano or mcedit or your editor of choice 😉 :

debian:~# vim /etc/mysql/my.cnf
...

Assuming that the changes are made, it’s time to restart MySQL to make sure the new values are read by the SQL server.

debian:~# /etc/init.d/mysql restart
* Stopping MySQL database server mysqld [ OK ]
* Starting MySQL database server mysqld [ OK ]
Checking for tables which need an upgrade, are corrupt or were not closed cleanly.

If mysql server fails, however to restart, make sure immediately you reverse back the changed variables to the commented values and restart once again via mysql init script to make server load.

Afterwards start adding the values one by one until find out which one is causing the mysqld to fail.

Now the second script (Tuning-primer.sh) is also really nice for MySQL performance optimizations are necessery. However it’s less portable (as it’s written in bash scripting language).
Consider running this script among different GNU/Linux distributious (especially the newer ones) might produce errors.
Tuning-primer.sh requires some minor code changes to be able to run on FreeBSD, NetBSD and OpenBSD *nices.

The way Tuning-primer.sh works is precisely like mysqltuner.pl , one runs it it gives some info about current running MySQL server and based on certain factors gives suggestions on how increasing or decresing certain my.cnf variables could reduce sql query bottlenecks, solve table locking issues as well as generally improve INSERT, UPDATE query times.

Here is an example output from tuning-primer.sh run on another server:

server:~# wget https://www.pc-freak.net/files/Tuning-primer.sh
...
server:~# sh Tuning-primer.sh
-- MYSQL PERFORMANCE TUNING PRIMER --
- By: Matthew Montgomery -

MySQL Version 5.0.51a-24+lenny5 x86_64

Uptime = 8 days 10 hrs 19 min 8 sec
Avg. qps = 179
Total Questions = 130851322
Threads Connected = 1

Server has been running for over 48hrs.
It should be safe to follow these recommendations

To find out more information on how each of these
runtime variables effects performance visit:
http://dev.mysql.com/doc/refman/5.0/en/server-system-variables.html

SLOW QUERIES
Current long_query_time = 1 sec.
You have 16498 out of 130851322 that take longer than 1 sec. to complete
The slow query log is NOT enabled.
Your long_query_time seems to be fine

MAX CONNECTIONS
Current max_connections = 2000
Current threads_connected = 1
Historic max_used_connections = 85
The number of used connections is 4% of the configured maximum.
Your max_connections variable seems to be fine.

WORKER THREADS
Current thread_cache_size = 128
Current threads_cached = 84
Current threads_per_sec = 0
Historic threads_per_sec = 0
Your thread_cache_size is fine

MEMORY USAGE
Tuning-primer.sh: line 994: let: expression expected
Max Memory Ever Allocated : 741 M
Configured Max Memory Limit : 5049 M
Total System Memory : 23640 M

KEY BUFFER
Current MyISAM index space = 1646 M
Current key_buffer_size = 476 M
Key cache miss rate is 1 / 56
Key buffer fill ratio = 90.00 %
You could increase key_buffer_size
It is safe to raise this up to 1/4 of total system memory;
assuming this is a dedicated database server.

QUERY CACHE
Query cache is enabled
Current query_cache_size = 64 M
Current query_cache_used = 38 M
Current Query cache fill ratio = 59.90 %

SORT OPERATIONS
Current sort_buffer_size = 2 M
Current record/read_rnd_buffer_size = 256.00 K
Sort buffer seems to be fine

JOINS
Current join_buffer_size = 128.00 K
You have had 111560 queries where a join could not use an index properly
You have had 91 joins without keys that check for key usage after each row
You should enable “log-queries-not-using-indexes”
Then look for non indexed joins in the slow query log.
If you are unable to optimize your queries you may want to increase your
join_buffer_size to accommodate larger joins in one pass.

TABLE CACHE
Current table_cache value = 3600 tables
You have a total of 798 tables
You have 1904 open tables.
The table_cache value seems to be fine

TEMP TABLES
Current tmp_table_size = 128 M
1% of tmp tables created were disk based
Created disk tmp tables ratio seems fine

TABLE SCANS
Current read_buffer_size = 128.00 K
Current table scan ratio = 797 : 1
read_buffer_size seems to be fine

TABLE LOCKING
Current Lock Wait ratio = 1 : 1782
You may benefit from selective use of InnoDB.

As seen from script output, there are certain variables which might be increased a bit for better SQL performance, one such variable as suggested is key_buffer_size(You could increase key_buffer_size)

Now the steps to make the tunings to my.cnf are precisely the same as with mysqltuner.pl, e.g.:
1. Preserve old config variables which will be changed by commenting them
2. Double value of current variables in my.cnf suggested by script
3. Restart Mysql server via /etc/init.d/mysql restart cmd.
4. If mysql runs fine monitor mysql performance with mtop or mytop for at least 15 mins / half an hour.

if all is fine run once again the tuning scripts to see if there are no further improvement suggestions, if there are more follow the 4 steps described procedure once again.

It’s also a good idea that these scripts are periodically re-run on the server like once per few months as changes in SQL queries amounts and types will require changes in MySQL operational variables.
The authors of these nice scripts has done great job and have saved us a tons of nerves time, downtimes and money spend on meaningless hardware. So big thanks for the awesome scripts guys 😉
Finally after hopefully succesful deployment of changes, enjoy the incresed SQL server performance 😉

Fixing Apache error – client denied by server configuration on FreeBSD

Thursday, January 17th, 2013

If you have just installed a FreeBSD host with Apache and configured a Vhost document root to interpret  PHP or Perl scripts and you end up with error in browser like:


HTTP 403 / client denied by server configuration error

or

Forbidden
You don't have permission to access /index.html on this server.

It is most likely due to improperly configured Apache directory or directories permissions. In Apache error log /var/log/httpd-error.log, there are plenty of error messages logged like:

[Tue Jan 15 13:09:39 2013] [error] [client 92.96.95.177] client denied by server configuration: /usr/home/hipo/public_html/management
[Tue Jan 15 13:09:41 2013] [error] [client 92.96.95.177] client denied by server configuration: /usr/home/hipo/public_html/management
[Tue Jan 15 13:09:41 2013] [error] [client 92.96.95.177] client denied by server configuration: /usr/home/hipo/public_html
[Tue Jan 15 13:09:41 2013] [error] [client 92.96.95.177] client denied by server configuration: /usr/home/hipo/public_html
[Tue Jan 15 13:09:41 2013] [error] [client 92.96.95.177] client denied by server configuration: /usr/home/hipo/public_html
[Tue Jan 15 13:09:41 2013] [error] [client 92.96.95.177] client denied by server configuration: /usr/home/hipo/public_html

The issue is caused by Apache <Directory> configuration which is restrictive and set to first deny and then apply allow rule, i.e.:


<Directory /usr/home/hipo/public_html>
  Options ExecCGI -Indexes FollowSymLinks
   Allowoverride All
    Order Deny,allow
    Deny from all
    Allow from localhost
    Allow from 123.123.123.123
</Directory>

To solve the problem change default Deny set policy (Deny from all) and first policy to be applied which is Deny to allow;

 <Directory "/usr/home/hipo/public_html">
        Options ExecCGI -Indexes FollowSymLinks
        Allowoverride All
        Order Allow,deny
        Allow from all
        #DirectoryIndex index.cgi
  </Directory>

It is possible to not specify any Order Allow,deny (if there is no previous Apache <Directory> directive to override, so in many  cases you can use;

 <Directory "/usr/home/hipo/public_html">
        Options ExecCGI -Indexes FollowSymLinks
        Allowoverride All
        Allow from all
        #DirectoryIndex index.cgi
  </Directory>

Finally restart Apache and all should be good;

freebsd# /usr/local/etc/rc.d/apache22 restart
....

Enable Apache libphp extension to interpret PHP scripts on FreeBSD 9.1

Saturday, January 12th, 2013

Enable php scripts to be interpreted / executed by PHP on freebsd
First you have to have installed and properly set up Apache from port, in my case this is Apache:


freebsd# pkg_info | grep -i apache
ap22-mod_fastcgi-2.4.6_3 A fast-cgi module for Apache
apache22-2.2.23_4   Version 2.2.x of Apache web server with prefork MPM.
apr-1.4.6.1.4.1_3   Apache Portability Library

I've installed it from source port /usr/ports/www/apache22, with:

freebsd# cd /usr/ports/www/apache22;
freebsd# make install clean
.....
Then to be able to start Apache from init script and make it run automatically on FBSD system reboot:


echo 'apache22_enable="YES"' >> /etc/rc.conf

I've also installed php5-extensions port;

freebsd# cd /usr/ports/lang/php5-extensions/
freebsd# make install clean
....
freebsd# cp -rpf /usr/local/etc/php.ini-production /usr/local/etc/php.ini

I had to select the exact Apache PHP library extensions I need, after selecting and installing, here is the list of PHP extensions installed on system:

freebsd# pkg_info | grep -i php5
php5-5.4.10         PHP Scripting Language
php5-bz2-5.4.10     The bz2 shared extension for php
php5-ctype-5.4.10   The ctype shared extension for php
php5-dom-5.4.10     The dom shared extension for php
php5-filter-5.4.10  The filter shared extension for php
php5-gd-5.4.10      The gd shared extension for php
php5-gettext-5.4.10 The gettext shared extension for php
php5-hash-5.4.10    The hash shared extension for php
php5-iconv-5.4.10   The iconv shared extension for php
php5-json-5.4.10    The json shared extension for php
php5-mbstring-5.4.10 The mbstring shared extension for php
php5-mcrypt-5.4.10  The mcrypt shared extension for php
php5-mysql-5.4.10   The mysql shared extension for php
php5-pdo-5.4.10     The pdo shared extension for php
php5-pdo_sqlite-5.4.10 The pdo_sqlite shared extension for php
php5-phar-5.4.10    The phar shared extension for php
php5-posix-5.4.10   The posix shared extension for php
php5-session-5.4.10 The session shared extension for php
php5-simplexml-5.4.10 The simplexml shared extension for php
php5-sqlite3-5.4.10 The sqlite3 shared extension for php
php5-tokenizer-5.4.10 The tokenizer shared extension for php
php5-xml-5.4.10     The xml shared extension for php
php5-xmlreader-5.4.10 The xmlreader shared extension for php
php5-xmlwriter-5.4.10 The xmlwriter shared extension for php
php5-zip-5.4.10     The zip shared extension for php
php5-zlib-5.4.10    The zlib shared extension for php

By default DirectoryIndex is not set to process index.php and .php, file extensions will not be interpreted by libphp, instead requests to .php, just opens them as plain text files.

In Apache config httpd.conf, libphp5 module should be displaying as loaded, like so:

freebsd# grep -i php5 /usr/local/etc/apache22/httpd.conf
LoadModule php5_module        libexec/apache22/libphp5.so

Next step find in /usr/local/etc/apache22/httpd.conf lines:

<IfModule dir_module>

DirectoryIndex index.html

Change

DirectoryIndex index.html

to

DirectoryIndex index.php index.html

(If you would like index.php to be processed as primary whether an Apache directory contains both .php and .html files.

After DirectoryIndex index.php, paste following;

<IfModule mod_dir.c>
    <IfModule mod_php3.c>
        <IfModule mod_php5.c>
            DirectoryIndex index.php index.php3 index.html
        </IfModule>
        <IfModule !mod_php4.c>
            DirectoryIndex index.php3 index.html
        </IfModule>
    </IfModule>
    <IfModule !mod_php3.c>
        <IfModule mod_php5.c>
            DirectoryIndex index.php index.html index.htm
        </IfModule>
        <IfModule !mod_php4.c>
            DirectoryIndex index.html
        </IfModule>
    </IfModule>
</IfModule>

Open /usr/local/etc/apache22/httpd.conf. I use vim so:

vim /usr/local/etc/apache22/httpd.conf

and press CTRL+g to go to last line of file. Last line is:

Include etc/apache22/Includes/*.conf

I press I to insert text and paste before the line:

AddType application/x-httpd-php .php
AddType application/x-httpd-php-source .phpS

AddType application/x-httpd-php .php .htm .html

And save with the usual vim esc+ :x! (exit, save and overwrite changes command).

Then restart Apache to load new settings, after testing Apache config is okay;

freebsd# apache2ctl -t
Syntax OK
freebsd# /usr/local/sbin/apachectl -k restart

To test php conduct the usual test if php is interpretting code with phpinfo(); by creating  file php_info.php and pasting inside:

<?php
phpinfo();
?>

One important note, to make here is if you try to use phpinfo(); test code like:

<?
phpinfo();
?>

You will get in your browser empty pages content – which usually appear only, if PHP execution fails. Even if you try to enable PHP errors to be displayed in browser by setting

display_errors = On in /usr/local/etc/php.ini, or configuring a separate php error_log file with setting variable error_log, i.e.:

error_log = /var/log/php_error.log

No error or warning is to be both displayed in browser or recorded in log. After consulting in irc.freenode.net #php, I was pointed out by nezZario that this unusual behavior is normal for PHP 5.4, as well as explained this behavior is controlled by var called:

Short Open Tags

To enable Short Open Tags to interpret PHP code inside <? set in /usr/local/etc/php.ini

short_open_tag = On

How to set repository to install binary packages on amd64 FreeBSD 9.1

Friday, January 11th, 2013

Though, it is always good idea to build from source for better performance of Apache + MySQL + PHP, its not worthy the time on installing minor things like; trafshow, tcpdump or deco (MC – midnight commander like native freebsd BSD program).

If you're on a 64 bit version of FreeBSD ( amd64) 9.1 and you try to install a binary package with;

freebsd# pkg_add -vr vim

Ending up with an error;

Error: Unable to get ftp://ftp.freebsd.org/pub/FreeBSD/ports/amd64/packages-9.1-release/Latest/vim.tbz: File unavailable (e.g., file not found, no access)
pkg_add: unable to fetch 'ftp://ftp.freebsd.org/pub/FreeBSD/ports/amd64/packages-9.1-release/Latest/vim.tbz' by URL
pkg_add: 1 package addition(s) failed

The error is caused by lack of special packages-9.1-release directory existing on FreeBSD.org servers. I've realized this after doing a quick manual check opening ftp://ftp.freebsd.org/pub/FreeBSD/ports/amd64. The existing URL containing working fbsd 9.1 binaries is:

ftp://ftp.freebsd.org/pub/FreeBSD/ports/amd64/packages-9-current/Latest/
h

You will have to set a repository for FreeBSD 9.1 amd64 packages manually with cmd:
freebsd# echo $SHELL
/bin/csh
freebsd# setenv PACKAGESITE ftp://ftp.freebsd.org/pub/FreeBSD/ports/amd64/packages-9-current/Latest/

If you're on bash shell use export instead:

freebsd# export PACKAGESITE="ftp://ftp.freebsd.org/pub/FreeBSD/ports/amd64/packages-9-current/Latest/"

To make ftp://ftp.freebsd.org/pub/FreeBSD/ports/amd64/packages-9-current/Latest/ as a permanent binary repository:

echo 'setenv PACKAGESITE ftp://ftp.freebsd.org/pub/FreeBSD/ports/amd64/packages-9-current/Latest/' >> /root/.cshrc

or

echo 'export PACKAGESITE="ftp://ftp.freebsd.org/pub/FreeBSD/ports/amd64/packages-9-current/Latest/"' >> /root/.bashrc

Now, pkg_add as much as you like 😉

How to get full host and IP address of last month logged in users on GNU / Linux

Friday, December 21st, 2012

This post might be a bit trivial for the Linux gurus, but for novices Linux users hopefully helpful. I bet, all Linux users know and use the so common used last command.

last cmd provides information on last logged in users over the last 1 month time as well as shows if at present time of execution there are logged in users. It has plenty of options and is quite useful. The problem with it I have often, since I don't get into the habit to use it with arguments different from the so classical and often used:

last | less

back in time when learning Linux, is that whether run it like this I can't see full hostname of users who logged in or is currently logged in from remote hosts consisting of longer host names strings than 16 characters.

To show you what I mean, here is a chunk of  last | less output taken from my home router www.pc-freak.net.

# last|less
root     pts/1        ip156-108-174-82 Fri Dec 21 13:20   still logged in  
root     pts/0        ip156-108-174-82 Fri Dec 21 13:18   still logged in  
hipo     pts/0        ip156-108-174-82 Thu Dec 20 23:14 - 23:50  (00:36)   
root     pts/0        g45066.upc-g.che Thu Dec 20 22:31 - 22:42  (00:11)   
root     pts/0        g45066.upc-g.che Thu Dec 20 21:56 - 21:56  (00:00)   
play     pts/2        vexploit.net.s1. Thu Dec 20 17:30 - 17:31  (00:00)   
play     pts/2        vexploit.net.s1. Thu Dec 20 17:29 - 17:30  (00:00)   
play     pts/1        vexploit.net.s1. Thu Dec 20 17:27 - 17:29  (00:01)   
play     pts/1        vexploit.net.s1. Thu Dec 20 17:23 - 17:27  (00:03)   
play     pts/1        vexploit.net.s1. Thu Dec 20 17:21 - 17:23  (00:02)   

root     pts/0        ip156-108-174-82 Thu Dec 20 13:42 - 19:39  (05:56)   
reboot   system boot  2.6.32-5-amd64   Thu Dec 20 11:29 - 13:57 (1+02:27)  
root     pts/0        e59234.upc-e.che Wed Dec 19 20:53 - 23:24  (02:31)   

The hostname last cmd output as you can see is sliced, so one cannot see full hostname. This is quite inconvenient, especially, if you have on your system some users who logged in with suspicious hostnames like the user play which is a user, I've opened for people to be able to play my system installed Cool  Linux ASCII (text) Games. In normal means, I would skip worrying about the vexploit.net.s1…..  user, however as I've noticed one of the ascii games similar to nethack called hunt was kept hanging on the system putting a load of about 50% on the CPU   and was run with the play user and according to logs, the last logged in username with play was containing a hostname with "vexploit.net" as a hostname.

This looked to me very much like a script kiddie, attempt to root my system, so I killed hunt, huntd and HUNT hanging processes and decided investigate on the case.

I wanted to do whois on the host, but since the host was showing incomplete in last | less, I needed a way to get the full host. The first idea I got is to get the info from binary file /var/log/wtmp – storing the hostname records for all logged in users:

# strings /var/log/wtmp | grep -i vexploit | uniq
vexploit.net.s1.fti.net

To get in a bit raw format, all the hostnames and IPs (whether IP did not have a PTR record assigned):

strings /var/log/wtmp|grep -i 'ts/' -A 1|less

Another way to get the full host info is to check in /var/log/auth.log – this is the Debian Linux file storing ssh user login info; in Fedora and CentOS the file is /var/log/secure.

# grep -i vexploit auth.log
Dec 20 17:30:22 pcfreak sshd[13073]: pam_unix(sshd:auth): authentication failure; logname= uid=0 euid=0 tty=ssh ruser= rhost=vexploit.net.s1.fti.net  user=play

Finally, I decided to also check last man page and see if last is capable of showing full hostname or IPS of previously logged in hosts. It appears, last is having already an argument for that so my upper suggested methods, turned to be useless overcomplexity. To show full hostname of all hosts logged in on Linux over the last month:
 

# last -a |less

root     pts/2        Fri Dec 21 14:04   still logged in    ip156-108-174-82.adsl2.static.versatel.nl
root     pts/1        Fri Dec 21 13:20   still logged in    ip156-108-174-82.adsl2.static.versatel.nl
root     pts/0        Fri Dec 21 13:18   still logged in    ip156-108-174-82.adsl2.static.versatel.nl
hipo     pts/0        Thu Dec 20 23:14 - 23:50  (00:36)     ip156-108-174-82.adsl2.static.versatel.nl
root     pts/0        Thu Dec 20 22:31 - 22:42  (00:11)     g45066.upc-g.chello.nl
root     pts/0        Thu Dec 20 21:56 - 21:56  (00:00)     g45066.upc-g.chello.nl
play     pts/2        Thu Dec 20 17:30 - 17:31  (00:00)     vexploit.net.s1.fti.net
play     pts/2        Thu Dec 20 17:29 - 17:30  (00:00)     vexploit.net.s1.fti.net
play     pts/1        Thu Dec 20 17:27 - 17:29  (00:01)     vexploit.net.s1.fti.net
play     pts/1        Thu Dec 20 17:23 - 17:27  (00:03)     vexploit.net.s1.fti.net
play     pts/1        Thu Dec 20 17:21 - 17:23  (00:02)     vexploit.net.s1.fti.net
root     pts/0        Thu Dec 20 13:42 - 19:39  (05:56)     ip156-108-174-82.adsl2.static.versatel.nl
reboot   system boot  Thu Dec 20 11:29 - 14:58 (1+03:28)    2.6.32-5-amd64
root     pts/0        Wed Dec 19 20:53 - 23:24  (02:31)     e59234.upc-e.chello.nl

Listing all logged in users remote host IPs (only) is done with last's "-i" argument:

# last -i
root     pts/2        82.174.108.156   Fri Dec 21 14:04   still logged in  
root     pts/1        82.174.108.156   Fri Dec 21 13:20   still logged in  
root     pts/0        82.174.108.156   Fri Dec 21 13:18   still logged in  
hipo     pts/0        82.174.108.156   Thu Dec 20 23:14 - 23:50  (00:36)   
root     pts/0        80.57.45.66      Thu Dec 20 22:31 - 22:42  (00:11)   
root     pts/0        80.57.45.66      Thu Dec 20 21:56 - 21:56  (00:00)   
play     pts/2        193.252.149.203  Thu Dec 20 17:30 - 17:31  (00:00)   
play     pts/2        193.252.149.203  Thu Dec 20 17:29 - 17:30  (00:00)   
play     pts/1        193.252.149.203  Thu Dec 20 17:27 - 17:29  (00:01)   
play     pts/1        193.252.149.203  Thu Dec 20 17:23 - 17:27  (00:03)   
play     pts/1        193.252.149.203  Thu Dec 20 17:21 - 17:23  (00:02)   
root     pts/0        82.174.108.156   Thu Dec 20 13:42 - 19:39  (05:56)   
reboot   system boot  0.0.0.0          Thu Dec 20 11:29 - 15:01 (1+03:31)  

One note to make here is on every 1st number of month last command  clear ups the records storing for user logins in /var/log/wtmp and nullifies the file.

Though the other 2 suggested, methods are not necessary, as they are provided in last argument. They're surely a mus do routine, t when checking a system for which doubting it could have been intruded (hacked). Checking both /var/log/wtmp and /var/log/auth.log / and /var/log/auth.log.1 content and comparing if the records on user logins match is a good way to check if your login logs are not forged. It is not a 100% guarantee however, since sometimes attacker scripts wipe out their records from both files. Out of security interest some time, ago I've written a small script  to clean logged in user recordfrom /var/log/wtmp and /var/log/auth.log – log_cleaner.sh – the script has to be run as a super to have write access to /var/log/wtmp and /var/log/auth.log. It is good to mention for those who don't know, that last reads and displays its records from /var/log/wtmp file, thus altering records in this files will alter  last displayed login info.

Thanks God in my case after examing this files as well as super users in /etc/passwd,  there was no  "signs", of any succesful breach.


FreeBSD Desktop: Allow All system users to mount CDROM, DVD, USB Devices and other external devices

Friday, November 16th, 2012

freebsd allow all system users to mount CD DVD USB in GNOME and KDE desktop - freebsd power to serve logo

Users who use FreeBSD for multiple logins Desktop host or in universities multiple login Desktop  shared user PCs will have problems with mounting CD and DVD Roms, Usbs and other external devices. To mount any of those a root or toor superuser  will be required and this makes a really bad impression to the novice users, making them think FreeBSD is user unfriendly, where in reality it was just build to behave so with higher security in mind.
This ruins a whole user GNOME experience and disappoints the end user, especially if the user is just a person who needs to do some browsing and copy few files from and to the host.
This prevents udevd and auto mount in GNOME and  KDE GUI environments to be unable to automatically mount and unmount CD / DVDs and USBS where plugged or unplugged but instead just poping up permission errors whether CD or USB is attached.
Thanksfully, you can change this behavior to make FreeBSD a bit more user friendly and of course 'less secure' by few simple commands 🙂

Here is how:

freebsd# sysctl -w vfs.usermount=1

vfs.usermount: 0 -> 1

echo 'vfs.usermount=1' >> /etc/sysctl.conf

What is required next is to add all devices which will be mountable by all users in /dev/devfs.conf.

To get a list of devices do:
freebsd# camcontrol devlist

at scbus0 target 0 lun 0 (pass0,da0) at scbus1 target 3 lun 0 (pass1,sa0) at scbus1 target 6 lun 0 (pass2,cd0) #

Most USB devices are recognized and assigned as /dev/da0, and almost all CD and DVD Rom devices will be initialized by kernel as /dev/cd0, however if you get something different just set the appropriate vals.

a) Add permission records for CD / DVD ROM in /etc/devfs.conf
freebsd# echo 'own /dev/da0 root:operator' >> /etc/devfs.conf
freebsd# echo 'perm /dev/da00 0666' >> /etc/devfs.conf

b) Add permission records for USBs in /dev/devfs.conf

freebsd# echo '## allow member of operator to mount cdrom' >> /etc/devfs.conf
freebsd# echo 'own /dev/cd0 root:operator' >> /etc/devfs.conf
freebsd# echo 'perm /dev/cd0 0660' >> /etc/devfs.conf

To allow, all present system users to have access to mount USB, CD / DVD roms, it is necessery to add all users to the operator, group. This is a security bad practice as this will make allow all users to have extra permissions to binaries on the system owned or allowed to be accessed by operator group. However for home computers, where you, your sister and a bunch of good friends have accounts, security shouldn't be of a great concern.

If you know well all your users and you have disabled SSH on the system and security is not of top priority run:

freebsd# /usr/local/bin/bash
root@freebsd~# for i in /home/*; do user=$(echo $i|sed -e 's#/home/##g'); do \
pw groupmod operator -m $user; \
done

Onwards, you can check few users to see to see if they are added to operator group

freebsd$ id
uid=1001(hipo) gid=1001(hipo) groups=1001(hipo),0(wheel),5(operator)

Well that's all now your GNOME hal process – (Hardware Abstraction Layer) will be able to manage CD / DVDs and USBs with no more weird errors.

This article was inspired by cybercity's Allow normal users to mount CDROMs DVDs and USB devices. So thanks 'em for being a source of inspiration.

Enjoy 🙂