Posts Tagged ‘phpmyadmin’

Mass substitute WordPress site Old domain URL to new URL in MySQL (MariaDB) database after website migration

Thursday, September 13th, 2018

mass-substitute-old-urls-to-new-urls-when-moving-wordpress-website-migrate-wordpress

Mass substitute WordPress site Old domain URL to new URL in MySQL (MariaDB) database after website migration

If you have just migrated a wordpress blog or site to a new server (domain URL) and you have many articles pointing to the old URL. Out of sudden the new domain will end up with many broken links and that would have a severe negative SEO effect on your website leading to a certain downfall of your number of daily unique visits.

Of course manually changing the URL links is achievable by going through all Published Posts when migrating small websites with 10-20 pages,  however it is an impossible tedious task you would definitely want to avoid when you're migrating large WP based websites with few hundred or thousands of posts / pages,
bacause this would be a few weeks of mindless repeatable job to go through each and every post and substite the broken URLs.

Fortunately with a little bit of SQL magic either through MySQL CLI or PHPMyAdmin (if the website is moved to a shared hosting where you have disabled access to MySQL (MariaDB) default connect tcp port 3306.

Depending on the type of WordPress or Website the old broken URLs might be located in various Database tables.
 

– So when Mass URL substitution is might be required ?


1. You migrate a Website http://what-ever-website.com with (PHP / CSS / HTML / Templates) etc. from Hosting Provider Hostgator.com to UK2.com (because the website target client changed lately to United Kingdom customers) to http://what-ever-website.co.uk and the site is moved to a new domain beacause of Business rebranding
 

2. Other reason for changing internal URLs from one URL to another might be if you're migrating your website from HTTP to HTTPS for security.

3. You are restructuring file storage / image directories on the server or due to migration of files to external CDN (Content Delivery Network).
For example (http://your-server.com/images/ , http://your-server.com/files )  URLs pointing to old website location subdirectory has to be changed to the new one (http://your-server.com/img/ , http://your-server.com/data)


– So what is the automated approach to solve the task of Mass URL substitution across WP site ?


  •  Create full backup of all your website database and double-check the backup (try to restore on a test (home) server or other hosting account to make sure the backup is consistent and restore would work normally if necessery
     
  • You can Create Backup either with mysqldump command tool manually … with the right command arguments or use some kind of script such as My tiny mysqlbackupper.sh shell script which I shared under my previous article Make daily MySQL on Linux backup with Shell Script  via PhpMyAdmin.


2. Change old website URL to new one directly from Database using MySQL text client
 

To change incorrect URL with the new correct one the general query to run is:


update TABLE_NAME set FIELD_NAME = replace(FIELD_NAME, ‘find string’, ‘replace string’);


To change old website URL to the new website URL across every table within the wordpress database use below queries:
 

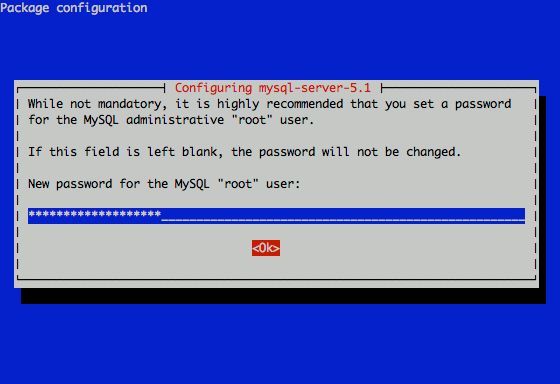
hipo@linux:~$ mysql -u root -p
Enter password:


USE blog;


UPDATE wp_options SET option_value = replace(option_value, 'Existing (old) URL', 'New URL') WHERE option_name = 'home' OR option_name = 'siteurl';

UPDATE wp_posts SET post_content = replace(post_content, 'Existing (old)URL', 'New URL');

UPDATE wp_postmeta SET meta_value = replace(meta_value,'Existing (old) URL','New URL');

UPDATE wp_usermeta SET meta_value = replace(meta_value, 'Existing (old) URL','New URL');

UPDATE wp_links SET link_url = replace(link_url, 'Existing (old) URL','New URL');

UPDATE wp_comments SET comment_content = replace(comment_content , 'Existing (old) URL','New URL');


3. Replace Old website URL to New one after migration using PHPMyAdmin web interface
 

If you don't have access  ssh shell, you can also run the queries via PhpMyAdmin to do so:

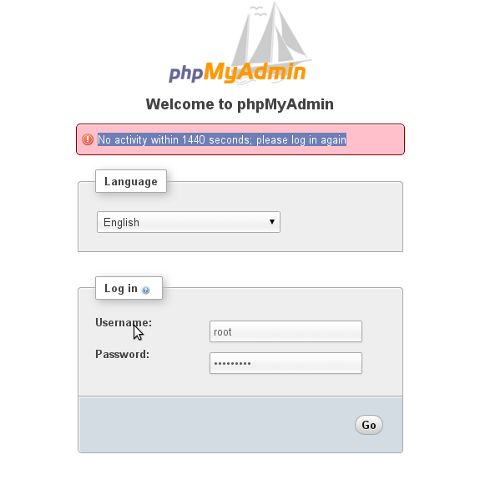
1. Open PHPMyadmin URL Panel in browser and login with your user / pass

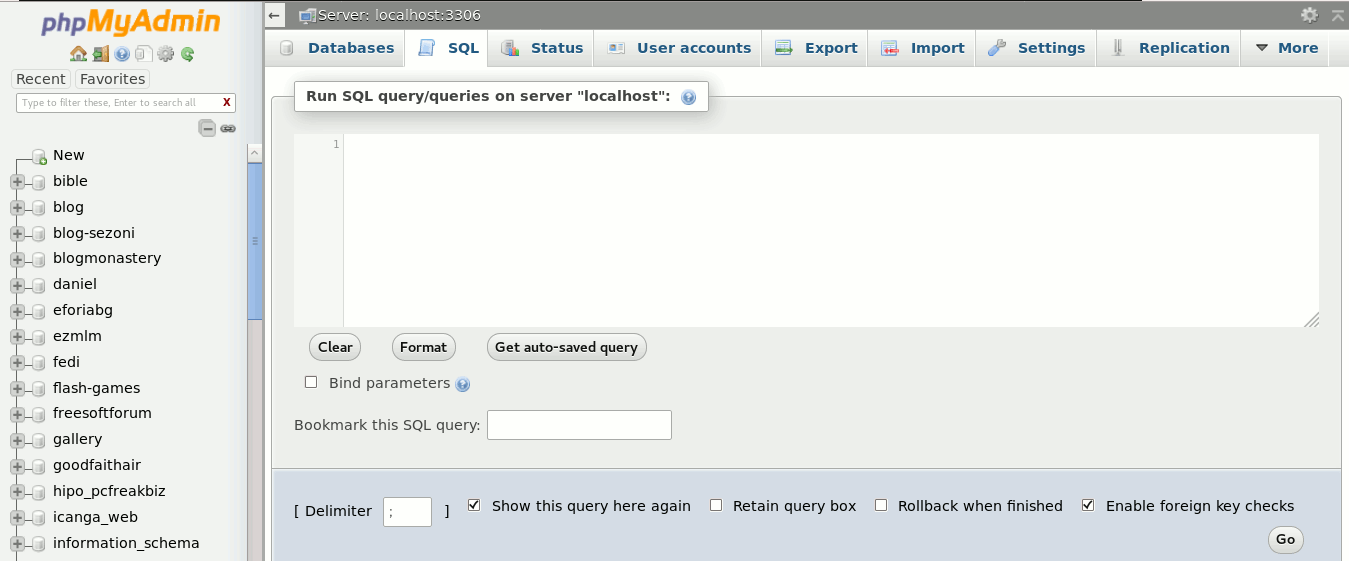
2. Choose the wordpress database of the wordpress site / blog

3. Select SQL tab and in the panel type on above given SQL queries
 

web-hosting-phpmyadmin-sql-query-tab-screenshot-how-to-run-sql-queries-via-phpmyadmin

If you're lazy to type there is also a web based SQL queries generator tool for moving websites to a new domain


4. Using Search and Replace WordPress plugin to do the old URL to new URL (strings) transition
 

If you have never used SQL queries and you're totally new to it and don't want to risk breaking up something there is also a bunch of wordpress plugins available that do the URL string substitution throughout each wordpress table in a WP database one such WordPress plugin is Search and Replace I have written earlier an article Change string in all WordPress Posts with Search and Replace plugin.


5. Problems with data-serialization
 

If you do a simple search and replace of Old domain urls to New ones, using above given commands and you still end up with some broken links on WP Pages that might be due to data-serialization issues (for the cause of issues check out what is data serialization).
Data serialization in wordpress terms is an array of PHP encrypted data that contains the actual URL, thus a simple search and replace as explained above if URLs use data-serialization would not work. There are available tools online that does URL search and replace operation through  "serialize-data sensitively" if you stuck with data-serializatoin caused issues.

Besides that for there are written scripts that does URL substitution to a WordPress or Joomla websites so an alternative to above WP plugin to replace the URL after migration is to use one of the scripts available a very famous one that will do pain-free all URL / string substitutions inside your WP, Drupal,  Joomla databses is interconnect/it.
 

Few closure words
 

As a system administrator and webmaster I have migrated wordpress installations many times with the need to change the old URLs to a new ones for both customer websites and my own wordpress based. On many ocassions because of lack of attention and hurry, I've messed up things.
The moral I got out of this is when you're doing a WordPress migration just like everything you have to be very attentive and do everything step by step slowly and have a good idea on what you're doing in advance …

Even as a person who had overall idea on how MySQL Server works and have experience in writting SQL queries, I have to confess I've  made mistakes during URL substitution operations when doing it via the MySQL CLI every now and then.

Thus I would recommend you better use some of the many plugins for wordpress and script tools (few of which I mentioned above), especially if you're not having at least few years with some kind of UNIX variation / Linux / MySQL.

Installing the phpbb forum on Debian (Squeeze/Sid) Linux

Saturday, September 11th, 2010

howto-easily-install-phpbb-on-debian-gnu-linux

I've just installed the phpbb forum on a Debian Linux because we needed a goodquick to install communication media in order to improve our internal communication in a student project in Strategic HR we're developing right now in Arnhem Business School.

Here are the exact steps I followed to have a properly it properly instlled:

1. Install the phpbb3 debian package
This was pretty straight forward:

debian:~# apt-get install phpbb3

At this point of installation I've faced a dpkg-reconfigure phpbb deb package configuration issue:
I was prompted to pass in the credentials for my MySQL password right after I've selected the MySQL as my preferred database back engine.
I've feeded my MySQL root password as well as my preferred forum database name, however the database installation failed because, somehow the configuration procedure tried to connect to my MySQL database with the htcheck user.
I guess this has to be a bug in the package itself or something from my previous installation misconfigured the way the debian database backend configuration was operating.
My assumption is that my previously installed htcheck package or something beforehand I've done right after the htcheck and htcheck-php packages installation.

after the package configuration failed still the package had a status of properly installed when I reviewed it with dpkg
I've thought about trying to manually reconfigure it using the dpkg-reconfigure debian command and I gave it a try like that:

debian:~# dpkg-reconfigure phpbb3

This time along with the other fields I've to fill in the ncurses interface I was prompted for a username before the password prompted appeared.
Logically I tried to fill in the root as it's my global privileges MySQL allowed user.
However that didn't helped at all and again the configuration tried to send the credentials with user htcheck to my MySQL database server.
To deal with the situation I had to approach it in the good old manual way.

2. Manually prepare / create the required phpbb forum database

To completet that connected to the MySQL server with the mysql client and created the proper database like so:

debian:~# mysql -u root -p
mysql>
CREATE database phpbb3forum;

3. Use phpmyadmin or the mysql client command line to create a new user for the phpbb forum

Here since adding up the user using the phpmyadmin was a way easier to do I decided to go that route, anyways using the mysql cli is also an option.

From phpmyadmin It's pretty easy to add a new user and grant privileges to a certain database, to do so navigate to the following database:

Privileges -> -> Add a new user ->

Now type your User name: , Host , Password , Re-type password , also for a Host: you have to choose Local from the drop down menu.

Leave the Database for user field empty as we have already previously created our desired database in step 2 of this article

Now press the "Go" button and the user will get created.

Further after choose the Privileges menu right on the bottom of the page once again, select through the checkbox the username you have just created let's say the previously created user is phpbb3

Go to Action (There is a picture with a man and a pencil on the right side of this button

Scroll down to the page part saying Database-specific privileges and in the field Add privileges on the following database: fill in your previosly created database name in our case it's phpbb3forum

and then press the "Go" button once again.
A page will appear where you will have to select the exact privileges you would like to grant on the specific selected database.
For some simplicity just check all the checkbox to grant as many privilegs to your database as you could.
Then again you will have to press the "Go" button and there you go you should have already configured an username and database ready to go with your new phpbb forum.

4. Create a virtualhost if you would like to have the forum as a subdomain or into a separate domain

If you decide to have the forum on a separate sub-domain or domain as I did you will have to add some kind of Virtualhost into either your Apache configuration /etc/apache2/apache2.conf or into where officially the virutualhosts are laid in Debian Linux in /etc/apache2/sites-available
I've personally created a new file like for instance /etc/apache2/sites-available/mysubdomain.mydomain.com

Here is an example content of the new Virtualhost:

<VirtualHost *>
ServerAdmin admin-email@domain.com
ServerName mysubdomain.domain.com

# Indexes + Directory Root.
DirectoryIndex index.php index.php5 index.htm index.html index.pl index.cgi index.phtml index.jsp index.py index.asp

DocumentRoot /usr/share/phpbb3/www/

# Logfiles
ErrorLog /var/log/apache2/yourdomain/error.log
CustomLog /var/log/apache2/yourdomain/access.log combined
# CustomLog /dev/null combined
<Directory /usr/share/phpbb3/www/>
Options FollowSymLinks MultiViews -Includes ExecCGI
AllowOverride All
Order allow,deny
allow from all </Directory>
</VirtualHost>

In above Virtualhost just change the values for ServerAdmin , ServerName , DocumentRoot , ErrorLog , CustomLog and Directory declaration to adjust it to your situation.

5. Restart the Apache webserver for the new Virtualhost to take affect

debian:~# /etc/init.d/apache2 restart

Now accessing your http://mysubdomain.domain.com should display the installed phpbb3 forum
The default username and password for your forum you can use straight are:

username: admin
password: admin

So far so good you by now have the PHPBB3 forum properly installed and running, however if you try to Register a new user in the forum you will notice that it's impossible because of a terrible ugly message reading:

Sorry but this board is currently unavailable.

I've spend few minutes online to scrape through the forums before I can understand what I have to stop that annoying message from appearing and allow new users to register in the phpbb forum

The solution came natural and was a setting that had to be changed with the forum admin account, thus login as admin and look at the bottom of the page, below the text reading Powered by phpBB © 2000, 2002, 2005, 2007 phpBB Group you will notice a link with Administration Control Panel
just press there a whole bunch of menus will appear on the screen allowing you to do numerous things, however what you will have to do is go to
Board Settings -> Disable Board

and change the radio button there to say No

That's all now your forum will be ready to go and your users can freely register and if the server where the forum is installed has an already running mail server, they will receive an emails with a registration data concerning their new registrations in your new phpbb forum.
Cheers and Enjoy your new shiny phpbb Forum 🙂

Alternative way to enter as administrator in MySQL if you forgot MySQL root password on Debian Linux

Wednesday, July 10th, 2013

Forgot MySQL password root alternative way to enter as administrator in MyQL MySQL logo with 2 dolphins

Whether you have to administrate a bunch of chaotic organized MySQL servers and amount of work is more than you can bear it is very common you make stupid mistakes, like loosing MySQL root adminsitrator password. There is way to recover password by stopping SQL server and starting it with –skip-grant-tables options via SSH , however if you do it that way there is at least few seconds of down time and as its not a good idea on productive servers Debian and Ubuntu Linux admins have better way to do it by using MySQL default user used to check whether all is fine with database on MySQL server initialization via /etc/init.d/mysql. User with GRANT PRIVILEGES, (all MySQL administrator users have grant privileges) on Debian based distributions is debian-sys-maint and whether you have root access to server you can easily obtain password with:

# grep -i -E 'user|pass' /etc/mysql/debian.cnf |uniq

user = debian-sys-maint

password = k6x6tBUBfHN3ZxHv

Using this password then you can login via mysql cli or via PhpMyAdmin, whether installed and do any normal SQL operation you do as root. Of course having this password in plain text file can be very dangerous, by default it is configured to be only red by root be careful not to change this permissions by default as anyone who has access to system can then access your SQL as administrator.
To reset MySQL root password once logged in run:

UPDATE USER set password=PASSWORD('NEW_PASS_WORD') where USER='root';
FLUSH PRIVILEGES;

Enjoy 😉
 

How to add a new MySQL user to have INSERT,UPDATE,DELETE permissions to a Database

Tuesday, October 25th, 2011

I needed to add a newly created MySQL user with no access to any database with no special permissions (user is created from phpmyadmin) with some permissions to a specific database which is used for the operation of a website, here are the MySQL CLI client commands I issued to make it work:

# mysql -u root -p
mysql> GRANT ALL ON Sql_User_DB.* TO Sql_User@localhost;
mysql> FLUSH PRIVILEGES;

Where in the Example Sql_User_DB is my example database to which the user is granted access and my sample user is Sql_User .
Note that without FLUSH PRIVILEGES; new privileges might not be active. 

To test further if all is fine login with Sql_User and try to list database tables.

$ mysql -u Sql_User -p
password:
mysql> USE Sql_User_DB;
mysql> SHOW TABLES;
...

phpMyAdmin No activity within 1440 seconds; please log in again Fix

Friday, July 5th, 2013

phpmyadmin no activity within 1440 seconds please log in again screenshot Debian Gnu Linux
I had some complains from Web Developers who constantly was working on a Testing Web Development server. That their opened PhpMyadmin in browser is often closing opened session (auto logging out) with an error:
 

No activity within 1440 seconds; please log in again

This message was driving crazy people, as often they code something in PHP and design a new table or something and refreshing in browser blocked their work flow process with this annoying error …

Thanksfully there is an easy fix to that, just raise the time limit via /etc/phpmyadmin/config.inc.php

First its necessary to enable cookies authentication (by default it is commented):

Line:

//$cfg['Servers'][$i]['auth_type'] = 'cookie';

should be:

$cfg['Servers'][$i]['auth_type'] = 'cookie';

PHPMyAdmin 1140 seconds (24 minutes) timeout behavior behavior is controlled through variable: cfg['LoginCookieValidity']
Also it is necessary to increase timeout from server php.ini  (in Debian and Ubuntu via /etc/php5/apache2/php.ini or in CentOS / RHEL / Fedora Linux by editting /etc/php.ini and changing 1h session expiry setting:

session.gc_maxlifetime = 3600

to

(60*60*8  = 28800 – 8 hrs)

session.gc_maxlifetime = 28800

By default cfg['LoginCookieValidity'] is omitted from config.inc.php so you have to insert it at end of file.

A reasonable timeout value is 8 hours. To change PhPMyadmin Login TimeOut to 8 hours:

$cfg['LoginCookieValidity'] = 60 * 60 * 8; // in seconds (8 hours)

If you want to make Timeout Expire almost never (and you don't care about security) set it to some extra high timeout like 1 year  🙂

$cfg['LoginCookieValidity'] = 3600 * 24 * 365; // 1 year
 

How to Reset Joomla admin Password from MySQL command line

Wednesday, June 19th, 2013

joomla logo how to reset admin password

It is very common thing for clients having Joomla based websites to forget their password. It is possible to reset password from jos_users table using PhpMyadmin. But it is much

# mysql -u root -p
Enter password:

Welcome to the MySQL monitor.  Commands end with ; or \g.
Your MySQL connection id is 975975
Server version: 5.1.66-0+squeeze1 (Debian)

Copyright (c) 2000, 2012, Oracle and/or its affiliates. All rights reserved.

Oracle is a registered trademark of Oracle Corporation and/or its
affiliates. Other names may be trademarks of their respective
owners.

Type 'help;' or '\h' for help. Type '\c' to clear the current input statement.

mysql> USE joomla_site;
Reading table information for completion of table and column names
You can turn off this feature to get a quicker startup with -A

Database changed

mysql> UPDATE `jos_users` SET `password` = MD5( ‘new_password’ ) WHERE `jos_users`.`username` = “administrator” ;

Replace "new password", string with whatever new password is necessary
Change “administrator” or admin with joomla's admin username.

There you, go Joomla admin password is changed 🙂

How to set password on a mysql server with no password via mysql command line interface

Monday, March 28th, 2011

Many Linux distributions’s offered MySQL server comes without a set default password, in practice you can freely login to the mysql server on a plain mysql server installation on Debian, Ubuntu or Fedora by simply issuing:

linux:~# mysql -u root
Enter password:

Pressing enter will straight let you in the mysql server. The same kind of behaviour is also probably true on BSD based and many other Unixes which have pre-installed or the option to install a new mysql server.

I remember in my past that I’ve even seen a productive mysql servers on a servers running CMS based websites which doesn’t have a root password set.

Some administrators doesn’t take the time to think about the implications of the no password mysql installation and therefore being in a hurry simply let the server without an administrator password.
This is very common for the most lame and uneducated ones. Many novice system administrators think that by installing a phpmyadmin and configuring a password on it’s web interface is equal to setting up the mysql server (daemon) a password.

Thus for all this the uneducated ones and for all those who already have noticed that their newly installed mysql server doesn’t have a password set I’ve decided to give an example how a new mysql server password can be set or how an existing mysql server pass can be changed to a new one

To make any password manipulations usually the mysql-client package does provide a very handy instrument called mysqladmin , mysqladmin has many possibilities among which is creating a new mysql server admin (root) password or changing a previously set mysql server password to a new one

1. Here is how you can set a new MySQL server password:

mysqladmin -u root 'password' YOURasddsaPASSWORDjqweHERE

2. If you need to change an already existing mysql password you need to provide just one more argument to mysqladmin:

mysqladmin -u root 'password' YOURasdfdsaNEWasddsaPASSWORD_HERE -pEnter password:

Whether the Enter password: field appears you will be required to fill in the original mysql server root password after which the password will be changed to the above string passed in to the mysqladmin command line ‘YOURasdfdsaNEWasddsaPASSWORD_HERE’

That’s all now you have either set a new password for the mysql server or have already changed your previous one.

How to change MySQL server root password

Friday, July 29th, 2011

MySQL pass dialog Debian

I had to change my mysql root password for one of the servers since during the install I mispasted the password in the MySQL password prompt I needed the pwd to be changed.

Here is how I changed it to my desired one:

linux:~# /usr/bin/mysqladmin -u root -p'OLD_PASSWORD_STRING' password NEW_PASSWORD_STRING
linux:~#

The password gets changed immediately 😉

If a new password has to be set to a passwordless mysql server, the command to be issued is:

linux:~# /usr/bin/mysqladmin -u root password PASSWORD_STRING

Changing the MySQL password is also possible with mysql cli, after connecting to the sql server, though this method is a bit more time consuming. Here is how to do it from mysql console:

linux:~# mysql -u root -p
Server version: 5.1.49-3 (Debian)

Copyright (c) 2000, 2010, Oracle and/or its affiliates. All rights reserved.
This software comes with ABSOLUTELY NO WARRANTY. This is free software,
and you are welcome to modify and redistribute it under the GPL v2 license

Type ‘help;’ or ‘h’ for help. Type ‘c’ to clear the current input statement.
mysql> use mysql;
mysql> update user set password=PASSWORD(“NEW_PASSWORD”) where User=’root’;mysql> flush privileges;

Of course it’s possible to do change the root pass via phpmyadmin
Cheers 😉

How to Split files on Linux FreeBSD, NetBSD and OpenBSD

Sunday, July 31st, 2011

Split large files in pieces Scissors

Did you have the need to sometimes split an SQL extra large files to few pieces in order to be able to later upload it via phpmyadmin?
Did you needed an extra large video or data file to be cut in few pieces in order to transfer it in few pieces over an USB stick?
Or just to give you an another scenario where I sometimes need to have an enormous file let’s say 3G split in few pieces, in order to later read it in vim or mcedit .
I sometimes need to achieve this on FreeBSD and Linux hosts thus I thought it will be helpful to somebody to give a very quick tutorial on the way large files can be cut in pieces on Linux and BSD hosts.

GNU/Linux and FreeBSD are equipped with the split command. The purpose of this command is exactly the cutting of a file to a number of pieces.

On Linux the split command comes by default install to the system with the coreutils package on most Debian (deb) based and Redhat based (rpm) distributions, theerefore Linux’s version of split is GNU/split since it’s part of the GNU Coreutils package. An interesting fact about Linux split is that one of the two programmers who has coded it is Richard Stallman 😉

On BSD Unix split is the AT&T UNIX (BSD) split

In the past splitting files in pieces was much more needed than today, as people used floppy drives to transfer data, though today with the bloom of Internet and the improve of the data carriers transferring even an extra large files from one place to another is a way more trivial task still at many occasions splitting it in pieces is needed.

Even though today splitting file is very rarely required, still there are times when being able to split a file in X number of parts is very much needed.
Maybe the most common use of splitting a file today is necessery when a large SQL file dumps, like let’s say 200 MBytes of info database needs to be moved from ane hosting provider to another one.
Many hosting providers does disallow direct access with standard mySQL client programs to the database directly and only allow a user to connect only via phpMyAdmin or some other web interface like Cpanel to improve data into the SQL or PostgreSQL server.

In such times, having knowledge on the Unix split command is a priceless asset.

Even though on Linux and BSD the code for the split command is not identical and GNU/split and BSD/split has some basic differences, the use of split on both of these Unices is identical.
The way to split a file in few pieces using on both Linux and BSD OSes is being done with one and the same command, here is how:

1. Splitting file in size of 40 mb On Linux

linux:~# split -b 40m SQL-Backup-Data.sql SQL-Backup-Data_split

2. Splitting file in size of 40mb on BSD (FreeBSD, OpenBSD, NetBSD)

freebsd# split -b 40m SQL-Backup-Data.sql SQL-Backup-Data_split

The Second argument the split command takes is actually called a prefix, the prefix is used as a basis name for the creation of the newly generated files cut in pieces file based on SQL-Backup-Data.sql.

As I said identical command will split the SQL-Backup-Data.sql files in a couple of parts which of it will be sized 40 megas.

These command will generate few files output like:

freebsd# ls -1 SQL-Backup-Dat*SQL-Backup-Data.sql
SQL-Backup-Dataa
SQL-Backup-Dataab
SQL-Backup-Dataac
SQL-Backup-Dataad
SQL-Backup-Dataae

As you see the SQL-Backup-Data.sql with size 200MB is being split in four files each of which is sized 40mbytes.

After the files are transfered to another Linux or BSD host, they can easily be again united in the original file with the command:

linux:~# for i in $(ls -1 SQL-Backup-Data_split*); echo $i >> SQL-Backup-Data.sql

Alternatively in most Unices also using cat should be enough to collect back the pieces into the original file, like so:

freebsd# cat SQL-Backup-Data_split* >> SQL-Backup-Data.sql

Enjoy splitting

phpMyAdmin – Error “Cannot start session without errors, please check errors given in your PHP and/or webserver log file and configure your PHP installation properly.”

Monday, February 8th, 2010

I’ve encountered a shitty problem while trying to access my phpmyadmin.
Here is the error:
phpMyAdmin - Error "Cannot start session without errors, please check errors given
in your PHP and/or webserver log file and configure your PHP installation properly.

After some time spend in investigation I’ve figured out something wrong is happening with my
php sessions, therefore I had to spend some time assuring myself php sessions are working correctly.
To achieve that I used a php code taken from the Internet.

Here is a link to the PHP code which checks, if sessions are correctly configured on a server .
Executing the code proove my sessions, are working okay, however still the problem remained.
Everytime I tried accessing phpMyAdmin I was unpleasently suprised by by:

phpmyadmin session error picture
After reconsidering the whole situation I remembered that since some time I’m using varnishd
therefore the problem could have something to do with the varnish-cache.
After checking my default.vcl file and recognizing a problem there I had to remove the following piece
of code from the default.vcl file:

#sub vcl_fetch {
# if( req.request != "POST" )
# {
# unset obj.http.set-cookie;
# }

# set obj.ttl = 600s;
# set obj.prefetch = -30s;
# deliver;
#}

Now after restarting varnishd with:

/usr/local/etc/rc.d/varnishd restart

All is back to normal I can login to PhpMyAdmin and everything is fine!
Thanks God.